Kurt’s been in touch with his German model railroad.
I do really enjoy the layouts with a theme, especially the ones that are inspired by trips or past events.
And because a layout can be whatever you want it to be, the options are limitless:
“Al,
I’ve been reading your emails now for about a year, and the many postings, along with several YouTube videos I’ve found, have been really helpful for the layout I started in the fall.
Like many of your contributors, I’m resuming a long-dormant hobby I started over 40 years ago when my daughter was a toddler.
I began with a Tyco HO set and adapted track plans from a booklet of blueprints the Atlas Co published on layouts.
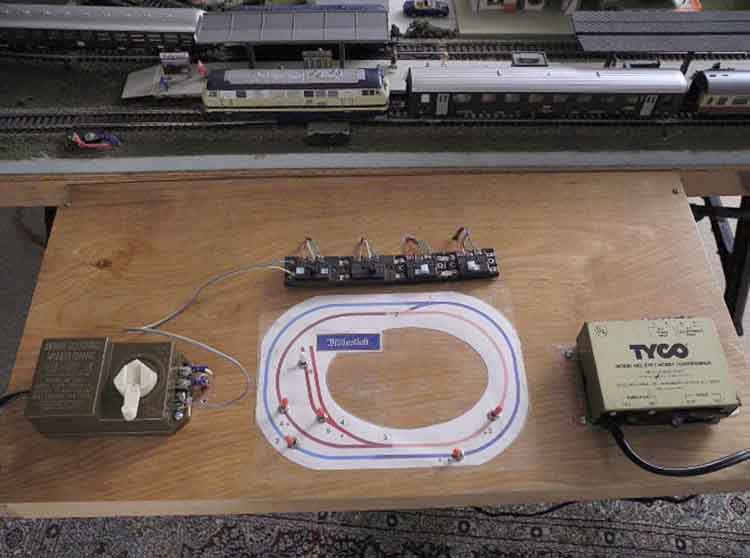
To facilitate moving the trainboard, which we used on the floor only at Christmas time (as in my childhood with an O-gauge set of Lionels), I cut a 4’x8’ sheet of plywood down to 6’3” (ca. 1.9m) in length.
Several years later, after my son was born, I had a trip to W. Berlin.
Here I purchased a set of passenger cars and a diesel engine that the Italian company Lima made, these with German and Austrian markings.
I was only interested in running trains, so I quickly filled up the board with dual ovals, a siding, and multiple spurs, running up to 4 engines off two power packs and track insulators separating sections I controlled with Atlas Selectors.
This time I wanted to add a control station with a track diagram, and that approach required relatively complicated wiring through a terminal block.
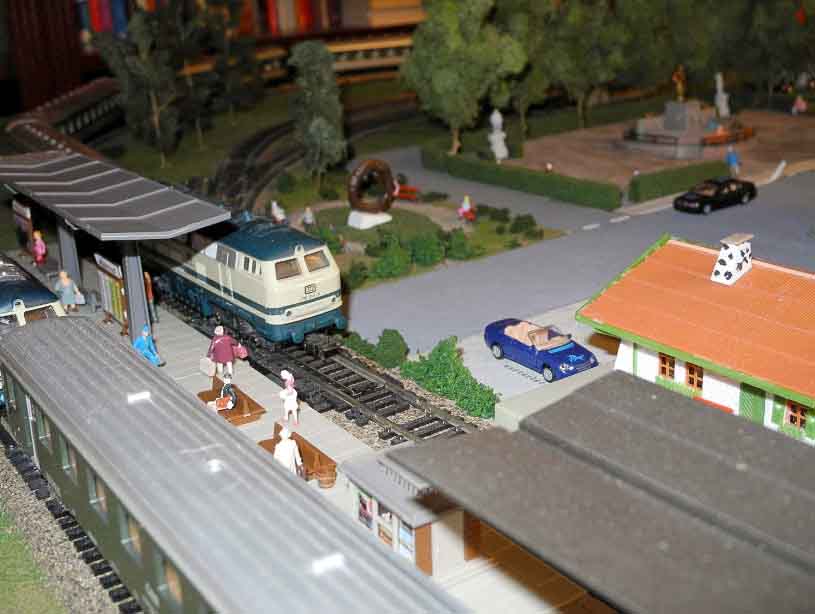
The setting is a village of half-timber buildings that could be anywhere from Troyes in eastern France to Maribor in Slovenia.
But the DB markings on the engine and cars give it away as Germany, probably near Austria (one car has ÖBB markings).
The fictional town is called Müllerslust, based on a song, “Das Wandern ist des Müllers Lust” [my translation is: Traveling is a Müller’s joy], and the town is therefore Müller’s Joy.
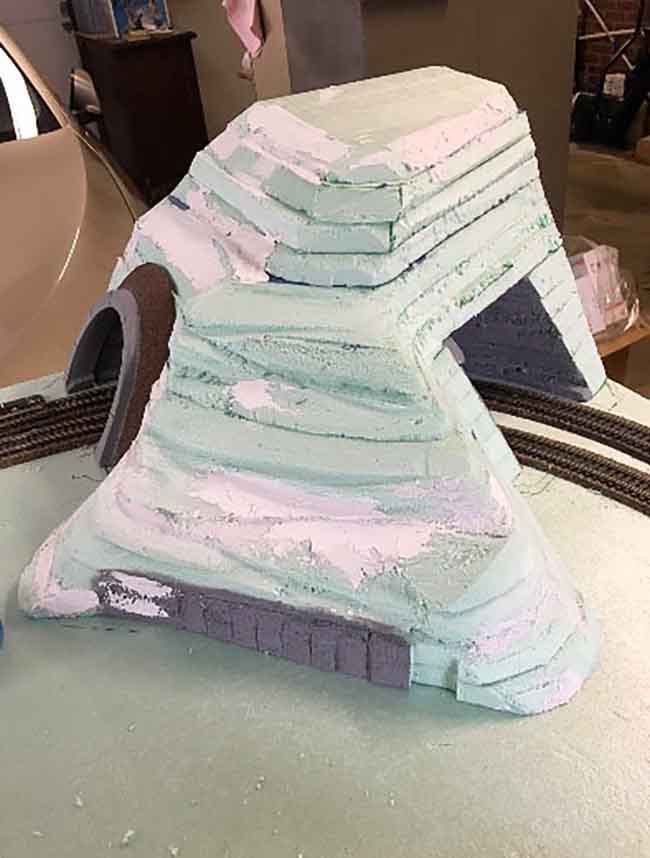
Since I have no experience building scenery, I made many mistakes and adapted accordingly.
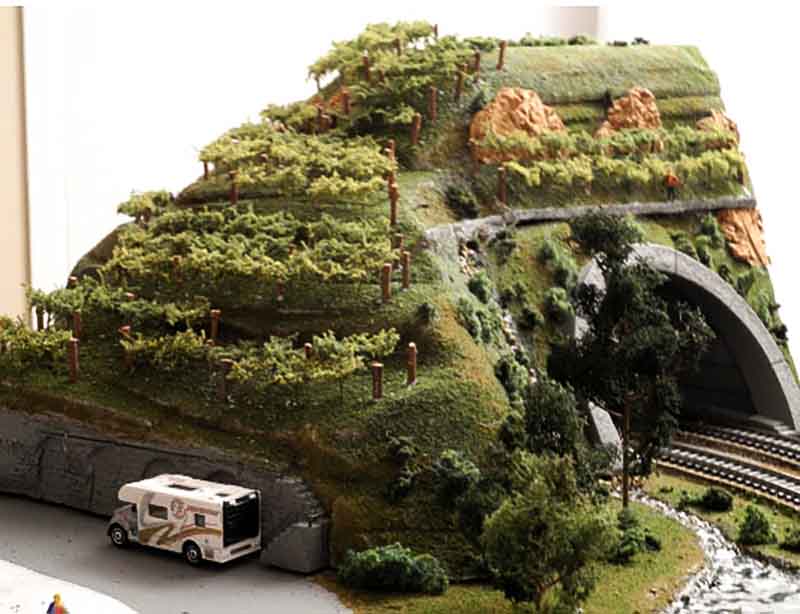
I started building a tunnel with a long, initially gradual, grade, but for a vineyard I wanted on the hill, I searched the internet and discovered how steep the vineyards in the Mosel Valley are—and I found the possibility of cutting the gradation to accommodate a road.
The pictures I found online helped immensely.
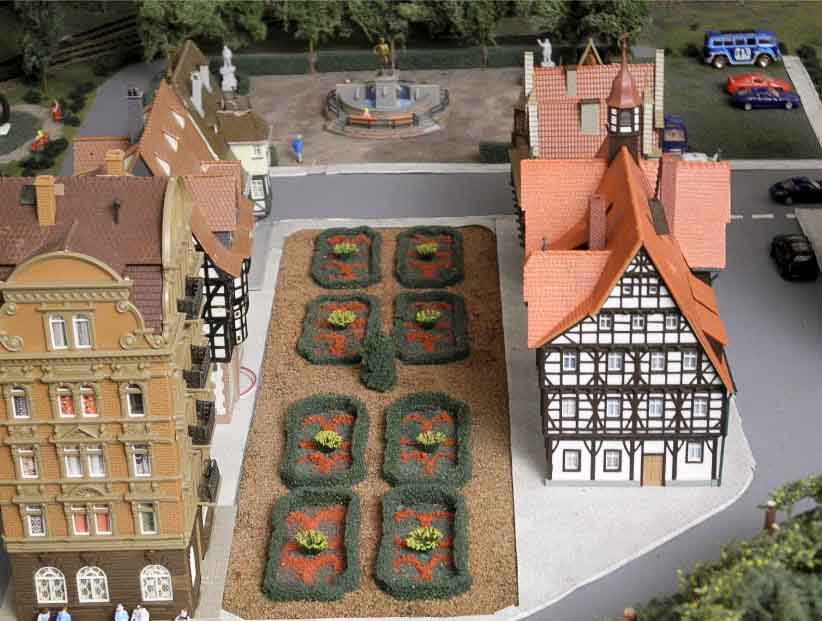
The style of one building is a couple of centuries newer, and I have an anachronistic Baroque garden in the town center (though it goes well with the non-matching building, part of a lot I bought on eBay—thanks for that frequent suggestion).
I’m now far enough along with Phase 1 to share pictures.
Phase 2 will add lighting, some of which will run grain-of-wheat bulbs on AC and others will run LEDs on DC. For the latter, I’m going to use an old mobile-phone charger, which will provide a constant voltage at an appropriate level.
As you’ll see from the photo of the control block, there is sufficient space to add switches for the lights or other things.
In Phase 3 I’ll add road signage. One problem I discovered with Faller kits, which I like for their detail, is that they sometimes require supplemental kits not identified in their descriptions.
I have a two-track crossing that will eventually need sensors, and a park fountain that requires a pump to circulate real water.
I now have the pump, but it’s not clear what sensors are appropriate.
I had read that Woodland’s “Realistic Water” often develops bubbles.
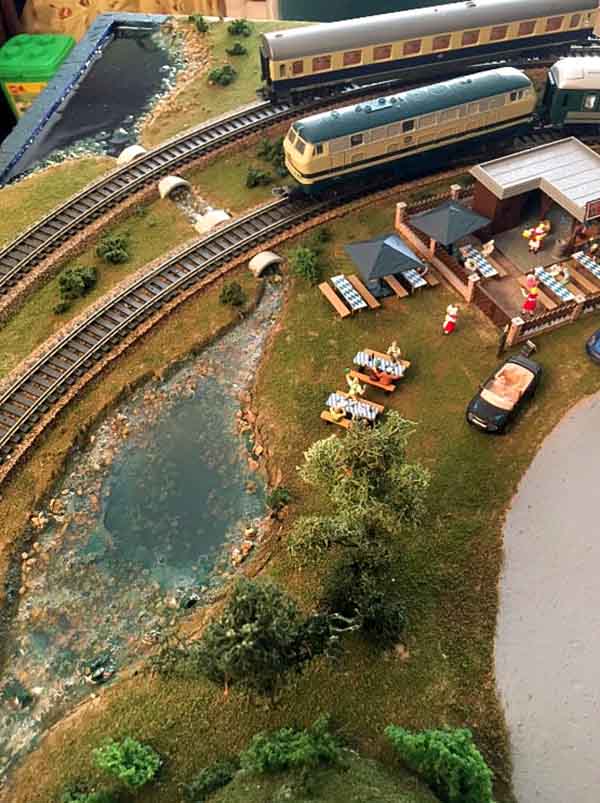
While we were on vacation, and the trainboard was in the hot garage, the last pre-vacation layer of “water” turned somewhat brown in the shallow pond. With subsequent layers the murkiness has diminished considerably.
For the deeper water (upper left in the picture), I added blue food coloring to the next layer; I used too much coloring, but I notice that in this section I don’t have the bubble problem. The picture makes it look like there are bubbles, but what you see is really a slight rise around the rocks (talus).
Do any of your readers have suggestions on how to avoid the bubbles? It seems the problem develops over several days; you don’t see it right away.
Best wishes,
Kurt”
I love that so many of us return to this hobby after decades away, and it’s still just as fun.
A big thanks to Kurt for sharing his German model railroad.
That’s all for today folks.
Please do keep ’em coming.
And if today is the day you get started on your layout, the Beginner’s Guide is here.
Best
Al
PS Latest ebay cheat sheet is here.
PPS More HO scale train layouts here if that’s your thing.


Your layout seems to be coming along nicely. Don’t know if you used foam insulation as a base, but my realistic water bubbles came from off gassing from the insulation. The water area needs to be completely sealed with plaster cloth to stop the bubbles. After I corrected that, no more bubbles.
Love the vineyards. I have seen them on the hillsides in France and Germany.
Kurt
Nice small layout. If I may suggest that you install a second single crossover
opposite to the one you already have. That way a train can go from the inside track back to the outside track. THEN you may want to include a couple of blocks ( a power section) that can be turned on or off to stop one train.or the other.
Good luck.
I love this layout. Simple yet elegant.
Good looking layout. I too have jumped back in and took the plunge into DCC. I also did a 4×6 to setup a double oval with two cross overs and two sets of siding. I would post an article if I knew how to submit it with pictures.
Bob in Virginia
Nice set-up Kurt, your problem with bubbles is easily overcome.
When mixing liquid materials, ‘Stir slowly do not shake’ . This method is used when mixing Varnish to avoid bubbles.
Wayne McClelland
The Colonial from down under
(New Zealand)
I have been away from the train hobby for a while and I would like to build the one in your letter head. Is there any way I can get a copy of it.
i’m building a dog bone style layout. I’m going to cut 4 inch pieces of 2X4 wood to support the elevated track. whats the best way to secure the wood so they’re all the same height?
Great layout Kurt, the vineyards on the hill side are really a nice touch. Looking forward to future photos. Always enjoy Dave’s videos.
Cary B
I found Kurt’s master-piece stunning.
Once again Dave ~ way-to-go!
You can never have too much of Dave. Long may his hobby pudding keep rising in Yorkshire !!.
& Kurt, your layout is looking good.
where do i find the big kahuna deal? tried ebay without success.
Laurie
layout is looking very good keep up the good work happy modeling is the best modelling.those trains look great Dave thanks for sharing.
For water I now use 100% silicone over a painted base. It’s also good for waterfalls. I dry brush white paint to simulate waves and on the back of the silicone on my waterfalls.
Be careful of fumes when making a large lake or long river.
Also,once again I would like to make my pitch for battery powered Radio Wave controlled DCC Loco’s. No track wiring,almost no track cleaning problems.
I use NCE but there are many other control systems available.
Bob in Mississippi
thank you for the many positive comments; glad several of you like the vineyard. In the opposite corner is a small field of hops. I agree with the comment about another crossover; it’s just that I didn’t see where I could put one. I’ll look again. Realistic’s water doesn’t require mixing, so I don’t think slow stirring is likely to be the answer. Using plaster cloth could well solve the problem, but of course I already have everything else in place. If I don’t find an easier solution, I must need to re-do this part. I’m really pleased that Dave’s posting on coach connectors is in the same link; I’ve been looking for such a possibility.
Nice work Kurt and a useful commentary. A couple of replies mentioned Dave’s post… I didn’t receive it. Has Dave banned me for pointing out the Diesel engines drowned his voice in a previous post? Hope not! I really enjoy his videos. Dustyk uk
For realistic water scenes, I suggest you watch any of the youtube videos done by Luke Towan. He describes and demonstrates everything about this and much much more. He even shows how to get rid of bubbles in water scenes.
This is the first H/O set I have noticed on Alisters site..
I am into the German/Swiss/Austrian: mainly Roco/Fleischmann/Hag etc..
It makes a pleasant change from the UK layouts..
Keep up the good work….very interesting
There are a few posts I have put on Alisters site….if you can find them
regards
Peter Clare [Liverpool]
Wow wee, you still have it. Looks very nice you did great work. Be proud. I also learned alot from Al’s site.
Great layout, Kurt. The garden and the picnic area are the best. I do love seeing the different model railroads from all around the globe. Thanks to Alastair. Cheers! NJ Mark
I had golf-ball sized bubbles ruin the lake scene on my N scale layout, several months after having been poured. The substrate was the same dense, carvable foam insulation that Kurt has used. The lake bed was (presumably) well sealed with the paint colouring used to give the illusion of depth etc. Regardless, the outgassing problem was the cause. I used a two-part epoxy product for a much more successful second attempt.
great layout I love the passenger trains
Nice layout. Love the vineyards – excellent touch!
This is awesome. A lot of time, expense and work. I looks so real.
The culverts are a nice touch.
Hi Kurt, Rocco here from Haskell NJ in the good old USA. I have quite a few German trains myself. I married a German girl while stationed in the army in Augsburg, Germany from 1963 to 1966 and since then, because my wife’s family was still there and she was an only child we returned there every couple of years. Each time bringing home lots of Model railroad items from The DB, Just love those German model trains. Most of my trains and accessories are from Fleischman. They are great running trains. At the time I was stationed there in 1963 I started with Marklin, but they ran on ac so I decided to go with Fleischman dc. Of coarse in the US most molders operate in dc, well today it’s dcc, but I am to far invested in dc locomotives and track to change over. I am 75 years old and do not have the patients or eye site to start over. Though I do have a few sound loco’s in dcc, but I use a dc-dcc power pack for those. Like you I had the old cast iron lionel when was young also. My dad bought me my first Lionel set and put it on a 4×8 sheet of plywood in 1950. I have loved trains ever since. I just thought I would share that with you. Take care. Rocco.
Kurt, That looks like a marvelous start to your new layout. I wouldn’t worry too much about an anachronistic building or two: it’s your layout and lots of towns have places where older buildings are replaced by newer ones that exist side by side. Also, I think your stream and ponds look pretty good and I really liked the picnic tables next to the stream.
I would also be interested in the layout design on your letterhead. I am new to model railroad and would most likely work in N scale.
Ps I look at all your posts first thing ever morning wanting to see what everyone is up to or the tips offered.
Thanks all, and Al
Next time, to eliminate the bubbles, try using a heat gun or hair dryer set on low. The hot air pops the bubbles before they harden.
Kurt –
I’m sure there are many ways to do it, but I had good luck with “Magic Water,” which I believe is a polystyrene resin with a slight retardent in it to prevent cracking as it hardens. I poured my river over a plaster riverbed, rendered with acrylic paint. Sealed with a very thin pour first, then a final pour, almost 1 1/2” thick. No bubbles, perfectly clear, no problems, though you do have to plan on slight scalloping or “cupping” at the edge of the pour.