Rods been back in touch, this time with his model train incline deminsions:
“Alastair,
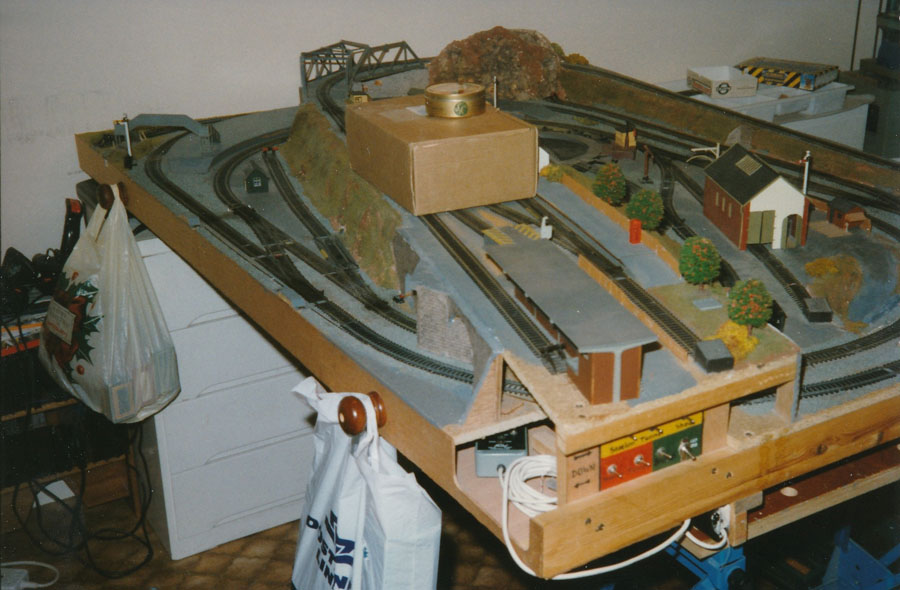
Further to the post about calculating inclines, this was the layout I mentioned in my posting, the overall view is not a great shot as it was taken just as a record when it was all packed up ready to be sold.
You can see the incline on the far side rising from points in the outer main line just out of shot, to cross the girder bridge at the far end. This was a climb of about two and a half inches in about seven feet or about 1 in 30, eased a bit at each end to transition to level.
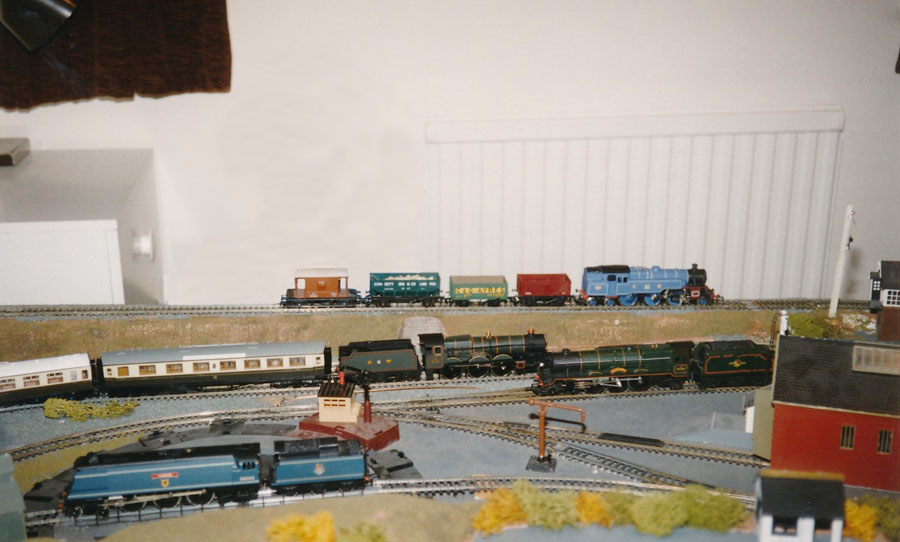
A pacific or 4-6-0 would take three pinpoint bearing coaches up the bank quite well, and a pannier tank with a traction tyre would do two of the old plain-bearing Triang hopper wagons, fully loaded with fish grit, and a brake van, but that was asking a bit much.
The layout overall was 6′ x 4′ and built on crossing L-girders made of 2″x 1″ so it was quite rigid but would just sit on the spare bed whenever we didn’t need it for visitors. If we had someone to stay, it could be stood up on its end against the wall and covered with an old curtain.
Rod”
Rod’s Model train incline deminsions got me thinking, and I had quick look for other posts on inclines:
Making a model train inclines.
Building model train inclines.
Now on to Hemi.
(Hemi’s last post is here if you want to catch up.)
“So, you guys want to see another use of TYCO parts? How about this?
Takes a few TYCO trucks, plastic OR the metal ones…..(Yes, theres a reason to this madness!)
The plastic trucks, you model logging railroads? OR have a logging line on your regular railroad as a servant to the system? Need log cars? How about an alternative to the expesive, disconnect cars from Kadee? NOT as detailed, but close and WORk, and in use with logs on them, will look just as good!
Take an look, (actively, that is) for old TYCO or even Mantua cars that are considered “Old Timers”. The trucks under these cars, are the ones, you need!
You’ll see in a bit why I say, the plastic OR the metal trucks for this build….
These are the Kadee cars:
These are nice models, a bit of work to build and a lot of painting of moving parts, YES they do swivel, and transpose as the car is loaded with logs, PLUS, they have sprung wheel sets in them! SO, a little reason to why they are a bit expensive for a set of them! Sadly, I got mine for a good price, otherwise, I wouldn’t have them!
Then as I built these, I seen something…..
A little brass stock, tubes, and solid square rod and a bit of solder and flux, and you can make something a bit close to the Kadee models, but, older looking for a year gone by? Sure, its a logging railroad, they never had brand new equipment all the time anyway, so…..
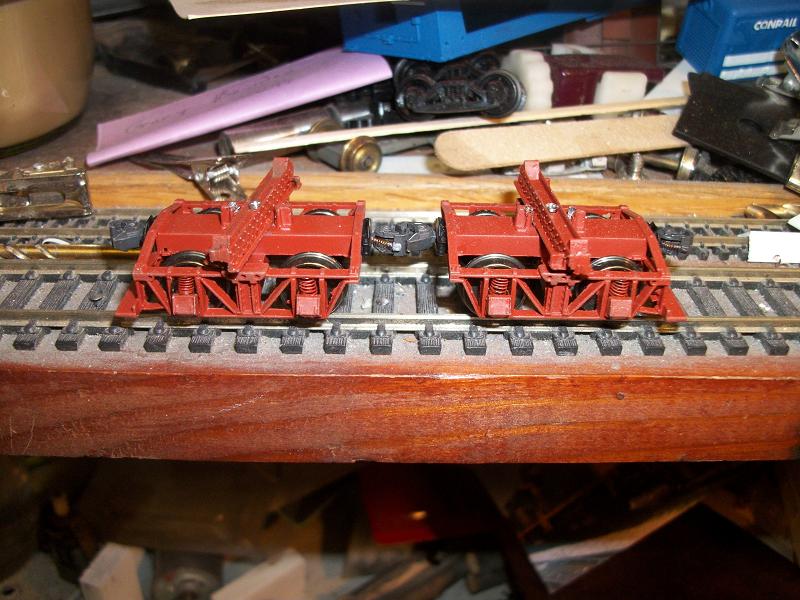
With the plastic TYCO trucks, you got this:
If you look the Kadee couplers are burried inside square tubing thats the same inside diameter of that of a Kadee coupler box, WHICH, allows me to stuff the coupler, and a draft gear box, inside the brass tubing, then it was marked from the outside to be drilled and taped for screws. The top of the inside of this box, has one extra thickness of brass shim stock to give a bit more “meat” for the tap to hold 2-56 threads in and try to prevent stripping out of the threads….REMEMBER, it is brass after-all!
This frame of the log “bunks” are bolted to the truck. NOW, you’ll be enlightened as to why I said both, plastic and metal trucks above! See, the mounting of the bunks to the trucks?
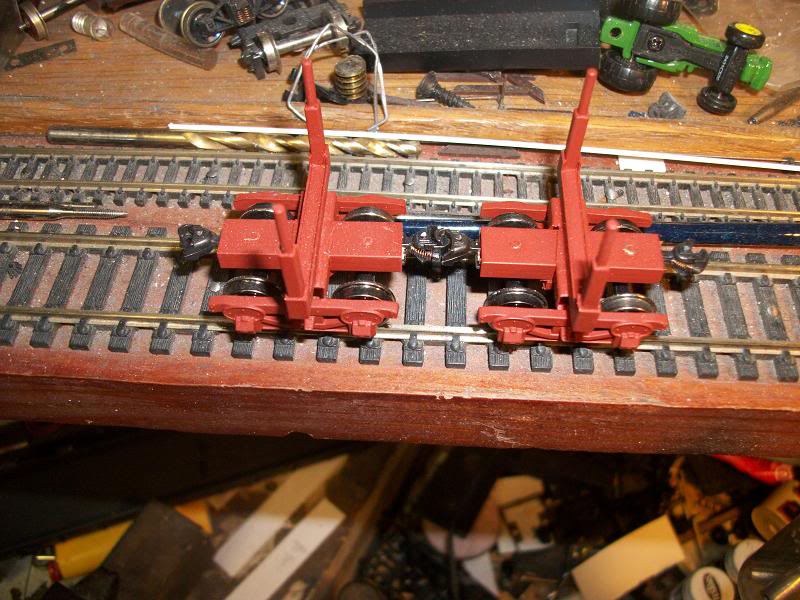
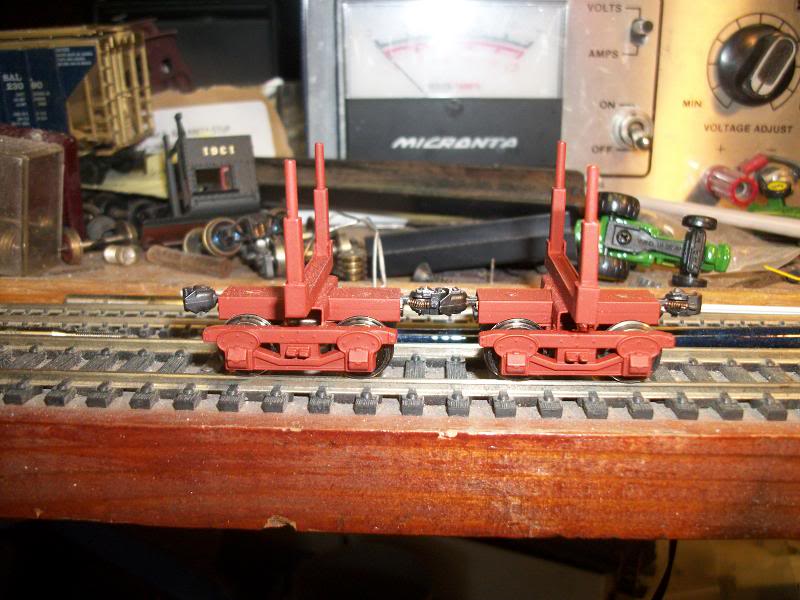
This picture shows that the log bunks made of brass construction were bolted to the plastic truck. THIS “Disconnect car” will NEVER be loaded with logs……..why? Well this is an unloaded model and can’t, these “carriages” have to swivel UNDER the logs, OR atleast the bunks do….At least to allow the car to traverse through curves in the track if these don’t swivel it will derail the car!
On this particular set of “Disconnect” log cars, those plastic trucks, from TYCO (or even Mantua’s will work the same way) but they were plastic, and somehow the truck actually was broken! The plastic snapped right at the location of the truck where the bolt was to hold it to the cars floor, This is WHY these are ridgetly bolted to the log bunks made of brass, to hold them together and keep the bearing locations in-gauge for the wheelsets! Thus, using a BROKEN part, and giving it a new life and returning it back into rail service! Thats why I choose these….. To not toss them away but use them in another light and make use of broken parts….. Most guys either toss ’em out, OR put them around an engine service yard, I choose to putthem back into rail service in a whole other way! Gives them a new lease on they’re life span!
Having that done in the manner I diod it adds to the fleet of log cars I’m building, BUT gives me some that can remain unloaded, for that differernce sake. -Not EVERY car at a sawmill, or in a yard is always “loaded” so.. this gives me some unloaded cars!
These type cars will be hastely detailed, beat up and look terrible as to be the “uncovered” disconnects…..to hide all this, and such and look somewhat realistic. NOW on the metal trucks, this WILL NOT appear the same, the metal trucks, will have the bunk to swivel above the truck frame, to have logs mounted in the bunks and chained down like my other log cars have had done to them.
NOW, when I get to building the metal trucked ones from Mantua, those will have the log bunks to will swivel, and be loaded with real wooden logs! As the bolster center for the screw will be its pivot point…..
Hemi”
A big thanks to Hemi (again!) and to Rod for sharing his Model train incline deminsions.
And if you’ve picked up a tip or two over your last few visits, don’t forget the Beginner’s Guide is cram packed with ’em.
That’s all this time folks.
Best
Al
PS Latest ebay cheat sheet is here.
PPS More HO scale train layouts here if that’s your thing.


-Thanks for posting Al! Much appreciated!!!! -WILL have more to post as I’m able to get good pictorials there of as well as time to type it all out……..
The information that I constantly discover on this site is most enlightening. I must thank you Al and all your fabulous contributors. I have recommended this site to many of my modeling friends. You’re never to old to learn something new, you know.
Regards, Tom (USA)
Hmmm, I’d say your problem is not the incline, but a big box on the track!
TYCO aka Take Your Company Over
Hemi why don’t you use a solid bar between the 2 trucks and be done with it?
A box car runs with the curves no problem.I don’t understand coupling them together.And what’s the point of not being able to utilize the rolling stock ?
The Critic
I’ve been getting your vlog’s for about a year now.I love all the wonderful layouts you have shown.Plus all the valuable information from everyone.I got my grandson a Bachmann HO train that came with EZ-track,my question is? Is there any other track compatible with the EZ-track?
Your incline of 2.5″ in 7′ is 2.5/84 = 2.97% which is right on the maximum for any layout. Remember we are working with gravity, so check your overall layout for any tilt. You could raise the starting end 1/2″ and drop the incline to 2.38% which would make for a much easier pull by any engine. Even a slight tilt of the layout would be significant. To check tilt, use a bubble in a 48″ level.. Also make sure your incline is really straight without any humps. you know what humping will do. I agree with moving the box first. good luck
Alstair and Hemi:
It was a great photo of a popular model that takes up so much interest. The Old time Logging Trucks.. Hats Off the Hemi for showing us how to use TYCO or Mantua Freight Trucks to make Logging Trucks. There are some of us who are not great at building expensive scratch built type kits. Now for my Comment. For those of us, who use BIC One piece single blade razors,, you wonder what you can use those “Safety Covers” for. Guess What Hemi,, they look like those U Channels you have used to support the side pieces that hold the logs on the trucks. They appear to be almost the width needed too. And the ends would over hang the trucks. They are not heavy but thin plastic. Can be used, by adding a square piece of hard wood or balsa to fill in the space between the edges in the center of the U Channel. OR a piece of solid brass. That way you can Drill a Pivot Hole through the channel to push a mounting screw thru. Then you can put a thin washer under the “channel” so it would Pivot on the trucks. I have been saving those pieces for years along with the handles, in a couple of old Quaker Oat Cereal boxes. You can even paint those shaver safety pieces black with some rust in them and stack them near a spur track like it came from a scraped logging truck. ~ Mike in N.H. USA. 8/31/2020
Thanks Mike! I have not found the U channel over the razors yet. an idea I MAY have to look into!
I ALSO see your from NH so am I!!!! Where you located!?
Al, is it possible to pass Mike a long my email address? as we may be able to connect locally and all!