Rob has been in touch with some LED lighting:
“Hi Al,
I think some of your readers might be interested in this subject.
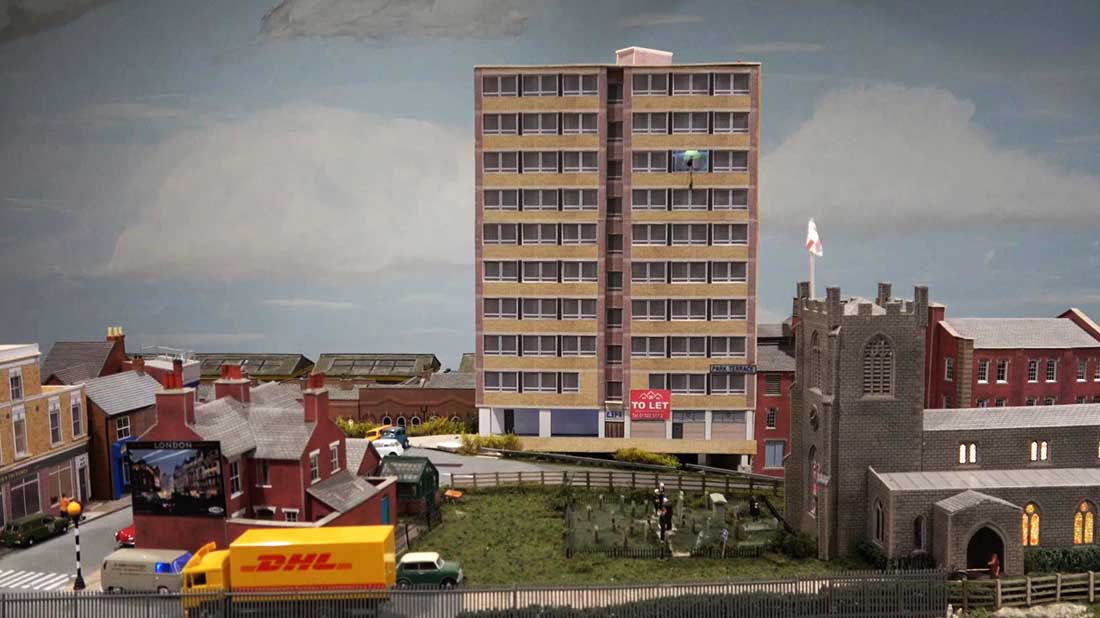
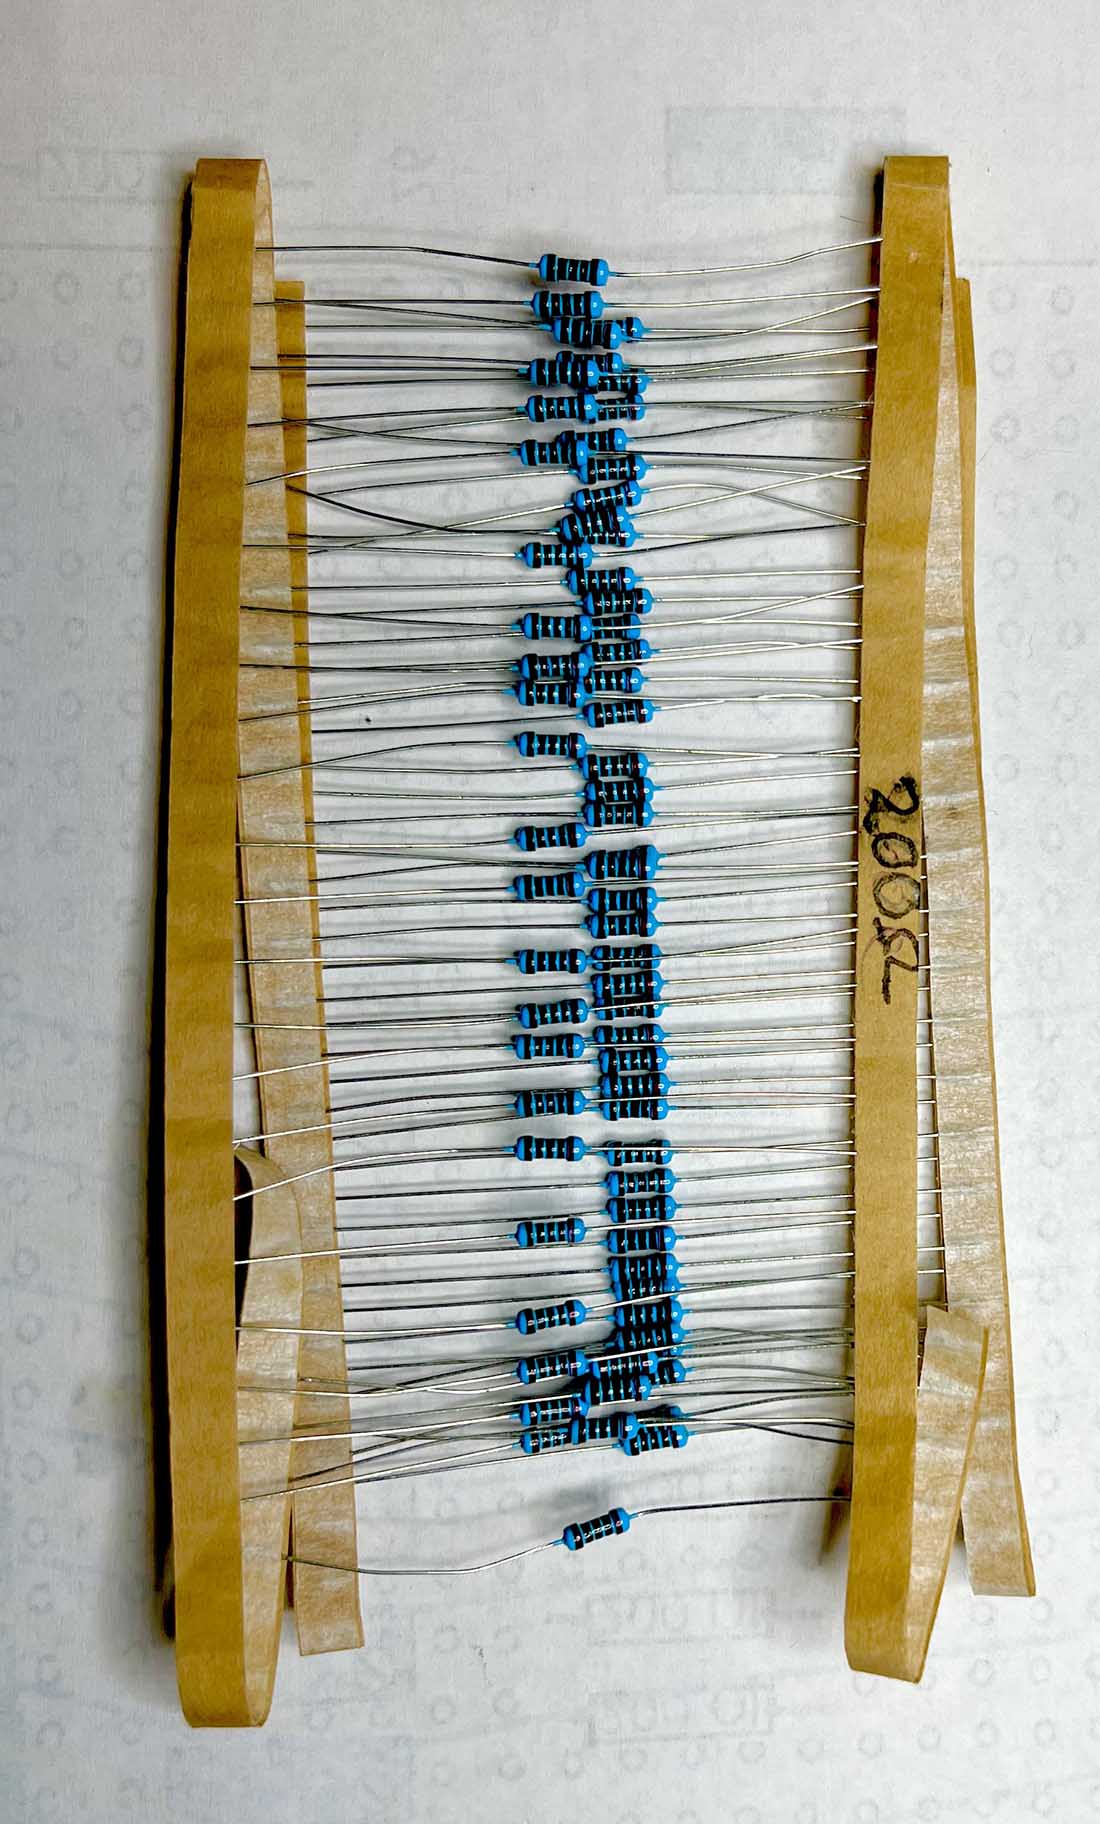
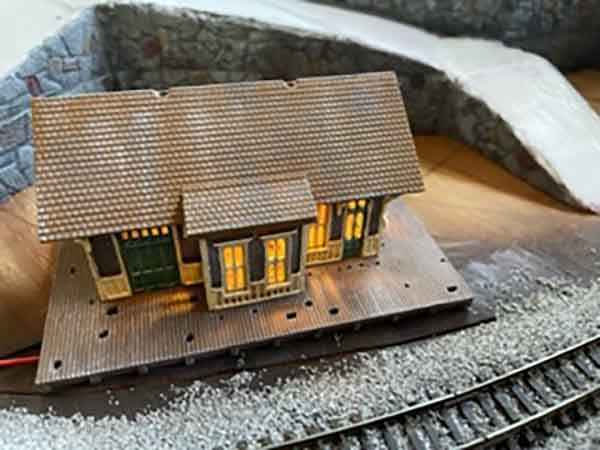
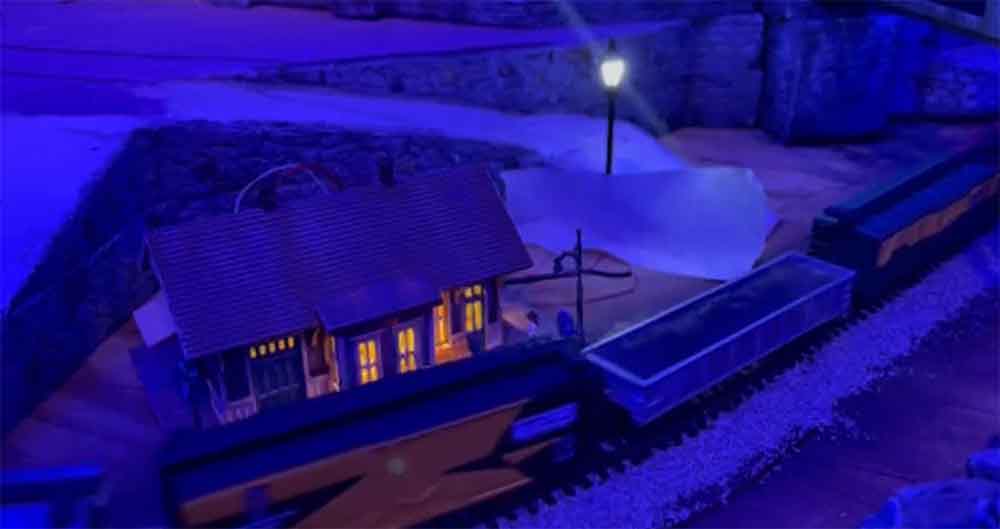
I have decided to light up my housing block. Finally? To do it, I want to control the brightness of the LEDs I plan to use. I want to vary the brightness and intensity plus the color emanating from the windows I plan to treat. I will also vary the interior color and add curtains and drapes randomly.
In the past to vary the brightness of the LEDs I have always added or subtracted resistance feeding each one. This is a clumsy method and this time with so many to do all at once I wanted to find a different way.
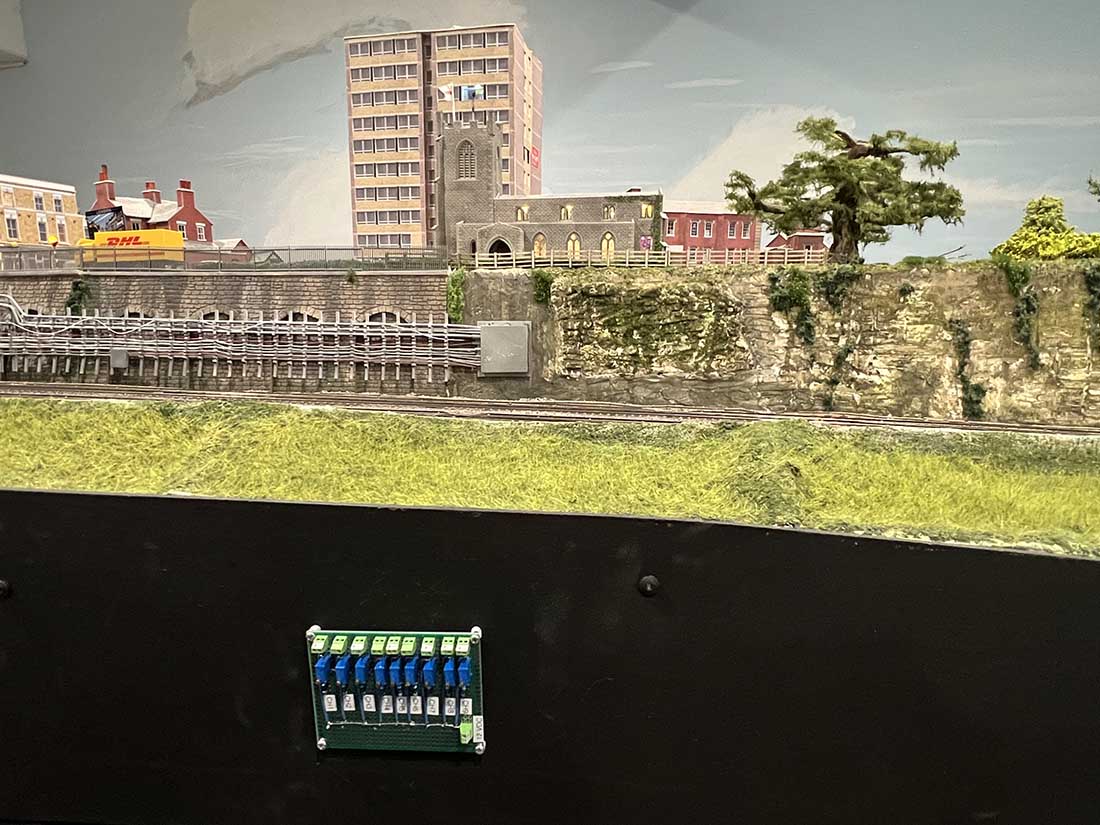
In my search, I discovered this relatively simple way to get the job done and once the building is lit, I can stand back and tune the lighting effect to best enhance this project.

“Alastair,
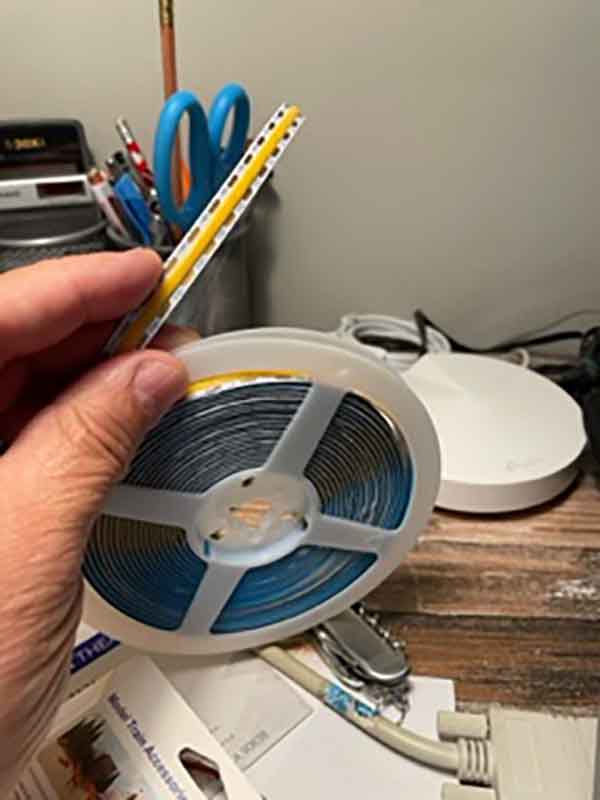
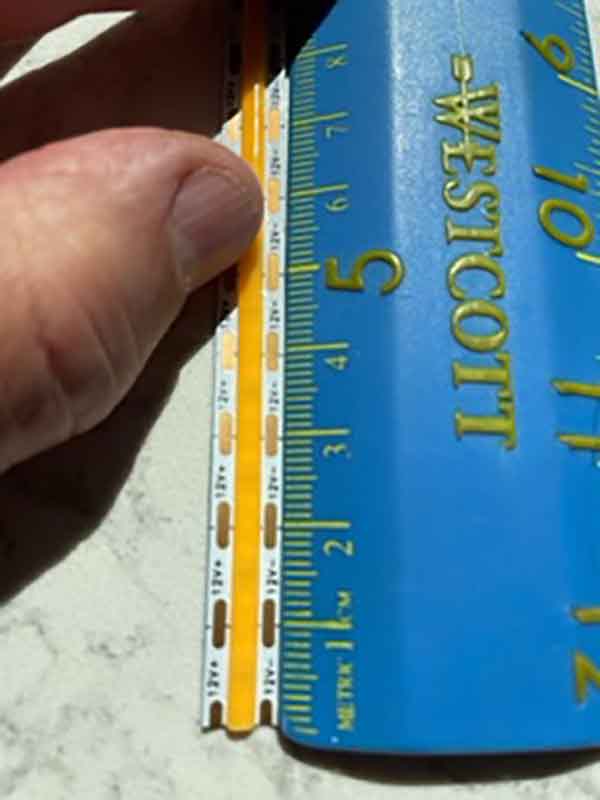
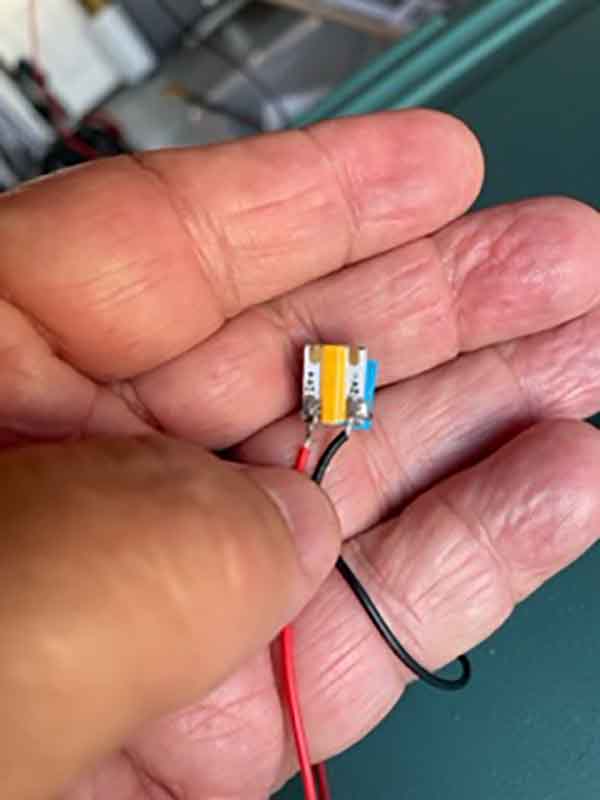
Good day! I wanted let your readers know about a wonderful new family of LED strip lighting, called COB, or Chip On Board.
What the the differences from other LED strip you might ask?
Heretofore typical led strip light were only able to be cut in 2” increments, then soldered, and placed into model structures.
But the new COB strips run continuous along the strip, and can be cut in 1centimeter lengths.
This is great news for us N Scalers, with tight spots in tiny, tiny buildings.
See my pictures and video below.
Clark”
Now on to Steve:
“Hi Al
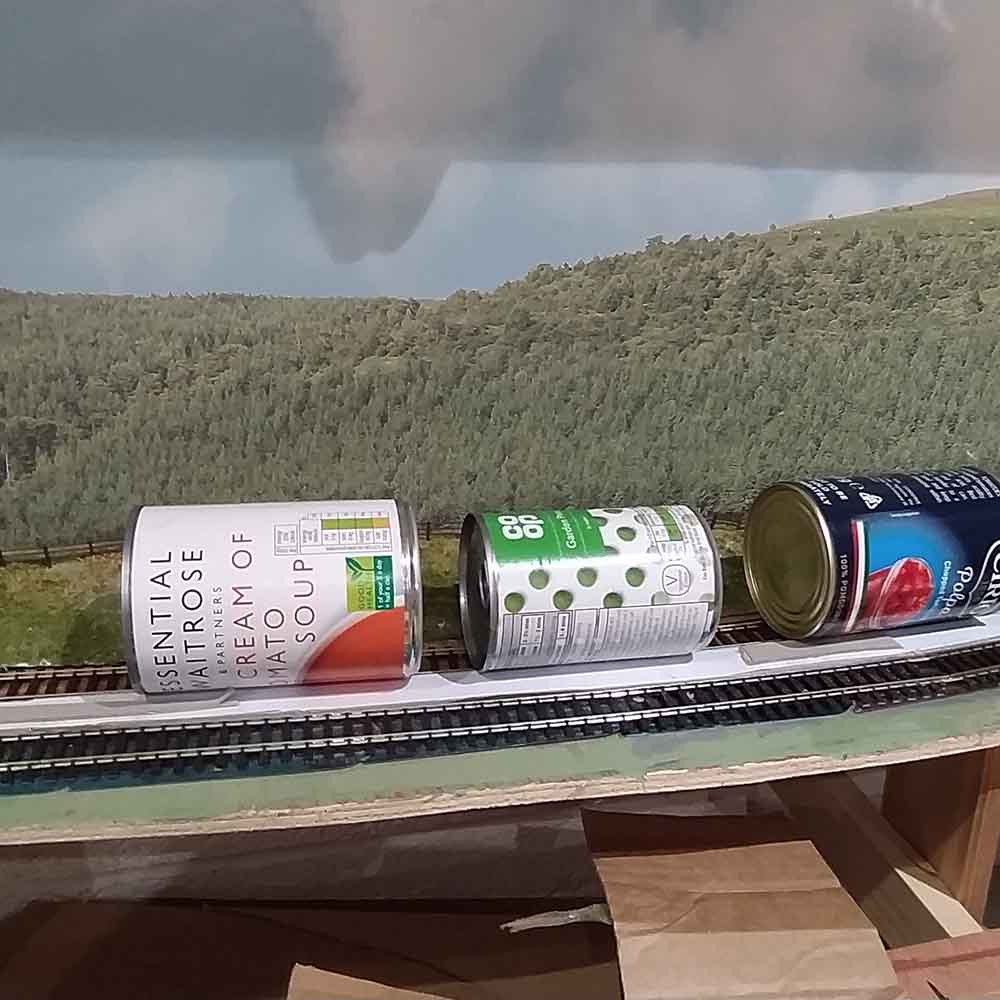
When laying track using glue rather than track pins, you can use food cans such as soup, peas etc to weight the track down while the glue is setting.
I have attached a photo illustrating this.
My track is 00 but I imagine it would work with N or 0 gauge too – as long as it’s not 3-rail!
Regards
Steve”
And now on to Peter.
He’s done what a lot of you do – put old kitchen cabinets to good use:
“Hi Al
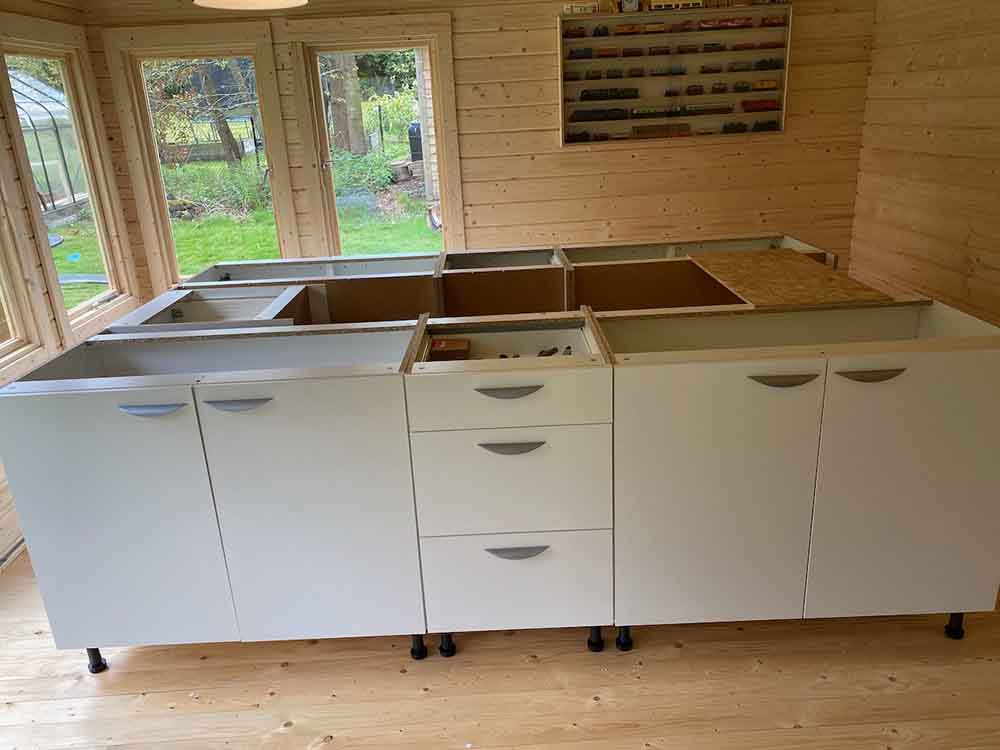
I very much enjoy your site and thought I’d send pics of my HO OO project which might be of interest to people.
I decided to build a solid baseboard with plenty of storage underneath so installed some basic kitchen units which provide the perfect height (pic1).
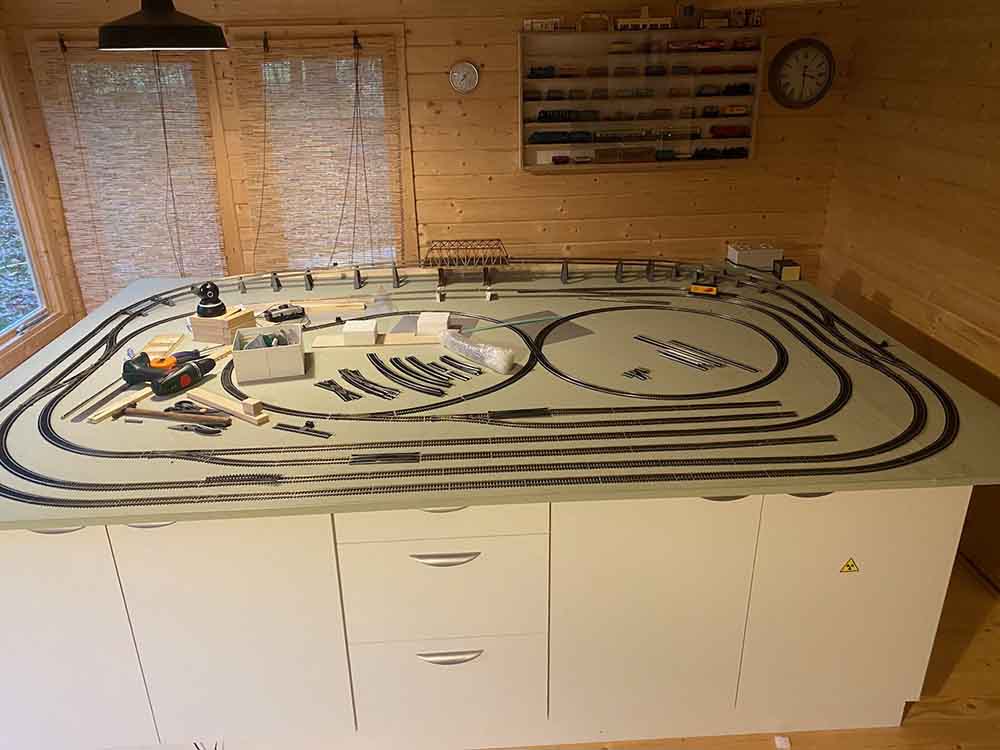
The baseboard itself consists of sheets of OSB board with a top layer of sealed and painted Sundeala. Yes, I know that we are “forbidden” to use this material but there we are, I just wanted to use it to see what happens 🙂
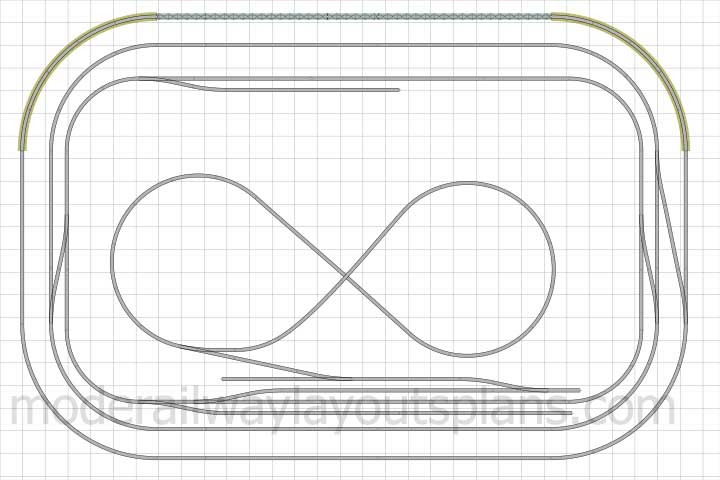
I’ve put together a starting point layout with a DC figure of 8 in the centre with an outer 3 line DCC so hopefully the best of both worlds (pic 2).
Best wishes
Peter”
Now on to Charles – who is asking for a little help:
“Al,
I have a question to post to the group.
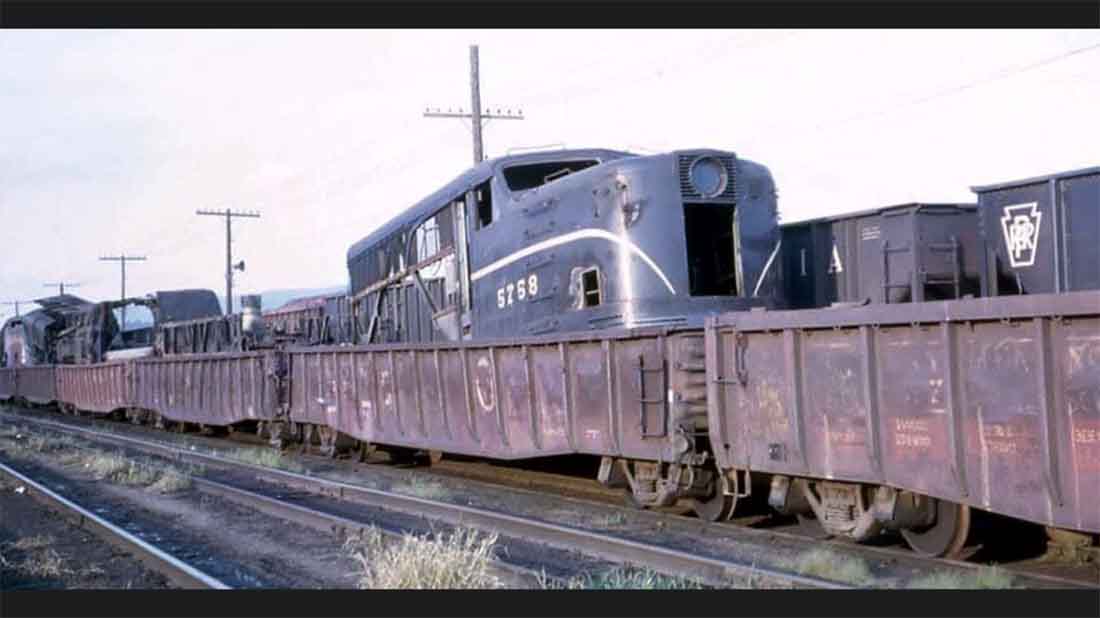
This is my first attempt at a prototype from a photo.
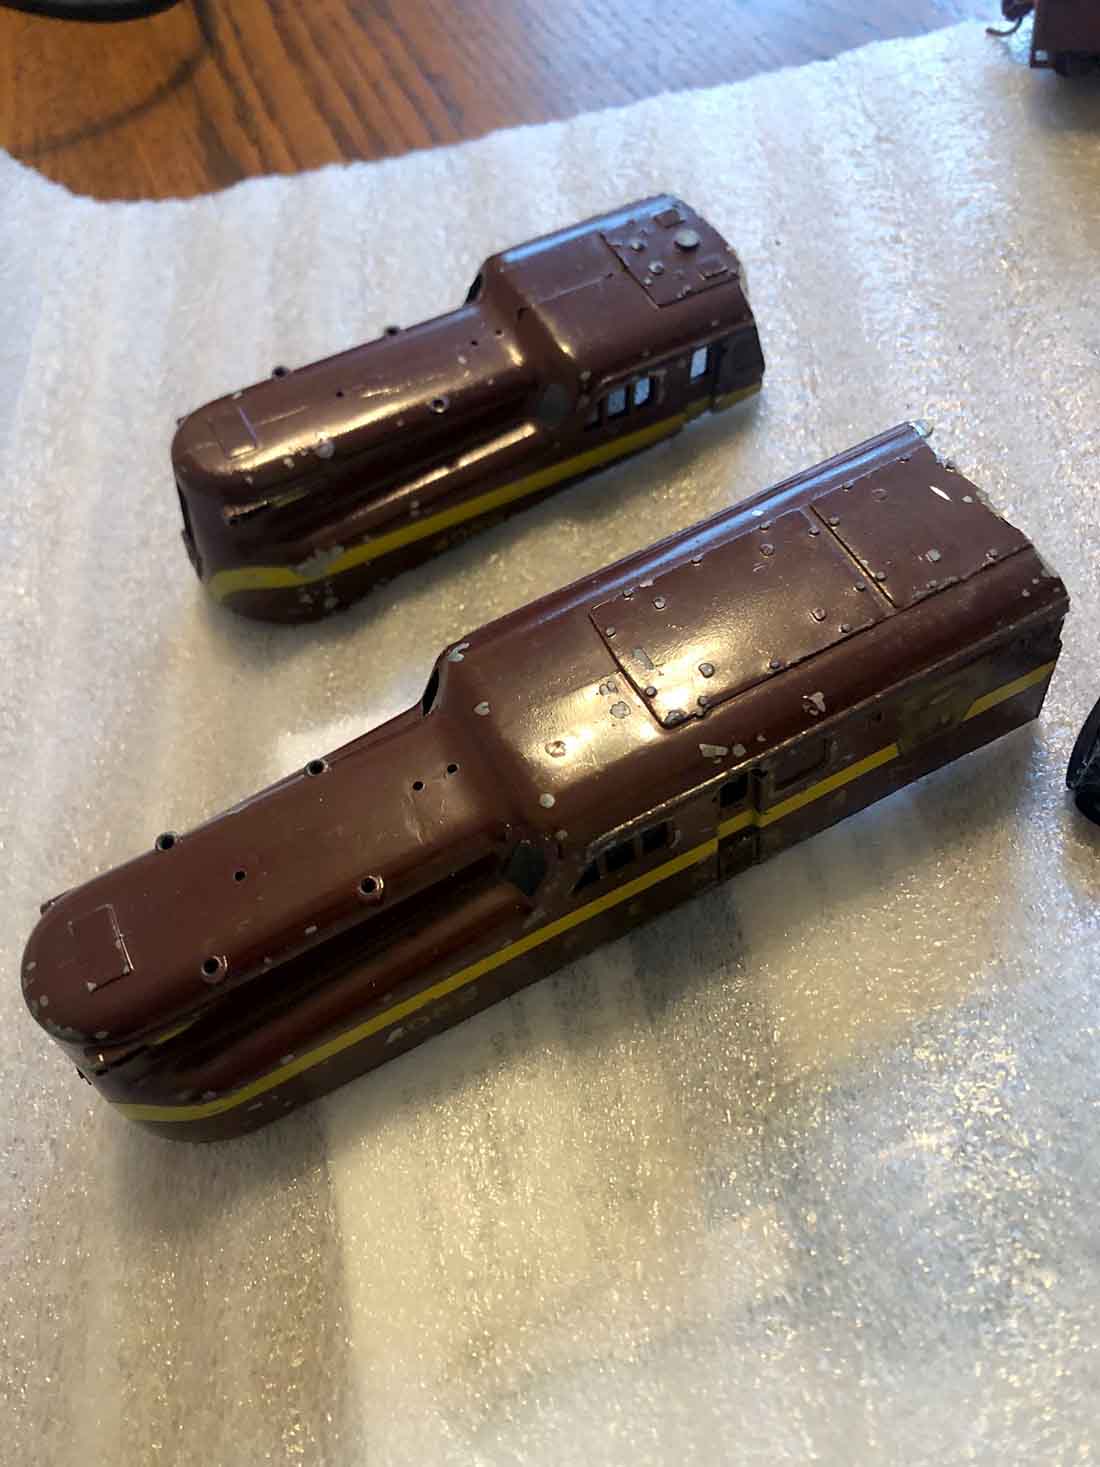
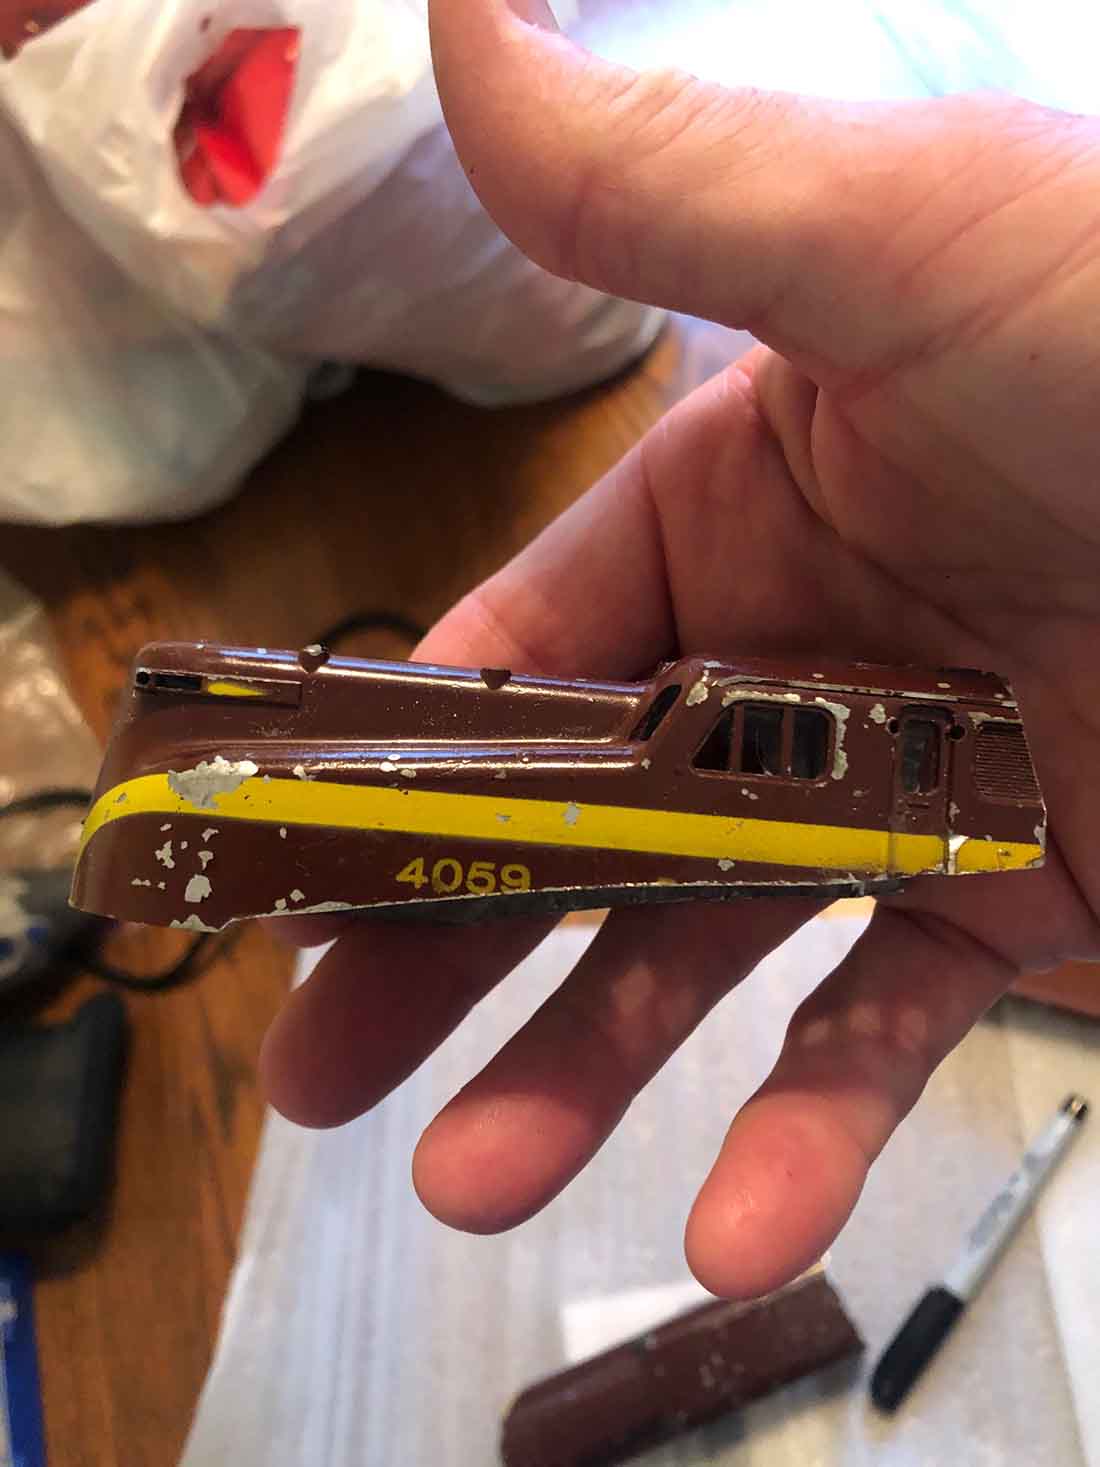
I hated to do the deed of destroying a GG1 shell, especially an old Penn Line vintage die cast one. I caught heck from my nephew!
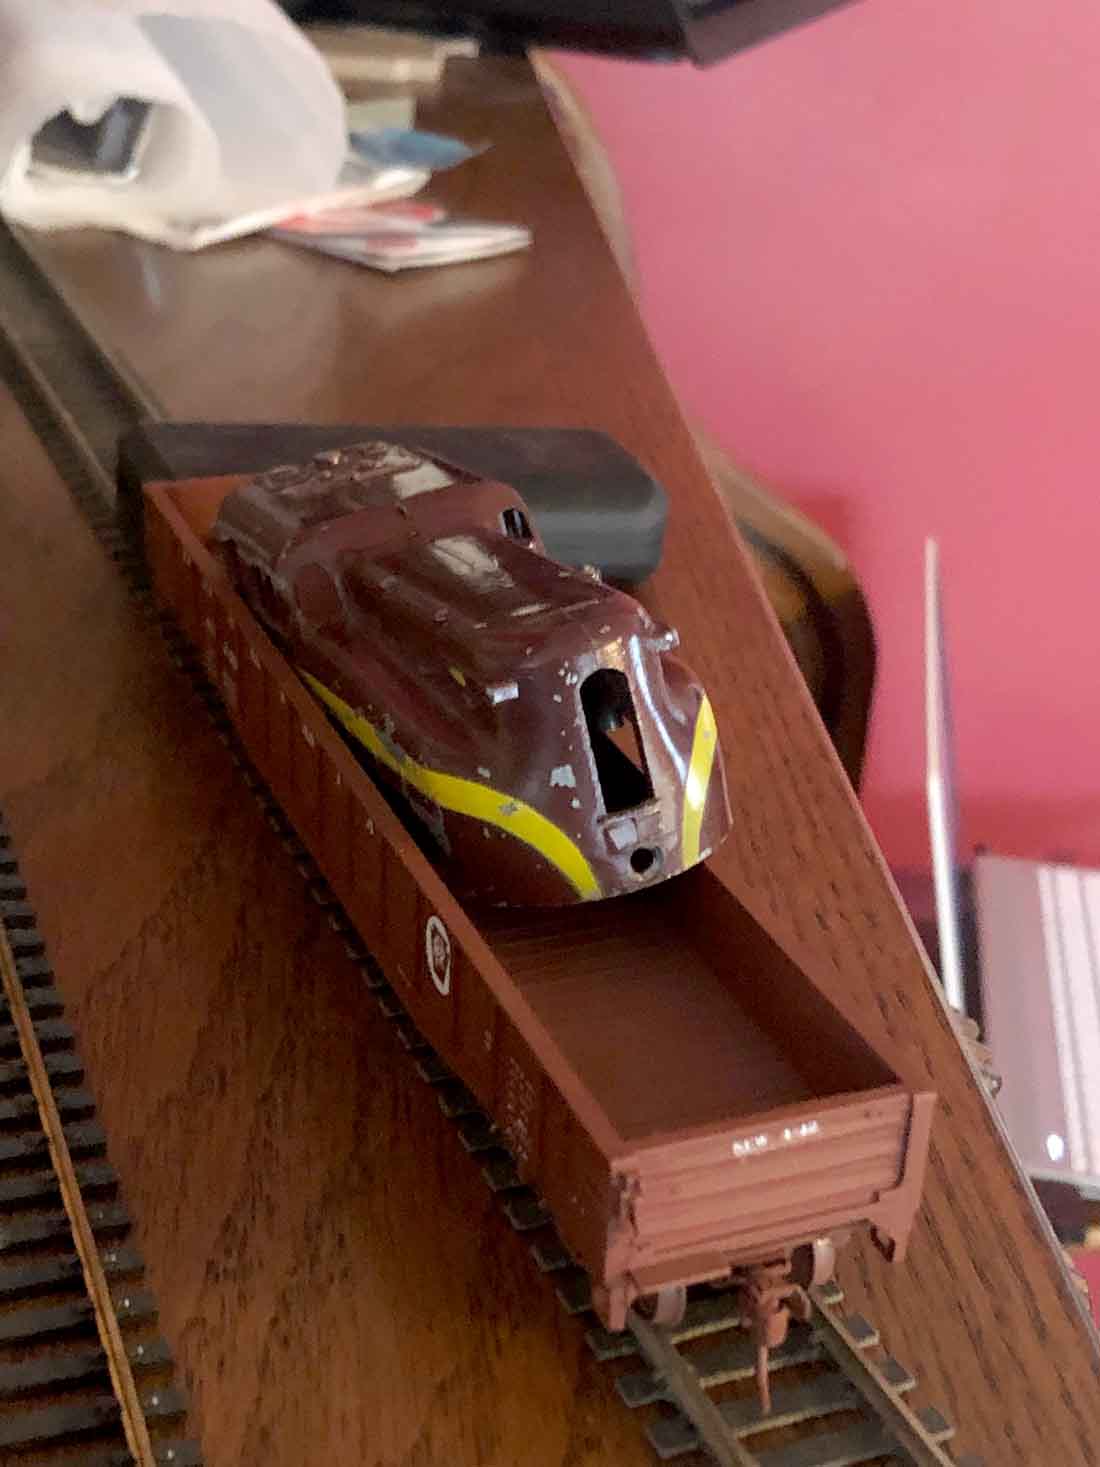
Anyhow, my question is are all HO scale gondolas the same width?
As can be seen in the photos, the cut shell doesn’t fit into the gondola as it does in the real photo.
If you blow up the real photo, you can see that there are five cars loaded with one GG1 that has been scrapped. I plan on making the full load eventually.
I can continue to cut the model to where it will fit on a significant angle, but I wanted to seek more professional level opinions.
I am including an additional photo to see if anyone has any idea as to what I could use to model the brake shoes in HO 1/87 scale, for my next project. To be around my roundhouse maintenance area.
Thanks for any ideas or thoughts from all.
Charles in New Jersey”
And now on to Josie:
“Hello Al,
I wonder if you might help. My name is Josie and I am planning on building a small model train installation for a BBC programme and I wanted to know what the smallest possible circumference would be for a O gauge train?
Is this something you might be able to answer?
We don’t have a huge amount of space but would like to know how small a simple 360 circle could be.
Many Thanks
Josie”
That’s all for today folks.
If you can help Joise or Charles, please do leave a comment below.
That’s all for this time folks.
Please do keep ’em coming.
And if today’s collection of missives has inspired you to leave the comfort of your armchair, and join in with the fun the Beginner’s Guide is here.
Best
Al
PS Latest ebay cheat sheet is here.
PPS More HO scale train layouts here if that’s your thing.
Need buildings for your layout? Have a look at the Silly Discount bundle.

Josie, the answer is I’m afraid ‘it depends’ because there’s such a variety. The old Hornby tinplate O gauge locos were mostly just four-wheeled and had hugely crude wheel standards, so would negotiate quite tight radii, but those were kids’ toys. If you’re thinking of serious modelling, Iain Rice gives his “neck-out practical curve criteria” for finescale O as:
Main line: 7’6”
Secondary lines: 6’6”
Light railways: 4’
Docks, industrial etc: 2’9”
in his book Designs for urban layouts, Atlantic, 2002.
Hope this helps.
Re Josie’s question. Depends on what needs to run on it. I model in 00 myself but a quick google of 0 gauge minimum radius suggests about 3ft upwards (radius, so 6 ft upwards diameter) as long as the locos and stock are very short such as 0-4-0 locos and 4-wheeled trucks and coaches. You might get away with a bit sharper curves as long as you stuck to tiny locos e.g. pugs.
If the layout is to look anything like realistic, sharp curves will detract from this unless it is supposed to be something like a quarry railway. Perhaps you could make it in 7mm scale, but use 00/H0 track i.e. make it a model of a narrow gauge line in 7mm scale? That way any buildings, figures etc would be the same size as if it were 0 gauge but the stock could be smaller and curves sharper (maybe even under 2ft radius)?
PS re cans for weights – that could work on 3 rail track if you “staggered” the cans so that one rests on left rail and centre, the next one on right rail and centre and so on(?)
The picture looks like an old Alco 1st gen diesel?
Josie
I use 027 track it is the closest radius 0 gauge track you can get. That would give you a diameter of 54 inches. That is from outside tie to outside tie. Only shorter engines and rolling stock will make that curve. If you use 031 most rolling stock will run on it.
Steve from Toms River NJ
Jose- the smallest stock curve in 0 gauge is a 27″ radius. Total diameter of a circle would be about 30″ outside rail to outside rail.
Depending on what you want to run, this would work for most post-war and small modern equipment. Most anything that’s rated for 031 will run on 027.
Small diesels and 0-4-0. 0-6-0 steamers can handle that tight of a curve. I have 027 curves on my layout and can run some lightly larger engines like GEEPs and RS-3’s.
Bob
Looks good.!!!!!! Would like to see more.
Greetings Al, this is Tony from Pennsylvania here in the U.S. To address Charles’ question regarding how to fit a scrapped loco shell into a gondola, page 58 of the book Pennsy Diesel Years 3 from Morning Sun Books shows his shot of the Alco PA shell in a gondola from a slightly different angle, and it’s apparent from this photo that a portion of the left side of the PA carbody (the side away from the camera) has been cut away to allow the shell to snuggle down into the gondola. This is necessary since you could not allow the sides of the diesel shell to rest on the side sills of the gon for safety reasons; it needs to sit low in the car for stability while in transit.
Hi Al: Re the COB LED strip, thanks for the idea! Please advise the brand and type that Clark is using. Thanks, Seymour
Josie, The Smallest Diameter in 3 rail O Gauge would be 0-27. If you are running 2 Rail You would need 36″ Minimum for short Locos and Cars. If You are running O scale Narrow Gauge you can run trains down to 30″ Diameter.
That is not a GG1 shown in the top photo.
To: Seymour Preston Jr.,
RE: LED product used, here’s a link
https://www.amazon.com/dp/B08HYR426N?psc=1&ref=ppx_yo2_dt_b_product_details
Note: this is 12 volt, some of the COB’s are in 24 volt, so look closely when researching.
If that’s not a GG1 what is it ? Inquiring minds would like to know . The led is great they have came down on price so much you can buy a roll for less than 10$ US.
The problem with the locomotive in the gondola is not the width of the loco, but the thickness of the gondola walls (model plastic vs. prototype metal). Milling down the gondola walls, or the loco walls, would be a tedious process. If the load is to be permanent, consider notching the loco so the front goes to the gondola floor but the sides rest on the gondola sides (would appear to continue down inside where they can’t be seen).
In the prototype picture, that is indeed a PA body in the gondola. Theoretically, it could be a PA1 or PA2. The right side of the shell has been braced with square tubing to help retain some stability when the rest of the lower body panel is cut away to fit in the gondola.
Charles may have destroyed a GG-1 for naught.
Where can the cob led lighting be purchased
I did not see your video
Hello Charles,
I do believe that the Body in the Gondola is a PA and Not a GG-1. The shape of the nose is entirely different and the area around the headlight is different also. The reason why I say this is that I enjoy seeing PA’s on my layout in G Scale and in HO.
I hope that helps,
Stephen
Maine, USA
You are correct that is not a GG1. I did get to drive the 4800 around in the engine house yard in Philly before it went to the museum.
Yep! is an Alco. Because the nose shapes were all the same, it could be PA1, PA2, FA1 or FQ2.
I like Peter’s idea of using the kitchen cabinets. People replace them often simply out of vanity and to “fix up” a kitchen and often times a few good cabinets are wasted, as well as the doors, drawer slides and hinges.
New or used, you have a stable base and they can even be place along walls. And he’ll have lots of storage for extra rolling stock if he pads the drawers or places dividers inside. It will be so convenient and he can even have places for hanging controllers or a hat. He gets his layout and tons of useable storage.
I would suggest a hot air popcorn machine and a small fridge too. 🙂
Frank in Orlando
Make that FA2, not FQ2.
Many thank to all for the GG-1 (now a PA-1!!!) question. My bubble was completely busted! Sorry for my mid labeling error.
I thank you all for you interest and input. Guess I’m now modeling a different load. I will likely never hear the end of destroying GG1 for naught!
The shell in the full scale gondola looks more like an old Alco or Fairbanks Morse passenger loco than a GG-1. But, over the years, no telling how many different types of loco bodies have been shipped on flats or gondolas. Heck even old steam or export diesels with different gauges have been shipped that way. Go for it! Also, remember that while pretty much ALL freight cars are built to a certain maximum width, most molded metal or plastic gondola body shell sides are probably close to 6″ scale inches thicker than the full size, and also, not every loco body is necessarily cast or molded to the correct scale width. MAYBE with some carefully planned sabre saw cuts, lots of glueing, filing, sanding, and filler, the width of the body shell could be reduced enough by a blade kerf just enough to fit?
Peter: RE: COB LED’s
https://www.amazon.com/dp/B08HYR426N?psc=1&ref=ppx_yo2_dt_b_product_details
Josie Minimum diameter.
Rolling stock and length of train enter into the equation. Passenger cars require
7′ 6″ for long trains. You may be able to get away with 6′ 6″. Freight trains can
use the smaller diameter. With a long train with the engine heading North on a
half circle, the body heading East or West at 90 Degrees and the last car heading South, the central part of the train tend to be pulled off track. For a more realistic look, Lionel made super O for a few years. It is a smaller diameter circle with a center rail that is a thin vertical dark colored bar that blends into the road bed.
Charles, I wouldn’t feel bad about cutting the GG-1 shell. There are much better models of the GG-1 that have been made since the Penn Line edition! I practically gave away 2 of the Penn Line GG-1s at a train show last November! (Neither was complete, but one could probably be made from the 2 that I had.) Personally, I’d carry on with your plan! Even though that’s an Alco in the photo, undoubtedly the same was done with other locos, including the GG-1!
what i wood try is a heat gun soften up the shell a bit to make it fit
O gauge Peco Setright curves are a 4 ft radius and are about the minimum practicable. They have the advantage of being ready formed, you just click them together, and being a British make, readily available. They also do straights and points and can be easily connected to their brand of flexible track. Just make sure you buy Peco bull head rail sectioned flexi track and not flat bottomed flexi track.
Cheers
Martin
Variety this AM, reminds me before LED days. String of Xmas tree lights worked pretty well. Variations there with size of lamps and allowance for heat dissipation. And yes a 120V. overhead light dimmer worked. Of coarse has to be installed by current codes with even Arc-fault or GFCI technology considered, not strung any which-way either. Homosote doesn’t burn very well and sturdy enough for any base. But these are used on trees or outdoors even, candles could work (kidding)…
No, the series type string of lamps probably not a particularly good idea, many variations out there or used to be. All white (clear) or multi-colored?
Even myself wouldn’t have the time or patience with the micro circuit lighting. By all accounts a worthy and monetary affordable investment but just to dim lights? Not sure but all good info.
With Regards, R.
Some good ideas on wiring lights, thank you.
I bought a 13.8V ac/dc 150W converter from Ebay years ago and run a bus around the layout. Ebay now has 24V 6A power supplies for about $15 with free shipping. Bobs circuit can be hooked to this. As an alternate to 3V individual LED’s I use 12v strips cut to in dividual (3) pieces. I wish I knew of the COB’s I use adjustable DC/DC voltage converters to light a whole town. Ebay 10 pack was $11.95 with free shipping. I use them also for strip lighting and signals. The blue potentiometers could be used directly from the bus with 12V LED’s. The boards can be cut for individual mounting. Leave enough free holes for mounting. When lighting a town some buildings could be lighter than others. The 3 strip can be painted to reduce brightness of those if wanted.
Alastair…Thank you for your service!
Rob…Thank you for such an informative presentation on dimming LED’s. I have been agonizing over the purchase of commercial units and It is just what I need.
Clark…Great presentation on Cobb LED’s. They spread the light better than a single LED, and, the color is better for lighting interiors.
All submitters to this Chanel…A BIG THANKYOU for suppling tips and education for model railroaders. I live in a community of 2,500 homes and I am the only one that is interested in model railroading!
…Bill
Some confusion as to circumference, diameter and radius. When I was a kid I had a Lionel 027 train set and the DIAMETER of the circles was 27 inches (i.e., the radius was 13.5 inches and the circumference of the circle was abut 85 inches). I don’t know whether the 27-inch diameter is calculated from the centerline, the outside rail, or something else. But I do know the diameter was nowhere near 54 inches because my train board was only about 3 feet wide (i.e., 36 inches), and I had a complete oval.
Rob, another informative video. Instead of using ‘perf’ board, you could use Veroboard. Its a number of copper strips, glued onto a biscuit base, with holes at 2.5mm spacing. Components just solder into the holes as required (a lot neater).
Steve (Sydney)