Today’s post is all about how to start a model railroad.
I do love posting pictures of folk making a start on their model trains – because that’s what it’s all about… making a start:
“Hello Alastair:
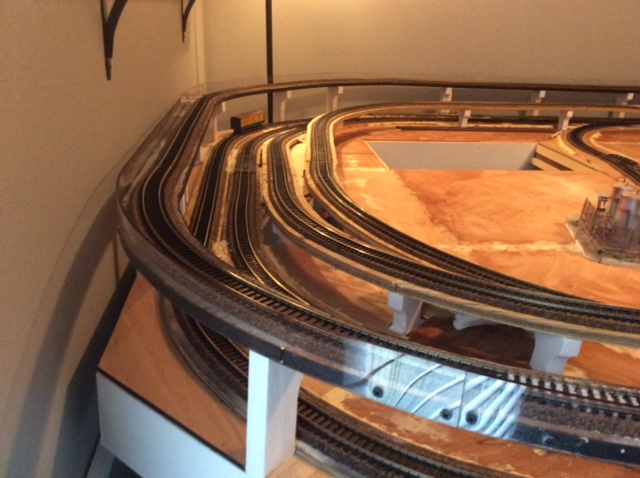
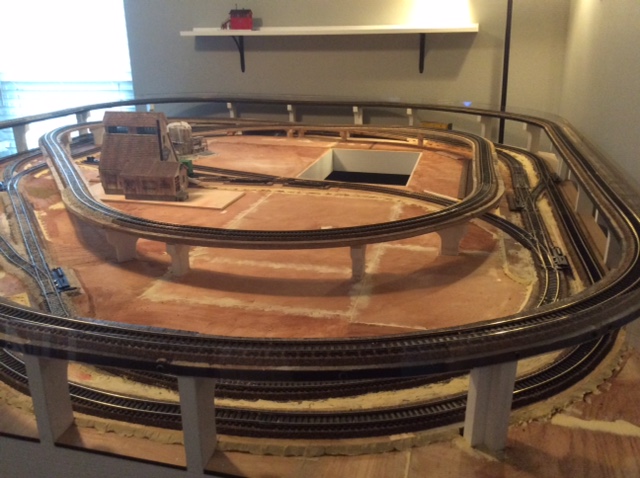
This may be an unusual request, but a sincere one. It has been years since I built a layout. I did my study model and had a preliminary landscape design…
The track work is very close to what I had originally planned… only a minor change. My thoughts have changed about one area and I would appreciate any advice your subscribers might have.
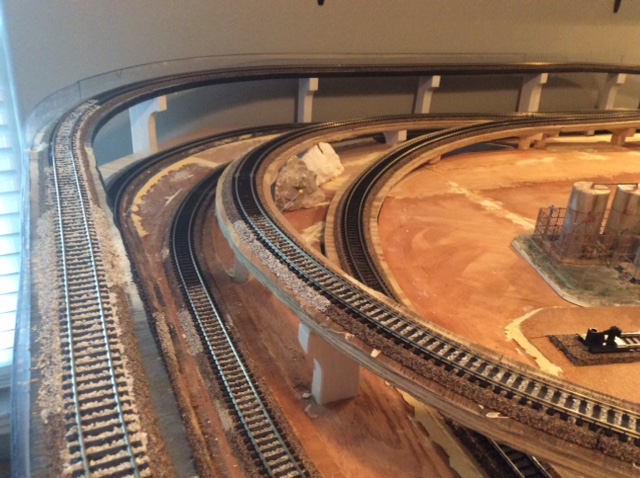
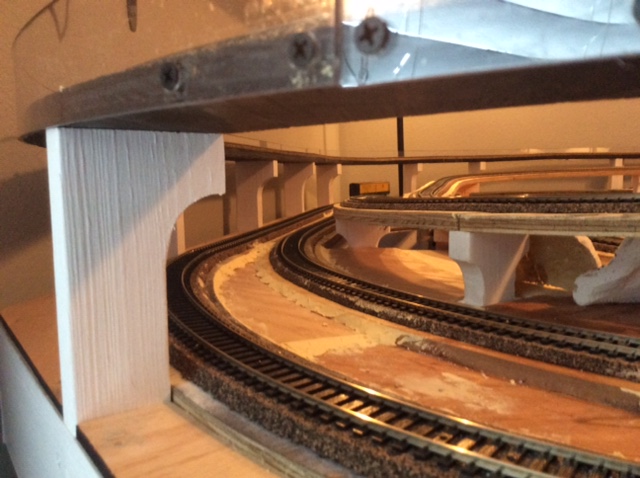
The attached photos show an area that was going to be a mountain and associated grade through sharp cliff walls. I added one line too close to the ascending ramp and it created an issue. Would you mind asking for ideas on this?
Thank you and keep up the great posts. There is a lot of talent out there.
Cheers…Mike …Clermont, Florida, USA.”
Now on to Yale, who is also attacking the thorny question of how to start a model railroad:
“Al: Thanks for your terrific site. I am an old guy as well. My wife and I are building an N scale railroad. It is called the Fairfield and Cheston line.
It is based on real towns from central Pennsylvania in the USA. We haven’t rebranded our locomotives yet so they still carry the Pennsylvania Railroad road name. We have one Chessy locomotive as well.
We are modeling in the 1950-1970 era. Our buildings, trucks and cars are from that period. Names on businesses came from the business directories from those towns. Fairfield is a small farming community. Cheston is the big city. We took some license, It really is a county.
The layout is approximately 14 feet long. It is L shaped. The widest part is 5 feet wide. The base was made from do it yourself kitchen cabinets that I assembled. This provides space for all stuff we use for the layout: building materials, track, tools, paint, glue etc. It also provides access to the wiring. One cabinet has bedding in it so when our kids come for a visit they want to stay in the train room.
On top of the cabinets we constructed a framework of 1 x 3 lumber in grid fashion. We used old drop ceiling tiles glued to the framework from which we laid out the surface for the train tracks. The ceiling tiles were cut, dug out to form our river beds and lake. Then lined with plaster. They were finished using Woodland scenic water kits.
Mountains and tunnels were made using foam from all that stuff that get delivered by post. The foam was covered using Sculptamold, painted brown and landscaped. Most of the buildings were kits with a few modified to fit a specific application.
My wife started detailing the insides of some buildings. Takes more patience than I have, but gets us lots of wows when people see them. She even dressed storefront windows. This is a work in progress. Working on a lumber yard on one end and a refinery complex on the other end. This will add another 3-4 feet to the layout.
We just converted the layout from DC to DCC. We have two DCC locomotives and plan to convert a couple of our better DC locomotives to DCC with sound. Turnout operation is so much better with DCC. We have 22 turnouts and most now have companion block signals. The digital controller display shows turnout positions. I am trying to learn how to program routes. This gives new meaning to teaching an old dog new tricks. I even have software that will allow me to operate everything from my laptop. Just need some more learning time.
Hope your readers get something from this.
Yale”

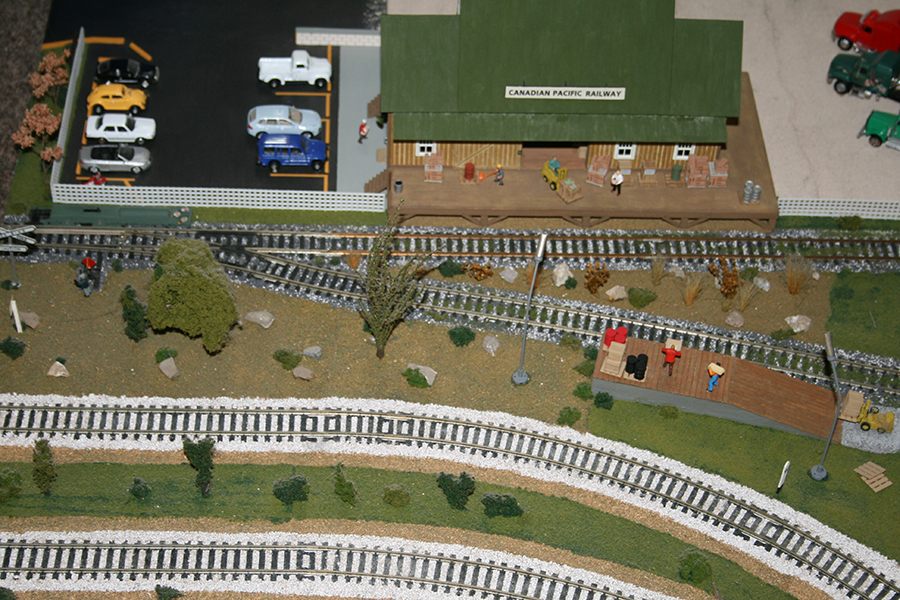
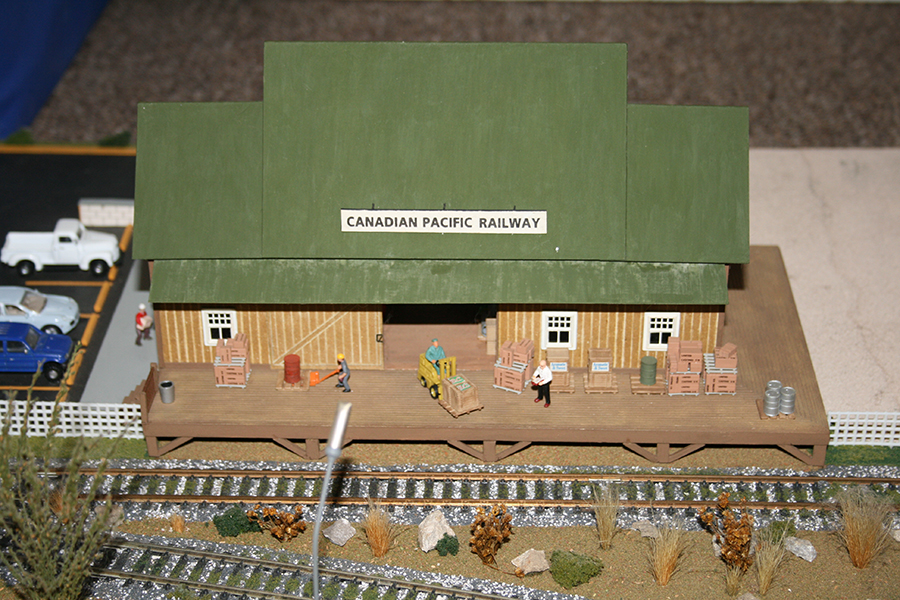
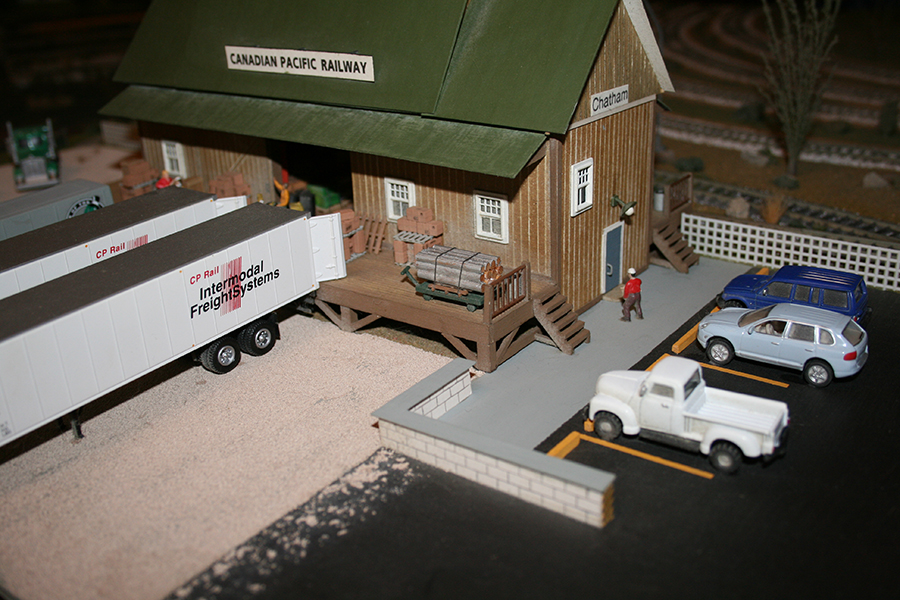
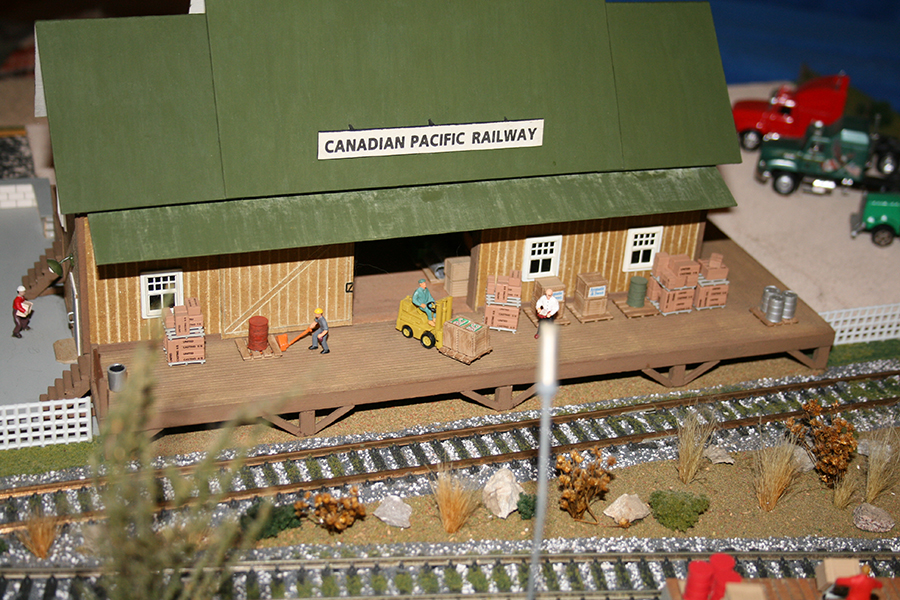
“I thought you would like to see my scratch built Canadian Pacific Freight Station.
The freight station is just down the road from my observatory. Made of the same material as my observatory, cereal box cardboard, and painted with my favorite paint, HUMBROL.
I painted the cardboard, which was a grey colour, an earth brown. I used a scriber to rule off the board lines and then painted the entire building with a clear flat HUMBROL paint.
The roof was a fun thing to do. I painted the roof a mid forest green and when the paint was still tacky, I used a thinner and white wash to give the effect of sun bleached look. I hope everyone likes my freight station the way they liked my observatory.
Thanks Al for all the great emails you send to us around the world. Please keep them
coming.
All the best to you from Dave in Ontario Canada.”
That’s all for today folks.
If you’re still wondering how to start a model railroad, find a space, pick a track plan and get going!
Remember, it’s the start the stops most people…
A big thanks to Dave, Yale and Mike.
It still amazes me what lands in my inbox each morning. Please do drop me a mail if you have anything you’d like to share.
That’s all for today folks.
Please do keep ’em coming.
And if today is the day you get started on your layout, the Beginner’s Guide is here.
Best
Al
PS Latest ebay cheat sheet is here.
PPS More HO scale train layouts here if that’s your thing.


These layout are great makes me want to go bigger. How do you decide how big to go and how do you power it. These large layout need power how do you do this so all trains run?
Mike- Clermont
Dont quite understand the “issue”-please clarify that- but if it is that the rails are too close and large rolling stock will bang into each other then there is no other solution but to relocate close quarters. Your layout is very similar to mine and the biggest problem I have is the planning of scenery from a focal point -the control area -because you dont want to have stuff face the wall. Logical stuff has to be under the overhead rails. The beauty of your scheme is running long freight trains continually and that makes it great. Your stanchions are exactly like mine. IMHO in designing hills and tunnels- dont hide the trains for long and less is more.
Yale and Dave -great work-
George from NY
⭐⭐⭐⭐⭐ Dave. There are many posts where skill and ingenuity can be admired – but other, unrelated interests can generate that, too. Railway modelling can stir memory and inspiration, above that. Thankyou, Dave for your scratch built freight station. I scratch build, and you have prodded me into further work. Also we went from Norfolk, UK to somewhere further west than Ontario last autumn: a holiday of a lifetime which included the Rocky Mountaineer. Your station almost screamed “remember me?” That’s engagement!
Hi, Dennis. How large is the area that is available? Then allow minimum 3 ft clearance all around maybe a little bit more to allow access by wheelchair. Then just pick up a pad and paper and start drawing what YOU want for a layout diagram. There is NO wrong track plan! You could use one that is already drawn and modify that. If you haven’t done so already, PLEASE do yourself a favor and get Al’s book. It will save you from most of the problems that the rest of us have experienced at one time or another. Norm in York, PA
Also to Dennis, use bus wires and drop feeders about every 6 feet or so to reduce voltage drop and help locos run smoother. I Split my 6 foot by 16 foot layout into three power districts each with its own separate power, 14 gauge wire for the busses, 22 gauge for the track feeders. I basically took a “folded dog bone figure 8 stretched it out to 6 foot by 16 foot, put in a second track parallel to that then just ran another around the outside of all that. Several crossovers and some sidings and voila I have about 300 feet of trackage
I think the scratch built station and it’s loading docks and parking lot all look great! However the landscaping between the tracks looks too artificial to me; IMO it’s too neat, too evenly spaced apart, with rocks and bushes too similar in sizes…
Skip
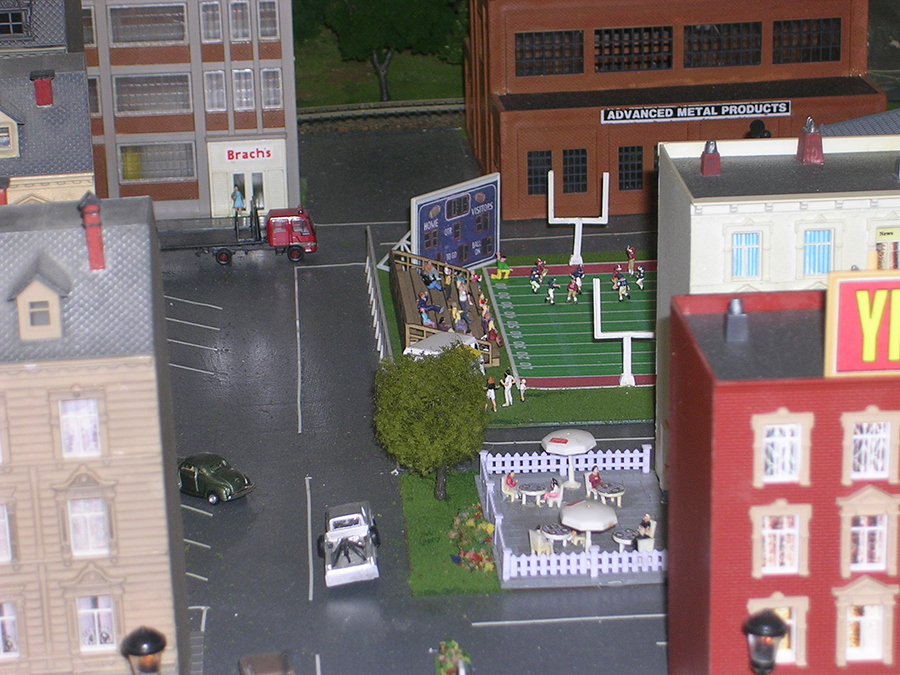
Great freight depot. Lots of action, lots to study. Parking, trucks, lift truck, wonderful. Thanks for sharing.
Rob McCrain – Farland Howe
Very nice work, you must be proud.
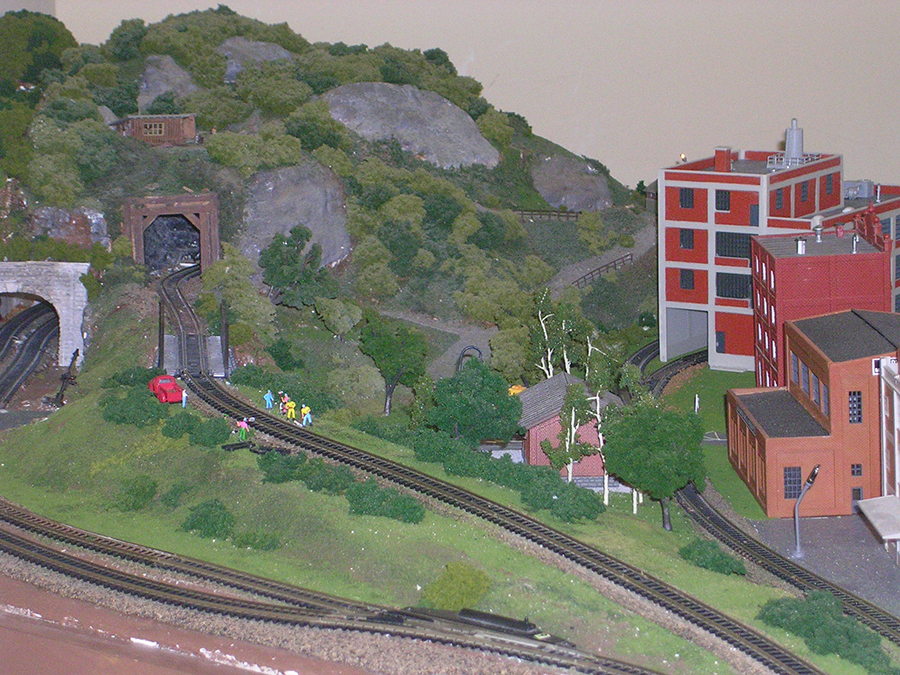
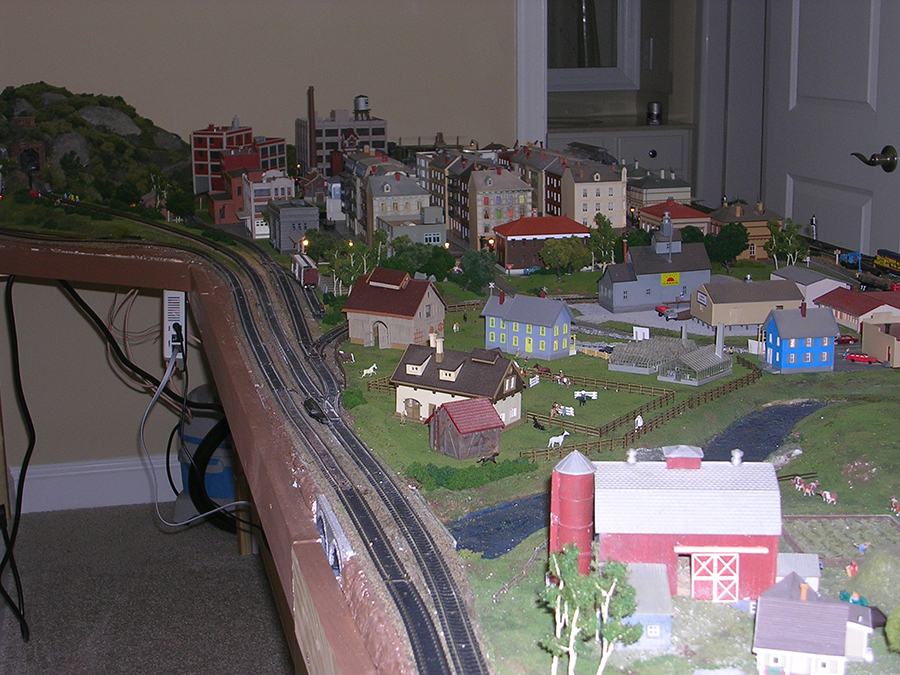
Beautiful Layout. The farm scenes are very nice and bring back memories of farming as a kid long ago. Keep us posted on the progress.
Mike: If I understand your problem, it has to do with the last picture. Try adding a support at the intersection of the layout and wall; it looks like there should be room. Then for the offending support, rotate it 90 degrees. This should give you added clearance and enough support for the ascending ramp. Delighted to see your layout as I may face a similar problem with a layout I have I in the designing stage.
Very nice work everyone. One health comment: some of the old drop ceiling tiles have asbestos fibers in them and should not be used. Mike: If the problem is the clearance for a rock cliff between the ramp and the lower inside track, I would recommend removing the outside lower loop and centering the other track between the ramp and the raised outer loop so that you have room for a cliff on both sides of this track.
Mike, if the problem is just a cosmetic one, I.e. that you can’t really have an overhanging rock face where the outside high level line runs almost above the low level, may I suggest you put both those low level lines in tunnel through that “trench” area, looks to be room for separate tunnel mouths on the curve in the distance on the first shot. It would hide part of the circuit as well, giving more of impression that the trading “goes somewhere” other than just round in circles. At the sides of the layout, where the high track is straight, you could disguise the supporting structure as a viaduct with concrete branching piers and girder sides.
Train, not ‘trading’ in my previous post. Damned spellcheck!
Hi Mike, I had to deal with the same issue with my G scale layout in our basement. Perhaps allow the ascending track to be exposed totally underneath suppoerted by modern consrete pillars, and let it hug the mountainside that would be painted on your wall. This would give scenic details places to thrive between the pillars and adjacent to the offending low level line. I had the same problem only 16 feet long, so I painted a city behind the ascending/upper level track and make the track look as though it was an el supported on steel girders running alongside the city..
Dick – Hardin Mt
An interesting way to help plan a layout is to find an existing plan that catches your attention and stretch it. This can be done by taking the plan and cutting it into quarters. Take the 1/4 sheets of paper and place them at the extreme 4 corners of your designated area. This is of course on paper. Now connect the 4 corner sections with new track to come up with a larger design. You can then modify this new plan to suit your space and ideas. This how I did mine but I also made some changes as I went along if I didn’t think it looked as I wished. I thought that I would have a 8X12 layout but ended up with 9X13 as I added here and there to make thing fit and work.
Great looking layout, I have avlso started to rebuild my layout, and did send a couple of photos, but have not seen my humble pics. I did ask a question about
Mixining codes re: 100 and 83 . My hobby shop said no problem, but I am not
Too happy with it,my old Layout was code 100, but I did aquire a lot of Code 83
From an old friend,along with a DCC system with 4 Locomotives.does anyone have any tip on this code issue?
Danny, in M.R. magazine I have seen several layouts that use code 100 for mainline rail and codes 83 or 70 in sidings, yards or branch lines. There are short section of track available that transition between different codes.
A true pleasure just to look at.
Thank you for sharing.
Hi Mike – Now what you are making is what I call a railroad layout. I am not sure where the clearance issue is so would it be possible for you to send Alastair a picture or two with arrows superimposed upon them to show the problem area. Please keep us posted with your progress.
Pretty Neat.!!!!
Mike;
You might be able to install an avalanche diverter wall/roof. It kind of looks like a porch roof, open on one side, and an avalanche goes over the train & tracks, usually not inhibiting them. Brad
I love your layout , awesome job,thanks for the pictures.
Really nice to see folks enjoying a hobby from their youth. I found the hair pin legs that were used on my first train table in 1953. That inspired me to put a small HO
scale layout together. Although small 4.8′ x 5′.3, I enjoyed putting it together along with my wonderful wife. We really had no plans, we just proceeded day by day and a year later it was complete…We named our layout “Oreville” …68 years later, I still get the same enjoyment from my small layout as I did from my larger one as a child. Is it perfect? No, but I am happy with the results…There will always be critics
offering you their advice. Have fun, that’s what it is all about….
I am in the planning process and designing a HO layout for my spare bed room (sorry honey) I have a lot to learn I am good at wood work ,wiring gonna try not to burn the house down. Thank for your site and helpful information
All good stuff…. to Mike in Clermont, this is Frank from East Orlando. I like how your high in the sky track has a semi oval-like shape. It’s interesting.
Good luck with it and have fun.