My word, I have something very special for you today.
Mike kindly agreed to be the crash test dummy for the latest print out scenery.
And all I can say is that he’s been very thorough:
“Hi Al,
It’s been a decade or two since I had my own layout, but I’ve been enjoying your blog for a number of years now.
It was “Martin’s tunnel” post that first made me want to get back in to it.
Ever since Ive been toying with the idea of making one just for fun. Your offer of trying out the the new tunnel print was just the excuse I needed.
I’m pleased with the way it’s turned out, but saying that, I’d do things slightly differently on the next one, as you’ll read.
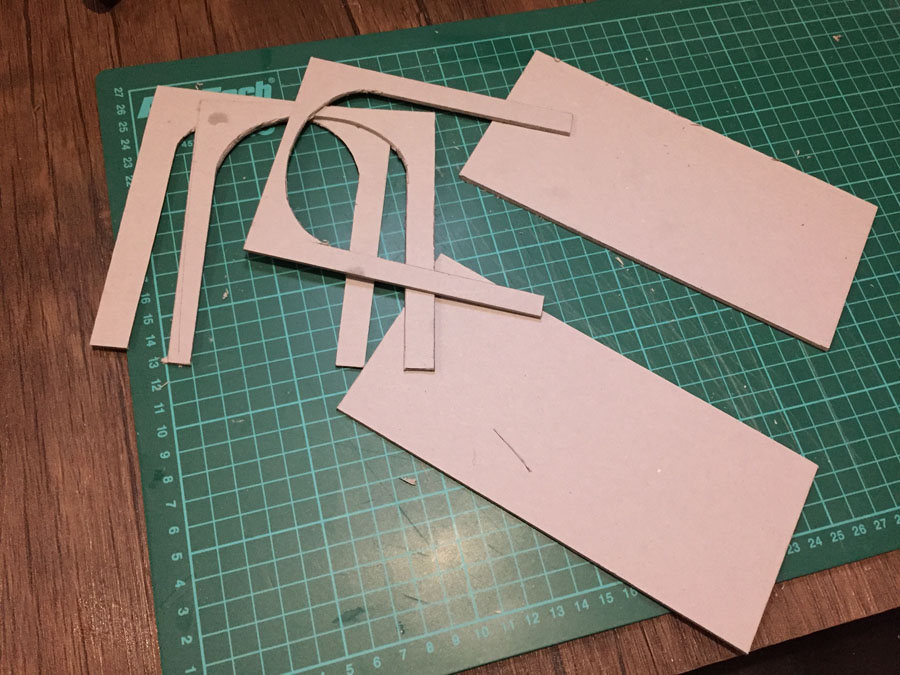
First, I made a card frame for the tunnel entrance because I wanted the tunnel it to fit snuggly in the foam. Also, I wanted the inside of the tunnels to fix to the outside without any gaps.
(All images are clickable.)
The print comes with a tunnel outline, so making the frame was easy enough.
Here I’ve printed out the tunnel and stuck it to card.
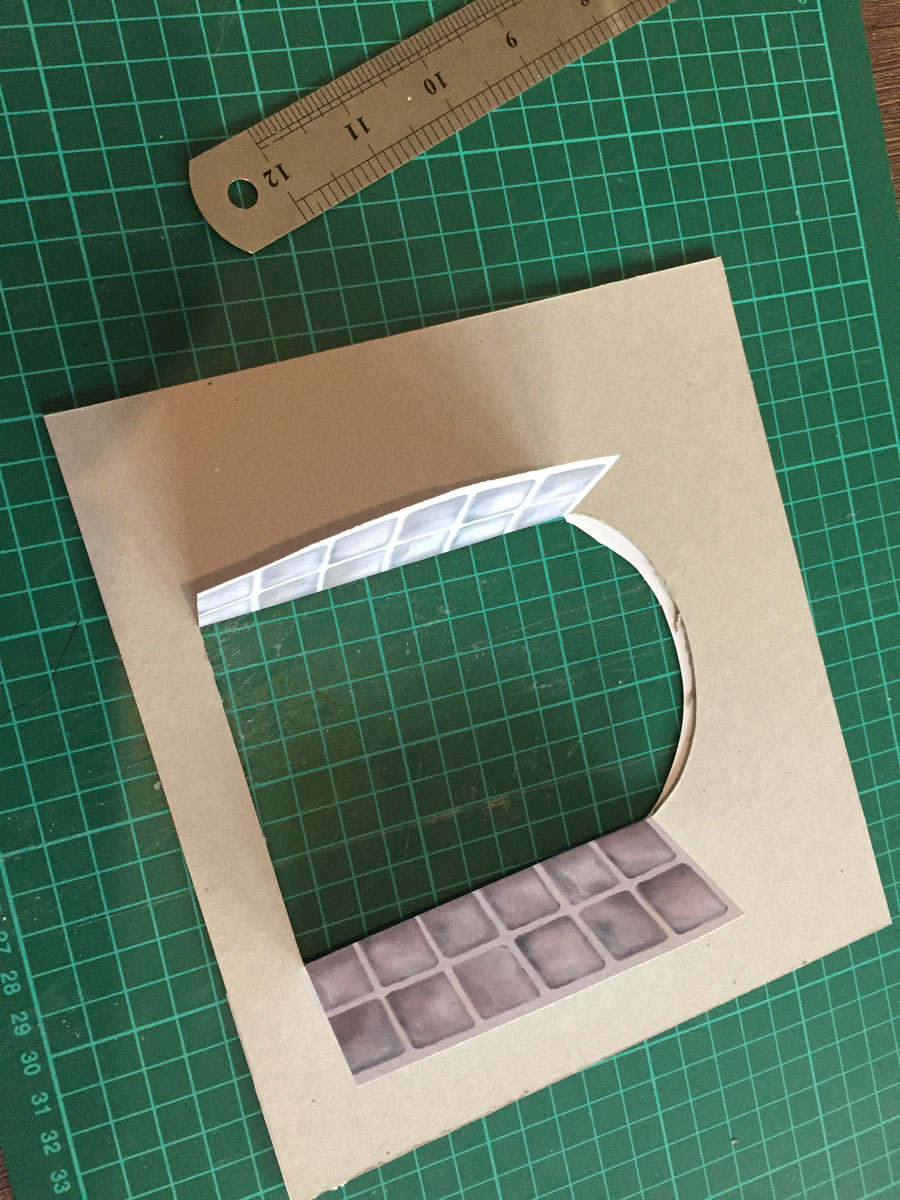
You can see the flaps that line the inside of the tunnel.
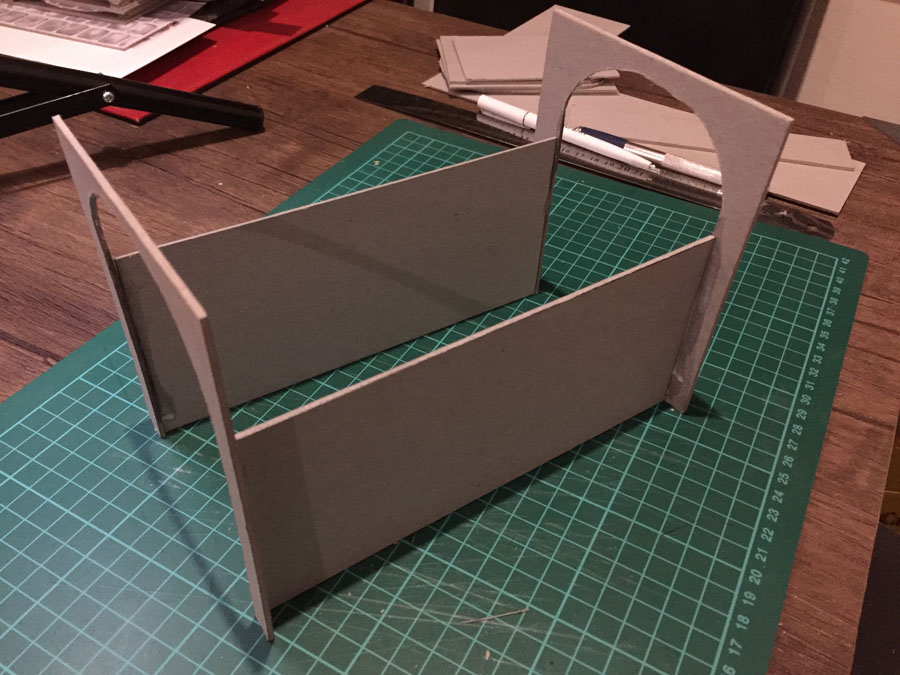
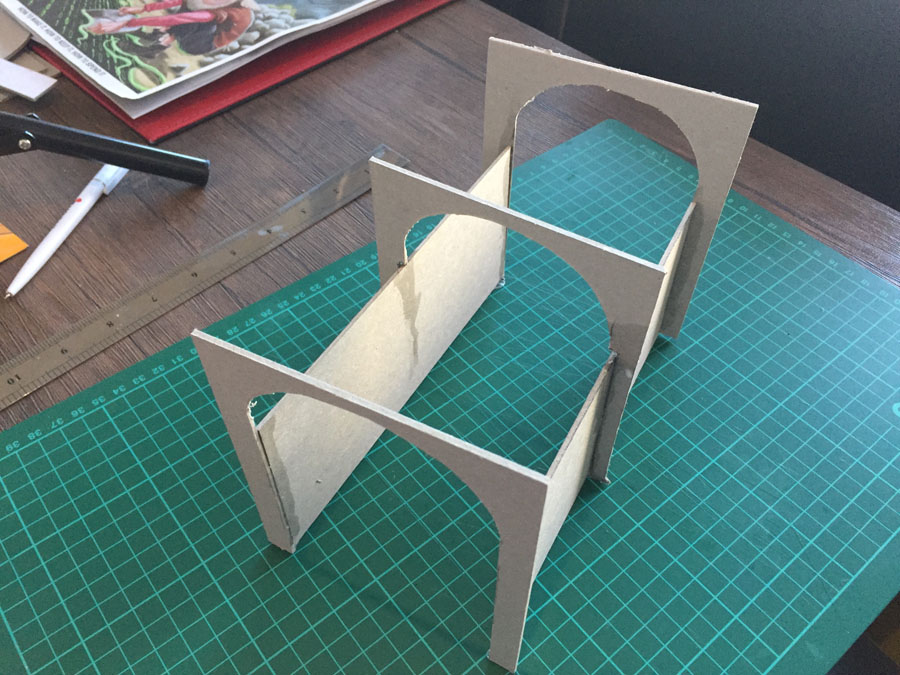
Here the flaps are folded completely behind the tunnel wall.
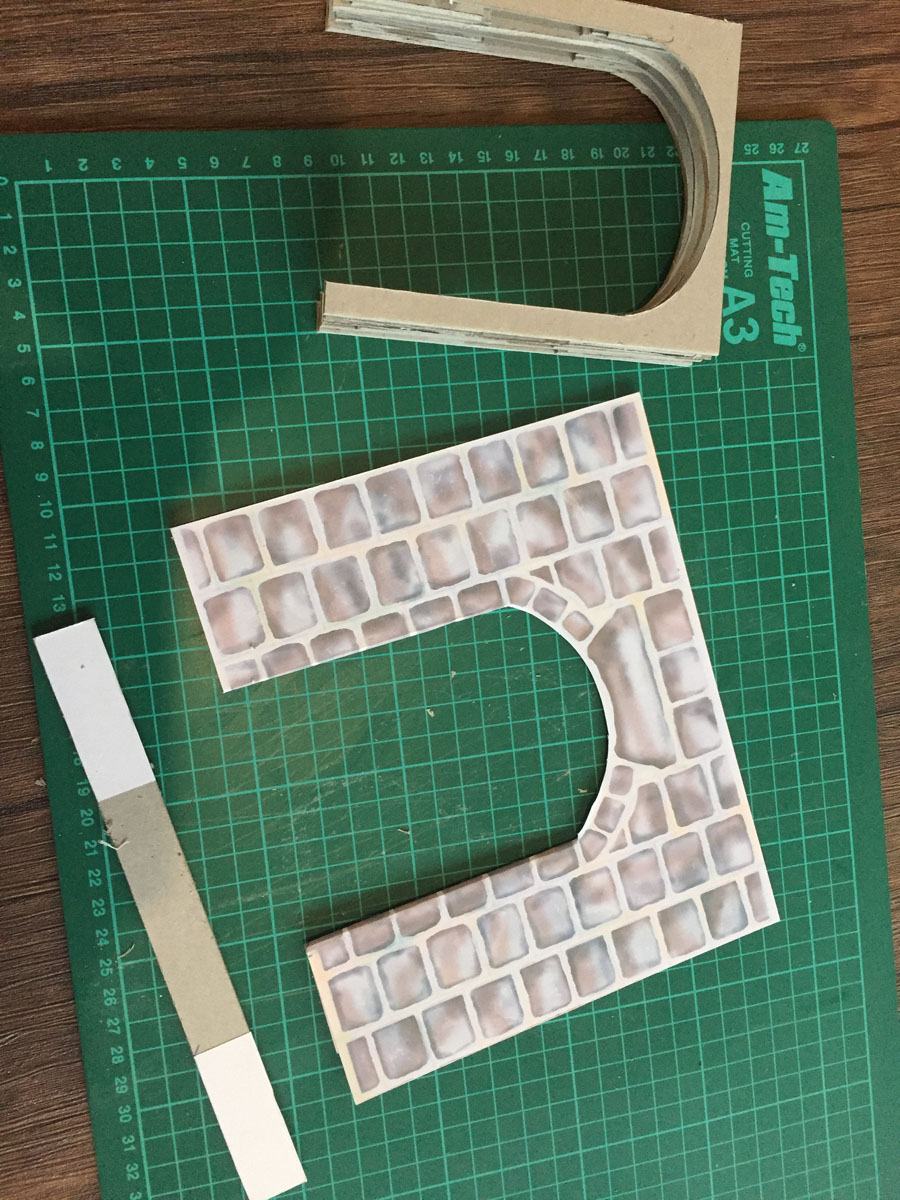
Think of the print as a base coat only – it needs to be built up, so it has what John calls ‘relief’, and it also needs to be weathered.
Doing this is easy and fun.
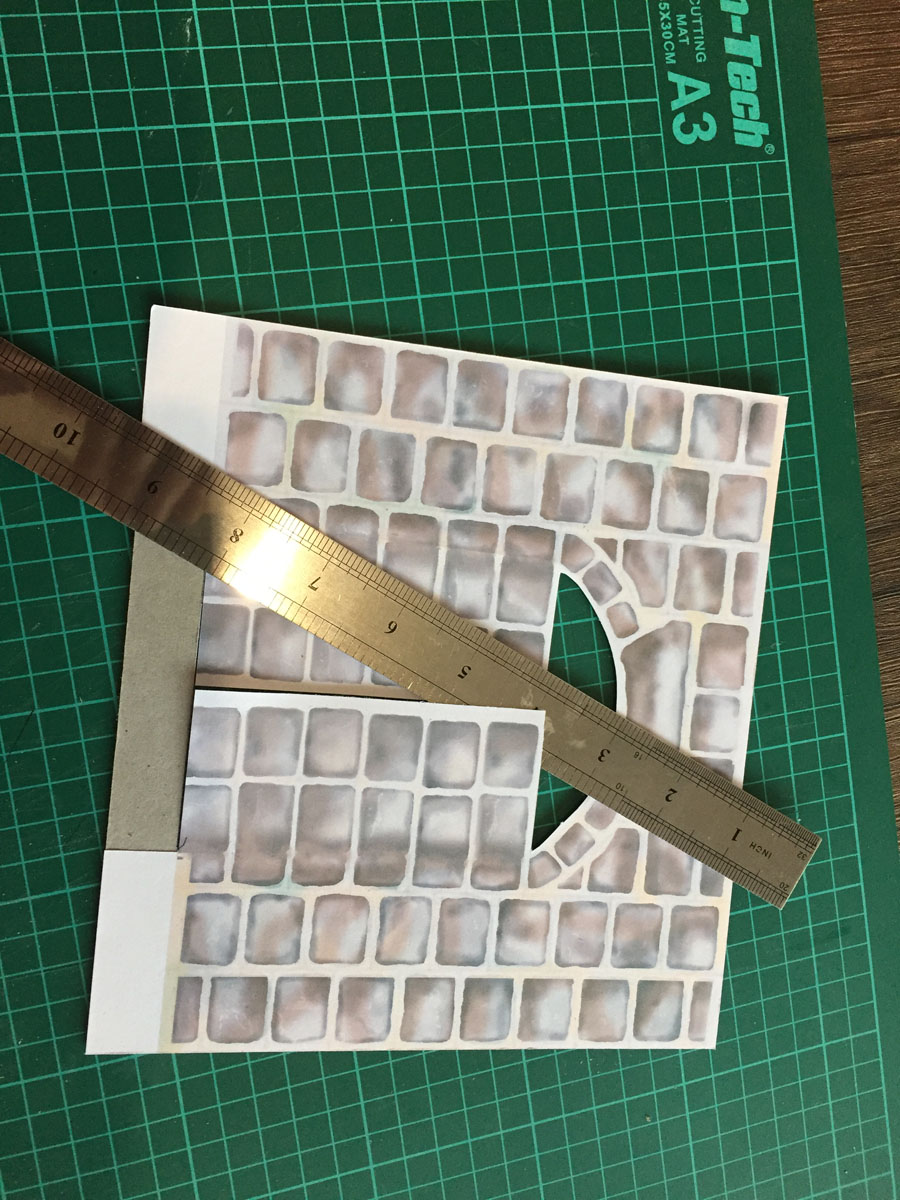
Just print out another tunnel wall. Here, I’ve stuck it to three sheets of blackish card to give me the right thickness I was looking for.
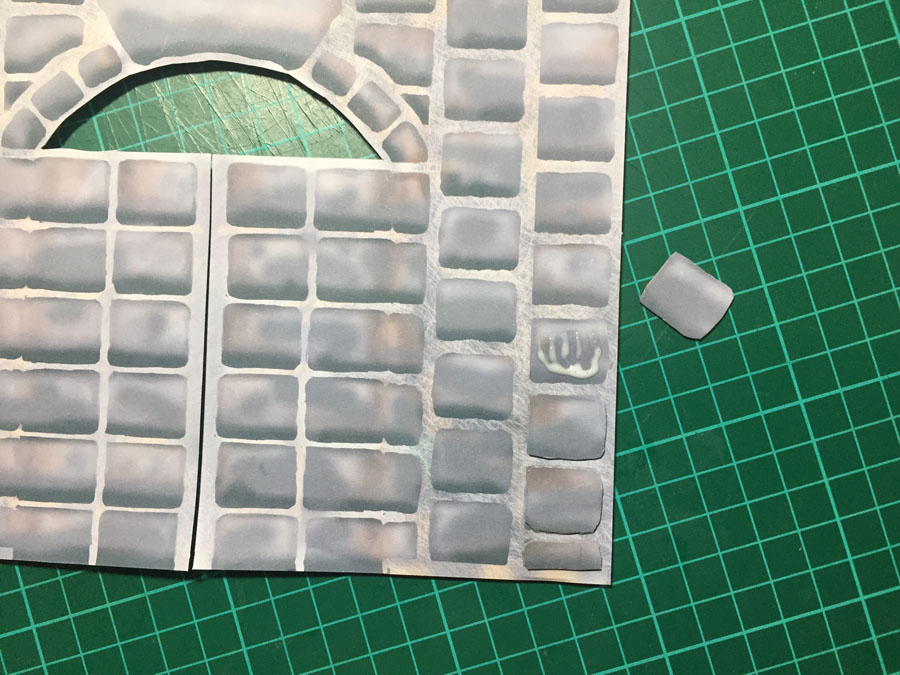
Then, just cut out the stones and stick to the original tunnel print.
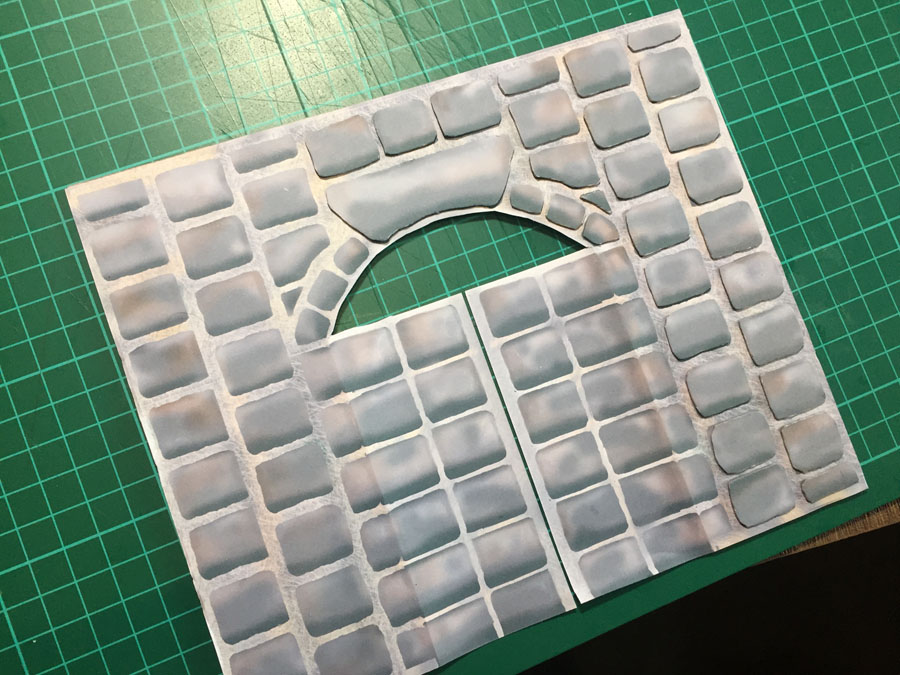
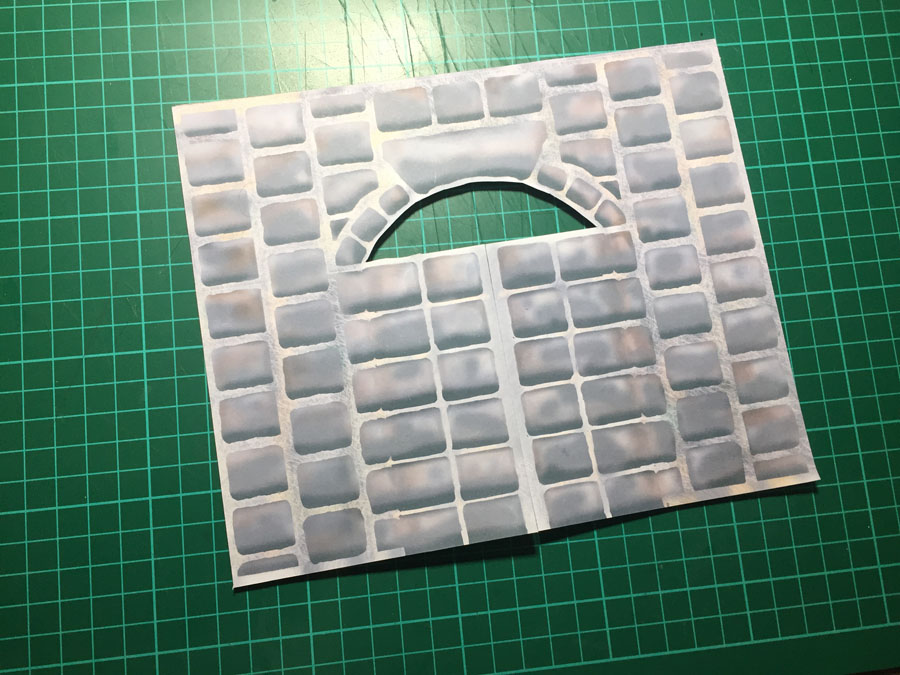
Here you can see how much of a difference it makes – I’ve done the right hand side of the tunnel only.
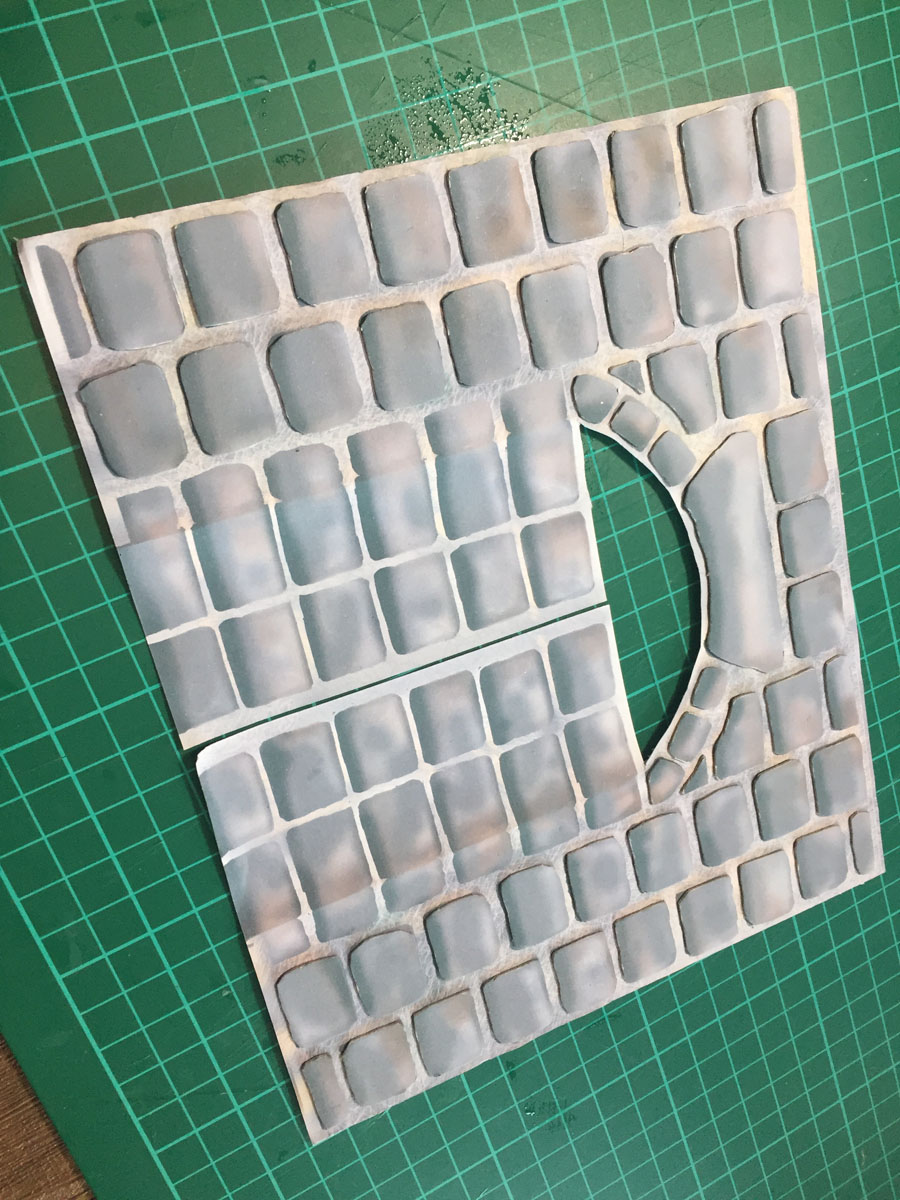
Here’s it with all the stones glued on.
It looks better, but it still has a long way to go – that’s when the weathering comes in.
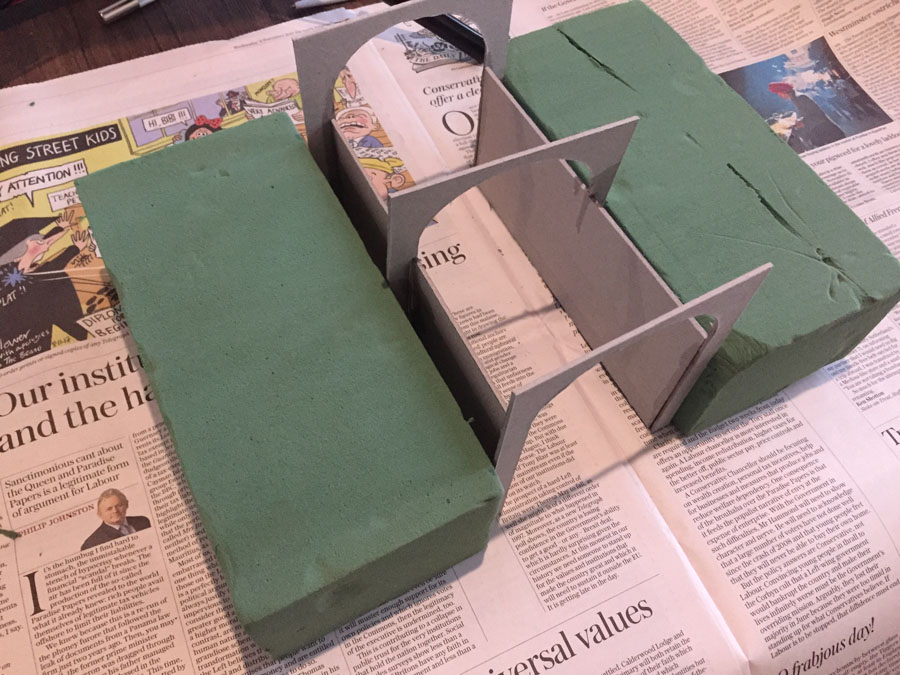
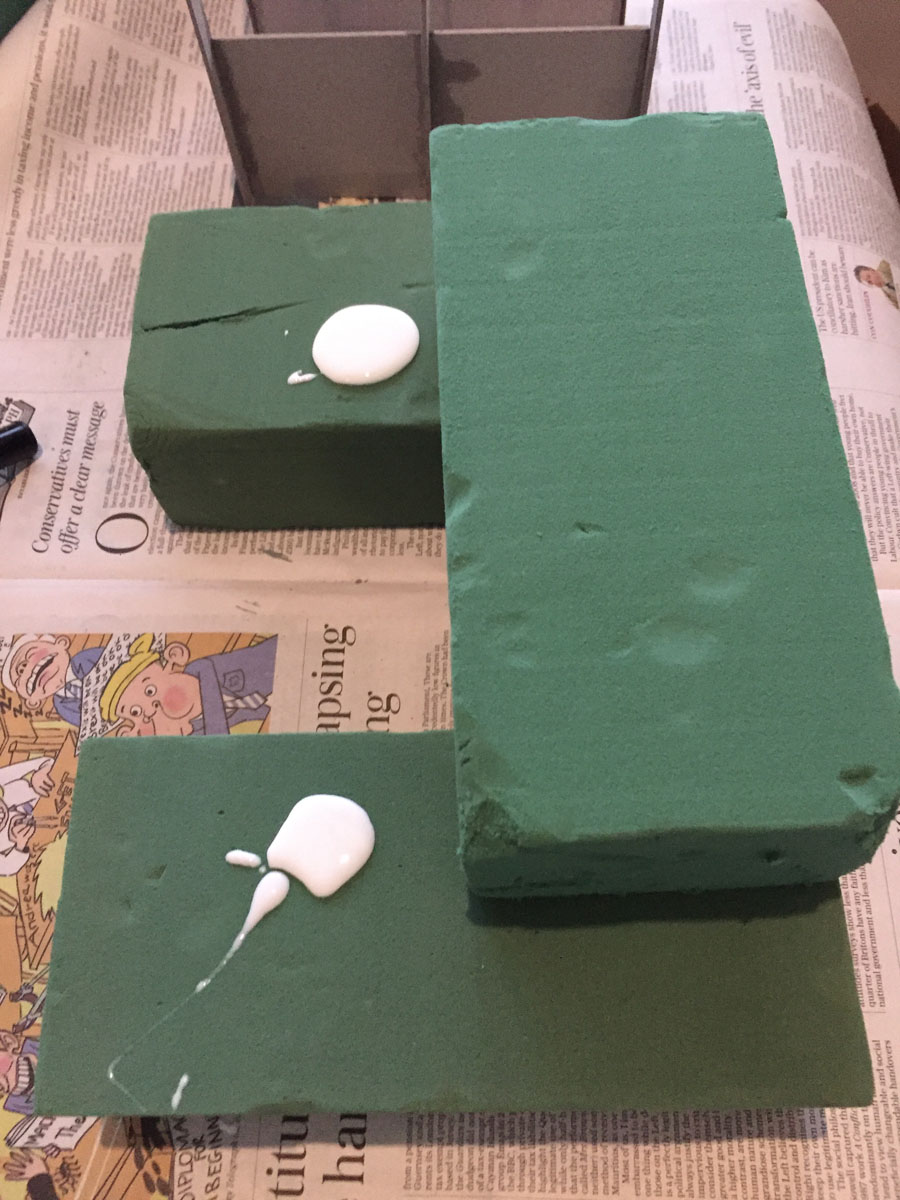
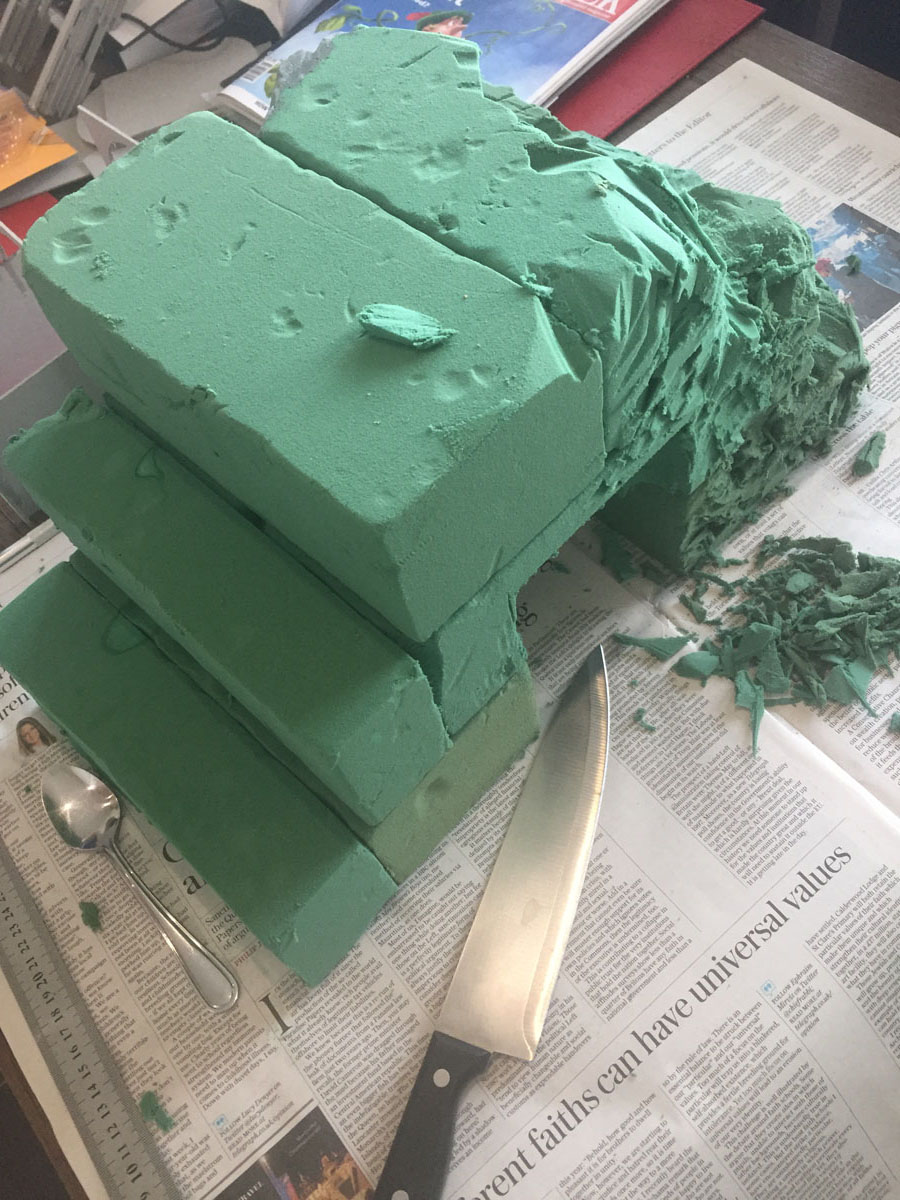
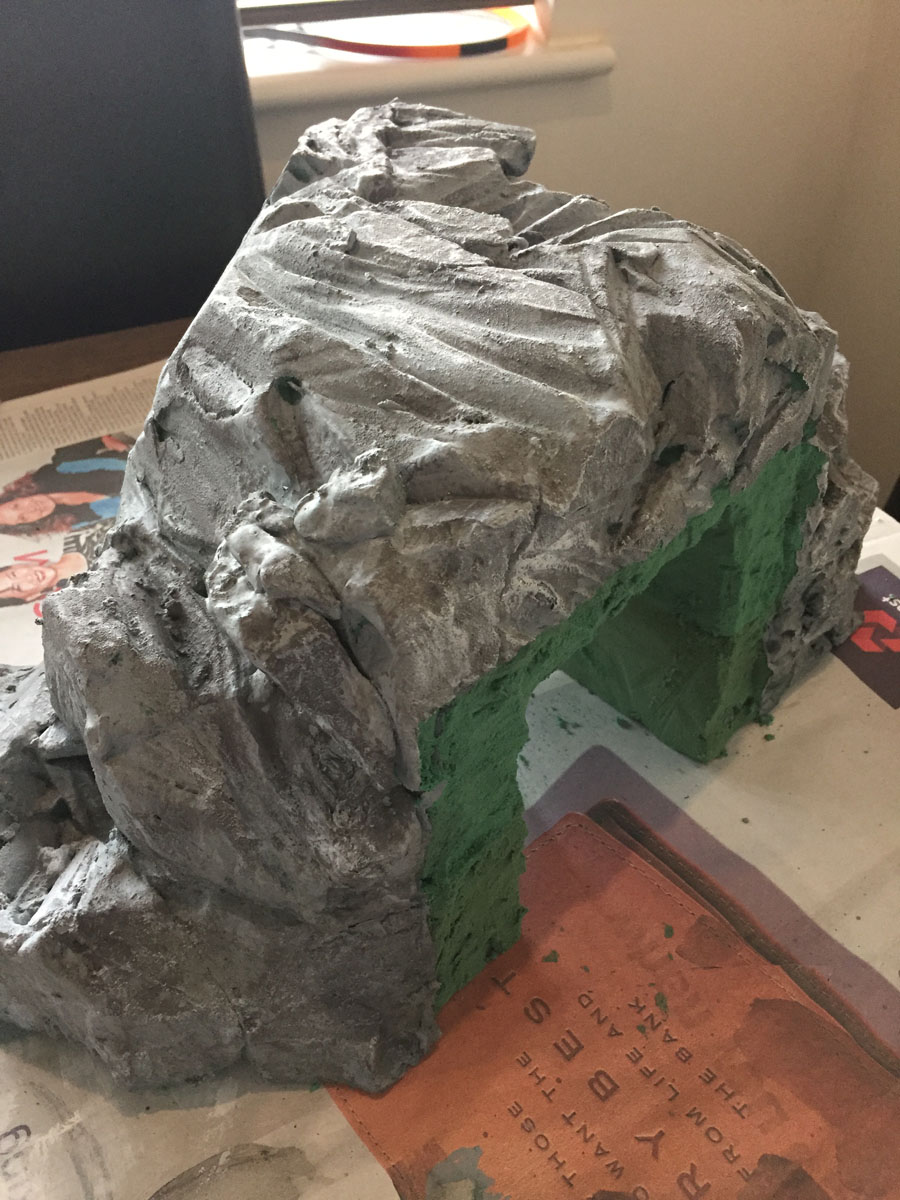
Here I’m using the tunnel frame to measure the foam / dry plant bricks, to save me carving it all out.
In “Martin’s how to” he uses insulation foam. But I didn’t have any lying about. But I remembered seeing a post where they used the dry plant bricks – so used them instead.
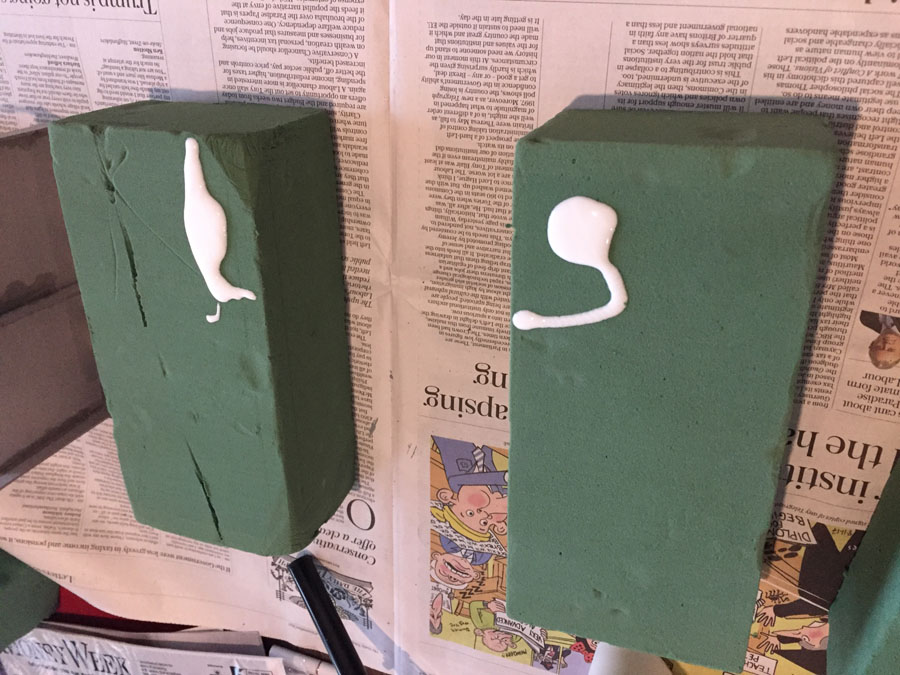
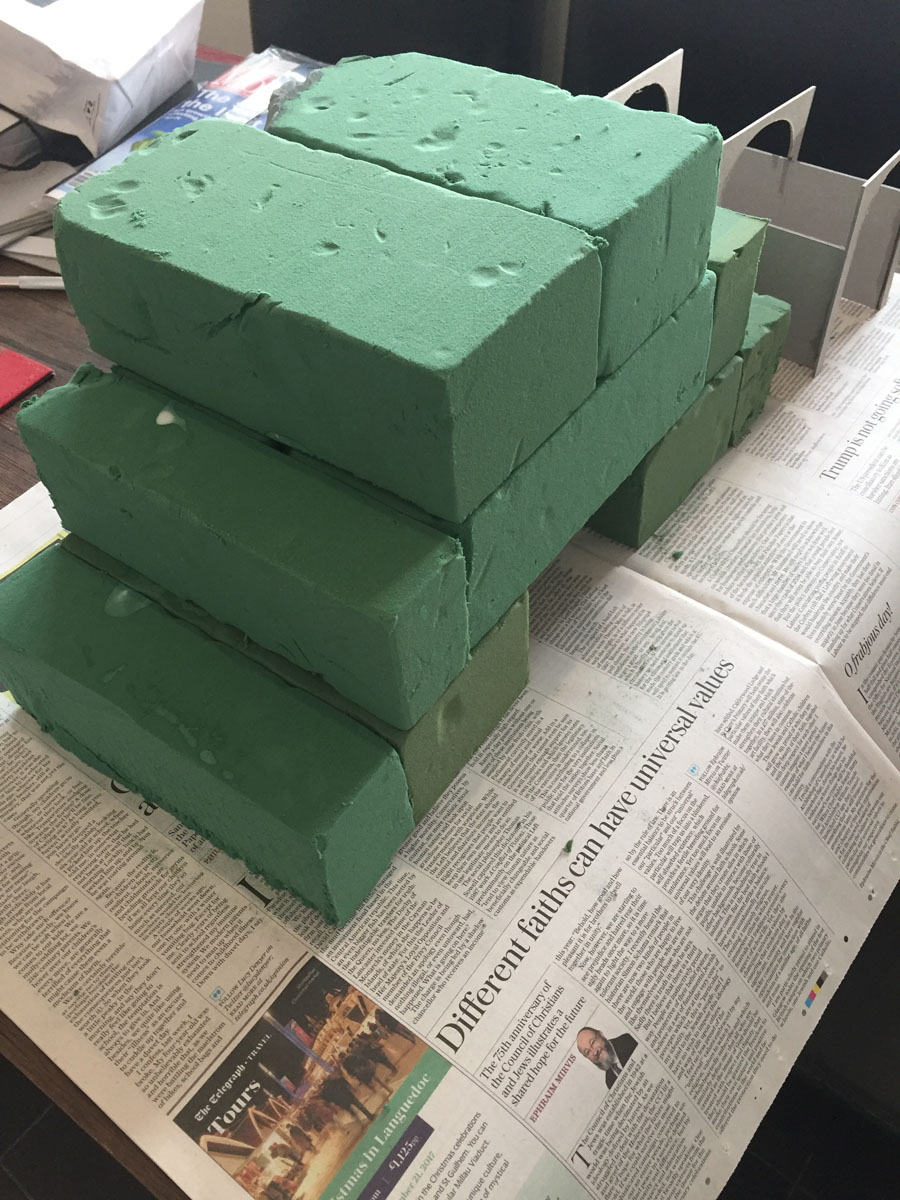
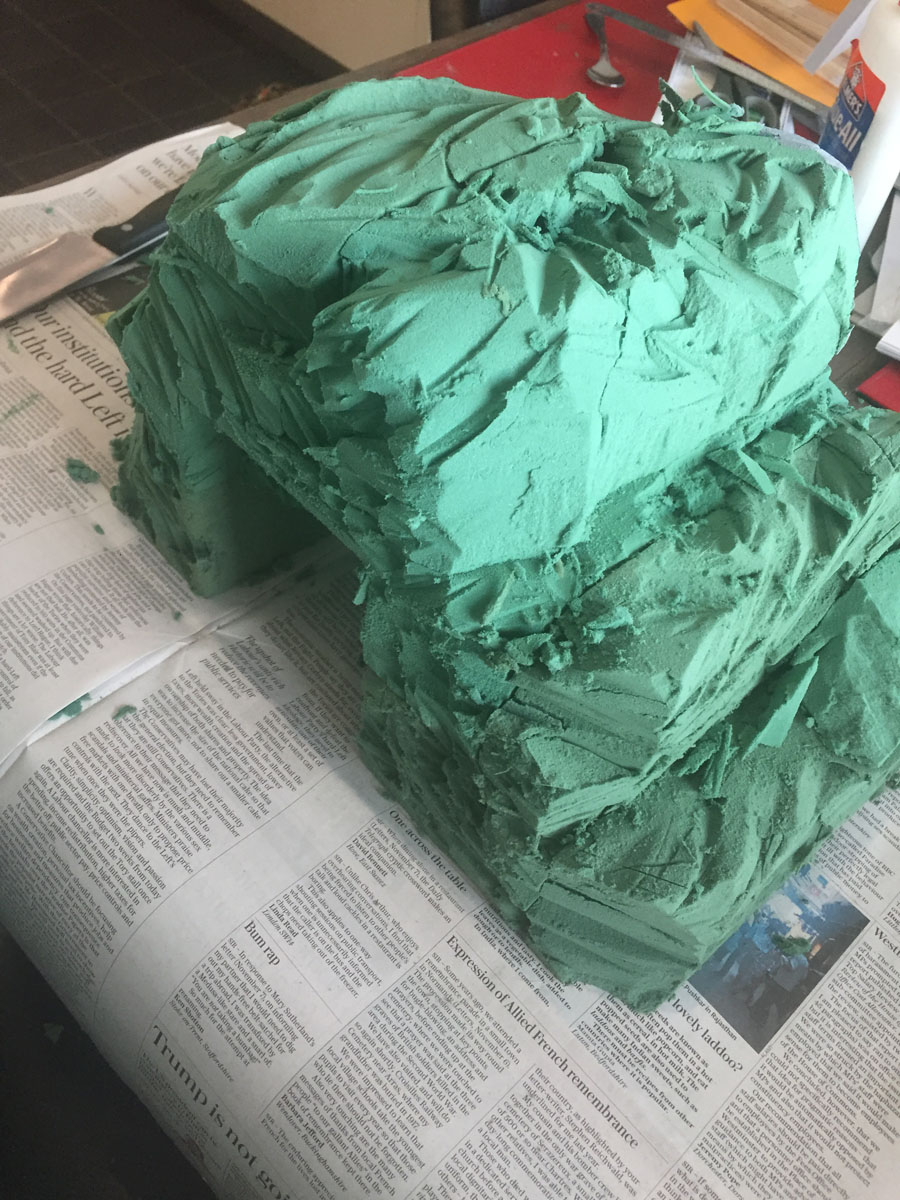
Then glue your mountain together.
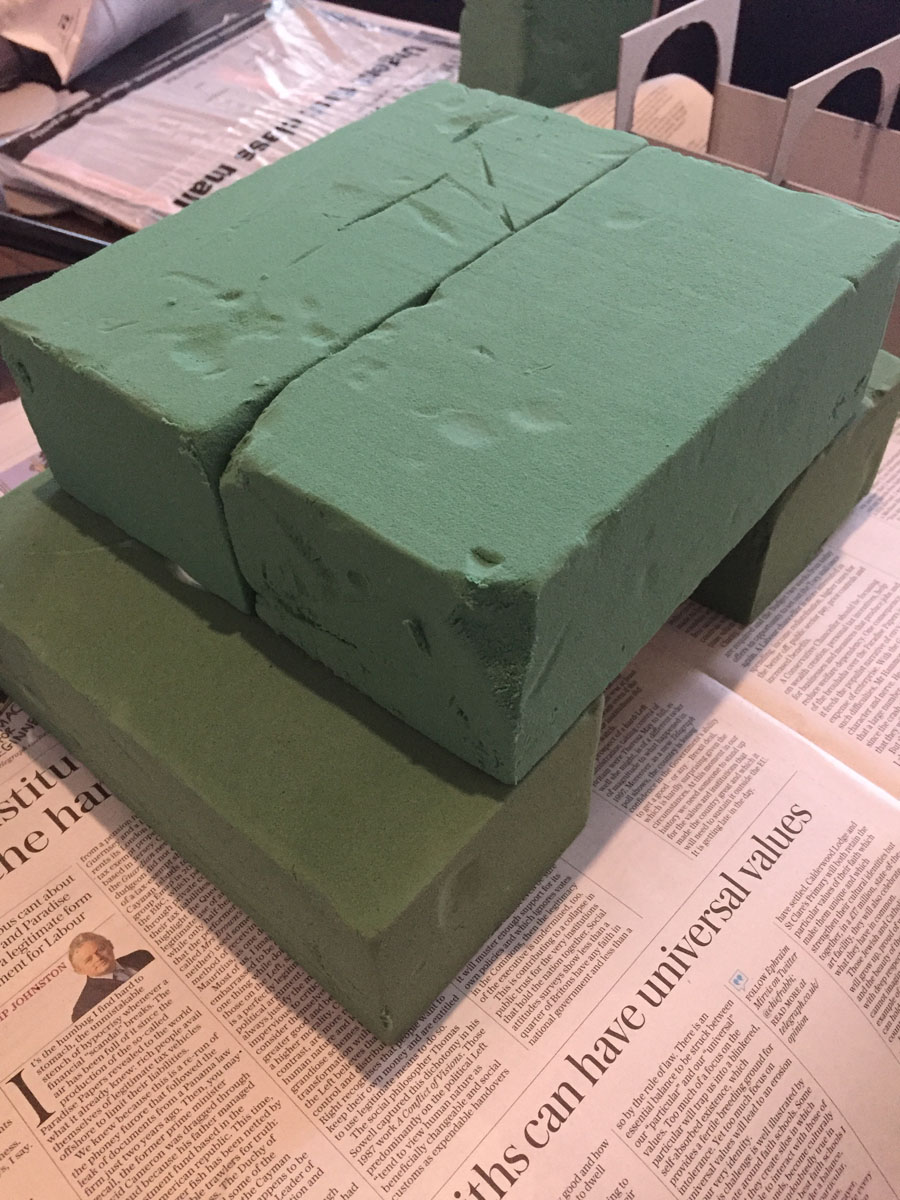
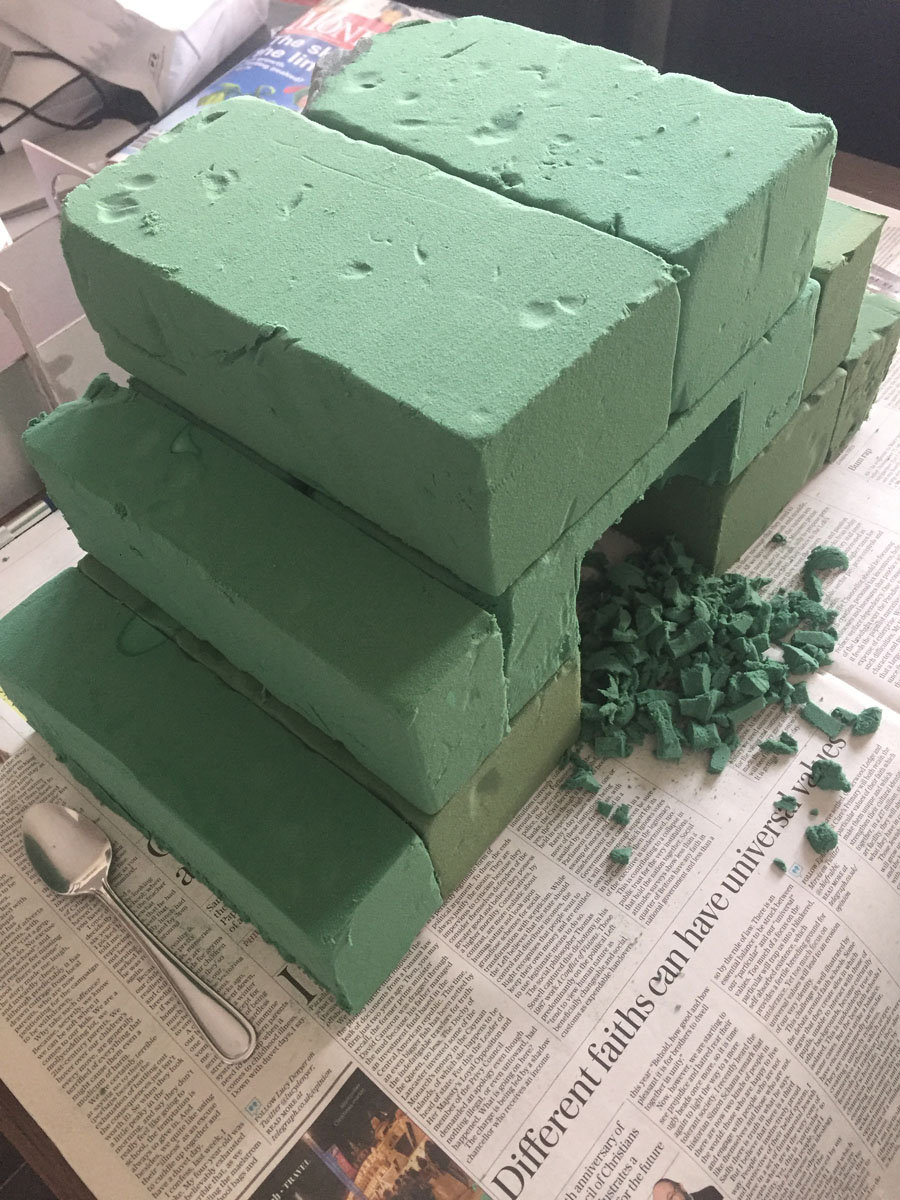
Here I’m carving out the top half of the tunnel. I have to say, I was really surprised how easy it was to work with the flower foam bricks – I just used a spoon. It was like working with ice cream that doesn’t melt.
Now for a really fun part – carving the mountain. Loved doing this.
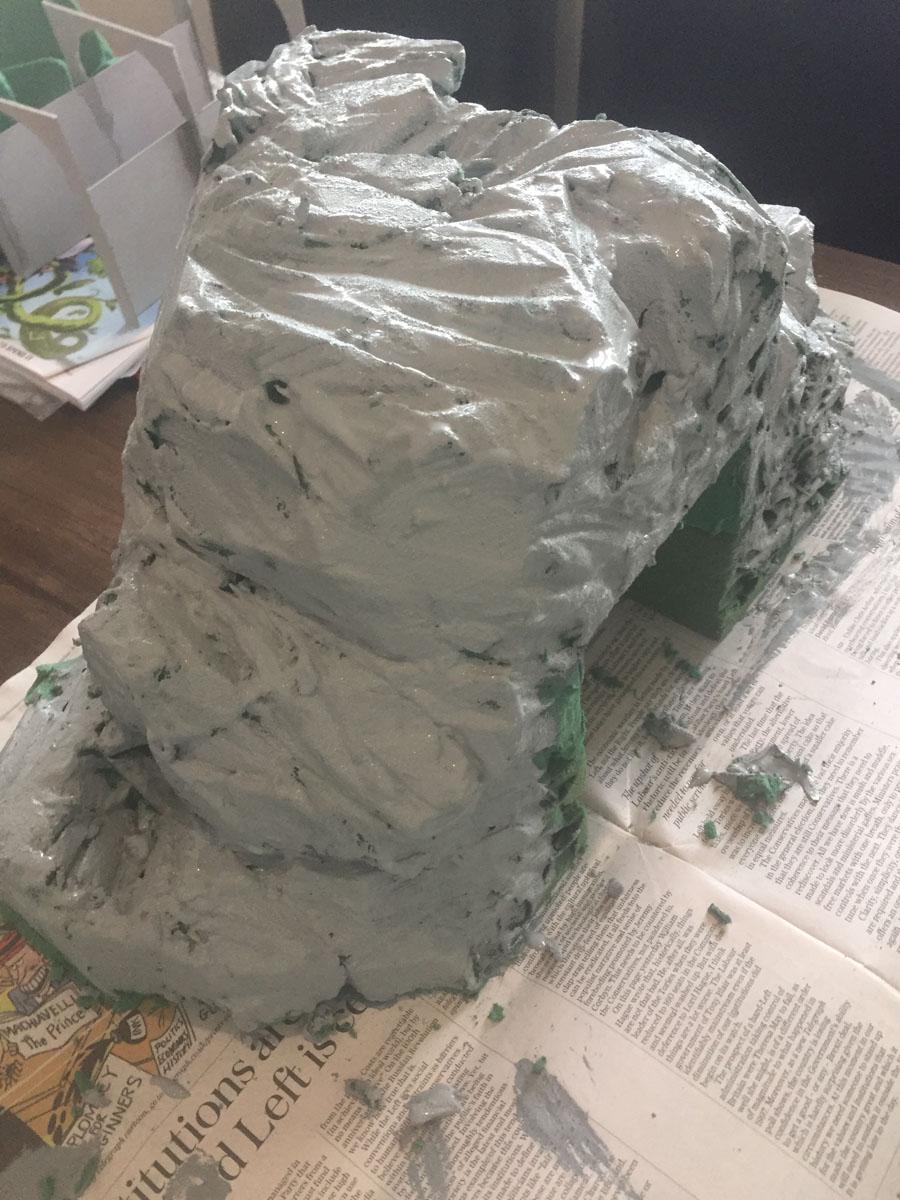
Once you’ve carved it, give it a base layer of grey. Or gray if you’re the otherside of the atlantic.
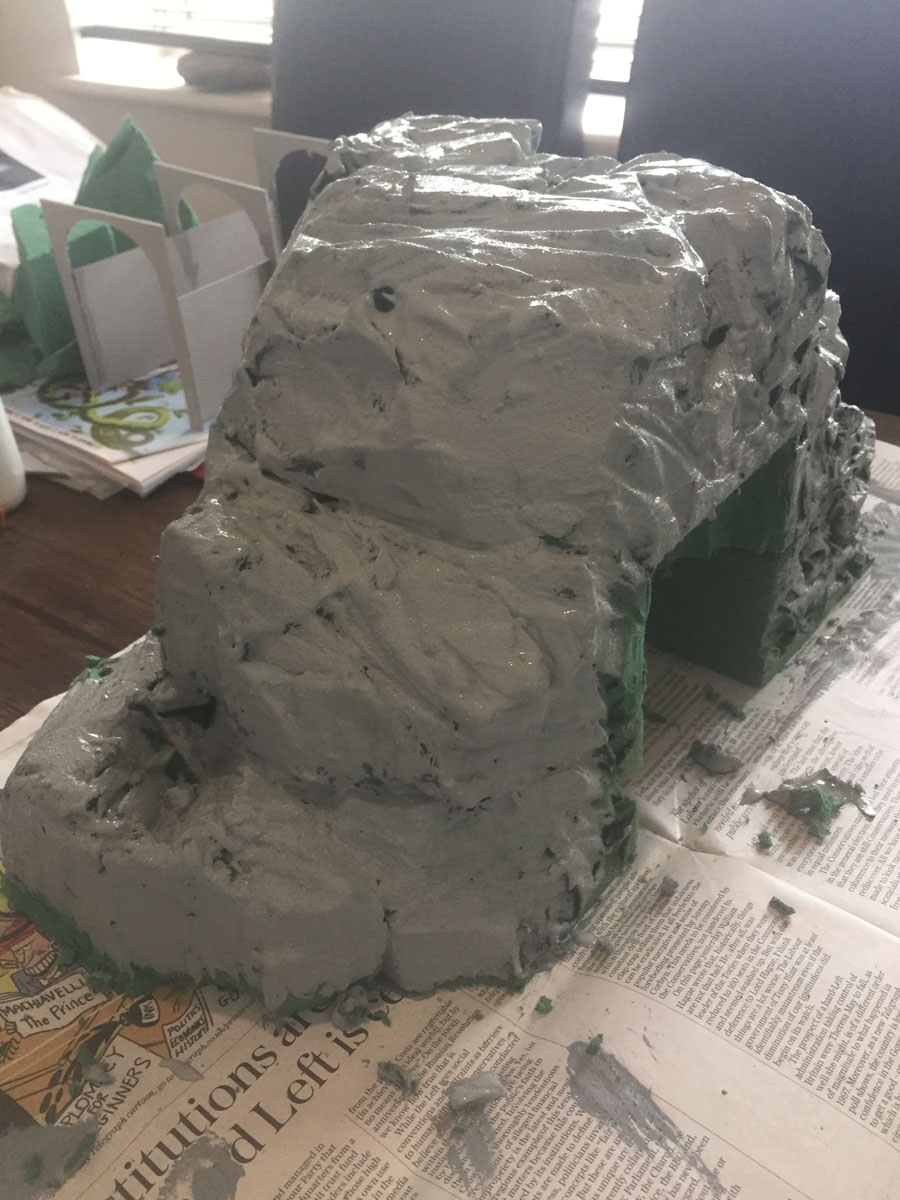
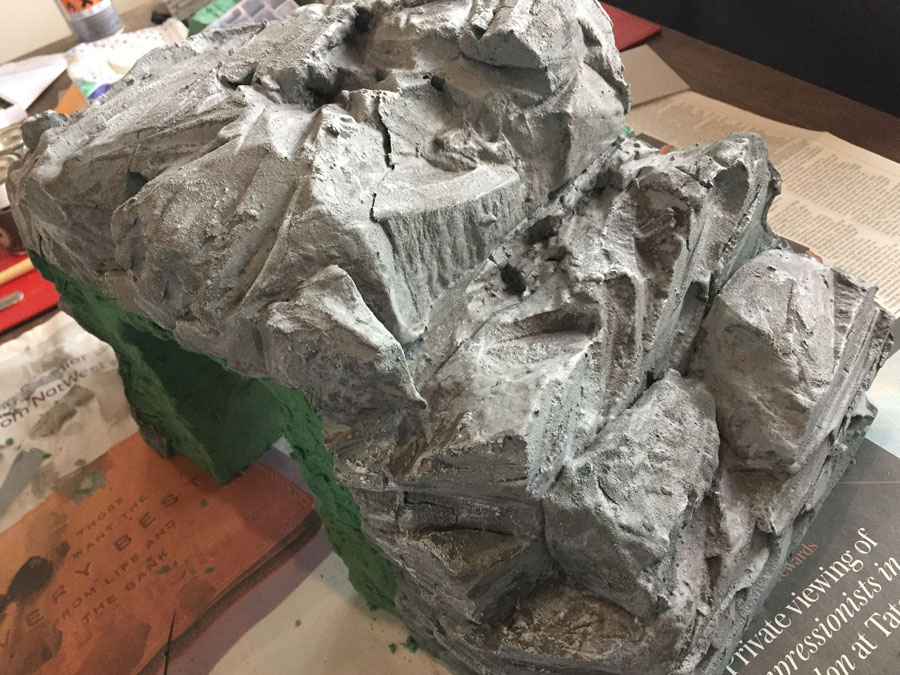
At this stage, I started to get a little worried. The tunnel print still looks very toy like, and so does the mountain.
But I kept on going – I know from the blog all projects hit this stage. Didn’t stop me worrying though.
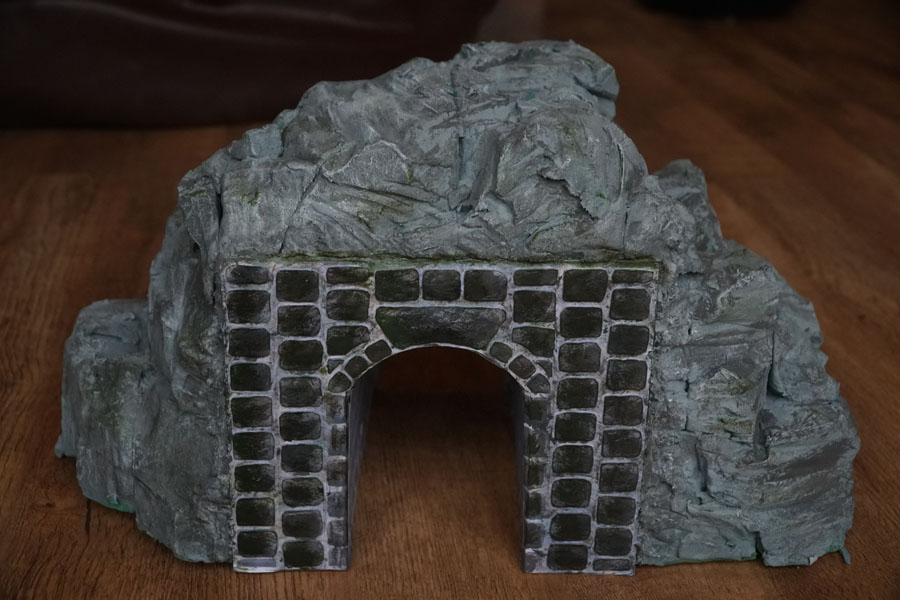
Here’s the exact point where it all starts to come together. I used a very, very dry brush with black on it (well, very, very dark brown) and just took my time dabbing it over the bits of rock that were ‘sunk’ (the opposite to sticking out bits).
I was surprised at just doing this how much better it made the rocks look.
And then when I did exactly the same with a dry white brush (on the bits sticking out) it transformed it.
In fact, I was really pleased with it.
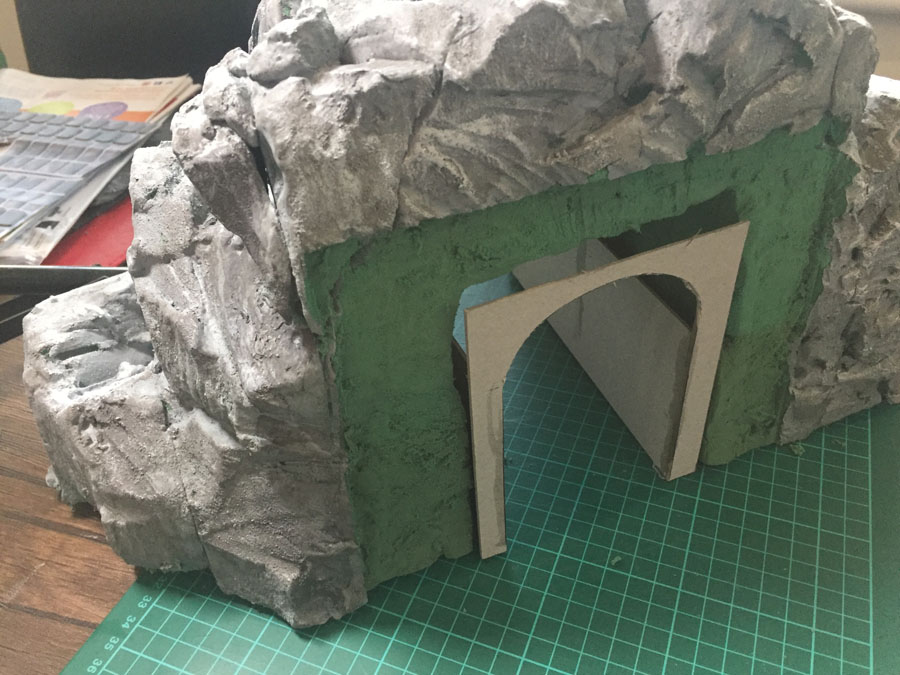
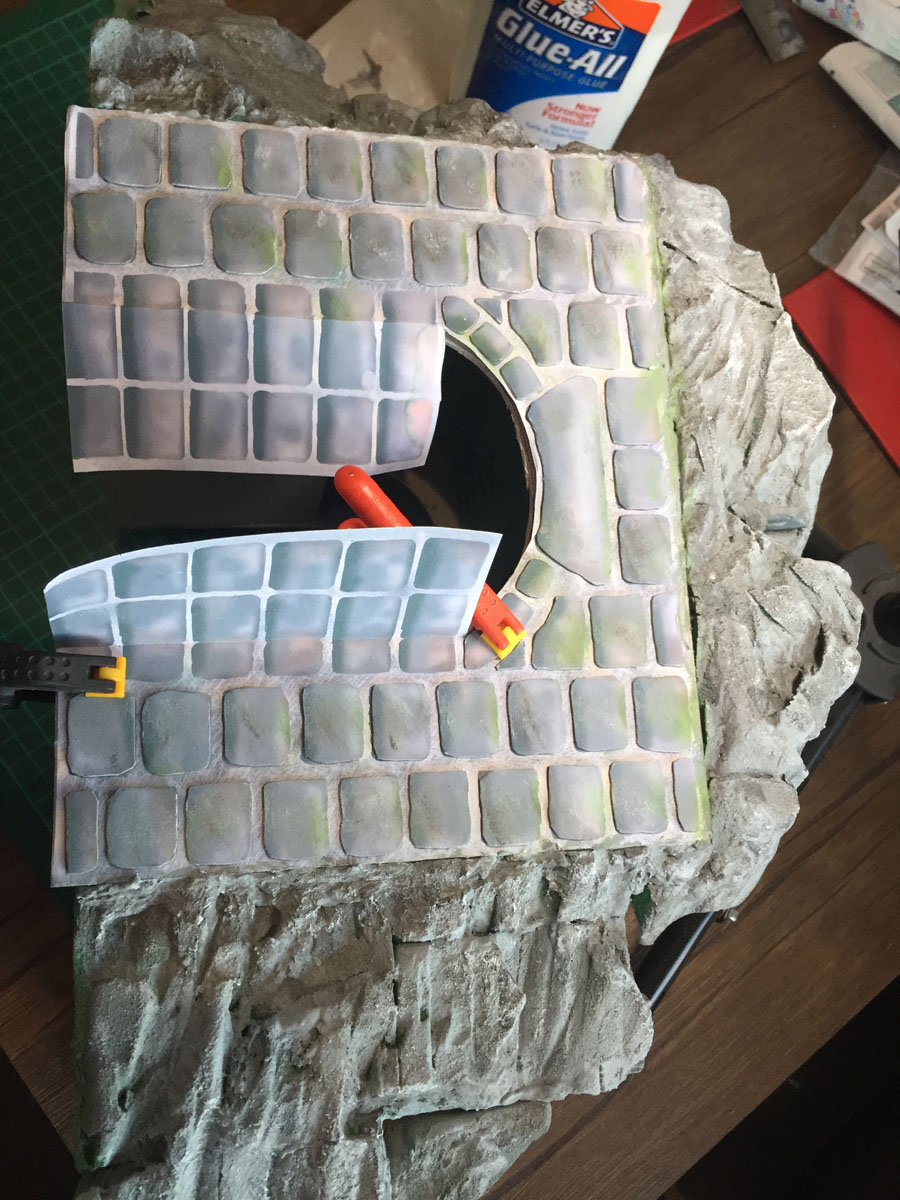
Now to get the tunnel print in place.
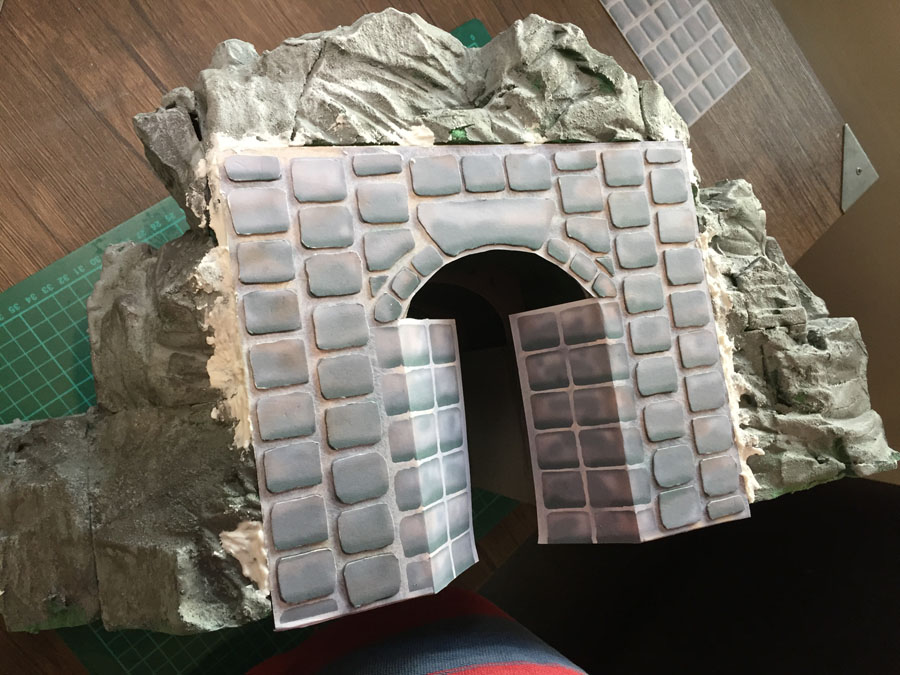
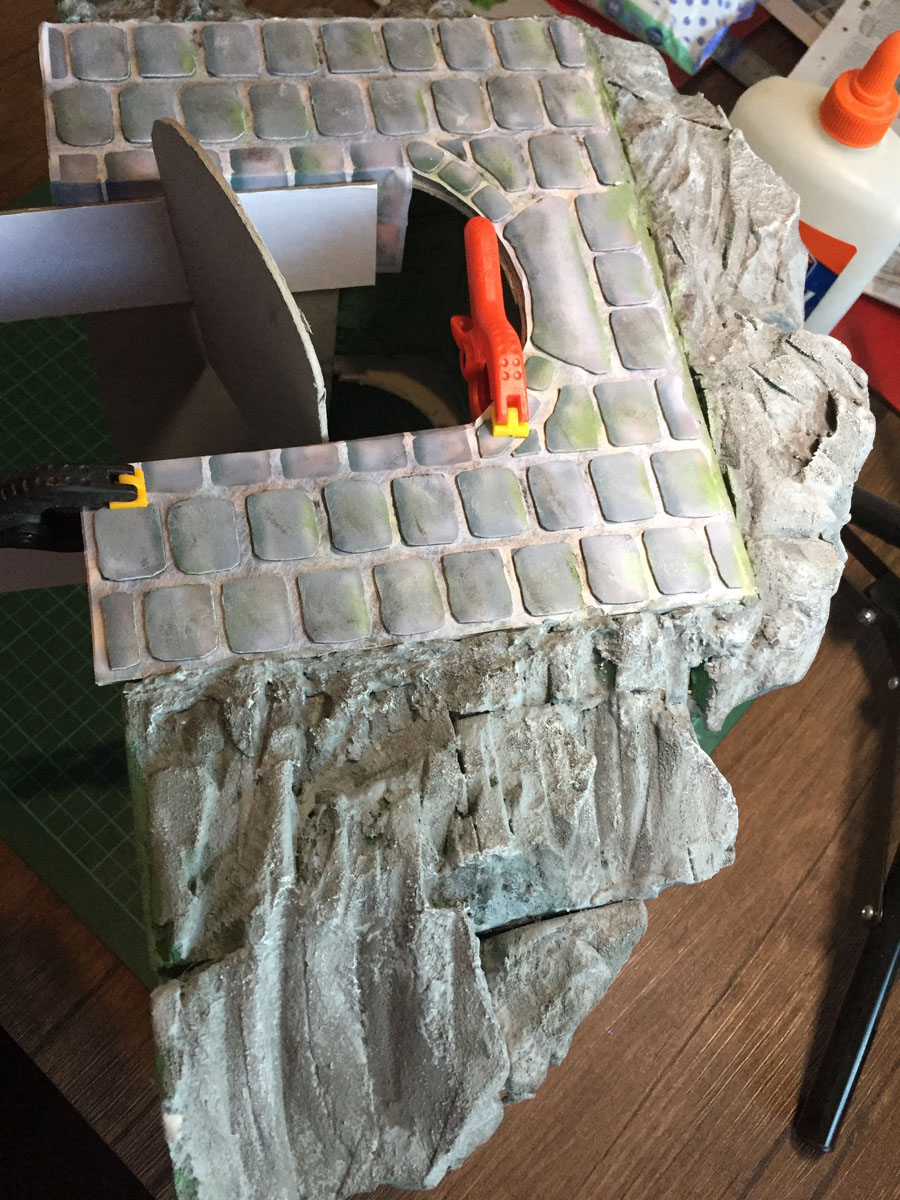
I stuck the print to the card frame and used a DIY filler for the gaps at the side
Here I’ve painted the filler.
I used exactly the same technique with the black and white paint.
I also added more glue to secure the tunnel print – I really didn’t want any ‘wobble’.
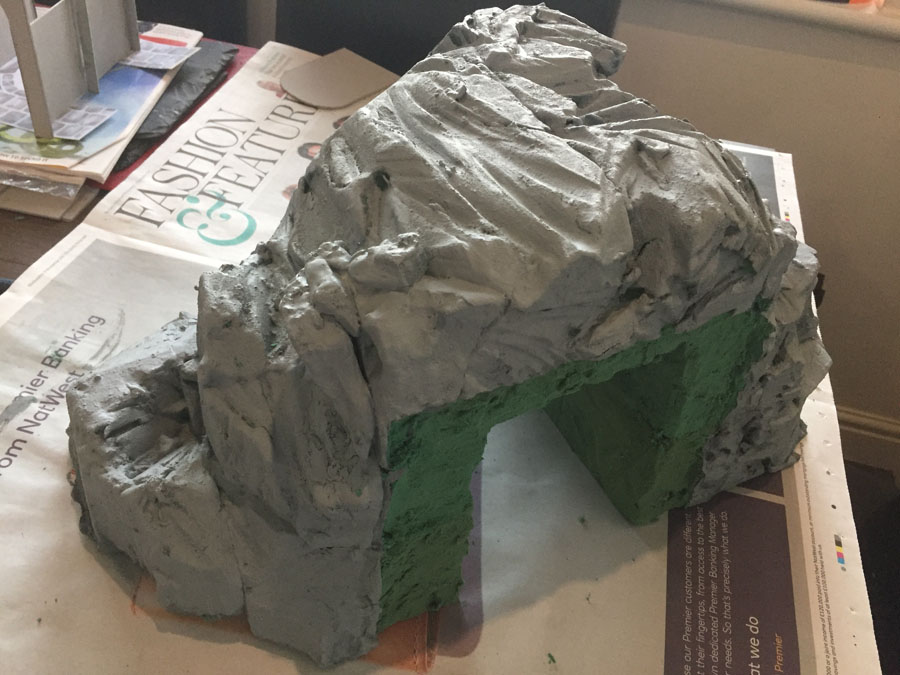
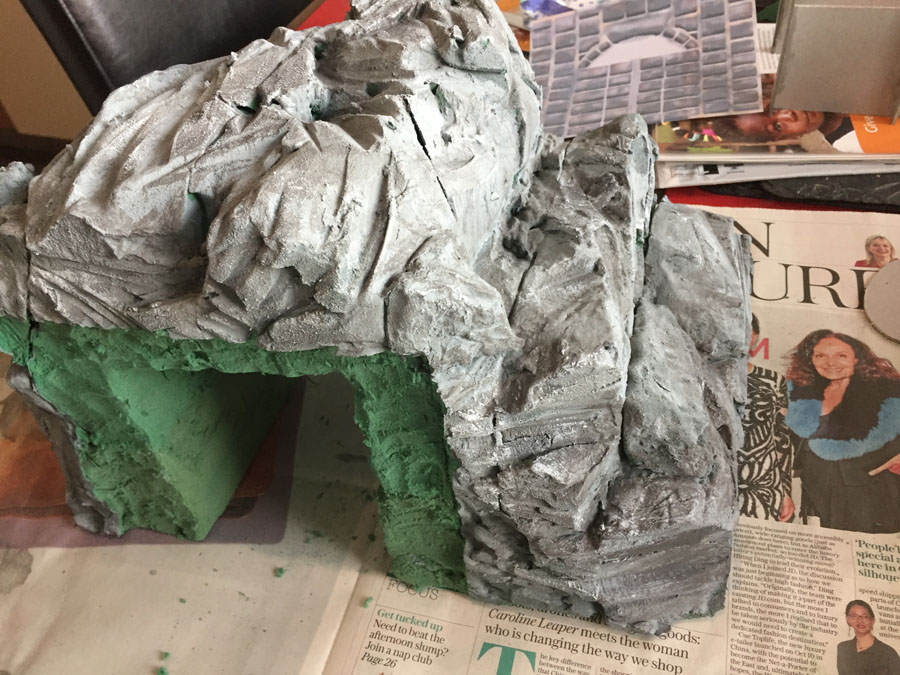
Now for the part I like most – the weathering. Again, using a very dry brush, I began to add green.
I also used a dark grey to pad out the stones.
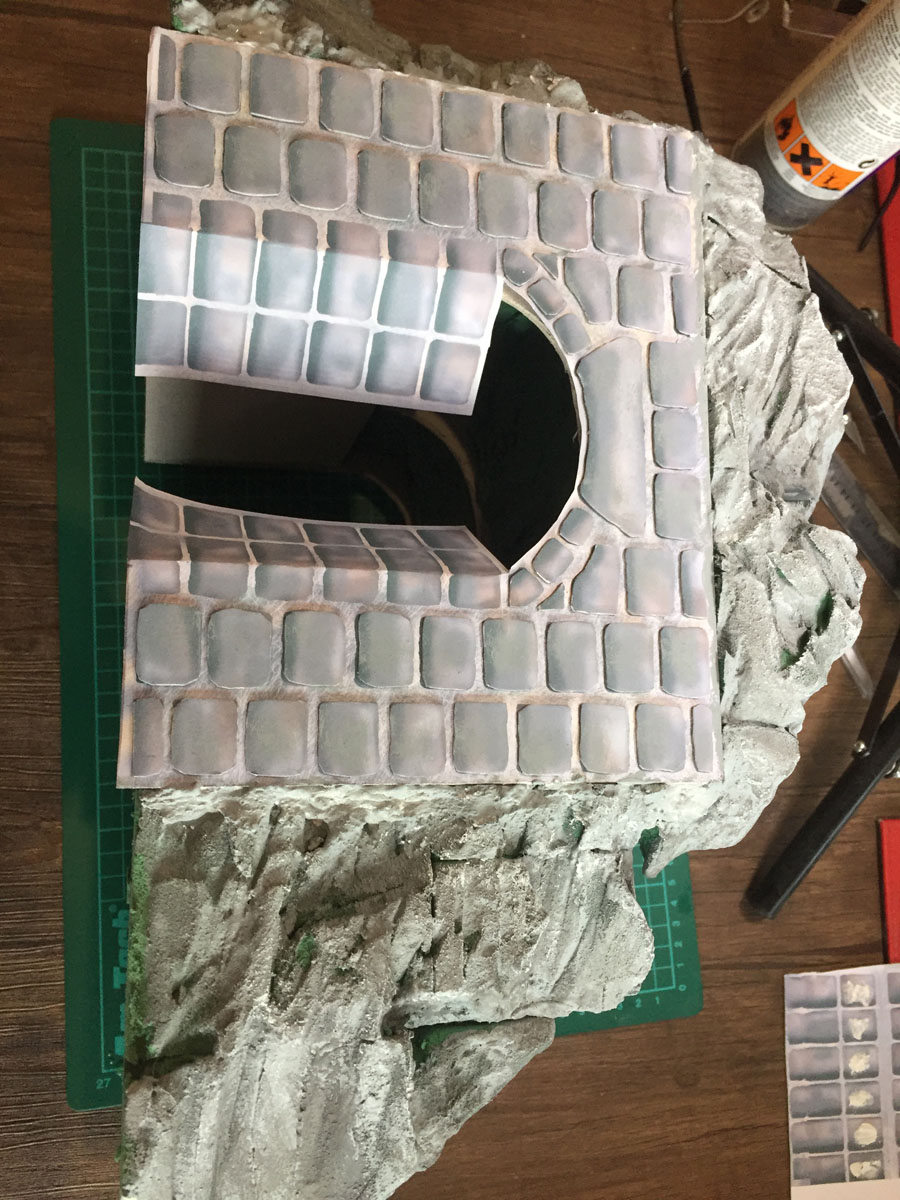
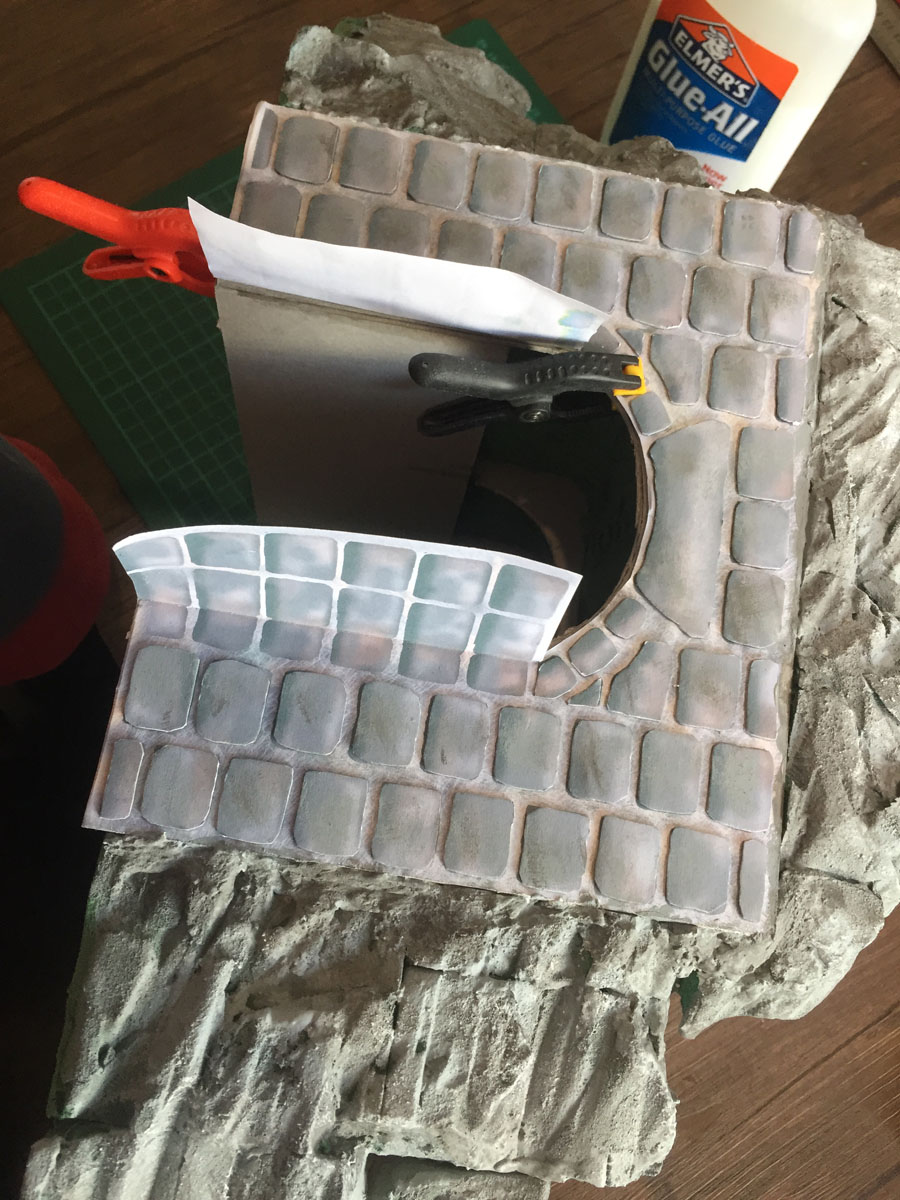
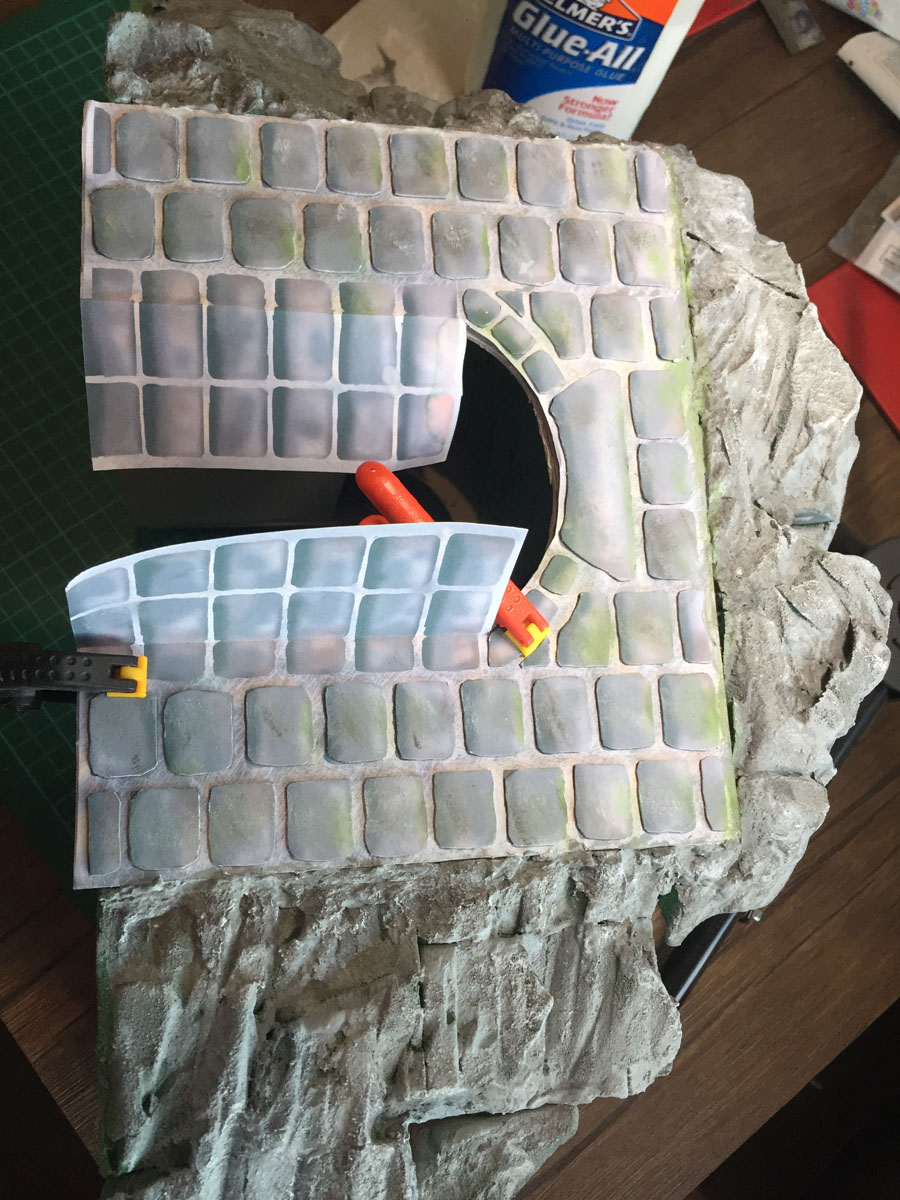
Here I’m gluing the tunnel flap to the tunnel wall. Using cardboard wedges to make sure it’s flat.
More weathering with the green.
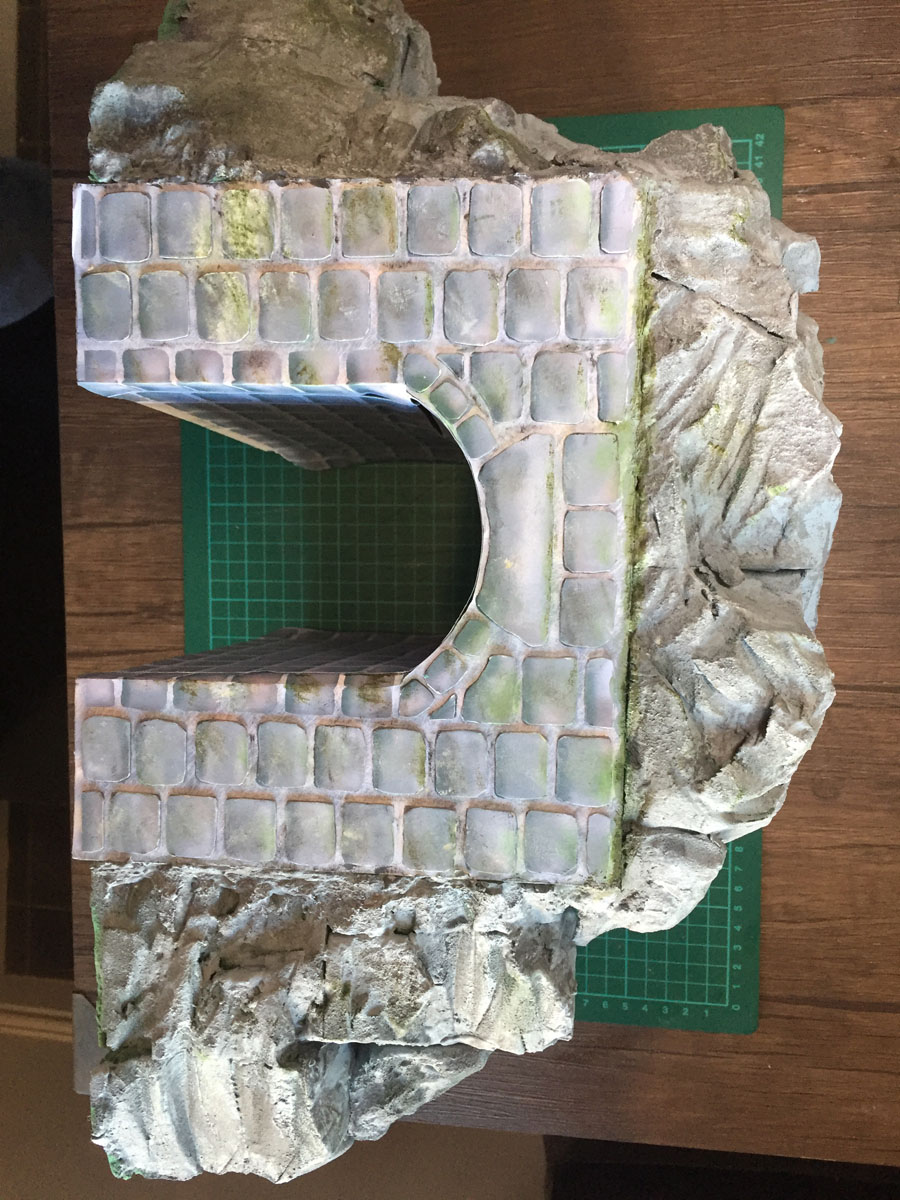
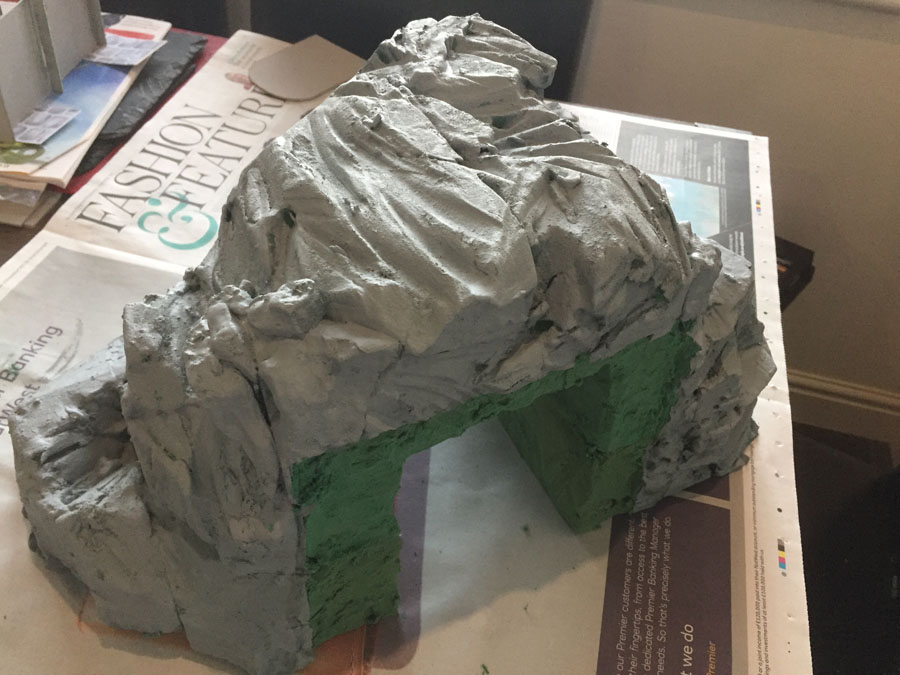
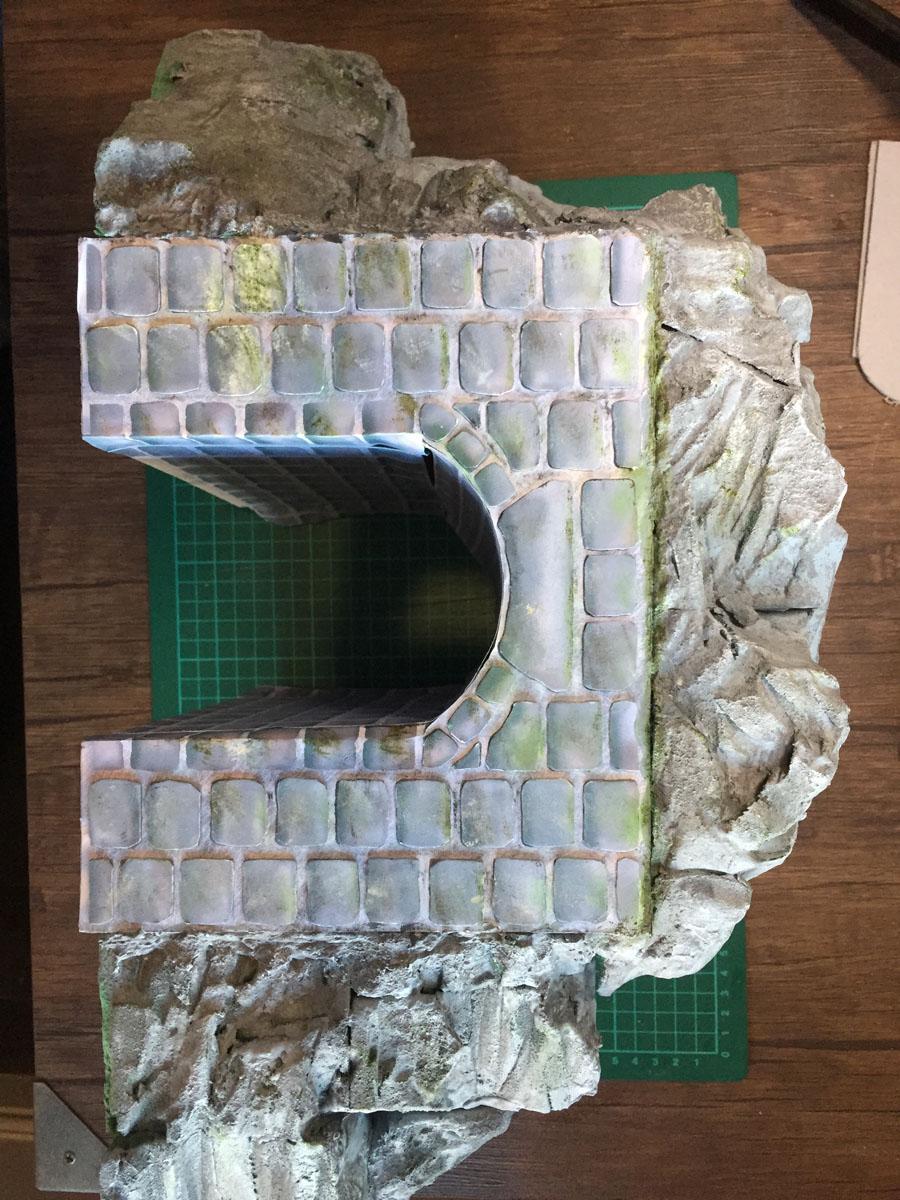
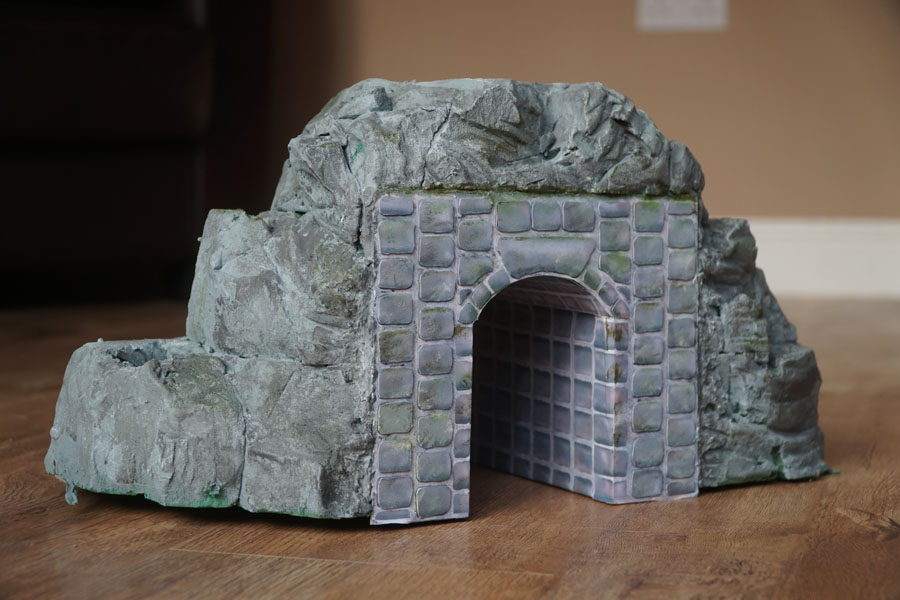
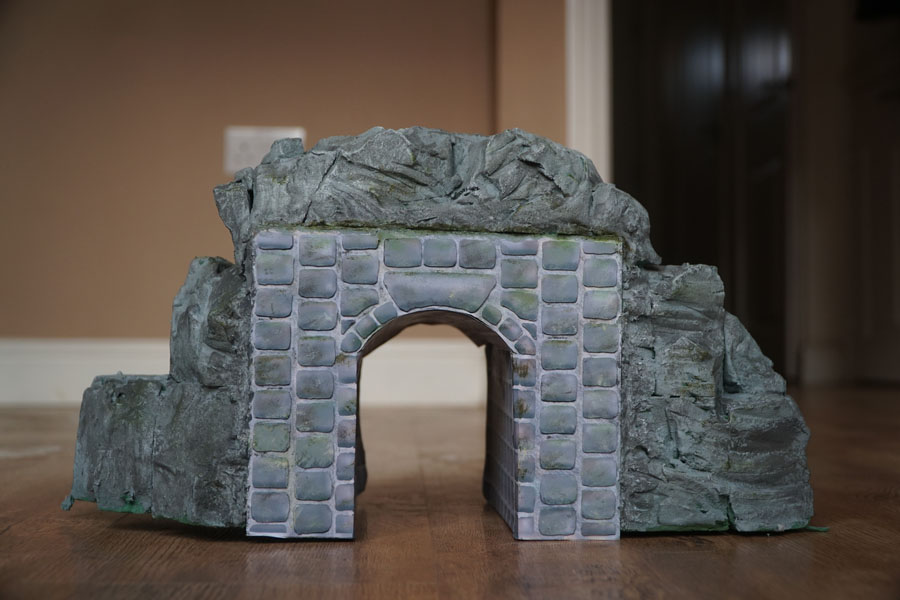
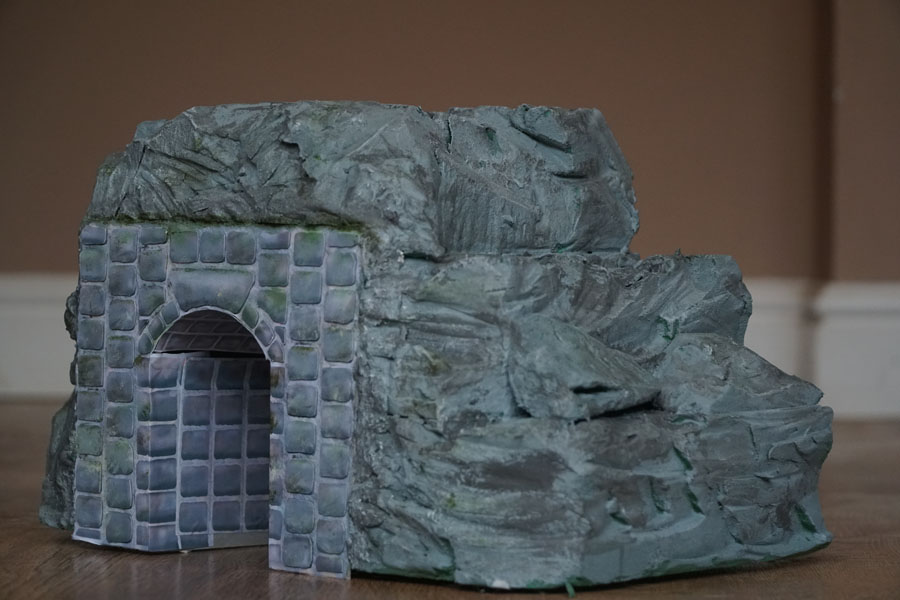
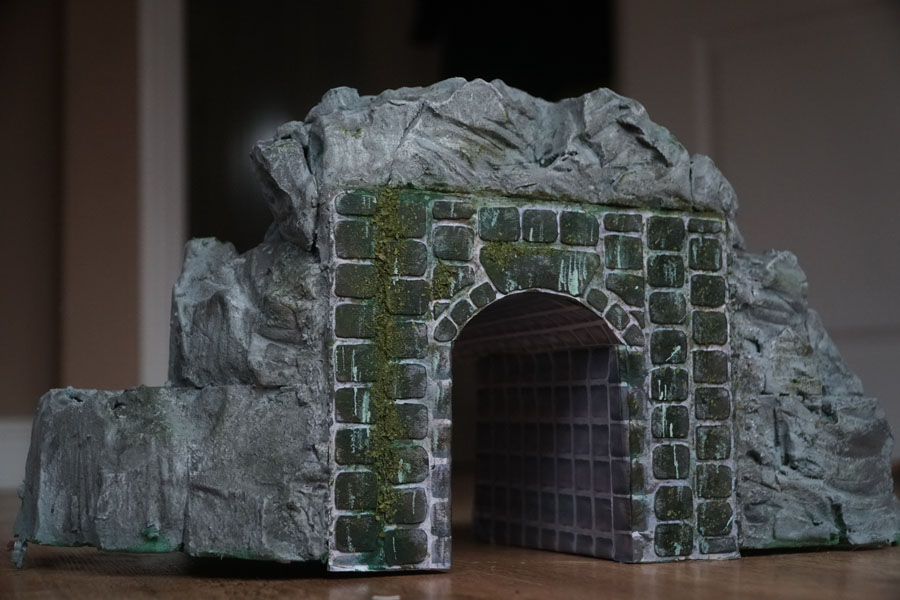
At this point, it looks pretty much done, so I thought I’d photo it.
This was me just being cautious though, I wanted to weather it a lot more. But I thought if it all goes wrong, I still have this pic.
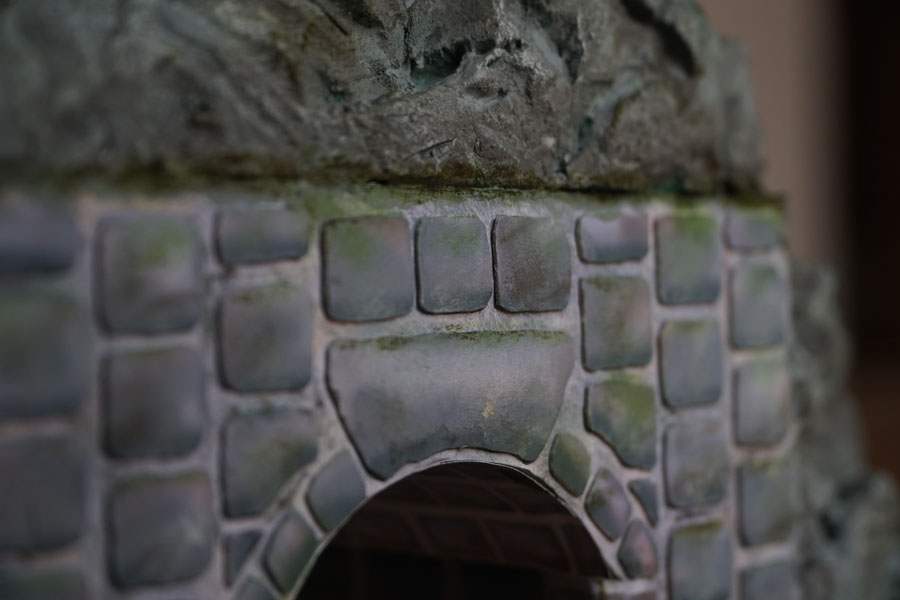
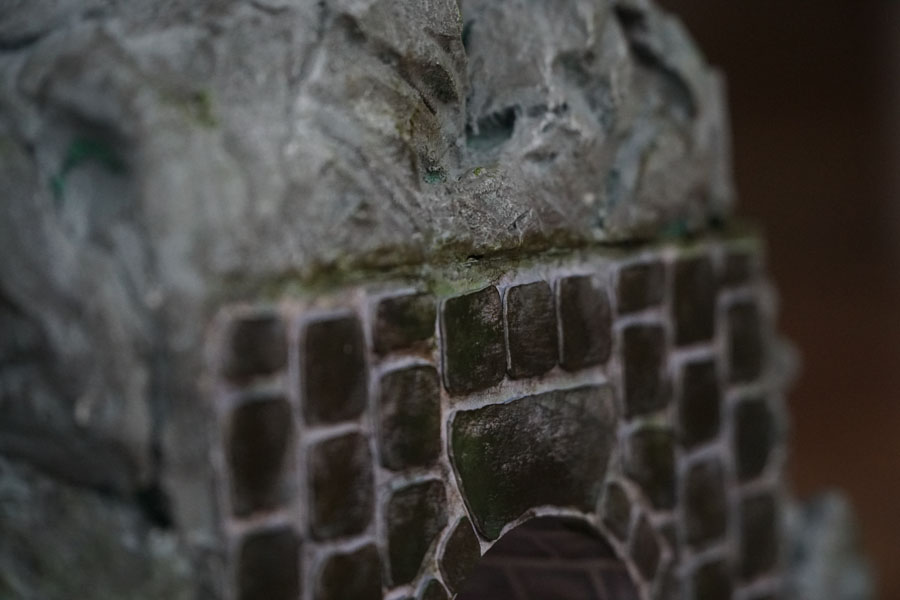
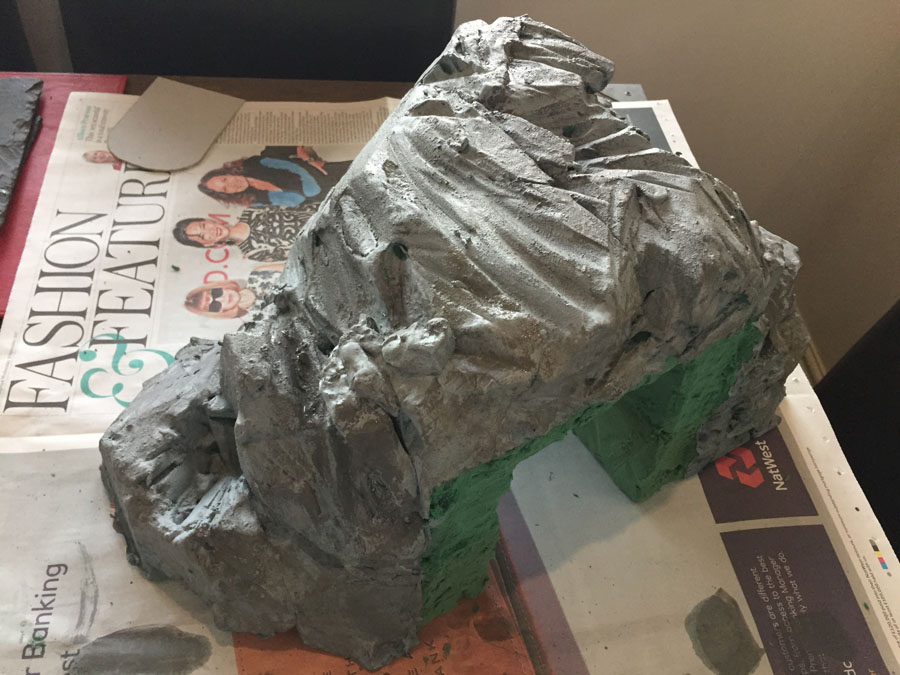
Now I get really busy and make the stones a lot darker.
Again, just different shades of dark grey applied with a very dry brush.
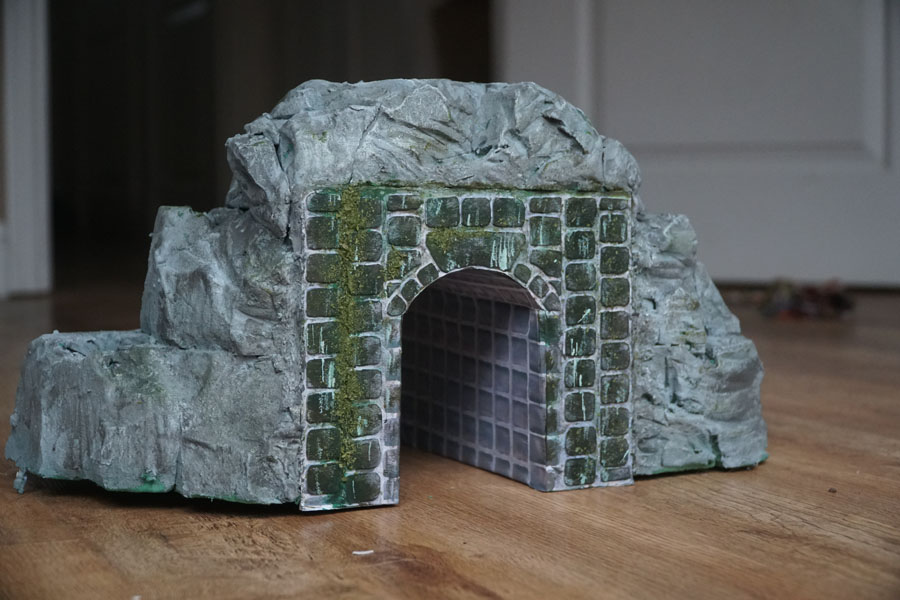

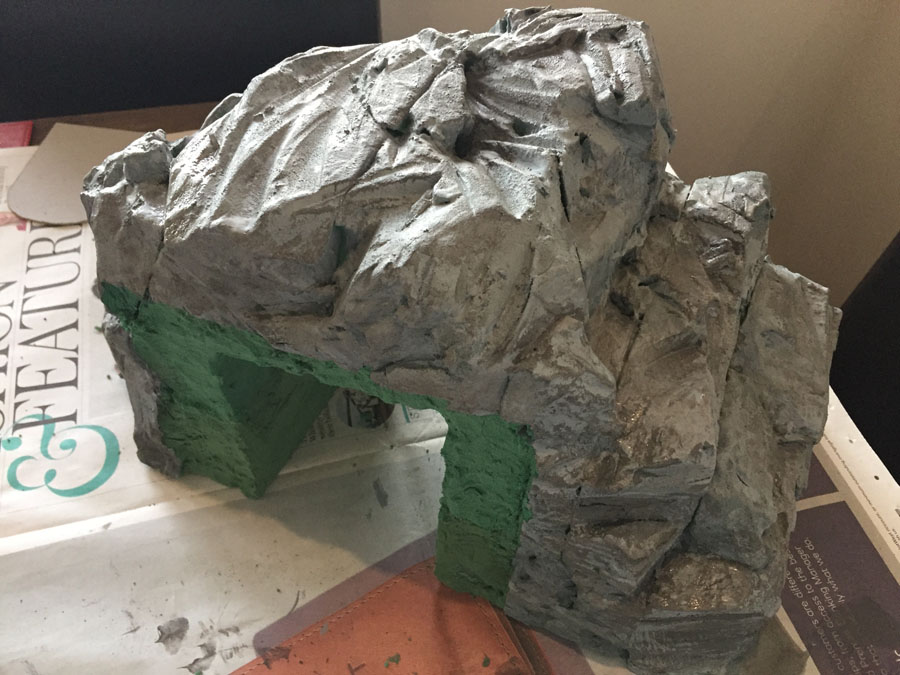
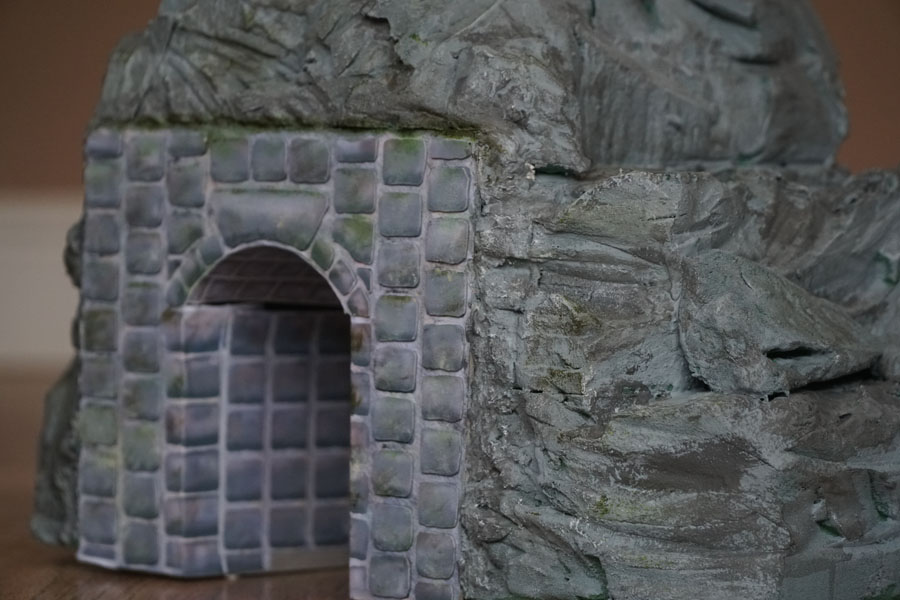
Now a quick word on scale. Al’s made these prints big as it’s easier to scale down than enlarge. Have a look below at just how big.

Here’s an OO loco. So you can see, in a proper scene I’d either chop the bottom 4 stones off when making the tunnel, or print it out smaller (Al say’s he going to do a ‘how to’ on doing that).
I really wanted to make another one that was smaller and a different colour, but Al was in a bit of a hurry, so I hope what I’ve done is helpful to some.
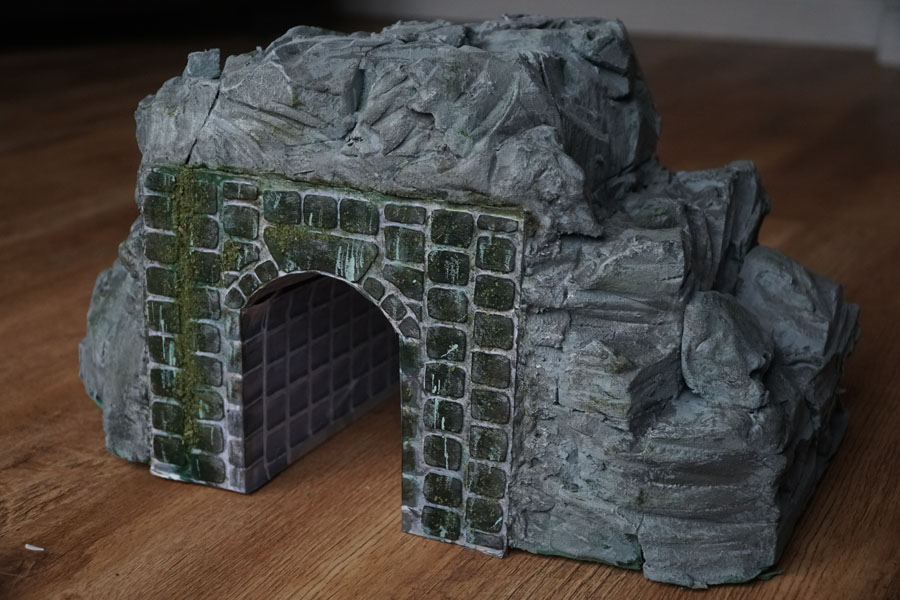
I can’t tell you how much fun it was to make this tunnel.
I think the options are limitless if you treat the tunnel print as a base coat. It would have been just as easy to make a light brown rocky tunnel – just get stuck in with the paints and enjoy yourself. I did.
Thank you Al for letting me try it out.
Mike”
A huge thanks to Mike.
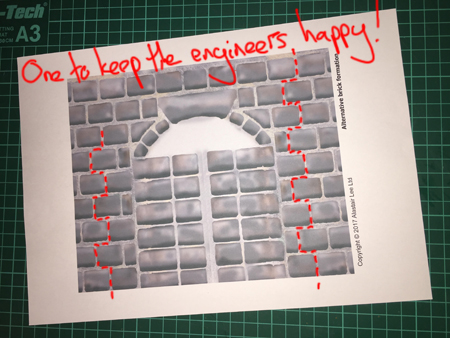
I should also add the print comes with an alternative tunnel face – one to keep the engineers happy.
I just love what Mike’s done with the print and it just goes to show this hobby is all about having fun.
And there’s great news about the tunnel print too. Right now I’m bundling it absolutely free with the Beginner’s Guide.
Why am I doing that? Because every now and then I have a sale.
Other sites seem to have a sale every two days or so. Not me. In fact, the last one I had was long, long time ago.
So when a sale does eventually come along, I want you to know it’s the real deal.
And this one is my best one yet, by a long stretch.
Not only is the Beginner’s Guide the lowest price it’s ever been, I’m also throwing in the brand new tunnel print, absolutely free.
You get the tunnel print out worth $9.
And the Beginner’s Guide is knocked down to just $9 from $27.
So right now you are saving a whopping $36 – and of course, you get everything that comes with the Beginner’s Guide normally.
Of course, I’m biased, but it’s a silly deal.
You might be thinking, “Where’s the catch?”.
Of course there’s a catch: this deal is about to finish! Then the tunnel print will be gone. So will the videos. And the Beginner’s Guide price goes back up to $27.
So grab it here now before it all disappears like a shadow in the night.
That’s all for today folks.
Best
Al
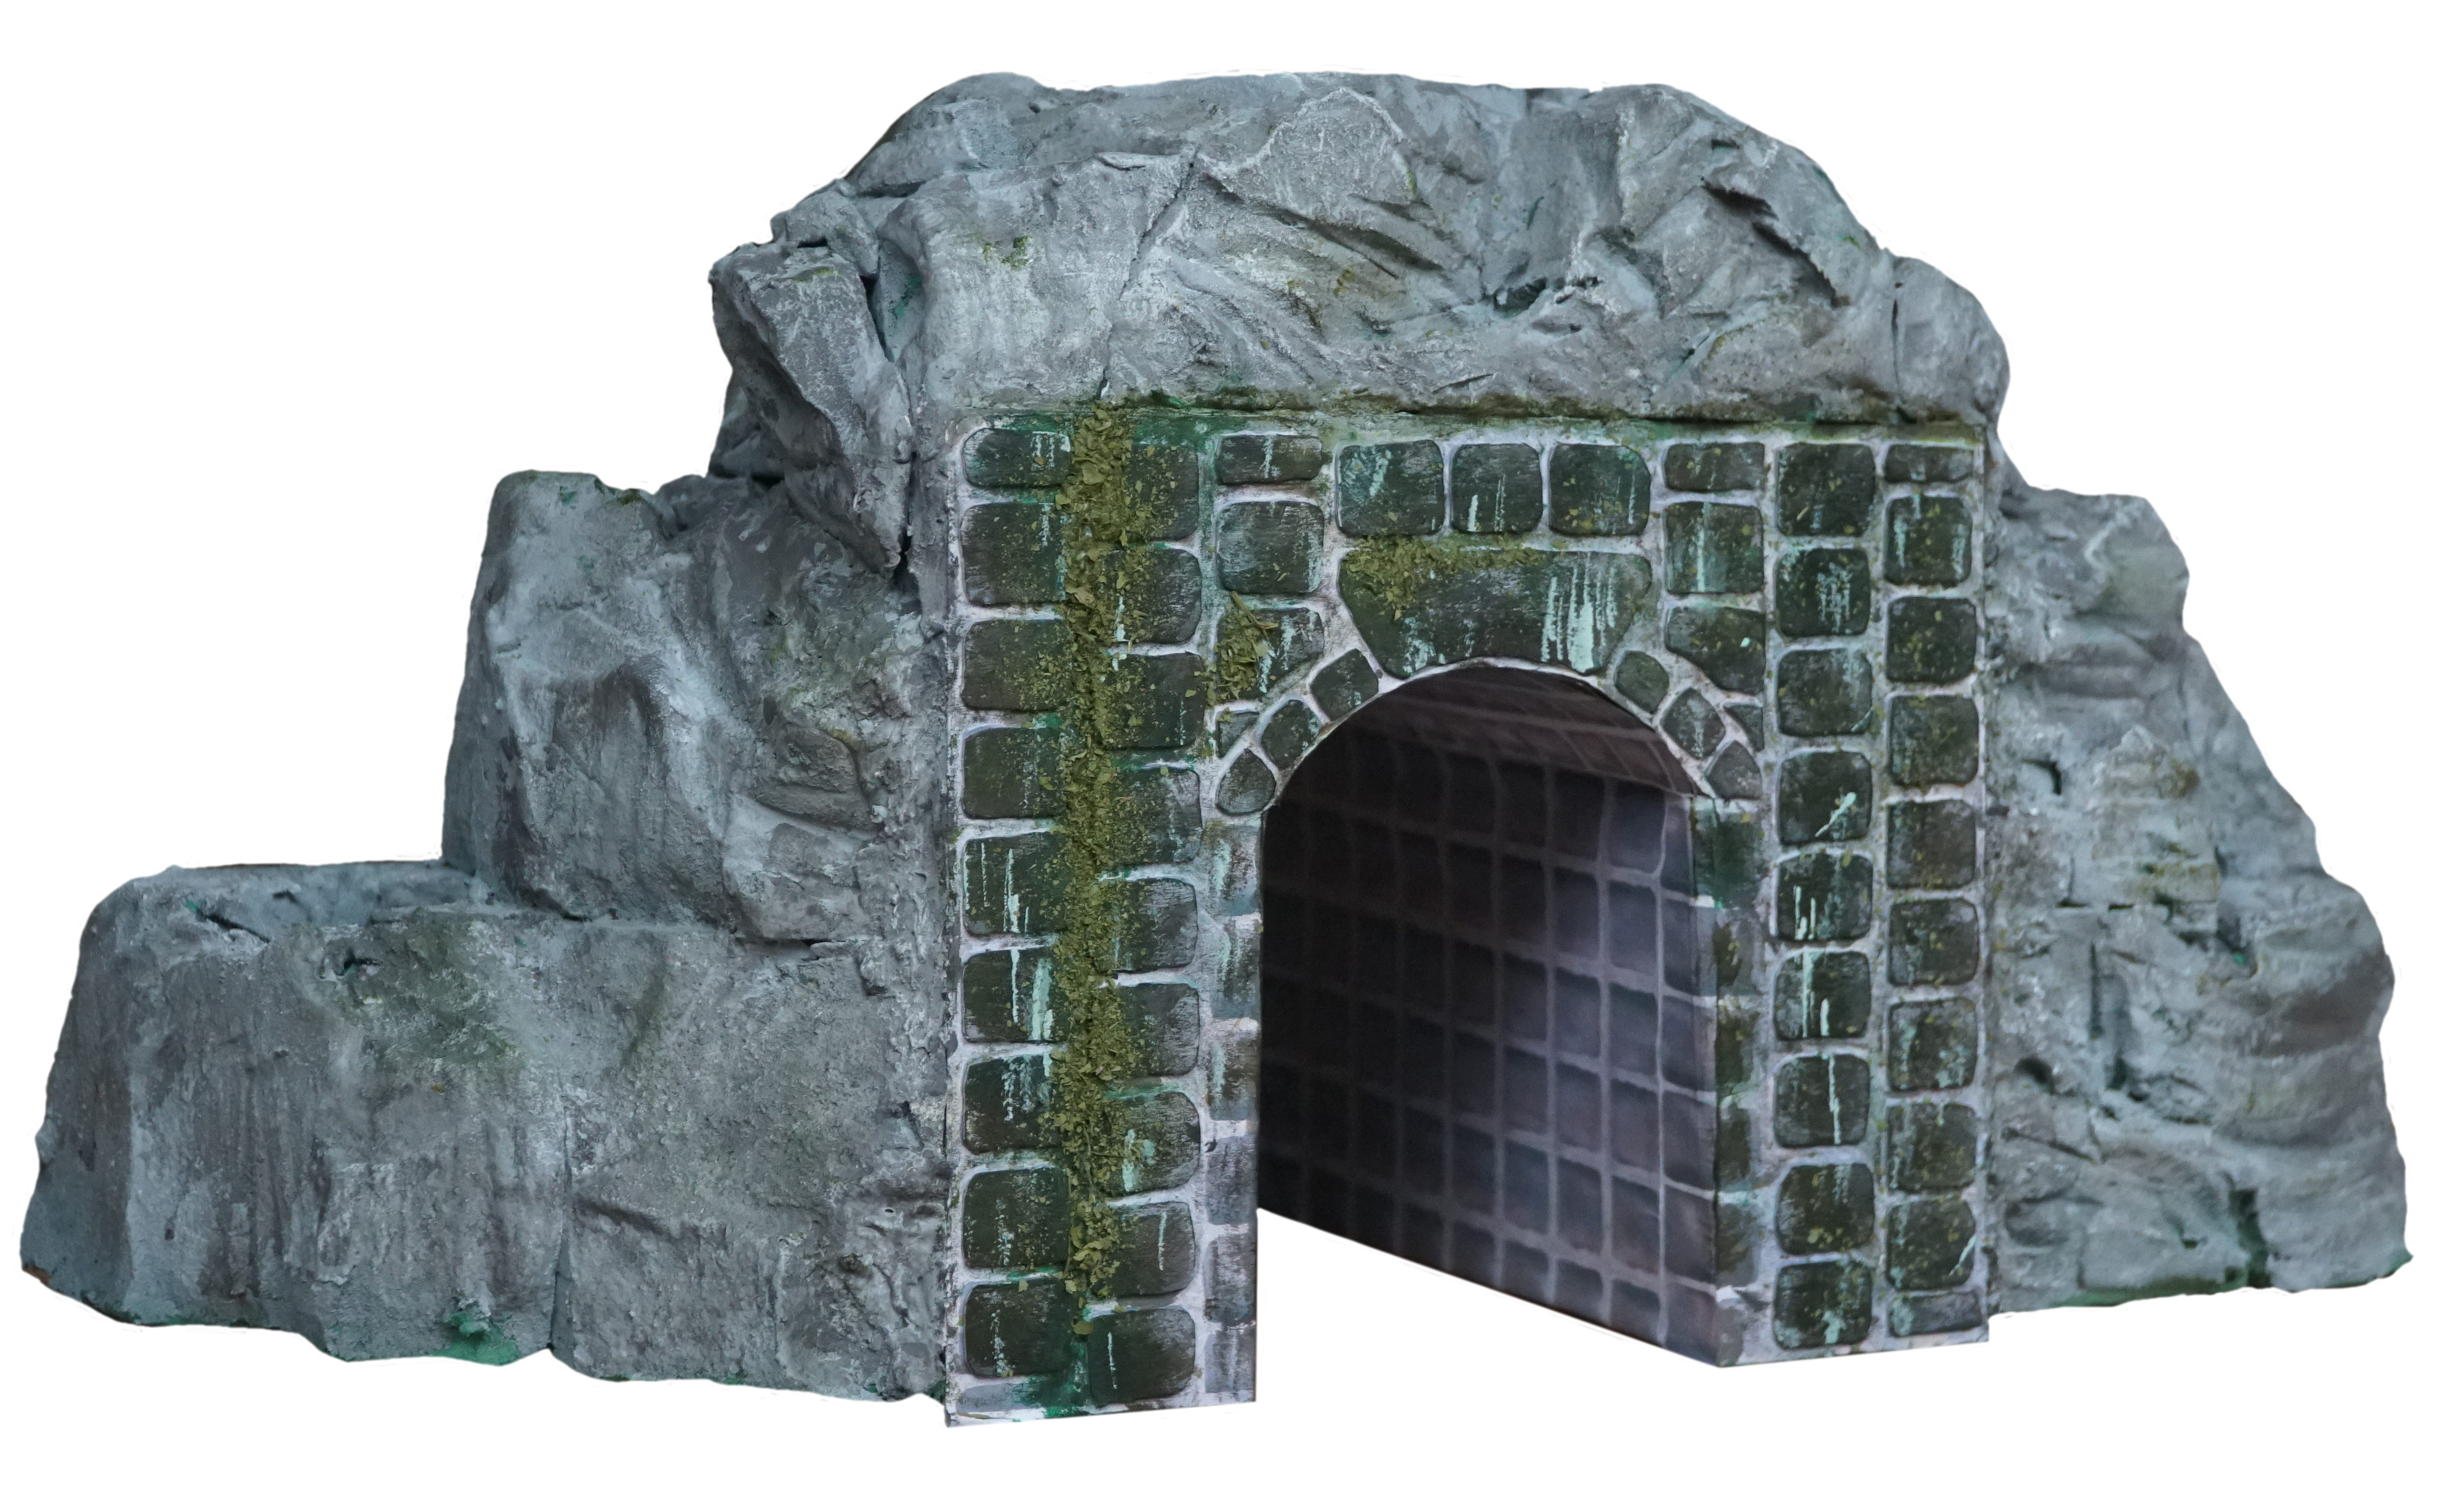
PS Here’s some large pics of the tunnel (images are clickable, just like the ones above).
7

Very nice
The series of photos really helped me follow the build. Great work!
Good job! Greatest how-to ever!
Brilliant what you can do with cheap material. Very good modelling.Thanks for sharing.
Hi, a very impressive Hand made road tunnel. I use the same technique but I use styrofoam of builders yards that are unwanted. I also find that until you dry brush it doesn’t come into the reality of looking real, but the effects once finished are fantastic as yours is.
A work of art for certain. Simulated water or dripping water and a bit of moss running just inside the inner walls would be good but not necessary. Well detailed and realistic as is.
Rich
Thank you. I put this on save so I can do one later. David
One of the best how tos I’ve seen, and your skills are top notch!
Please explain how to “dry brush”. I could guess at the process but the term leaves questions.
Thanks
I do not seem to see why you would need to reduce the height of the portal from
the original print out as given in the program other than for the gage of equipment
your running ? but it seems like it would be just as much fun no matter what you
might change
hope all have a great Christmas and new years !
Be well and stay safe Al. and R.R. fans
George
If sealed the flower foam will probably be OK but, when dry it is powdery and that has a high safety risk … anyone doing so should wear a mask BUT, ideally do not cut or scrape it, better still DO NOT USE it for modelling purposes- styrofoam is safer.
Thank you for the step-by-step construction. I believe even I could do that it I follow carefully your instructions. I’ve so wanted a way to construct a tunnel through the rockies, and you have provided it for me.
Very nice I like it.
A great looking tunnel and mountain and wonderful it can be made scooped flower foam with a spoon. You’ve given me some ideas! Good stuff!
Very nice, Mike.
I guess because it’s just a tutorial that the tunnel is so short.
It seems like I wouldn’t want to waste the project without using it on a longer tunnel.
Our RR daylights those shorties.
Don’t you think, styrofoam will be cheaper than flower foam. More over, former may not leave any DUST! Which is a health hazard. Thanks & regards,
GOPAL DAGA / INDIA
Great description of how to. It will be very useful in rebuilding a tunnel from one to two tracks. Thanks.
Very nice.
when you say quick sale, you aren’t joking. I got the email this morning, went to buy the guide at 12:15 Texas time and there was no sign of a sale. Bought the guide anyway.
Mike, your talent and imagination are an inspiration.
In the spirit of using scrap material, I was thinking of using a large round juice can as a tunnel, but I will use your front and back pieces. Thanks
Ok, official WOW! Thank you!
p
Thank you Now I’m going to do a double track version HO.U inspired me!
I note that the finished tunnel is ‘sealed’ but must remind that plant bricks provide a respiratory hazard when crumbling as the individual particles are very small. Please therefore make sure you are using a mask and wash the particles rather than sweep them when the item is completed.
the instruction
of your construction
is so impressive
and so progressive
thanks for the info.
I have been trying to build a tunnel the photos are just what I need thank you peter
Excellent job mate on using just basic materials and I reckon it gives far more satisfaction. Happy New Year
very nice, looks like a nice bit of work, I experimented the tunnel idea usind a paper bag, dampened and covered with grass n gravel. not as nice as out of foam but a tunnel no less. My next proj. will be , taking pics of my layout.
Super awesome!!!!!
Thank you. I liked the mountain’s detail. This is a keeper.
I have not been involved with Model RR since my dad built a 6′ x 24′ layout on S gauge track in 1945.. He tried to teach me the wood working tricks he knew.(He WAS A Master Carpenter) , but i regrettably did not appreciate his efforts. Now at 81, I ran across this web site and have enjoyed all the messages and photos of the accomplishments of other Rail Road Engineers.
Thanks to all of you that contribute to this great sport, Opps Hobby) and passion
Im an invisioner..I need to know what my project will look like when done. So,,,,, all the step by step pictures helped me with the tunnels / bridge to be built this winter. When its too cold to be outside. I also build furniture , in spare time.
One of the better how to do it description of a tunnel.
How much should printouts be reduced for N scale?
Thanks
That is really cool how you make this. Thanks
I like it.
Great idea, I think I could make one because of the pictures and the instruction. Thank you very much.
great ideal saves money on store built tunnels will try on n gage scale thanks
This build has opened my eyes to possibilities. Thank you so much
excellent project, very helpful for me since I’m be constructing my layout very soon!
Very nicely done….great job.
Thank you Mike for this very helpful advice on how to build Tunnel port ,step by step instructions from beginning to end with the finished product awesome. I’ve been into the hobby since I was little kid and wanted to learn how to do these things and build my ultimate model rail road with all the bells and whistles and now with this I can begin to put a plan together,
Once again Thank you Mike
Woo this is great and so simple. I have looking for a way to build a realistic tunnel for a long time Thanks
This gave me a lot of ideas and that’s important to someone with absolutely no artistic talent. So I gotta tell ya, when I was about 10 I built myself a layout but I left the hobby when I hit junior year in high hood. I am about to turn 76 and I know I’m slowing down but I refuse to pilot a rocking chair so I have this ambition to model railroad. I’m @ctually looking forward to it but I’m about 12 to 18 months away. Once I’m ready n making the best decision on what gauge to build all your tips will come in handy.. thx. Joe
Great looking tunnel enjoyed your description of what you did as you professed.
When I had my late Lionel layout I used juice cans and milk jugs to cut my tunnels from for long tunnels braised cans together.