Dean’s been back in touch with a helpful post on model railroad led layout lighting:
“Cheers, Al, from Dean in New Mexico.
I’ve begun to fit my buildings with internal LED lights on the N-scale Conejos Valley Railroad. I use small LEDs I buy in bulk (from Amazon or eBay).
When an LED fires, it acts as almost a dead short. So, you need to add a resistor in series to limit the current or it will burn out in a second.
For a 5-volt supply, you need at least a 250-ohm resistor, for 12-volt, 600-ohm.
I always wire mine up with a 1000-ohm resistor to give a longer life to the LED.
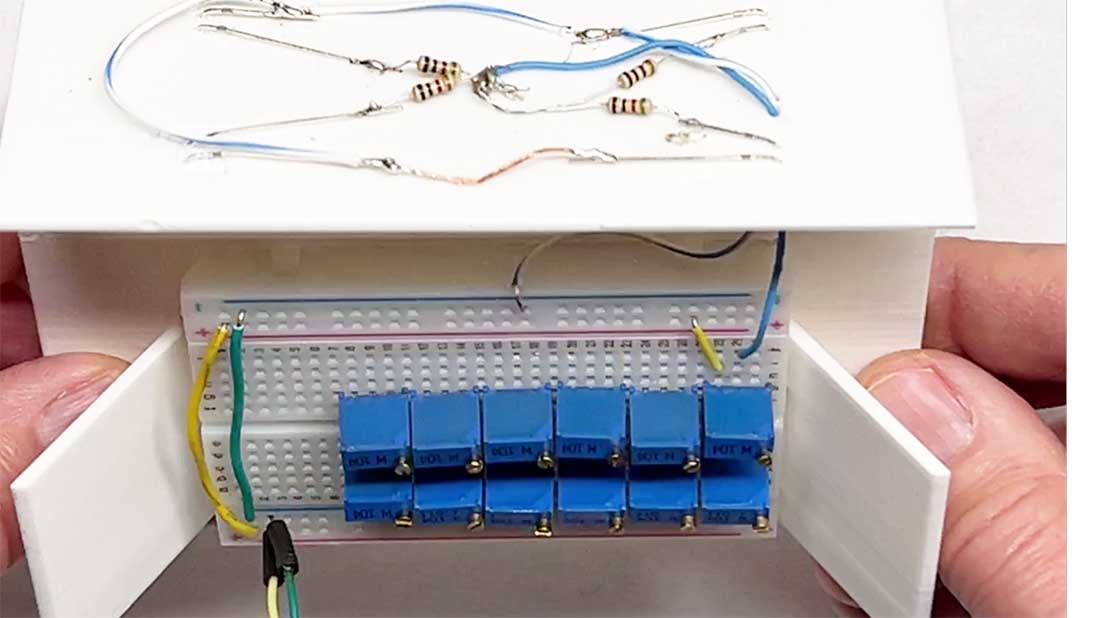
I also put a 100K trimmer potentiometer in series with the power leads to the buildings. These are used to adjust the lighting for each building.
Parts I use are shown below with their bulk cost. These days I mostly use the 3-mm version since it fits better in small N-scale buildings.
You can buy LEDs with an included resistor if you want to make life simpler but be sure they are rated for the voltage you will be using.

I use the variable voltage supply shown below so that I can adjust the voltage (and level of light) for all my buildings at once.
I’ve used the one shown below for years and you can still find it on eBay for around $5.
It’s mounted on a standard electrical cover plate that fits in a small electrical box fastened to the layout’s frame. The power supply is powered with a plug-in Wal Wart that supplies 12-volt DC at a couple of amps. Power for my switch machines also comes from the Wal Wart.

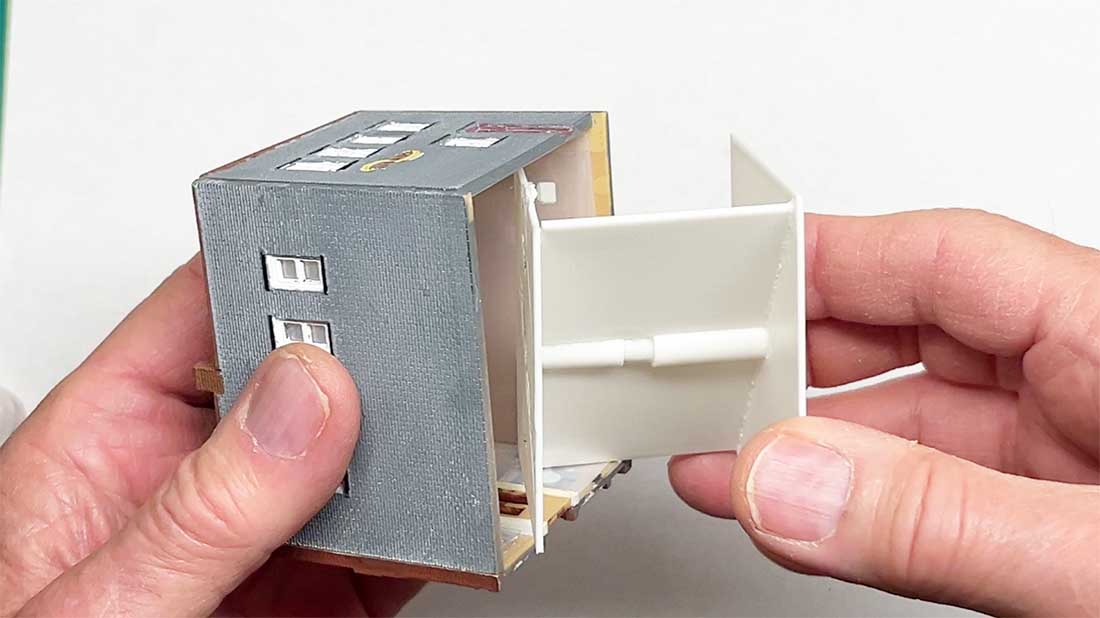
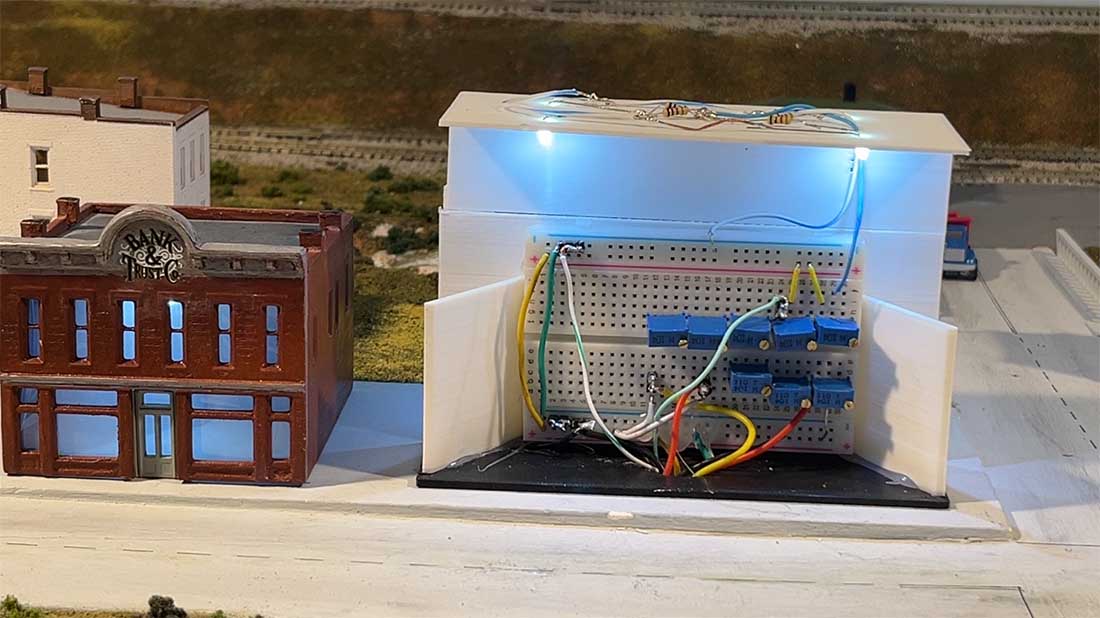
I print out support pieces using a 3D printer and PLA to hold the lights and provide a baffle.
These are printed out for each building in two pieces which are then glued together. I design them so they act as a base support for the building.
If you don’t have a 3D printer, you can also make these up from Styrene or balsa wood. But I find it is faster and cheaper for me to 3D print these. The 3D printer I now use cost $200 and is far better and user friendly than my 4-year old unit. A completed assembly is shown below.
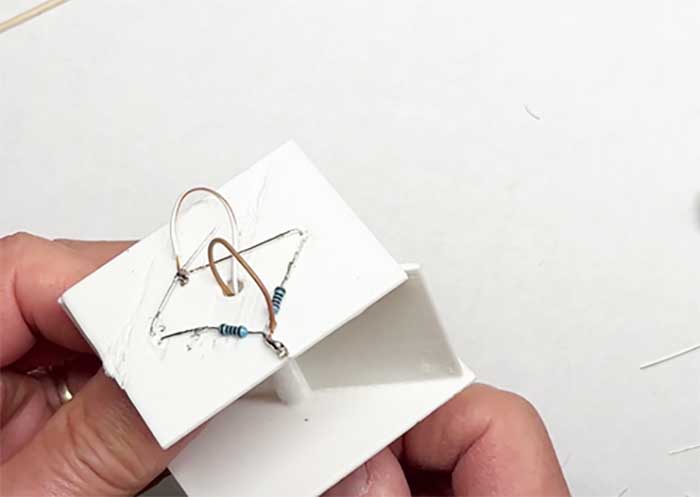
This building was lit with two LEDs, each with their own limit resistor. The two are wired in parallel to the wires that go to the main power panel.
As I solder the leads together, I melt the joint into the PLA material to give a ridgid assembly—it looks bad, but won’t be seen.
Model railroad LED layout lighting:
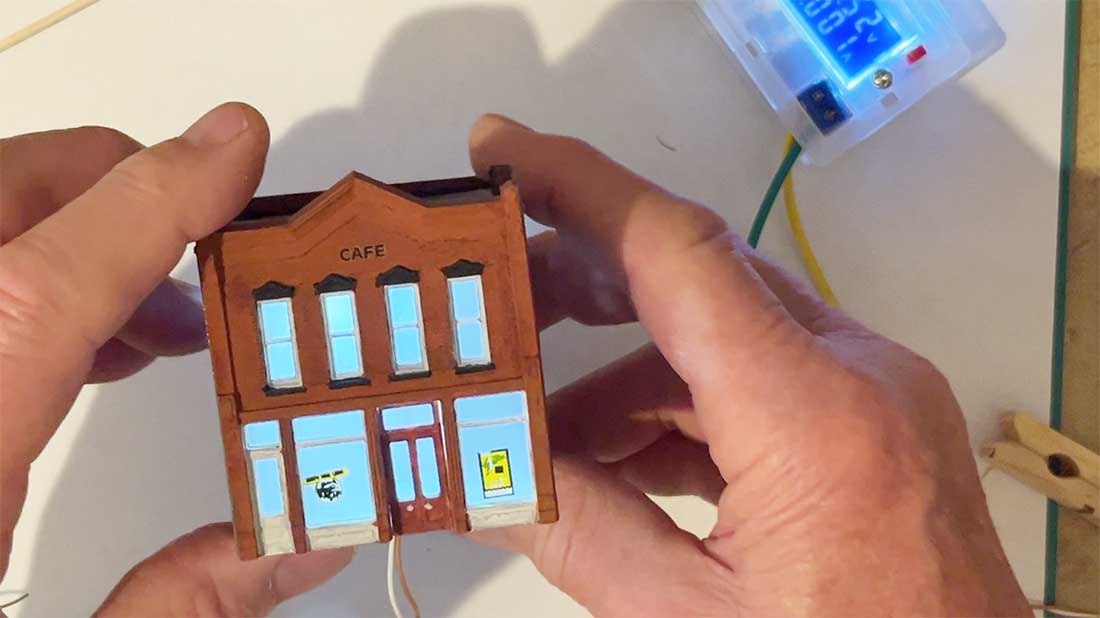
Many of my buildings are from Woodland Scenic kits. A completed building is shown below. Note that the light appears bright white to the eye, but the camera sees this as a cold blue.
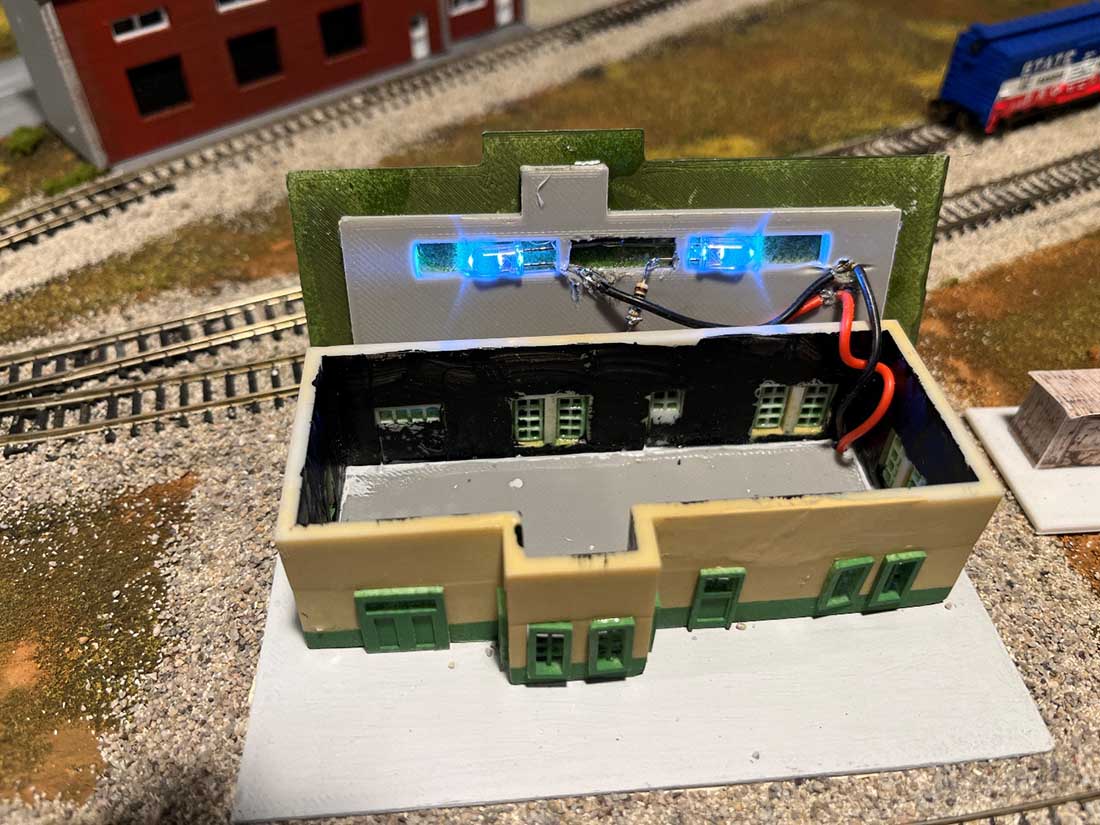
Here’s a station on my layout that uses two 5-mm LEDs. Everything is supported in the roof of the station
All the wire pairs that come from the various buildings go to a central distribution point on my layout I designed to fit inside the hotel.
Interconnections are made with a prototyping breadboard which I have described in more detail in the video I published, see below.
I can wire up to 12 buildings through this central distribution panel. The four LEDs and resistors can be seen at the top of the support.
Below is a photo of the support for the hotel.
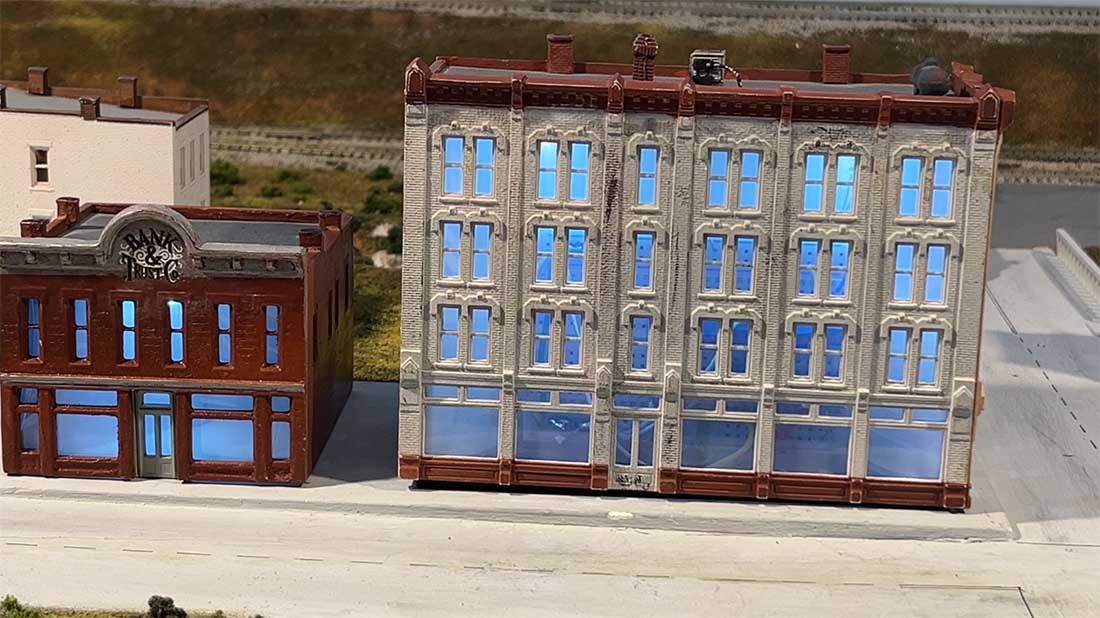
And here it is with the hotel in place. The glazing I use for the buildings has a foggy look that helps to mask the inside.
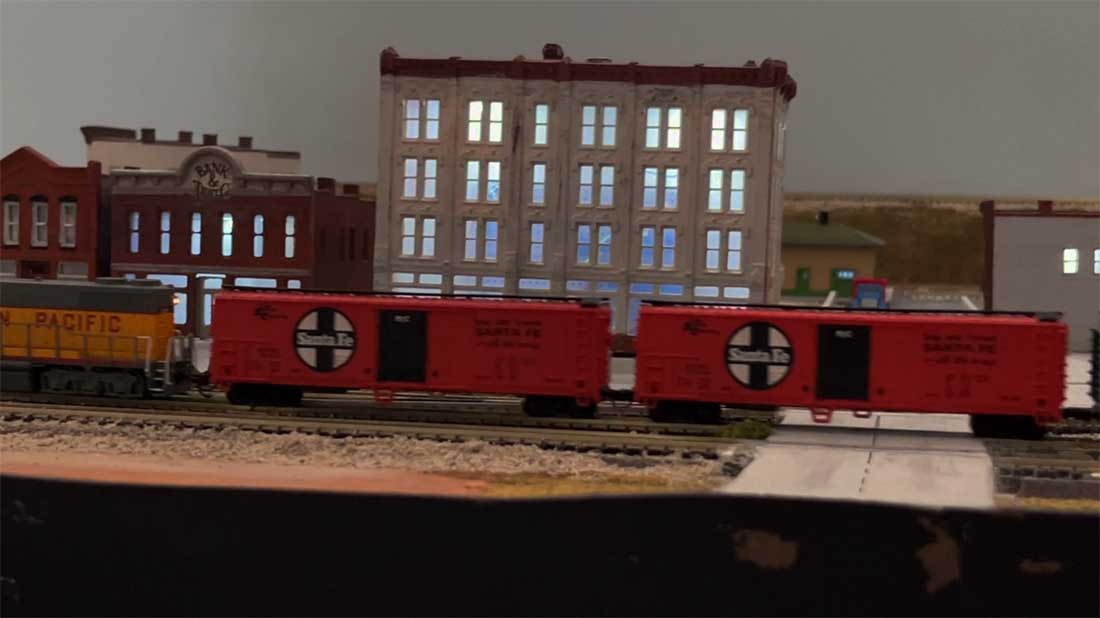
And here’s a final photo in action. A night train passes through Conejos.
You can see an action video in my video:
I’ve almost finished the Conejos Valley Railroad and only have a few finishing touches to go, lighting more buildings and touching up the scenery.
That’s all for now, Al, thanks for continuing to improve your blog!
Dean”
A big thanks to Dean for sharing how he does his model railroad LED layout lighting.
Dean’s last post – also on lighting – is here:
And it also reminded me of these posts too:
That’s all for today folks.
Please do keep ’em coming.
And if today is the day you decide to join in the fun, the Beginner’s Guide is here.
Best
Al
PS Latest ebay cheat sheet is here.
PPS More N scale layouts here if that’s your thing.

I can’t comment on this… a few hints. This is not about me, me me. Late 60’s I went to a school for soldering things at micro level. Coarse was 2 week venue, the soldier connections had to be shiny, not cold soldered with individual wire strands showing. Not hand twisted or stranding mashed. For work as shown you would first pre-soldier/tin all stranded wires. Yes, round needle nose pliers are out there to form tiny loops to first connect components and devices together mechanically (not twisting/wrapping. Next a drop of liquid flux, low heat and solder must flow over-through fastening. Smooth, shiny and just enough soldier. Point being… real simple to do and have both electrical and mechanical connection. Maybe a small section of shrink tube, maybe not needed.
No, I can’t weld or braze. Never learned or had need for involvement. Everybody has seen good or shoddy work there I’m certain.
Dean, would it pay to paint out some of the windows on the inside, dark enough so that no light will shine through it, to give the impression that not all the rooms have their lights on.
That’s enlightening. Seriously , that’s incredible , especially considering it’s N scale , so the light is to be scaled down accordingly, serious stuff . We’ve all seen over lit or over bright lights on many displays and though the intent is good if the lights are too bright ( not to scale) it seems to detract rather than add effect. Thankyou for showing how to scale down the brightness. As my father always said ,” if you’re going to do something , do it right “.
Those multi-turn variable resistors are great for controlling the brightness of LEDs. I used several of them on my layout when lighting my high-rise apartment block and terrace building. Well done and well explained. Rob
interesting. nice work.
Great little tutorial. It’s nice when all the info is in one place. I would be interested in knowing what your new 3d printer model is. I have an older model that I never use because it’s such a pain.
nicely done to make the building gleam at night as they should
On blacking out windows. Yes it’s a good idea and one I am planning. At this point the hotel is not finished. I need to put in a white card to block out the details on the electronics The glazing I use is a material that can be printed with a normal printer. I plan to not only black out some windows but also print out window shades at various heights. Also internal details on the large windows at the lowest level. A subject for a later blog piece.
Dean: This was the easiest to understand tutorial on lighting I have read; you also carefully showed what parts you used. Thank you for taking the time to do this.
Yes I will subscribe
Dean,
Excellent lighting tutorial. Your method works and provides the same benefits as the Woodland Scenics Just-Plug system but at a much lower cost. Thanks for sharing your methods. By the way, where in New Mexico are you? I know there’s a lot of N-scalers in the Las Cruces area and some in Clovis too. Probably even more in Albuquerque.
Ebay has DC-DC 3A variable step down power supplies for about $1.20 in a pack of ten. I have a 15V volt AC/DC power supply bus for all accessories. Another cheep source of AC/DC are used train power supplies. They are very inexpensive on Ebay. The trimmer pots are useful if you want different lighting effects on different buildings. Instead of individual LED’s and resisters I buy 300 LED strip lights. They are 12 V and can be cut in three LED pieces. They have an adhesive back and require only two connections. This is only cost effective if you have many buildings but the excess can be used for general lighting. Deans approach makes the most sense for small layouts.
Very informative. I have one question about the Trimmers. Are you utilizing audio or linear taper Trimmers? Thanks,