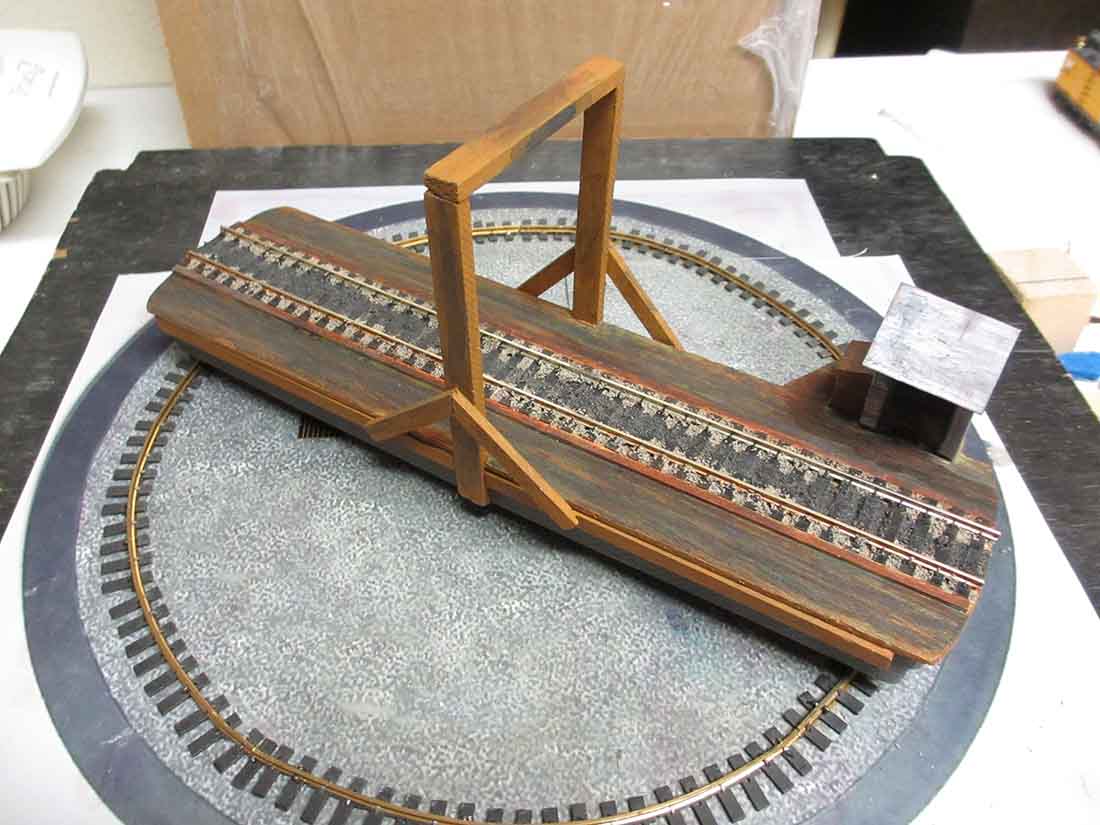
Tim’s been in touch with a very brave scratch build – a model train turntable.
And he’s done a great job too:
“Alastair here is a tip for Ken or anyone planning to scratch build a turntable:
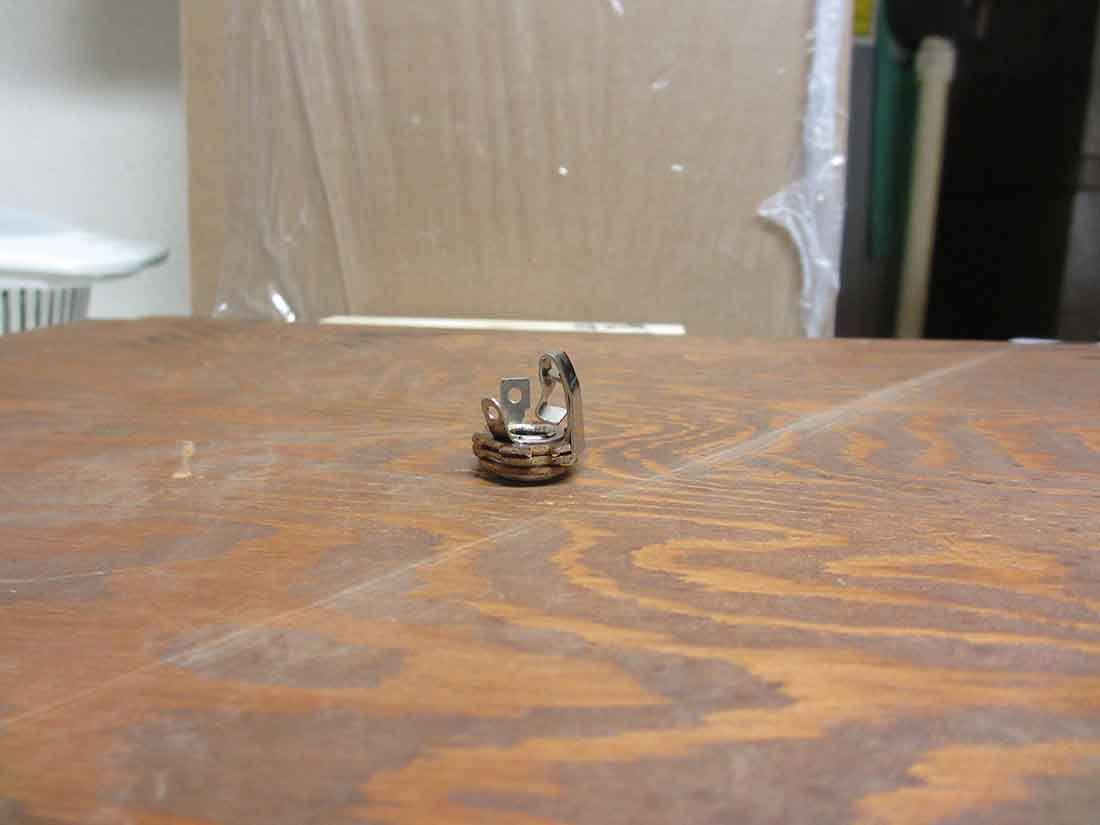
If you decide to make a scratch built turntable, you can use an old style large dual contact audio plug and jack as the spindle and pivot hole. This makes powering the track on the table very easy.
Wire the plug leads through the table to the rails and wire the jack from your track transformer.
When operating regular DC and completely turning your engine, the section(s) of inbound/outbound track(s) to the turntable must be isolated so that their polarity can be switched independent to that of the transformer.
This will allow the track to match the polarity of the rotated turntable, since this way of wiring keeps the polarity of the table constant.
Once the engine is off the turntable, the transformer direction can be changed to the new direction and then the isolated section must also be reversed again, to match the transformers direction.
The turntable will also need to be rotated back again to match the polarity of the next inbound engine.
The hard part is making sure that the plug is perfectly centered and perpendicular when screwed into the bottom of the turntable.
I got this tip from a video clip on scratch building a turntable, when I needed to build one to turn a doodlebug at the end of its branch run.
I am still working on how best to operate the table.
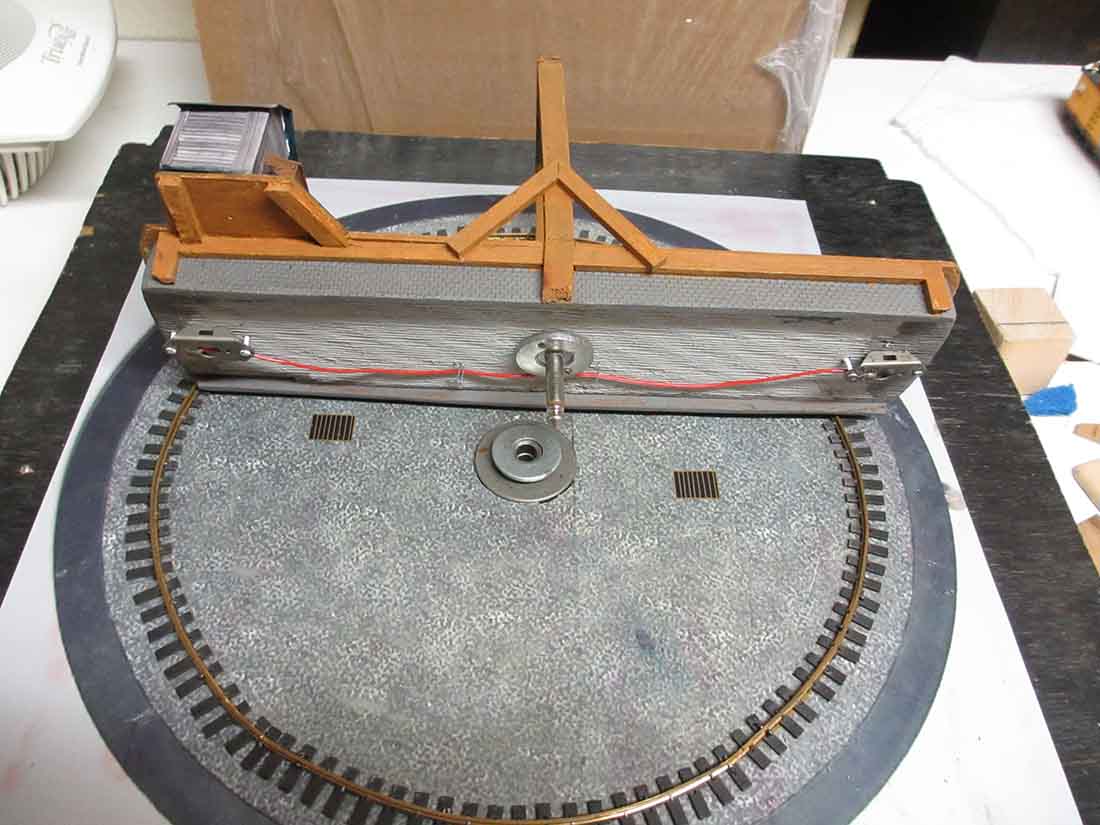
Since these pictures were taken, I have added wooden railings with a pit access ladder and a fine toothed gear around spindle and glued it to the bottom of the table.
I also found a roller bearing donut in my spare parts stash that reduces friction and stabilizes any wobble of the table due to the tightness or lack there of between the plug and jack.
The wire in the pic that runs the length of the table bottom is for an alignment indicating circuit.
When the tracks are properly aligned the table will complete a simple dc circuit to a light and battery (one light and battery with leads to each contact pairings) thru contacts in the pit walls at the center of each track and the opposite wall.
The bottom of the pit is just a picture from a computer paint program’s gravel texture with drawings of drains added.
The rail is old brass flex track cut in half and formed into a circle. Make sure that the alignment contacts on the table do not touch this rail or you will get a short in your circuit.
Alignment circuit:
wire to contacts on left side of pit }—@—+[batteries]~—{ wire to contacts on right side of pit
Best of luck,
Tim”

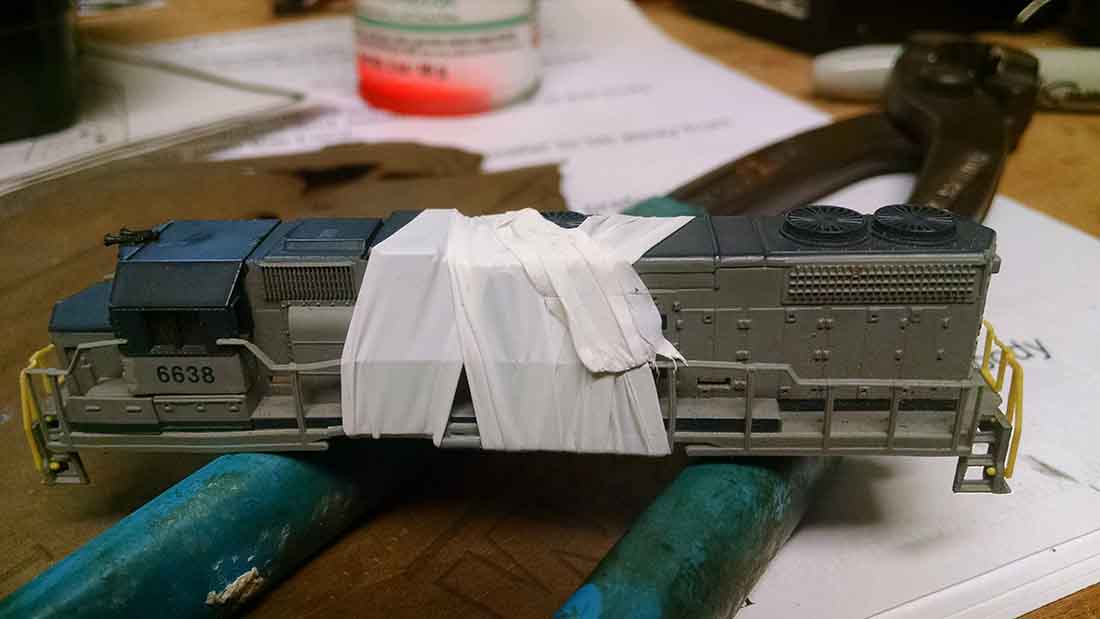
“Al–
I have one for you; I was trying figure out how to hold one of those little bitty tiny N scale handrails in place while I glued it back in place with a bit of epoxy.
My hands are not stable, tape will pull the handrail right back off of its intended location, tape reversed with the shiny side toward the handrail will not let me position it correctly, etc., etc.
I looked around for a new trick and came up with using pipe tape (the stuff you use to prevent leaks on pipe thread) to wrap the locomotive.
It holds nicely, even stretching a bit like, but not too much like, a rubber band.
I have included a picture for you, and I really like all the tips!
This little guy is running around the tracks now, happy as can be!
Jerret”
And now on to Mark.
He’s shared a very simple but effective ‘how to’:
“Hi Al,
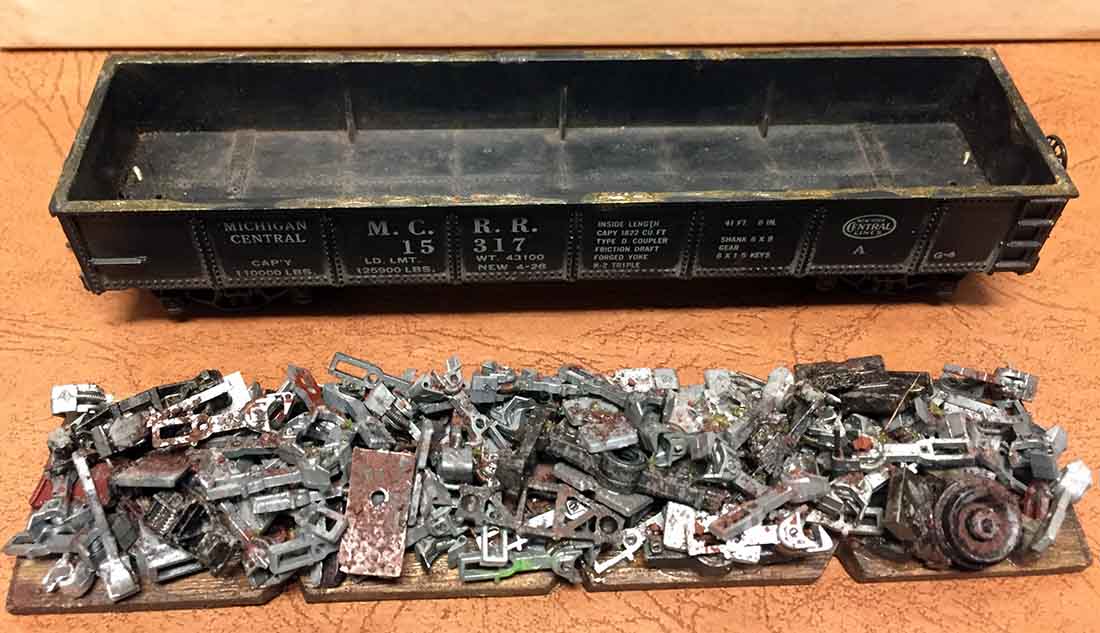
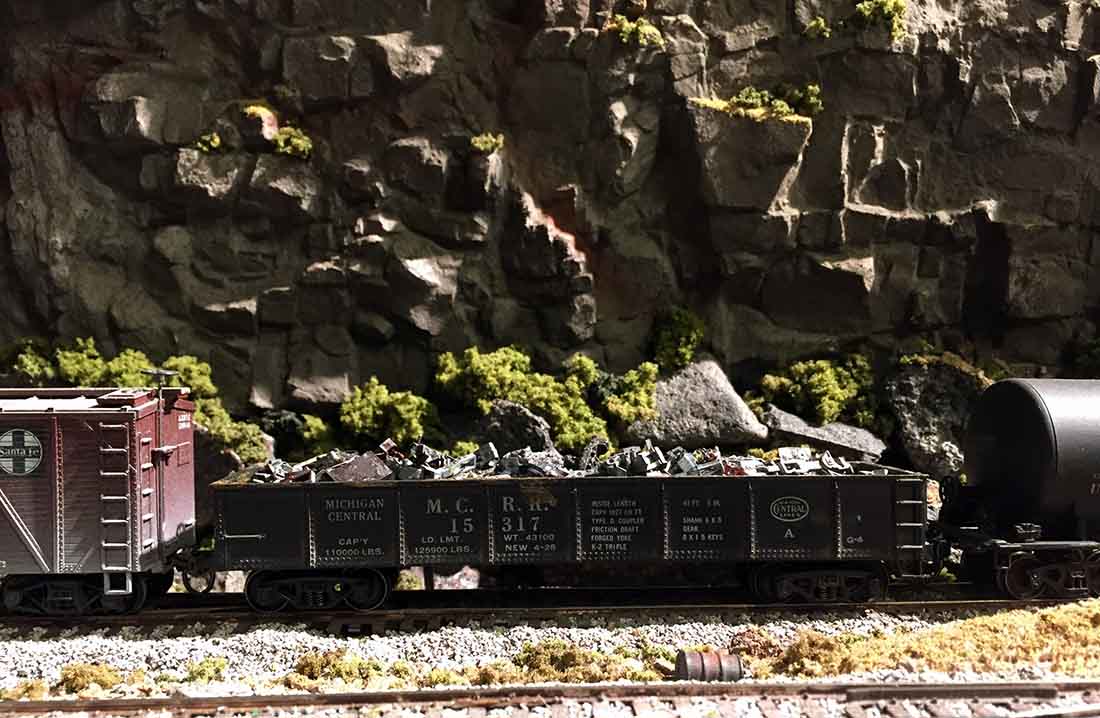
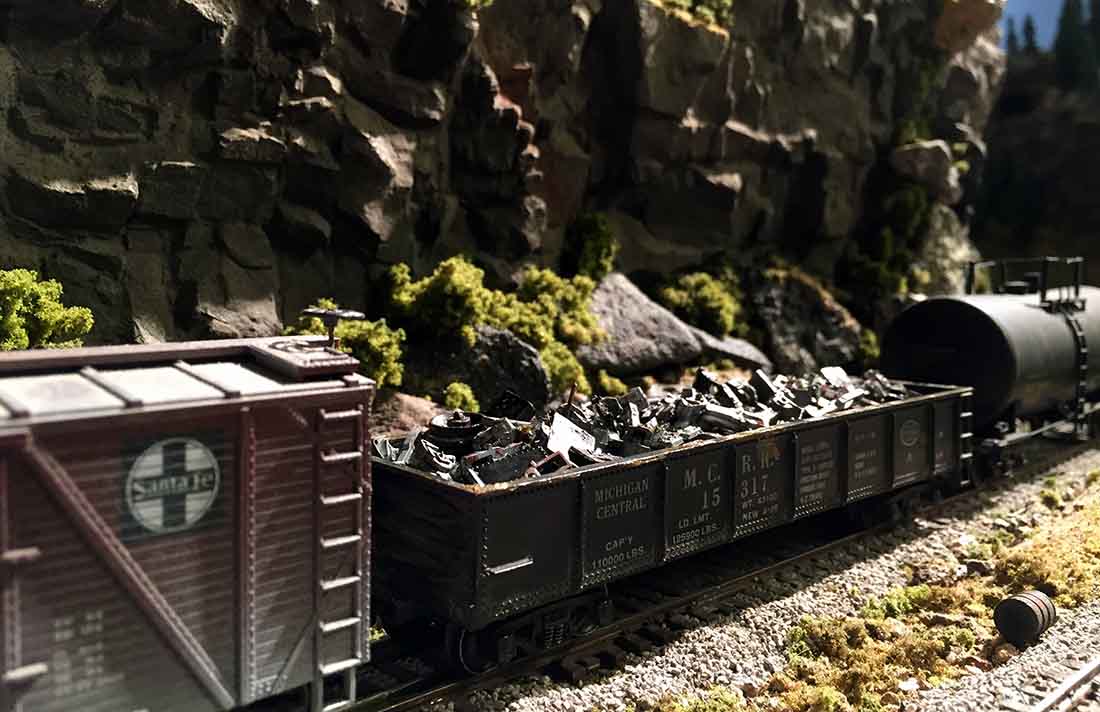
Looking around for a quick, fun, (and cheap) project this afternoon and I came across an old Varney gondola in the scrap box.
Added some metal wheels and Kaydee whisker couplers.
Cut out a load base from some scrap bass wood, piled some stuff on it from the scrap box along with some rust and dirt powder.
Then sprayed some alcohol on it to break surface tension and then drizzled some scenic cement on with an eye dropper.
Let it set in the Las Vegas sun for a bit to dry, dropped the load in and it was on it’s way!
Took about two hours and just a few bucks of parts.
Great way to enjoy an afternoon!
Thanks for looking!
Mark”
A big thanks to Jerret and Tim. After all these years, I’m still constantly amazed at what comes in.
That’s all for today folks.
Please do keep ’em coming.
And if today is the day you get started on your layout, the Beginner’s Guide is here.
Best
Al
PS Latest ebay cheat sheet is here.
PPS More HO scale train layouts here if that’s your thing.


Great tip on using the silicone pipe tape! Thanks for sharing. 👍 👍