Jim’s been in touch, he’s added to the DCC HO trains on the blog:
“Hi Alastair.
Jim from Cape Breton, Nova Scotia, Canada here. I’m submitting some more photos of my 12’x14’ DCC HO scale train layout.
I have many 1-3 minute action videos of the locomotives on this layout, but now sure how to send them to your train site. The videos keep getting bounced back to me for being too large to e-mail. Perhaps one of your many followers could state how to send these videos.
I always look forward to visiting your site & seeing what other railway modellers are doing & the tips that can be gleaned from their efforts. Thanks & keep them pics & videos coming.
Jim.”
(All images are clickable.)
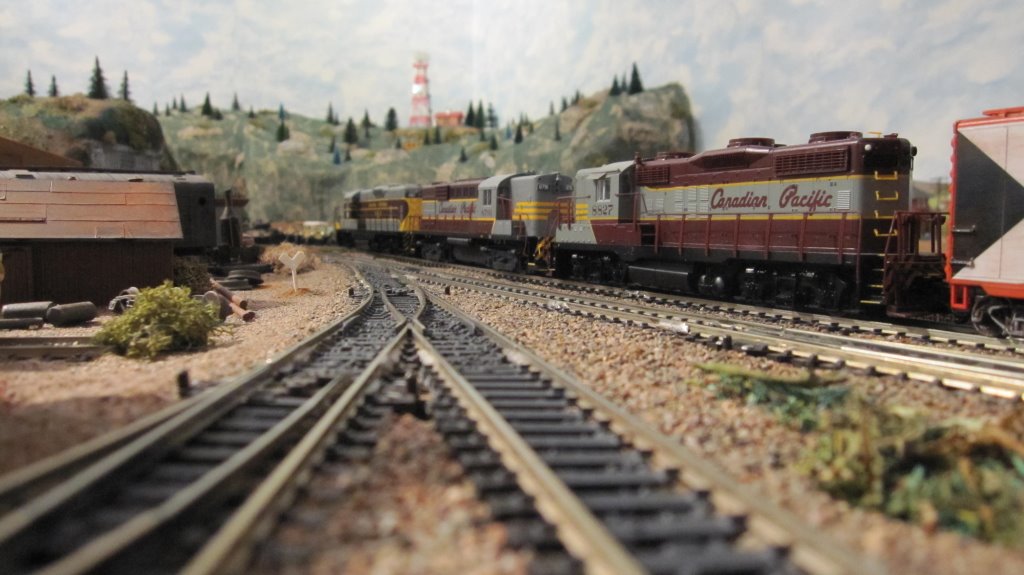

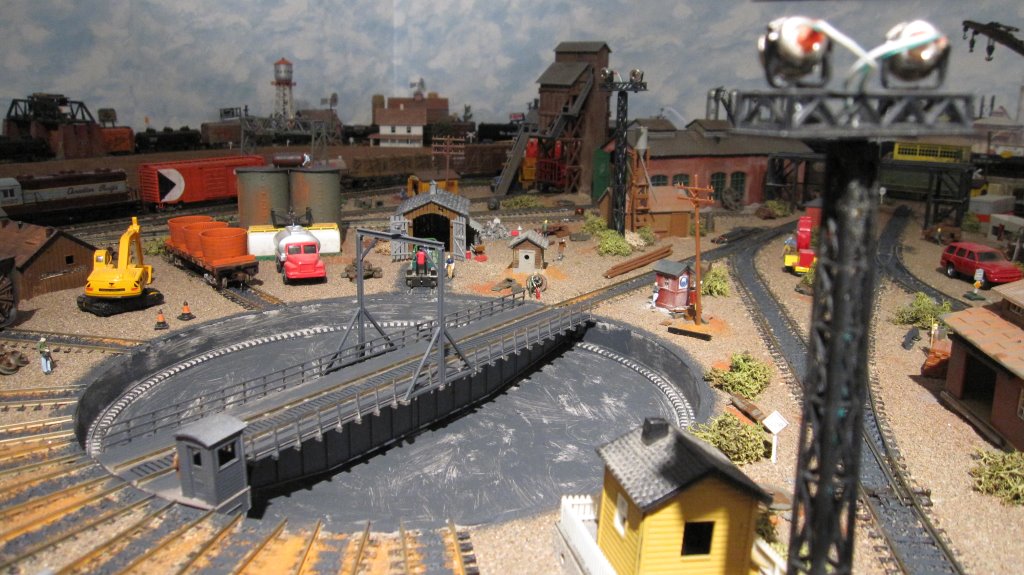
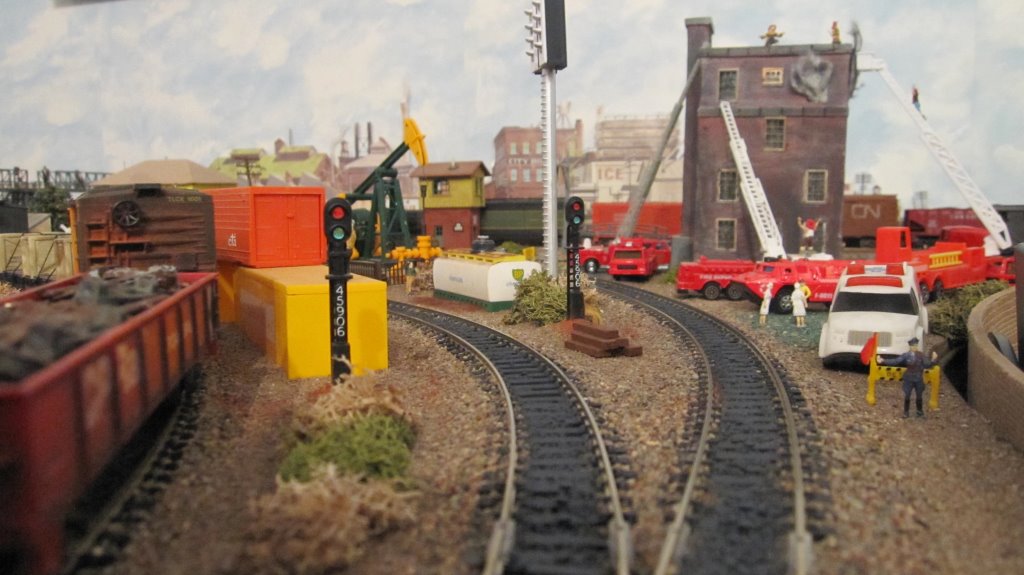

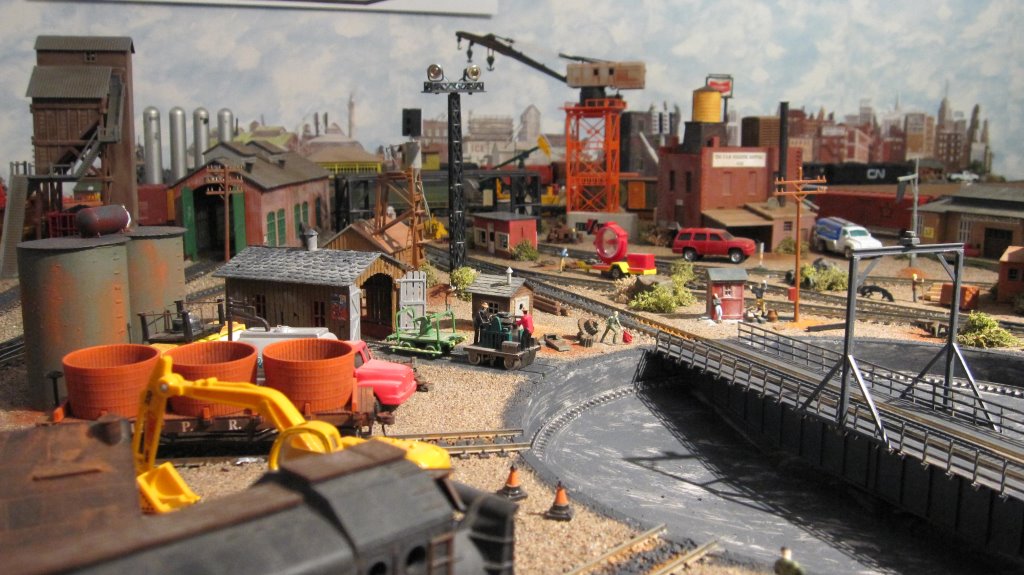
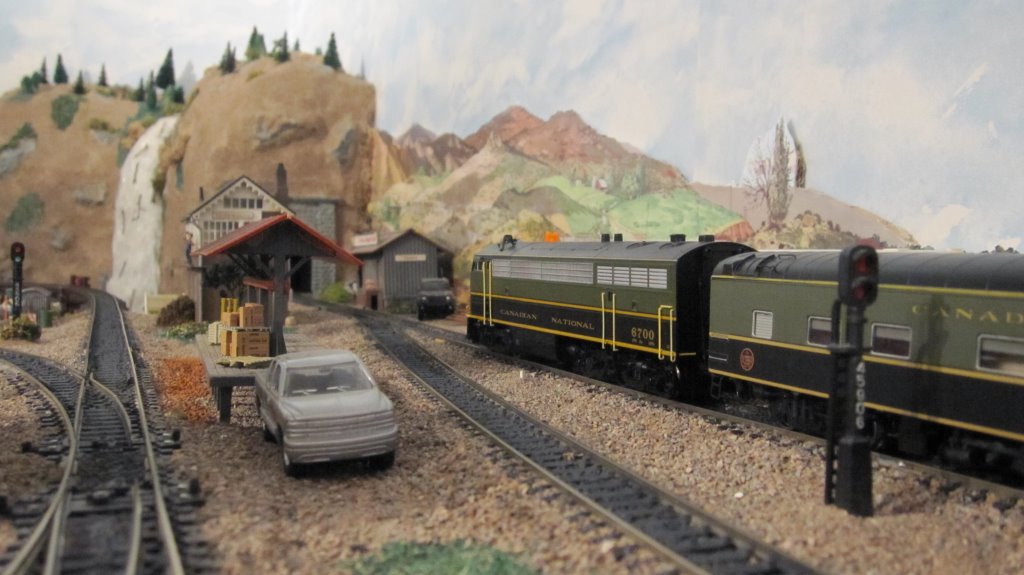
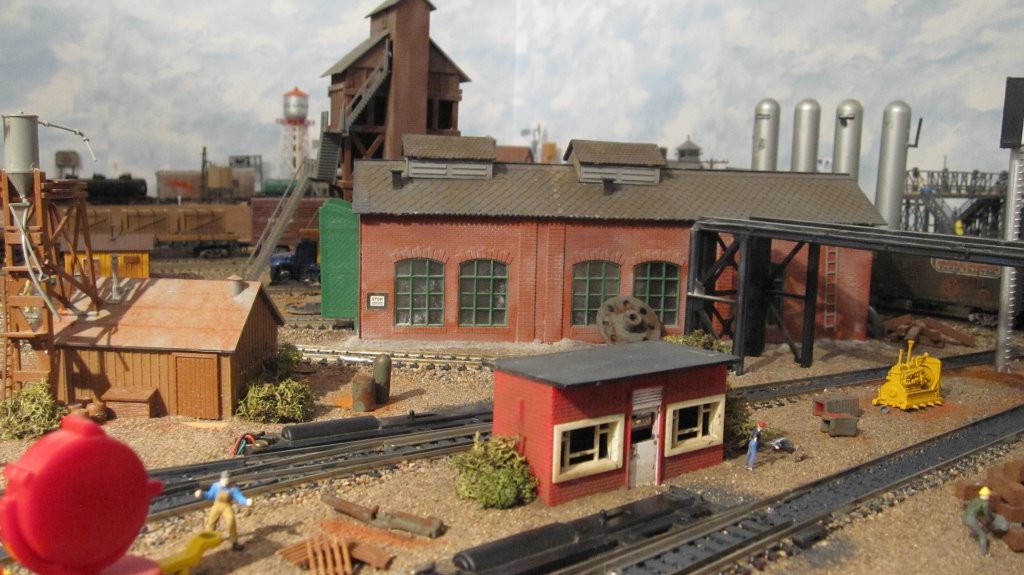
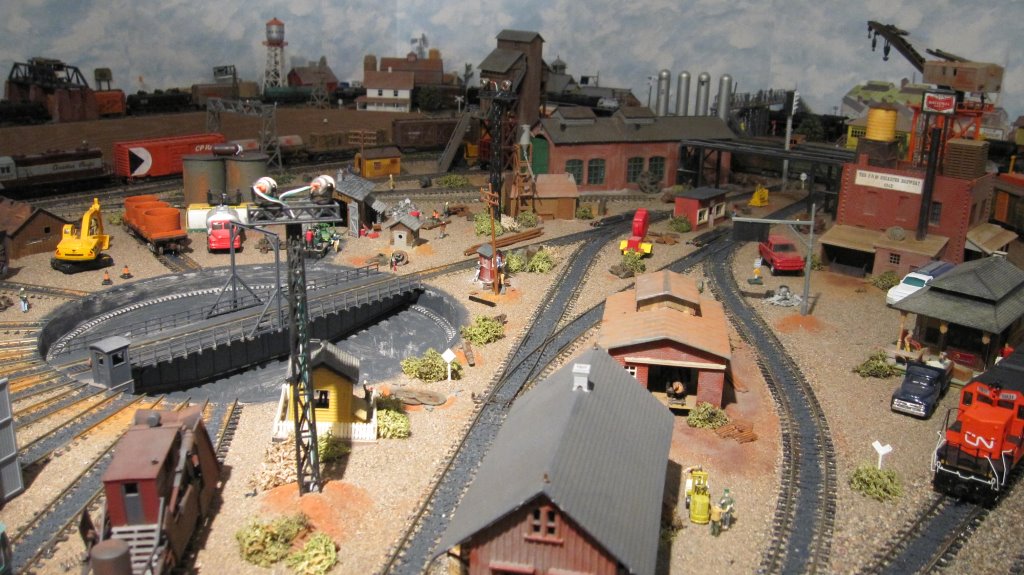
A big thanks to Jim for sharing his DCC HO trains.
(His original post is here if you want to get up to speed.)
Next, a very useful tip from Gary:
“My wife doesn’t throw anything away anymore without saying “Can you use this on your layout?”. I love walking around the arts and crafts stores and the .99cent stores looking at stuff that I can use.
You would be surprised with a little imagination you can turn junk into great scenery items and save some money (this hobby can get very expensive).
I save all my little scrapes of wood and wire and plastic to make mounds of garbage that sit along the railroad yards, tracks and in back of buildings. Happy modeling everyone.
Gary”
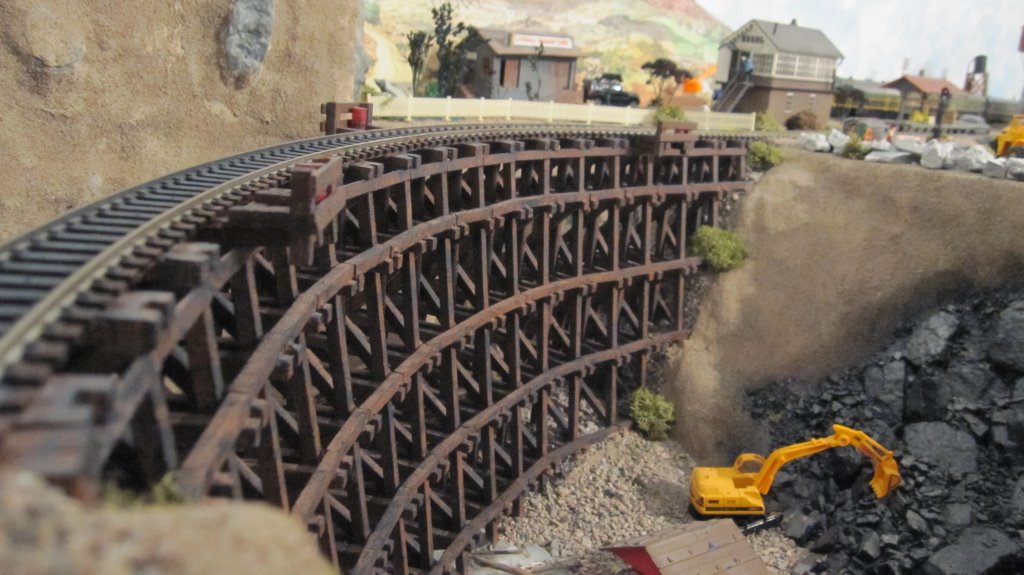
And lastly, more from Hall of Fame member, Dangerous Dave:
That’s all for today folks. Thanks to Jim for sharing his DCC HO trains.
Please do keep ’em coming.
And if today is the day you stop dreaming and start doing, the Beginner’s Guide is here.
Best
Al
PS Latest ebay cheat sheet is here.
PPS More HO scale train layouts here if that’s your thing.


Jim’s layout has everything I would want on my own layout and probably a lot more. Does Jim have large area views of his layout? I like his transition of one area into the next. His use of space is totally awesome. How long did it take to complete his layout to where it is now? Thanks for the pics – you gave me some great ideas for when I finally have time to build.
Jim, upload your videos to u-tube and send the links to Al. If you are not sure on how to do it, Google uploading videos to u-tube. I had to do it the first time and is very easy and it worked. Brian – Knysna, South Africa
Thanks for sharing Jim. Brilliant video as usual Dave!
Outstanding Dave! The lighting is spectacular.
Gorgeous work, particularly loved the trestle!!
I really like the Bridge and hope to be able to do some thing like it for my lay out
upload your videos to You tube would be easiest and you could share them with every one you know
Very nicely detailed.
Unless it is the lens angle, it looks like the tresle is both curved and arched.
is that correct. It looks great from the angle he you took this picture. A very, very,
good looking bridge as well as all your other photographs. I love them.
Again, great job.
Hi Dave, great video as for wiring up lights and finishing touches, I have said it before on your web about wiring up to 12 volt out puts, if you have 3 volt bulbs then you could wire 4 lights together ie bulb 1 to 2 then 3 then 4 then take the two ends one from bulb 1 and other wire from bulb 4 , those two into the 12 volt connection, this worked for me with out the resistor been used. I was doing a bit Soldering last night and this worked for me, myself coming up to 70 had some shakes doing it, notices you haven’t on the video so put down to old age, keep the good work coming look forward to many more. Roy
Thanks once again Dave for another great how to video on installing lights. You show how easy it can be to do what many would think to be a hard task. Good on you Dave.
Pete “The Mackem” in Sunderland
Can’t wait to see the YouTube videos my northern friend…
Fantastic work guys.
Great photos Jim and I hope you can sort your video problem out so I can view your trains running. Excellent video Dave as per usual. Thanks for your workshop. Cheers Rossco Adelaide, South Australia
Congratulations to both Jim and Dave. Would love to see a track plan for Jim’s layout – any chance Jim? Once again it’s a pleasure to see what others are doing and getting tips on how to do things. Regards to both. Douglas – now in Devon!
Great work!
Thanks all for comments re wiring , its basic but shows how easy it is , waiting for some new connectors from Germany which should prove useful and will post a video when they arrive , but if one feed in with about 6 outlets , Roy I know your system works I have used it myself its as you describe using 4 x5v from the 12 v supply its what I think they call wiring in series …Cheers dave
I am currently working on a bridge similar to yours .How did you build the bridge especially the curve. Please provide instructions or the video
thank you
barry lipton
gaithersburg md USA
Beautiful layout Jim. Loved it. Would have been nice to see the round house. Must be massive. Thanks, Jim E.
Wasn’t this layout with trestle that just caught eye wrong because of excessive construction?? Looks pretty good now, lines are smooth, flowing, would leave just as is…
awesome