Eric’s been in touch with a clever but simple way to manage his signal lights for model train switch.
“Hi, Alastair,
Thank you for your daily blog, which is a real service to the model rail community.
I have attached details of a way to change a simple 2 aspect, red/green led signal using contacts on a points motor. As there are only two wires from the led signal this can be a real challenge. I hope this helps others that may have encountered this difficulty.
The Problem: How to use Gaugemaster SEEP points motor PM 1, to switch Gaugemaster SEEP 2 Aspect colour light signals from red to green etc, when ONLY 2 wires are present from the light signal unit and you would normally need 3-4.
You need to change both the positive and negative to each coloured LED and this is normally achieved manually by the supplied manual crossover switch with the light unit.
However to achieve this automatically by using the contacts on the points motor is a challenge.
The Solution: Shown below is a low tech proposal using 2, 9 v batteries. The red and green LED are in effect using one battery each to provide the required polarity change when the points change.
The thicker line shows the current path at each change over.
Signal lights for model train switch:
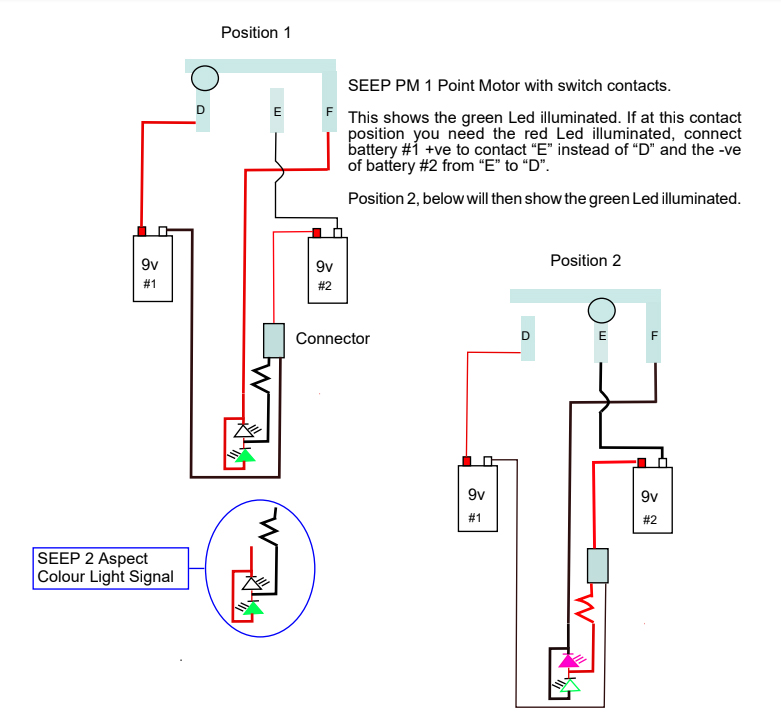
Image is clickable
Eric”
Now on to Fred:
“Al –
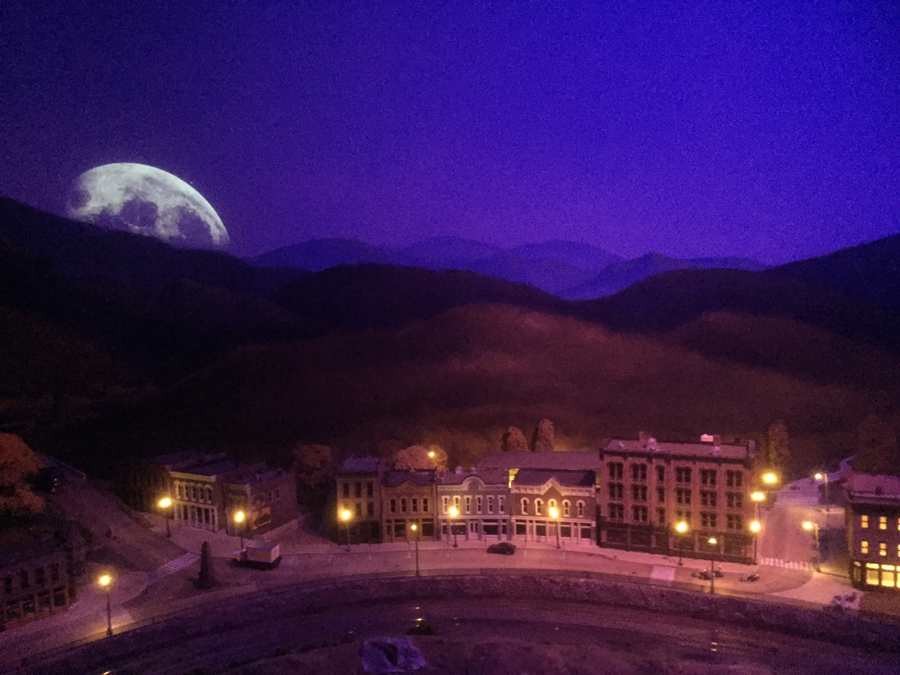
I didn’t tell you, but I’ve been working on my lighting.
Theater gels on fluorescent tubes in the diorama soffit, dimmers on the incandescent spots, and a small planetarium for my celestial effects!
Obviously the moon isn’t exactly to scale, but I can make it appear to rise from behind the mountains, and I’m working on the optics to make it smaller.
A little “over-the-top,” but sort of a cool effect, don’t you think?
Fred”
Joe’s been in touch with his progress (his last post is here).
“Hi Al; Thanks for putting up the pics.
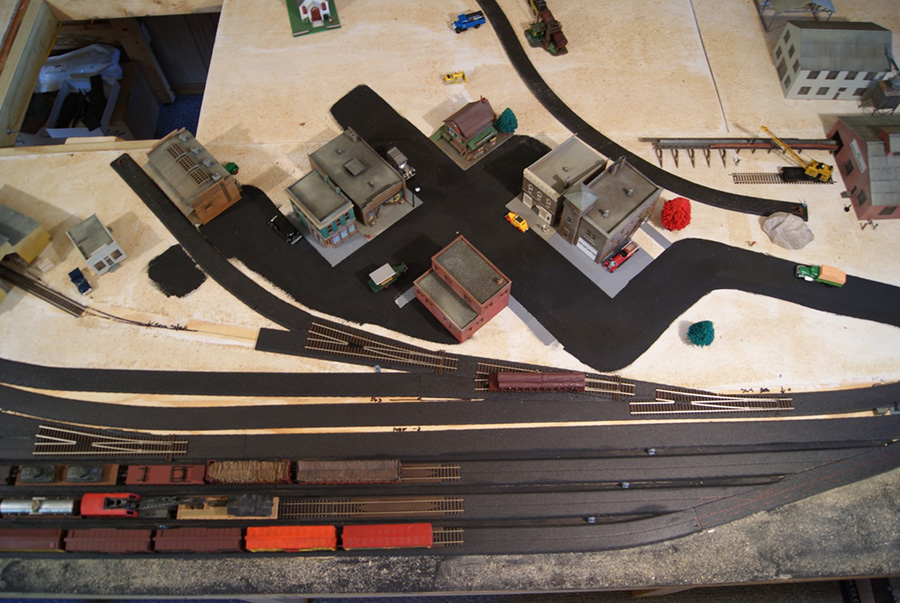
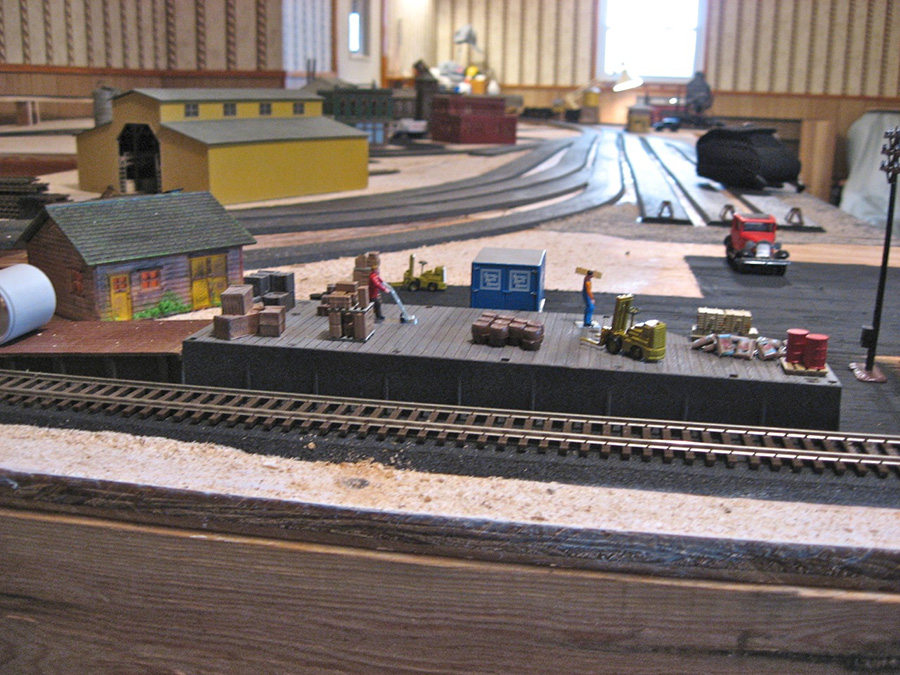
Here are some more “construction” pics.
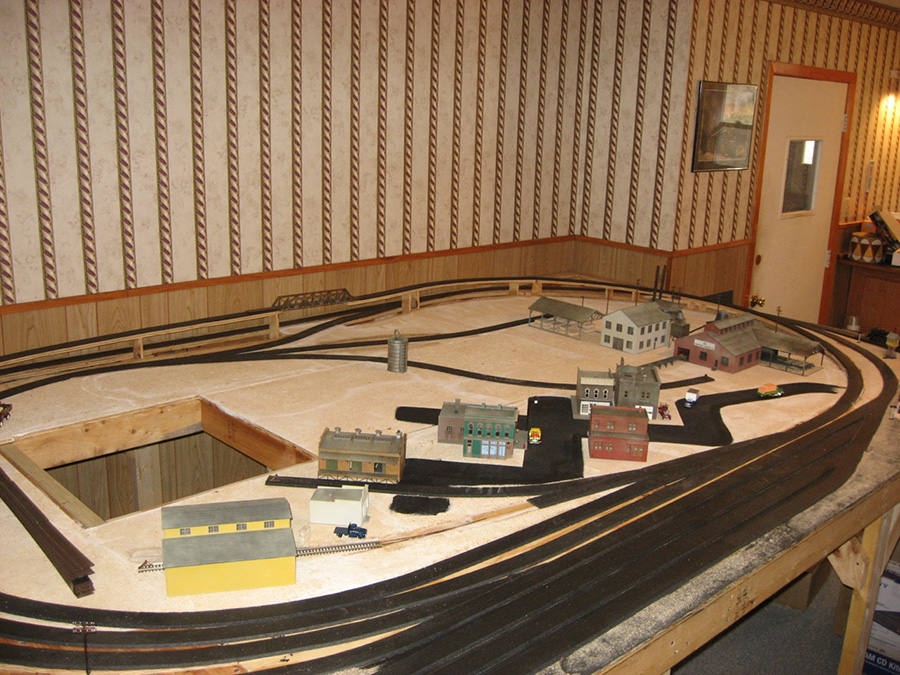
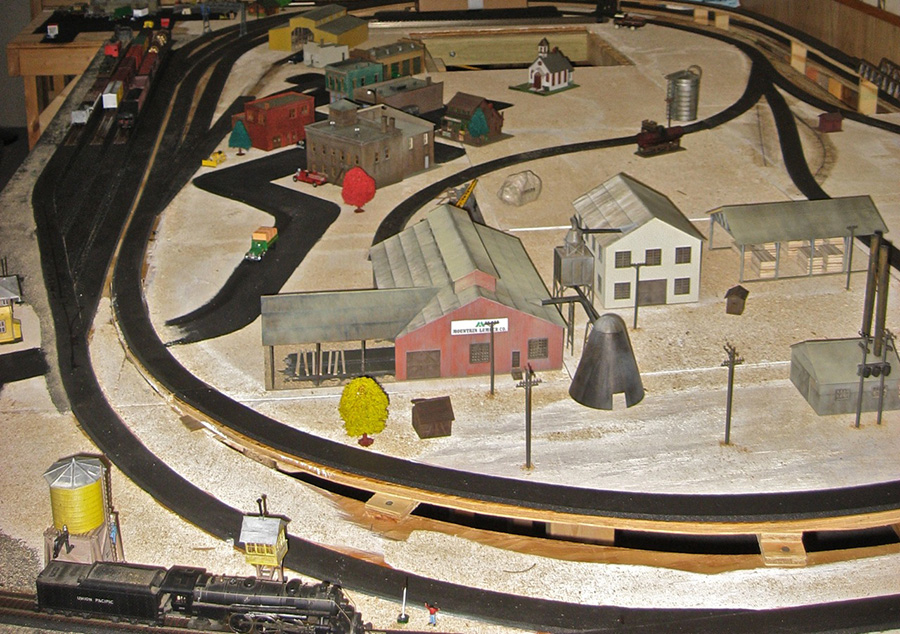
The layout is a ‘free lanced’ 1940 – 1950 steam era set roughly in the “town” of San Juan Creek in N.W. New Mexico.
The main industries are coal mining and lumber.
I can’t tell if I already sent these. IF they are duplicate, please discard.
Laying roadbed. Elevation for inner main line completed. 2.75% grade.
Joe”
That’s all for today folks – a big thanks to Fred and Eric for sharing his signal lights for model train switch wiring diagram.
Please do keep ’em coming. If there’s anything you want to share just hit reply to any of my mails.
(You can send as many pics as you like, but please don’t send more than 3 pics per mail – send as many mails as you like…)
And if you’re enjoying the posts, don’t forget there are hundreds and hundreds more with the Beginner’s Guide.
Best
Al
PS Latest ebay cheat sheet is here.


Thanks for that lighting tip.
Hi
If the power supply is AC (alternating current) you could achieve this with two diodes controlling current flow direction depending on switch position. You would most likely need a resistor in the 1K to 2K range as well.
Fred: cool effect? More like frightening effect! ;-D
Wow!!! That’s really good. I’m impressed. Yet again!
Couldn’t you do this with a DPDT relay and one power source?
An old trick with the ‘night sky’. Paint in the moon and stars with paint that ‘glows’. As you dim the ‘daylight’, they will begin to appear and glow for a time. when the lights come back on (sunrise), they will fade.
I do not know how long they will glow.
There are all kinds of paint that glows on google.
Good luck!
Really Kool! love the effect.
Thank you Al . and every one that shares the great info on solutions to problems on lights and power problems and track arrangement stuff too
Be well and stay safe all !
George
Wow what a brilliant two tips I’m in awe….
Nice night time effects. That looks like a winner.
Jim AZ
Hi, Fred, can you do a video of the moon rising on your layout? I’d love to see that!
A good trick for taking night time photos, which I discovered by accident. It is best done after dark or with minimal light.
1. Set up your camera on a tripod so that it aligns with the part of the layout you want to photograph.
2. Set the exposure to a good duration (I used my camera’s longest: 8 secs) and manually focus it. (If you can do it, also close the aperture right down, e.g. f22.)
3. Turn off the room lights so that it is as dark as possible and start the exposure.
4. At some point during the exposure, fire off a flashgun, bouncing the light off the ceiling.
5. You will probably need to adjust things to get the best effect.
Fred,
If anyone mentions the size of your moon, tell them it is a “Harvest Moon”…
Problem solved…
Harvest Moons can look gigantic!
great tips and photos thanks for sharing.
Lovely work Fred, I’m very impressed. Very cute Eric, neat solution, but as an old signalman I have to say just because a point has been set one way or t’other doesn’t mean you want to clear a signal, I’d sooner have a separate switch, but I can see benefits from knowing the point has thrown fully.
Rod
Awesome work Fred. And thanks Eric, I’ll try it out.
A Rotary switch would have done the lot – lights – colouration and points all at the same time.
Really cool night lighting effects Fred. Where do you get the theater gels?
Interesting solution Eric. However, a prototype railroad would probably have two three-light (red, yellow and green) signal heads for a single passing siding. One signal head would indicate the occupancy status of the mainline and the other would be for the siding. A similar setup would be located at the opposite end of the passing siding if the mainline is bi-directional.
Nice update photos Joe. I like your broad curves and all the structures you’ve added. I live in south central New Mexico and haven’t spent much time in the northeast part of the state. Is there really a town named San Juan Creek? Anyway, I like the concept of the lumber and coal mining industries. You could probably also add some oil and gas industry too if you wanted.
Thanks to all of you for sharing your ideas and thank you Al for posting them.
Wonderful work bye ALL.