Ken has been in touch with this excellent model train table height tip.
We all know if your table is too low, back pain will soon follow.
Too high and it’s hard to reach things, and of course, the grandkids can’t see it.
And what about when it wobbles, or you just can’t get it level? Ken has the answer:
“Hi Al,
I’ve been reading and enjoying your email updates from around the world for a few years now, and have a little something others might benefit from.
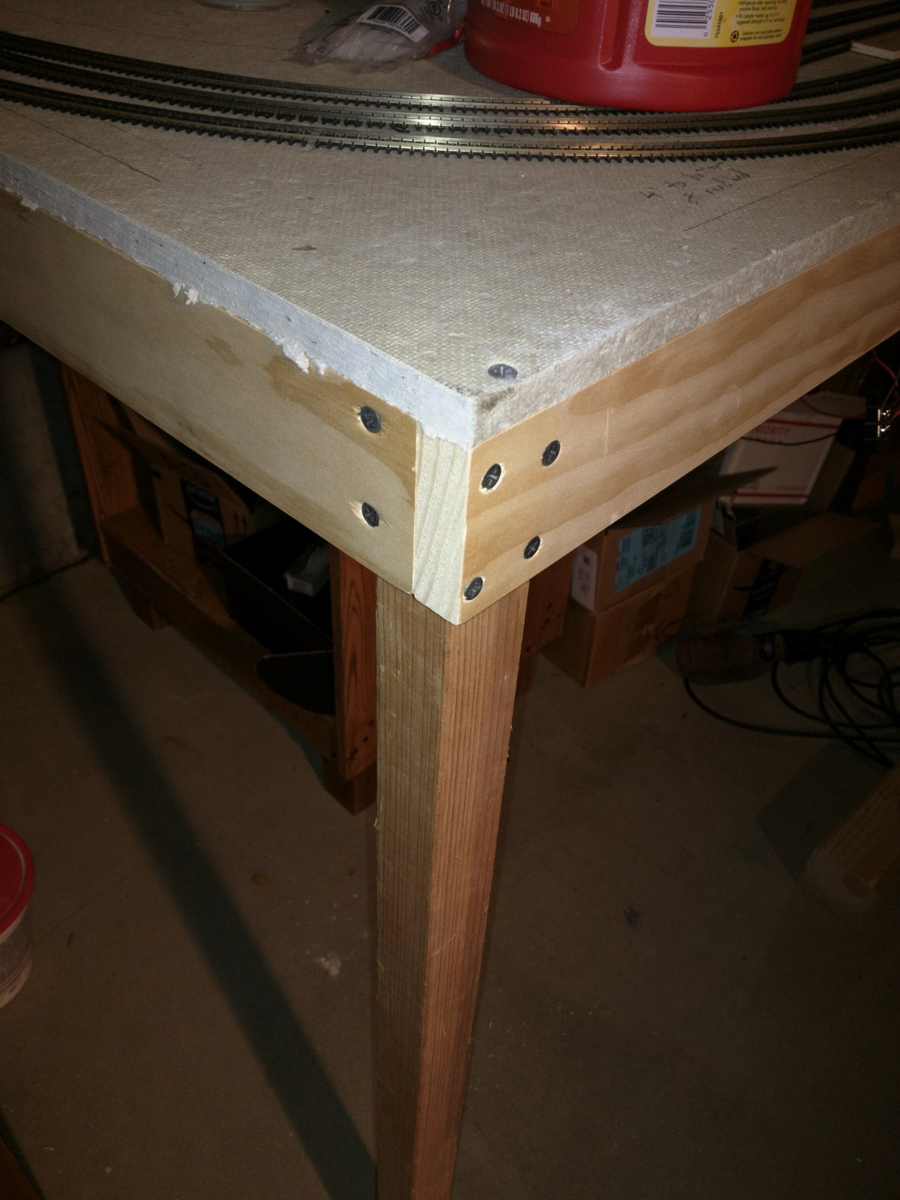
For those of you who have uneven floors where you are building your layouts, or who transport modules to shows and such, I have developed a simple method of adjustable legs.
The key components are threaded inserts and carriage bolts.
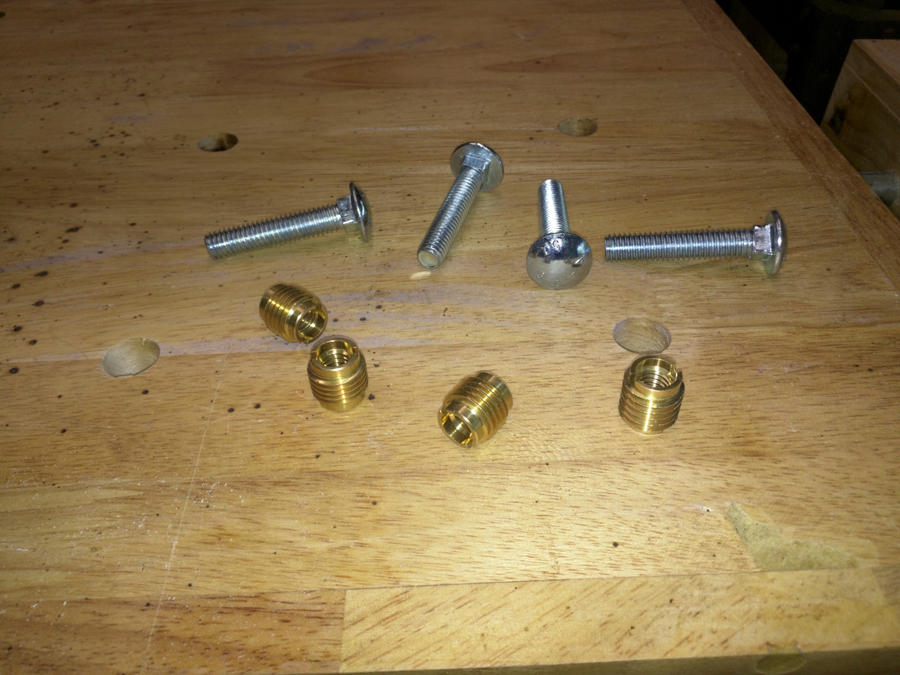
The actual size and length will be determined by your situation, but I used 3/8″ bolts and 1/2″ inserts. The inserts are threaded for the size of the bolts.
I purchased mine at a local Ace Hardware store, but I am sure you can find them at more locations.
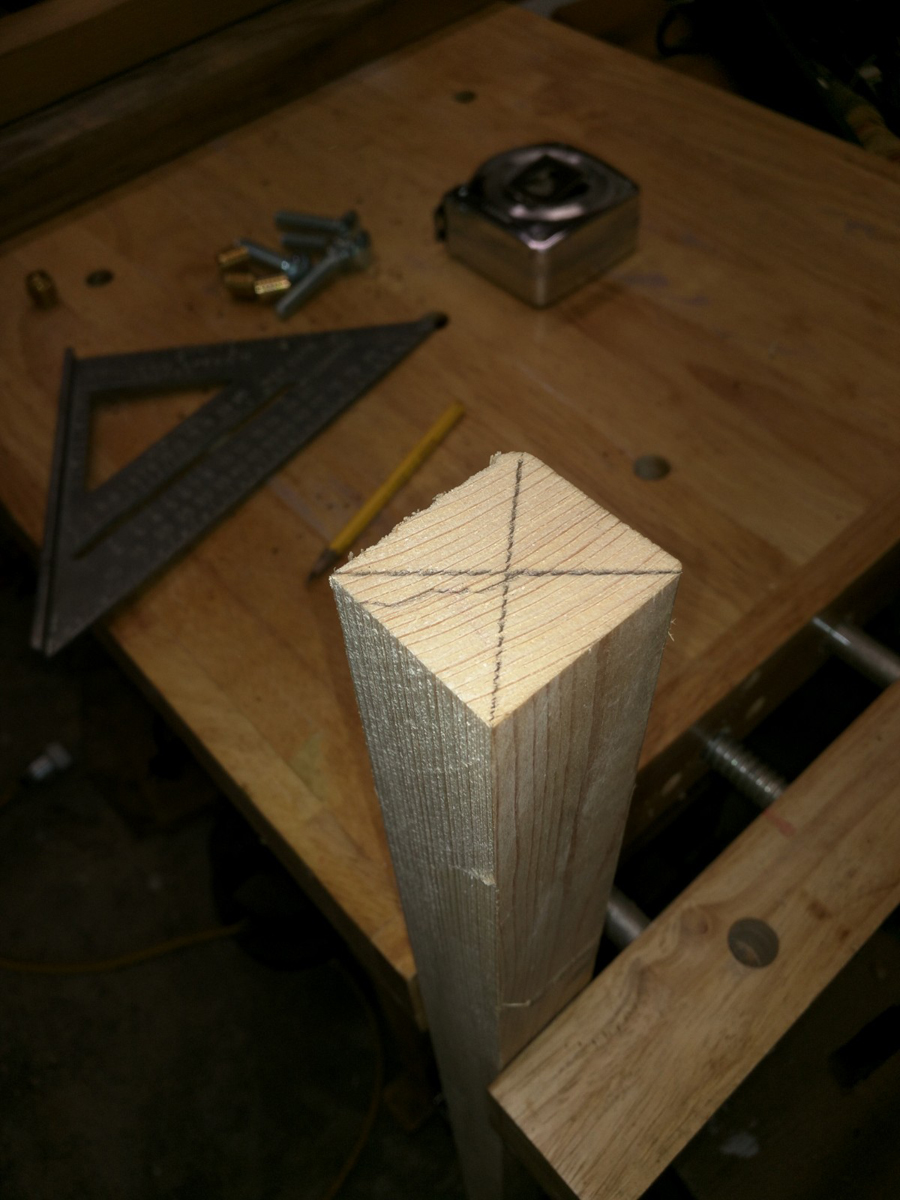
First you mark the ends of you legs to get center:
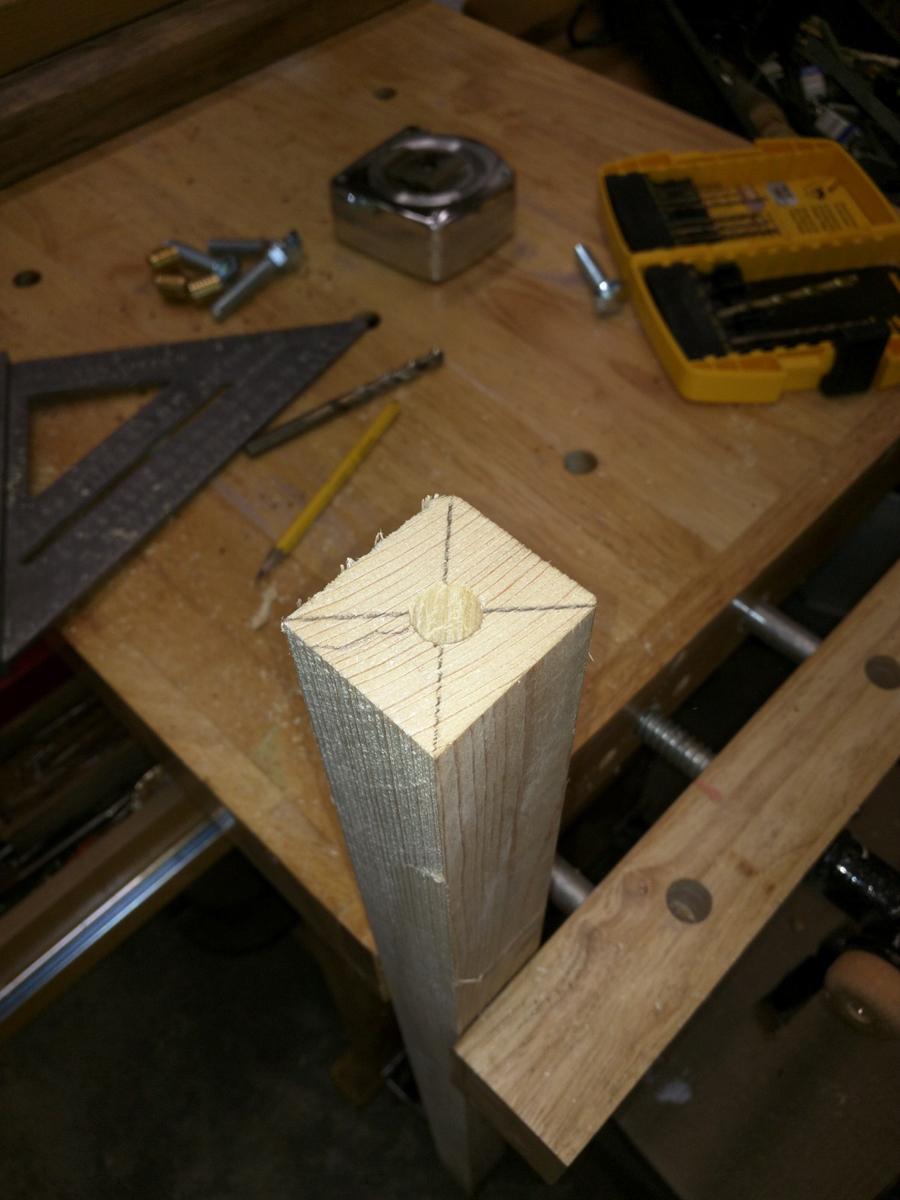
Next drill a hole the diameter of the insert, and long enough to allow the bolt to screw into the insert as far as possible.
Thread the insert into the hole, and thread the bolt into the insert.
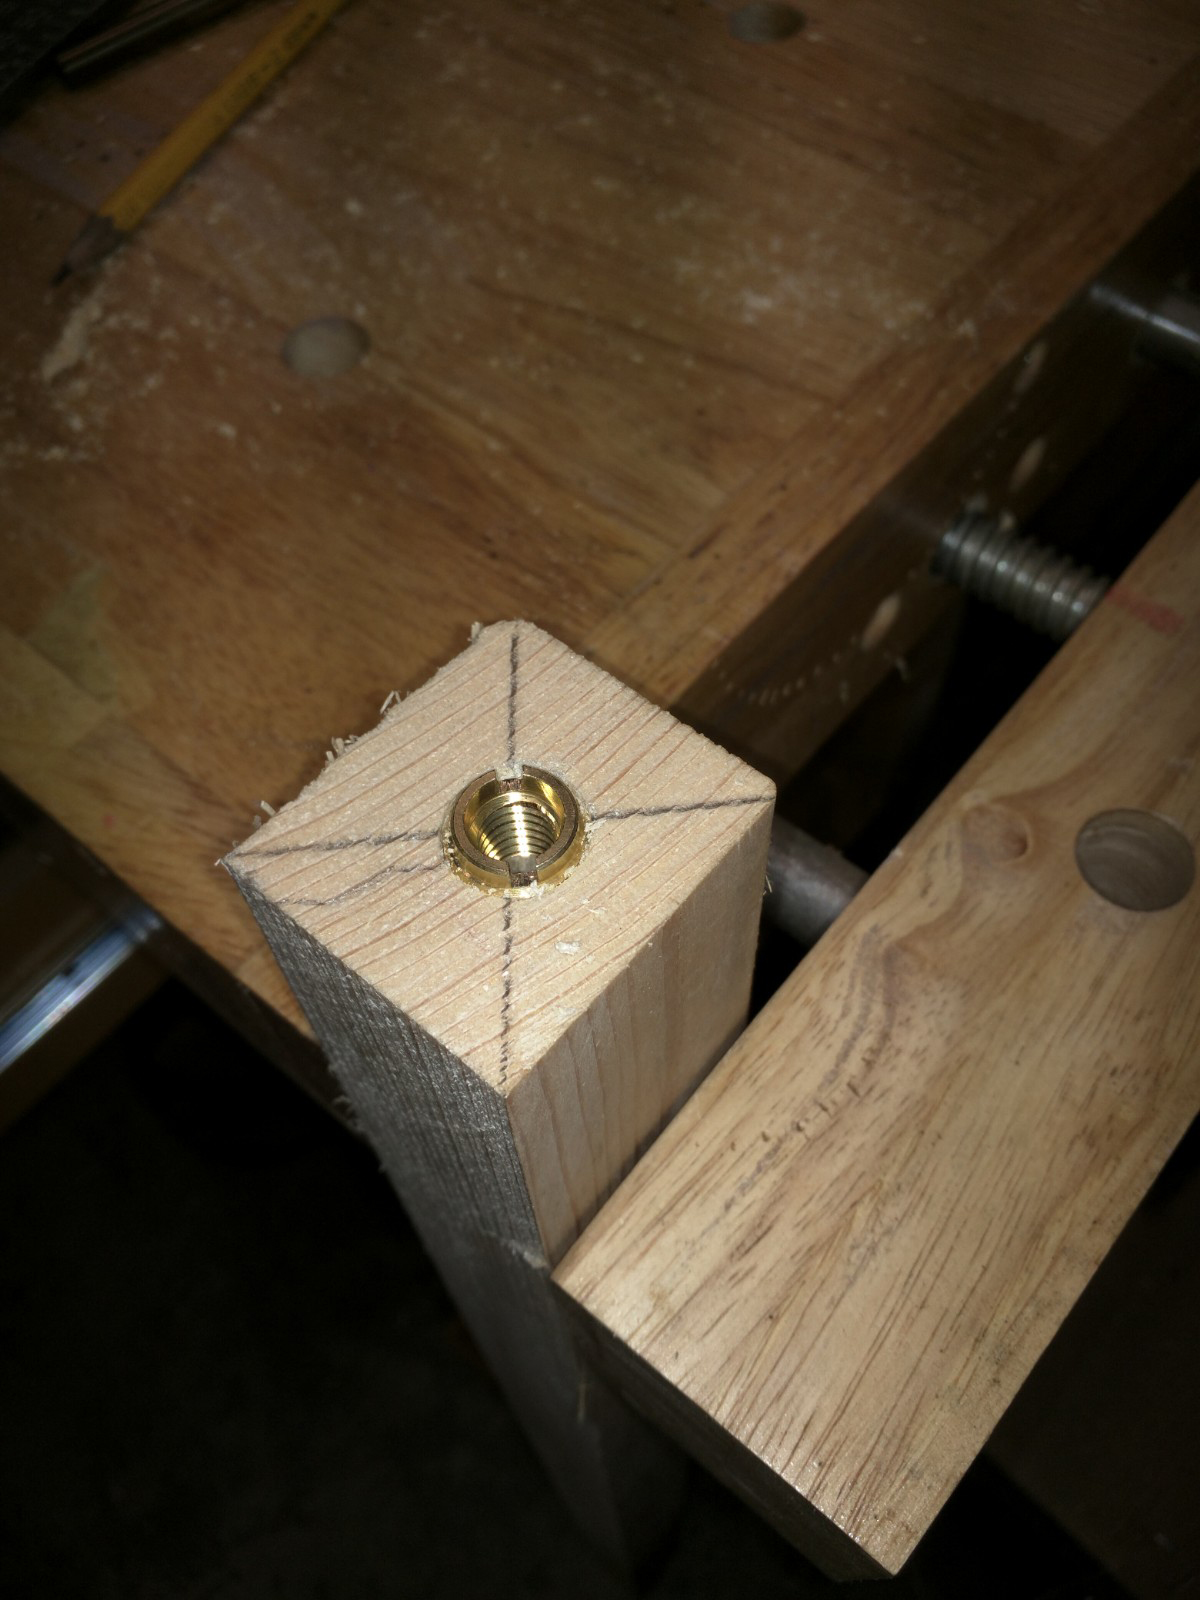
Since you are threading the insert into end grain, you may have some trouble getting it to thread in straight. I wound up putting the bolt into the insert and using a wrench to turn the whole assembly while putting pressure on the bolt to get the threads started.
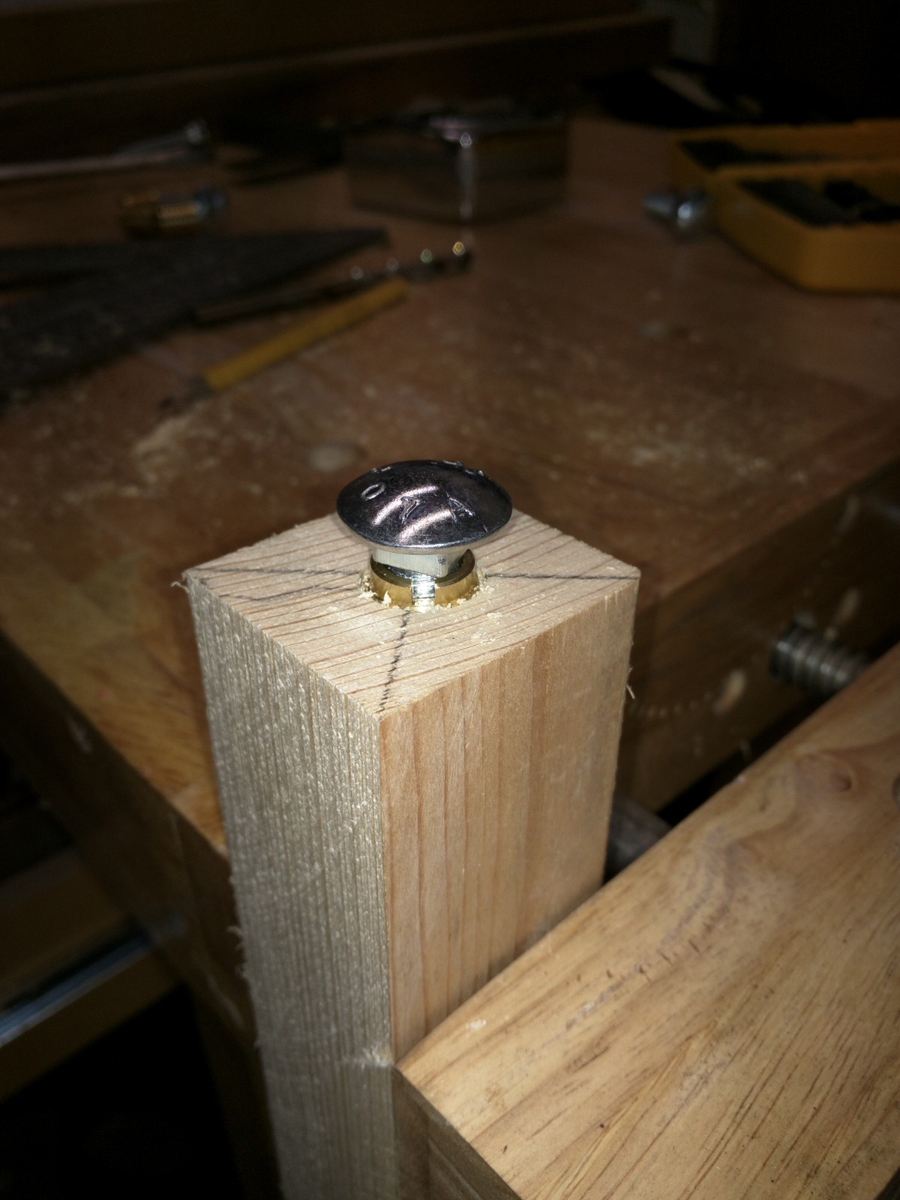
Once you mount the leg to the layout, you can use a wrench to turn the bolt in or out to adjust the height.
If you are worried that the bolt might move, you can add a nut on the bolt between the head of the bolt and the insert. When your height is where you want it, just tighten the nut against the insert.
I hope this helps someone out there.
I’ll be posting more as my railroad progresses.
Ken”
“Hi Alastair,
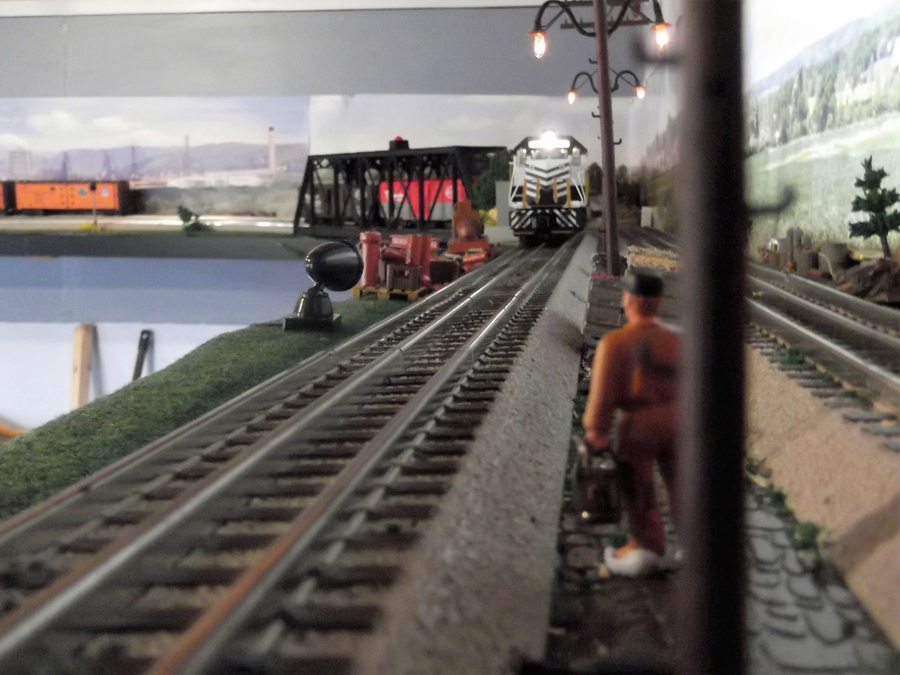
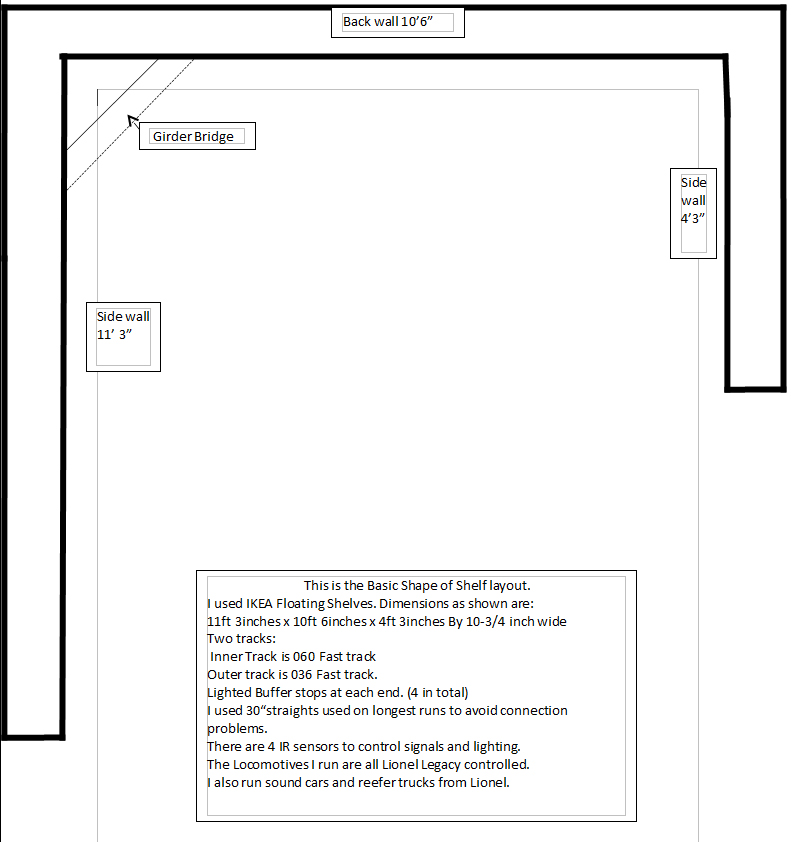
As promised some photos and a rough sketch of my shelving layout in my Summer house.
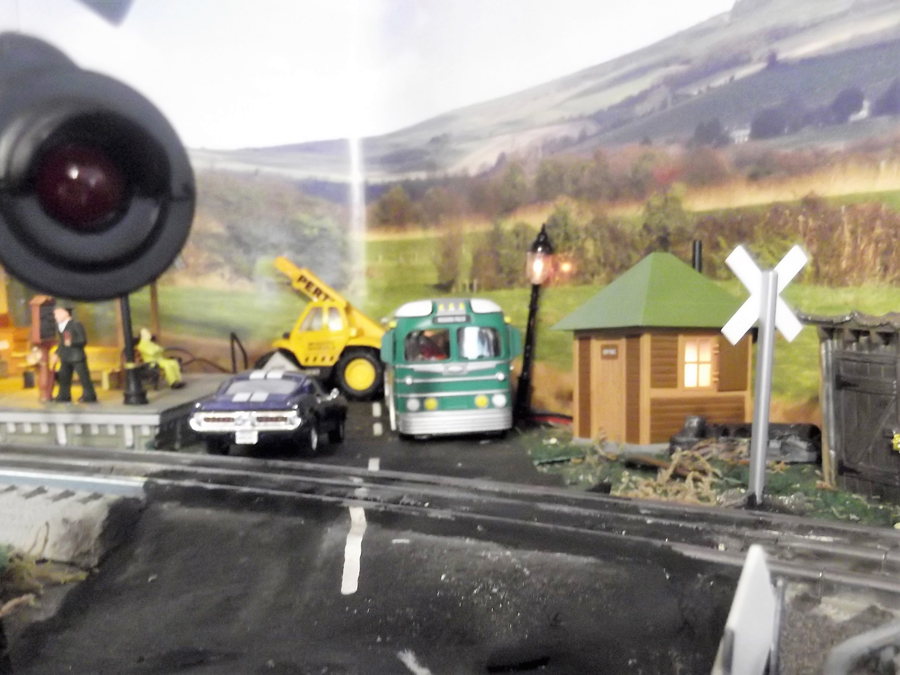
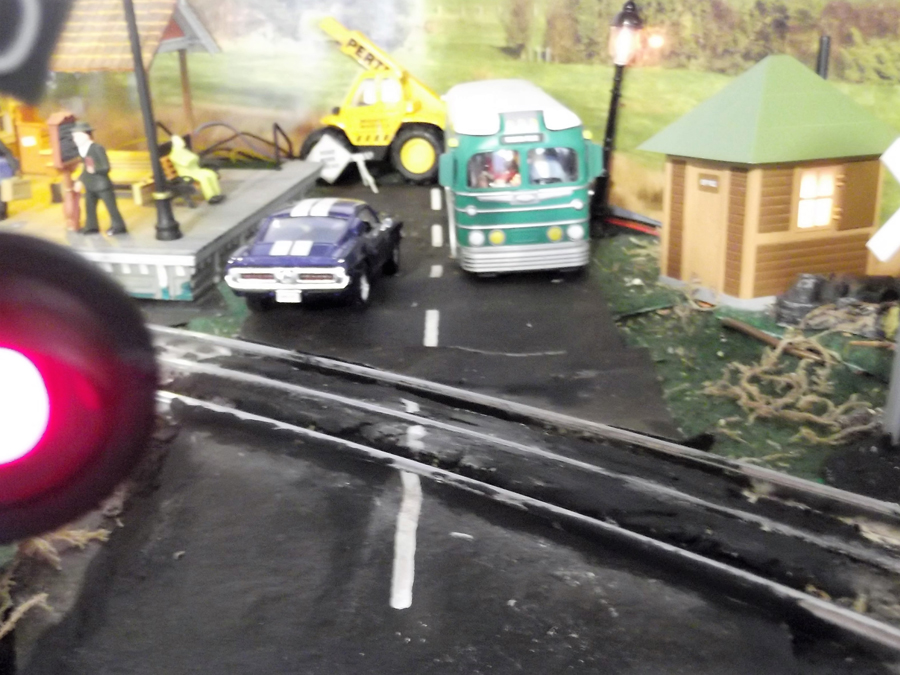
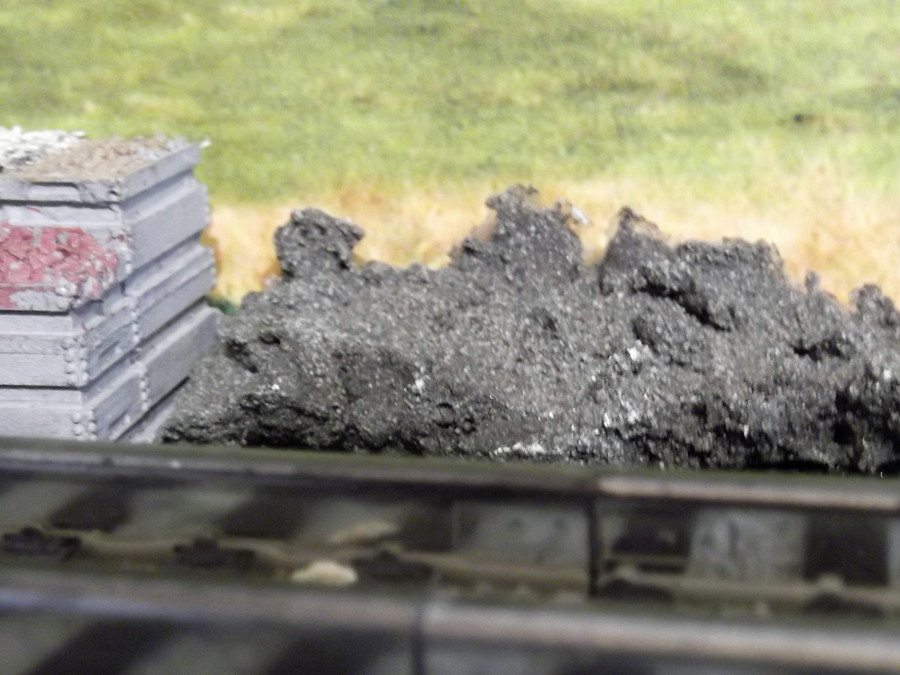
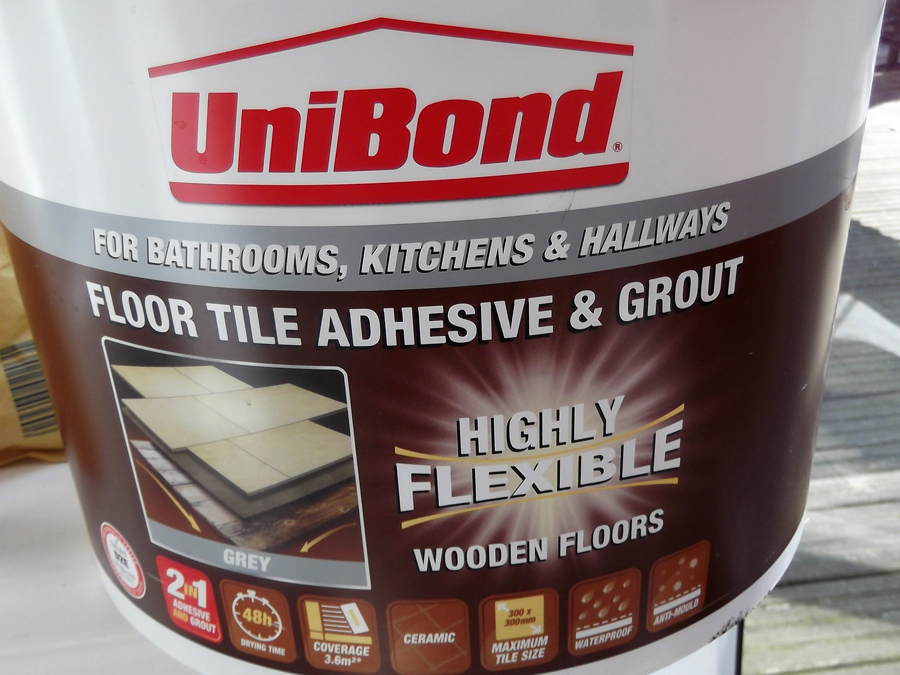
The Tile adhesive/grout was great for making rocks and road works, I used it to make the train crossing by spreading it across the rails and waited until semi dry to smooth it out and finishing off with black paint and white centre marking. The hardest part was cleaning the bits between the track close to the rail edge. but the trusty dremmel and a steady hand sorted it out.
Keep up the good work.
Ernie”

“Greetings from France
I have just finished my layout if you are interested.
Incline, decline, bridges and extra running track now installed giving 115 metres (5.5 miles at OO gauge scale) of running track with 6 crossings, 3 sets of points between lines and 27 sidings. All within a footprint of 4.5 x 4 metres.
Best Regards
Bernard”
Latest ebay cheat sheet is here.
That’s all for today, folks.
A big thanks to Bernard, Ernie and to Ken for sharing his excellent model train table height ‘how to’.
Please do keep ’em coming. And don’t forget the Beginner’s Guide is here, if you want to get going on your own masterpiece.
Best
Al
PS More HO scale train layouts here if that’s your thing.


Well done Bernard with the incline …And Ernie haas done a nice job there ..and Ken that baseboard and adjustable legs should prove to be useful with uneven floors ..Dangerous Dave
Thanks for the tour Bernard. I enjoyed the trip. Greetings from Nova Scotia Canada.
Ken great tip on the leg adjusters
Bernard i loved the trip thru your layout. I would love to see the track plan…all the interweaving was marvelous. I want to do something like that with mine. I liked the walls you built around the layout. Good idea kind of closes it in
Clever idea for the extensions! The leveling ideas are very useful and an inexpensive fix. All great solutions.
Kathe, Florida
It’s always good to get ideas from good experience, keep us informed.
Thanks Jim Gill
The 3-rail layout photos shown; is that an “O” gauge layout like USA tinplate or (ugh!) Lionel?
Skip
An unrepentant Marxist.
(but not Karl; -Louis!)
Loved the camera mounted on front of engine or car in video.
Ken,
Our club uses the ‘T nut’ rather than the threaded insert. They’re much easier yo install and go in straight every time…
Not bad, not bad at all for someone in the other part of the woods. Good job.
waay koool stuff from all three of you guys
keep em runnin fellas
stjohn in long beach calif
On our club layout we just drilled a 5\16 hole in the 2×2 leg and ran a 3\8 tap in it and then just screwed in a 3\8 carriage bolt. You really don’t need the metal insert. This modular layout has been in constant use for well over 15 years. We used carriage bolts as they have a smooth round head that is easy on the floors in the buildings we set up in.
Bernard, I don’t think you needed such gentle grades as that, most modern sorts of loco has enough weight in it, or traction tyres on, to cope with quite realistic trains of free running stock on 1 in 30 or even a tad steeper. It feels weird seeing all that “weight” of track and brickwork suspended in fresh air on those spindly columns, are you planning brick arch sides perhaps? If you have one loco that occasionally derails on crossings where others run normally, the most common cause is the wheels are tight to gauge, the distance between the backs of the wheels for OO should be 14.5mm, we have found a few rogue wheelsets on brand new stuff down to 13.2! It isn’t too hard to ease out trailing wheels to gauge – I find twisting one wheel round the axle while easing gently out often does it, for tough ones I hold the axle firmly with pliers and use a tack lifter against the wheel back and the pliers, squeezing gently together, this keeps the force evenly distributed each side of the axle to avoid crushing or distorting the hole or bush in the wheel – but for driving wheels, particularly those with gears mounted on the wheel backs, I’d go back to a dealer as less trouble than the alternatives!
Oh, the signal box, they’re almost always sited with the long run of Windows parallel to the running lines, so the signalman has maximum chance to see the tail lamp to confirm each train has passed complete.
Rod
You a’ll make me look dumb
Bernard
absolutely brilliant for a hopefull such as myself to see,I believe this type of information should be a requirement for all those starting up,so much to learn but in time it can be don
Ian
WOW what a great ride that was love your layout I have a 4ft strip to program my DCC if I want to run my trains I have to go to our club layout at Butterly
thanks for sharing this
all the best Paul
T-nuts of course would be better, I have used them in the past. However, when I went looking they didn’t seem to be available.
Looking today, it seems like everyone has them!
Thanks for the push to look harder!
Bernard, great idea on using the threaded rods for adjusting the height of your inclines. I had not thought about that before. I enjoyed your video and explanations.
Thanks for sharing.
Bernard, that was one of the best videos for both content and how to that I’ve seen on Al’s site and I’ve been a follower for several years!! You’ve given me great insight on how to plan and build my American Flyer layout! Thanks again
Steve
Oklahoma, USA
I found Bernard’s video interesting. A very nice layout and use of space. Your elevated section looks well-built and solid. Many people are unrealistic about inclines, I see you have mastered that lesson.
Rob McCrain – Farland Howe
Bernard thanks, great video and layout. Your sure add some tracks to your layout.
Thanks Al again for the site.
Ken,
I have used the threaded inserts in furniture projects. Like the one you showed, mine have a flange at the top. You cannot get them flush unless you first bore a shallow hole to accommodate the threaded insert. To get the best straight bore, I use Forstner bits in a drill press when possible. It rarely is.I have resorted to hand cutting a ring around the insert hole with a razor knife to accomplish my task. I can keep the flange cut shallow.
Another issue with these inserts is that don’t do well in soft coniferous woods like pine and cedar. They will rapidly widen the hole due to any moving of the bench/ table. Poplar is better an oak is best. But that’s an expensive table leg. One last thing: I found inserts with an Allen wrench to make installation easier.
Great common sense solution to keeping your layout level, and I love doing POV videos on my layout, shows the many places I still need to work on.
Good stuff today!