“Al:
I have already used Martin’s PDF to make a railway tunnel.
Here is the result of my effort, just finished yesterday.
Regards,
David”
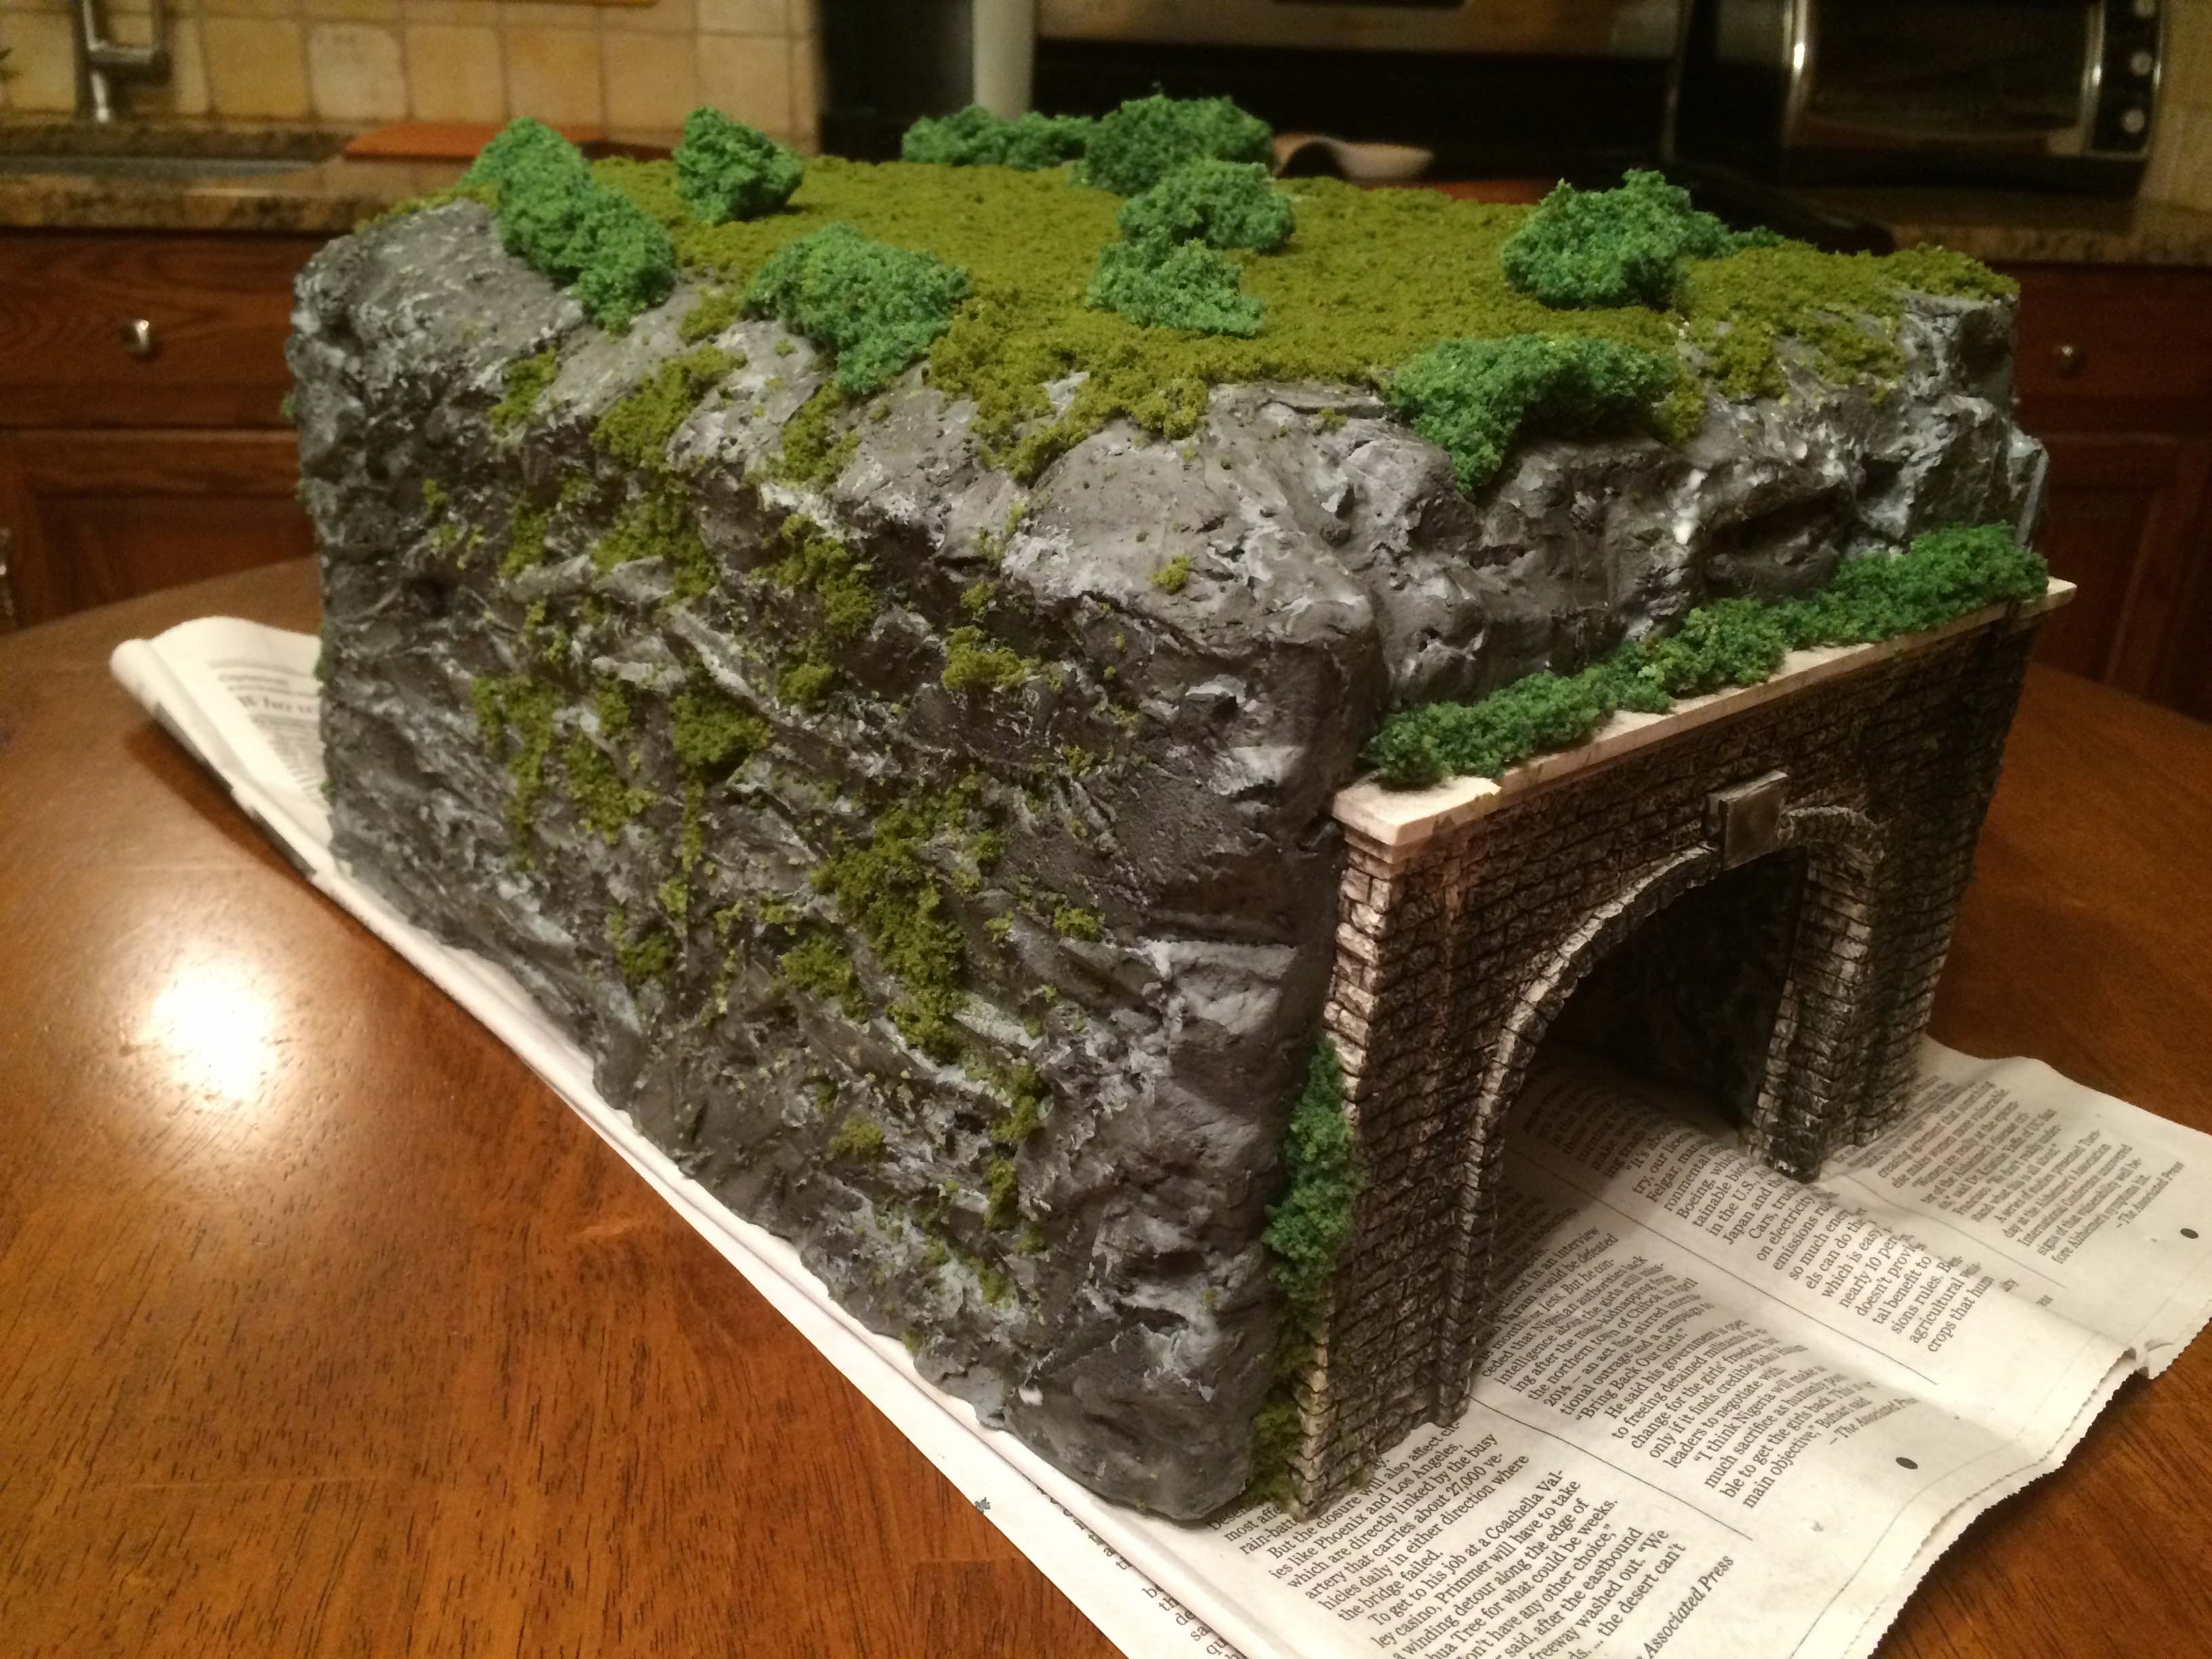
(Martin’s tunnel ‘how to’ is here).
And lastly, who remember’s Eric’s layout?
Eric has been kind enough to send in this follow up:
“Hello Al
I thought after the amazing reactions that came from showing my layout that some might like to see a bit of the construction side as I rebuilt the layout, it might hopefully help some find a way round obstacles.
Picture 1 The helix
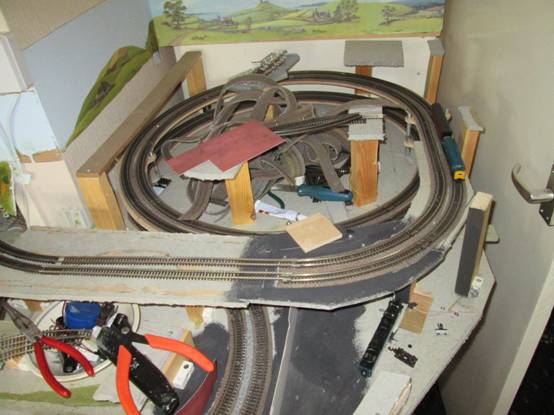
I had to expand the side shelf as I needed 29 inches for the helix to fit it in as it uses third and fourth radius Peco track, the Sundeala board shaped to take over from the helix swings the track 90 degrees to go over the much lower track the helix itself has had a seven passenger coach Deltic climb it with ease and even the lower sharper curves don’t cause any problems. The helix was purchased from modelrailwaysolutions.co.uk and they do them for OO or N gauge.
Picture 2.
This shows the overall track layout round the solid wall I have to contend with but it does give you plenty of time to adjust things before you run engines on it but I always try get at least one bit of track wired to test it first. The underlay I got from Gaugemaster for the exposed parts is ready gravelled so all you need is the same colour ballast to fill in the gaps between tracks.
Picture 3.
This shows the top board over the helix, note all the markings and the buildings so again you can figure out the best ways of designing it, the building site is fixed as I have side and top access here. I usually mark where the building will stand and then I can work without the buildings in the way. ( Note the helix below).
Picture 4
This is as the top board takes shape, on the farm itself, note the planned lines don’t always help and have to be adjusted to suit. In this pic the farm takes shape.
Picture 5
Shows the join between the scenery and the top board and how I used a hillock to hide the joins. You can’t hide them all but you can hide a lot

Thanks to everyone who has contributed. If you’ve got a any pics or tips you’d like to share, just email them in to me (just hit reply to any of my mails).
And if today’s missive has got you itching to make a start, side step all the usual mistakes with this guide.
That’s all this time folks. Please do keep ’em coming.
Latest ebay cheat sheet is here.
Best
Al


Very well detailed building well impressed
Thanks for your help darryl
Kim has inspired me to update my poles. Would like to see a ‘how to’ on them. Thanks – Brian
great stuff guys
and keep em runnin’ fellas
I like the smoke bush idea, I was only looking at these the other day at National Trust stately home. Didn’t cross my mind, it has now.
I also like the tunnel and helix. A good space saver
Alan
Electric poles add a lot of realism. Wiring between them even in HO scale is a challenge. First you need to stay to the side of the tracks where you can still reach in for a derailment or to clean the tracks. Adding wires makes you vulnerable to boo boos. I wait until it is mostly sceniced before I add the poles.
Ed C
Yes please Kim, would love a “how to”. The smoke bush trees are great, but I don’t think I’ve ever seen one. I’ll be looking from now on though. Thanks to all, great work.
I like the helix.
My only quibble about Eric’s layout is the bends in the road, which look a bit too rhomboidal:- angled instead of curved. Have you glued that down yet?
Everything else looks tremendous – I love the ploughed field.
BR ‘Blue’ era in OO?
Hi Brian. I will send in a how to make them.
plastic insulator’s. Suppose you could share the how and what to use to make these and please send me the how to. I think they look absolutely great. What did you use for the ”electrical” box on the poles as well.
Also could you share Please ? the making of the transformers [electrical ] units in the 1st image.
How I made my transformer’s. Would you believe they are old electrical relay switches.I took the parts out of them and saved the plastic shell.Then I used thin stiff plastic to make the heat fin’s.I use a lot of instant glue in my build’s as it doesn’t leave a film or lump. Instant glue the fin’s. Then paint the whole lot with I used crafter’s paint acrylic. Just add a few drops of water to the paint to thin it out and paint a few times. Once I finish my towers for the station. It will deliver a low voltage to the poles from the station.12 volts will do with a transformer regulated supply under the table to feed the station.Most poles have a ground wire that leads down to the ground. That will be my negative.The positive will be the main wire going from pole to pole.All grounds will lead back to the station to complete the connection.For the positive wire that will go from pole to pole will be jewellery thin wire so it wont be heavy for the poles and easy to attach from pole to pole. The reason you see in the transformer pic fork like pieces on the insulators as it will be holding a main bus wire that will have power going through them that I will tie into.
The electrical box on the pole is old capacitors from a scrap radio.I snipped off the capacitor leaving as much positive and negative lead’s on it.Then when ready to mount my insulators I snipped them down.When you snip the pin will be pointy so file it flat so the insulator will instant glue not on a point. just leave anough post to stick out.In case you wonder on the first pic you see a canister attached to a transformer. That is filled with pcp fluid to supply the transformer not all of them have it.
Love seeing the improvised materials and creativity going into these great scenery effects. Kim, the transformers are outstanding. thanks to all for sharing. Cary in KY
Great stuff,ya’ll are amazing!!
To Builder Kim:
Excellent Results on the telephone – power poles. What Scale are They? Did you use old resistors for the Insulators the Wires are connected to? What type relays did you use for the step down transformers? Did you also mount Street Lights on the poles and if so, did you wire them so they work? From Mike in N.H. U.S.A.
Eric,
It is amazing what a few rocks and a bit of shrubbery will hide.
In one case I used a sidewalk to hide a baseboard join.
All the best,
John
Started using flowers from my SmokeTree last year. Glad to see someone else doing this. A large handful compressed and spray painted makes a great tree
Pretty Kool.!!! Mine is going to look something like that too.
very nice i think i may use some of these.