Nigel has been back in touch with his multi level N scale:
“Hi Al
About a year ago I sent you some details on a layout I was starting to build in a shed at the side of my house in the North West of England (30 minutes from Manchester).
Having not sent any updates I thought it was about time to give you and your growing number of followers some news on where I am up to..
You may recall that my plan was to create a layout based on the Alpine area of Europe with mountains and plenty of tunnels having been influenced by a stunning model of the Gotthard Pass over 45 years ago on Hastings Pier.
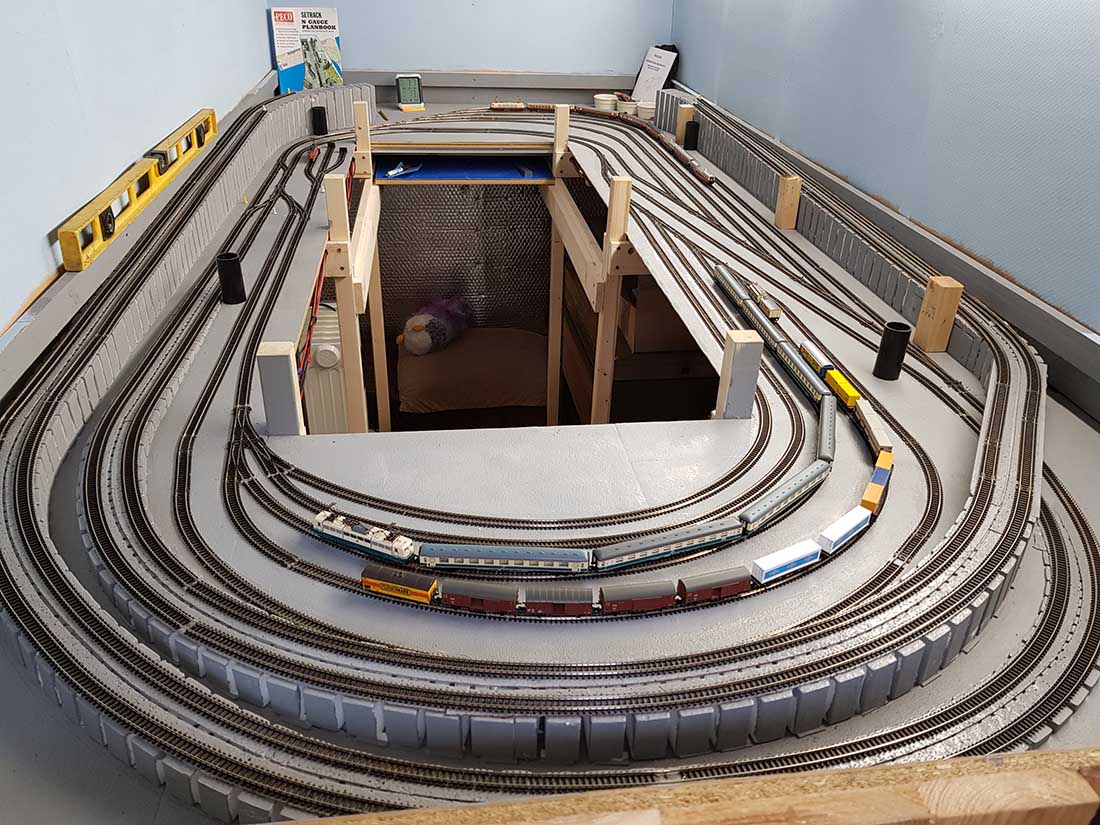
The layout which is DC powered has a lower deck to store up to ten ready made trains in open ended sidings with two of the four main lines running on the lower deck which bring the trains up to the main deck courtesy of 2 Woodland Scenics 3% riser kits.
The other two main lines will run on the main deck giving me a total of four lines running around the 10 foot by just under 5 foot layout with each track making several loops of the layout with the use of gradients, tunnels and bridges.
Progress has been slow for many reasons, the main being the fact I am still working full time and also like Dangerous Dave have a pond that needs looking after now and again and there is always the attention you have to give to the lady of the house of course whose interest in Model Trains happens to be absolute ZERO !!!
Then there are the issues you come across in this wonderful hobby we do that on occasions drive you completely NUTS !!! delaying your progress and yes I have had a few of those..
Several of your followers noticed from my first post that I had no ventilation in the shed and noted that it could potentially cause me some issues in the future, so I took the advice on board and put vents at both ends of the shed.
The installation of these did not however go without incident as the vibration of my trusted jigsaw cutting through the side of my shed resulted in some weights ( used to weigh down track when laying it ) falling onto the lower deck onto a loco and a couple of coaches causing irreparable damage. Needless to say the weights are now stored elsewhere where they cannot cause any damage.
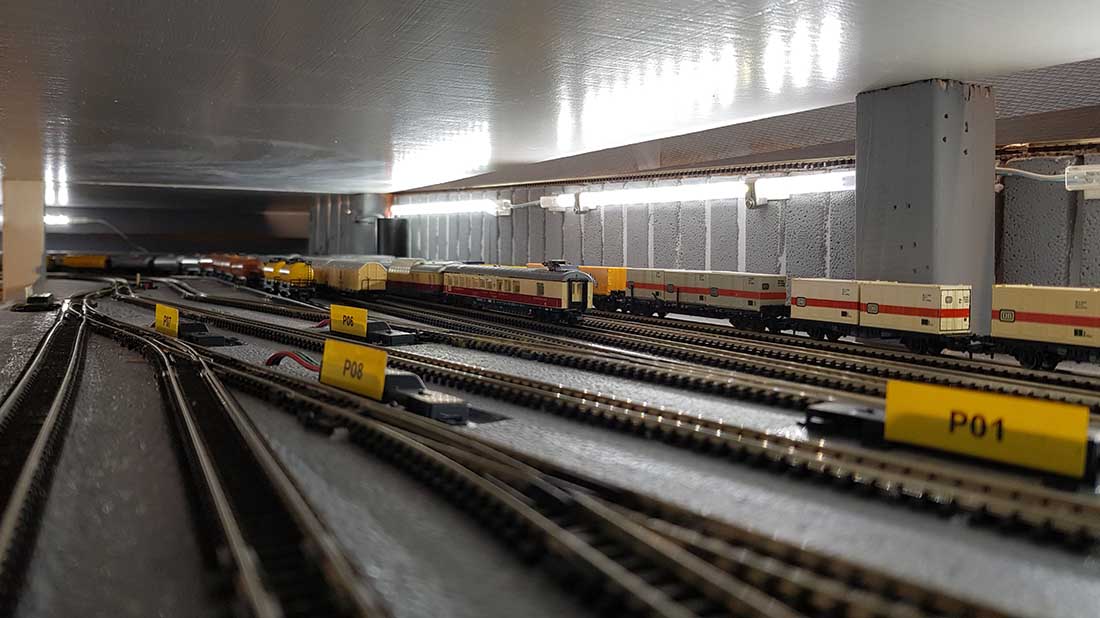
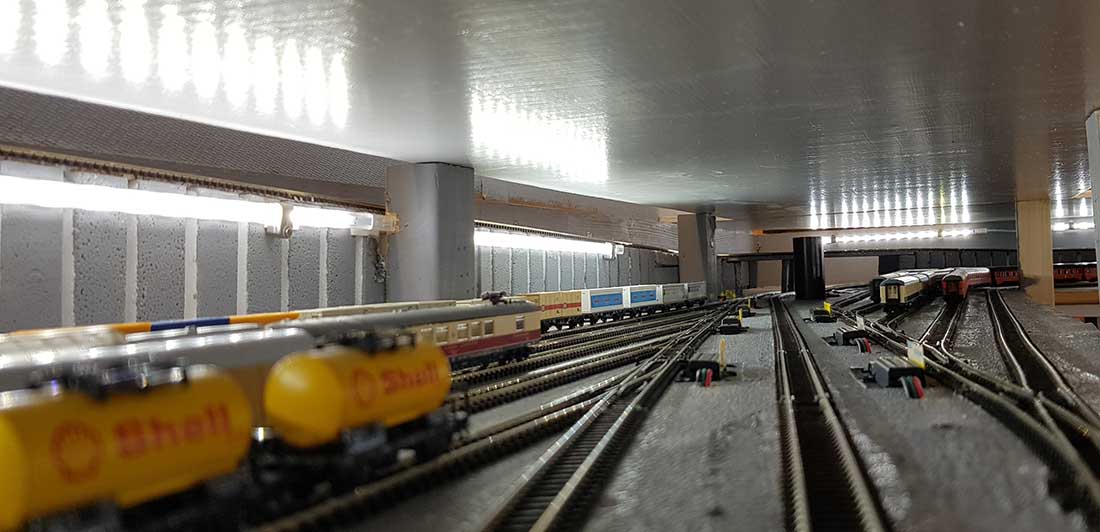
The lower deck is now fully completed with surface points motors installed to operate the majority of the points of which there are 24 in total, all those that are motorised are code numbered, I chose to use block switches that operate 5 points each.
Wiring the points motors and more importantly positioning them in such a way to ensure they were 100% reliable was quite time consuming but after some tweaking and lots of testing I am happy with the way they are working.
After loosely positioning the top deck boards that sit 6 inches above the lower deck I decided lighting would be beneficial to illuminate the lower deck all around, so I installed two sets of LED Strip lights that are used underneath kitchen units, I was so impressed with them that I went and bought a set and put them in our bedroom.
Lots of testing has taken place to ensure that I am getting no derailments or power issues on the track that has been laid.
During the whole construction of the lower deck I have always been very conscious to have everything running as trouble free as possible before I go on to the next phase in starting construction of trackwork on the main deck as there is no going back as the saying goes….
Since my original communique I have continued to add to my rolling stock and have also purchased the odd loco and received a couple as gifts so I now have a really nice selection comprising Swiss and German.power units and a good amount of rolling stock. .
I am now at the stage where I am confident to start working on laying the track on the main deck but before doing this I will be applying the backscenes to three sides of the layout, hopefully these will be with me in the coming weeks
I still have to finalise a track plan that will need to incorporate bridges, tunnels and gradients to achieve the number of loops I am looking to create and with it unfortunately being just under 11 months before the big day (retirement) progress is likely to continue at a slow pace but hey it was always supposed to be a retirement project in the first place…
I have included some pictures showing…..
Lower Deck Track Plan, before points motors were fitted
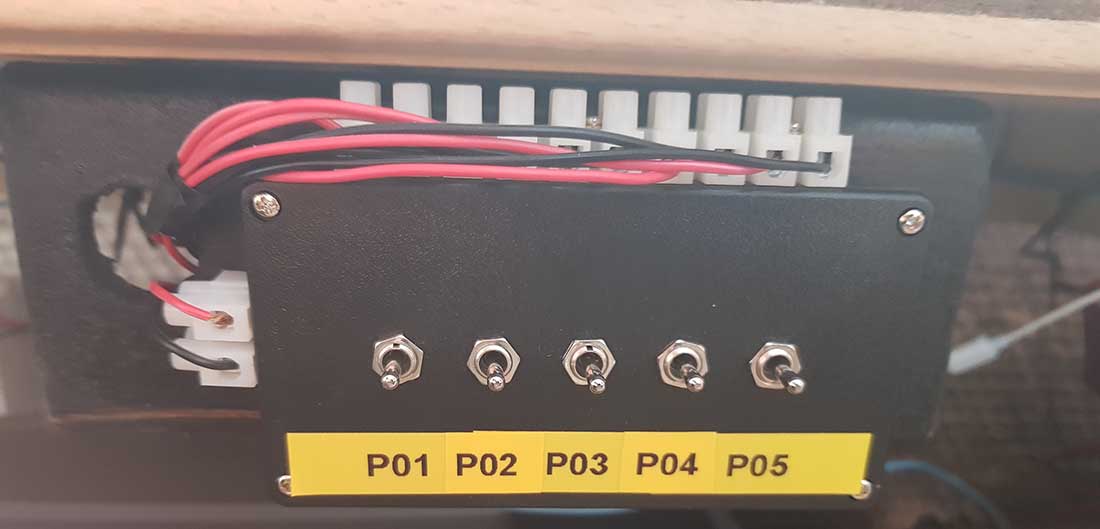
Block Toggle Switch
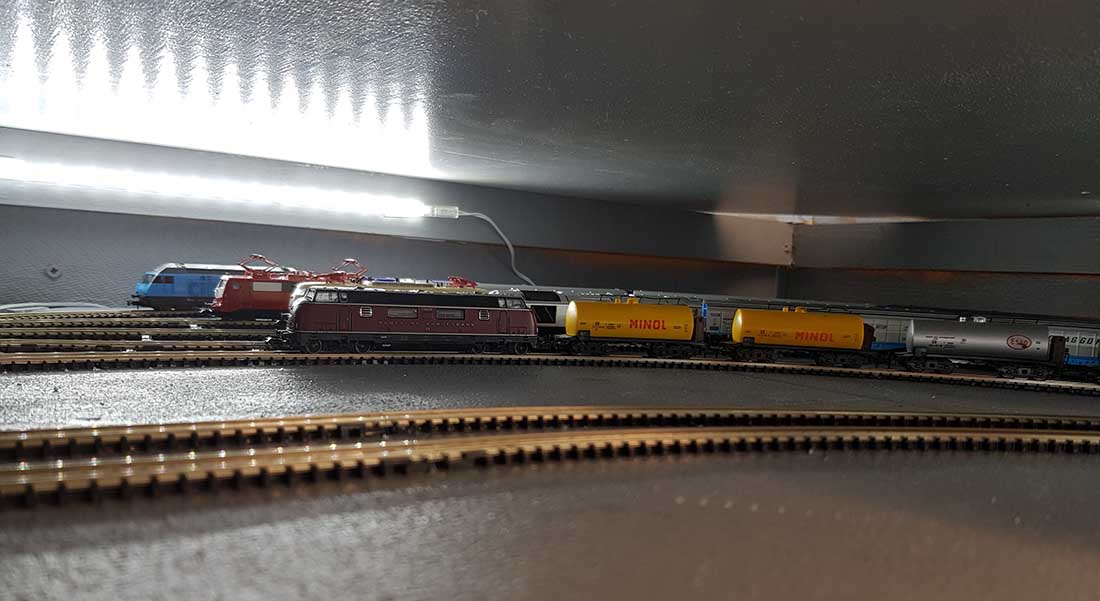
Several showing the layout with the top boards in place, lighting

A final picture showing the top boards in place.
Kind Regards
N Gauge Nige.”
A big thanks to Nigel. It’s an ambitious multi level N scale and I’m eager to see his next missive.
Please do leave a comment, I’d love to know what you all think.
Now on to John who has made something that catches the imagination:
“Al can’t say enough for all the things you do for our hobby. Thank you, thank you.
Several days ago on your blog a fellow railroader talked about what I think was a new building, a stone and gravel building.
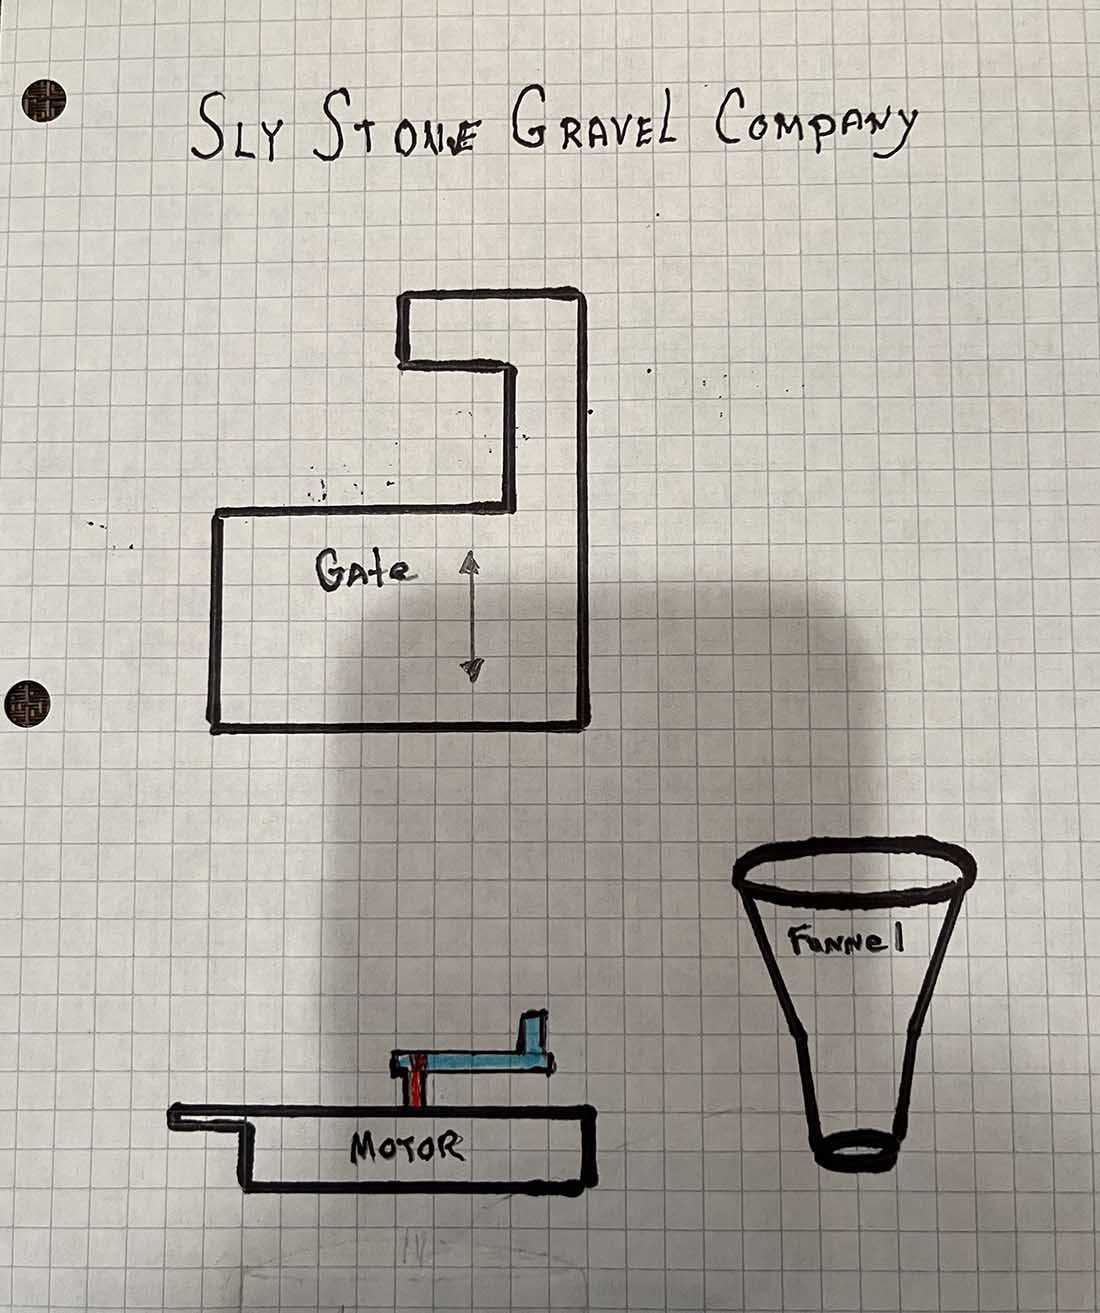
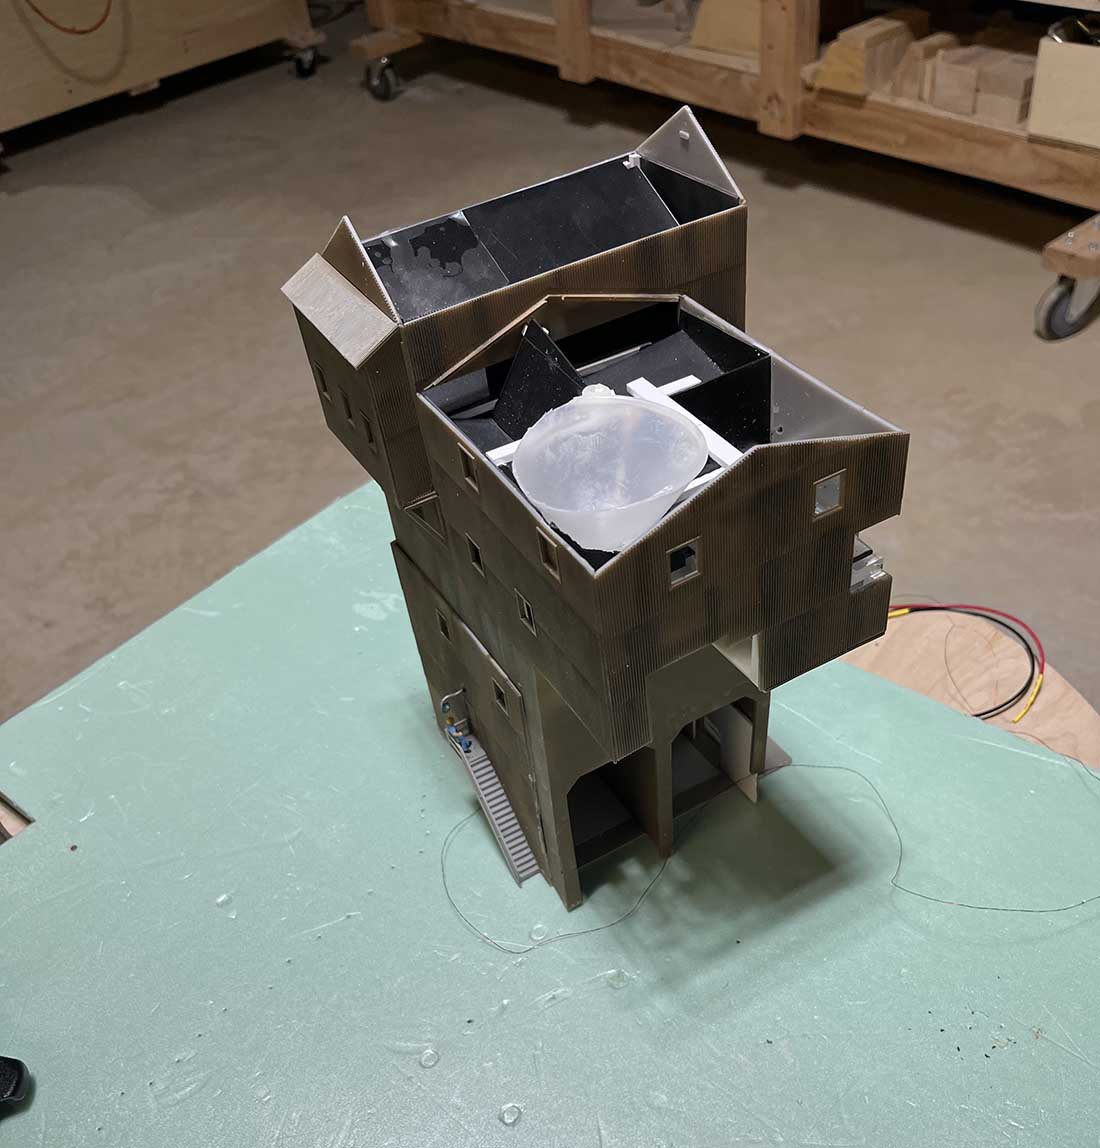
This brought to mind a Sly Stone Gravel Company building I put together for my previous layout.
I wanted when the freight train went under the building there was a way to release a load of gravel into the appropriate car. Attached are some photos and drawings showing and explaining what I did.
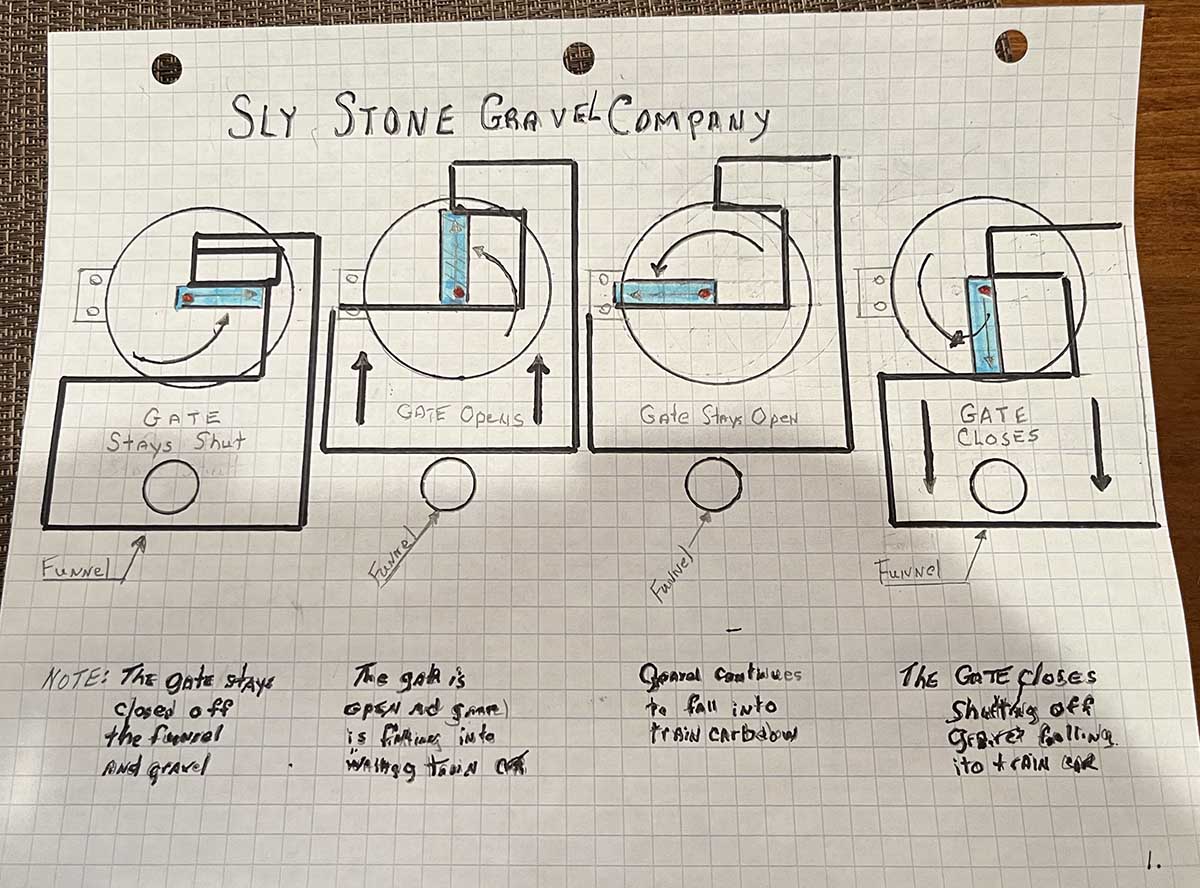
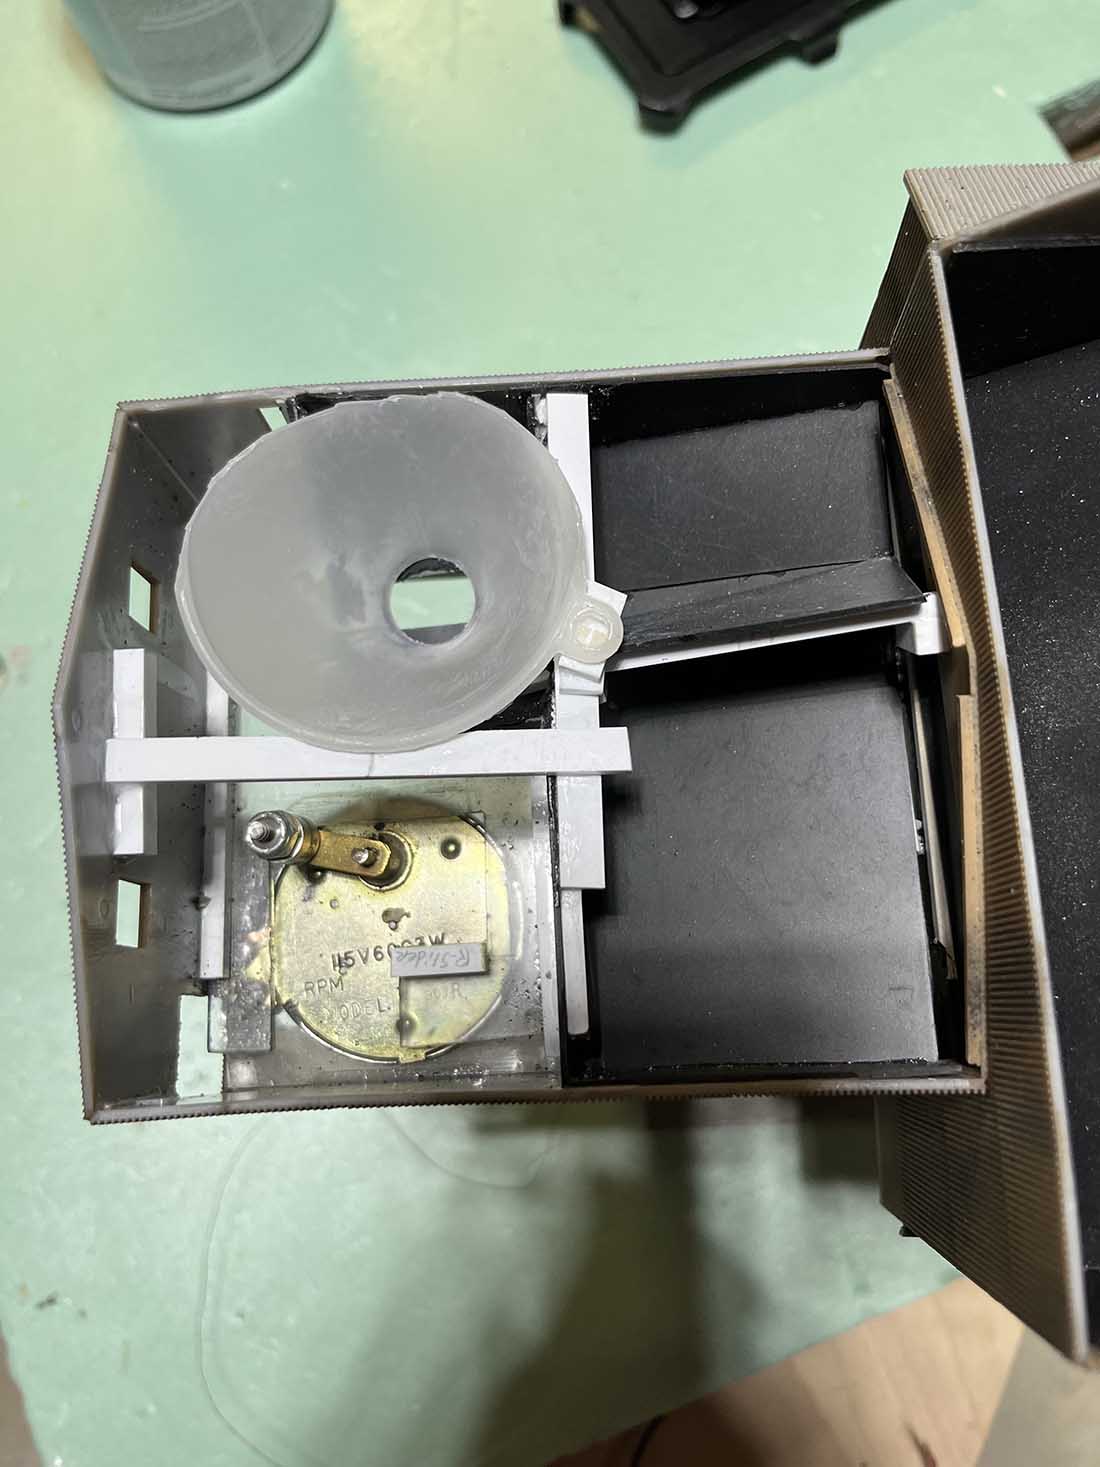
One of the first things I did was design a gate that would slide back and forth by a small motor. I was lucky in that I found a low rpm motor that I could attach in the area along with the gate.
I made an arm attached to the motor that actually caused the gate to move back and forth( see the attached drawing to see how the motor and arm and gate worked together)Above the gate a funnel was added to hold a load of gravel to a waiting train car.
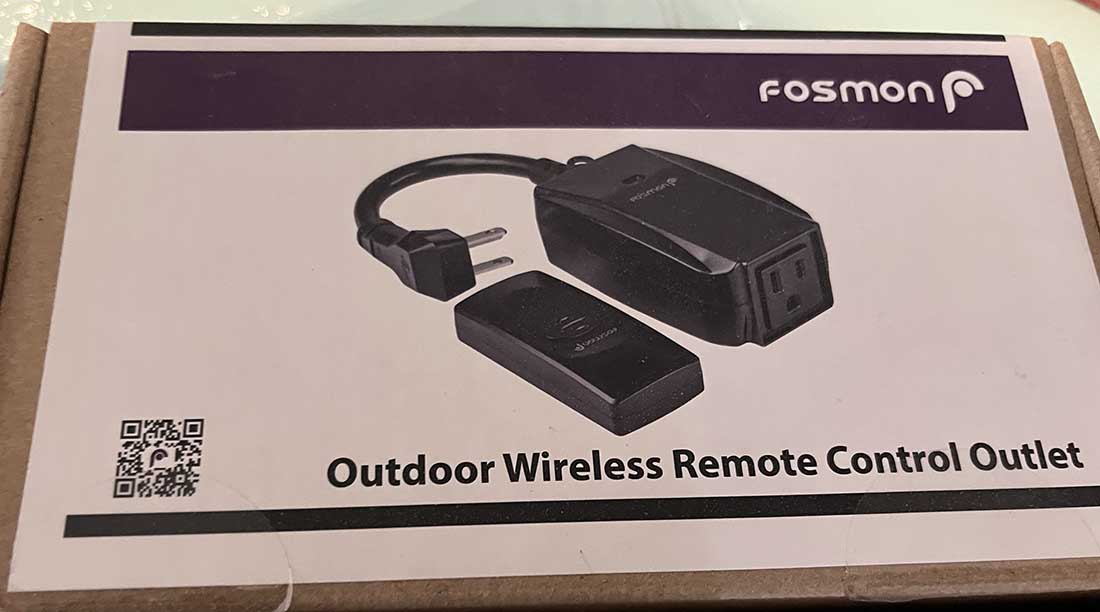
The motor controlling the gate was powered by 110 house current which was plugged into a wireless remote control unit. This allowed me to press the remote control transmitter in my pocket to dump a load of gravel.
I hope someone can use this on their layout.
John”
A big thanks to John and Nigel.
That’s all for today folks.
Please do keep ’em coming though. It’s still very quiet this end.
And if today is the day you get going on your layout, the Beginner’s Guide is here.
Remember, it’s the start that stops most people.
Best
Al
PS More HO scale train layouts here if that’s your thing.

Max us of available space + max fun!
Looking fantastic. Great job.
HOLY COW! I am at a loss for words with you both! Good job!
Lots of tracks. It will be a fun layout to operate. Great track laying. It all looks well done. Rob McCrain
Great idea for the gravel drop. I use a remote control power outlet to turn Christmas lights and my sawdust extractor on and off.
Hello Nigel,
Thanks for showing the incline to your lower level. I’ve thought of a helix but have ruled that out instead for an incline a like you have built.
Thanks
Mark
(Southern California, “SOCAL”)
Nigel
As a regular reader of Al’s site for many years, I regret that paragraph nine of your post was first time that I have had an involuntary LOL moment on the site.
good layout for the space. great job.
I think Nigel is on to a great start. I hope he continues to send in pictures. It’s making me inspired to keep working on mine.
I just loved the Sly Stone Gravel company name. Many completely missed that! Great job on the layout!
Don’t want to be negative, but I have a doubt about railways where too much of the “fiddle yards” and storage are hidden below decks or in helices. I know that staging is important to some, but reality is that most trains are stored outdoors in sidings and shunting yards. The sight of rolling stock and locomotives in these areas is also part of railway life, and besides, who doesn’t want to show off their favourite locos and carriages?
Nigel, great start on what promises to be a neat layout. I wouldn’t want to have to duck under to access the central operator’s area at my age, but you must not have that problem. That’s a lot of complex trackwork in the staging level: I’m glad you’ve tested it thoroughly before adding the upper level. Your LED lighting of the staging area was both necessary and a great idea.
John, thanks for sharing your gravel dispenser design. I saw another video a few years ago where you or some other model railroader was working on a similar design. It took a lot of fiddling with the mechanism before he got it to work properly as I recall because his stored enough gravel for several hopper loads.