Deans been back in touch. He’s added to the N scale mine kits on the blog:
“Greetings, Al, from across the great pond, from Dean in New Mexico.
In my last update I talked about filling in a hill and adding a gravel road (on my Santa Fe Northern N-scale layout) up to the location of a mine kit I was building using a Walthers N Scale Diamond Mine kit.
(A similar kit is also available in HO scale.)
Some of your readers suggested that I include some hints and instructions on how to build this kit.
Indeed, this is the hardest kit I have ever put together, particularly with my old shaking hands and fingers.
The entire assembly took over three weeks working sporadically. But the completed model is worth it.
See the video below to get a more complete picture of how I assembled this kit.
So here is what I learned: First, some general hints for a successful build which could be used for any kit you want to build:
Follow the instructions in the order that they are listed. I didn’t and I jumped ahead in a couple of spots. This led to difficulty in putting in a couple of the pieces and they had to be cut down to fit. No big problem, but it would have been easier If I had just followed the instructions.
Take your time in figuring out where and how to locate each piece. This can be difficult. In a couple of cases, I had to break apart joints to relocate a piece.
I was using Super Glue, medium consistency, and breaking joints did not lead to problems. If you use the kind of cement that welds the parts together, breaking parts apart might be impossible.
Use gluing aides as much as possible to hold pieces together correctly and make sure your joints are tight before final glueing. I’ll show examples of aides in the photos below.
Paint pieces before assembly, then touch up as needed when parts are together. I first sprayed the walls with aluminum paint then I weathered the parts with very dilute black paint followed by dilute red paint. These were smudged on with small cosmetic sponges.
Here are the tools I used:
Sprue cutters or nippers (Amazon).
A utility knife for trimming sprue points.
Nail files (grocery store) for final sanding.
Glue and applicator (Amazon). My Super Glue bottle came with several thin tubular dropper applicators which were very useful.
A square.
Paint. I used an airbrush and three colors of pre-mixed acrylic primer paint (Amazon) black, white, and gray. The paint came in the correct consistency for airbrushing. You could also use spray cans of paint.
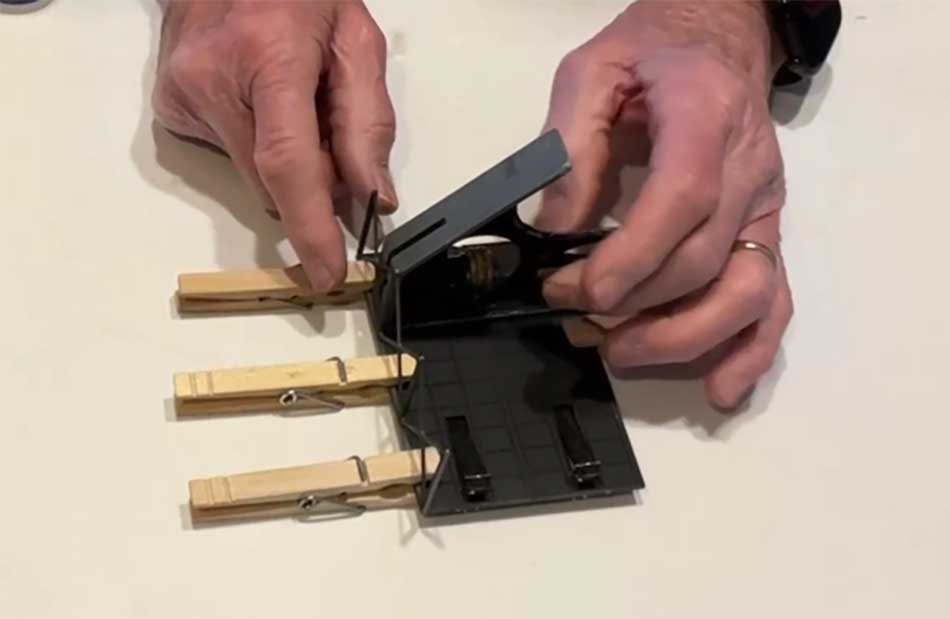
In the first photo I’m holding a floor support to the loader building floor with clothes pins. Note how I’m squaring it up with the square.
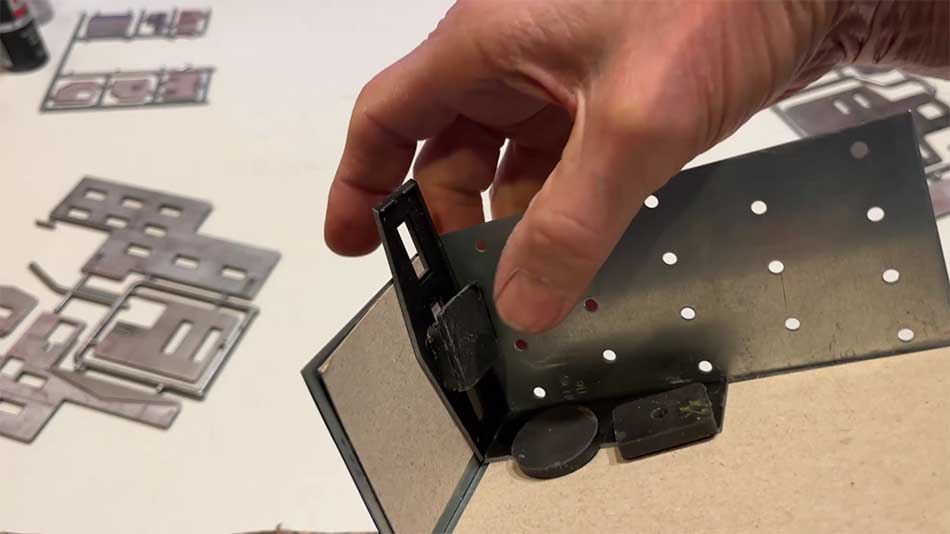
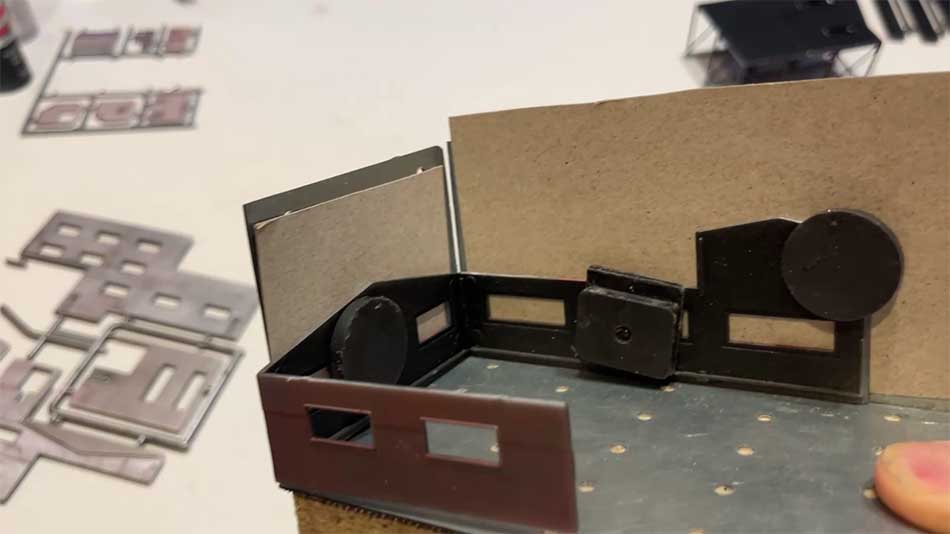
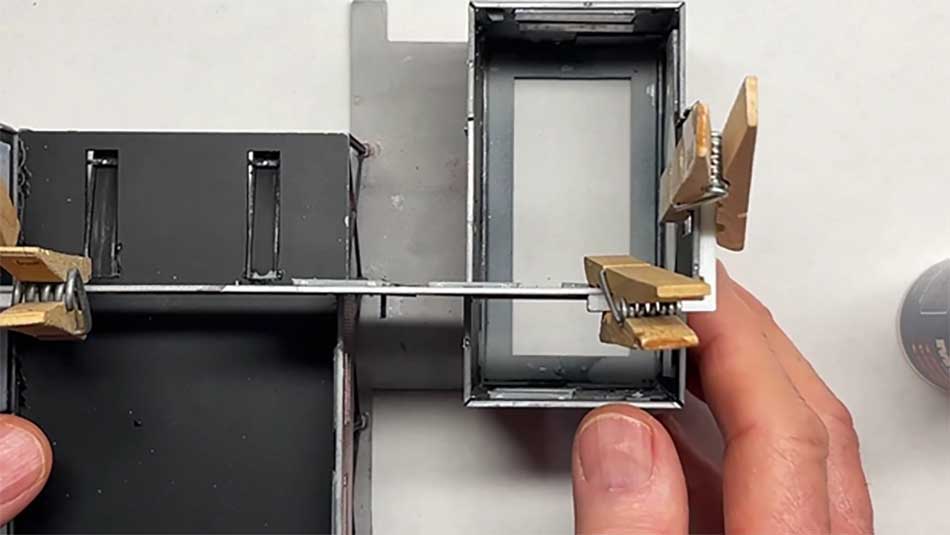
In the next two photos I’m using my glueing jig (made from a square board with four metal plates attached). The pieces are held down with magnets and pieces of cardboard are used as spacers to help not to glue the parts to the jig
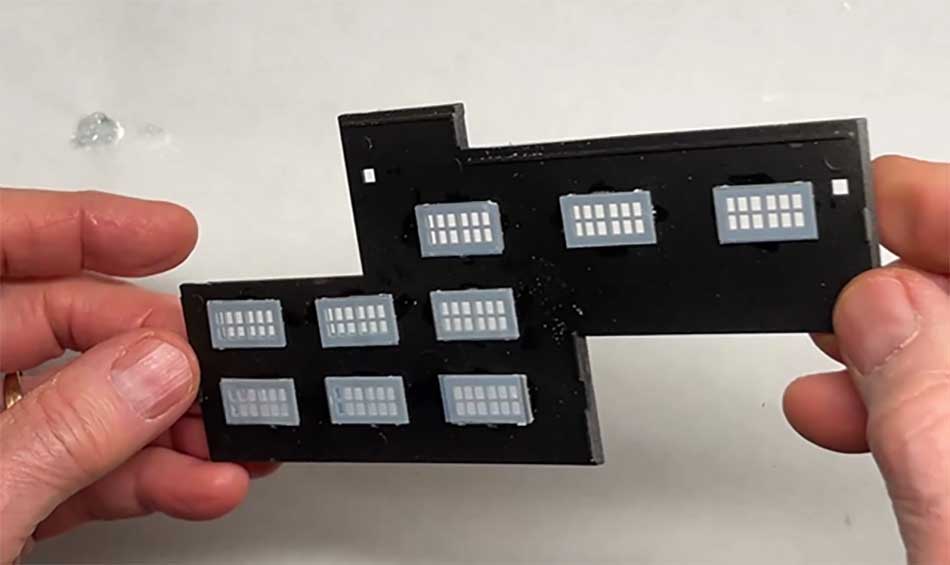
This shows one of the walls with window frames and glazing attached. The window frames were first glued in place then the glazing was attached. I used a foggy piece of transparency film since the glazing piece supplied by Walthers was not big enough to cover all the windows.
Above, I’m holding the final wall in place with a rubber band before glueing.
The two walls here were held with a 90-degree angle I 3D printed—you could make one out of a metal angle piece. It’s hard to see, but there is a slot in the white angle where the two pieces connect. The slot keeps the glue from running between the angle and the walls.
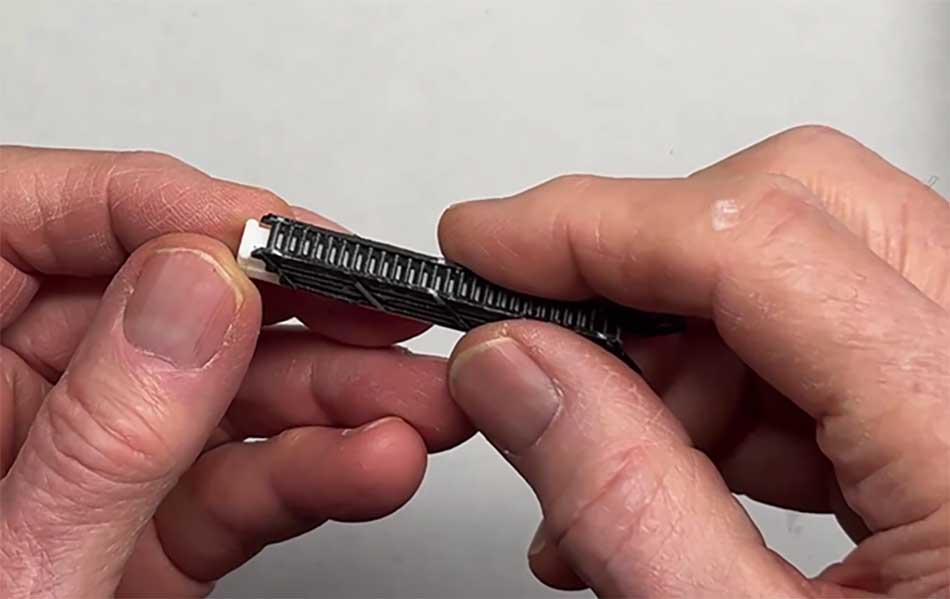
The stairs came in three parts which were very difficult to glue. Again, I printed out a small angle to help hold the pieces while gluing.
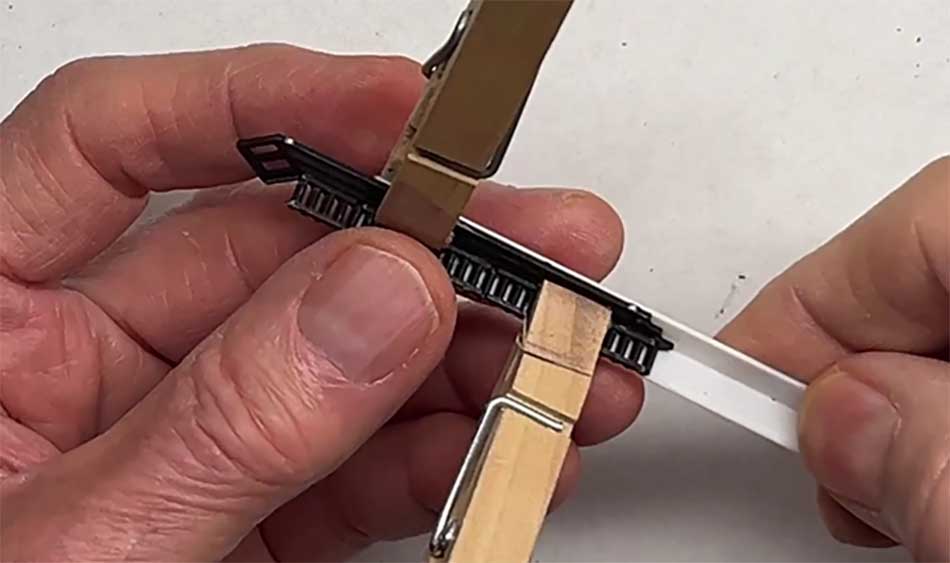
N scale mine kits:
I also 3D printed a rectangular piece to help hold the third part in place.
Here I’m holding the first two supports for the Slack Bin with magnets and my gluing jig. (Slack is small coal pieces and dust from the crushing process.)
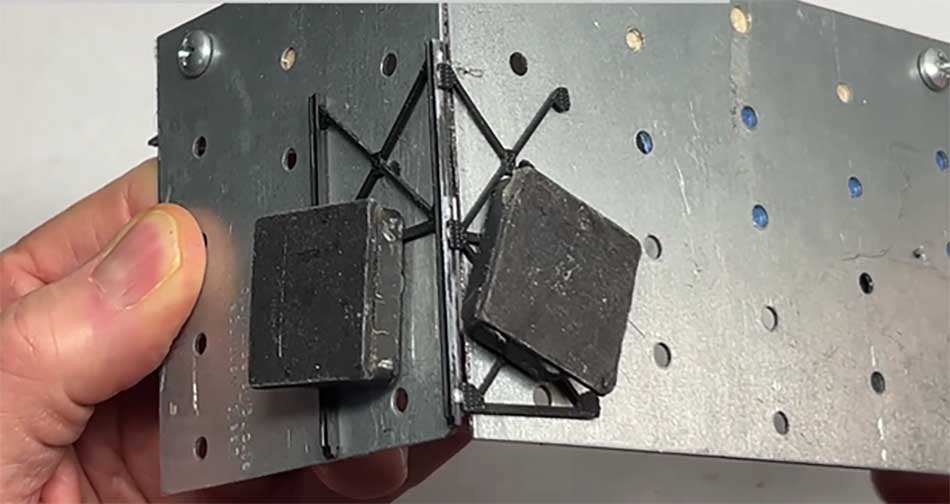
And here is the final Slack Bin. This was a very difficult assembly to put together because of the many small parts.
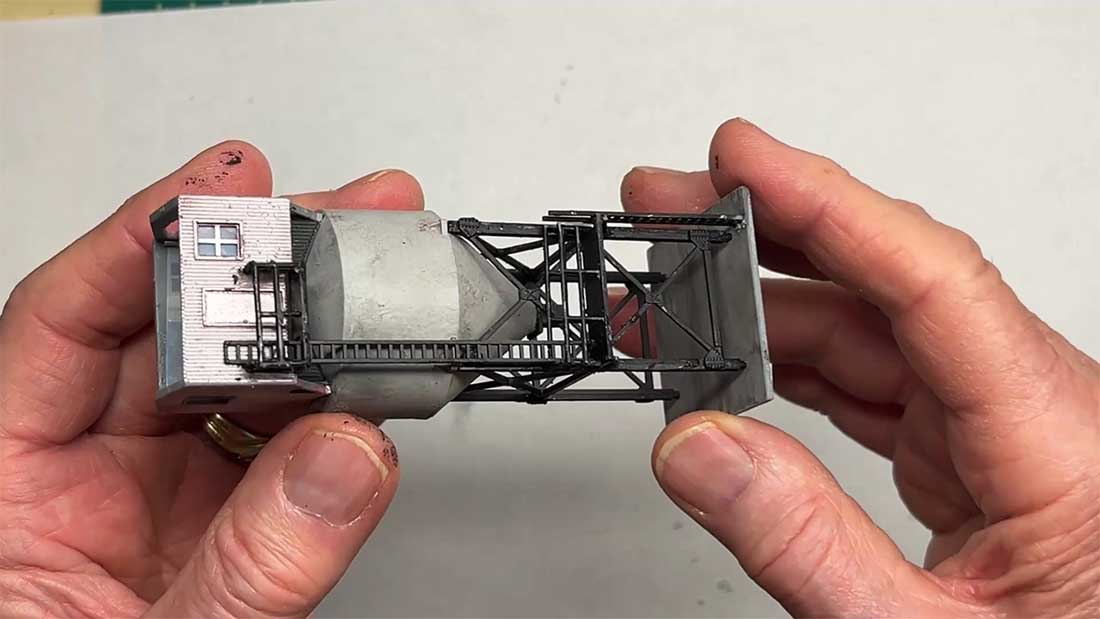
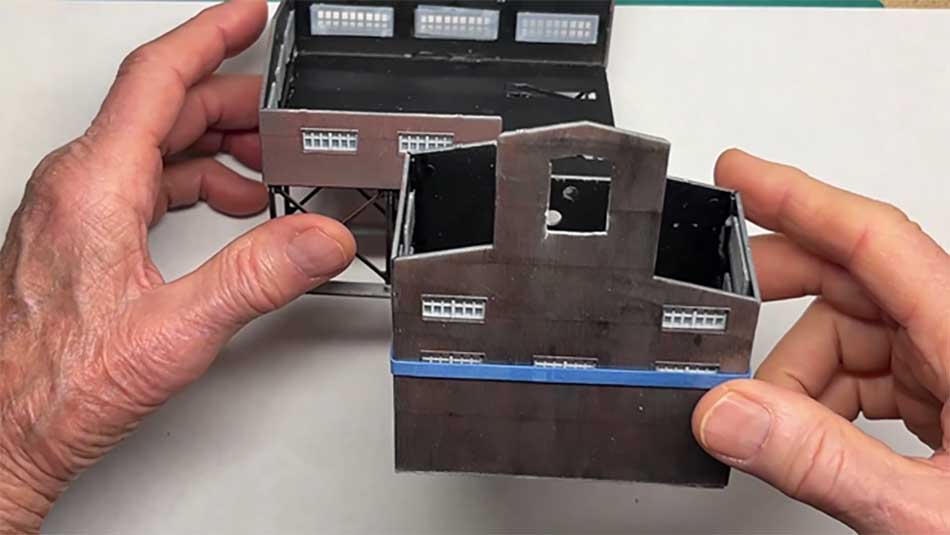
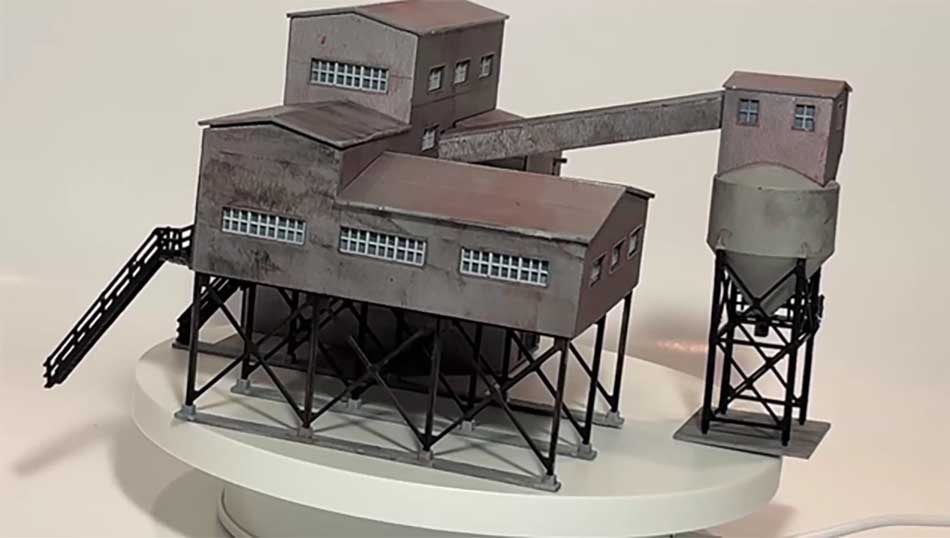
And finally, two photos of the completed model. At this point I didn’t glue the roofs in place since I’m going to add lighting to this model.
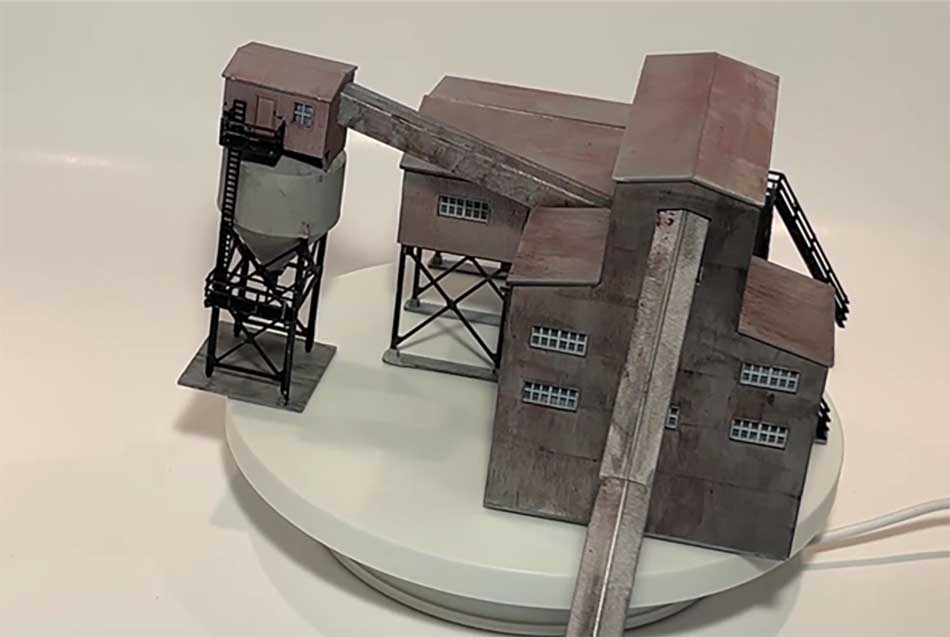
I found I will have to relocate a passing track and loading spur in the location where I’m putting this building. I didn’t plan on this mine building when putting down the original track and the tracks were located too close together. Relocation and adding lights are two other installments in this saga.
As usual, see my YouTube video for lots more on this assembly:
If you leave any comments and questions below, I’ll try to answer them.
Thanks Al, for your great blog,
Dean”
A big thanks to Dean for adding to the N scale mine kits.
You can see Harry’s N scale mine here: N scale coal mine kit.
And Jeff’s: N scale coal mine.
That’s all for this time folks.
Please do keep ’em coming.
And if today is the day you press the fun button and get started, the Beginner’s Guide is here.
Best
Al
PS More HO scale train layouts here if that’s your thing.
Need buildings for your layout? Have a look at the store.
They are great fun to make and great value too.

Well done Dean, you have done a fabulous job so far. Very nice weathering as well.
I know all about fiddly bits and sometimes shaking hands even though I model in HO scale.
Brian – the HOn3 guy in Knysna RSA
Thanks for the information, I agree planning is very important when building anything.
THANKS AL FOR YOUR SITE
well done
I’ve built the same kit only in HO scale. Can’t even imagine doing it e N scale with my fat fingers. Using the clothes pins as clamps is a great idea. I used Testors liquid cement to glue parts together. Works great on the windows. Great job, by the way! Looks good!
Dean, A big THANK YOU for your advice on the construction of this kit. The techniques you use will be a great help to me and many modellers constructing buildings whether kit, kit bashed or bespoke and regardless of the material used. Thanks again
Andrew in Oz
Thanks for all the wonderful information and it will be very helpful in the long run.
Very nice tutorial photos and video Dean. You have more patience that I could muster to work in N scale. I think I would have used canopy glue to attach the window glazing and maybe left some gaps in the glazing to simulate broken windowpanes. You could still paint a few panes black to simulate the missing panes.
That looks good!