Dean’s been back in touch again with an update. This time he talks us through his N scale river technique:
“Al,
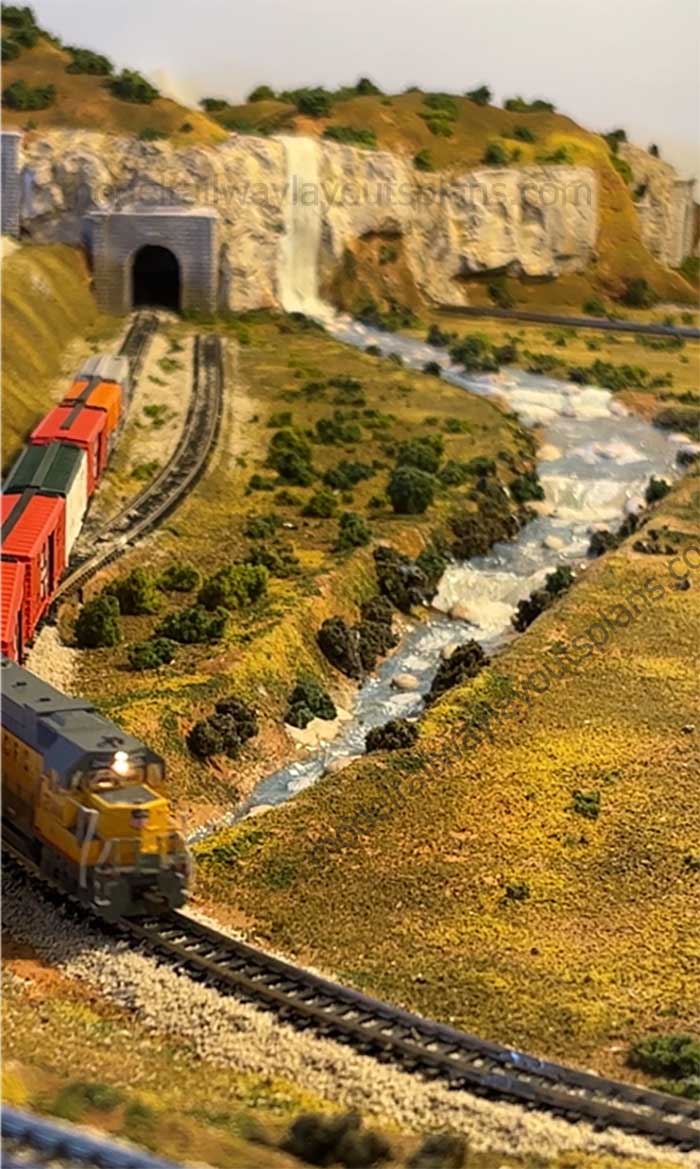
I finally got back to finishing the flowing river on my N-Scale, western, Conejos Valley Railroad layout.
I really like how the waterfall (discussed in an earlier submission) and the river turned out.
This video is the eleventh in a series discussing my construction of the 80″ x 36” small N-Scale layout.
This is a fourth submission on the scenery and here I talk about finishing a tiered river with rapids.
I am testing out the use of inexpensive materials that you can readily obtain (white glue, plaster, paint, cotton balls).
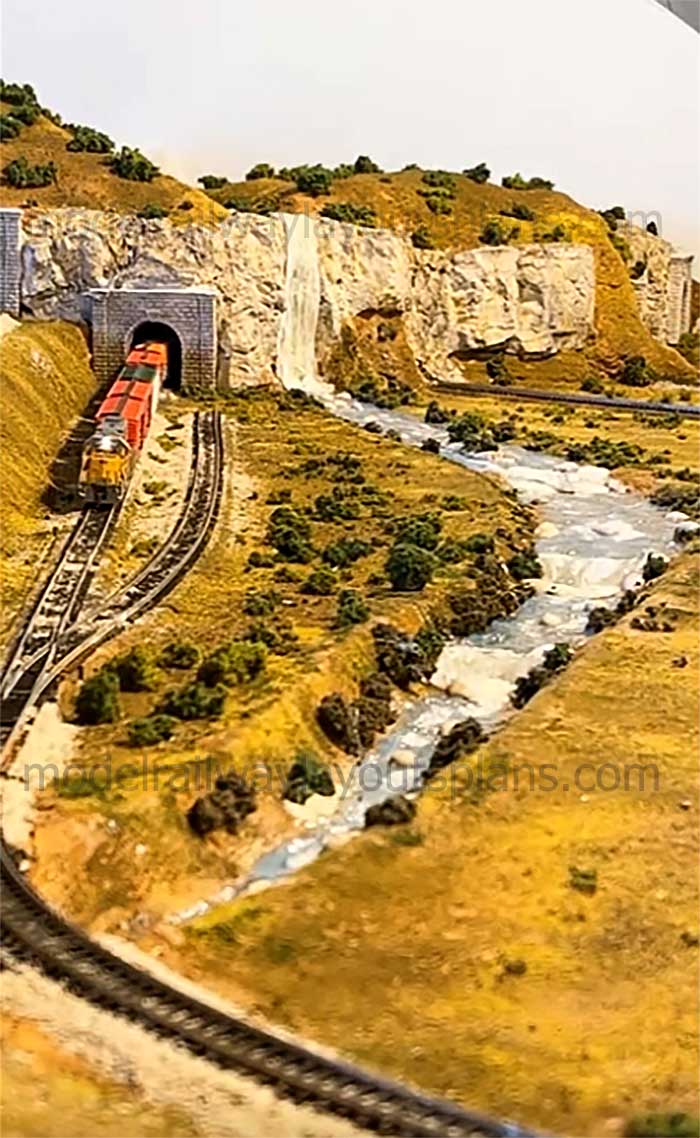
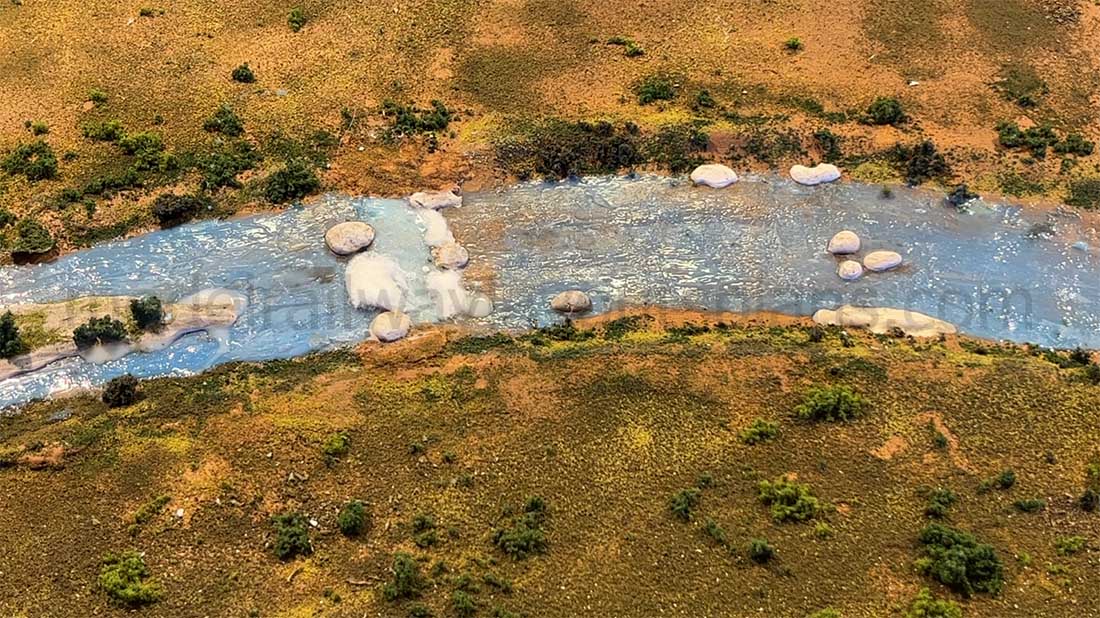
Here’s a photo of the results. Note the rapids and the small island.
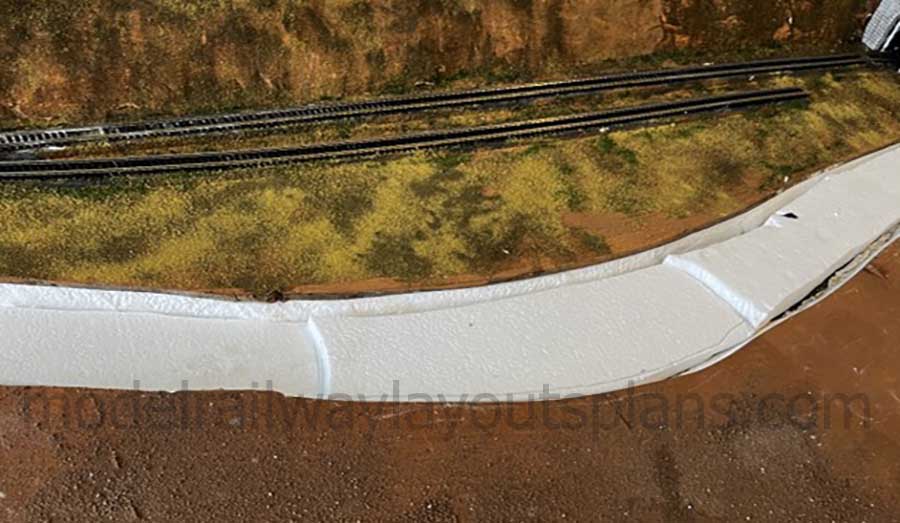
Four layers, or levels, were formed with ¼” Styrofoam sheets.
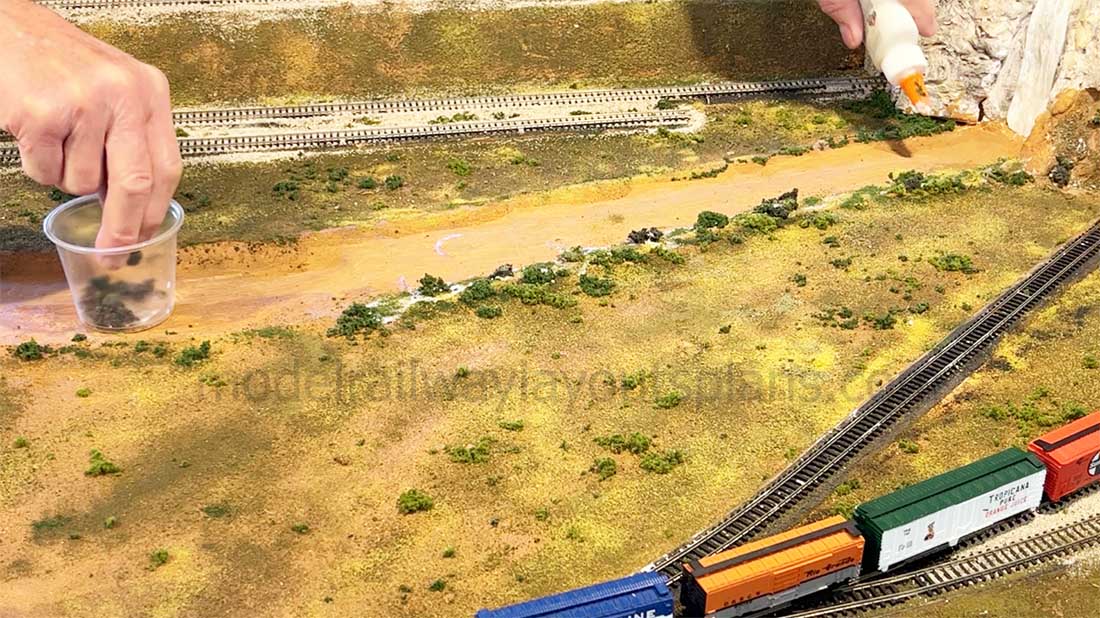
The riverbanks were textured with fine turf (Earth, Burnt Grass, and Green) and clump foliage.
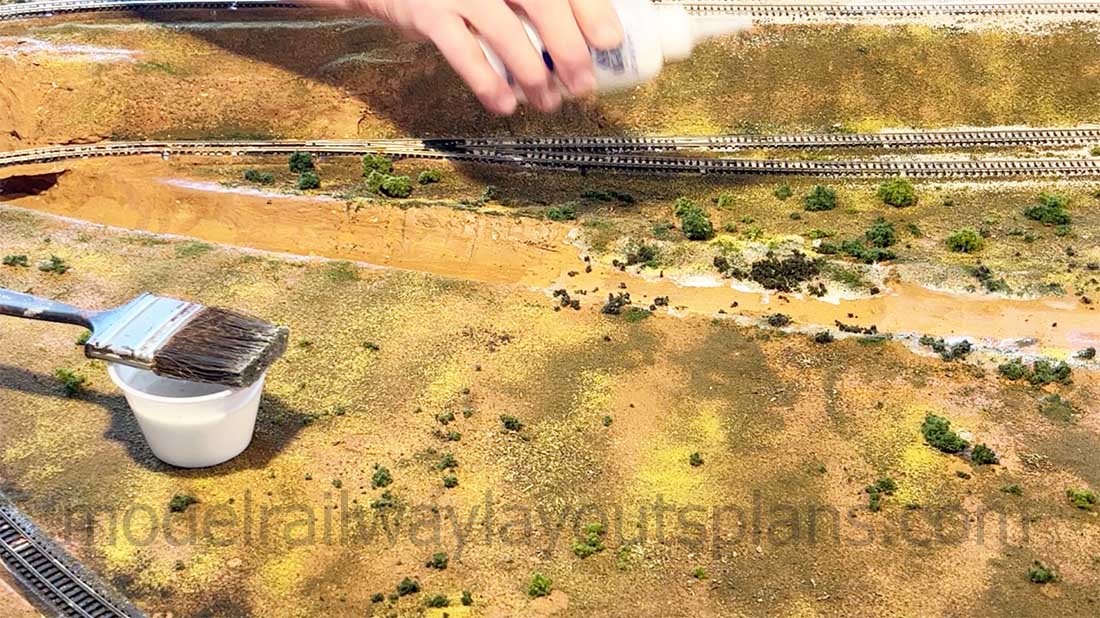
Everything was glued down with scenic cement (1 part white glue, 3 parts water, 1 part isopropyl alcohol).
N scale river:
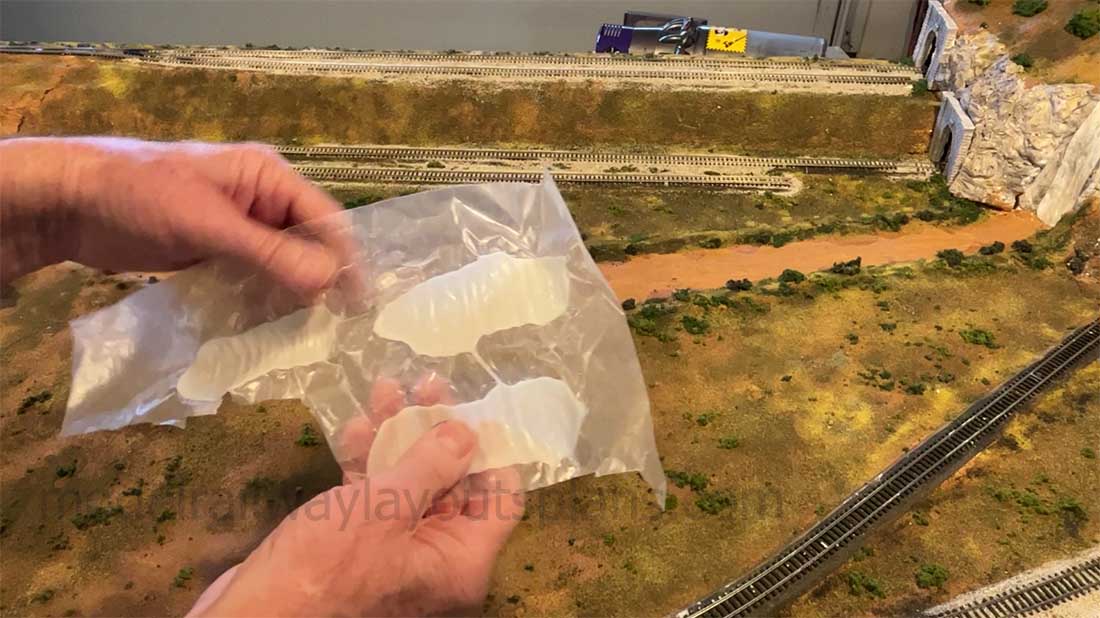
I created “rapids” by pouring textured layers of white glue over wax paper. After they had dried, I cut them to fit and fastened them down with hot glue. The thin parts can be easily folded to go over the drop in water level
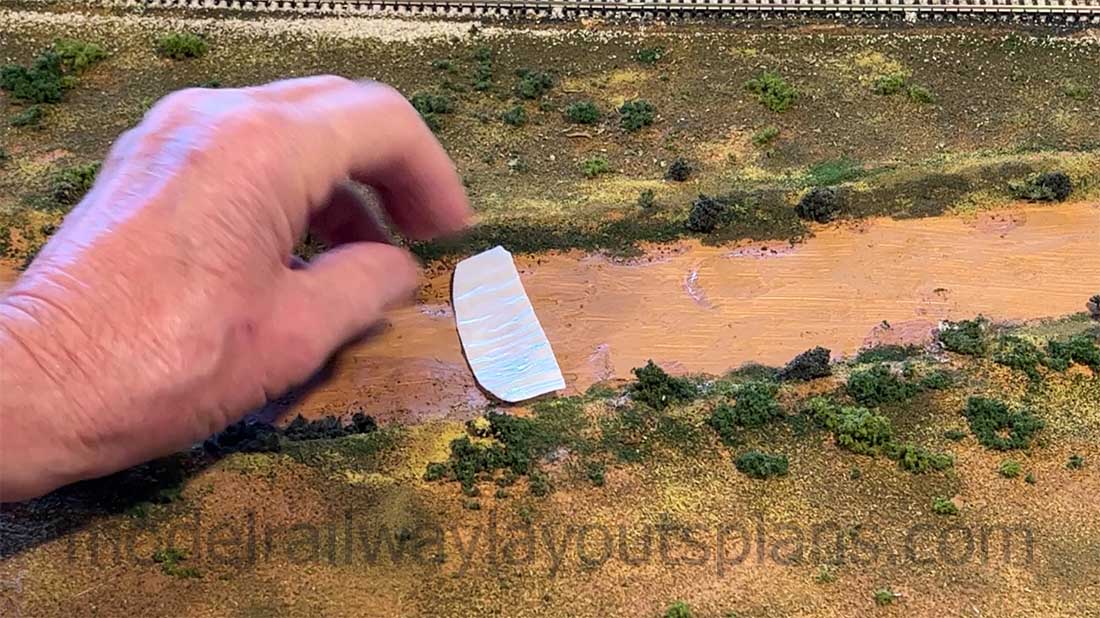
Here’s a rapid in place.
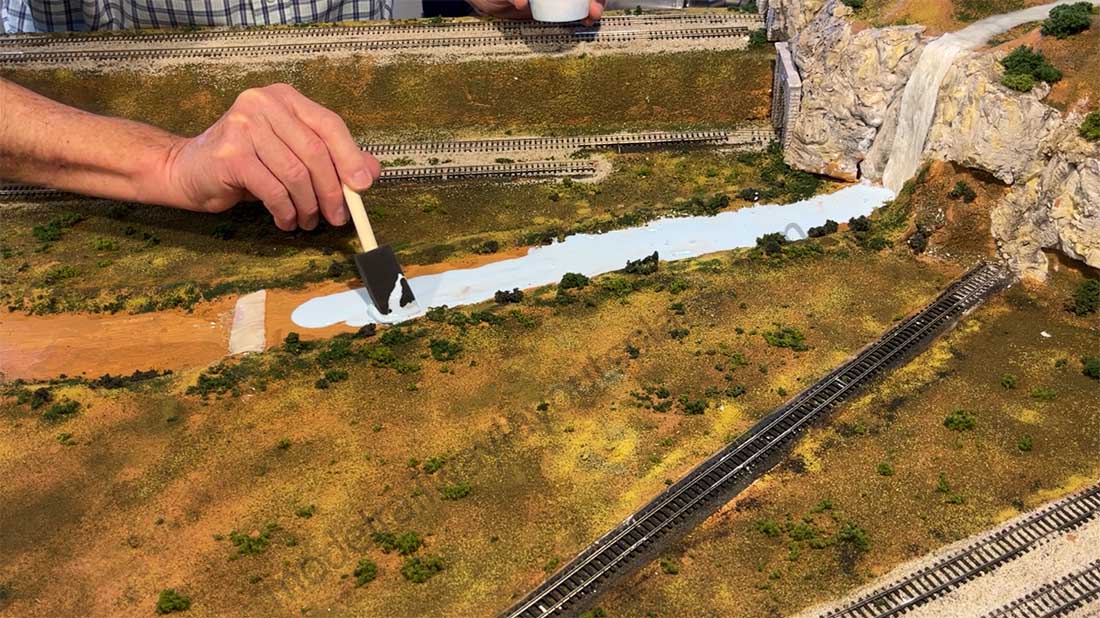
Then I poured the water with white glue dyed with acrylic paint (1cup white glue plus 2 drops blue paint). After the first layer dried, a second layer was added.
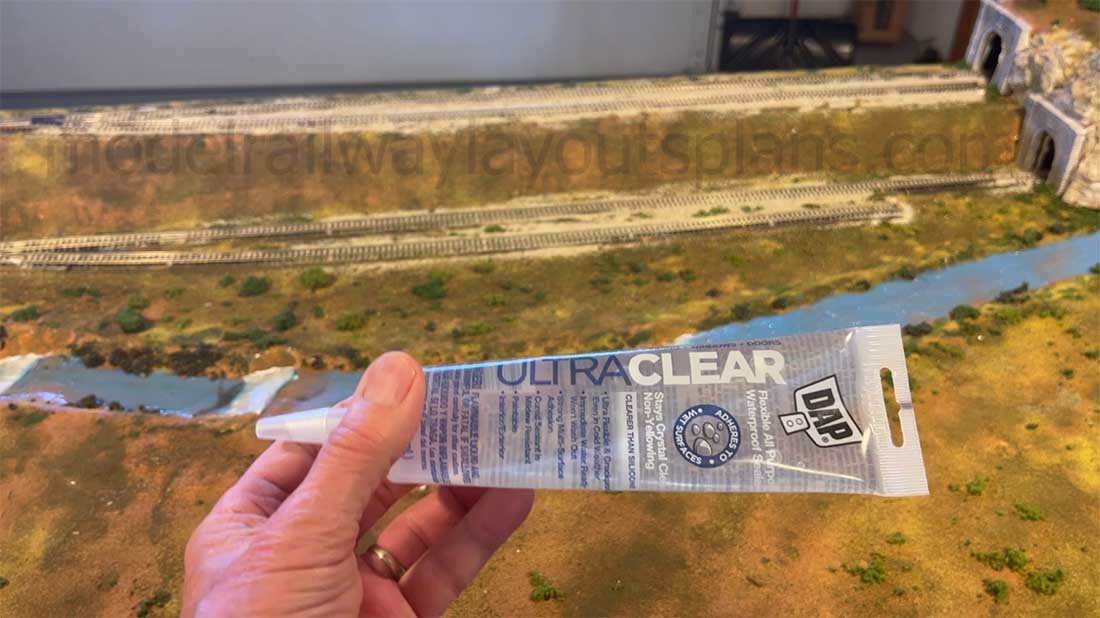
To create ripples and texture on the N scale river, I used Dap Ultra Clear sealant. This is an organic based material which you should use with good ventilation.
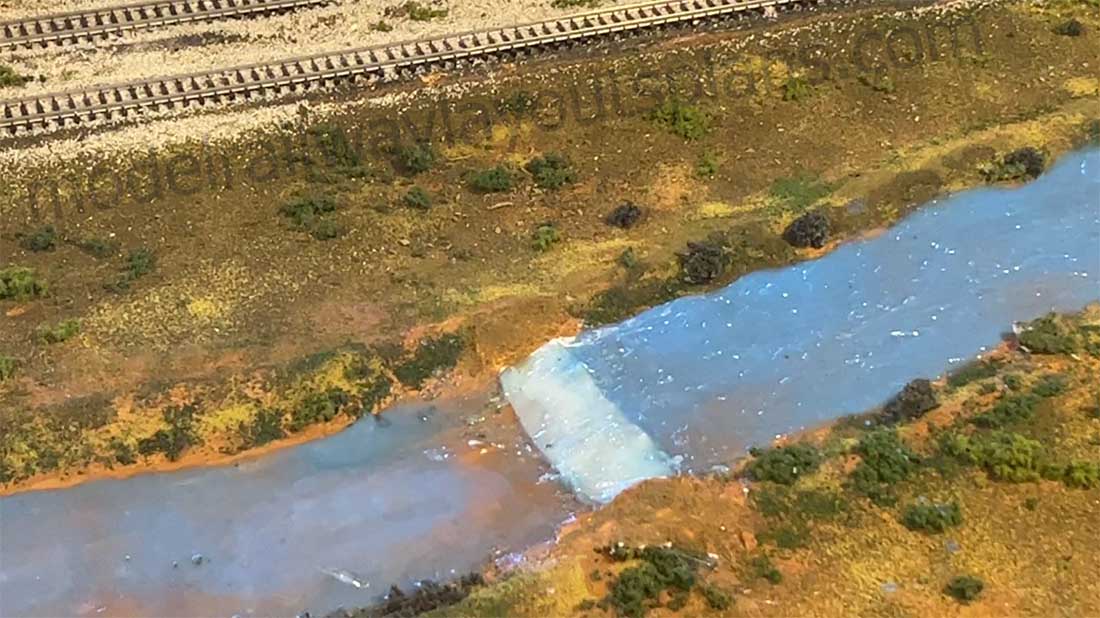
The river on the right has the Dap applied (see sparkles), that on the left is untreated.
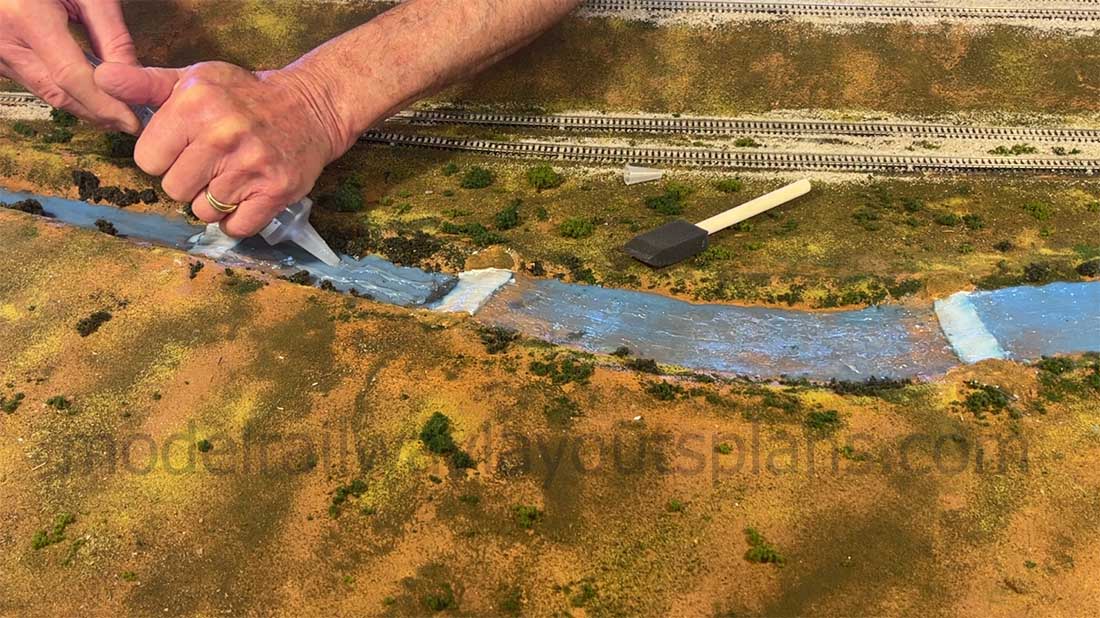
The Dap was smoothed and textured with a foam brush while wet.

Rocks, boulders, and a small island were made by adding blobs of thinned Hydrocal plaster.
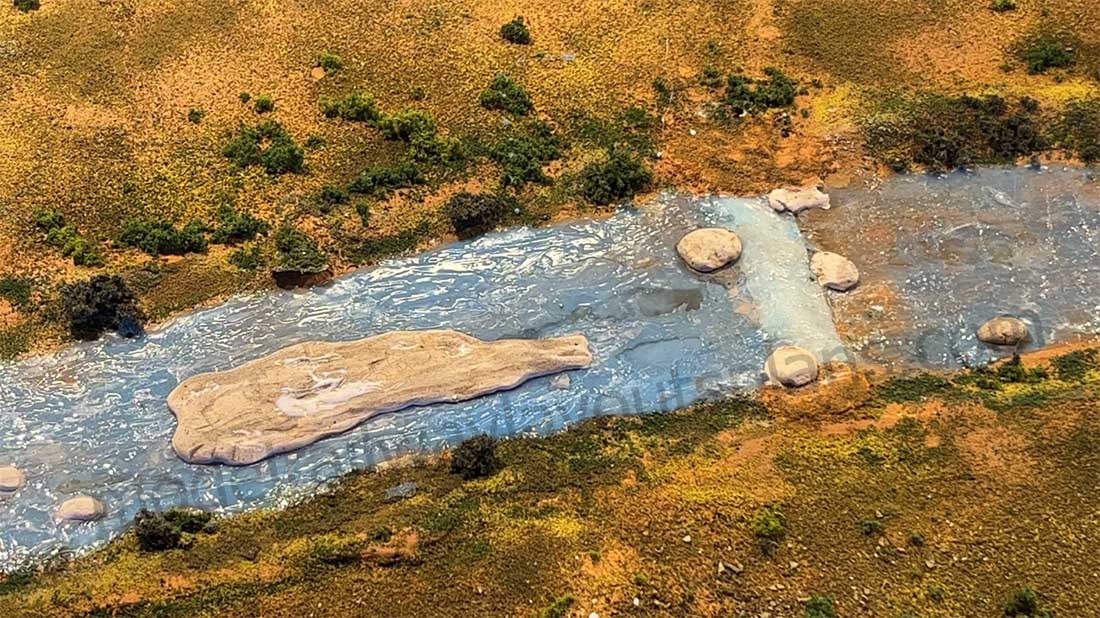
They were then carved (utility knife) and formed (emery board) and dyed with diluted paints.
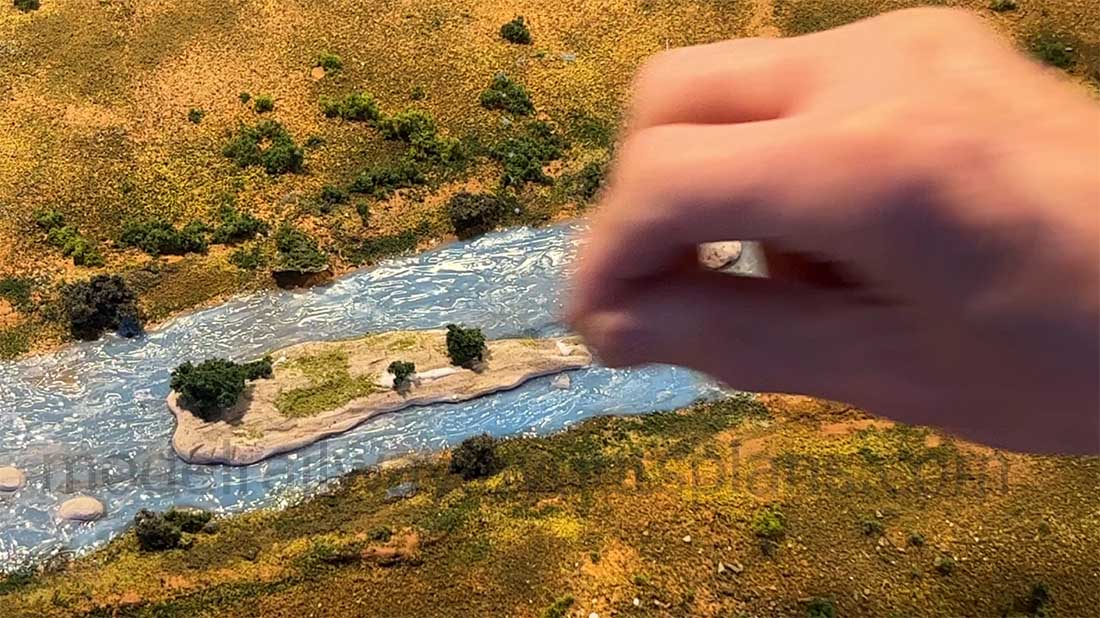
And trees and grass were added to the island.
Here’s what the river looked like at this point.

Foam at the rapids and bottom of waterfall was created with fluffs of cotton soaked with Scenic Cement.
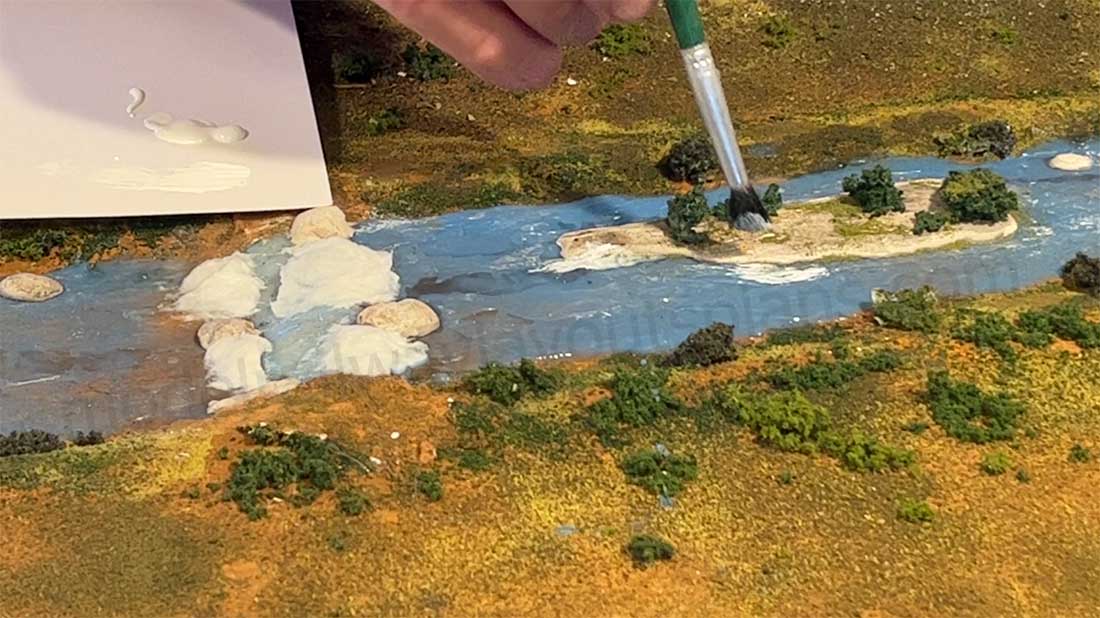
Finally, foam and ripples were dry brushed with white paint.
Here’s another photo of the final result.
All in all, I’m quite happy with the results. Two thoughts for next time:
Use less blue paint so that the river is not quite so blue.
Use smaller tuffs of cotton at the top and base of the rapids. These are a little too big.
Cheers,
Dean from New Mexico.”
A big thanks to Dean for sharing his N scale river ‘how to’.
If you want to see Dean’s last post it’s here:
And there’s this one too:
I know I’ve said it lots before, but I do enjoy watching a layout come to life over the months. And for some of you, that’s years. Both are fine!
That’s all for today folks.
Please do keep ’em coming – all scales, all standards welcome here.
And if today is the day you get started on your layout, the Beginner’s Guide is here.
Best
Al
PS Latest ebay cheat sheet is here.
PPS More N scale layouts here if that’s your thing.


Excellent how-to. Exactly what I hope to do on my next project. I’ll definitely keep this one for future reference.
from the mountain tunnels to the flowing stream, this was great workmanship all in all. great job!
This is really good. Believe though too many have blue lakes and streams simply because it’s water??? Water is blue out to sea because the sky is the only color it can inherent/not absorb. Lakes, ponds & streams take on the colors of surrounding countryside/landscape or plain pollution…
PinC: Last year we had new pool liner installed, it was pebbled sand color, black and dark brown specs. This was supposed to be aqua water outcome, but what? Exactly what water color is… AQUA. All other light of the spectrum is cancelled except that which produces those color waters that surround say Bermuda, or tropical south seas islands. The SAND is what creates that effect or illusion.
Believe it or not 🤔, Rich
Great tips here, I have “water” on both my N-Scale layouts. One is “water’s edge” for just a hint of a larger lake.
The other is a river on my switching layout. It doesn’t have to be big, even just a hint of water, lake or river. But it really adds to the overall realism of your layout.
love the trout stream but why was it fast flowing at the beginning and tapered off at the tracks? Do like the DAP water though . I used that for my lake also
The Critic
I am concerned that glue will not maintain the color and may crack over the long run. Will it yellow?
Great job of explaining your technique. Is there a way to build or paint on the backdrop, a mountain as the source of the water?
One of the best “how to videos ” I have seen. Great job.
Appreciate your sharing with us.
Roger in Kansas
Great “how-to” video. The question in my mind is: Did he use a router to grind out the baseboard for the shape of the riverbed, or was all the land and track on both sides of the river originally elevated?
Terry/ Idaho USA