Pat’s made a model railroad start :
“Alistair,
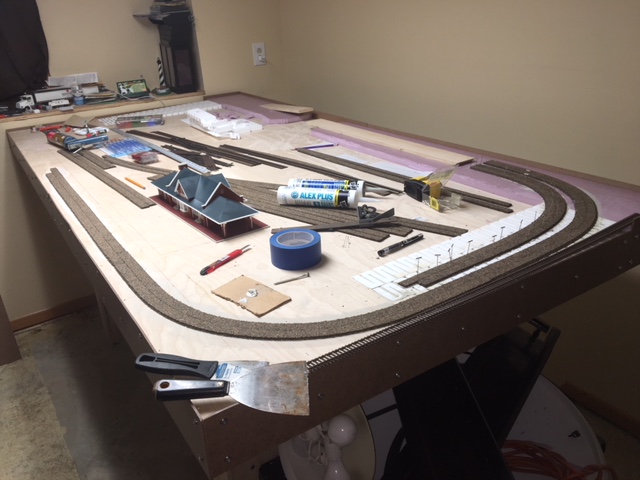
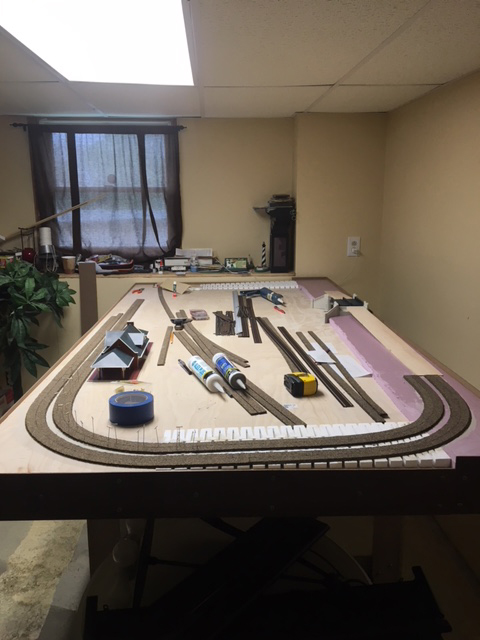
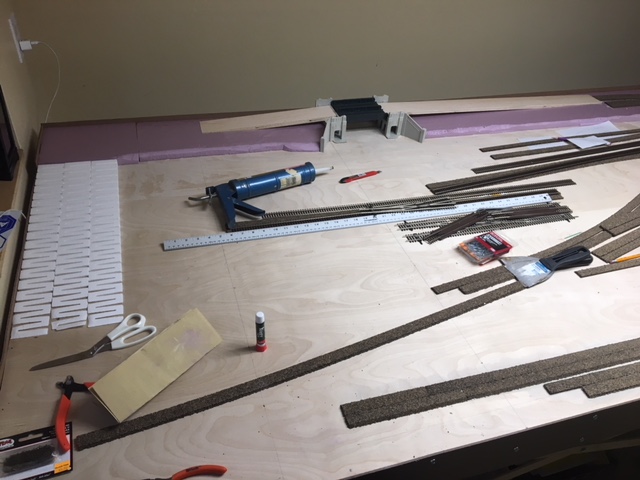
Here are some pictures of my first try at a layout.
It is HO scale and I built the 4’x8’ train table myself from a Michael Gross narrated video available on YouTube. (If anyone recognizes the table and wants to build one as well, please read all the comments under the YouTube post before getting the components and starting. There are several mistakes that they made.)
I just got into model railroading this year. Our family has a history of working on the Lackawanna RR in our area.
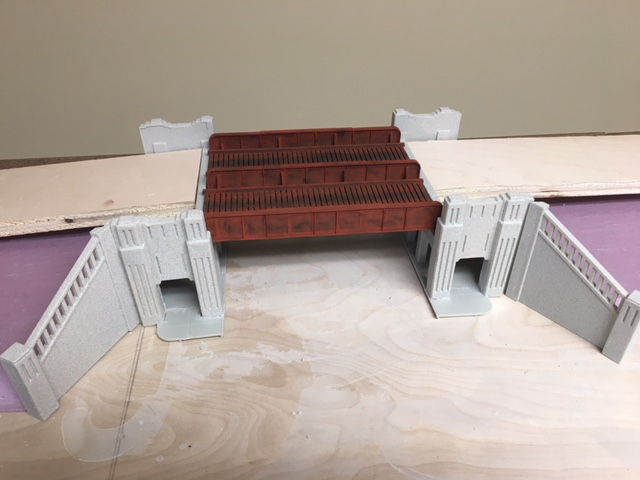
When completed, this layout will hopefully recreate an area that I patrolled on foot when I first became a police officer.
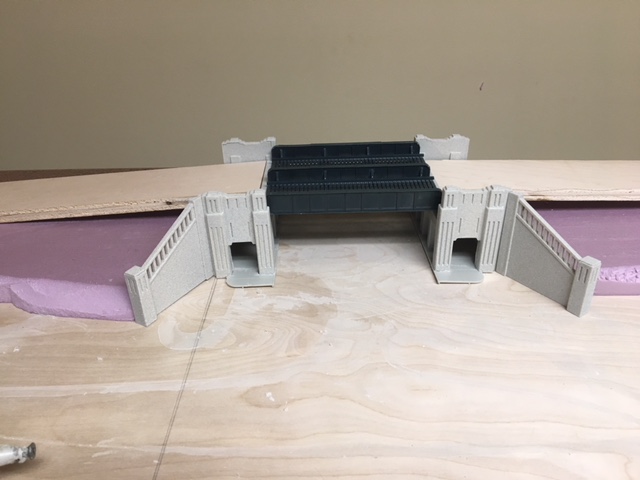
For the finished bridge, I used Stoney Mountain Weathering Kit to achieve the look.
I will send more pictures as it progresses. Keep your fingers crossed that I can do it.
Thanks,
Pat, NY USA”
Pat’s made a model railroad start – and that’s what it’s all about.
Remember, it’s the start that stops most people…
Now on to Eric:
“Hi Al.
I thought of a catchy title for the start of my new N gauge project, so I’ve called this.
The Making of Smeedle 123 … sounds almost familiar doesn’t it?
This is Part One, a brief snapshot of the track configurations as I perfected my plan and the start of the town layout of Smeedle so far. This is just a twin track on the level for a change for me, I can’t remember any other layout where I haven’t had multiple levels or at least two.
You can see the station went from a three platform to a basic two platforms to allow me to add the goods and engine shed areas. The station building is kit bashed, two small stations merged into one. You can see the start to finish of the station area as it progressed, just more people and fencing to add there.
Most of the layout will be in the open with only the rear section hidden, I have goods yard and engine shed linked by a third controller DC of course, even though I have only concentrated on the seen areas up to date there is the engine shed area and a whole townscape to start on next. I still have managed to have 26 lights already wired and working.
You will see a hint or two on the pictures of how to. One, to raise platforms when you use underlay, Two, I use cling film for protecting the rails when adding grass etc. The third is the most simple. I use ballasted underlay so just spoon in the loose ballast between the two tracks without using glues to stick it all down, this means if you alter things you can reuse the ballast filling and no gluey mess to clean up. I do this mainly due to using Sundeala board, compressed newspaper, as it is best not to wet it too much. The track is pinned not glued.
Around the goods shed I have blended winter, spring, summer, and darker summer grasses as well as earth mix and rocky sand sprayed over with hair spray to hold it down.
I will try keep you updated as I progress as I think I am going to enjoy taking it a little more leisurely, hopefully providing greater detailing if my hands and eyes can cope.
For the ones that want perfection, well this is out of my head, based on any small Yorkshire town. The board at best 7’6” by 5’.6” with a wall and hatch. I don’t do weathering, I don’t do plans as they say on Facebook I invoke rule 1. (Do things as you like them, not what others think you should do).
The control is all by DC as I prefer it after watching all the problems others have with DCC and decoders. I have upgraded my Gaugemaster controls to 2 * Q, 4 track controllers, 4 will be for the lighting for adjustments so they can be dimmed or brightened as required.
Keep up the good work Al.
Happy Modelling
Eric (Leeds) UK”
Latest ebay cheat sheet is here.
A huge thanks to Pat and Eric for sharing their model railroad start.
You all know I’m a fan of seeing the updates, but I also like seeing folk making a start – because without that, nothing happens…
That’s all this time folks. Please do keep ’em coming.
And if you want to make a start on your layout, the Beginner’s Guide is here.
Best
Al


hi pat,
i think you will have problem with your bridge, the grade needs to be more of a flatter aproch at both the bottom of the bridge and the top and bottom of the other side.
I totally agree with the post above me.Beautiful layout but in my eyes too busy with turnouts.
Hey Pat, that bridge with pedestrian portals looks vaguely like the Bailey Ave bridge in Buffalo. Was that the inspiration?
Pat, I like what you are doing. Simple and bound to succeed. With good access, the scenery can be top notch. And Eric, you will have interesting running sessions. Lots of track. Good idea for the access hatch. Rob McCrain – Farland Howe
I’m also new to model rr I’m working on my first layout and having a lot of fun doing it I love all the different pics I get sent from u guys I’m doing ho layout it started as a small 4×8 but I don’t do everything small so I’m adding another 4×8 table to it I’m hoping the ideas I have come out good on my layout if u give me a link to we’re I can post pictures I will it’s not much to look at right now but it’s a work in progress
Always enjoy fellow modelers’ creative thinking no matter which scale they choose.
Pat,
Looks like a great start to your railroad…i hope it gives you many hours of enjoyment !
You mentioned you were a cop….hopefully, retired because you had your years in (and not because of health)… anyway, thank you for your service !
Dave, in NY
Keep at it Pat (that’s how I started) and be sure to send pictures of your track layout before you make it permanent. Then some us older and maybe wiser folks may be able to help you avoid some of our past mistakes – mine are many.
Bob
Great progress Eric, please keep us all updated with your progress.
Mal
Wales
Very modern having a ramped approach to the station Eric. Don’t fancy pushing a wheelchair up that one, mind!
Rod
The only problem i see is fitting decoders in N scale engines. I don’t have problems in S scale engines. I guess you would have to buy engines with decoders already installed.
Wow!!…makes my N pale into insignificance. That is some layout Eric has going.
great start. nice size. like the bridge design. nice photos. thanks for sharing.
Hi Pat, This Rocco who grew up in NYC, but live in Haskell, NJ for the past 53 yrs. Yes I am old. Please be sure to send the progress photos. It looks like a very interesting project. Thanks. I’ve been in to model railroading on and off since 1951. This is some website, would you say. Love it.
A guy having good, plain FUN with his model railroad. I love it!
Pat and Eric,
Great work! Both of you have made a start on what appears to be a couple of interesting train layouts. Thanks for submitting your photos. Keep us updated with your future progress please.
Great start, really like the bridge.
Different presentation of a very good up and coming layout.
Looks like you’re having fun. Mission accomplished.
Wow Eric!, another new layout. I also enjoy the design and build with 4 different layouts in 10 years and when I have finished my second inglenook shunting layout about to start again with the fifth.
Keep up your great modelling work and I look forward to seeing you progress on Alistair’s blog.
Andrew in Oz