Paul’s been in touch with his HO scale track risers:
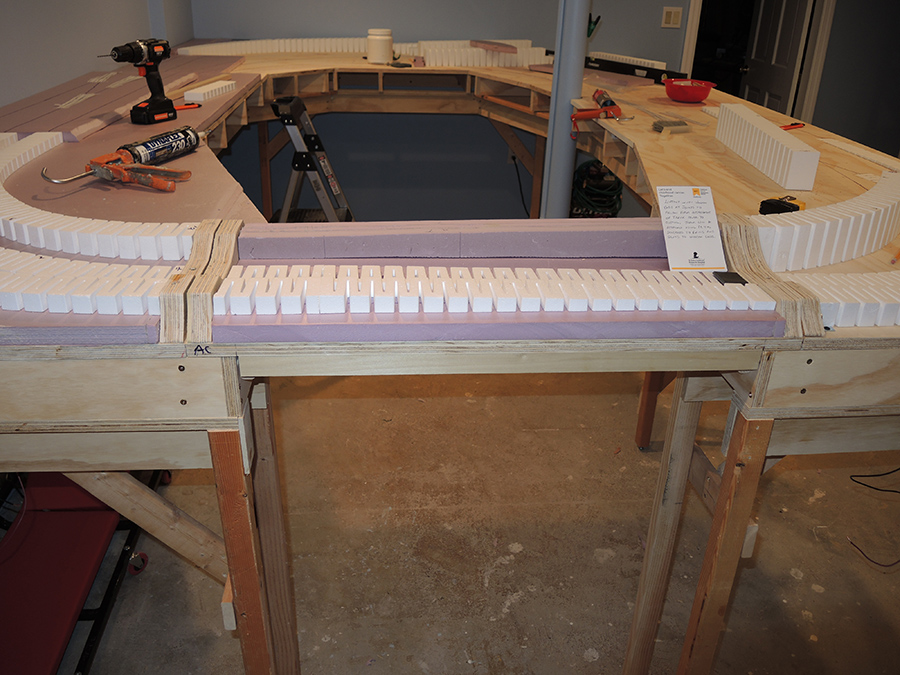
“Hi Alastair I thought I would send you some progress photos of my new 8 X 12 around the wall layout.
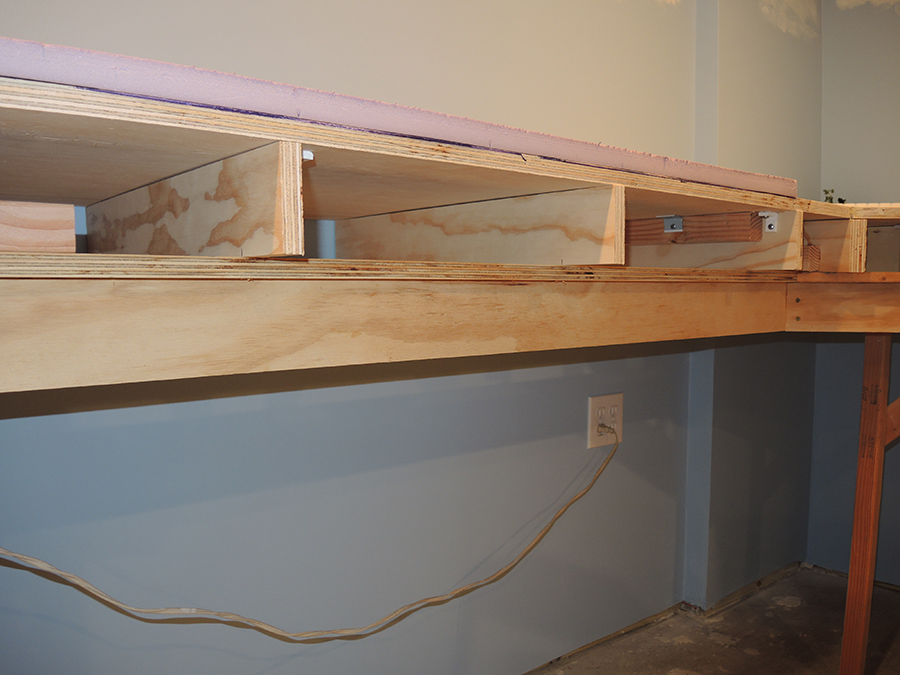
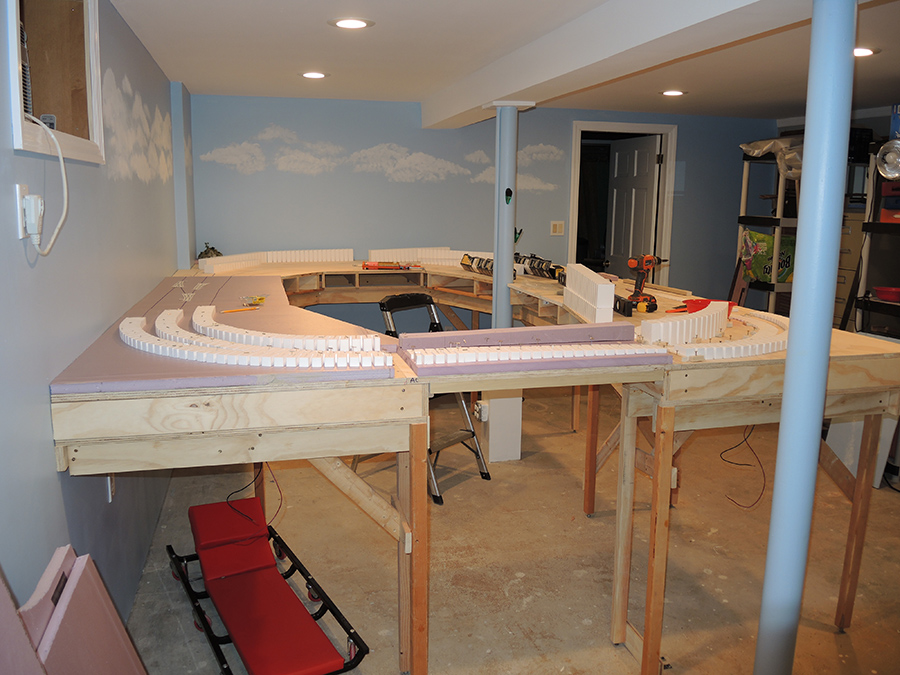
It is constructed using 3/4″ plywood to form L Girders and the baseboard.
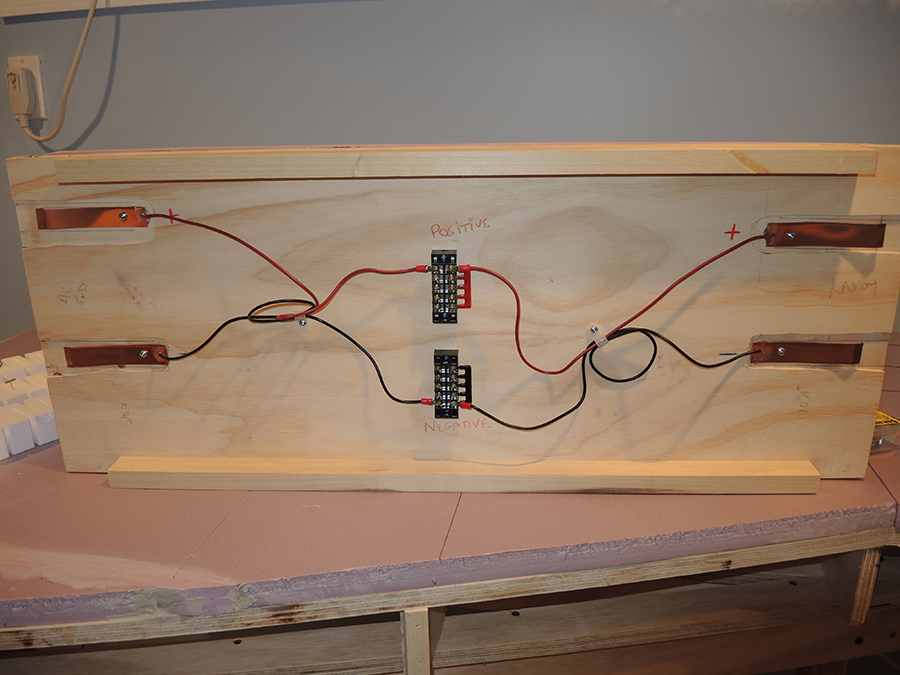
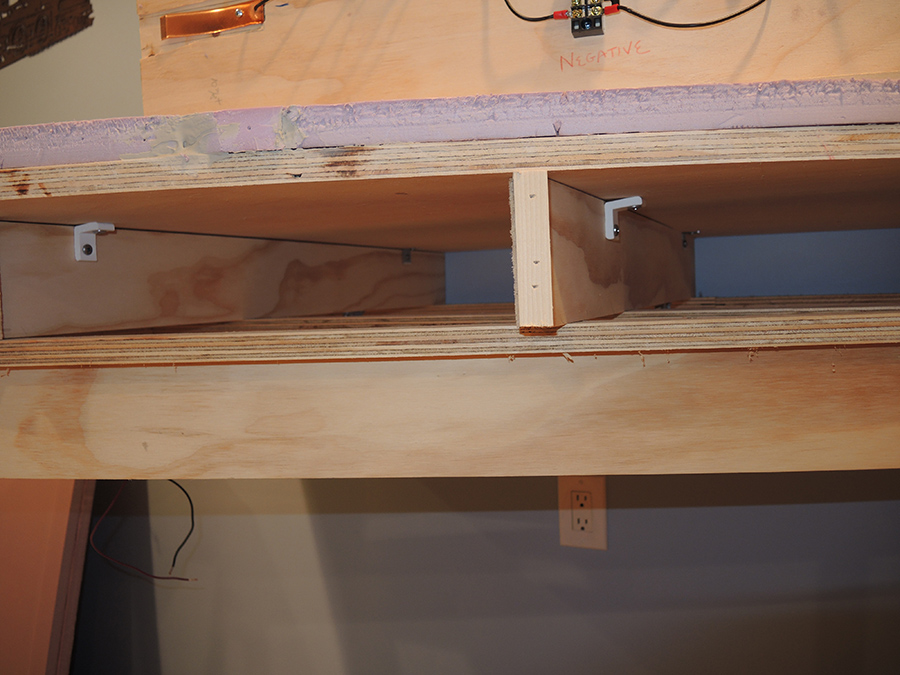
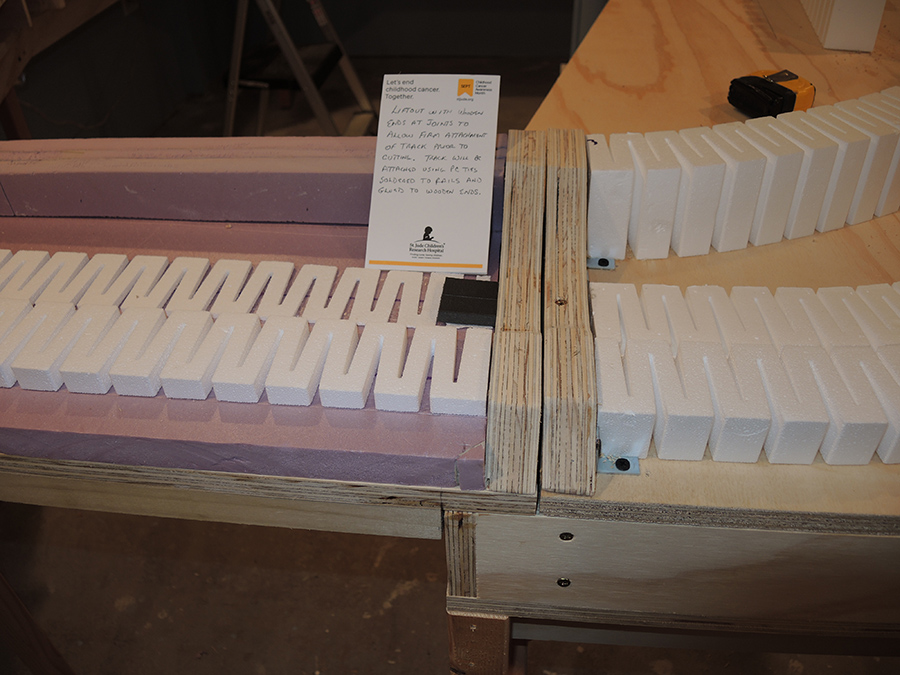
The mainline layout is a three times around over-under track. There is a liftout which has 3 tracks crossing it.
The liftout uses copper pads and contacts which I made to continue the electrical circuit when in place.
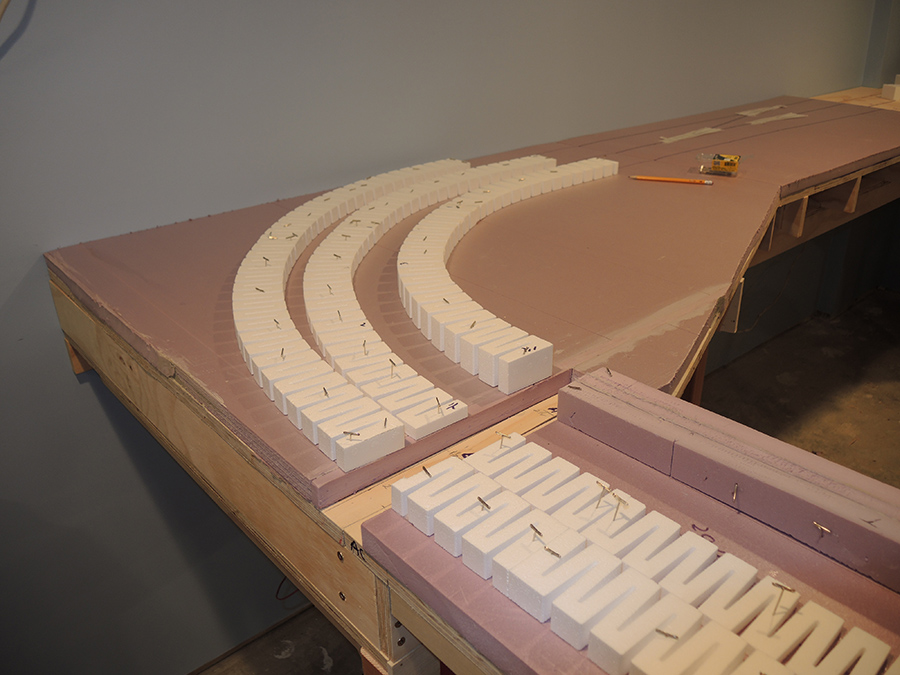
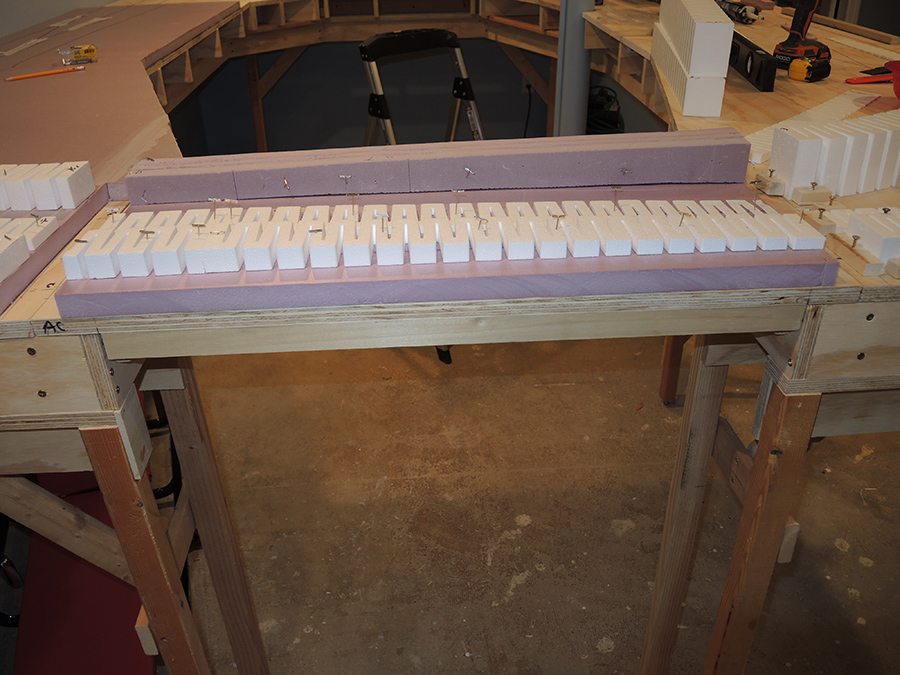
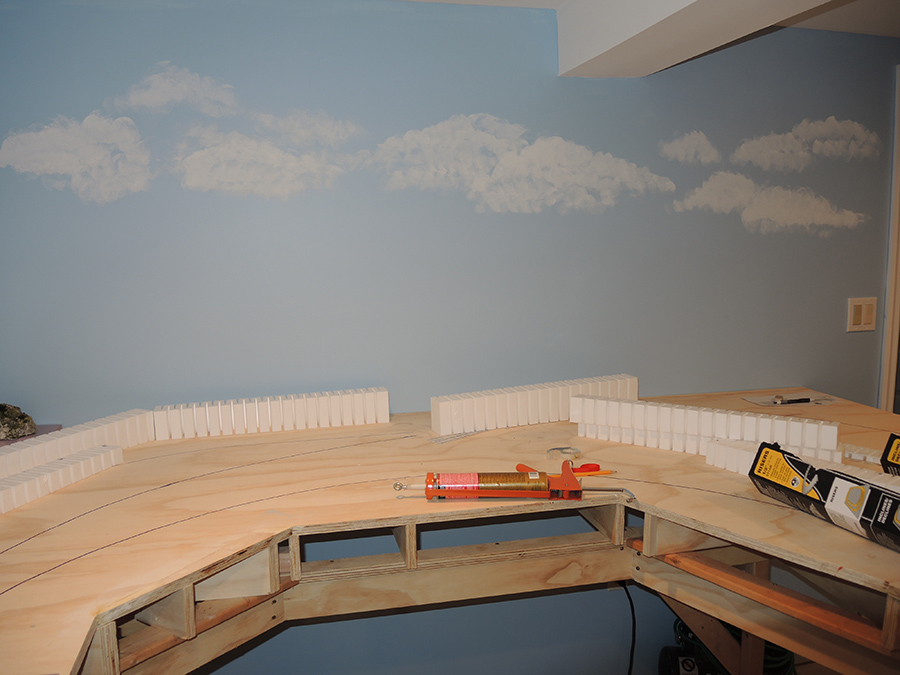
The layout also uses Woodland Scenics HO scale track risers to create a 2 degree incline and decline throughout the layout.
There will be a steam flowing to a lake which runs under the three small bridges.
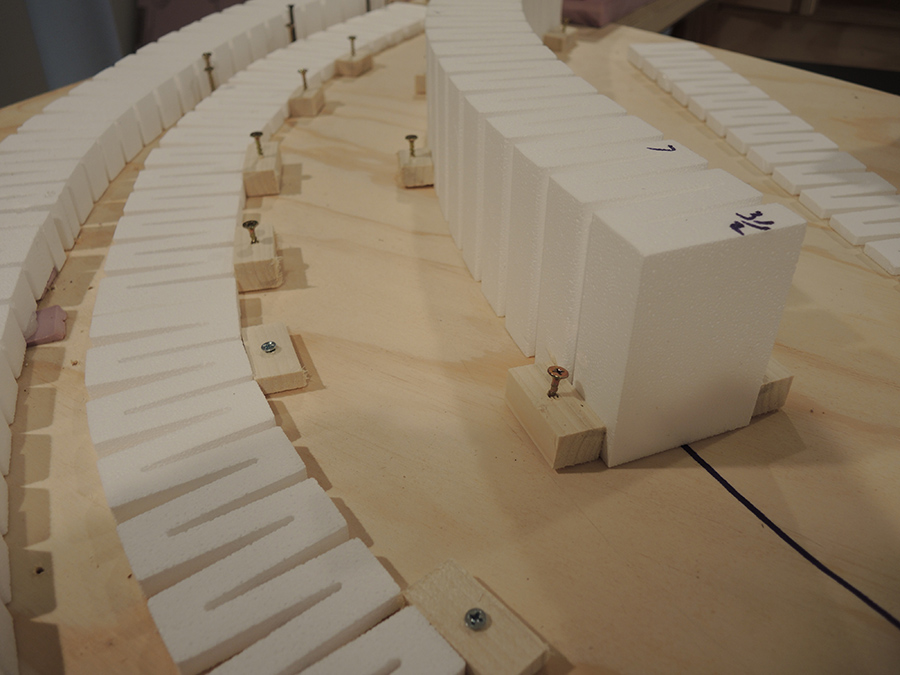
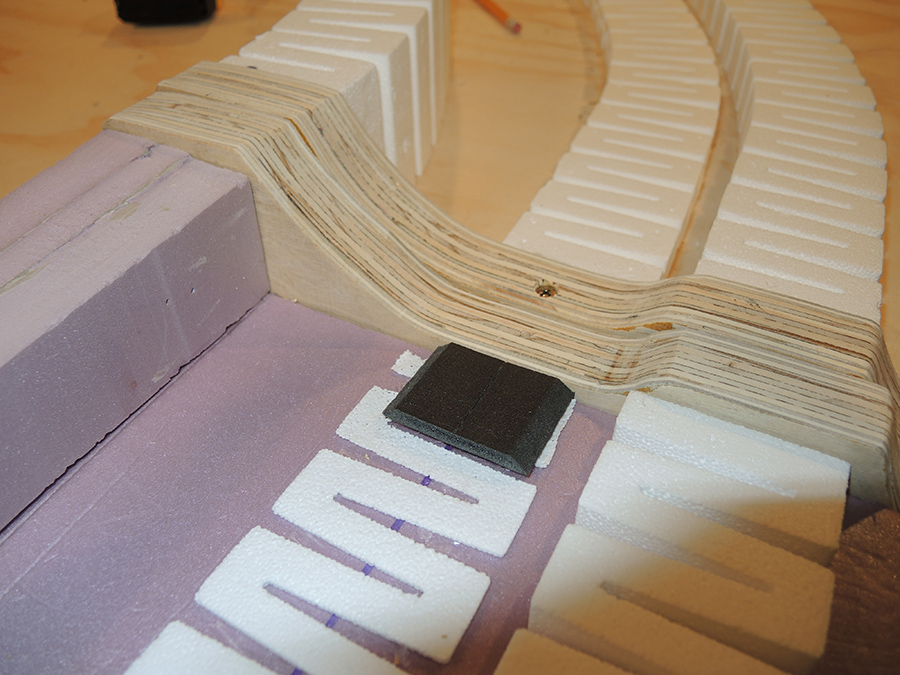
I cut out the foam using the Dremel tool seen in the photo. It works great by allowing you to slice off the foam in small layers until you reach the desired effect.
Essentially the layout is blowup or dissected version of an old 4X8 layout I found in an old Model Railroader magazine. What you do is cut a copy of the layout into 4 pieces, or quadrants. You separate the pieces and then draw lines connecting the tracks to form an around the wall layout.
I finished the basement room this past summer and started construction of the L girder baseboard in September. The trick I am learning is that you have to plan all your moves so as not to make any parts inexpressible. That’s the fun with an 8×12 HO layout.
So right now I am building a small hill to fit in a corner of the layout that will be hard to reach in the future. It is removable so I will landscape it on the workbench and then put it in place.
I have also built a temporary bridge over some of the layout so I can sit on top and not crush my work.
I will send more photos as work progresses.
Thanks for all the great tips you forward to us via your blog.
Paul”


HO scale track risers:


A huge thank you to Paul for sharing his HO scale track risers.
It just goes to show how a little planning can go a long way. Can’t wait to see an update from Paul!
Ken’s approach to risers is totally different, but still works: HO scale risers
That’s all for today folks.
Please do keep ’em coming.
And if today is the day you get started on your layout, the Beginner’s Guide is here.
Best
Al
PS More HO scale train layouts here if that’s your thing.

Paul, when you cut the rails slide on some special rail joiner that I have used. I cut the joiner in the middle down to the flat part. Then I open the sides into a U-shape with slightly slanted sides. If the inner edge interferes with flanges bend it outward some more. Glenn
Hi Paul….Love the idea of using copper strips on the bridge to complete the circuit…On my layout I use a swing away bridge that does not work too well…Will have to change to a lift out…Thanks…Steve
Paul, great idea with the cutting the smaller track plan into 4 parts, then making it any size that will fit your space. I really like the “layered” effect especially if you have the room to get one track well above the others. Tall, wide trussels really add visual interest. Please, please add an overall track plan drawing, even if it’s hand drawn on a piece of paper, to give us some idea of your overall intent.
Great job
Chuck
Awesome workmanship! I like the positioning blocks for the WS risers.
Hi, I liked the way Paul did the lift out. If possible could you tell more of how you built it, or is there a site I could go to, to learn more.
Very nice construction on the whole layout.
I like this blog. It has some very interesting material and comments on it.
Thank You.
Nice. You’re off to a great start with smart planning. Envious of all that space you have to work with. LOL.
Jim AZ
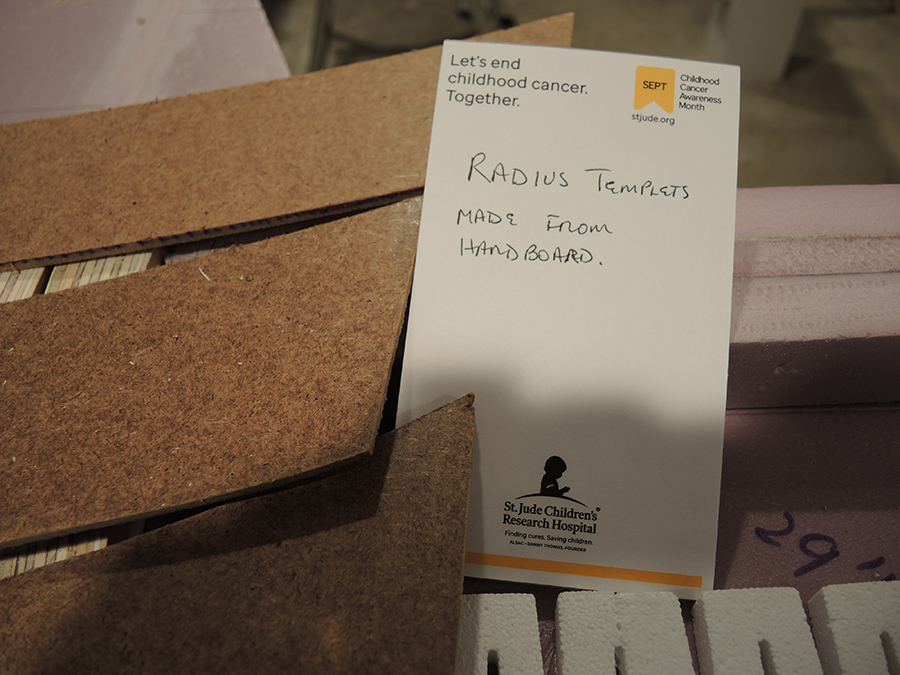
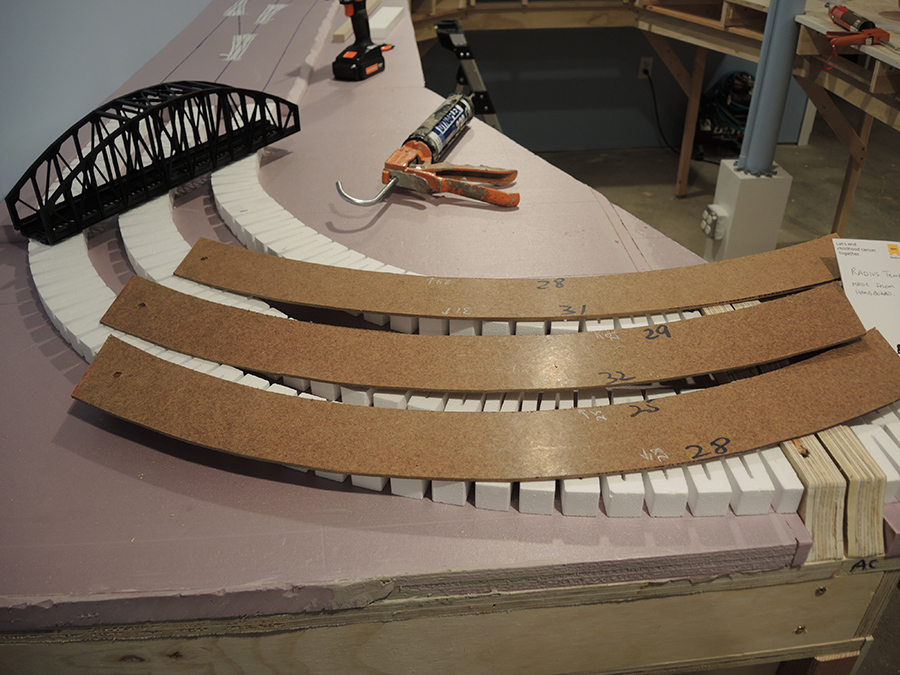
Radius templates. Marvelous idea. I still may use the Atlas 22 and 24 inch radius pieces for my curves but will keep this in mind in case I want to custom with flex track
In addition to the comments above I like the fact that you “work neat”. It bodes well for the future of this project. You have kindly provided us with some good solid “how to” photographs. Please follow through with periodic updates. This is good stuff that deserves detailed exposure if you will be so kind to take the time to inform us. Thanks in advance,
Rail buff in FL
Thanks to all for the great comments. I will be sending more photos along with more details of what I am doing and how I did it. Paul — Northport, NY
Nice start to your layout ..Dangerous dave
WOW there have been some significant changes to my layout in the past year or so. Nice to see it from the beginning Al. As soon as I get some items I ordered I will show you all the changes. The problem is that Covid woke up some dormant hobbyists and that has caused many train items to be on backorder.
The question I have always had for people who build lift-out sections: Where do you put the section that you’re holding it in your hands?
Terry Idaho/USA
And I’m a big fan of L Girder construction. It gives a lot of flexibility to the original construction. And if you drive the screws from the underside upward, you can even move a girder after the railroad is built. Geez Paul, there is something for all of us.
Paul.
It looks like you’re having entirely too much fun building your new layout. 🙂 Your construction method is top notch and built to last. I love that you took a 4×8 plan and cut it into quarters to extend it to 8 x 12. I’ve thought about doing the same with my 4×8 test layout but I’d also like to make broader curves which doesn’t happen if I just connect the corner bits with new straight tracks. I also like the heavy-duty design of your lift-out section and the clever use of copper strips to make the electrical connections, Please keep s posted as you prgoress further. Looks like a great start so far.
Paul, Your benchwork is very good. It is solid. I always say if it is not strong enough to walk on, (because you might need to) then it is not strong enough. Using the flex foam risers will give you differences in elevation which will add interest and make for a well above average looking layout, perhaps a stunner when done. Well done and keep up the great work, I know yours is going to be special.
Rob McCrain – Farland Howe
Great planning Paul. I look forward to seeing your progress in the future. I am very jealous of your carpentry skills.
Awesome job! I cant wait to see the finished product!
I have a question, I am getting ready to start my build, but I not very confident abt setting up a DCC & wiring it. I keep watching videos and reading any material I can get my hands on, but I am not very confident. Is there a good website or youtube video someone could recommend that could help me wire my own model train layout? Thanks
This layout will never move or shift. .Strongest layout I have ever seen built.
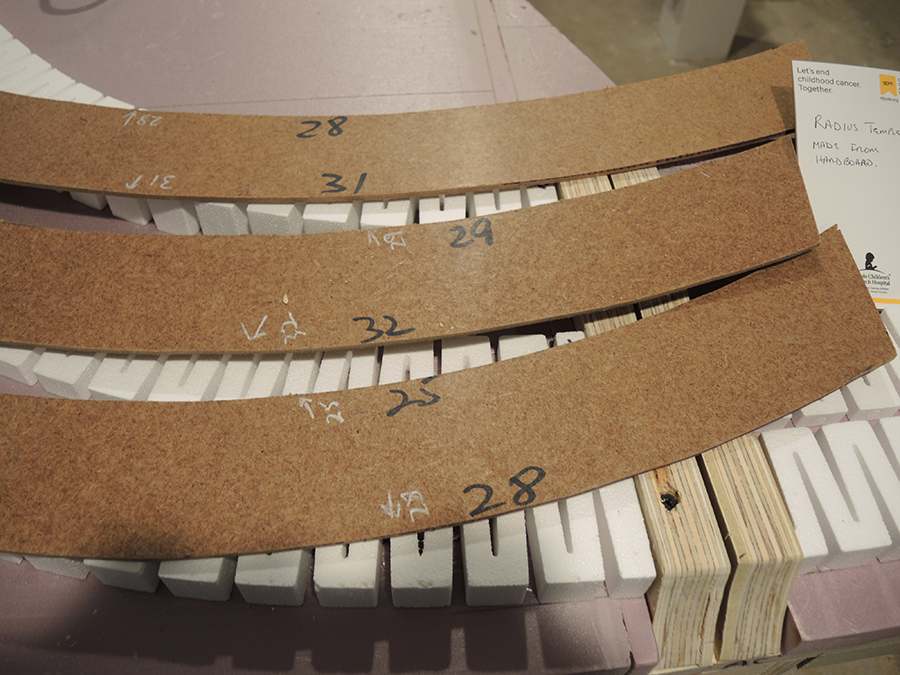
To all those who have questions. The layout you see was when I started about 2 years ago –it is way beyond this stage. It is actually now about 10X14 and growing. You can see parts of it in the video I sent last week about the Doodlebug I upgraded to DCC. Regarding the liftout section –I rarely remove it and actually roll under it on a mechanic stool I got at Harbor Freight. But when I take it out it sits on a shelf under the layout. In regards to quartering the original 4X8 plan you can freely reshape the corner radii in fact mine run mostly between 27 & 32 inches with only one area at 23inches. I was a carpentry contractor and yes you can sit on it if you can find a space I did in the beginning,but not now. I find the costruction and landscaping as much fun as running the trains. More will be
coming in a few weeks with a new liftout section that uses magnets and screws to help align the tracks. Paul
You could make a compass to draw the radius for flex track. they are not to hard to make and they work great. I see you are using a creeper for working under the layout. It saves a lot of aggravation and it makes it easier on the back. i had one for the last layout I worked on. Nice work.
Hi Paul:
Like the idea of the blocks holding the Woodland Scenics Risers in Place.
Question, anyone can answer, How much Different is the Noise Level using
Homasote Board Vs. the Pink Insulation Board? That is how much louder is the noise of the trains passing over it on the track attached to that roadbed comparing one type of material to the other? Thanks for sharing your photos as well. Best of Luck creating your new layout…
Mike in Lebanon, New Hampshire, U.S.A.
I’m going to archive this because of it’s content and remarks. The tip about lift out was the greatest
# track lift out section: there is a club in severn MD that uses a dowel and hole to keep the alignment for the lift out section. I don’t know about the electrical connection
Mike Balog, I have pink foam or the WS risers on most of my layout with only a small section running over plywood. BUT all the track is on WS foam track bed which I think is the difference in sound. Never used Homasote so I can’t compare. I don’t notice any disagreeable sound from the trains, but then I am running all sound engines on DCC any they may mask any other sounds. If you are running DC you may hear the sounds coming from baseboard vibrations. Also track nails if driven through the track bed will carry train vibrations into the plywood baseboard and make it sound like a drum or speaker amplifying the sound.
I also have made stained glass window inserts and have considerable supplies and gear. One item we use is copper tape that has adhesive on one side. Thinking this could be used for connecting joints and serve as a soldering base to connect rails and other electrical connections.
Great example again, of how important benchwork is as the foundation of any layout.
Again, really great info on the riser position blocks.
Hot glue is great and terrible to change with all those
strands!
Now that’s built like a tank using some of the old and newer innovations. You could sleep or walk even on that grade of construction. But still when going with the L girder format what ever happened to “Cookie Cutters”. Those would have over and unders with varying the table top itself. Won’t be done with 3/4” plywood however, homosote was the ideal material I always preferred. Reasons being- sound deadening, lightweight, more flexible and can be secured at different levels, same 4×8 sheet. Easy to cut out for roundhouses, indentions/rivers, crevices and easements. Way cheaper and pretty durable. Sometimes saw partially through some of the strapping grade framework for features but not making any problems with structure at all.
No downgrading here and consider quite an engineering feat. as done, of coarse. Honestly don’t believe I could or would attempt it and look forward to additions with this certainly.
Regards, Rich
nice work, informative, thanks.
Inexpressible? Hmm…….
Would you say that you have a plethora of track risers?
Love the mechanics creeper under the bench work.
Paul,
That will be a nice lay out and getting ready to start mine. The fact that I have wide curves makes around the room best way but I am scared of doing a lift out. Think Duck under would get old quick.
Does anyone have feed back on lift outs?
Paul, After all he 2% incline, What is the height of the rest of the risers? Are they 3″ or 4″ and how many sets did you use for both inclines and Risers? Thank you. Can you please Reply?