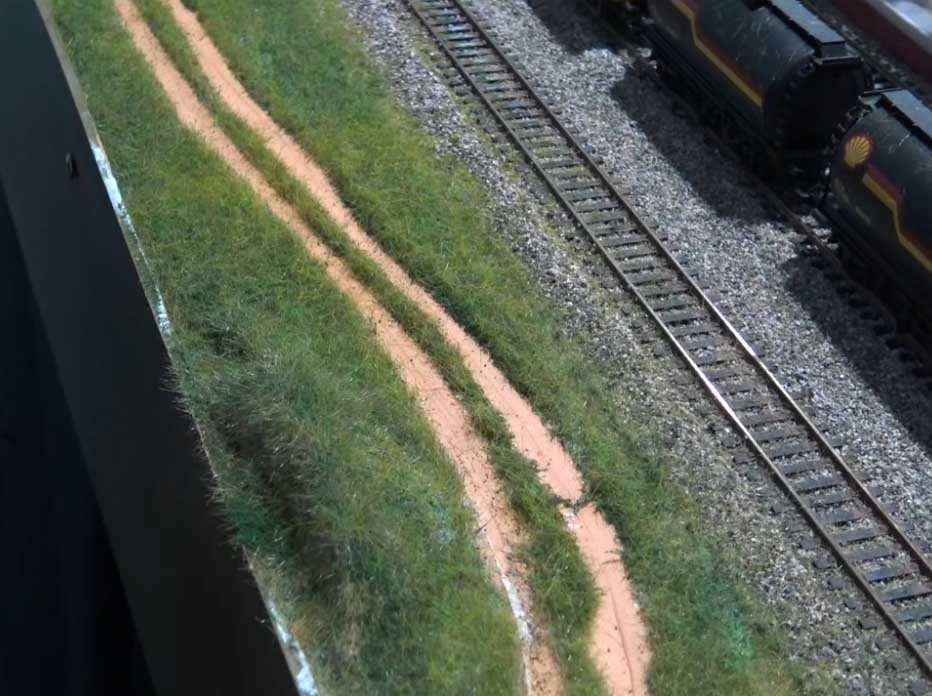
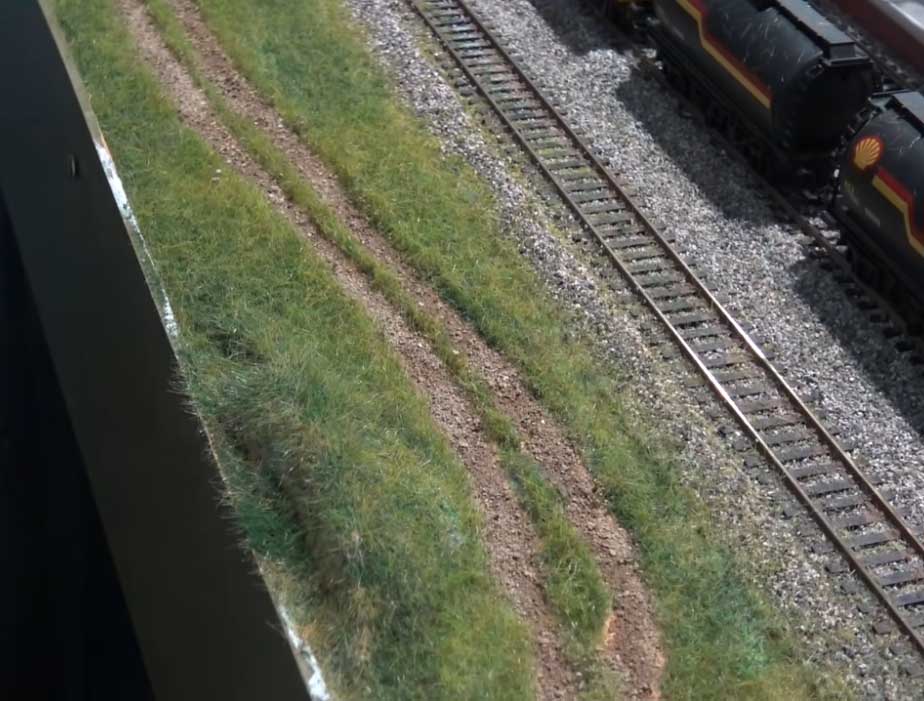
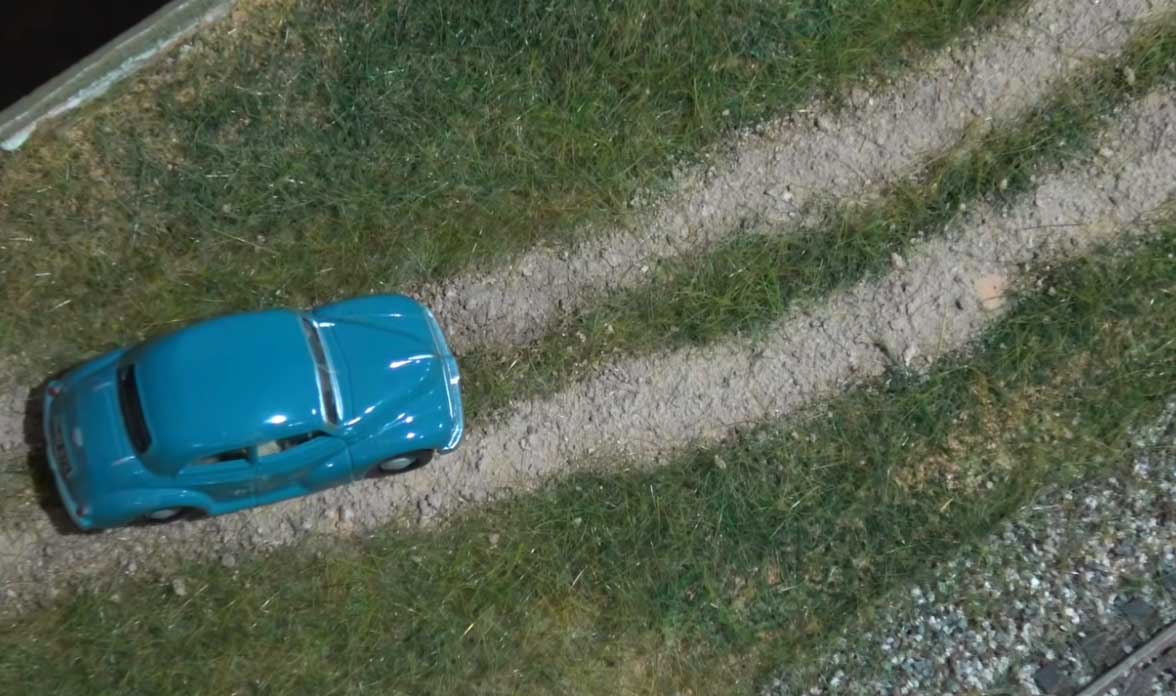
Rob’s been in touch again. This time he shows us how to make a model train dirt road.
“Hi Al,
It seems I have been perfecting single track roads through the rough.
In my latest effort, I have created this simple tutorial. There are a couple of things necessary to build a road as I’ve built in the video that I don’t go into in this short tutorial.
One is collecting the dirt, drying it, sterilizing it and sifting it to various grain sizes. Perhaps in the future, I will do a video on that, It is a subject to tackle some other day.
In this video, I use dirt out of my garden in an area where it has not been subjected to amendments like softeners or fertilizers, etc.
The other thing I do not get into is the special tool I have developed to initially layout the dual grooves that form it. This tool is homemade of course and it has N scale tracks at one end and OO tracks at the other.
To determine how wide one needs to make the tool drags, just take a scale vehicle and measure it. In fact, I would recommend you take 4 or 5 to measure since they are not all the same.
You could drill the ends of the small block I have mounted them on if you have the patience. When I originally realized I needed this tool, I was in a hurry but I have used it for years now and it works just fine.
One important thing about car or truck tracks is that though they may wind around and around, they always stay exactly the same distance apart. That is why I realized I needed the tool. It is simple but works as you see in the video like a dream.
The way you use it is to drag it along where you want the track to be. It works really well in foam board as I used here.
I glued 4 mm thick foam board along where the path was to be, created the ruts, taped them to protect them with Tamaya 1/4 inch tape then put the grass down over the tape.
When I pulled up the tape, it left the tracks without any grass so I could finish them separately.
The tool also works in wet drywall compound or wet plaster for a muddy track effect. It is harder to control in wet plaster however and you may ruin your tool. No worries though it that happens, just make a new one.
Thank you for all you do for the modeling community around the world. Though I don’t always comment, I do read every one.
Rob”
Latest ebay cheat sheet here. Had a look yet?
A huge thanks Hall of Fame member, Rob, for showing us how to make a model train dirt road.
A wonderful ‘how to’ – the end result really does look fantastic.
In fact, this post goes very well with Bob’s grass ‘how to’.
That’s all for today folks.
Please do keep ’em coming.
And if today is the day you get started on your layout, the Beginner’s Guide is here.
Best
Al
PS Latest ebay cheat sheet is here.
PPS More HO scale train layouts here if that’s your thing.


Beautiful work, Rob. I need to try the static grass, thanks for the tip. Cheers! NJ Mark
Thank You Farland, your skill as a scenery fabricator is outstanding! I’m now motivated to give it a try.
awesome!!! good job
Great idea to build a track side dirt road. Will have to try this on our layout. Great tutorial.
Kathe & Frank, Florida
That was a great lesson. It looks beautiful. I will try it when I landscape my next section of my layout, probably late spring. I work much slower than Dave. Did Dave actually say how long it took him to change his layout? I have found a real deal at Harbor Freight. They have 48 stick on 1/4 or 1/2 ounce weights in the auto department. With a coupon they are about $7. i spray them flat black then stick them in the cars. Even open hoppers are not noticeable.
Looks so realistic love it i’ll do that same path /road to the fishing hole.
Thank you Farland
Robert B
Thanks for the tips Rob! Very nicely done…
Rob, I really enjoyed your video on the vehicle road. Very good explanation on how to create one. Thanks for sharing.
Rob, Absolutely fantastic job and results. I must say your hand is a lot steadier than mine. This will make great country roads in farmland here in USA. Thanks for posting.
By using real dirt or sand don’t you run the risk of iron filings contaminating your track and engine motor then causing trouble?
Looks fantastic!
I have no layout yet. Lack of space. Working to correct that. Getting ideas from the post. Thank you.
Hi Rob, any chance of showing us how to make the track making tool?
ROB! That is AMAZING. You have transcended from model railroader to artist! I am SO MOTIVATED to get working on my first layout. THANKS FOR SHARING THIS!
good tips. the road looks really nice. thanks.
Rob, your video Tutorial is excellent. The dirt tracks look very realistic. Thanks for the tips in it.
Brian – the HOn3 guy from Knysna RSA
Rob , great tutorial as always , you’re awesome to share these tips and videos… thank you , they are really helpful .
Wonderful layout you have , I’m impressed as it appears you’re donning a suit as you work on your train . Gotta love that
love the tanker train, why doesn’t anyone have auto haulers train cars on their sets?
I have been a Lionel toy train guy since my family says since I was born. Over the 83 years I have belonged to several HO train clubs and modeled for them. The men that are doing the layouts I’ve seen here lately are truly Artests. The realism has been fantastic. Thank you all for sharing.
Looks great !!!!
Great work, especially the grass work! The road is great, too, and I actually liked the first photo, before you added the gray gravel, better than after you added the gravel.