John could have done with a model railway track planner. I think we all could when we start out.
Can anyone help? Please leave a comment below
“Hi Alastair,
I am an avid reader of your emails and all the layouts you’ve shown have given me the itch to go back into model railways.
I have joined a club and at the moment building a layout in stages for the clubs show, but have run into a problem.
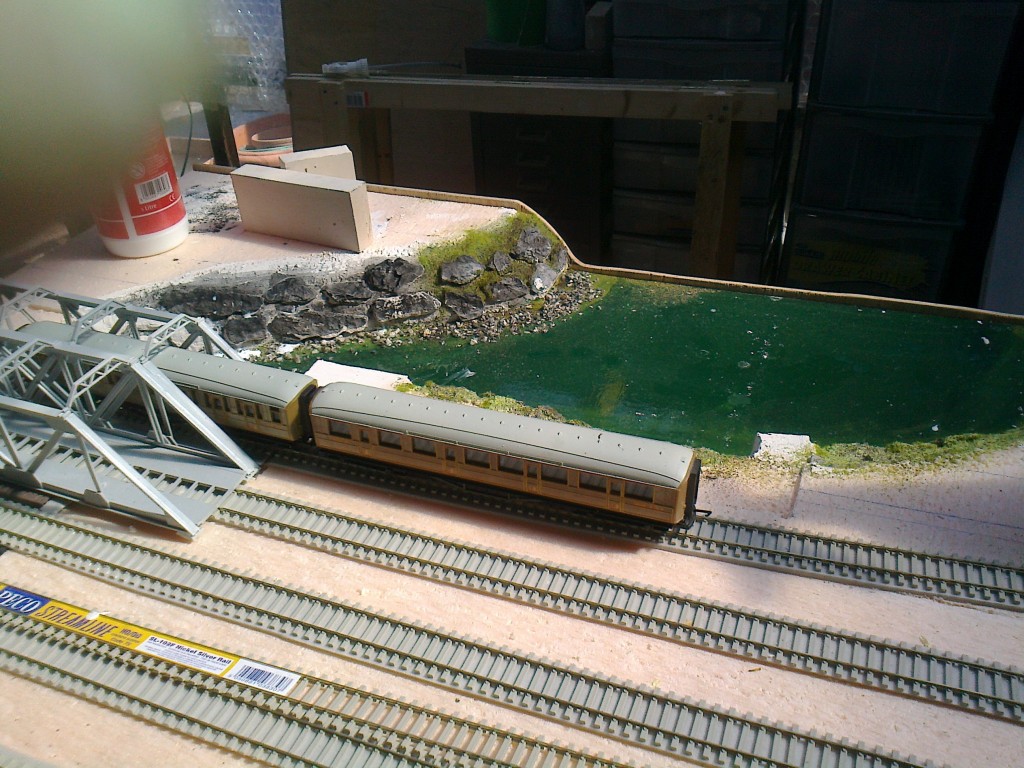
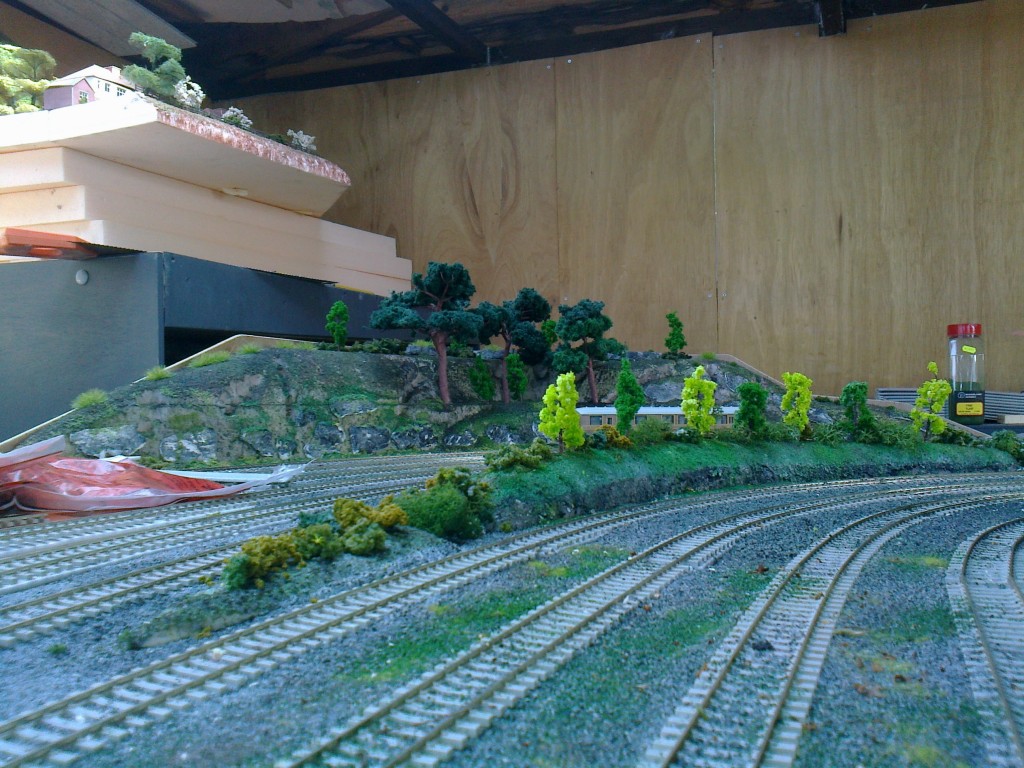
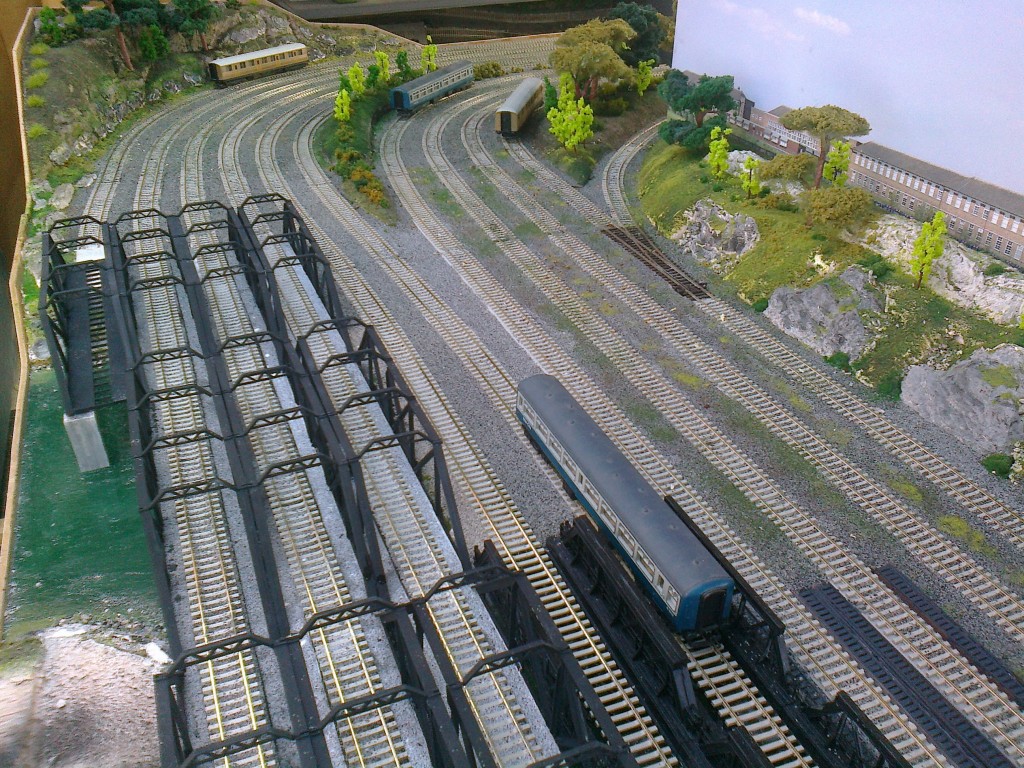
I am using boards of 4ft x 3ft wide boards and think I have gone and got over enthusiastic by having a ten lane track. This wasn’t a problem until I got to the end board and had to take all the tracks round a left hand radius onto the next board which left the inner tracks in a to tight curve.
I had to start again and took the inner 4 tracks up over the other six tracks, thus coming out of the curve directly over the other six tracks. This is my problem, because I made a tunnel at both the beginning and the end of the tunnel and find:-
1. It difficult to join up the fish plates at the tunnel entrance.
2. Had to bring the 4 tracks back to the inside again which I did by a bridge which has to come off to fit the fish plates at the tunnel under the bridge which is over the six lines of track. I have to do this every I want to move the layout which looks a bit of a messy.
Please have you or any of your readers any tips on how to get over this.
I have enclosed a couple photos
John”
“Al,
It has been a while since I submitted anything to you. I thought I would submit this as a window into progres on my Farland Howe layout.
Rob”
Big thanks to Rob and John for getting in touch.
That’s all for this missive.
Please do keep ’em coming.
And if today is the day you get going on your layout, the Beginner’s Guide is here.
Best
Al
PS Latest ebay cheat sheet is here.

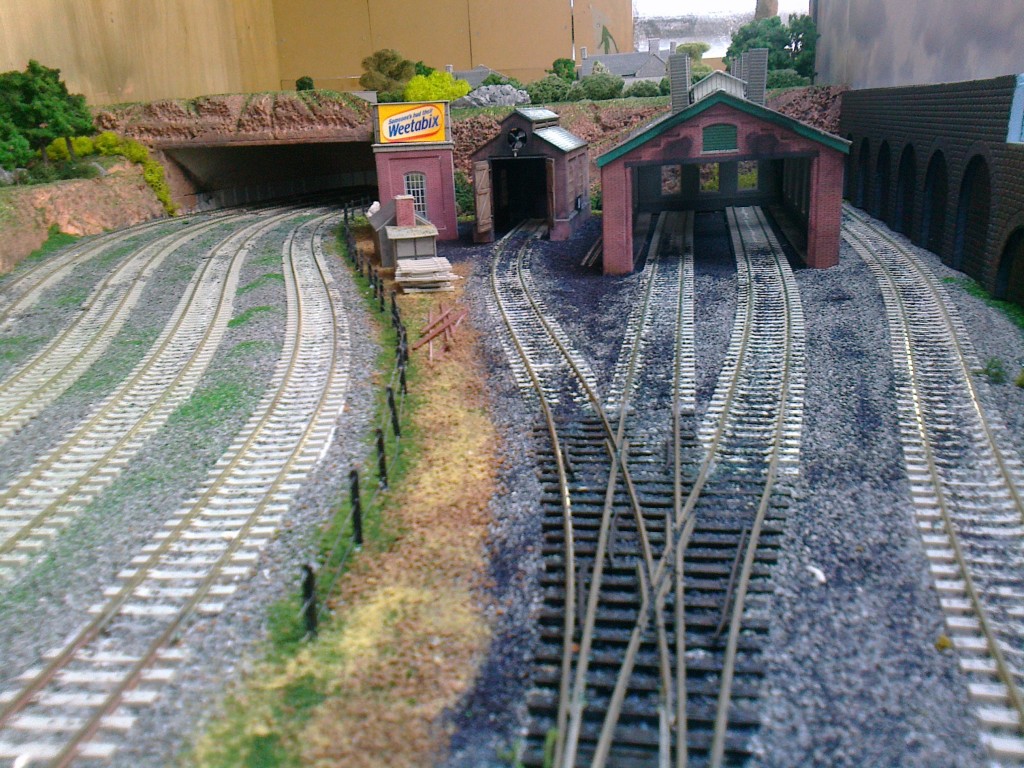
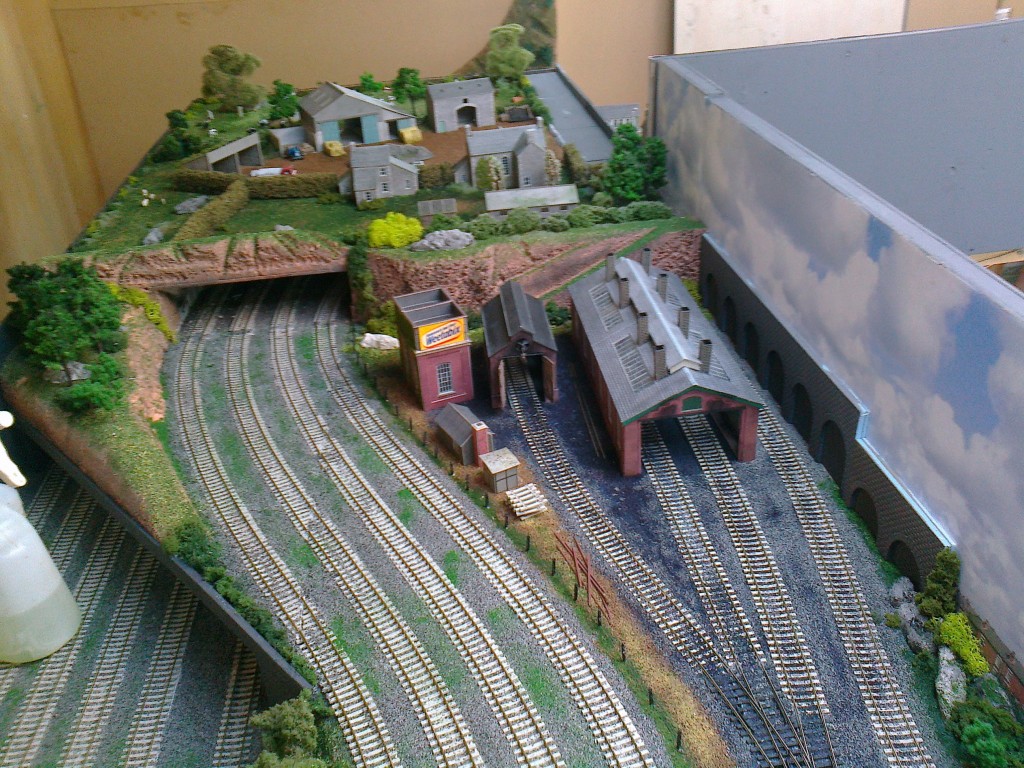
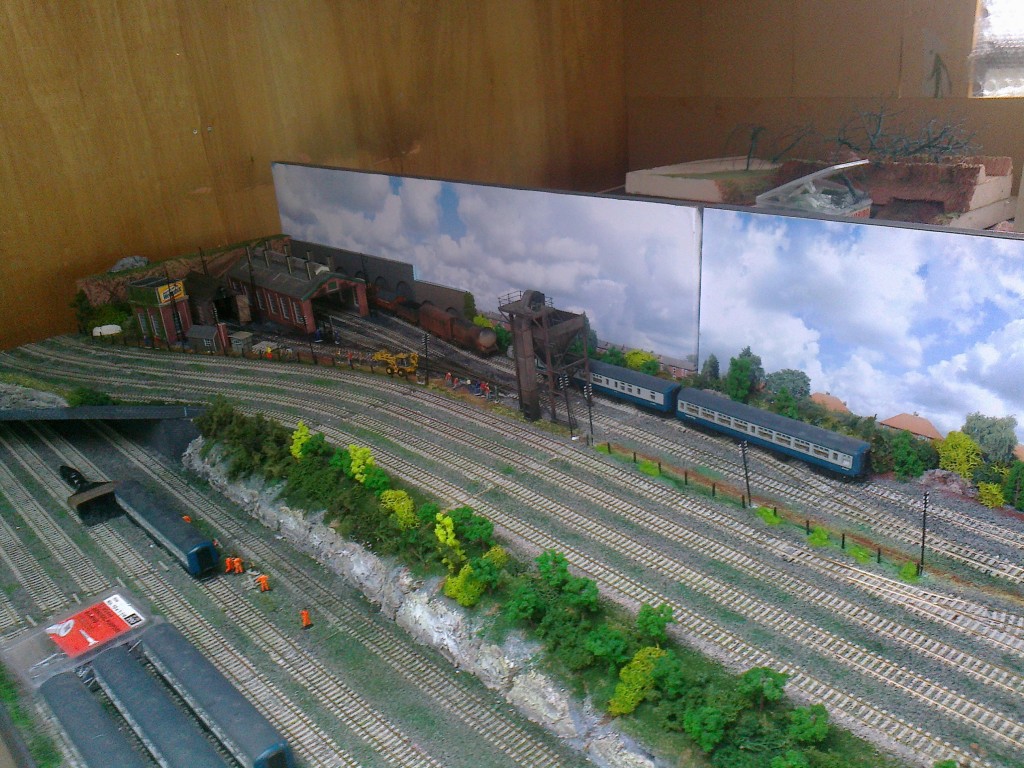
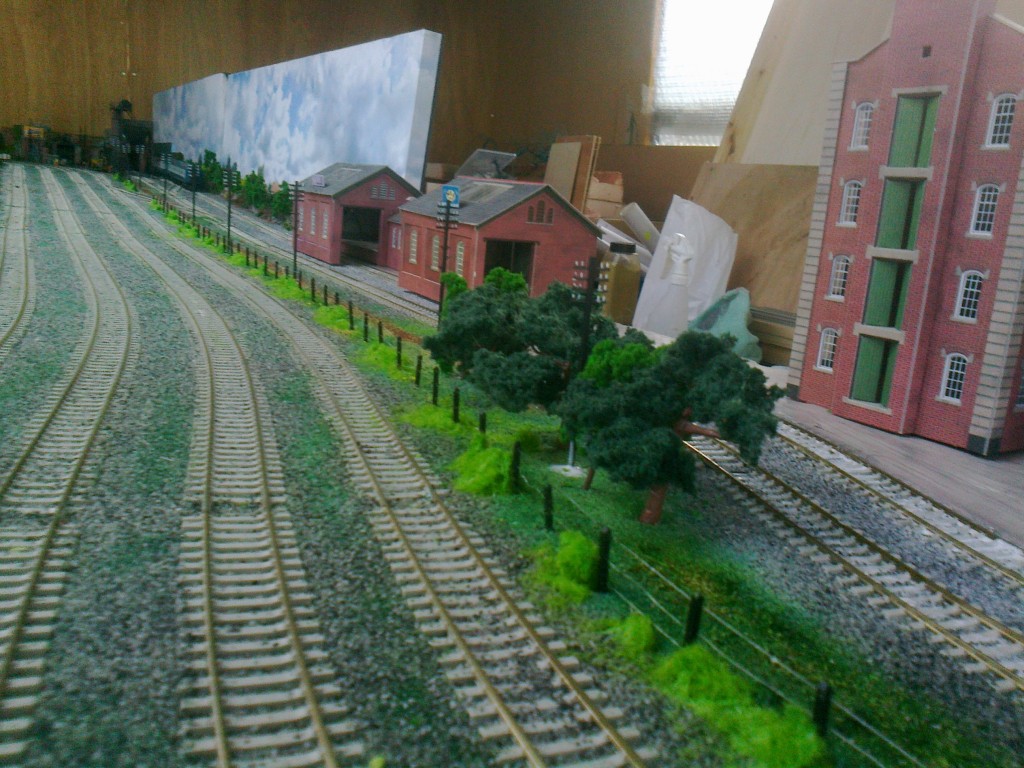

wow that’s very nice that.I have a 3 track system and that drives me nuts.But your’s hahaha .Really like this layout.Just a tiny comment.Add more thing’s to all the space in the hill’s.Great job would love to see more pic’s thanks for showing it all.
John
Having the 4 inside lanes go up and over the 6 outside lanes could make scenery a problem, with it blanking the outside area. How about if you take the 4 outside lanes high then run the 6 inside lanes under by snaking outwards into wider radii into a tunnel. This could offer more interesting scenery at that end.
The # ratio of inside/outside lanes can obviously be varied to suit the most aesthetic scenery layout possible and the radii that will fit the board. eg 4/6 5/5 6/4 7/3. etc
How about reducing each 4 track to 2 each using points and then use the existing 4 tracks to take locos round the bend and then convert back to 4 tracks as you already have coming out of the curve?
Rob has got those sounds well co-ordinated with the Loco`s
Just loved that video,a question, what size is it,
Thanks
Paul
I really enjoyed the video Rob. Love the sounds, I see working signal lights too. I also like the backdrop work. Very nice.
John…is the layout a modular system of equal sized sections etc?
To overcome the problem of track alignment (especially on curves) you need to replace the sleepers at the edge of the board with either strips of PCB or Brass. solder the rail & power droppers directly to this & use bolts/dowels to line up the base boards.
problem solved
John, why not fix multiplug strips under the joins, solder wires from track ends into the plugs in the right order then simply pull the plugs apart when you need to dismantle the baseboards then push together when you reassemble. You dont need fishplates.
Hi, It’s really easy to find yourself in this type of situation, especially if like yourself ,you have built layouts at an earlier stage of your life. As we would all like to have an enormouse layout in our home. But after looking at the pictures you supplied I have to agree with the previous person and suggest you take the outside tracks up and over then widen the radius of the inside tracks to form an “S Bend under the raised tracks.” I take it that your tunnel runs all the way along the back of your layout, so you would also have to run the high tracks that way also. Anyway whatever you decide to do I wish you all the best and hope to see pictures of your completed layout, please!!!
use code 83 nickle silver track you will have more flexabilty
Fantastic……I am so green with envy…if only I had even half the room, my efforts thus far have all been taken apart again, poor planning on my part, need to have yet another rethink. Making a modular layout is bad enough, but how and where to store the boards without damaging them is just one of the many problems.
I say the same as Howerd. I use cheap scart sockets on the underside of the baseboards and a link cable with a scart plug on each end. These have 21 connections and as all my boards wired the same these cables are interchangeable. Can put socket on one board and plug on other to cut costs.
Thanks to those for their advice, I have been given a way out of my problem and have taken on board his suggestion and will show his idea in some more pic’s when I have tried and tested it.
Again many thanks to your readers
John
Less is more with a model railway. Once you have watched trains going round and round in circles for a bit you soon realise a lot of the interest lies in operating like the real thing – waiting for a “path” through a busy junction, shunting out the dining car to join a train going the other way, putting the milk or paper train into a bay platform to unload out of the way of the main line, getting the loco serviced at the ashpit, coaling stage and water tower… if you want to just drive round in circles, I suggest Scalextric!!
you could try using peco fishplates for the joints that have to be taken apart solder one fishplate to the other at 90 degrees on its underside and these are easy to slide apart using pliers on the one that sticks out the side of the track, you have to cut away the rail chair on the sleeper to allow the fish plate to slide all the way back into the one track, hope this helps
I really enjoy this site and information. Usually look at it every night. My question is for Rob, what guauge is your layout?
Both layouts are great. I could view that all day Farland.
Steve
just a tip, to make realistic looking rolls of steel for your gondola`s or flat cars. Buy yourself a beer, first of coarse drink the contents. Next cut the can in strips about 1/2 inch wide roll the strips on a wood dowel or rod, size your choose. super glue the end to the roll. Use the can material with the inside out, shows nice shiny looking as a steel roll would. Only 1 beer please.
love your website and its tips,etc.. but most of what you show is not your average poor modeller. layouts that you feature are not in the finance realm of your average joe. would like to see more of layouts and tips from the poor people.
Great watching your video, the way you done your inclined and many other things. Doing the water affect has open my eyes as for not using the heated up type ie going through on to the floor. I have to look into a bit more before I do it when the time comes. Again you done a grand job only put people on those tractors then you can see that it will feel like they are working the fields. Roy
Farland. Well what can I say what a wonderful video. That is what Railway Modelling is all about. Sinking into the world which you have built with your own two hands and drifting away into your own world. Well I drifted away into Farmland and while I was watching and listening to it my coffee went cold. I had to put it in the microwave. That was fantastic movie and will come back and put it on again. You have captured good old England well also.
The layout seems to have love built into it and it oozes personality…………John
Sorry spelling should have read Farland not farmland.
I don’t understand all the remarks people are making about the size of your layout and average people, ones says, would not be able to afford to manage it.
My comment to them is are we all not in the position when buying or renting our houses flats / apartments where we are going to live, not in the position of choosing something suitable for our future needs. It is all down to lack of future planning. Sounds like sower grapes to me. We have most of us started out with not much or nothing and built it up over the years. I remember back in the 70s when I bought my first house all the building societies and banks telling me I was not earning enough. Then a locol estate agent got us a mortgage and we got started. I always looked for a house which gave me a model railway room even if it was small one. Think those comments were very unkind ones. Farland has great reality of it’s own. And has a unique personality. Wonderful layout. ……..John
Thanks Al for all the good work you’ve shown us in 2016. All the very best to you and your team, and also everybody else who uses this site. Hope the New Year brings peace and prosperity to all.
Frank.
The best I have seen!!
I don’t understand the need for a ten track mainline or anything. I don’t know what the shape of the layout is, and I have seen many club layouts that don’t have that many. what are you trying to model? Please elaborate. God luck.
Rob,
I’m a rookie and can only dream about your layout. I realize all the hard work that went into it. Thanks for the video..I can learn a lot from it..
Mike
Really looks nice. I just have to ask where on earth can you find 10 tracks going into a tunnel?
As for the Beer can medal why not a six pack use one can for the rolled steel the other 5 for while your working the steel into rolls. Keeps you in a relaxed state of mind. lol
Still in the process on my layout, always tryinv to find time to eork on it.
One I will jave up and running, lol
Reply to John – tight fish plates and tunnel issue –
When you have multiple parallel curves, be sure to calculate the out throw and in throw of the cars. Cars will pitch out going into a “out” curve and will hug to the inside of the radius as the trucks go around. Leave clearance of these marks between other marks from other curves.
If you are going around curves or perhaps a wavy track, it is possible for the track sections to not meet each other perfectly square. One solution is to off set the rails, so the fishplates are not across from each other. Do this by about 6-10 inches. This will avoid kinks where they come together.
OR – – put 2 sections of track straight together and solder the fishplates to make the section tight. Then lay it in, allowing again for the rails to slide. This is assuming you are using flex trak. If you are using Hornby radius 1,2,3,4, then you may need another opinion from another reader. Your layout is coming along nicely and looks great.
Bob – Brecksville, Ohio
Nice synch’ing of sounds to the speeds of the trains Rob. Very impressed.
Brian
Rob-
Great video and great layout! As a lot of people said- the sound is something special- can you give us a quick run-down on how you do it?
Wholly samolly alright that water color is a Bobby dazzler
Perfect color wish i had the nohow. great total layout.
John, If I understand you problem correctly, you want to connect the tracks that are under the bridge with fishplates without tearing things apart.
Since the purpose of fishplates is to 1) align the track and 2) to provide electrical connectivity between the two sections of track, I suggest the following:
If the fishplates you use look like a flattened “U”, I suggest you open (or flatten)one side of the “U” so it looks like a “J” lying down on its back. Trim the plastic “bolts” at affix the track to the ties, and slide the fishplate, now flattened on one side, under the two tracks, with the flattened side facing you. Then use a pair of pliers to bend the flattened side back against the base of the track to make a “U”. Then solder the fish plate as you normally would.
Of if soldering isn’t practical, slide the fish plate under one side of the rail, as above, then glue the flat side (on your side) with glue. Then solder feeders to all four rails, where you have access, to guarantee connectivity.
I hope I haven’t misunderstood your problem. Either way, good luck. Your layout is most impressive.
al:
I think that the answer is to scale down from so many tracks to say 2 or 3
I am tearing out my 50 year old layout that featured 8 loops on 4 levels. Hope to have 1/2 of a garage to re-build. am thinking 4 tracks on 2 levels. Maybe 4×20 for the base and then above that a 3×16.
I have to sell a car first. enjoy your blog and will join up when I start construction.
Look pretty kool.!!!!!
@david loree. There are many cost saving and ingenious tricks to save money on the blog.
A tip from me. Go to garage, yard and estate sales.
Many materials can be found there and for next to nothing.
Ebay is sometimes a great place to score a good deal.
Also start with used rolling stock and locomotives.
Learn how to service them yourself so you save money and save some used material from the trash bin.
But best tip I can give you is: don’t try to build your layout in one go. Many of our veterans and regular readers alike, started with just some used track and some second hand trains but have build up and upgraded their layouts over time.
Hi John: Impressive undertaking you have with a Giant Main Line. IF the Curve tracks in the Tunnel is a problem.. Suggest you consolidate the main lines with the tracks Narrowing down to Two or Three going into the Tunnels and out. Create a Passing Siding Prior to the Tunnels, with a possible “holding track” or a “Priority Track” in the middle. Using a three way switch on each end. At bridges you could have a holding track to wait for Priority Express Passenger Trains or Express Freight trains to pass, then the other train(s) on hold could enter that occupied block and proceed.
Farland Video: Liked the way the sound effects matched the different trains and locomotives. I tried to figure out why you have a HUMP on the left track going over that bridge just after coming out o the tunnel? Did the track buckle up? Perhaps you need a “Johnny Apple Seed” to come along and Dot the Countryside with More Trees, shrubs and ground cover,.,, along with some cattle or sheep grazing near by. A few of the fields with hay bales with a work crew loading flat bed trucks or “hay wagons” occupied by other workers stacking the hay bales. At one time in my life I used to have a small 60 acre farm and Let another farmer come and hay the fields twice a year. So, I know a little about farming… Speaking of Hay Bales,, if you go now to the Local Craft Shops like Michael’s or JoAnn’s Fabric Store, They have a lot of the Fall Decorations on sale now. Such as a Package of Hay Bales that are perfect for O or O27 Gauge layouts. If you opened them up, you could rewind them and cut them down for HO Scale or smaller for N Scale Hay Bales. Just a thought. ~
Happy Veterans Day on Nov. 11th..
ALL GAVE SOME, WHILE SOME GAVE ALL…
*S*A*L*U*T*E*.
Mike in N.H… U.S.A. ~ Wed, Nov. 10, 2021 ~
For large layouts or multiple levels like mine. I would recommend a computer software called Any Rail. I ended up buying it for a about $50. Once I stopped and read the instructions it helped me to figure out how to get the 3 different levels, with grades, and clearance needed for crossing over. The 3D was great.
you can use tools to help. For grades get a 100cm stick and screw a bolt at the end. The amount it sticks out is the grade in cm. Get a thin plywood and make a min radius half circle. Use it to locate track. Buy pre curved track and use these to set your curves. Get an Nmra gauge and use it to set spacings. Get a chain and use it to help set curves. Plan on close spacings so use your longest passenger car to determine curve spacing. Cut thin plywood 96″ ;ong and strip it to the track width with a curve at one end. Make one for each track run. First locate the track and then install. godd luck
John , sorry I’ve no suggestions on how to solve your dilemma.. however I hope you do as that’s a great layout you have . Remarkable detail and effort , looks very realistic. Fine job indeed .
nice dont have any real ideas for your track problem but is the top removeable ? that would help