Roger has been in touch with a ‘how to’ on his model railway traffic lights:
“Hi Alastair
I’m writing about my homemade traffic lights.
Like many of your readers I’m a pensioner and have had model railways for most of my life with long periods when they were boxed up as work and family came first.
I’ll write more about my railway in time. On this occasion I’m writing about my dabble with electronics. I’m retired from working in finance and farming so I’m no engineer but it’s always been a fascination.
Recently I bought an Arduino after reading how you could create a dcc controller with one – great theory but you need to start simply so it’s taken a while to understand the basics. I find learning easier if it’s relevant so looked for a project that I could use on my model railway- traffic lights.
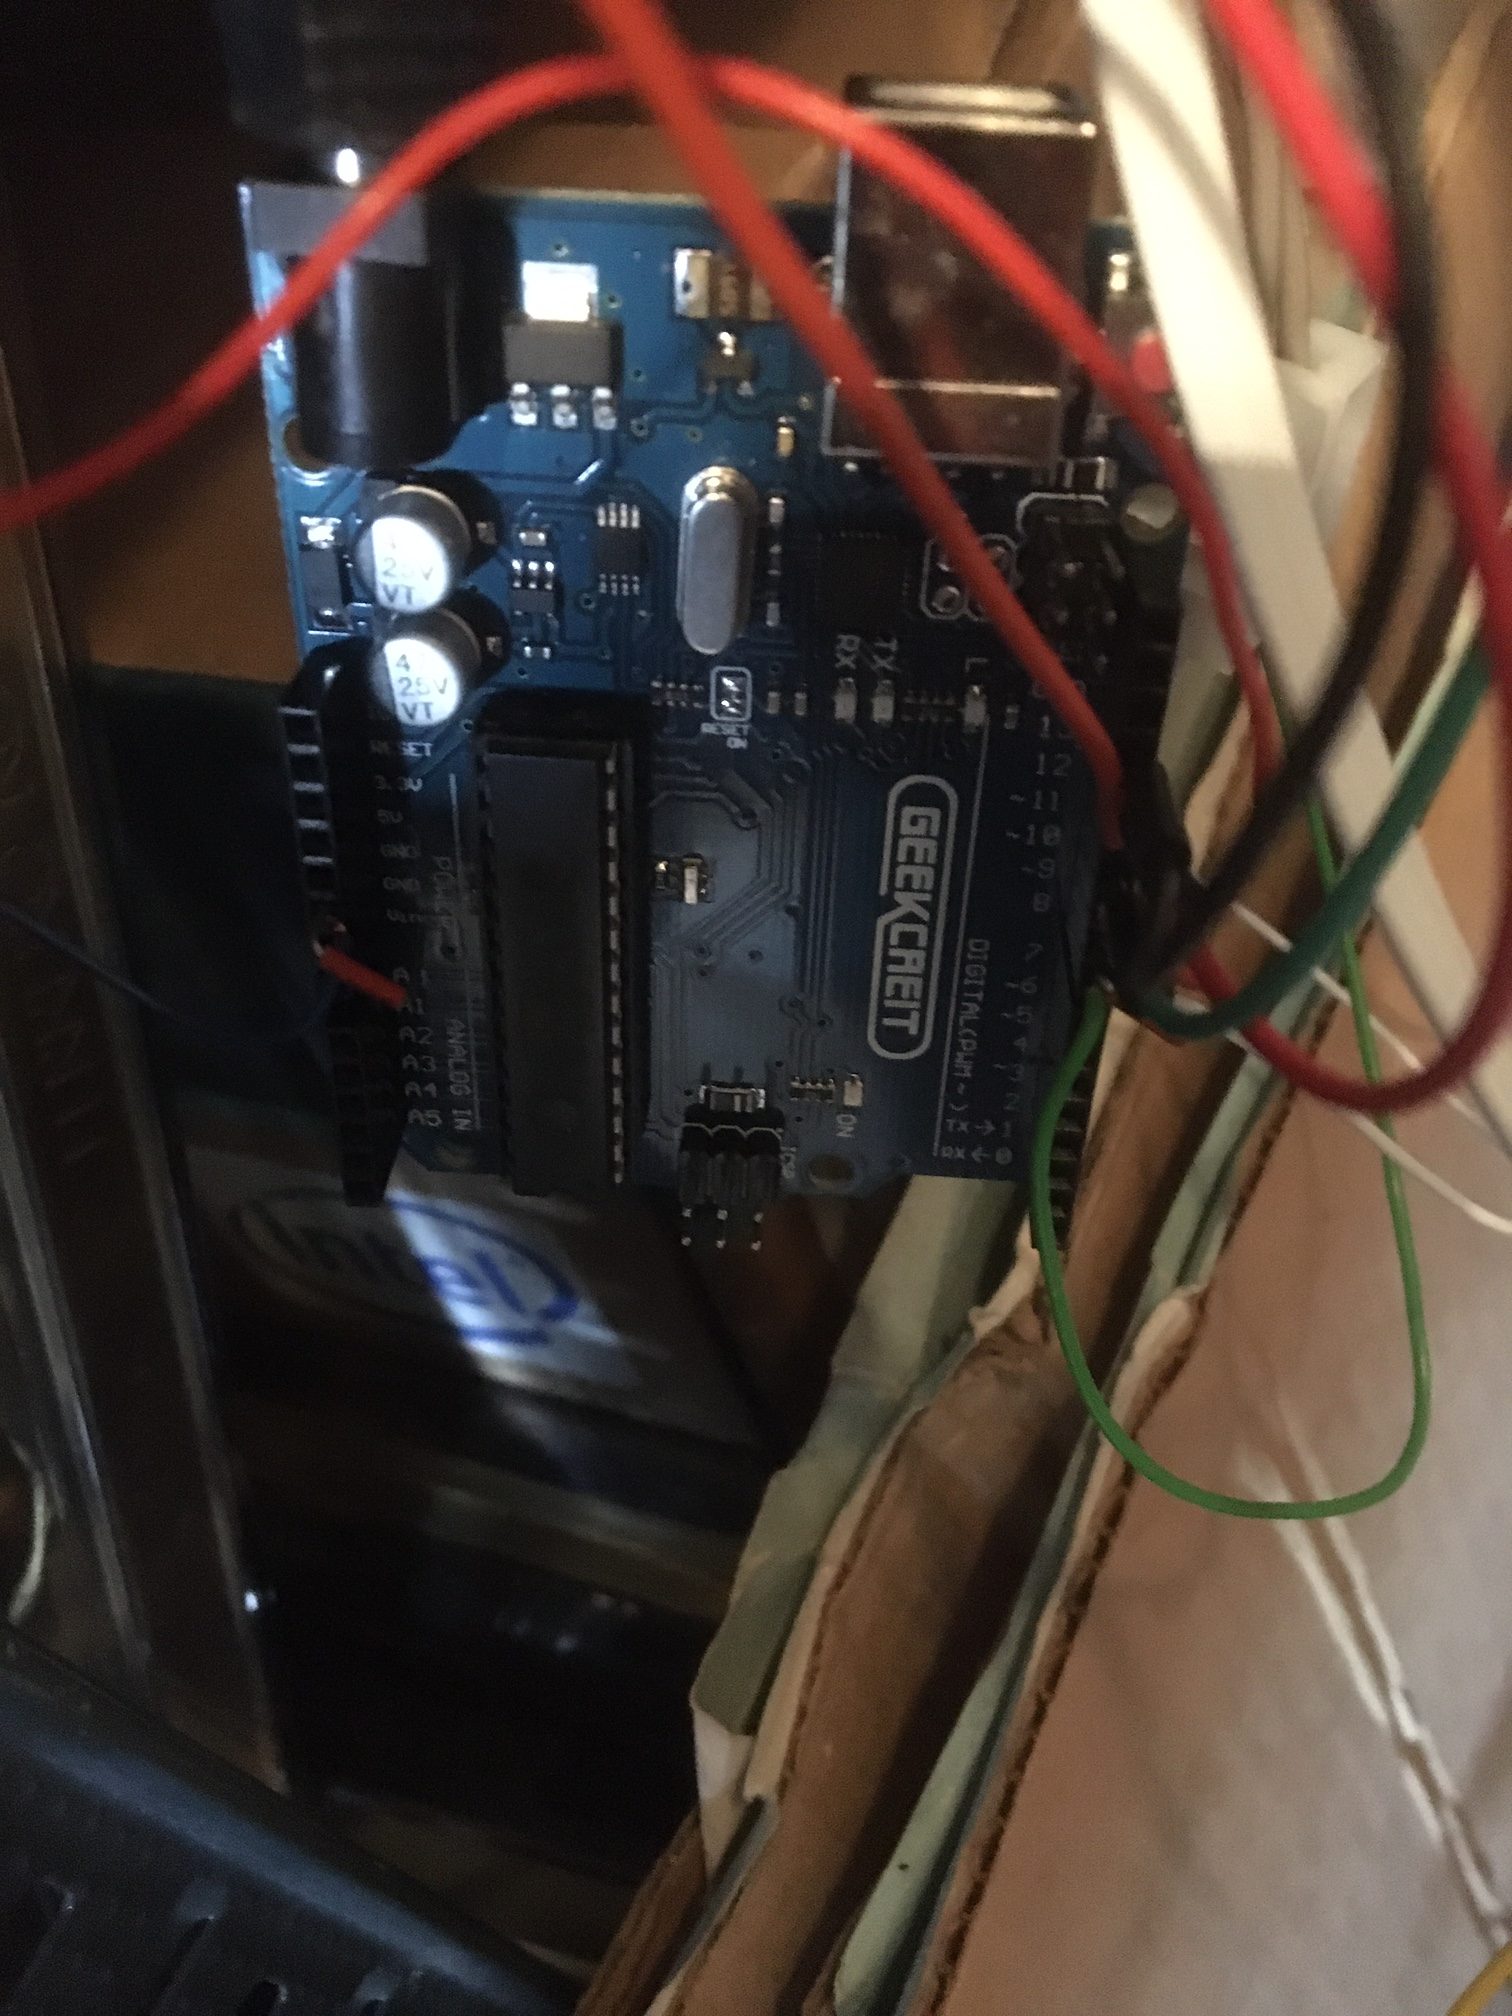
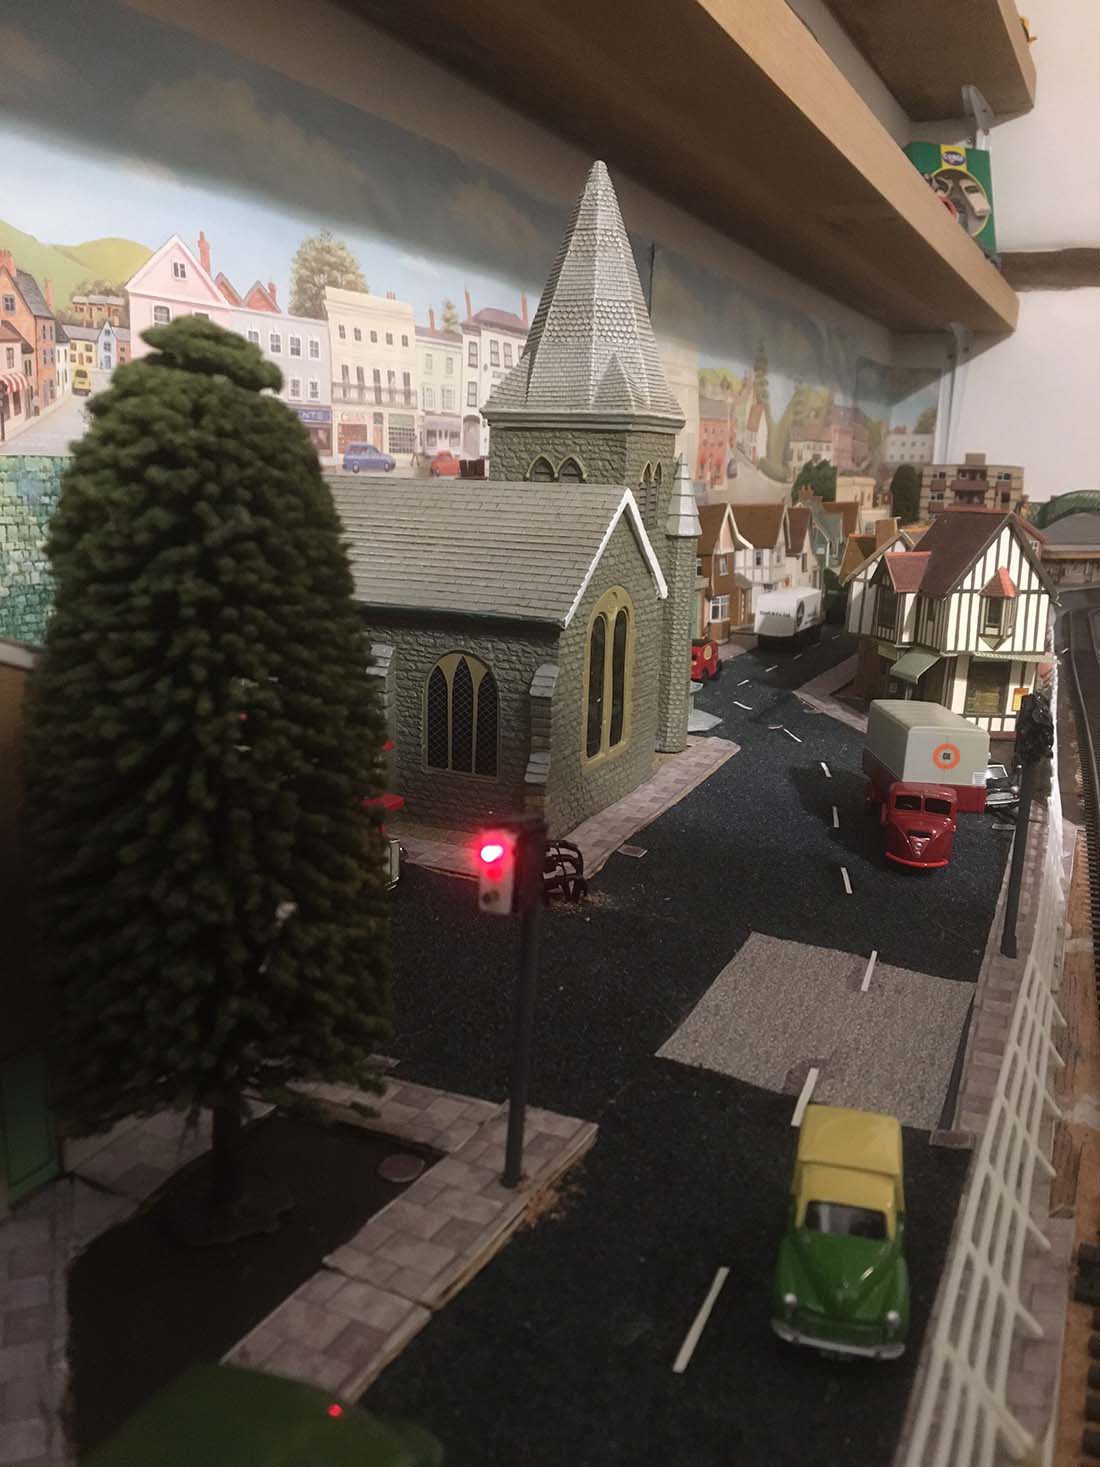
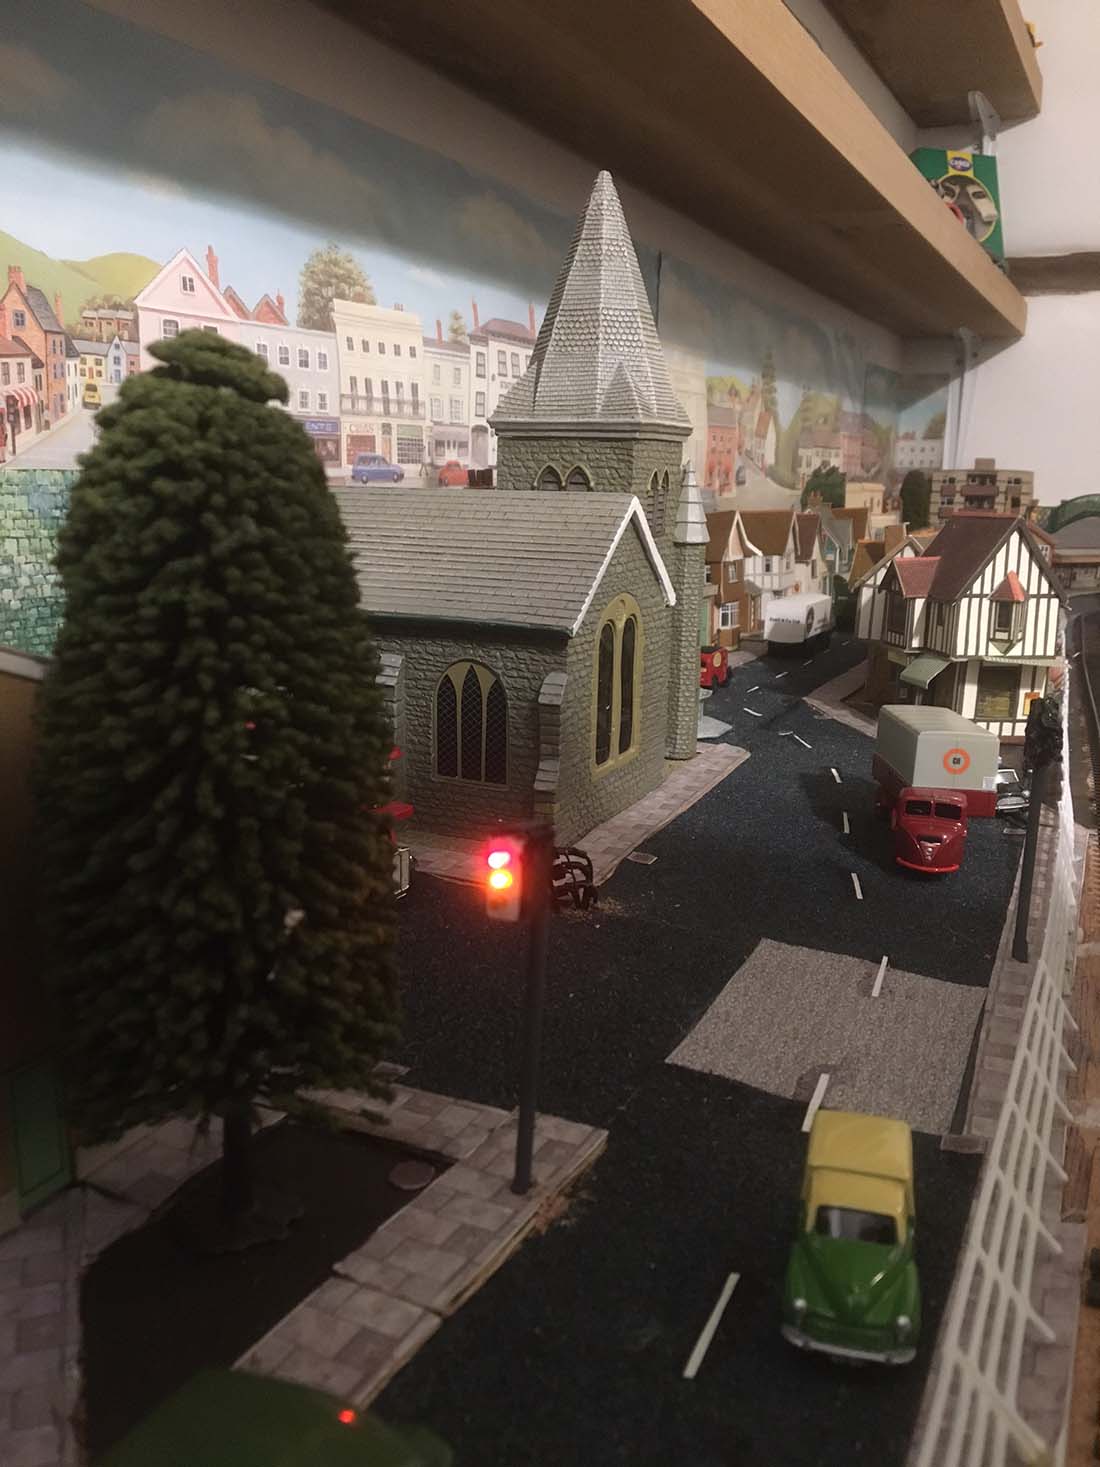
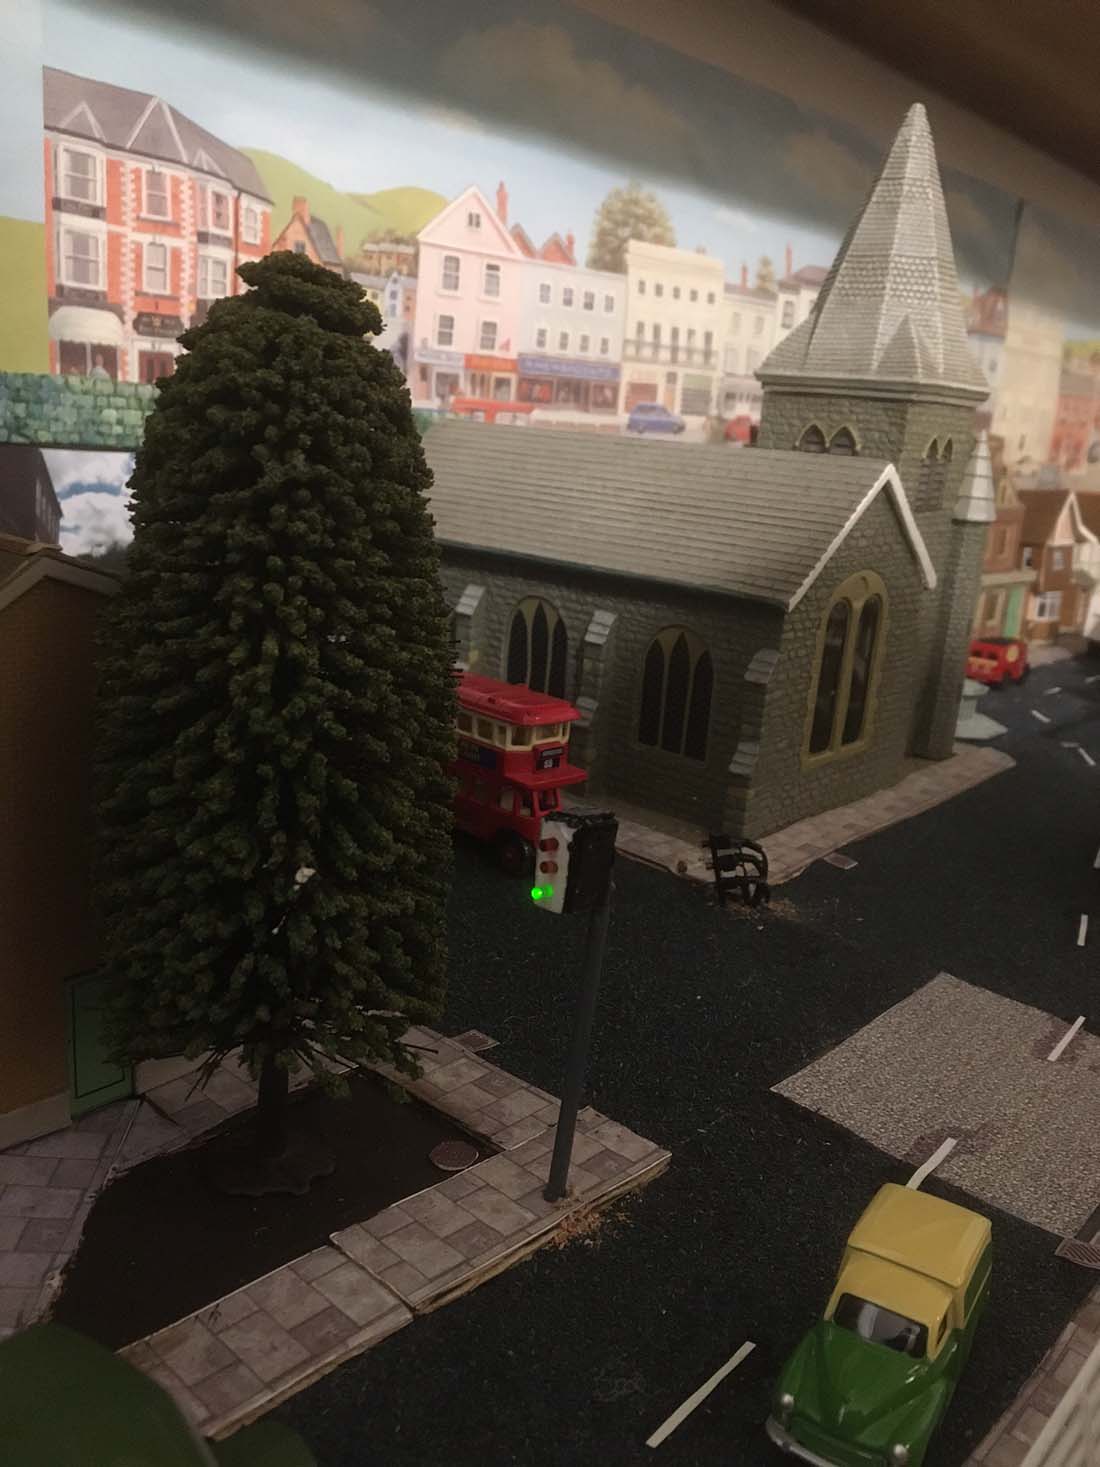
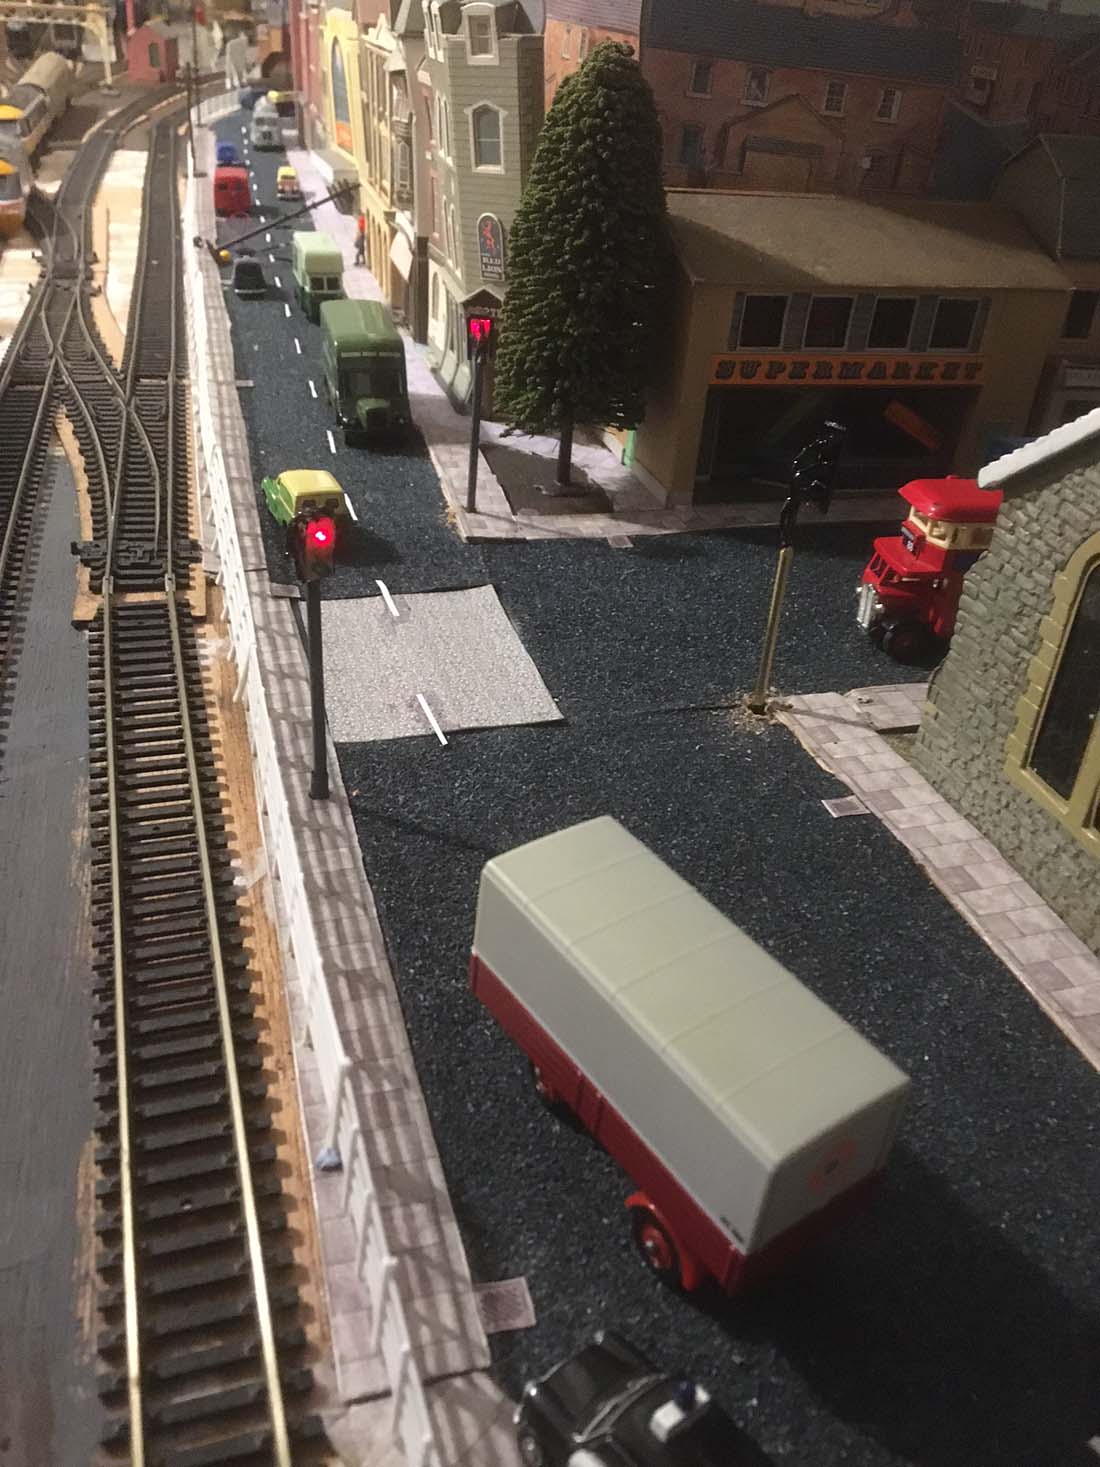
From reading other articles I’d already set up an old PC PSU to power lights and as it worked bought a distribution board as picture 2.
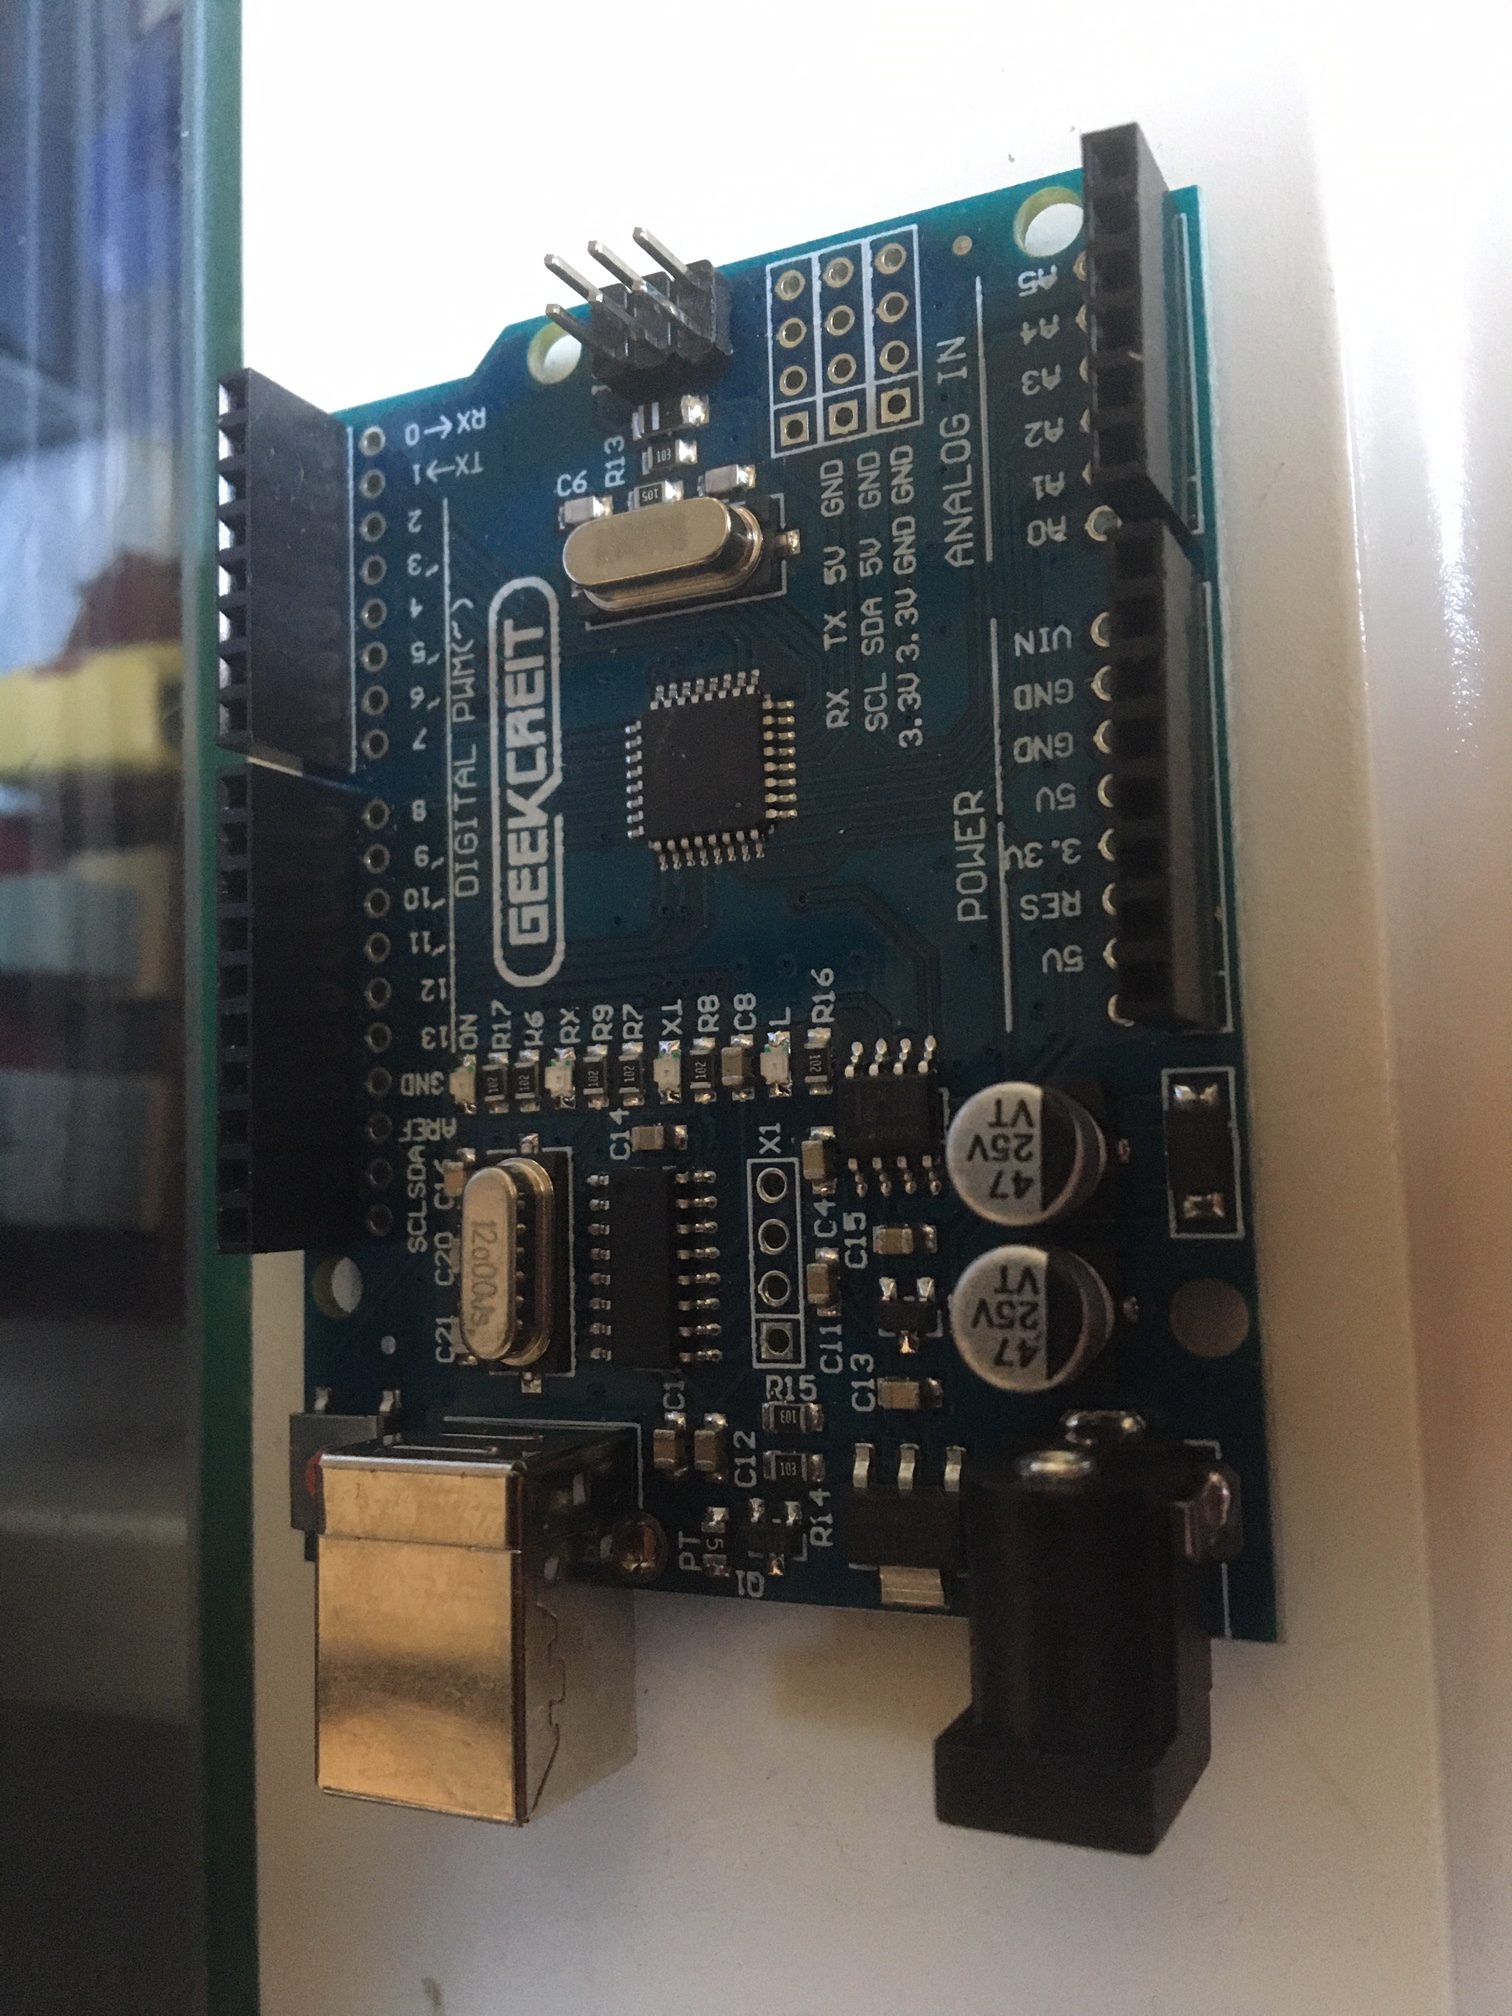
Picture 1 is an Arduino UNO for those who’ve not seen one.
Using a breadboard I copied some source code which is freely available on the internet just search arduino traffic lights.
Some of this didn’t work, some were really a congestion control and frequently had limited ‘how to’ details, but I got there through trial and error and got it going.
I then realised different countries have different change sequences. I guess no one else would have noticed but I would have known so back to the program to sort it out. Incidentally in the Arduino world a program is called a sketch and it’s all FOC shareware.
I used wires resistors LEDs and a bread board to get it working.
Now I needed traffic lights and whilst it would have been easy to just buy them it wouldn’t be cheap and I wanted to experiment some more.
So I bought 3mm brass tube decided on 6mm lengths – if it’s too tall I reasoned you can always push it down the hole. I experimented with different types of led Scale size seemed too small and in the end tower type looks best.
There’s a lot of fiddly soldering and shrink Tubing to do and I used the brass tube as the negative. Grey paint for the poles and everything on the head covered in black paint.
I was lucky enough to find an unused 4 wire telephone extension lead and even luckier to find the wires are red yellow green and black which works perfectly for the different coloured lights and black as the return. Incidentally having 12,5 and 3.3 volts available off the PSU, I chose 5 volts.
The arduino is now given over to that function but I plan to share the wires with another set I’ll create later. Arduino start at around £6 the brass tube £5 but enough for 15 poles and LEDs less than a £ each including a resistor so for 4 poles the cost is around £4 per ‘light’
Before I finish I’d just like to say how much I look forward to reading your daily message with my morning tea. Particularly during Covid it’s great to have the background support of a world wide club who incidentally have been sort of meeting virtually before covid was dreamt of.
So hello to all my virtual friends.
Best wishes
Roger”

A big thanks to Roger for sharing his model railway traffic lights advice – I seem to be getting more and more on Arduino.
Please do keep ’em coming.
And if today is the day when you pick this fine hobby back up, the Beginner’s Guide is here.
Best
Al
PS Latest ebay cheat sheet is here.


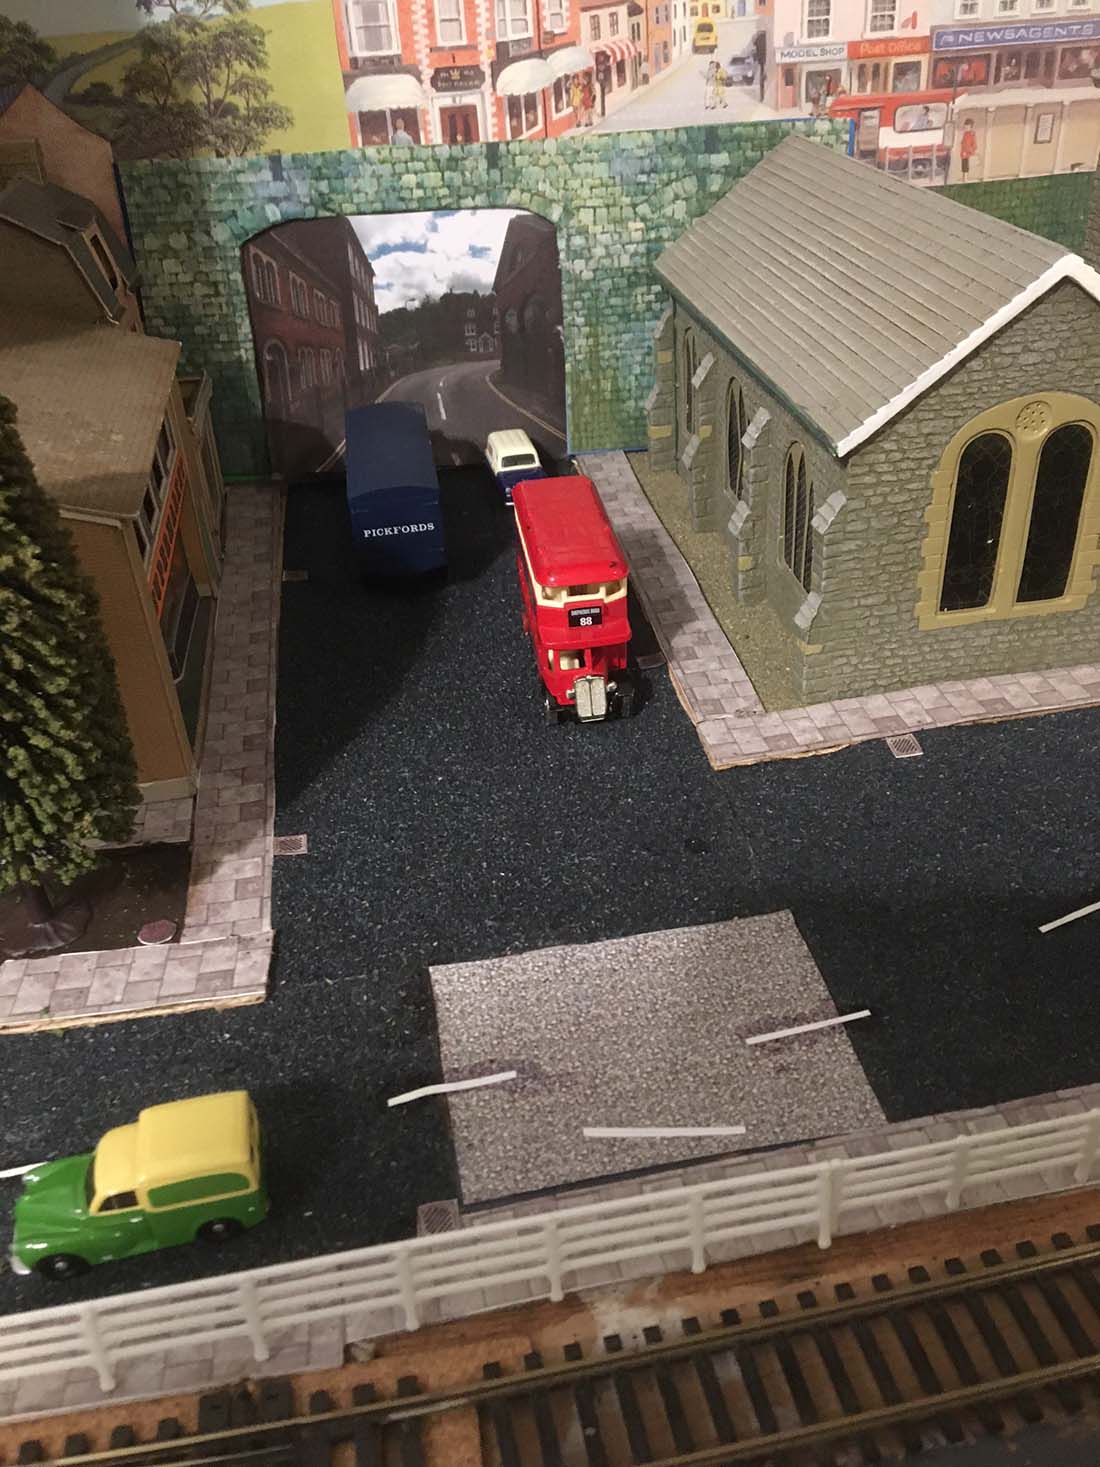
Great to see an Arduino project started from scratch – well done! I hope Roger can give us some details about how he made the traffic light head – it’s difficult to see how that was done, even when the photo is enlarged. While trying to see more detail, I noticed a telegraph pole has fallen in Station Road. It looks as though the police are on their way, but got seriously cut-up by the Scammel trailer truck… Someone is going to be in trouble. Thanks for sharing, Roger
As Keith Said, that Ford Anglia Panda car was seriously obstructed by the driver of the driver of the Scammell. Either the wind blew the telegraph pole down or someone had a prang (and fled the scene!).
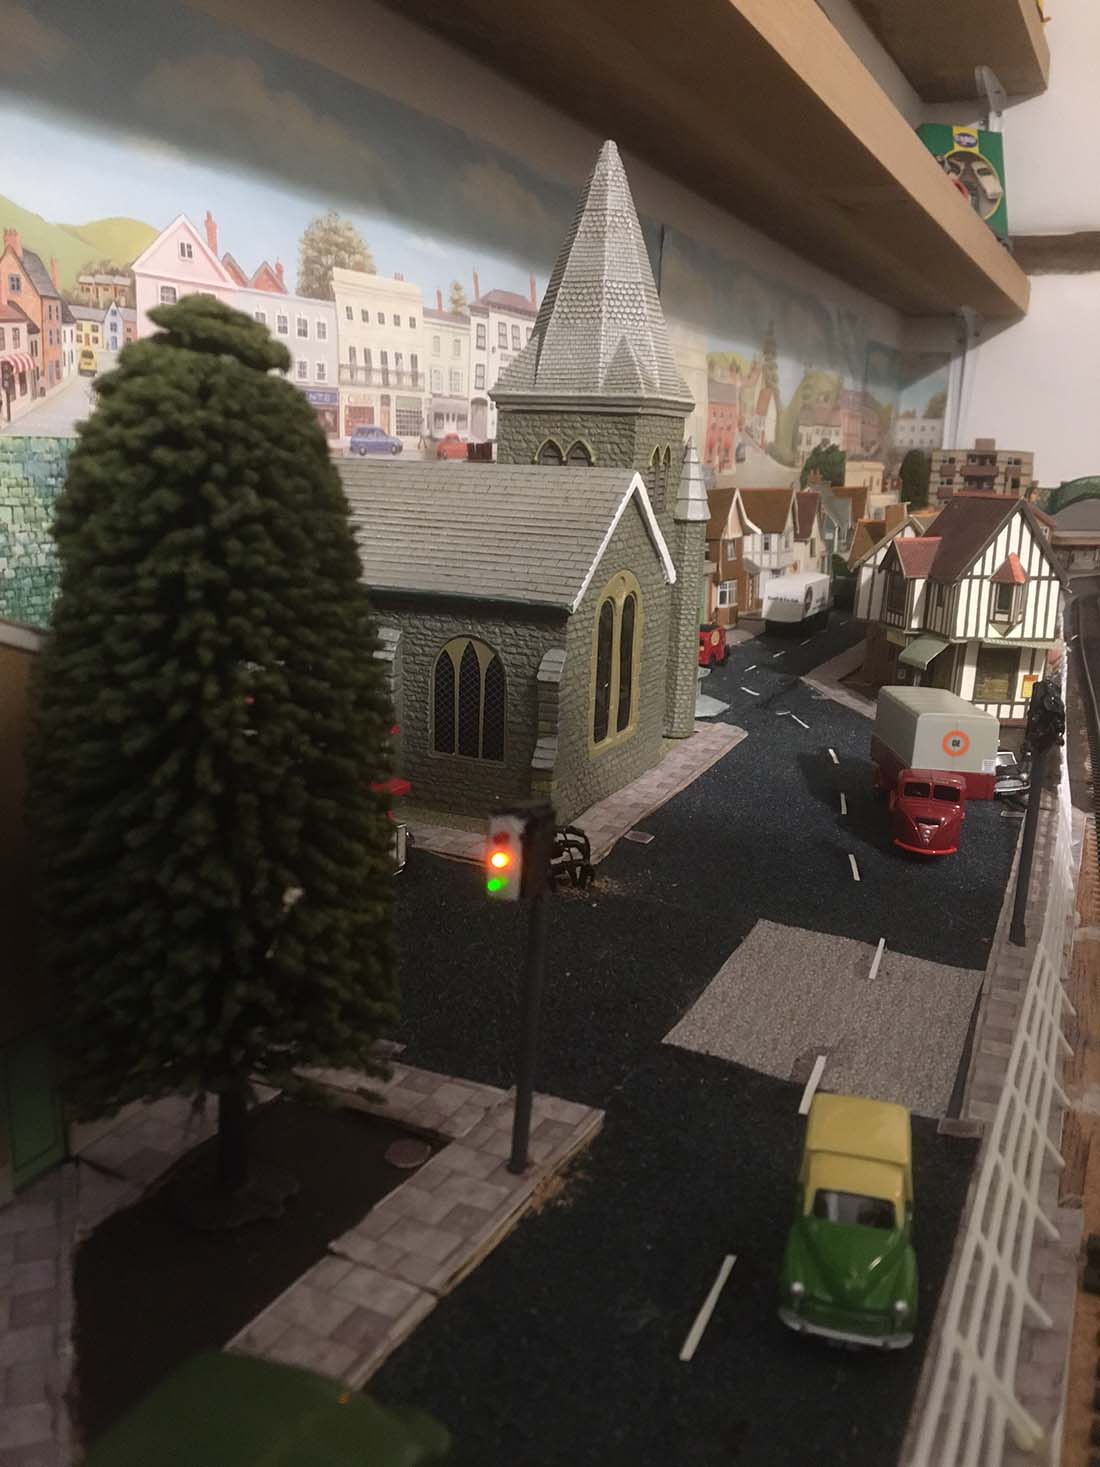
OK, onto the serious stuff, good effort and much appreciated, but there are a few additions to make. Assuming this is merry old England, you have a mistake in the traffic light pattern. Amber and Green never ever shined at the same time back in the forties/fifties for traffic lights, what they do now I don’t know, I am 12000 miles away!
At traffic light intersections there would have been stop lines for approaching traffic and even pedestrian walkways across the intersection, i.e. between the church and the supermarket, not criticism, just a few more details to add to the intersection, and of course, remove the lane marker from the intersection on “Station Street”.
Great modelling, I only wish I could achieve the same result!
Peter (from Australia)
Great job Roger. I only wish I could understand the theory about how these electronics work. I can’t believe how some folks can pick on the minutest detail to criticize and miss the whole point of the story. Give the guy a break!!
Thanks for your comments. The police mini van is waiting for people jumping the lights. I guess it’s a mistake to have today’s light sequence in Era 4/5!
I’m about to make some colour light signals so I’ll send pics of the process to Al they will be pretty similar apart from being only 2 aspects.
WOW! This is great, good job, well thought out.
Well I didn’t notice the pole being down in the last picture but I did see what looks like a major kink in the track at the left hand crossover switch. Hopefully it is just an optical illusion created by the camera but if not…it’s a accident waiting to happen for the next train.
Terry Idaho/USA
Nice setup.!!!
Somebody please convert the money figures to American Dollars and cents because I cannot find a way to convert them. Really do like what you have done Thank You.
We out here need much more explicit explanation about this Arduino stuff ?
Also more details on DCC reverse loop wiring and problems ?
Enjoy your site immensely and have purchased your in the past.
This is something to be very proud of, thats for sure. I am amazed by the things some people are able to make
Thank you Roger. I am recently retired and new to the RR modeling world. I have been following Alistar’s daily messages and reading my recently acquired copy of his beginner’s guide. I am currently gathering information on the whole process including details on how to use my Arduino. I see the two as combining both my interest in building a model train layout and learning to build sketches with Arduino.
Scott Gordon
The exchange rate is about ,84 cents USD today that is in EUROS to USD so a 5 EURO item should cost you about $4.20
Quite the effort. Jolly good job 👏 Vinnie from the Isl of Staten
The automobiles are on the WRONG side of the street…. WATCH OUT…!!!
1 pound sterling equals approx. $1.33 USD according to latest rate.
I enjoy your site very much. I have a collection of locomotives, cars, track and
buildings all 1940 and 1950 era. I would like to sell this collection for a reasonable
return. My insurance company said it might be worth a few thousand dollars to replace, but said they didn’t need to write a rider for it. If anyone expresses an interest give them my email address.
UK traffic light sequence: – Red only – Red and Amber together – Green only – Amber only – Red only. The reason is an amber only light warns approaching drivers that they will need to be prepared to stop. Drivers prepare to go with red and amber together.
The amber light is not a warning to be ready to stop or go it means stop the same as the red light.
I thought yellow means to Go Faster.
USA..TN.
Here in Connecticut, amber isn’t the only thing that means “go faster”, Sometimes even RED does also… If the police wanted to make a good amount of money daily, they should have plain closed cars at most street light intersections. It seems more people are running lights nowadays than ever before.And not only one at a time, sometimes two or three. It’s not safe to go right away once the light turns green on your side….
Many decades ago I built a set of traffic lights with sensors for my O Level electronics course based on simple logic gates and a 555 timer. I now dabble with Arduino and Picaxe boards. I have been meaning to construct a set of lights again as the logic is all up in my brain. I even bought some LED kits to assemble. I just need to write the code and breadboard them up again.
Currently workint on automating an automatic point switching system for a reversing loop so when the train approaches the exit it will feed into the point controller and switch up to two points as the loco approaches. Just waiting for a quad relay board to turn up
Very interesting. What use is it if the vehicles don’t move? I believe there are some systems that have moving vehicles and it would really be nice if someone on this site has used one, then you could have traffic lights that control the vehicle movement.