Jeff has a shorting track problem – can anyone help?
“Hi Al,
I have been receiving your emails for several years and have enjoyed them greatly.
They have encouraged me in model railroading. I am from Ohio and a novice to this hobby.
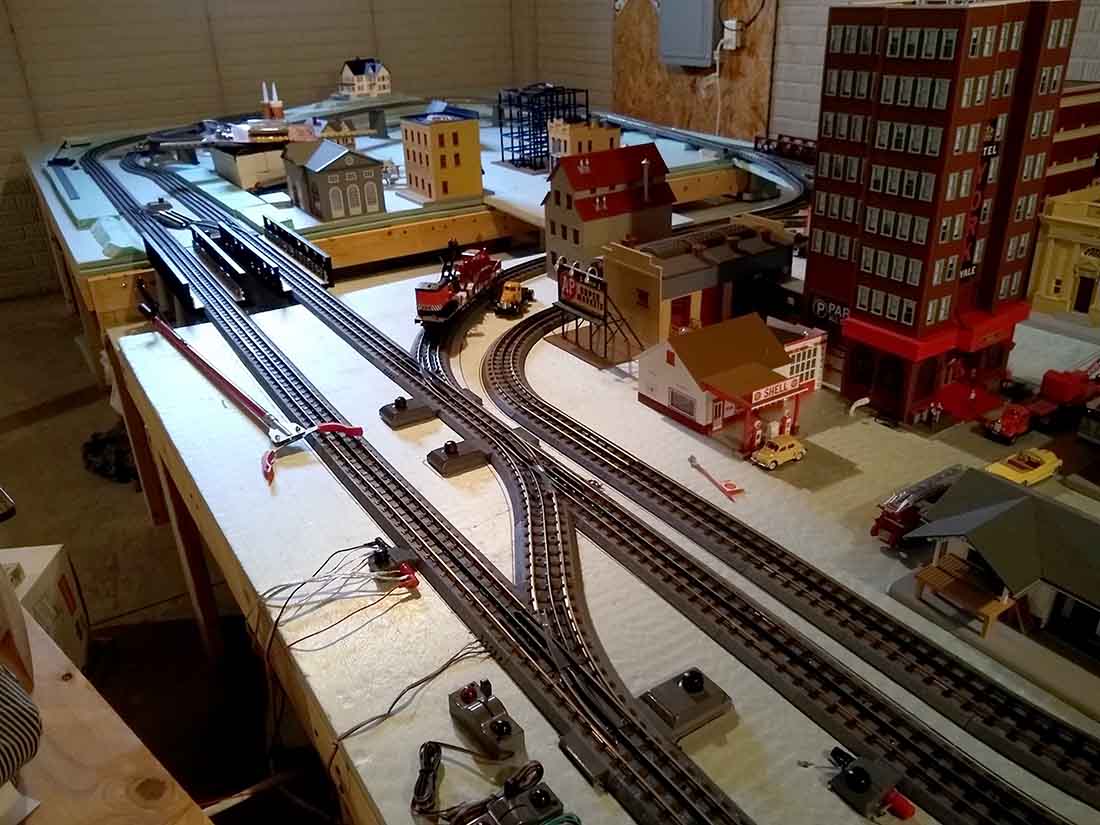
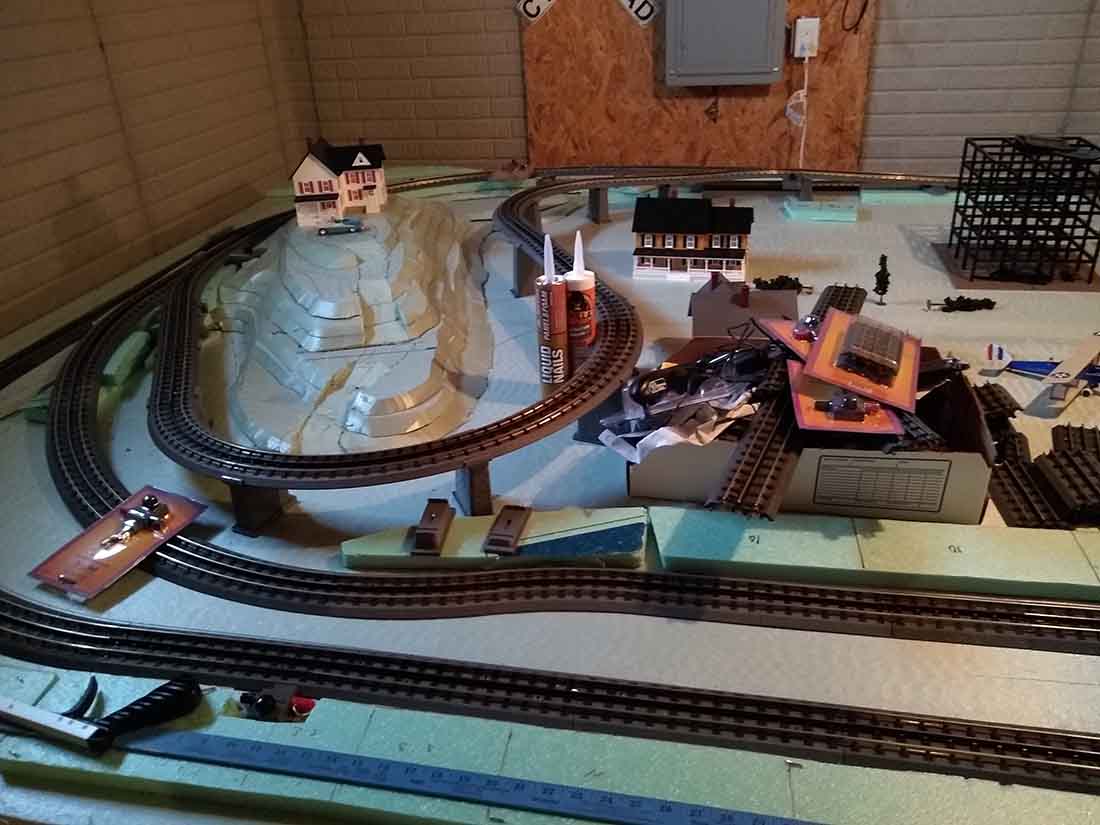
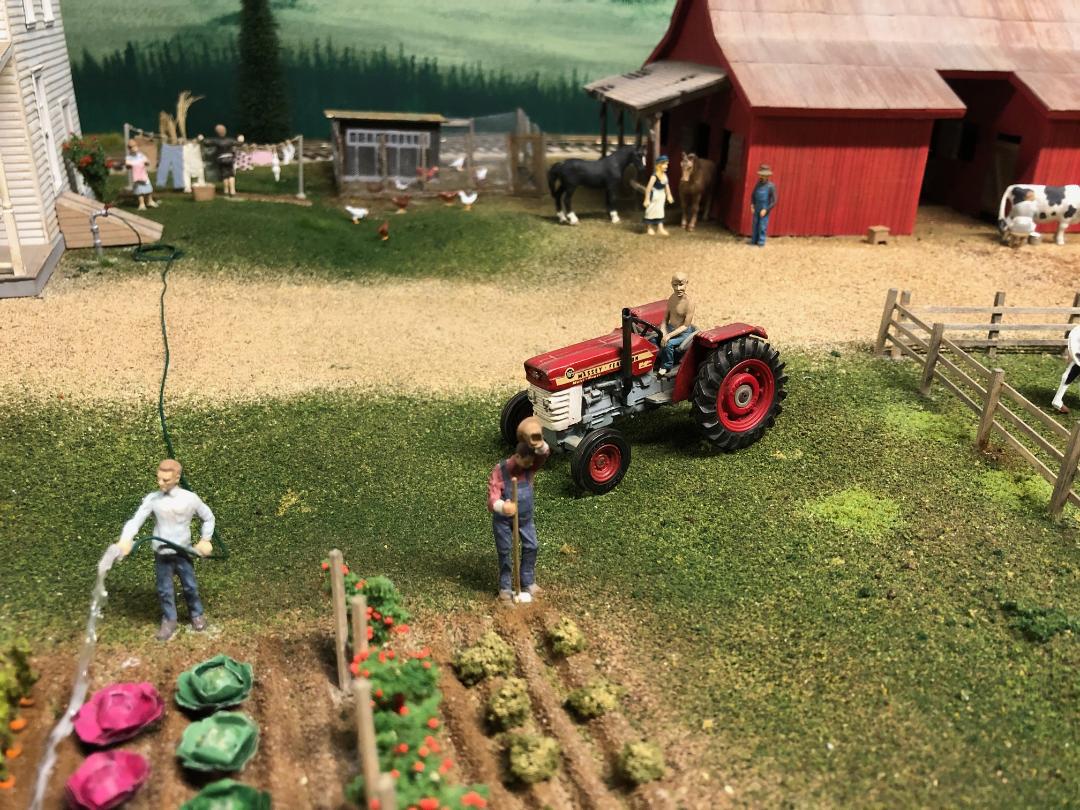
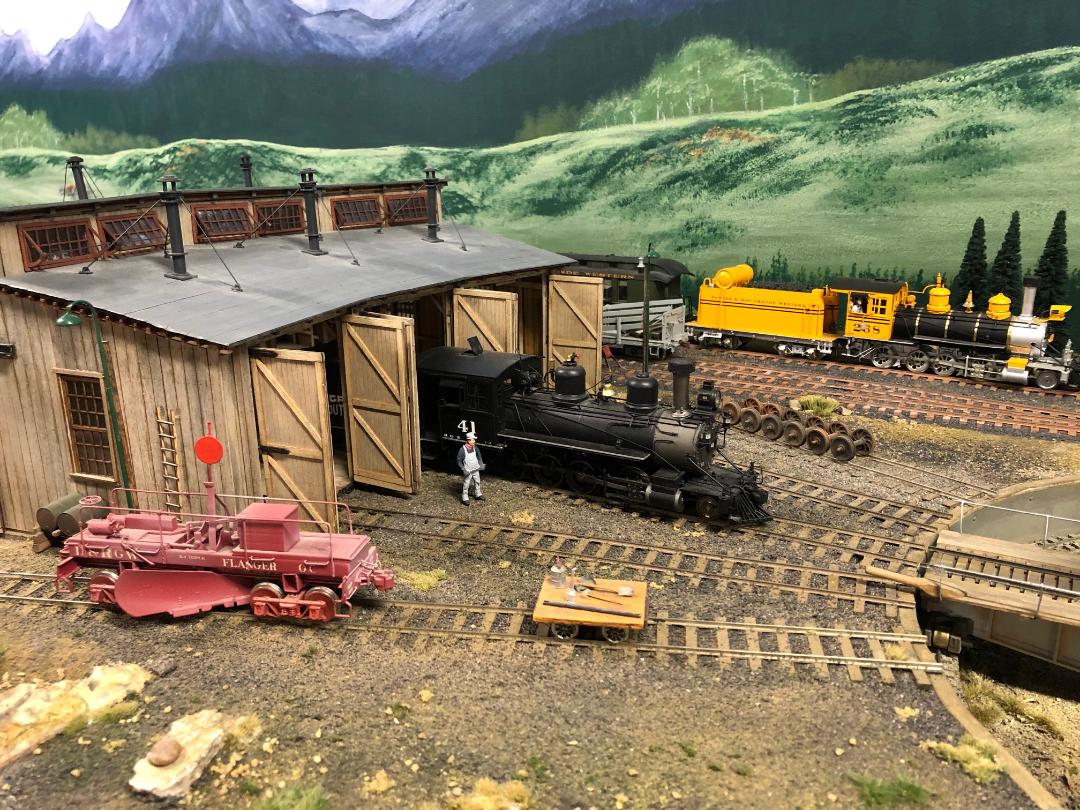
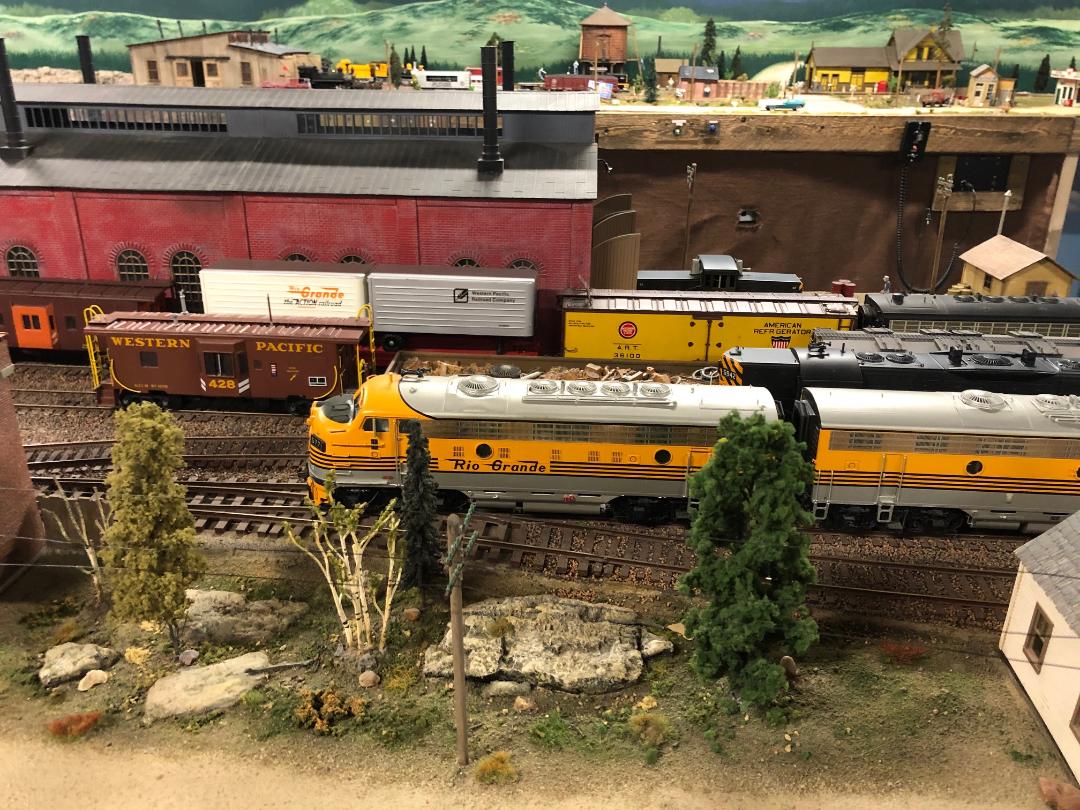
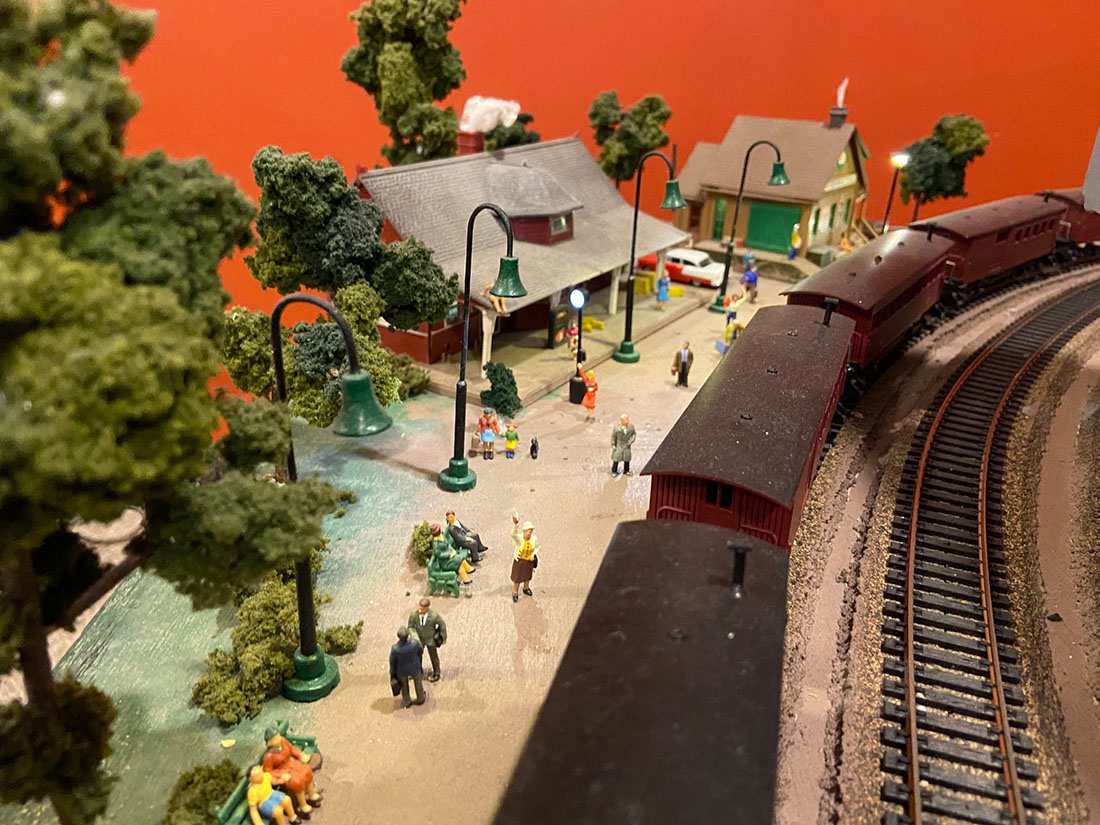
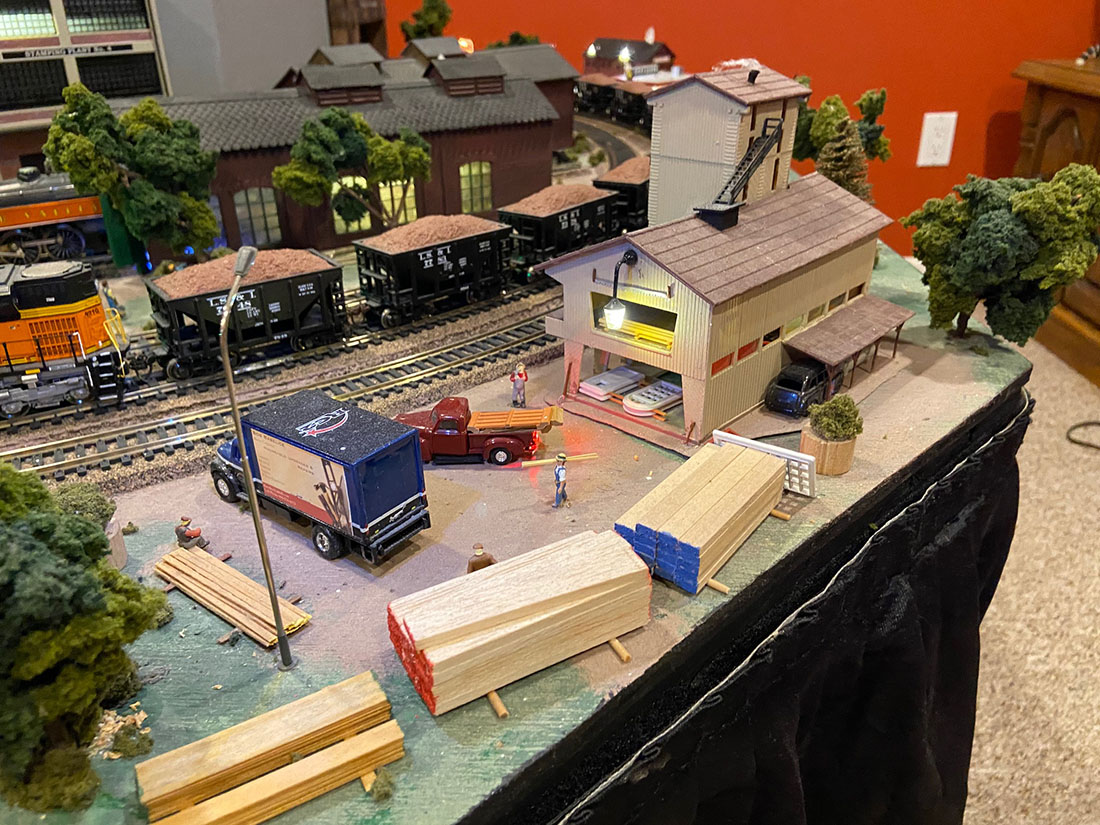
I’m sending you some pictures of an attempt I am making at an O scale layout.
As you can tell I am running a loop within a loop. I have connected them with entrance and exits turnouts.
I know I’m supposed to use insulated track sections. But I don’t know exactly how to place those sections or configure the wires underneath.
When my locomotive exits the inner loop to the outer loop or vice versa, it shorts on the insulated track sections.
I would be grateful for any advice on this.
Thank you so much for your encouragement in this hobby. I have included a couple of pictures so that you can see what I mean.
Have a blessed day.
Jeff”
Please do leave a comment below if you can help, Jeff.
Now on to Pete who has been busy with some revisions:
“Hi Al,
Some revisions here.
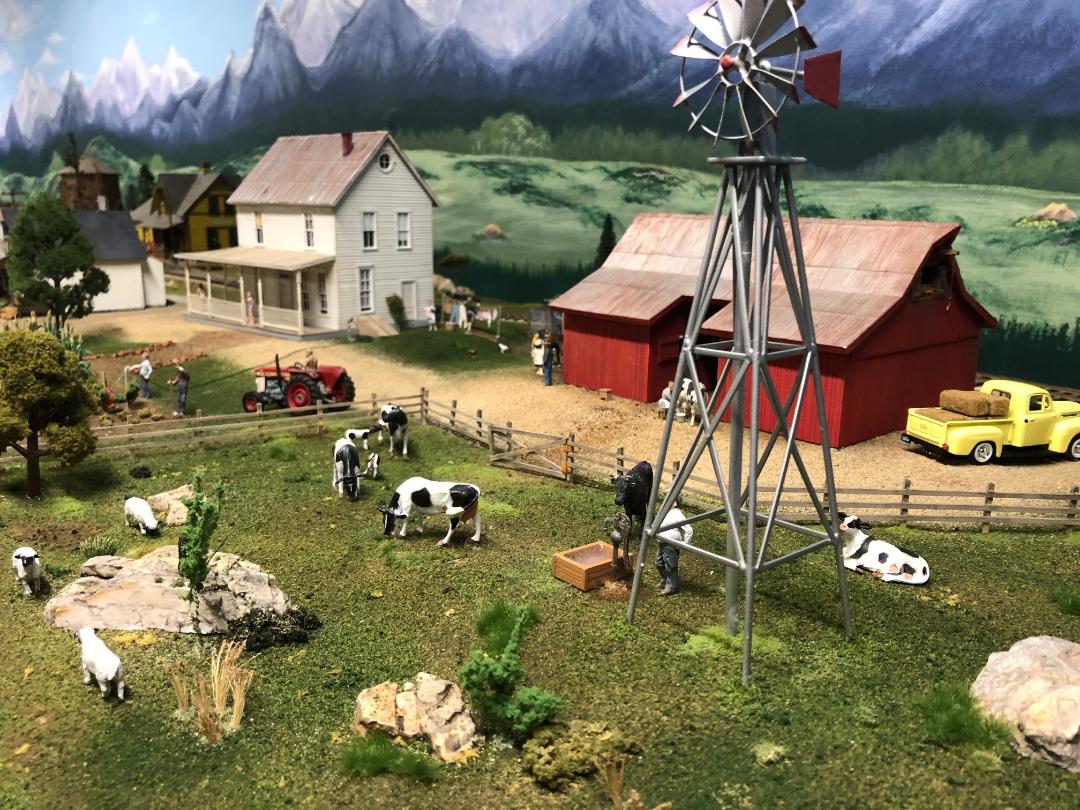
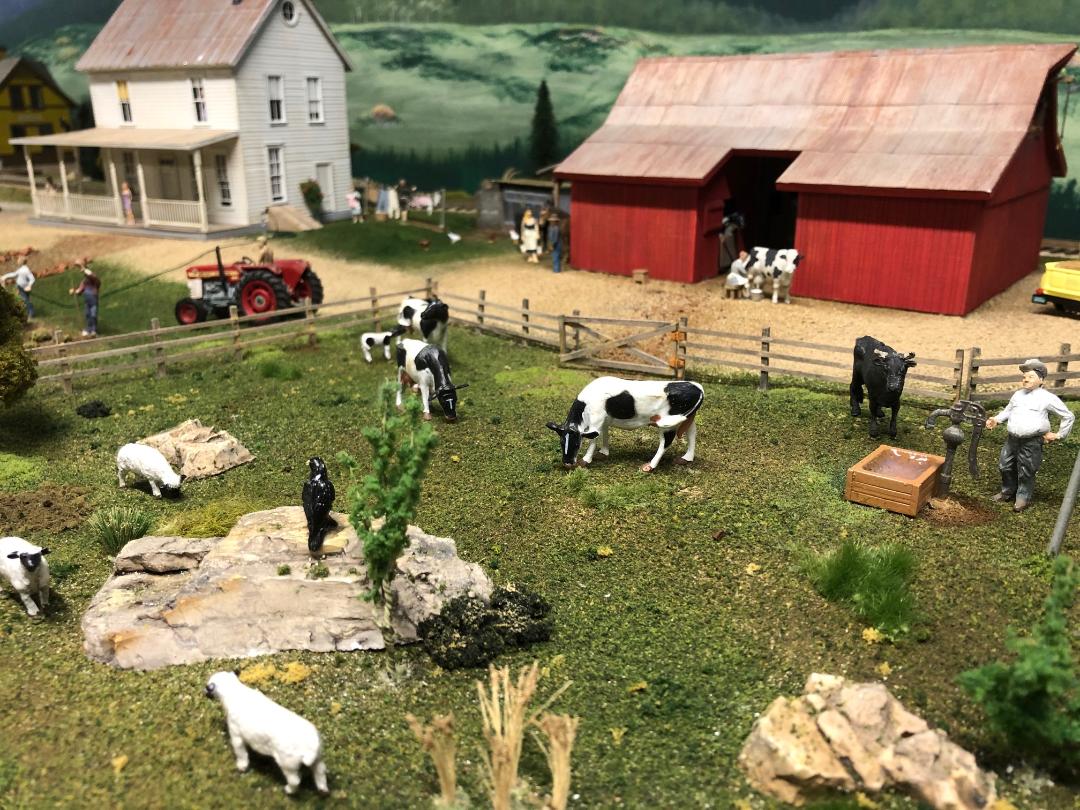
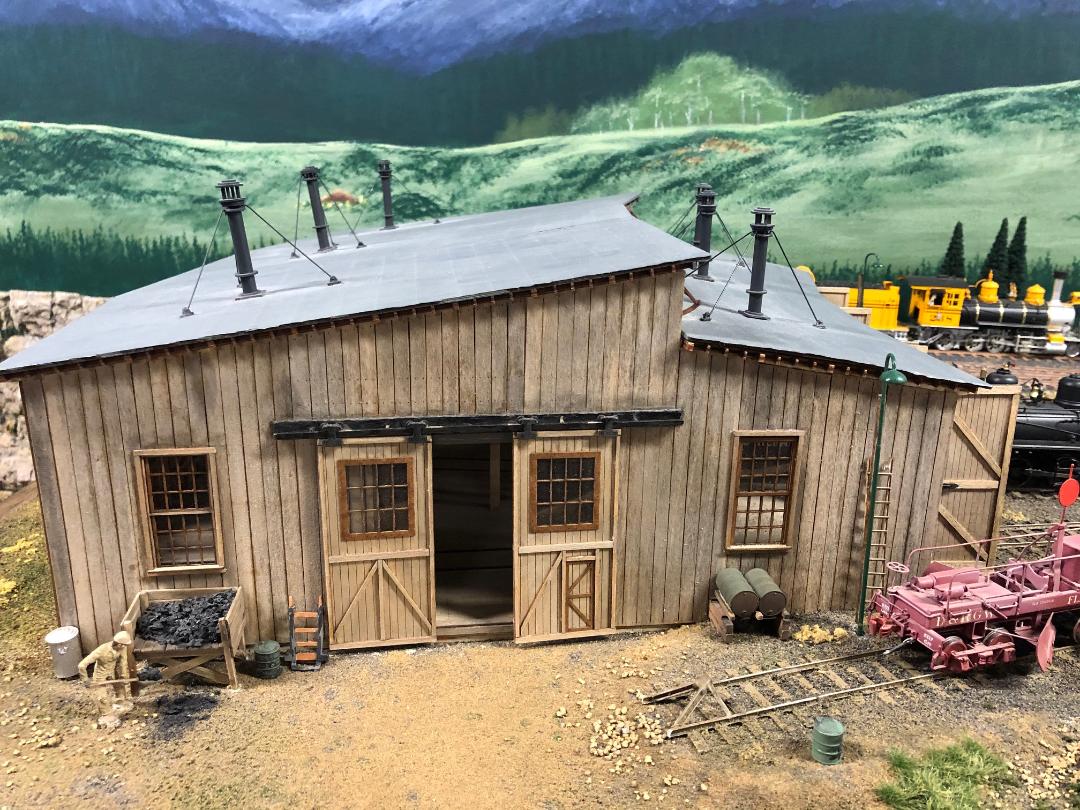
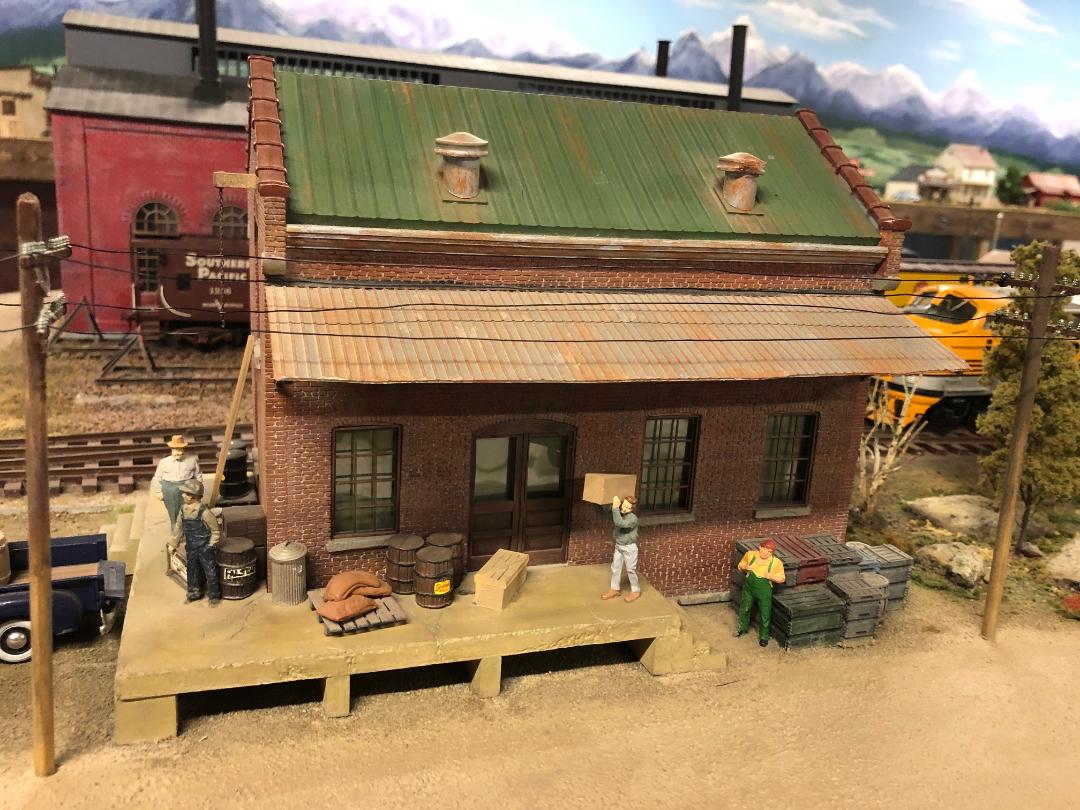
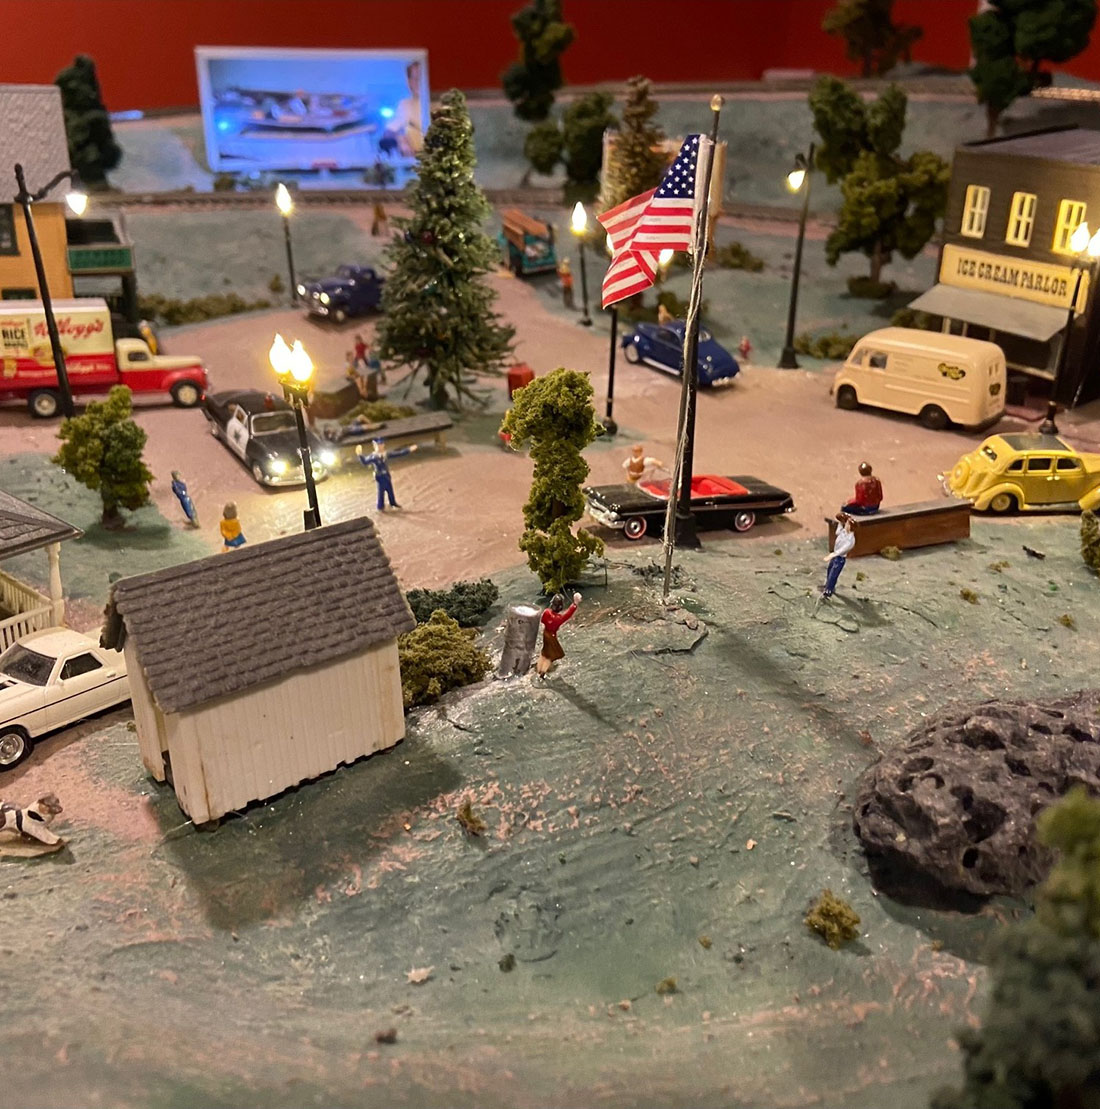
I made the fence from northeastern strip wood products, then aged with a greying solution. India ink and alcohol. It’s getting real close now.
After the benchwork of a particular scene is complete, I grid it with 1 x 3’s to accommodate buildings, the rest is sectioned off with cardboard strips or metal light screen for the plaster cloth to adhere to.
After all plaster has been put on (1st the gauze then fill in with pre made plaster (mud) in tubs) It is all painted with a latex earth tone. When dry, texturing begins. I use a combination of a lot of things as you see.
Lot’s of ‘Wood scenic products, etc. grass tufts, many different shades of texture, rocks, sand for roads, and so on.
I scratch built the farm house and barn, though the barn was a spinoff from an old Campbell HO kit, I just built it up from scratch to 1/48 O scale that I model in.
Trees are mostly commercial, I just grab whatever, whenever it suits my aesthetic needs.
The water for the garden hose is woodland scenic products for water falls and still water combination.
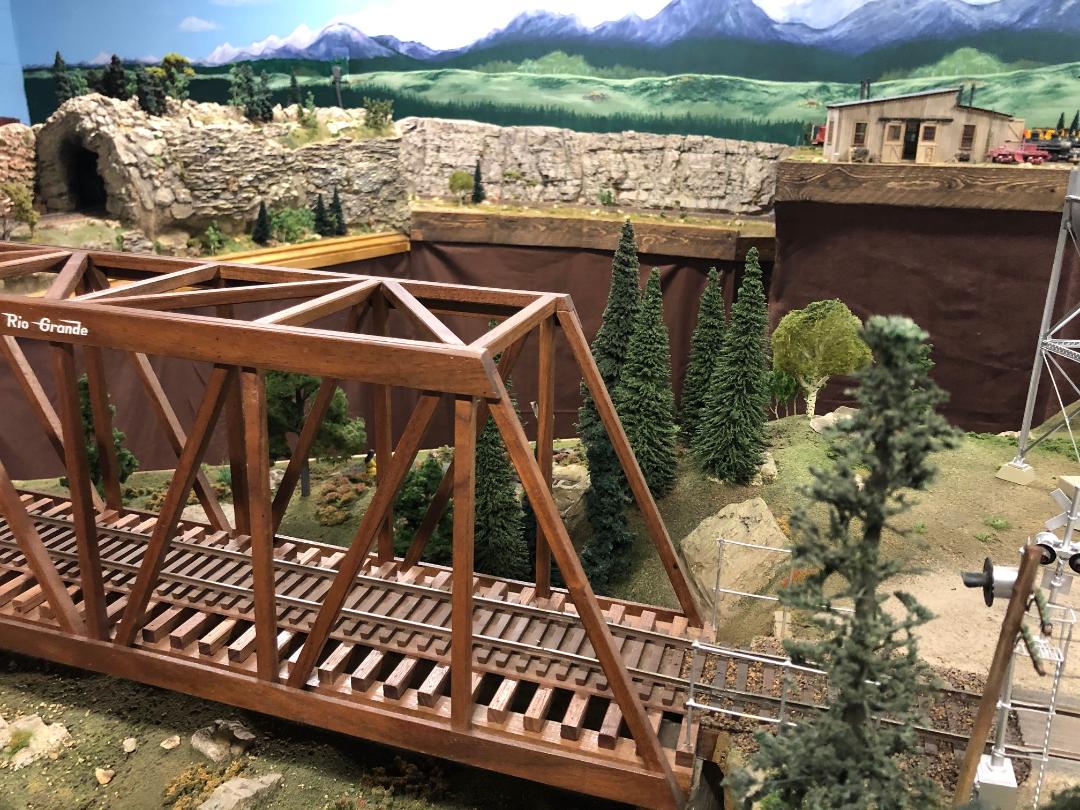
The rest by viewing is self explanatory, sooo, if you could kindly post these pics of both the standard gauge & narrow gauge, it would be most appreciated.
Thank you,
Peter”


A big thanks to Pete (his last post is here). His layout just gets better and better.
“Hi Al,
I love your site and I can’t wait to read the latest installment each morning.
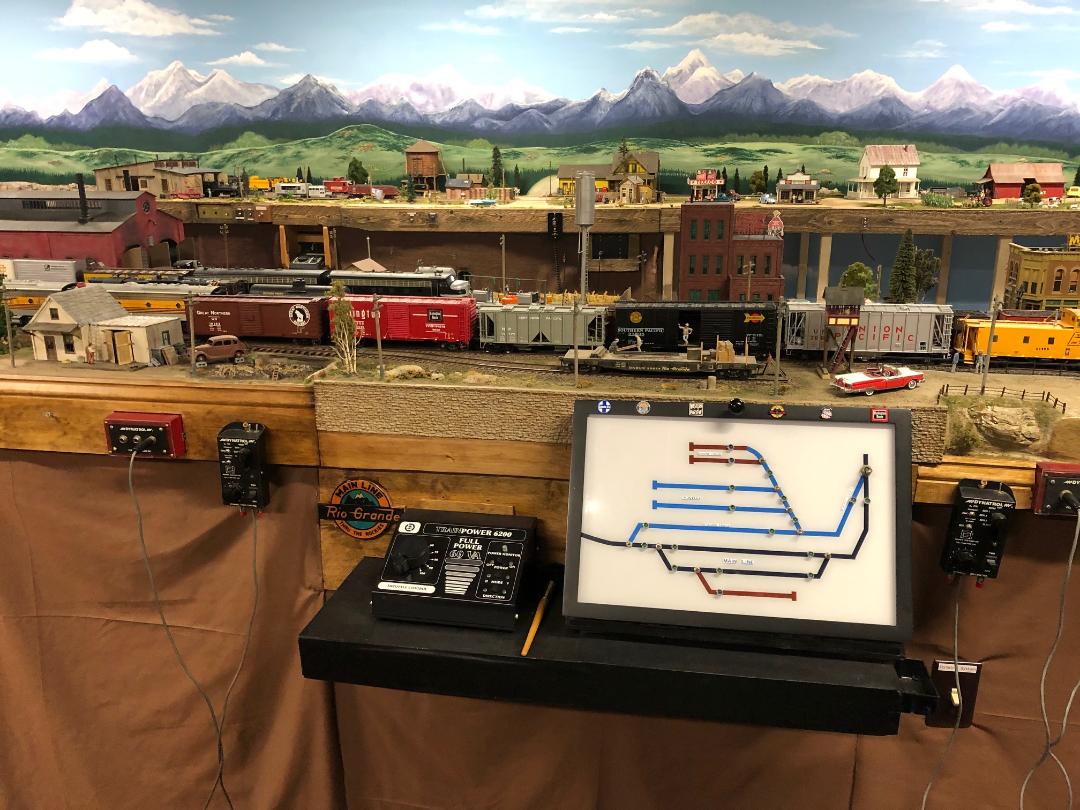
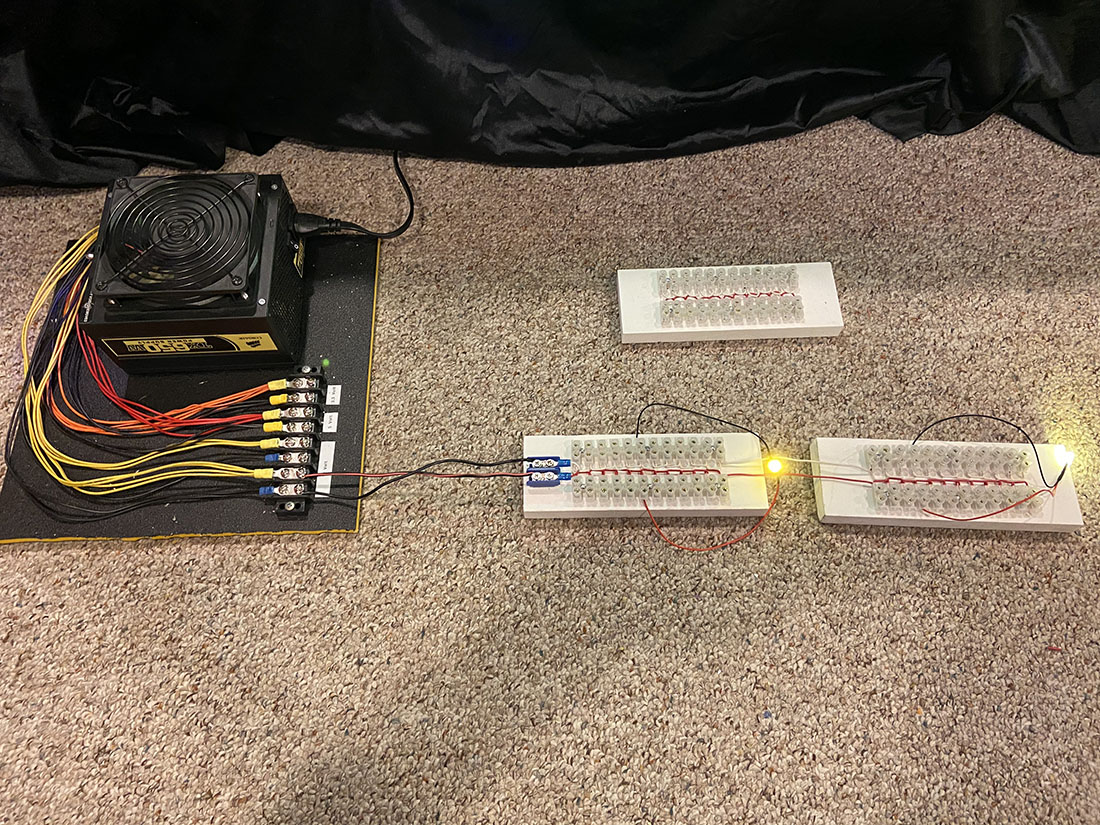
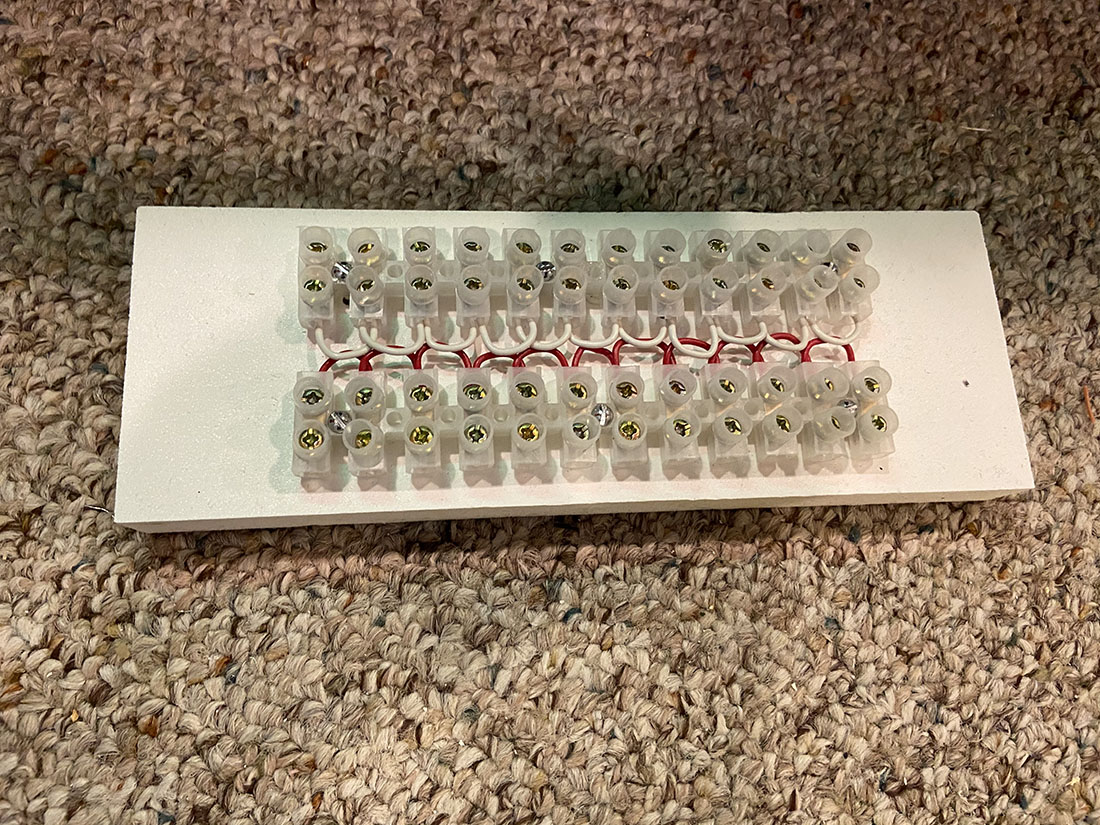
I have learned a lot from your blog so I thought that I would contribute a little with this power supply and hookup units “manifolds” as I like to call them , that I made.
Under my layout are 8 of these “manifolds” shown in the first picture.
They are daisy chained together to form an expanded hook up for my lighting.
They are hooked up to a computer power supply that I converted to light my layout.
The supply has 12volt,5volt and 3.3volt supplies perfect for supplying whatever voltage is needed to light the entire layout!
All of my lighting is Led from the buildings to the street lights and the vehicle lights.
Hope you enjoy these pictures and hints ,maybe some of your readers will learn something as I have done from this site!!
Thank you for all of your hard work to keep this site going strong!!
Bob ( From Pennsylvania)”

That’s all for this time, folks.
Please do leave a comment below if you can help Jeff.
And don’t forget the Beginner’s Guide is here if you are tired of sitting on the sidelines and want to join in with the fun.
Best
Al
PS Latest ebay cheat sheet is here

Insulate the turnouts so they are the switches from one loop to the other and wire as such to the insulated center rail. Only one transformer please. The commons have to be the same waveform. . Now add insulated tracks about one or slightly more feet each side of the turnouts. …let your turnouts do the work. No shorts. Works for me. Other thoughts anyone? That’s for AC not DC
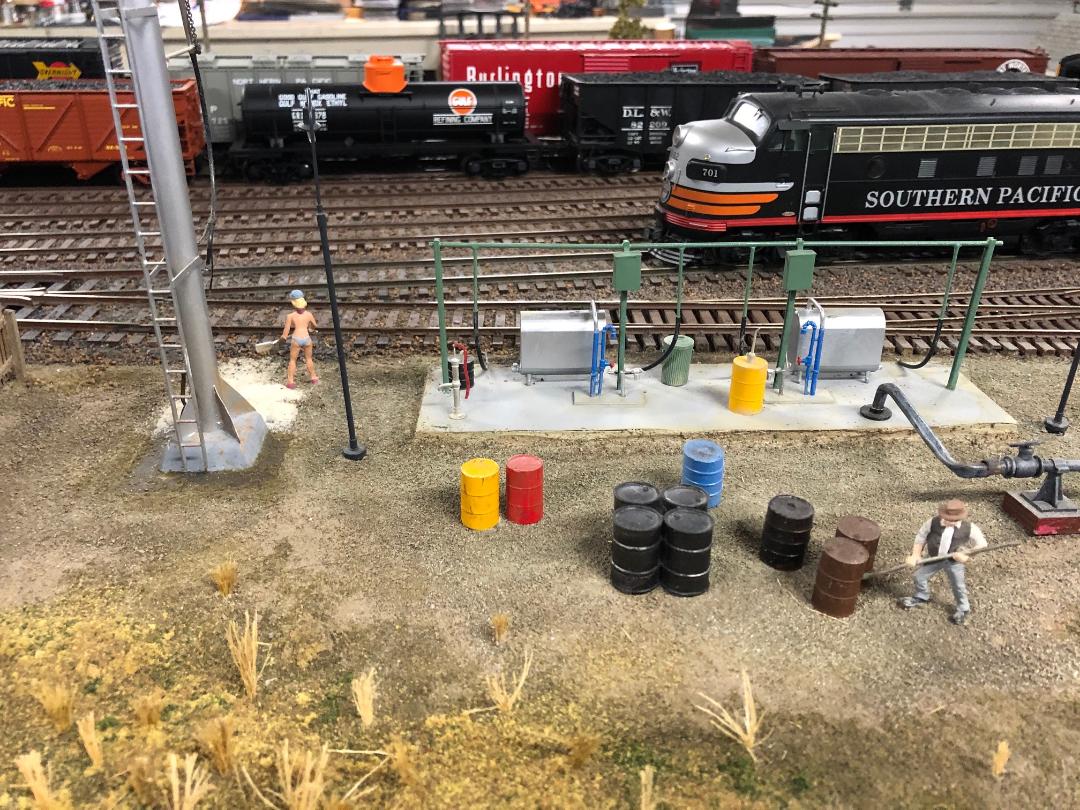
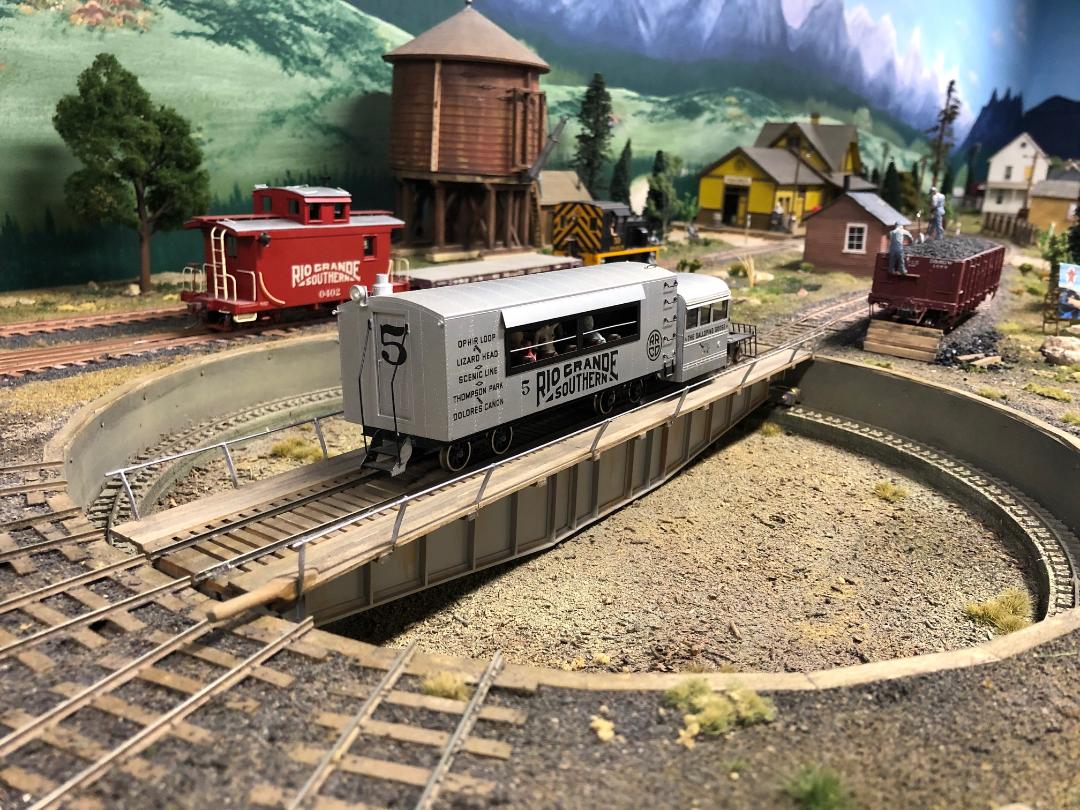
It’s hard to tell from the pictures but I’m fairly certain I spotted a reverse loop. Look that up for a full explanation. I’m not used to three rail so rewiring will be more than I know. You can buy a module that alters the current faster than light and stops the issu
I suggest you contact the manufacture for info.
Did you google track insulators?
to Jeff;
The center rail and outside rails must be separated. Think of the center rail as wired with red wire and the outside rails with black. There should be no shorting.
What do you mean by “insulated track between the two loops?
“JEFF”
your Layout would be SHORTING where the tracks join back to each other, if possible run your finger over one track around where the points take you around the LOOP, getting back to THAT POINT your finger should be the SAME RAIL.
WIRING
BLACK is BACK,
RED is FRONT
You have to make a wring diagram showing all the connections from your throttles/power supplies etc . . . to the track and the layout of the track and exactly where each track is connected to the rest of the track and show the points and how the rails of the points are connected to the rest of the track.
You also need to tell us when the short circuit does not occur and when it occurs.
Colin Mitchell
Jeff
First of all, I notice there appear to be some tools lying on the track. They may be the cause of the short.
Failing that, would you be able to post a track plan, showing where the breaks are, and where you get the short (and how the points are set when you get it)?
I notice you appear to have both a reversing loop and a triangle, both of which can cause short circuits – at least on two-rail layouts – if not insulated correctly.
However you seem to be using three-rail track, which normally doesn’t have problems with reversing loops and triangles. Would In be right in thinking that on your set-up the outer rails are bonded together, and the centre rail is the return?
To Jeff…Sorry, I’m not too familiar with the 3-rail system so I won’t be too much help to you.
Peter…I always enjoy seeing photos of your layout. They have given me many ideas for mine.
Bob…I’ve had the same idea using an old computer power source for powering all the lighting and low voltage DC accessories for my latest project. 3 separate voltages from 1 power supply. The hardest part was figuring out which wires supplied what voltage. A little internet searching remedied that. Now I use that for all my DC power demands except actual locomotive power. And the accessory terminals on the cab power pack supplies any low voltage AC requirements.
Simple
One if you have a small McLean transformer then all outside rails are on the common
If two transformers make sure they are phased together meaning they have the same synergy wave
Meaning if the plug on one needs to be reversed to phase it with the other
A multi throttle transformer takes care of this but you will grow and need a accessory or switch so learn to phase and you will not have this problem
Wish this was available 60 years ago when I started
Hi Jeff,
Need a little more information on your shorting problem.
Is the entire layout powered by one or several transformers?
If several, take the A/C plug from one of them and turn it around or flip the plug so it enter the house outlet the same as the other transformer. Easier to do if using a power strip. Notice the cord on the transformer has a rough side, or grooved side of the cord and a smooth side. They both need to be the same when plugging into the power strip. It’s called phasing the transformers together. Had exactly the same problem. Un- plugged one transformer from the A/C power strip, turned the plug around and it was fixed! Best of luck! Wes
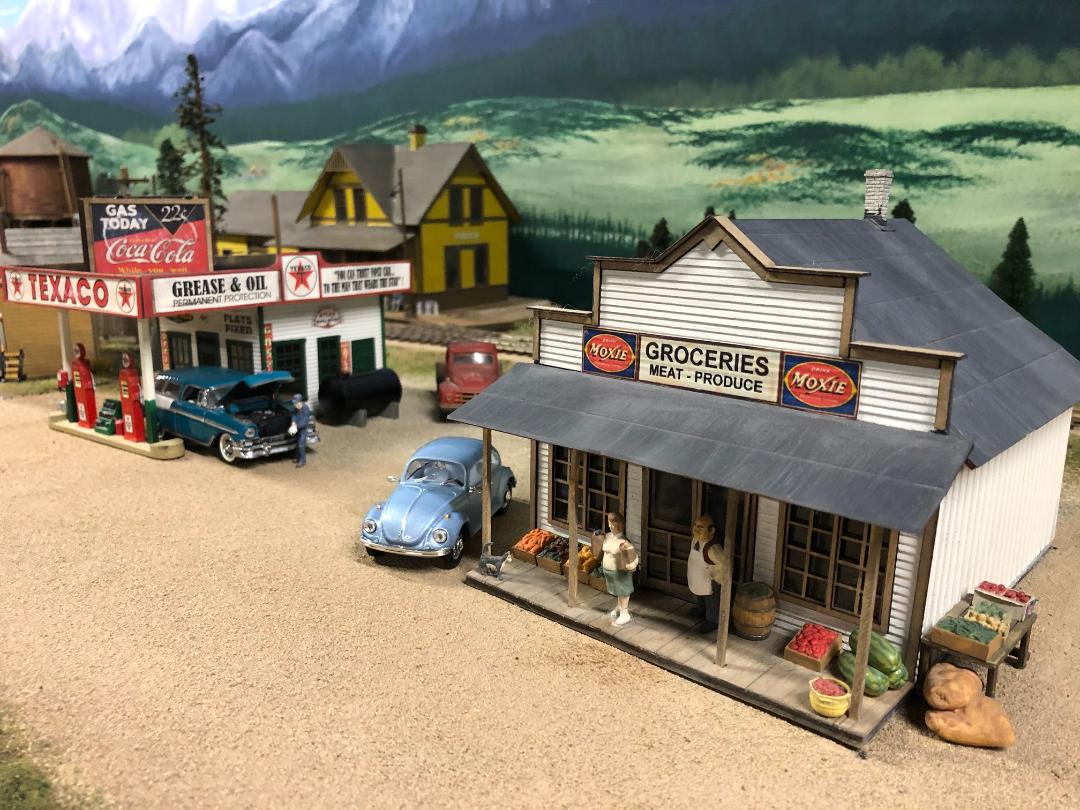
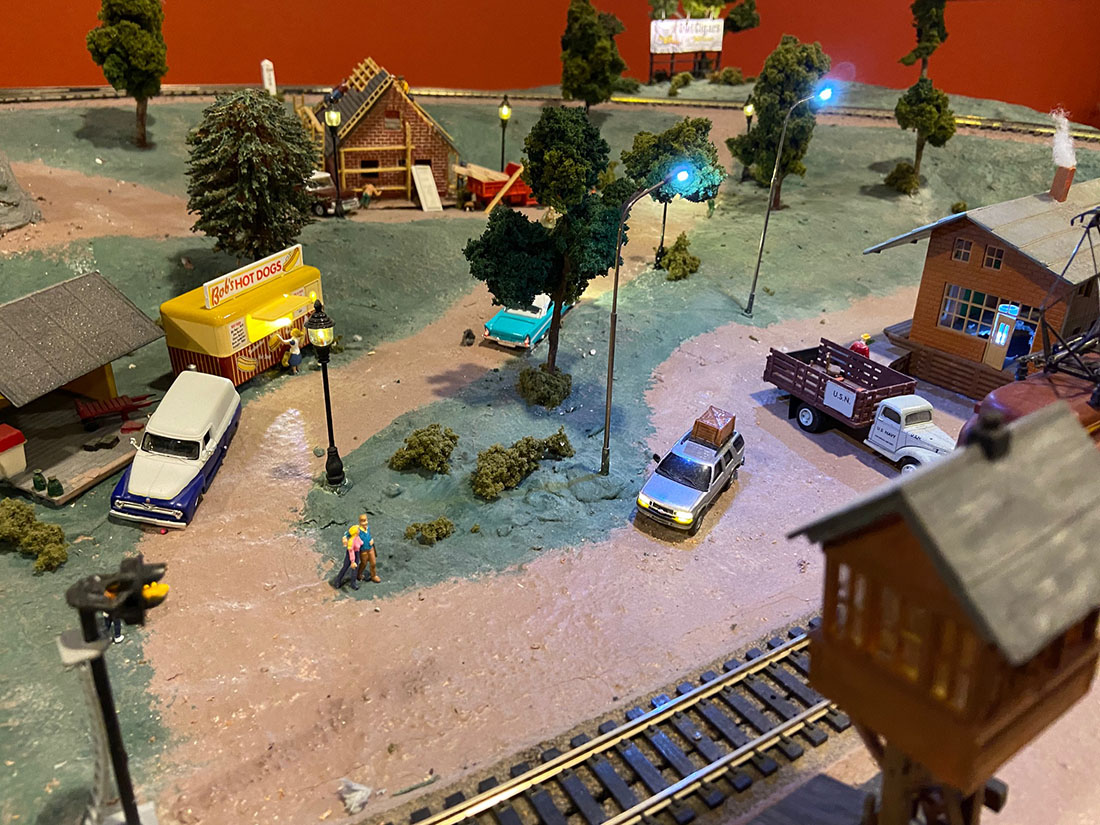
I do like the scenery on this layout the Dairy Queen and Country Grocery Store, was well planed out, I am work on my O scale layout and I look everyday on this E-Mail on any scales
I believe what’s being mentioned in posts is “polarity”? Yes, A/C must be polarized the same as D/C positive & negative. Never used to be century ago but every plug-in cord these days is. One prong on plug is always larger than other and the neutral (or white wire) is ribbed or fluted with the “hot” leg being the smooth wire of cable.
Point is if reversed, stuff may actually work. Your switching neutral leg somewheres and leaving hot leg hot… even with power off. Yeah, power surge or short can lead very easily to “overheating”, something that’s not going to shut down. Good luck out there.
Regards, Rich
No idea how Boss Mustang picture shows up here, l didn’t do it lol.
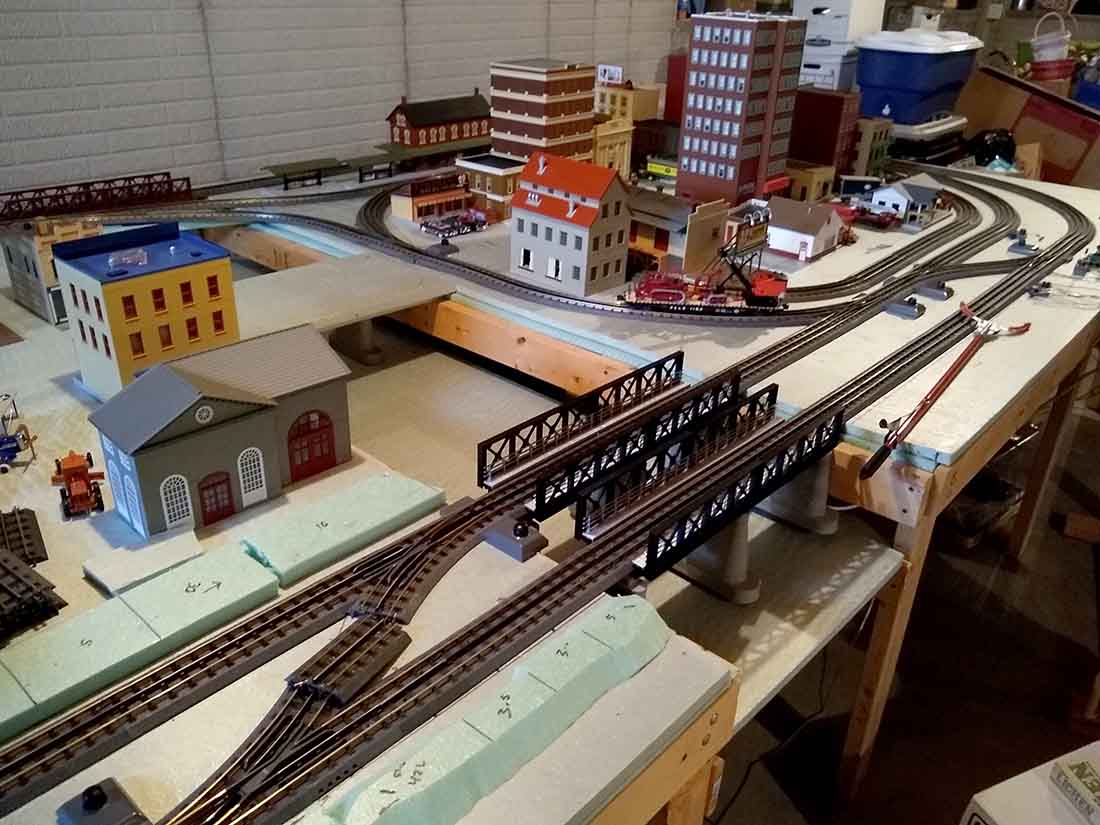
Love your photos of the layout. Looks like you have a reversing loop [3rd photo] where the short loop in the form of an ‘S’, connects the inner rail on the left to the outer rail on the right. Don’t know if that is your sole cause of shorting but would be one. As someone else suggested, there is a module you can get that automatically handles that problem. Can check turnouts to see if wheels cause shorts within the turnouts themselves. Would help to see where feeders and insulators are located. And specifically when/where you get a short.
Jeff, I model in three rail O as well. Seems like the old tubular Lionel track and switches never gave me a problem no matter how I configured the switches. ( as long as the insulated rail joiners installed at the factory were in place). Look like you’re using MTH Realtrack. I made a Christmas layout using that track with a couple passing sidings and did have some issues with the switches chattering or changing direction in in opportune moments. Now I’m making an Inglenook switching layout using Atlas 3 rail track. Beautiful track but after adding the switches, nothing worked properly. Called Atlas. Emailed them the track diagram and they sent wiring instructions. Nice folks. You might try sending your plan to MTH and maybe they’ll help you out.
You have the two loops wired reversed from each other! Reverse the wiring to one of the loops should fix the problem!
Jeff- Three-rail AC is pretty simple. Power to the center rail and common to one of the outer rails. Both outer rails are electrically bussed from the factory. I believe that’s MTH Realtrax you are using?
Check the transformers phasing as others have mentioned. If you can post more detailed photos and explanations we can offer more advice.
In 3-rail AC, reverse loops do not cause polarity reverses like in 2-rail DC since the hot is always on the center rail.
Bob in NY
Couple of questions for Jeff. Why are you using insulated sections? Do you have separate transformers for the inside and outside loops? If you only have one transformer, you don’t need to use insulated sections between loops (or anywhere for that matter). If you are using two or more transformers, you need to make sure they have common, or matching grounds. I had to make a special cord that reversed the ground for one of my Lionel power pricks so that I could move trains seamlessly from one transformer, across an insulated track section, to be controlled by a different transformer. Plenty of info on all this at the o gauge RR forum-https://ogrforum.ogaugerr.com/
With 3 rail track a reverse loop has no effect. I would suspect that an outside rail wire lead and a center rail wire lead were switched.
hy jeff, anytime you can go around a loop and get back to the same location going in the opposite direction, you have a reversing loop. Even though you have 3 raila, I suspect one or more of your locos has 2 rail operation. You need to cut both outside rails of each set coming into the switch at the start of the loop. You need to add a dpdt switch to reverse the inner and outer rails of either the main or the loop. If you do the loop then the train will also reverse when you throw the switch. If you do the main, it will just continue on. If you only use the third center rail and tie both outside rails together, then you wont have rev loop problems but your engines must pickup from the center rail to the outside rails. Get a test meter to allow you to check volatages without running an engine. Be sure to note the + or – when reading the meter. Good luck, bob
To clarify my earlier comment, you achieve common ground by reversing the polarity on the cord that plugs into the wall. Basically switching the wires on a non-grounded (two prong) plug.
Look awesome; But still needs work.
Great display of modeling. All of the scenery pics are quite realistic and highly detailed. Thanks for sharing.
Jim AZ
Bob – I like your idea for using an old computer power supply, but I am wondering why there are multiple wires of each color (4 each of orange, red, yellow, etc.) coming from the power supply and terminating together at the same post?
Can you show us a photo of the back side of the power supply?
Hi Jeff,
Richard Scott is correct that in this 3-rail system an “outside rail wire lead and a center rail wire lead were switched.”
Even if the tracks in various portions of the layout are insulated from each other, the metal wheels and axles on locomotives and cars are made such that they act as electrical conductors from outer rail to outer rail. If in one portion of the layout the center rail is hot, and in another portion the electrical leads are switched so the outer rail is hot, right when the train moves from one loop to the other the electricity will pass through the wheels and axles and form a short circuit.
The center rail is the Hot rail (like the 3rd rail on a New York Subway), so it should always be connected to a Red wire to make it Red Hot. Both outer rails provide a common Ground, so they get the Black wire. Since your inner and outer loops are controlled separately you probably have multiple power connections. These should all be set up the same. Take a good look at your connectors.
Good luck, and Happy Railroading
(Forget about all that Phasing talk – those guys play with those little HO trains and don’t understand real O-Gauge systems 🙂
Jeff,
Looks like you are using MTH Real Track from the pictures that have clear views of the switches. I have used quite a bit of MTH Real Track and it is easy to work with and shorts should not be a problem as long as the power (red) is to the center rail. The outside rails are the common (black). I have a two-loop layout (8′ x 13′) suspended from my ceiling on wire shelving that you find in closets in American homes these days. I have a transformer (MTH Z-1000) for each loop. Outside loop is just for running around the layout, while the inside loop is the “switching and staging sidings” loop (Actually a split loop on each side of the layout). If you use multiple transformers, you MUST plug them into a power stripe or you WILL face an issue of having the transformers that are not in-sync and that is hard on engine motors. To insulate MTH track, you simply fold back the copper connecters at the points of insulation on the opposing sides of track. I also put a piece of electrical tape over the copper ends as a bit of extra insurance. I placed my insulated spaces where the turn outs came together or the siding met the turnout. OBTW, it is quite easy to wire switches to operate simultaneously from a single throw switch – just follow the instructions that come with each switch. Good luck, Ron
if the tracks short you use a track stretcher, lol, works every time…
Try the Lionel Fastrack book. May Help
I read through the comments, I see most are correct answers for a given situation. I think some nomenclature definitions are needed. Many novices who are not into electrical wiring confuse opens and shorts or refer to all faults as ‘shorts’. For the time being, I will refer to the power leads as having polarity, referred to as red and black. When you start, it does not make a difference unless you are trying to match a standard. Let us say that the black wire connects to the center rail and the red connects to the outer rails. You can attach 2 sections of track together end to end and it is fine you can turn one section of track around and it is still red to red, black to black. No fault caused.
look up a sine wave on Google if you are not familiar with it. The sine wave rises to a peak voltage; drops through the zero point and contines on to form an identical, but negative curve and then back to zero. If you draw two identicle wave forms in a row; then cut the form in the middle and flip the second to lay on the first curve so that the negative portion of the second curve lays on the positive curve portion of the first curve you will see that they cancel out each other and the result is zero. This will cause the train engine to stop. So it is important that all track connect to the same color. The spring rollers will bridge across any insulator. A short is when the red and black actually touch. Most transformershave an indicator in the case of a short. An open is when one or both leads are not connected. If you understand what is happening; you have 90% of the solution. Hope you haven’t fallen asleep!
jeff,
This should not be an issue if the electricity flows only in one direction.
I have used mth real trax and the only time I could possibly have a problem is when you try to use more than one power source and have them working in opposite directions.
Otherwise it is like one big network (the internet) and the positive is running on the center rail and their is a “common” common that is followed consistently.
Wiring a three rail should not be an issue.
The key is always have the electricity flowing in one direction.
Mike
Jeff nice looking layout, you should look into OGR Forum been a member for a couple years, many members are always there to help out take care and good luck.
If I’m seeing correctly the inner loop entering the other side of the track at the switch in front of the red roof building is in doubt if you didn’t put a voltage block in the track as you would have the track of opposite poles entering each other at that point. that ois what I noticed by observing what pics you sent.
I thought only a two rail system has a shorting concern for reverse loops.
Well I looked at all the responses and I see some folks who have not used 3 rail setups so I assume most guys on here are not familiar with the alternating current that is generally used with 3 rail systems. Lionel used 3 rail alternating system from the first to make their system easy for children to use. I got my first train in 1950 at the age of 8. Never had a problem with shorting except when the train derailed. You only supply power to two tracks. Connect the ‘+’ pole on your power supply to the center rail. Connect the ‘-‘ pole to the outside rail of the track. I am sitting here trying to think of a situation where this method will cause a reverse loop like two rail direct current shorts out. I do not think one exists. I had crossovers in my track and turnouts and never once did my track cause a short. It did not have any place where the track insulated a connection from one section to the next. If you want to have sections where the track is dead then insulate both ends of the section and wire them to your switch. You should only need a switch on the center rail just like a light switch in your home. That is on the ‘+’ terminal of your power supply. Home wiring in the USA uses black and white but we model train folks use Red and another color. Red is ‘+’ and the other color is ‘-‘. When you have a crossover, all it does is charge the other side of the outside rail system, it does not cause a short because the outside rail on either side is the ‘-‘ pole. I never had a layout large enough that it needed more than one power supply so I don’t know about trying to use more than one transformer. I think since they are wired the same, you should be able to use the ‘+’ pole on both transformers to the center rail without getting a short. Just remember always make the center rail your ‘+’ pole.
Well I don’t know a thing about the electrical issue you’re having , but I sure am impressed with the go to knowledge many of you have to offer this fellow . Good luck to you sir . Aside from that it looks like it’ll be a stunning track plan and layout .
Likewise for the other posts … very nice work , very nice layouts indeed . Y’all are serious modelers , I thirst with envy . I’m a novice with limited wheel house , enjoy each day what this blog brings … it’s a learning experience as well as an outlet for the enthusiasts. Thank you all for sharing , especially those talented enough to help suss out and sort out this man’s dilemma. Too f ing cool .
You need to isolate 2 of the 3 tracks in the “WYE” section of track in picture 3.
DENNIS…
Jeff, I am not familiar with three rail. But looking at the photo with the complete crossover, there is a connector with a maze of wires. Check to see if all the wires to each post are of the same polarity. I.e. all the wires to the red post are from the same source and all the wires to the black post are from the same source. Also check the wires on the connector in the lower right of the photo. The fact a locomotive shorts navigating the crossover indicates this, the loco, even cars may be bridging the opposite polarities.