Got some small space model railway pics for you today – and some not so small:
“Hi Alastair, I am enjoying your blog tremendously and learn something every time. I have been collecting model train stuff for 30 years and only recently unpacked everything that I have bought either new or at second hand dealers or in my travels around the world. So I have built a loft room to lay everything out.
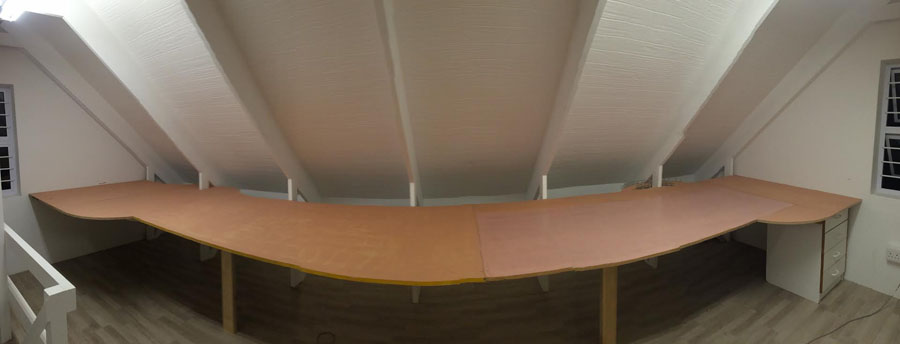
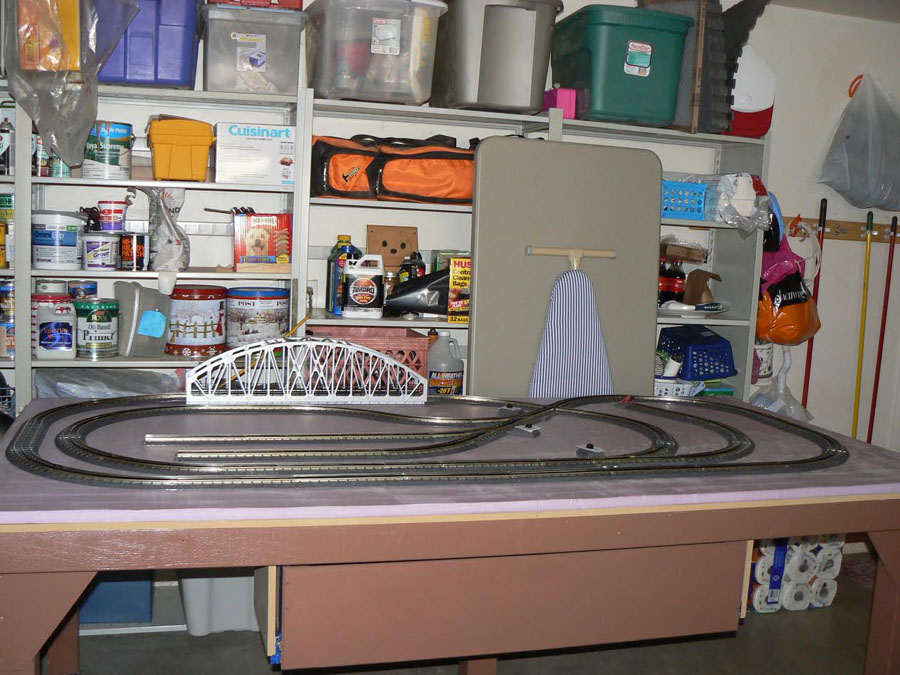
The layout will be 7 metres (23′) by 1220mm (48″) and either end the width increases to 1600mm (63″) to facilitate nice easy curves. I am attaching a picture of the layout. It is a panoramic photo so appears round in the front, but it is staright. More on that later.
For the last 6 months I have been repairing houses, sheds, and a lot of the things that I have, but not yet laid a track. I will be working in HO scale, and my theme will be a real INTERNATIONAL railway, with engines and coaches from Germany, Belgium, Holland, USA, South Africa etc.
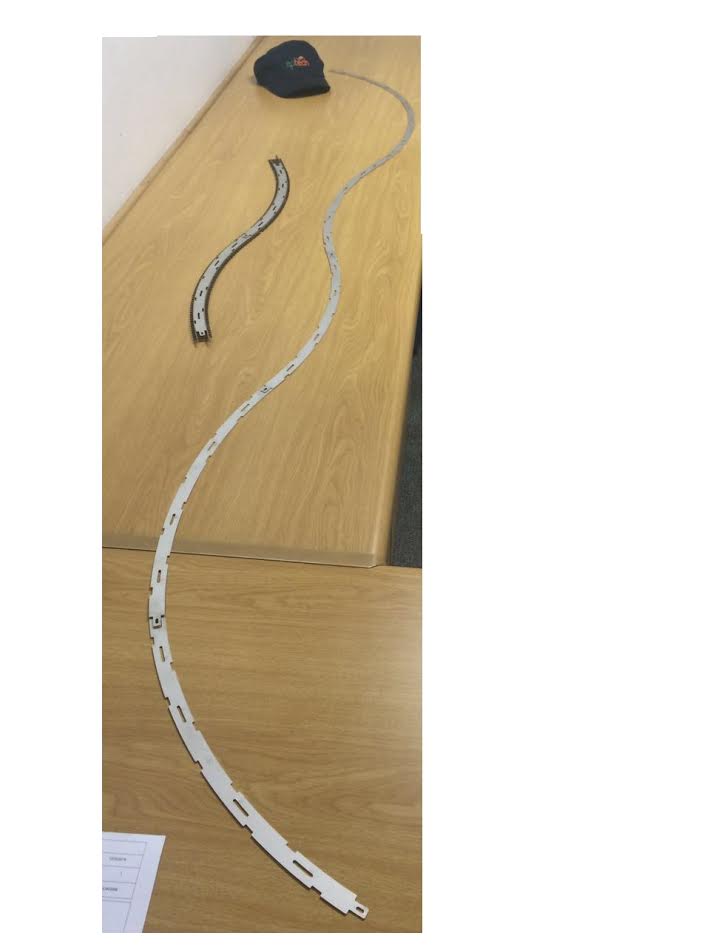
But I wanted to share something that I have had laser cut and they are track guides for flexible track, which enables you to make any layout curve to the exact degrees that you need. So I have made 15″, 18″ & 22″ guides. See pictures attached. Soon I will be starting my layout and will update as I go along.
Greetings from South Africa.
John B.”

“Hello Alistair
I wish to thank YOU for all the emails I have received from you over the last two or more years on the matter of model railways.
I only started my real interest in model railways as I approached my retirement. I am resident on Alderney in the Channel Islands (the only Island with a running standard gauge railway) where I have trained to be a Train Guard. Great fun.
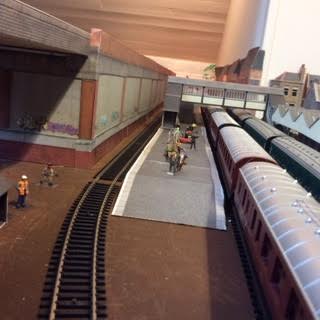
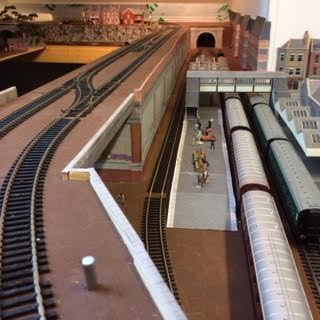
My wife and I have decided to return to live in the U.K. after nearly 11 years here so I have had to dismantle the whole layout in preparation of the move. We hope that next year we will be able to sell our home and move back, when I will start to rebuild my model railway. (22ft x8 ft).
I will send a couple of pictures of my now defunct layout following this email.
Keep up the good work and thank you again
Stuart Heap”

“Alastair,
I am a first time writer. I have read several posts and looked at several videos. I think all the ideas that you pass on are great. You provide a service we all need.
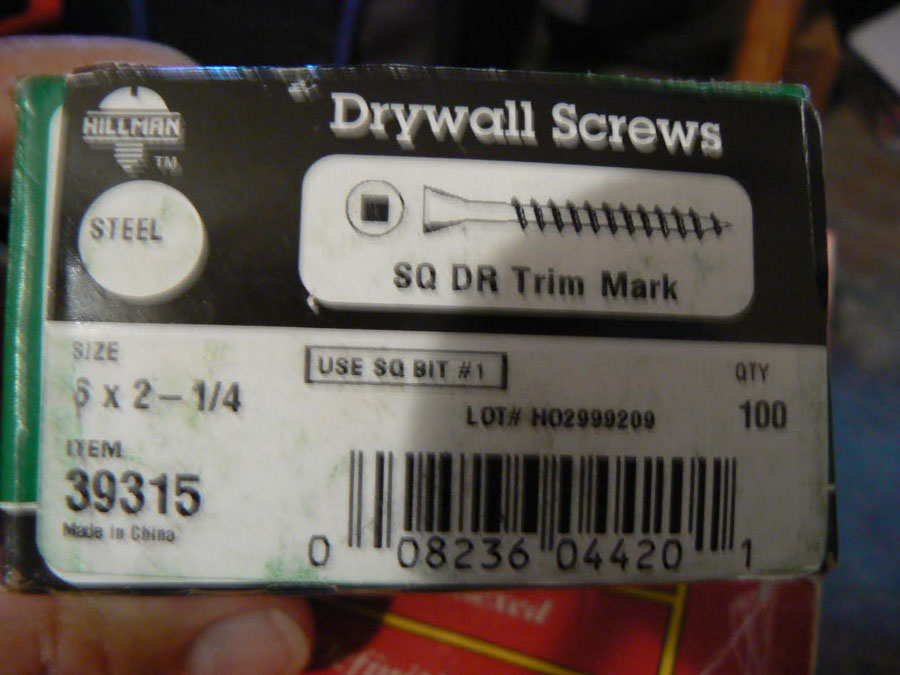
Now for my great find. I have seen many railroaders struggle with attaching the one inch foam to the base board and then the track to the foam. Gluing is a messy process to say the least. MTH track requires a #4 screw at least 1 3/4″ to 2″ in length to accomplish this. If anybody has found a #4×2″ flat head wood screw please let me know. I spent several hours on the phone trying to find them.
Finally a great guy, Skip at Copperstate Nut and Bolt in Flagstaff, AZ came up with a great solution. Since he was about 100 miles away I checked my local ACE Hardware store. And they had what he suggested. The screws are called SQ DR Trim Drywall Screws. The product number is 39315. They are a little longer then needed but look good. I have attached a photo. I hope some of the guys find this use full.
Best regards,
Terrence
Prescott Valley, Az”
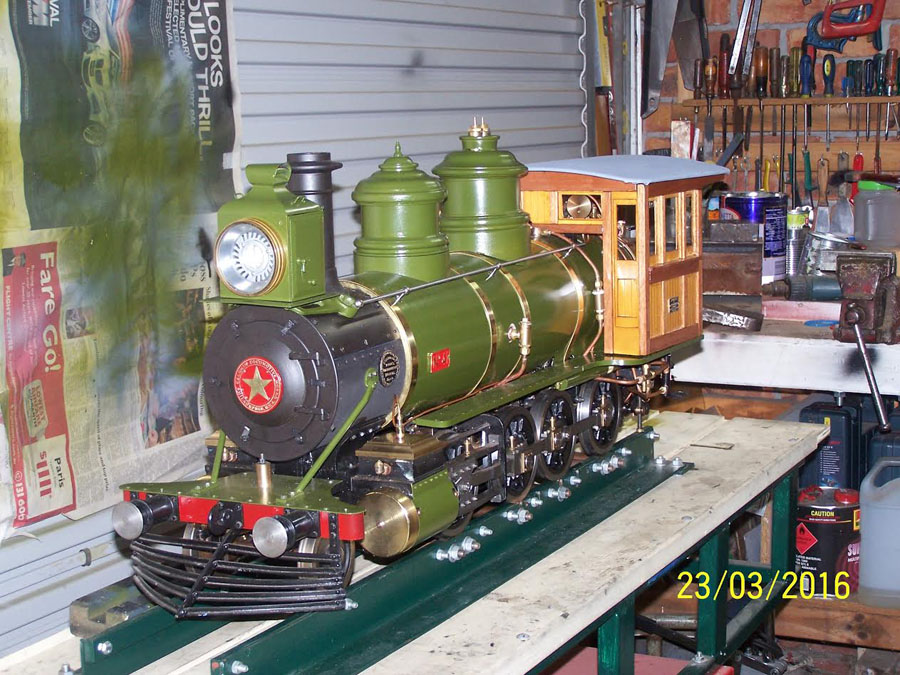
“G’day Alastair,
I used to be a HO man 60 years ago, I’m into 5 inch gauge these days, but I still like to look at the beaut models and dioramas you present. Dangerous Dave is my favourite.
Keep up the good work.
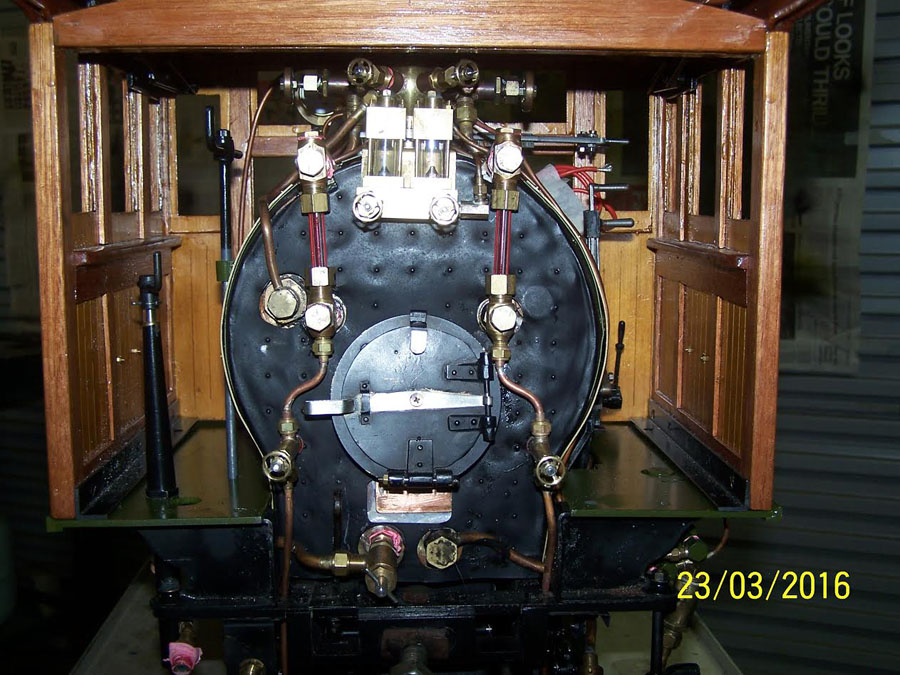
Attached two pics of my latest creation, 5″ gauge live steam model of a 3′ 6” gauge Queensland Railways 2-8-0 purchased from Baldwin in 1879. I hop they are in fact attached. The computer is playing up.
The loco is virtually complete but the tender is a work in progress. Began building in about 2008!
HO is certainly quicker.
John
Wandong Live Steamers
Victoria, Australia”
A huge thanks to everyone today – loved the fact the John has been building since 2008. I think that’s what this hobby is all about, doing a bit here and a bit there.
I pondered over publishing John B’s pics – not much to see at the mo, but then I thought, no, that’s the whole point: John’s made a start. And I do love seeing the progress pics.
Talking of which, here’s one that got away – I never heard from Tod again. Such a shame.
That’s all this time folks.
If you’re feeling inspired and want to make a start, don’t forget the Beginner’s Guide.
Please do keep ’em coming. Just hit reply to any of my mails if you’d like to share anything.
Latest ebay cheat sheet is here – still updated daily.
Best
Al
PS Thank you so much for all the nice replies to my last mail – I really was bowled over by them. Thank you. I’d like to reply to everyone but I’m struggling to do so. Please bear with me.


Stuart – nice layout, shame it has to be dismantled :-(. If you’re moving to the Thames Valley area, I’m sure the Cholsey & Wallingford Railway would appreciate an extra Guard….
Richard
PS – The Pallot Museum on Jersey also has a standard gauge line, but it’s not as long as the Alderney one.
This Looks Very Good, I did like the smaller layout real good
How can I send you some pics of my railroad.
For John B – be careful John when you build curves that swap direction as your picture indicates. For smooth running and to therefore avoid derailments, all curves need a transition from the most extreme radius through straight and into the next turn but your setting devices switch immediately from a left curve to a right curve. Imagine you are a passenger in a car when the driver suddenly switches the steering wheel from a medium left turn to a medium right turn at 50kph – very uncomfortable!
I am trying to find a cricket match figures in HO. for my layout, would anybody know where I can get it
Hi Alastair,
Looking at John B’s track laying template guides he has built some unique features into them not found on regular radius gauges. Would he be interested in selling some and/or the possibility of allowing them to be manufactured and made available for sale? Is there a way to initiate that conversation please.
Thanks,
andy
Eight years for a five inch gauge live steamer is good going Al, that’s a LOT of work. Stuart, don’t know where you’re moving to but volunteer guards are ever welcome on the Severn Valley.
Rod
Johns engine is a beautiful sight for sure hats off for a great work in progress.
Domie
Are the kits O gauge? I am interested in the flat store fronts,
thanks,
patrick
Hello I am Emailing from Orleans, Mass, 02653. The flex-guides are a great idea. Good luck with your new layout. I have created a portable HO layout in my apartment. My HO collection started in the late 1950`s . I`am semi retired and have more time now to work on the engines. Bye.
Hi from the US (for British Modellers):
I recently purchased some Bachmann weathered coal wagons. As I am into ‘operating’ I was a little disappointed that the number had been almost obliterated by the weathering. After examining the possibilities of renumbering the wagons with pressfix or methfix transfers, which I may have to do on a lot of ‘billboard’ private owner wagons, I decide to try, as a last resort, a gentle rub with fibreglass brush.. It worked just fine, the numbers are now perfectly legible without damage to any of the other decoration. Now all I need to do is to add rust and grime to the underframes..
I love those templates. It looks like you have gaps in critical locations. Gaps where nails are used to anchor lengths of flex track while keeping the sections aligned. Also gaps where rail joiners would fall, and soldering might be desired, and using the metal template as a heat sink.
I made similar templates out of Masonite to keep rails aligned at junctions on curves. I was having derails at junctions on curves, and the templates kept the rails aligned while I soldered the joints.
Still in training,
Carl in Kansas
For Terrence.
I have 1 inch foam on my layout. To keep the track down, I used pins that are used in sewing. They fit nicely into the predrilled holes in the track and the head is small and flat and easily hidden with a dab of a black felt tip marker. The pins should be inserted at angle and alternate the angle as you proceed down the line. It is advisable to glue the foam down to the board underneath. I hope this works for you if you try it. Cheers! NJ Mark
Good morning John B.
No doubt that I’m most interested in your track guides. I very much like the concept, and I’m sure they aid in the efficiency of your track laying, I do so wish that you would commercialize your idea which would make them available to the rest of the folks. thank you for sharing.
Regards. Tom Murphy from the USA
Hi Alastair, I am rather new to this hobby and working on my first lay out. I have completed the first level on a 2 level lay out using a table tennis table as the support. It’s coming along fairly well with the exception that I need a I” piece of MTH O gage Realtrack but have been unable to locate that specific size. I was just wandering if it was available and if not any suggestions as how to solve this problem. I sure have enjoyed your e mails.
Thanks Bob
wow that 5′ gauge stuff sure looks interesting…
great detail…
keep em runnin fellas
stjohn in long beach calif
nice work
To whoever was looking for cricket match figures – I’m not sure you can get them for H0 (probably because Canada/USA and Continental Europe aren’t major centres for cricket) but Langley do them in 00.
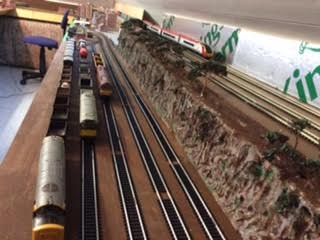
I see no ballast on the ties between the rails on most of your layout pictures.
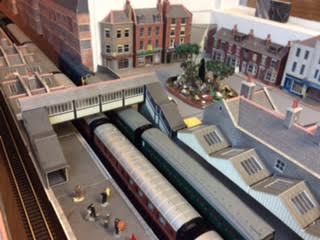
would love to see a “bird’s eye view” of the layout in picture # 9.
For starters keep up the good work it takes time. Now for some good news. I helped a friend of mind who was in the Air force and he had a ” S ” scale layout in his basement to take down where he was being transferred to another base. What we did was to take this lay out apart and we put pieces of plywood about 2 to 3 inches wide and about 6 to 8 inches long and we screwed the pieces on to wood bases and then when the movers came to get his belongings all that they had to do was to slide the layout into mattress boxes like king size or queen size boxes and all of he scenery was intact and not a tree was broken in the move. When he got his belongs back all the movers had to do was to deliver the layout to the new room and he opened is up and unscrewed the plywood pieces and put it onto the legs and get a nice tight fit and he had his layout up and running in no time at all. All that he had to was to check on the wiring and it was designed to come apart in a hurry once he got is orders. If you do the same way you can send your layout taken with you if you so want to take it with you… Now if you don’t want to keep your layout then keep a couple of pieces of buildings to take with you. if you do sell it , Make sure that you take a video of the layout and then you will have it to look at if you have a video then you will be able to learn from your mistakes to make a new layout better. I hope that the information is helpful to you. When you make a video make two of them on to give to the new person who buys it make sure that they can see the trains running and then they can see how to put it together or if you are a real good talker maybe you can sell them your home and you won’t half to take it apart. Just a good idea. Good luck with your choice. Darrel
great pics and hints also love hearing the stories on every bodies layouts this blog was great a lot of different stuff thanks to everyone who sent stuff in and thanks to Al for passing it on.
Looks Great
Terrence,
The trim screws you are showing should be available in 1/4″ increments in any hardware or big box store.
I would strongly suggest getting the stainless versions, since many scenery treatments use water, and could cause rust stains. It could take quite a while for it to show up, and it would be a shame for that to impact all your hard work.