Steve’s been in touch with an update on his Model railway station platforms:
“Dear Al,
I am constantly amazed at the skills shown in your posts from people! I thought I would offer a few of my humble attempts at creating my two stations on my layout.
This is an update as I sent a few early stage pictures last year.
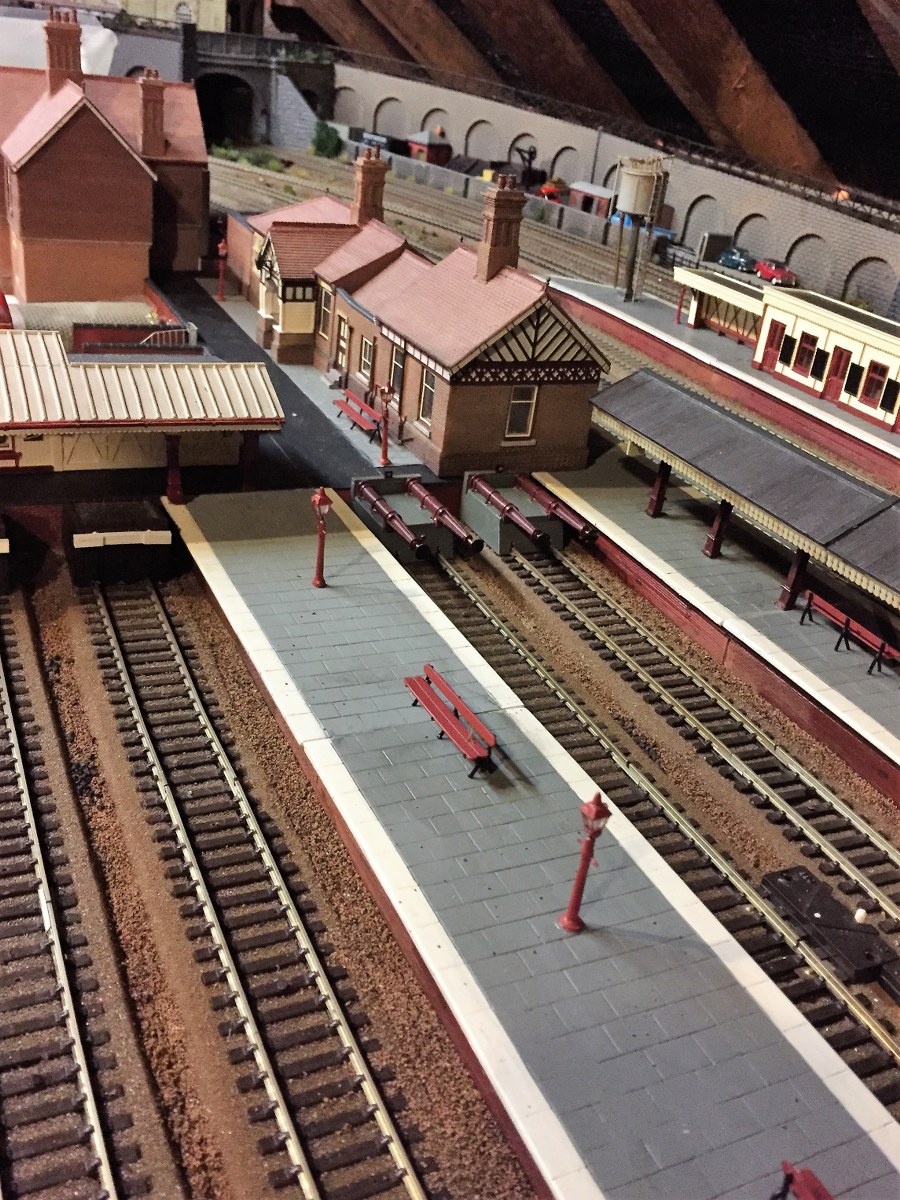
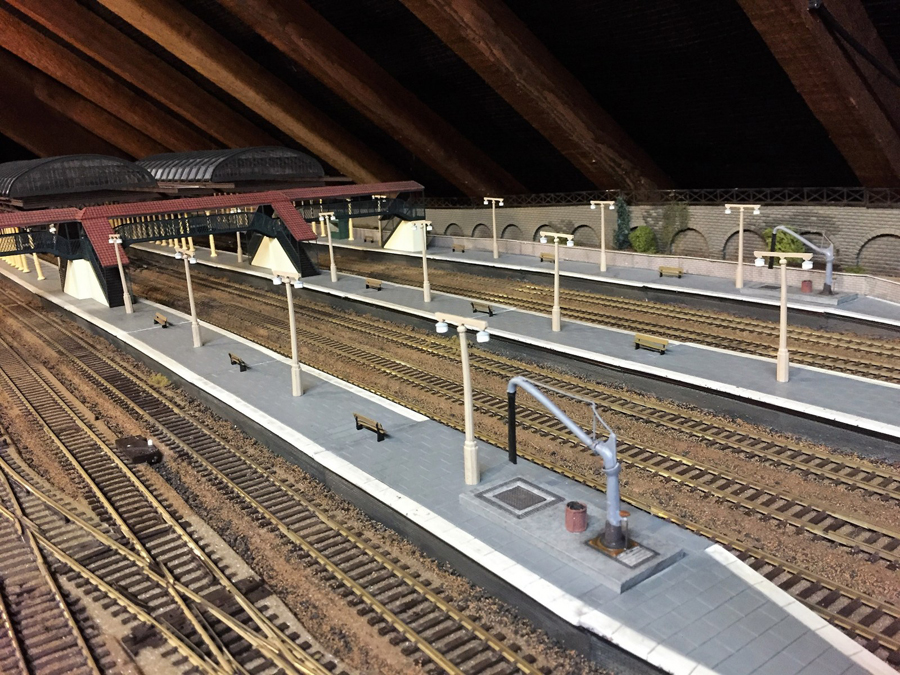
One is a through station which has a junction on each end permitting trains to come off the main lines into a station platform without passing though a station on the main line every few seconds! This offers more interesting train working within the confines of a loft space!
This arrangement permits the train to change engines from the nearby engine depot ( not complete!). The terminus station feeds from one direction only off the main line via the through station taking a slow middle road through it before entering the terminus station on the other side of the layout.
It is the old fashioned analogue so isolating sections and switches permit the engines to be uncoupled at the front of the terminus platform and a replacement engine to be backed on at the other end. The buildings are out of the box items as I said before as I have not got the great skills shown by many of your contributors (or the time – later perhaps!).
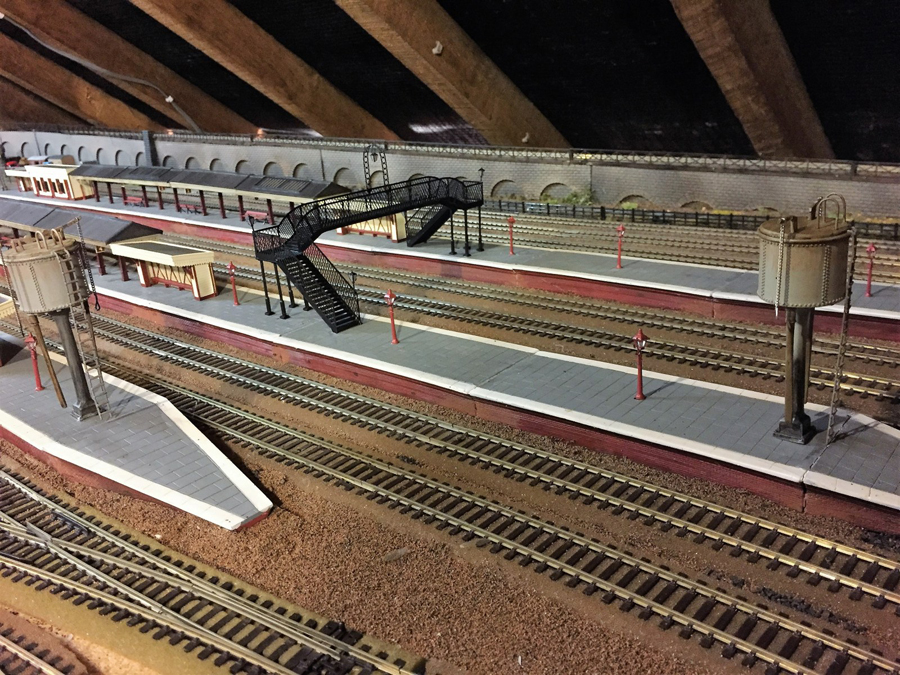
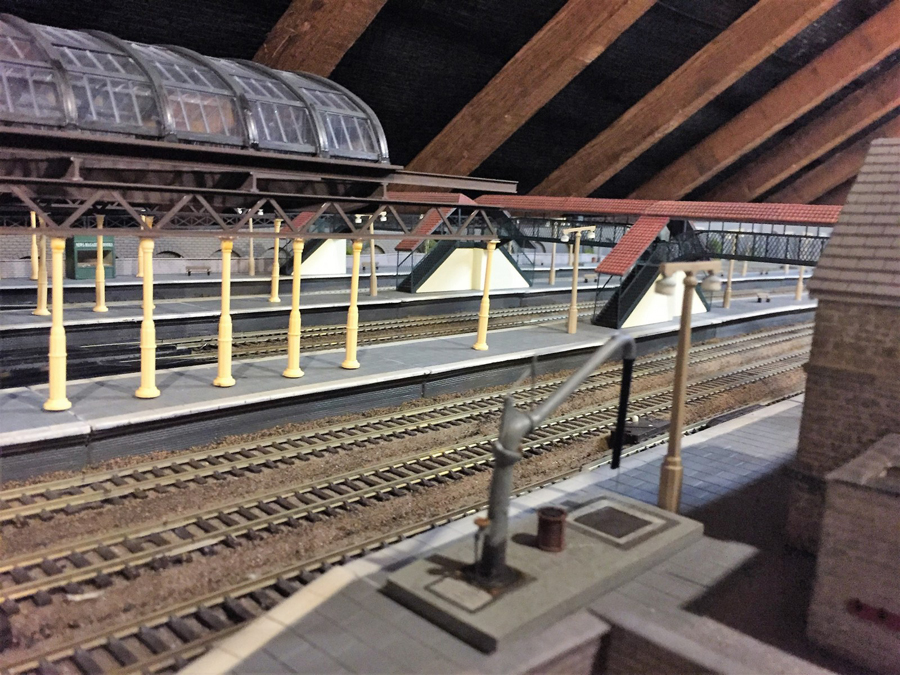
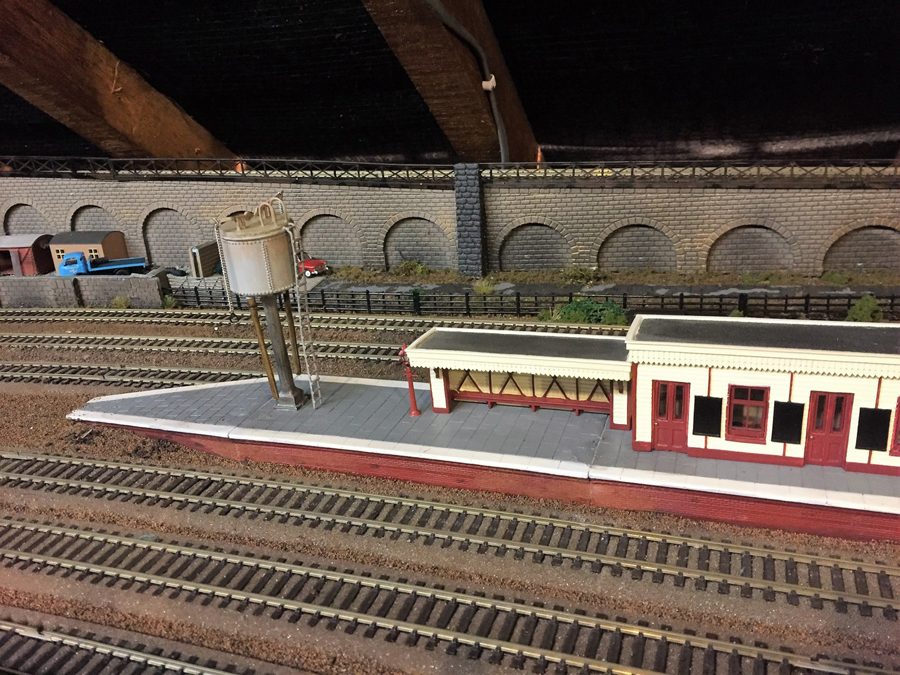
I have weathered many of the station features and is roughly based on the Western and Midland regions in BR days in my case the 1960’s. The terminus roof looks part finished and this is deliberate!
I am planning to put scaffolding round the open end suggesting the overall roof is partly dismantled and will be demolished in the the near future – which was common place during this period ( a pity but that’s another discussion).
Sorry no trains on it yet as they are still in the boxes while I get the stations up and running and the scenery behind them, I think some work on the sheds and then trains can run again after a thorough track cleaning session!
After that I need to think about signals and people and roads and and and…
Good modelling everyone
Regards
Steve”
Model railway station platforms:
“Al,
Thank you for the many layout suggestions, from yourself and many others.
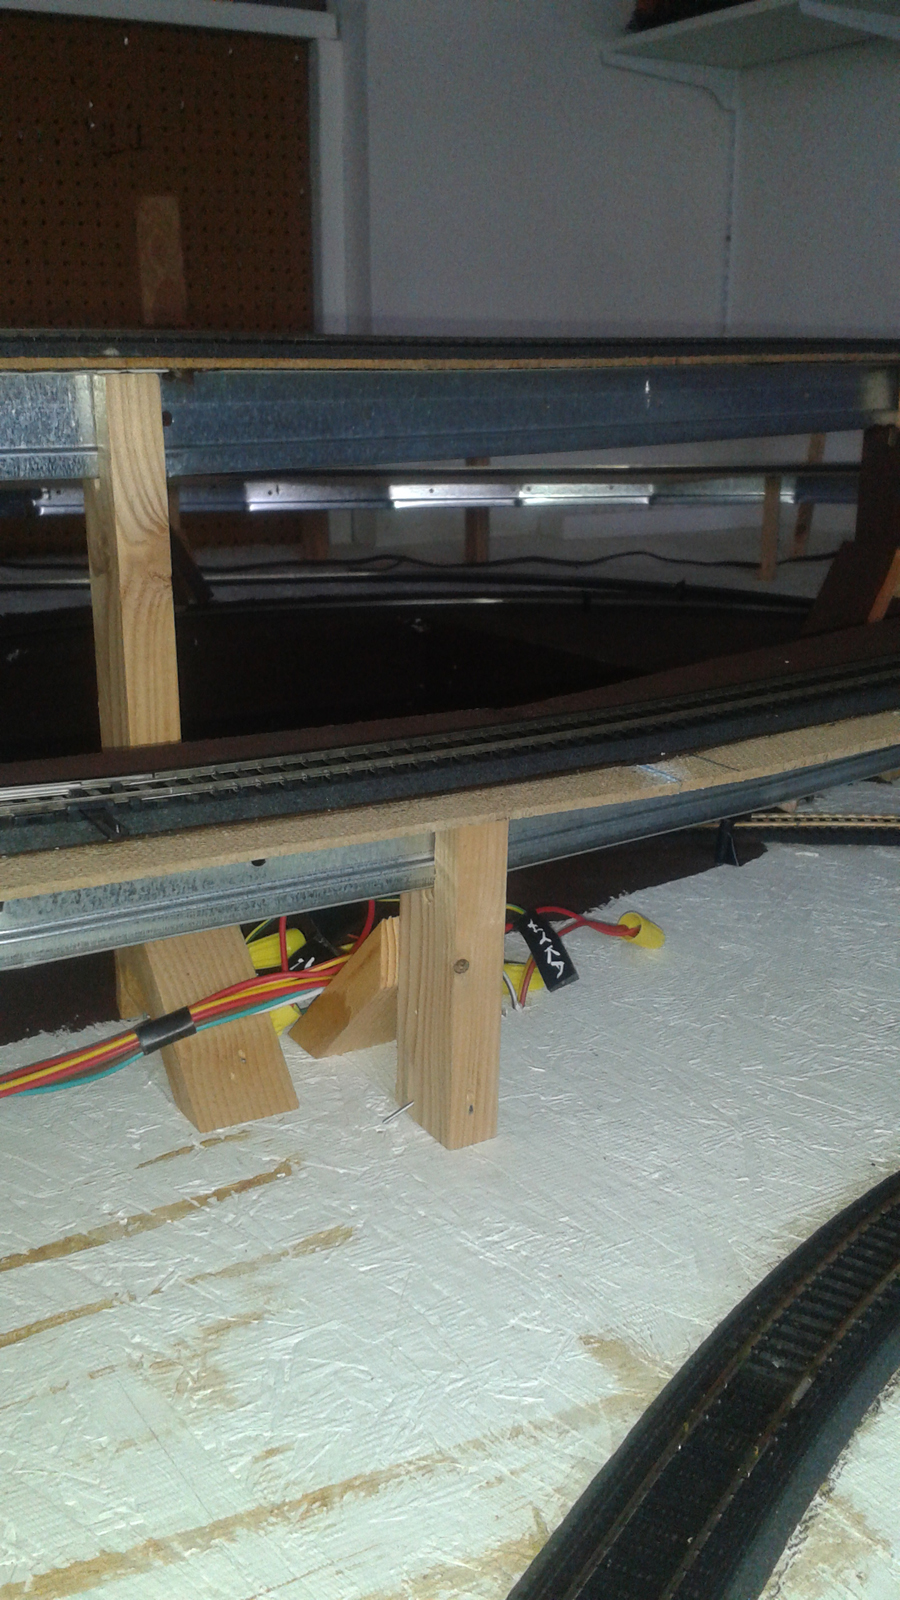
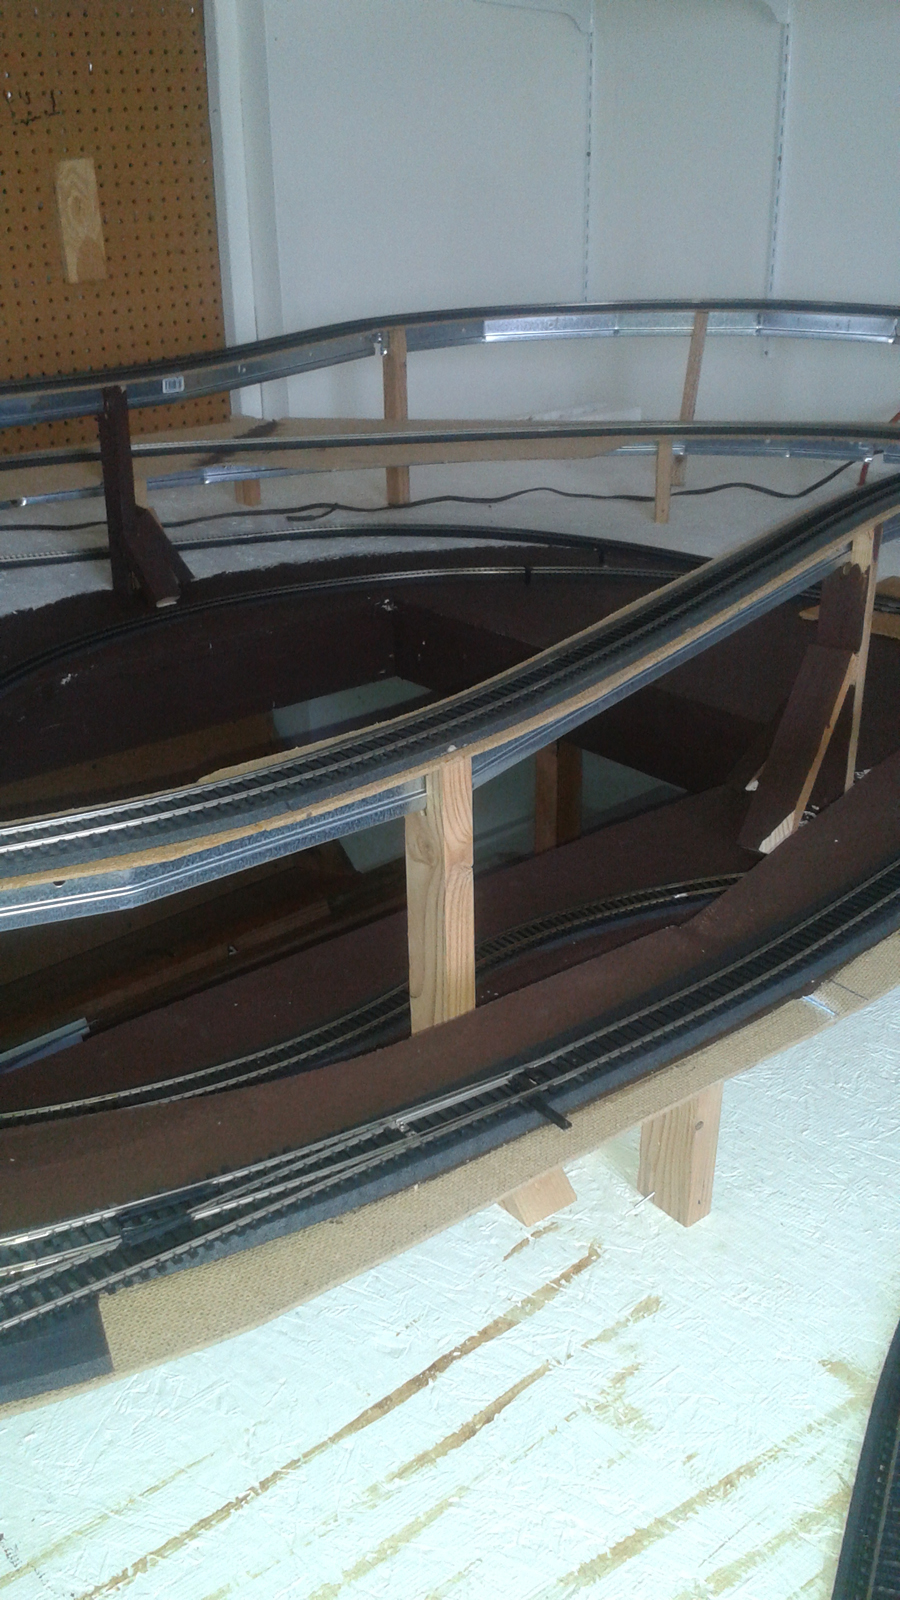
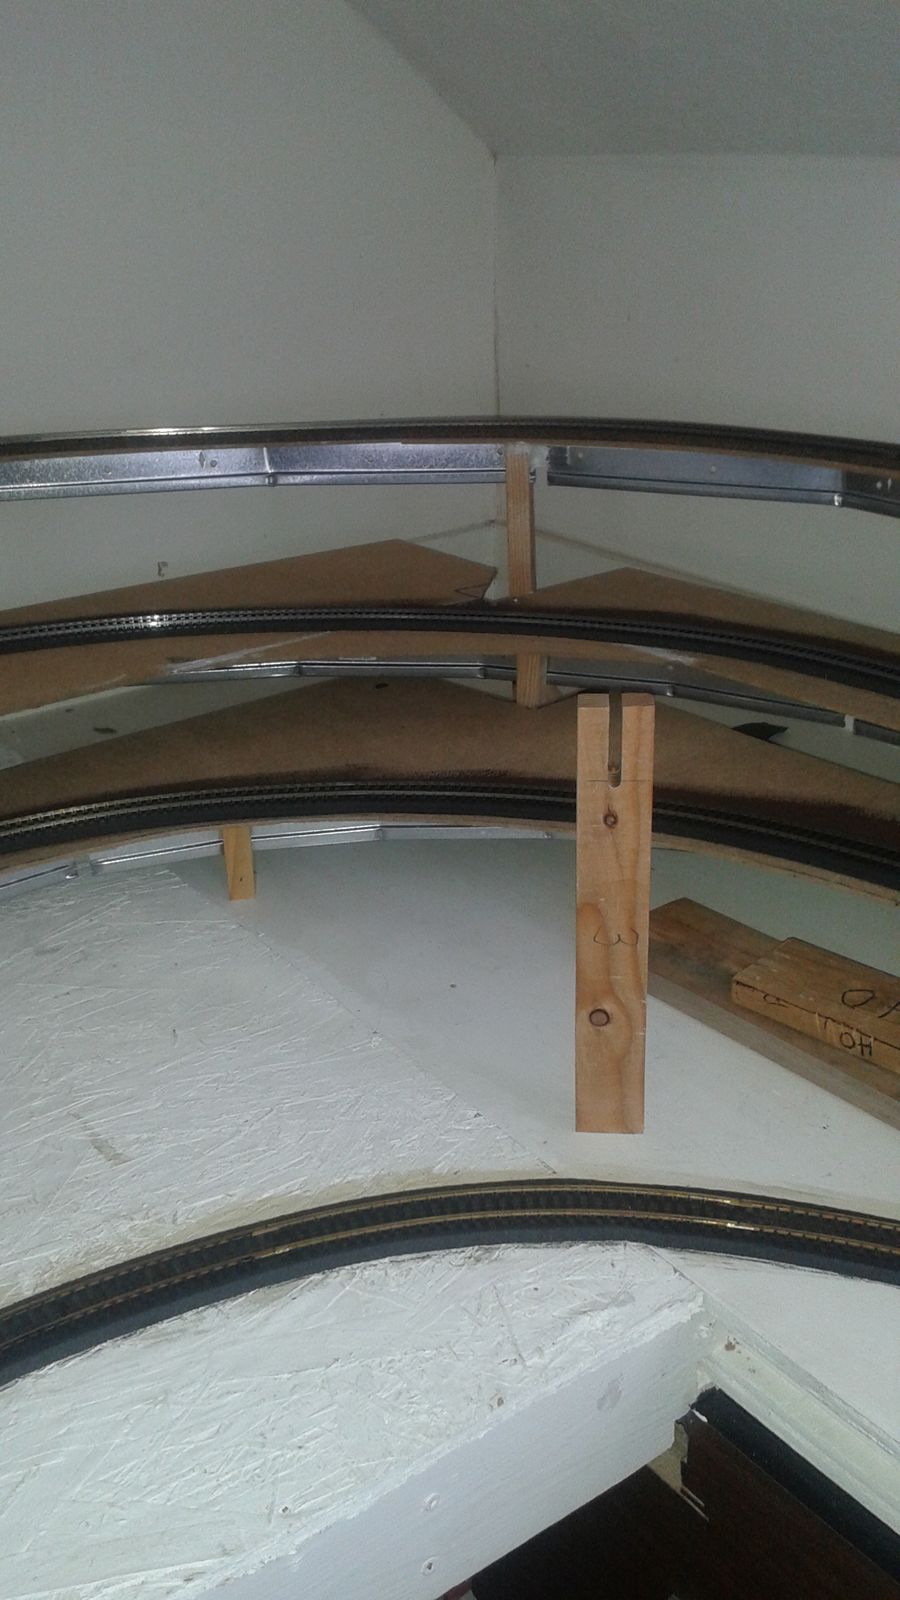
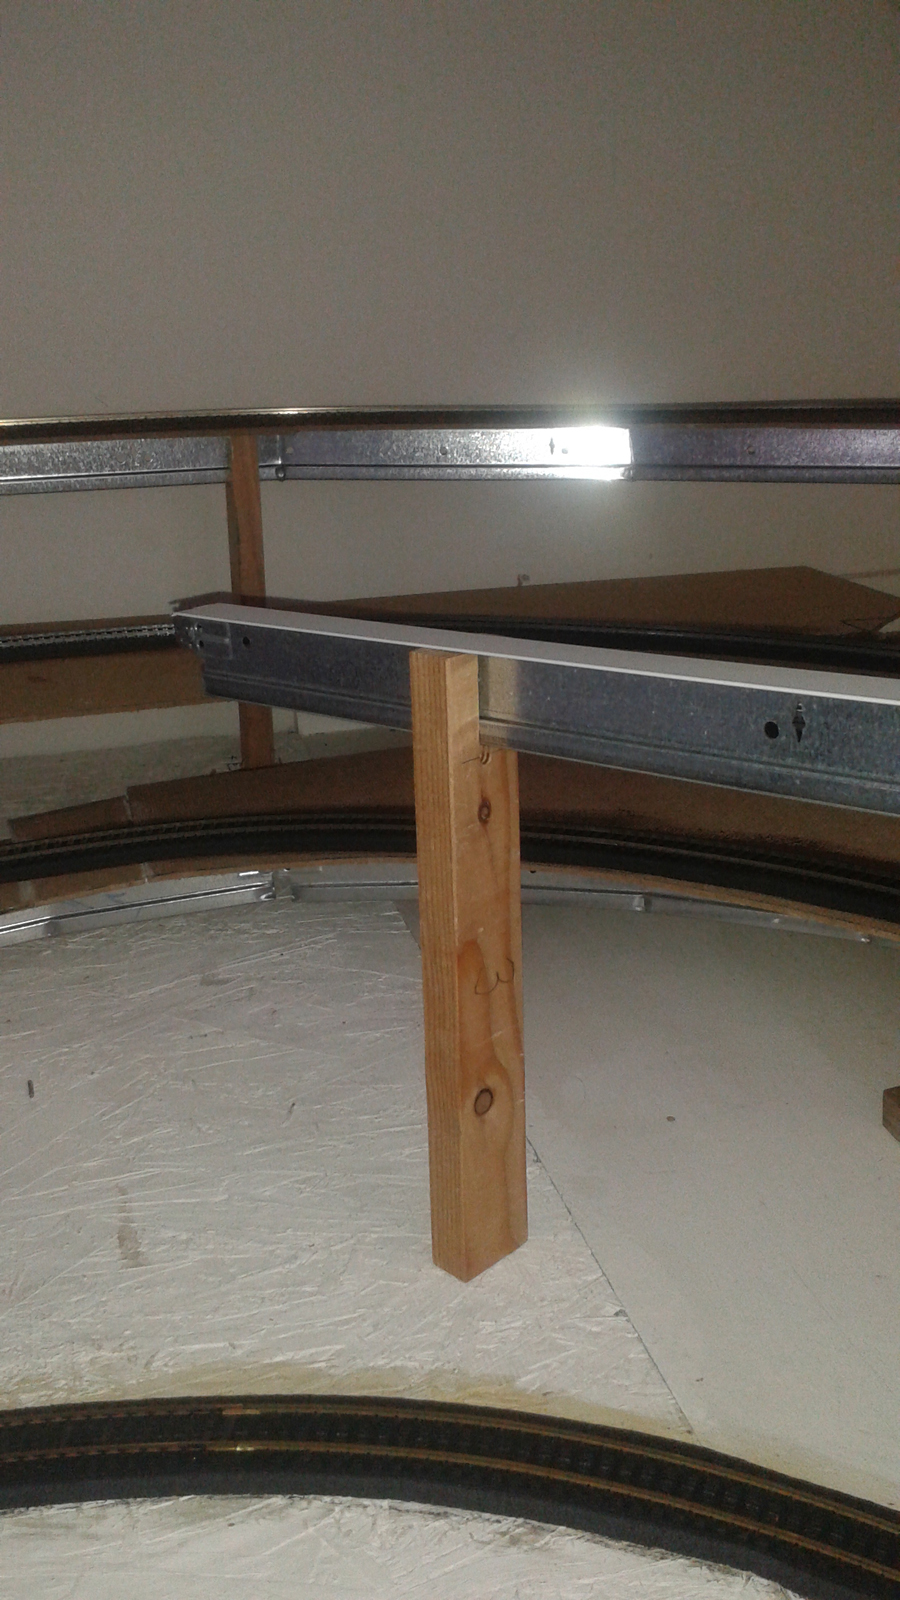
Attached are some photos of how I build elevated or hillside track. I use 4 foot ceiling tile “tee rail” from Home Depot, and this makes for easy slopes and level runs. The tees are topped off with 1/8″ press board.
One picture shows a notched column made from 1×2, an example of how to raise and support the tees. I used a brad gun to attach braces and columns. But I used caulk to lay the press board on the tees, to keep the press board smooth and even.
The tees can be notched underneath for tunneling track.
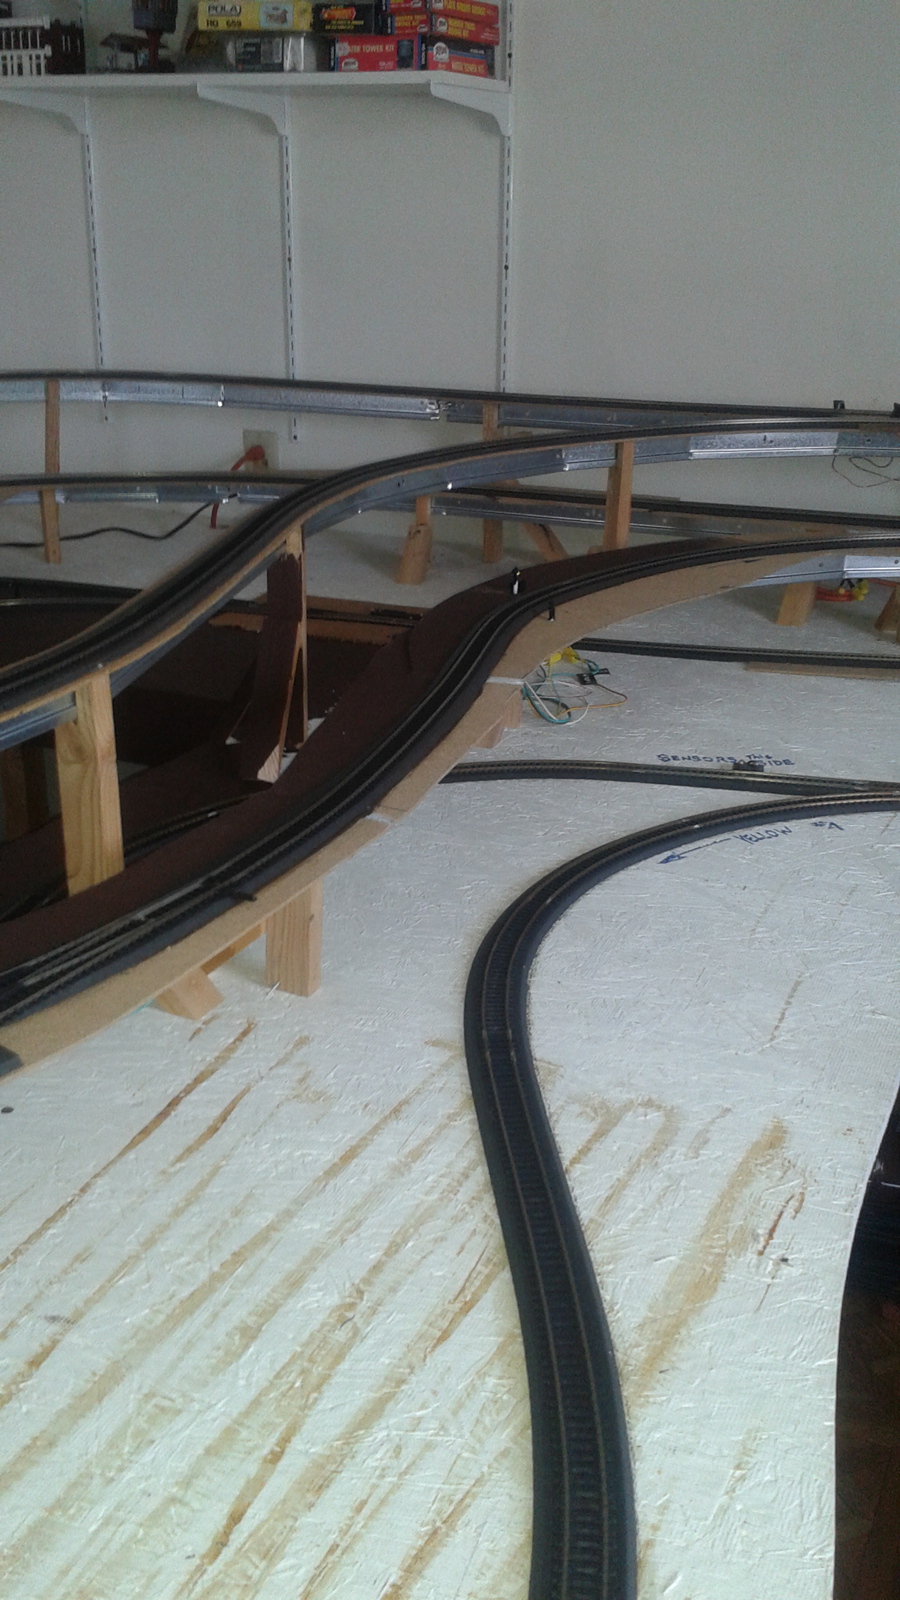
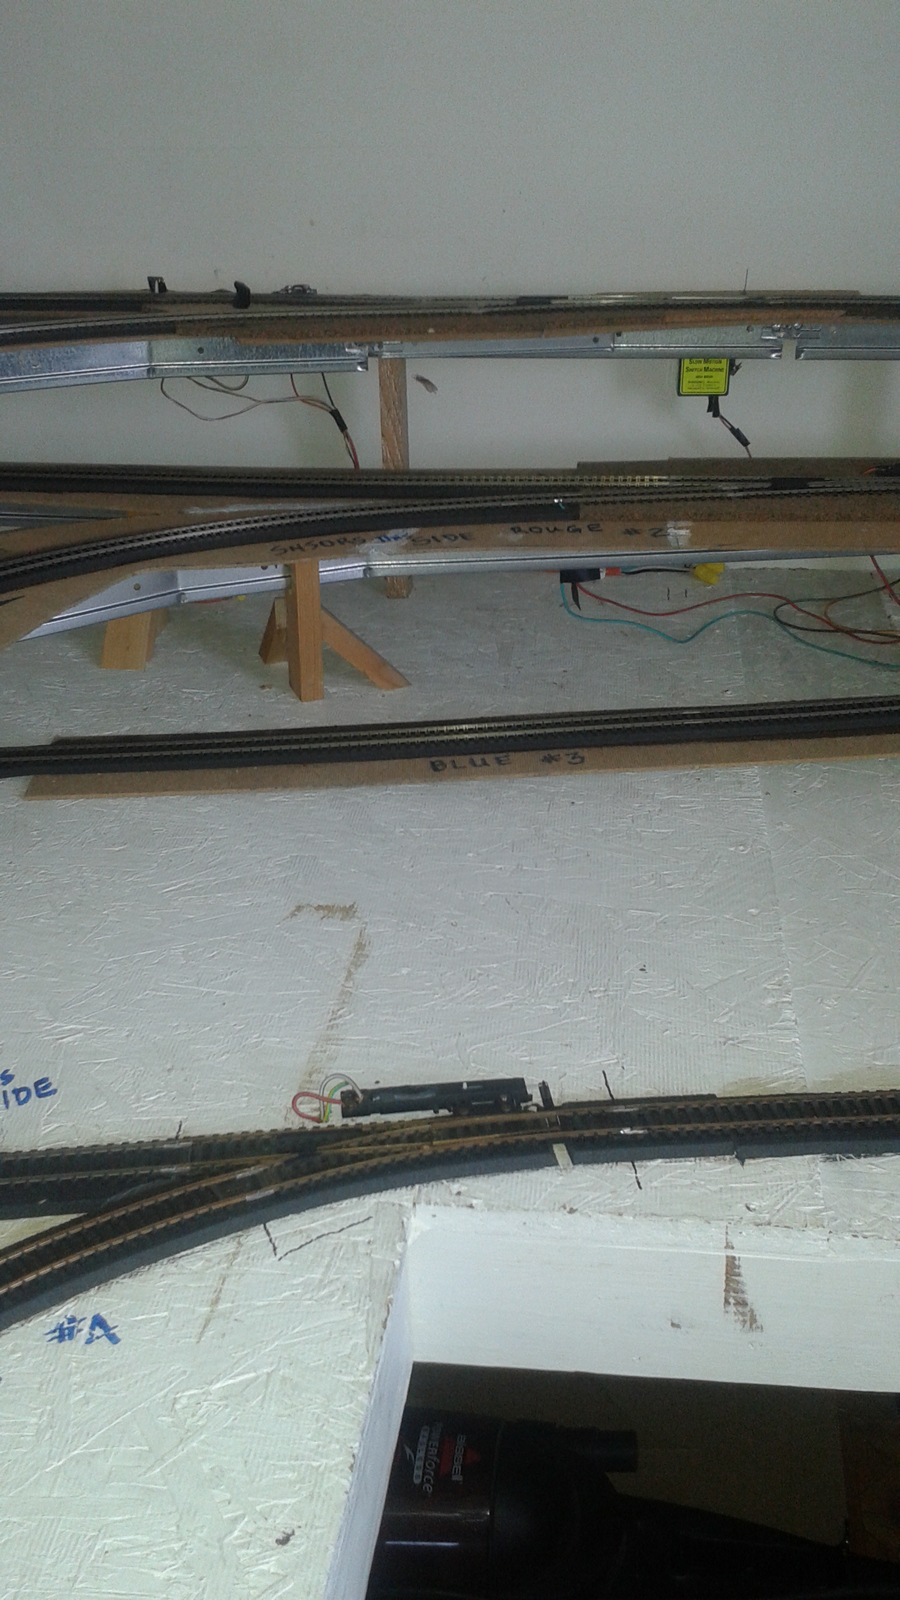
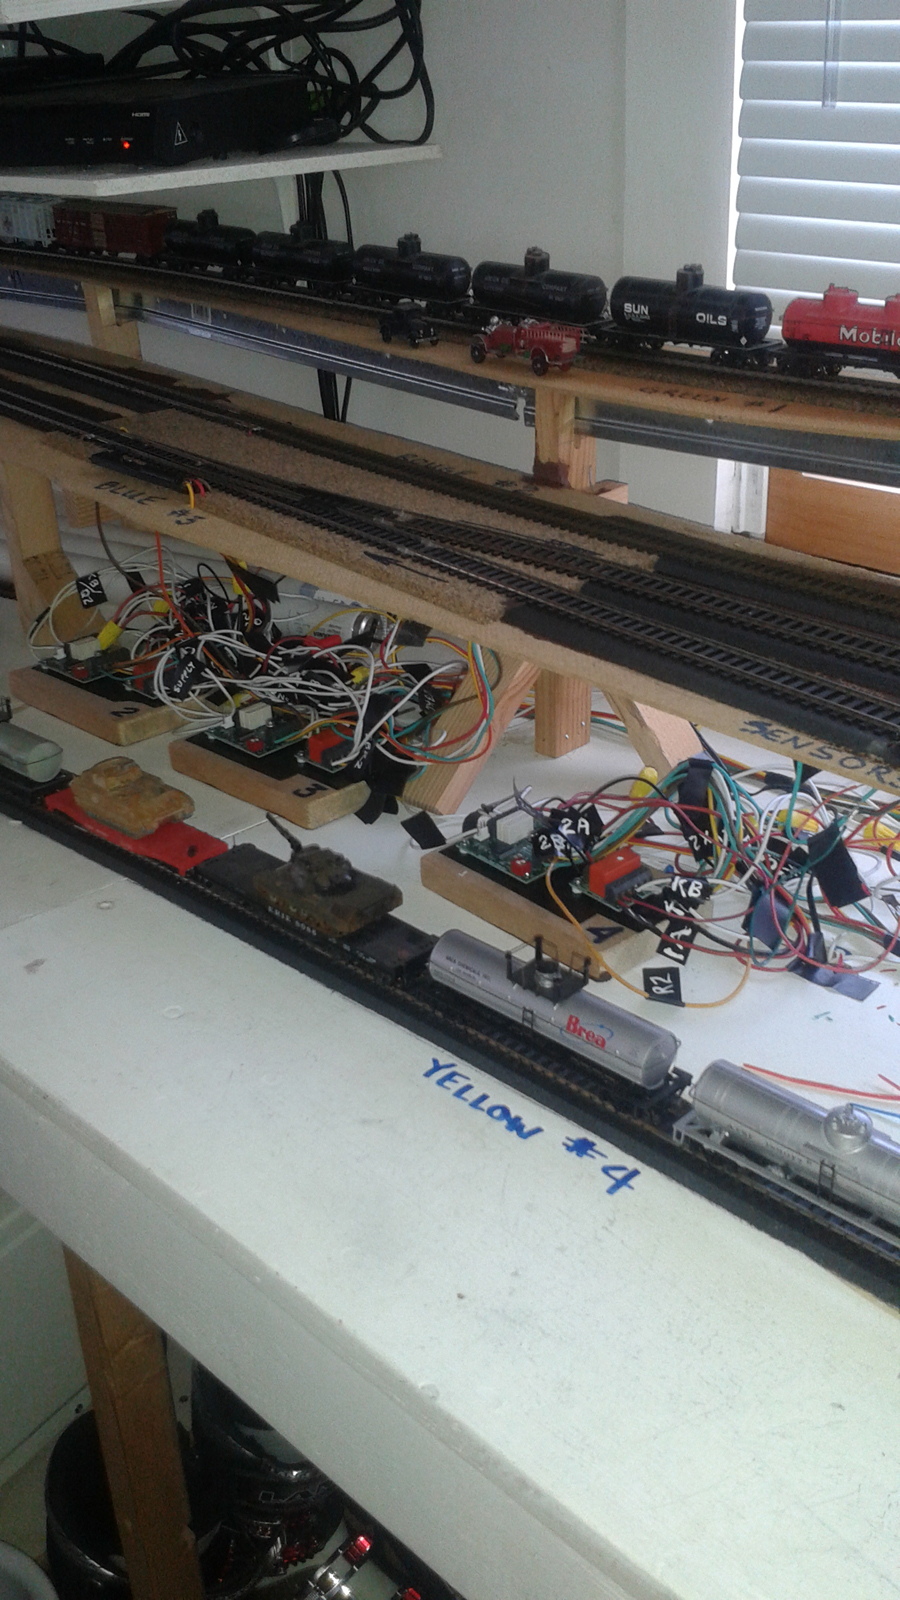
Another photo shows the convenience of hiding lots of electronic gear under the long “tee” spans. My layout so far has four automatic reversing loops using Atarax prefab circuits with optical sensors.
Another trick: “Cheap” wire in long lengths, and with efficient multistrand core, can be had from Harbor Freight or your local parts store in the form of trailer wiring kits. They come with 24′ continuous lengths multicolored.
Hope these ideas are useful if not new.
Thanks,
Dennis”
A huge thanks to Steve for sharing his model railway station platforms, and to Dennis too.
I’ve been doing the blog a number of years now, yet I’m still surprised at what comes in sometimes. You really are a clever lot out there.
Thanks to everyone who has sent in a contribution – and this is probably a good time to say, if you’ve sent me something and I’ve not replied, please be patient. I get a gazillion emails a day and I do my best.
That’s all for today folks.
Please do keep ’em coming.
And if today is the day you get started on your layout, the Beginner’s Guide is here.
Best
Al
PS Latest ebay cheat sheet is here.
PPS More HO scale train layouts here if that’s your thing.


great work
Hi.
Well done a very clean and crisp layout. Thanks for the layout function explanation it is always good to hear how people are running their sites rather than just assuming they go round and round. For me the fun is the running, setting up trains rather than the modelling of scenery.
Steve, this is very impressive. Bet you can’t wait to get that rolling stock rolling!
I’m particularly impressed by your well-lit, crystal clear photography. Would you mind sharing your choice of camera – is it something mere mortals can afford?
Thanks and all the best…
Very impressive. Keep it up. It looks from the pictures that you have used quite a bit of metal in building it.
a men brother is all about running the trains , work on the back ground if you want too , not that you have too, it all great looking stuff, carry on
Well done Steve and Dennis station platforms as I remember them
Nice going there Steve , I also get more enjoyment out of setting up a layout and doing scenics , and of course filming the layout after …Dave (Dangerous Dave )
Great work!
Question…
What are the metal “beams” you use to support the elevated track bed?
Thanks.
Joe
Great detail . probably the best I have ever seen . Gives us great ideas for our layout.
Awsome work on the stations…Really like the wiring idea…Will look into that…Mike
I thank each and everyone who shares their skills and technic’s with photo’s and text of their layouts. I am getting back into this hobby now that I am retired. and apperciate the ideas and the stunning layouts.
Each time I look the pictures I wish that an “overall” picture and or a complete diagram of the layout was included. I believe this would help people like myself in planning a layout. I was in the electrical and elecronics field for 35 years and have had extensive expierience building and remodeling houses.
What I need is a layout that can continue to grow and be updsted without the thought of a complete taredown and rebuild.
BOTH layouts are awesome!!
Steve has a great idea with the stations ‘unconnected’ to the main lines, nice detail too
and Dennis, that’s some ‘old school’ engineering building on your layout, not just a ‘flat-board toy railroad’ w scenery attached….good designing….lets see some pix AFTER the scenery is built….
keep em runnin fellas
stjohn in long beach calif
I agree with 5:04 post. I too am returning to th hobby after forty years. With the bewildering amount of great layouts its difficult to get started with something that can be expanded gradually rather than build and rebuild as many of you like to do. Great site Al love all posts and pictures. Great place for information.
A word of advice to all. T noticed the bare rafters in the back ground. If one is planing a layout, first consideration should be giving to future back drops and the walls behind your layout. Once your framework is in place, it will be hard to reach in some cases. Working over your layout is never fun.
Dennis, to make the curves in the tee rail do you cut out wedges on the inside top of the tee and notch the out side or just bend them? Nice pics. Tim
Hi Dennis, what a fabulose idea, the ceiling rails, brilliant, some guys were doing some replacement celings at work this morning, got about 200 feet of the T rail, they were going to put it in the bin!!!!
Have a look round as buildings are up dated they rutinely replace ceilings and light units, ask, most fitters are only to glad to get rid of the stuff, the ceiling tiles are great for building your base for scenery
Mark
a very nice layout
Paul from Ozzie
I like it!
Great layout. Creating the layout is the most satisfying part of collecting trains for me. After that’s done its sort of a let down. I went with an O gauge layout and regret not creating an HO. With an HO I would have had a lot more space to work with. Keep up the great work!
I think the most important thing about a model railroad is just start and build it to your liking. Start simple and work up as you go and learn. Oh and by the way a model railroad is never completed. Too much information can at times be overwhelming, but let it work to your advantage … ideas … hints, tips, of all areas of model railroading are great tools to use along the way, a learning process. Model railroading; it is, a piece; a time; a place; that is brought back to
life in miniature. Enjoy!!
Thanks Steve and Dennis MRR well done. Dennis pic #6 liked I saw the model of a Ahrens-Fox Fire Engine. Have a model of a 1937 AF fire engine.
Tom: Central Maryland, U S of A
FYI: A Story: In early 60′ to 70′ era, coal burning locos would run in rural areas; burnt coal residue still smoldering would drop out of these fire boxes and start fires along the tracks. Especially dry Spring and Autumn months. Grasses; shrubs; woods; even barns and/or outbuildings also … fire will create its own draft … and when windy well you can imagine? These fires would keep FD’s busy and could be quite intense depending on nature and where the fire was located. One fire in particular I was riding as a fire fighter acting Officer very windy dry spring day. Fires traveled about 8 miles along tracks … a good deal of off road in fields, etc. attacks had to be made to get ahead of the fires. Had additional fire depts. check their areas along these tracks. Called the PRR to have the trains check their fire boxes. Minimal fire damage done. Does anyone have similar stories or remember these locos?
Tom: Central Maryland, U S of A
It looks like metal railing that you would use for a drop ceiling in a “T” shape or inverted if you may say so compared to the way it would be used as if installing it for the ceiling application…
I would like to see video of it running and a track plan…
Are all elevated rails just single elevated loops or are their helixes envolved?
Nice layout but I also noticed the exposed rafters which makes me wonder where he is located. Where I live in Texas, our “lofts” like this easily reach 140 degrees F in the summer making it impossible to use this space without lots of insulation. Great layout work though.
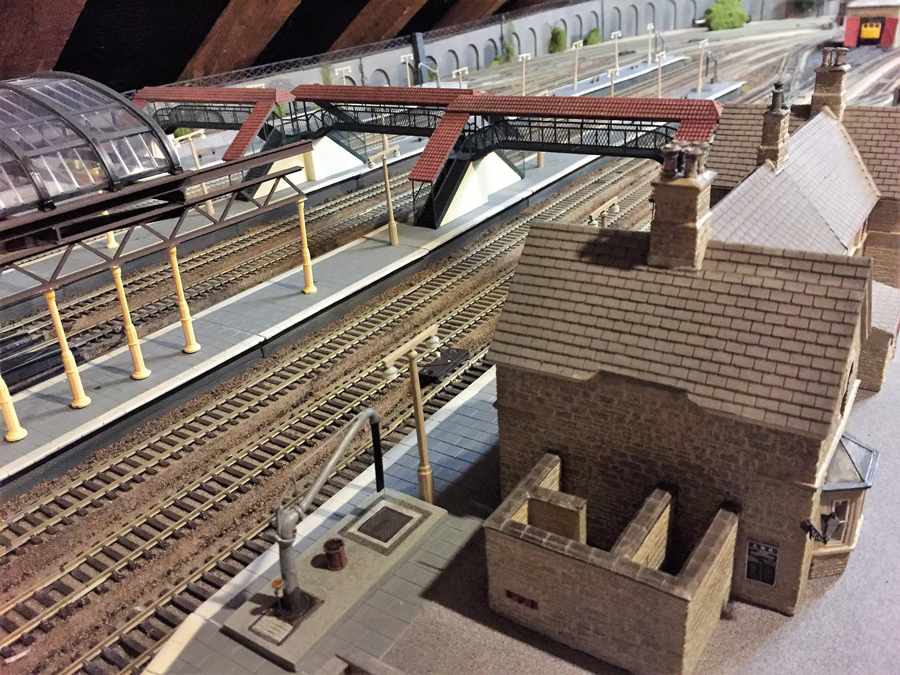
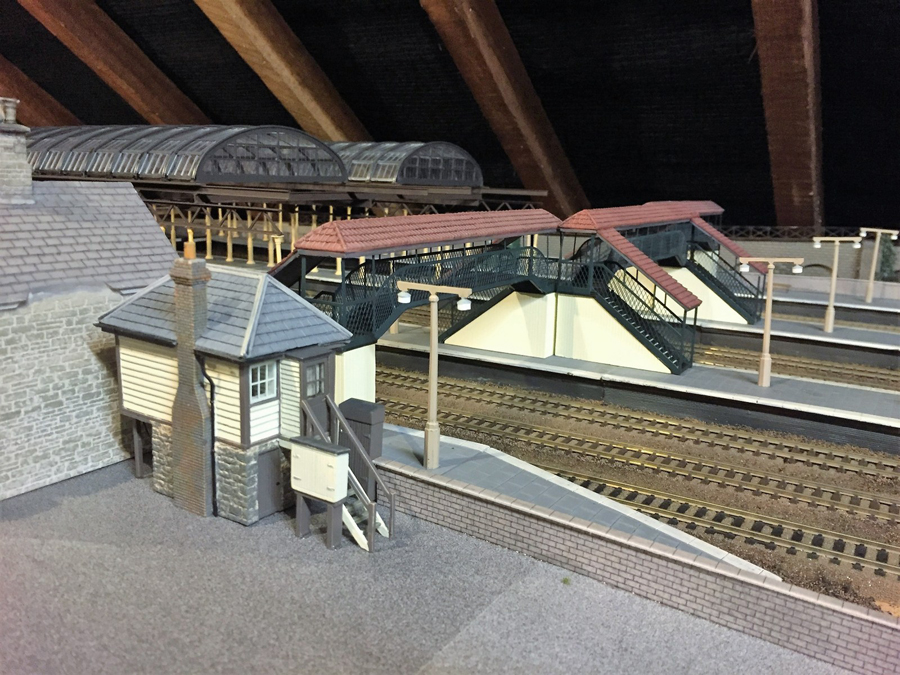
Steve, nice job, but a very odd place for what appears to bo the signal box. The key considerations fir siting were, closeness to main junction(s) to keep rodding runs short; good view to see tail lamps, even in fog; and easily accessible to train crew who needed to come and sign in if detained – rule 55. Hence, very rarely see one behind a wall and a footbridge and next to another building, if avoidable.
Rod
just great modelling need to see more.
Hi Guys Thanks for the comments and advice. There were a couple of questions that were asked as follows’
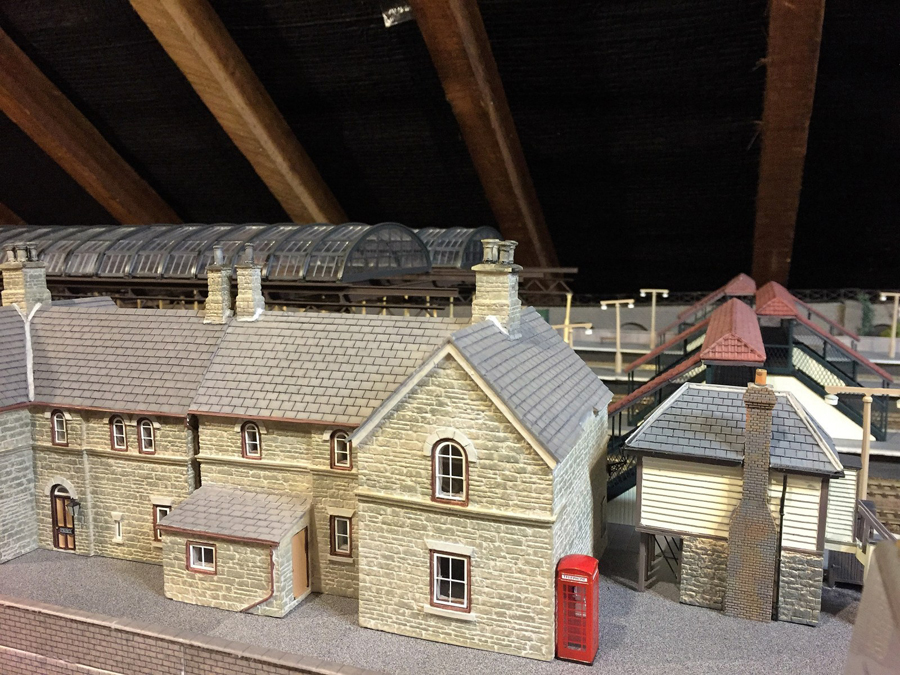
1) The lattice beams supporting the roof are plastic and are available in various sizes you cut them to length and paint. I used rust and sleeper grime to create the weathered effect. They are fixed carefully to the overall roof with super glue taking care to keep everything in line and straight!, They are available from any good model shop or the internet I beams, U channels etc have all been used to make something a little more realistic supporting the overall roof which is a Peco kit of parts again great care is required to keep everything straight when assembling! take your time as with everything like this and check at every stage. The rafters in the loft will be covered eventually as it does distract from he overall effect, this is a job for the future! . My house is in the UK so it does get cold and hot but not too bad and I have a window, heater and fan to control it! Regarding the small signal box thank you for the comment there will be a larger one near the junction controlling the main station this small one was intended to control the engine shed off camera only but I am not sure now!
The camera is an i phone 6 which I have to say does take great pictures in all lights and no special setting which is great for me!
Hope that answers everything
Happy days! Steve
Hi Steve,
Consider going digital.
It adds to your MRR experience.
Once digital you will never want to go back.
Cheers,
Jan
Hi Jan Yes One day One day…. I think that having about 100 locos and all insulfrog points the changeover would be too onerous and expensive but it will remain a plan for the future if I decide to have a total rebuild! Regards Steve
Dennis how long are the station tracks?
How many are there?
How big is your layout?
Must be hugemongous
Thanks I love it rjs
Steve and Dennis………….great work guys.
Steve…..great detail on the platform. Don’t forget the people waiting for that train.
Dennis…….I am very jealous of your carpentry skills……..great job.
Steve loved to have seen a train waiting for passengers to board. great depiction of a train station.
The Critic
Steve
love the whole look of the station, I’d be interested to see a track plan to understand how the different platforms work. looks like you have a really nice long straight area to get a realistic platform length.
I’m working on a main station with branch line platforms so interested to see how you designed yours
Thanks
Chris
Steve, Your stations and platforms look great. That must be a huge layout to devote so much trackage just to the two station areas. I’d like to see some overall views of the layout with that nifty iPhone camera.
Dennis, Clever use of two common products. My only issue would be that using the T-frames seems like it would add to the amount of separation needed between two tracks where one crosses over the other compared to just using say 1/2 inch plywood for the subroadbed.
Steve … I’ve got a weak spot for long passenger trains, and just wanted to say that your station recreation is absolutely wonderful. I’ve saved several photos as reference resources for my upcoming N scale new construction. Nice job.
Great station, Steve. Looks really professional. It will look wonderful with people and trains – not to mention signals!
Pretty neat.
Steve – your model reminds me of the last scene in the movie The Langoliers, where there were no people and no action, and the air was “dead” (no odors). Gradually, as time caught up to the actors we were following, people began appearing, action and sound started taking place (and of course odors returned). I hope you send us updates as time begins to return to the part of your world that you’ve allowed us into.
Adding to my enjoyment of looking at the station work and the elevated track was the clarity of the photos, they seemed almost 3D. Great work guys.
A curious point to address, I’m seeing several submissions show roof rafters, indicating the layout TD are in attics? I’m not seeing any insulation material. Aren’t these areas subject to temperature extremes? I would think that this would be bad for your rail oxidation and wiring in general. Am I missing something?
Never get tired of seeing the innovative ways modelers build and operate their layouts. Another great example of just that!