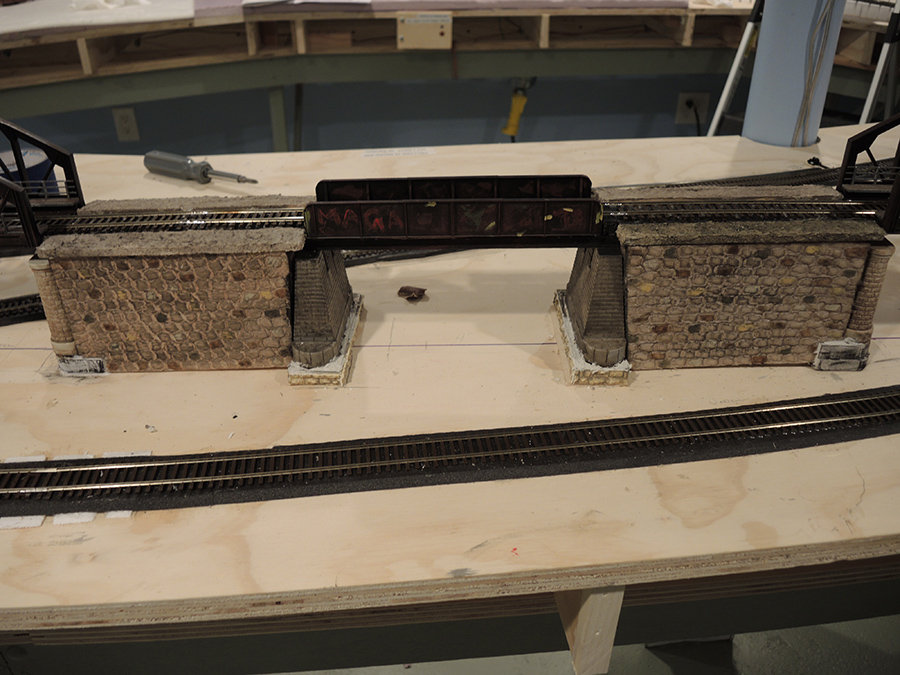
Paul’s been in touch with a great ‘how to’ for HO scale stone walls:
Hi Alastair, I thought I would share how I made some stone walls. The album I sent should play as a slide show so that it will repeat all the photos.
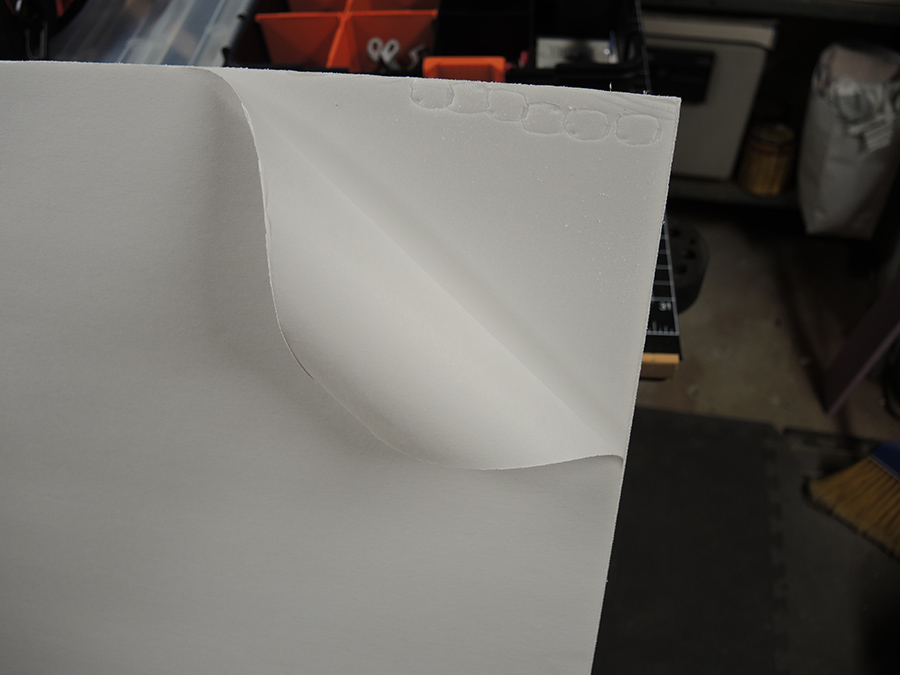
First thing is to get some white foam board at the dollar store. Next peel off the paper cover on both sides. This can be facilitated by wetting the paper. You can use the board as a single layer or glue two pieces together with PVA glue as I did.
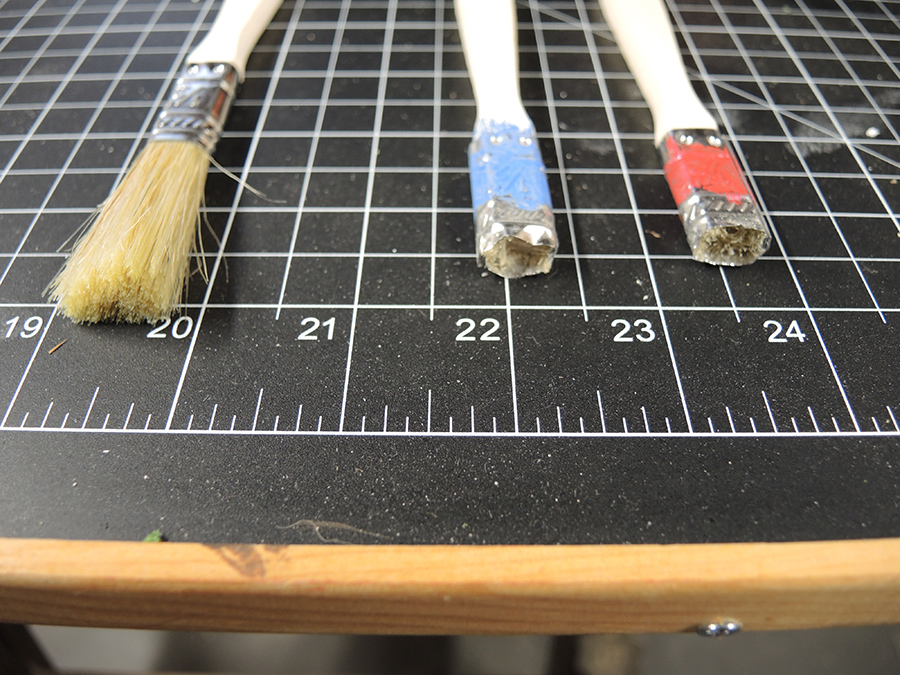
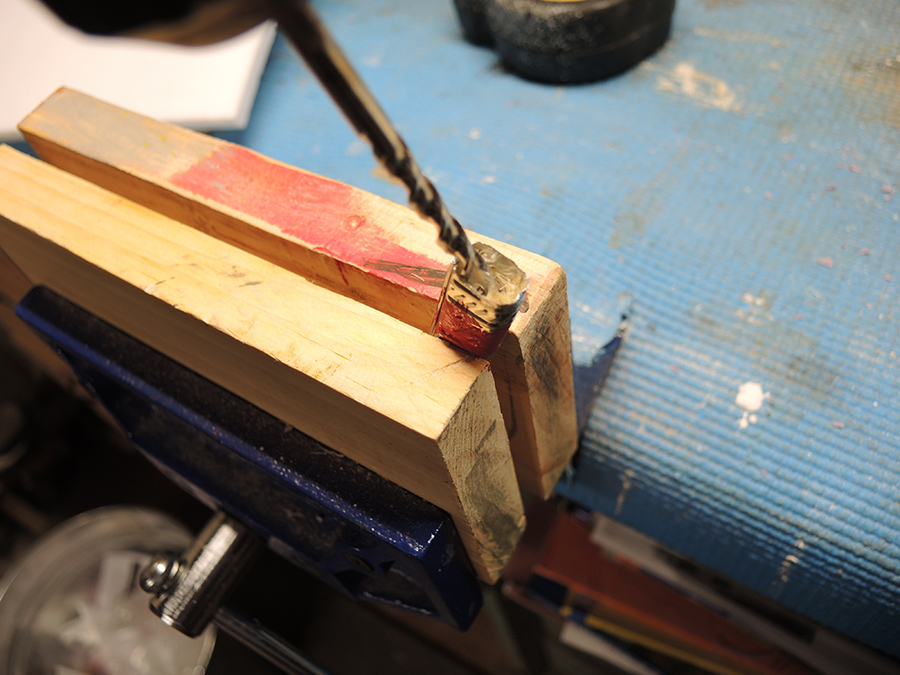
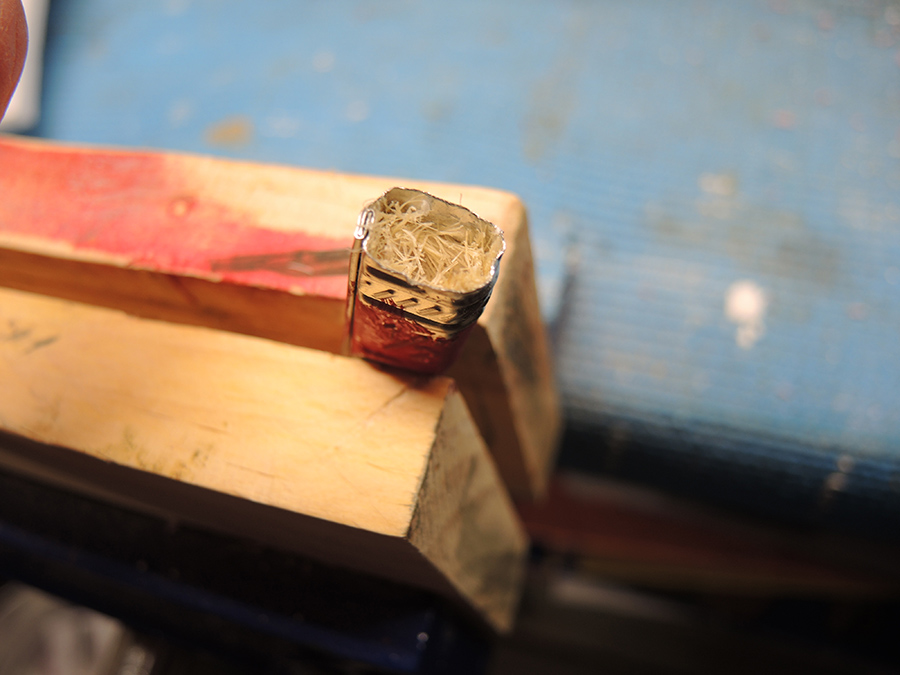
Next get some cheap ½” brushes and cut off the bristles right down to the metal binding. Using a drill remove the bristles down below the metal at least 1/8”. This leaves the metal binding exposed which will make the stone impressions in the foam board. You can make few different brushes and bend the metal into different profiles. Mark the tools you now made with different markings so the you will get different shape stones.
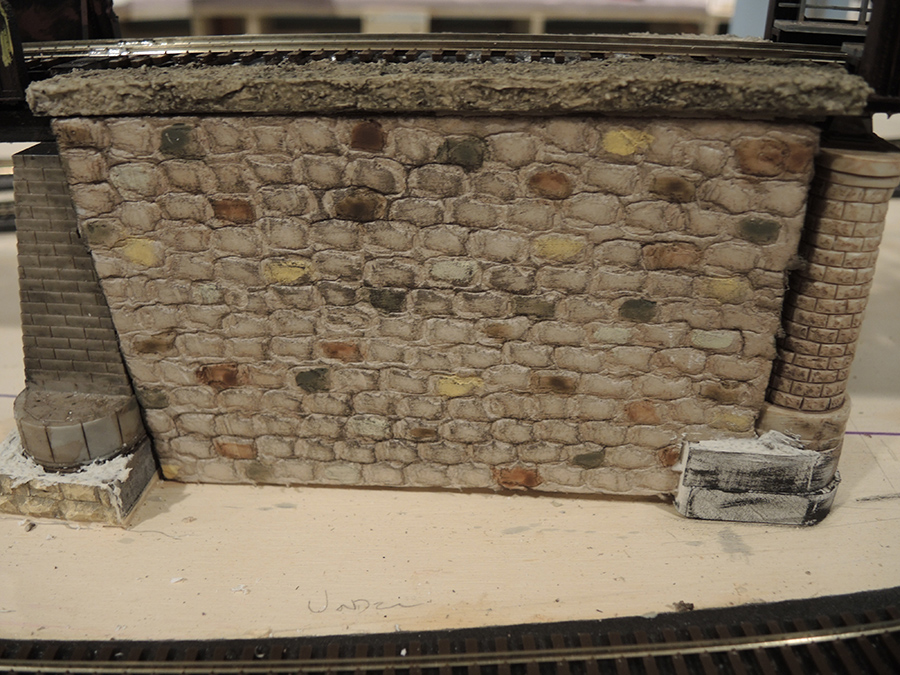
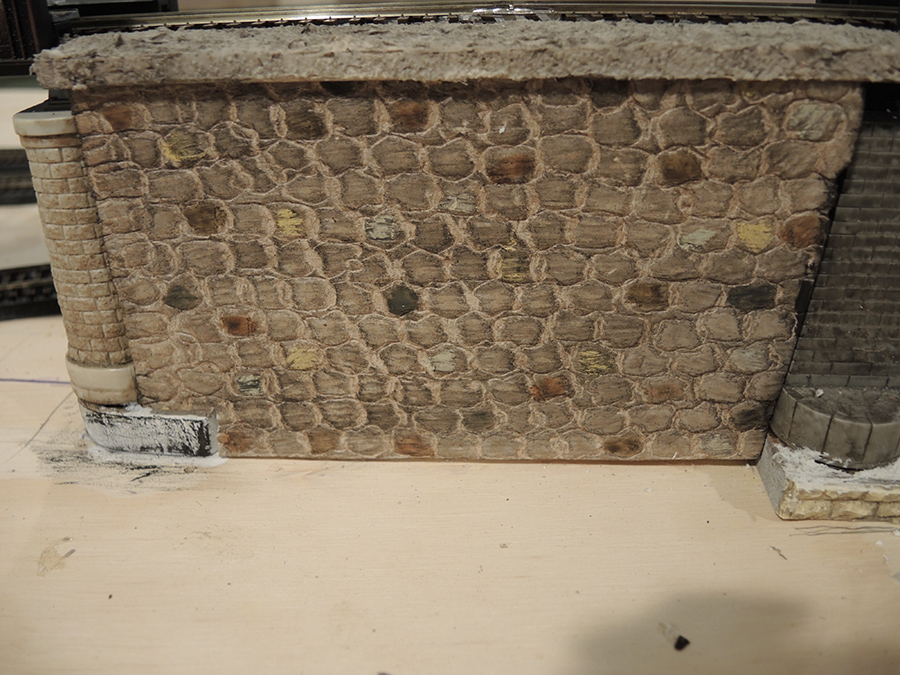
After you make all your impressions in the foam to form your wall you have to paint on the colors that you want. Make notations of the steps you use and the colors so that you get uniform walls. My walls were colored with the following procedure:
Two layers of Burnt Umber wash allowing drying between coats.
Add the different color stones as you like.
A coating of dry brushed black using a fan brush.
Lastly a single coating of a black wash to emphasize the grout lines between the stones.
Now on to Bill:
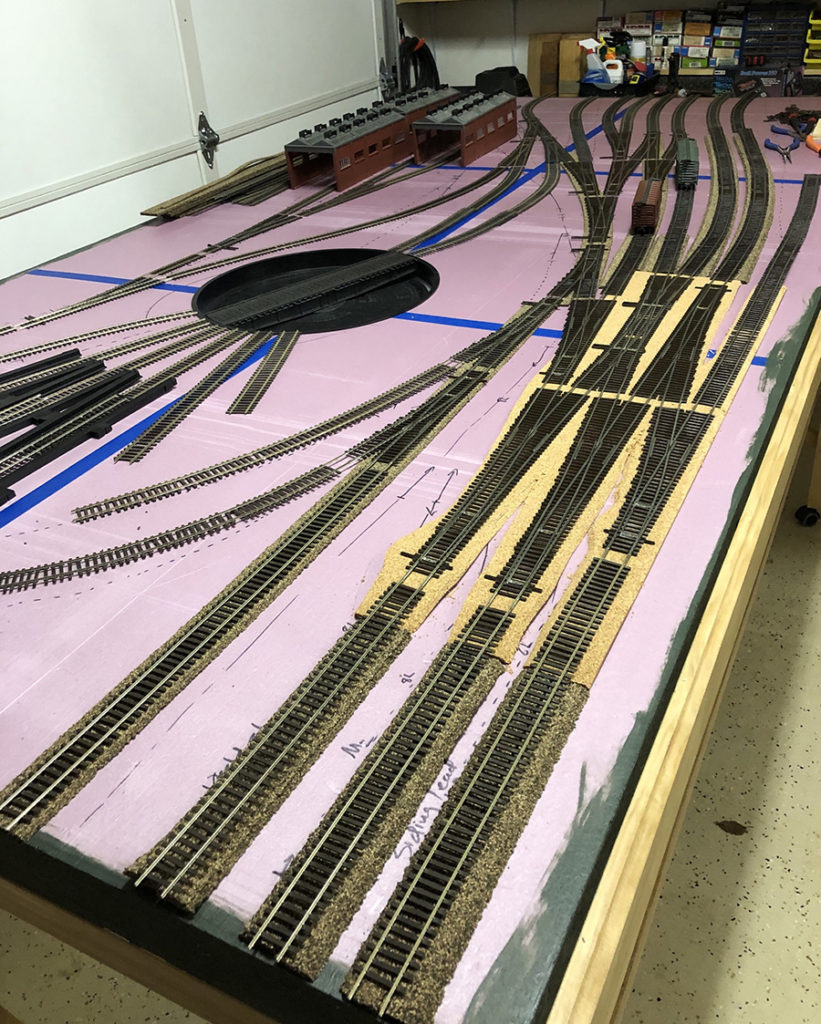
Bill’s been in touch again. He’s cracking on with his switching layout – his last post is here.
“Hi Al
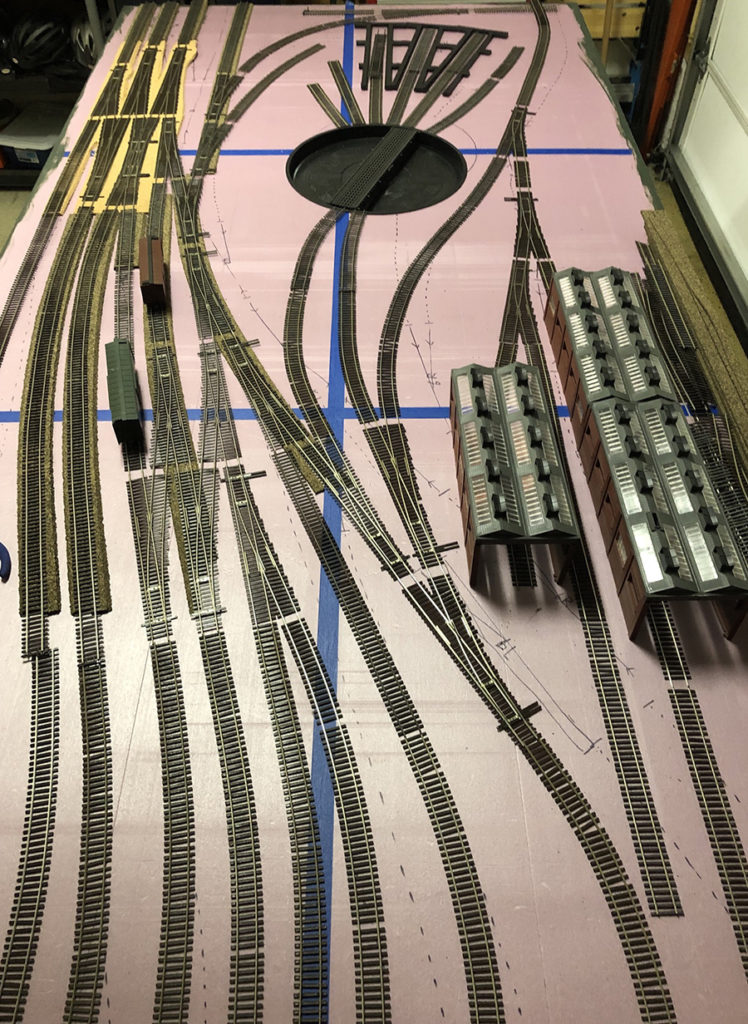
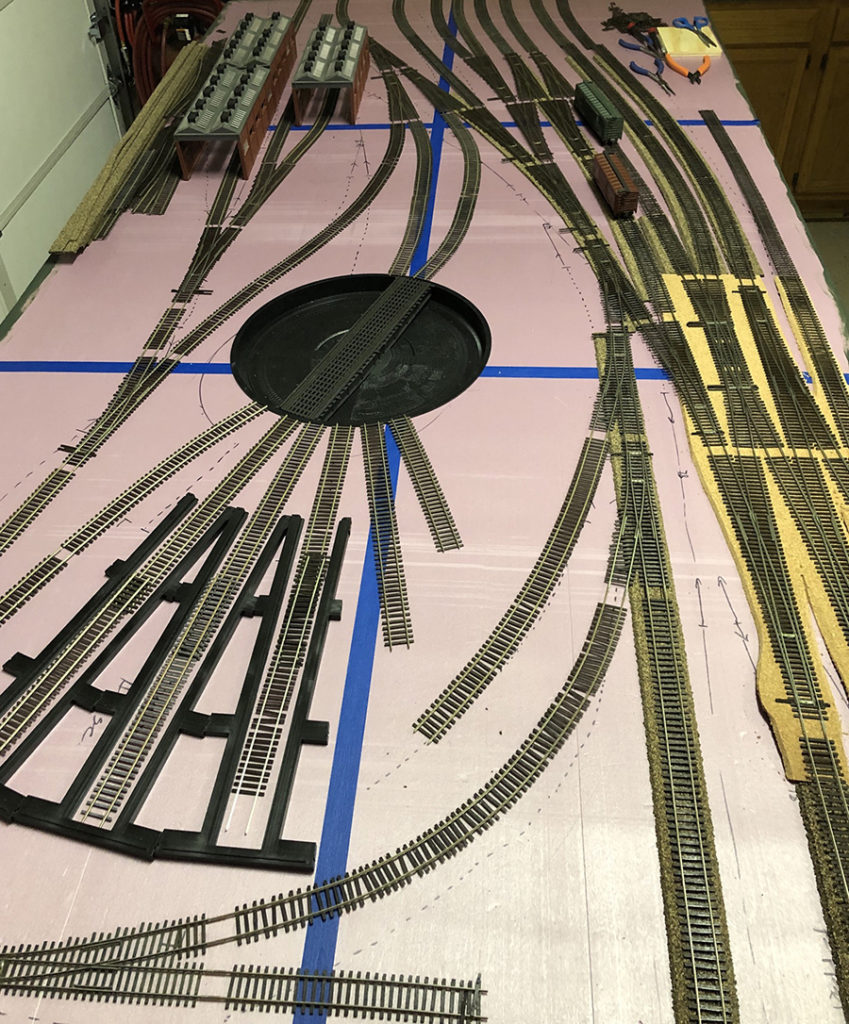
Just sharing an update on the first section of my modular switching layout.
I’ve had a few hours each weekend to enjoy my hobby and now I am finishing up cutting and test fitting everything together for the track.
In the next couple of weeks I’ll get the cork in place and I’ll start wiring the switches and other track components then I’ll put the track in place and start to power it up. I’m using a mix of cork for road bed. I’m using HO scale for the mains. Then I will transition to N Scale cork on less important segments. Finally some of the track will go directly on the foam.
It is fun to see how much I can put on a 4X8 table and still have room for the yard and service bulldings that are yet to come.
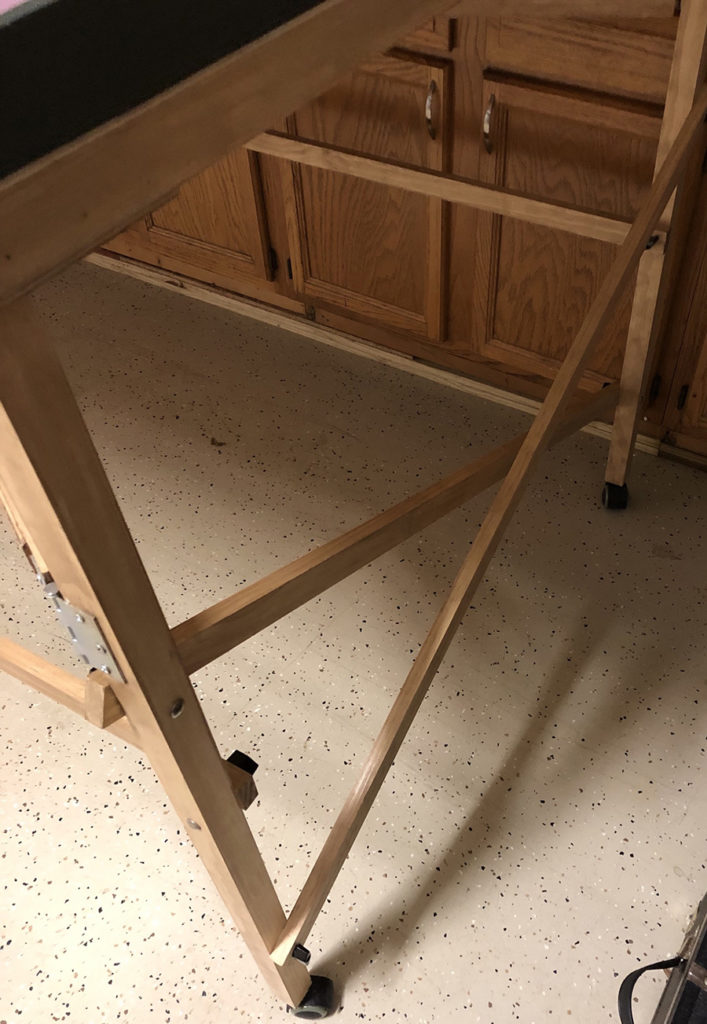
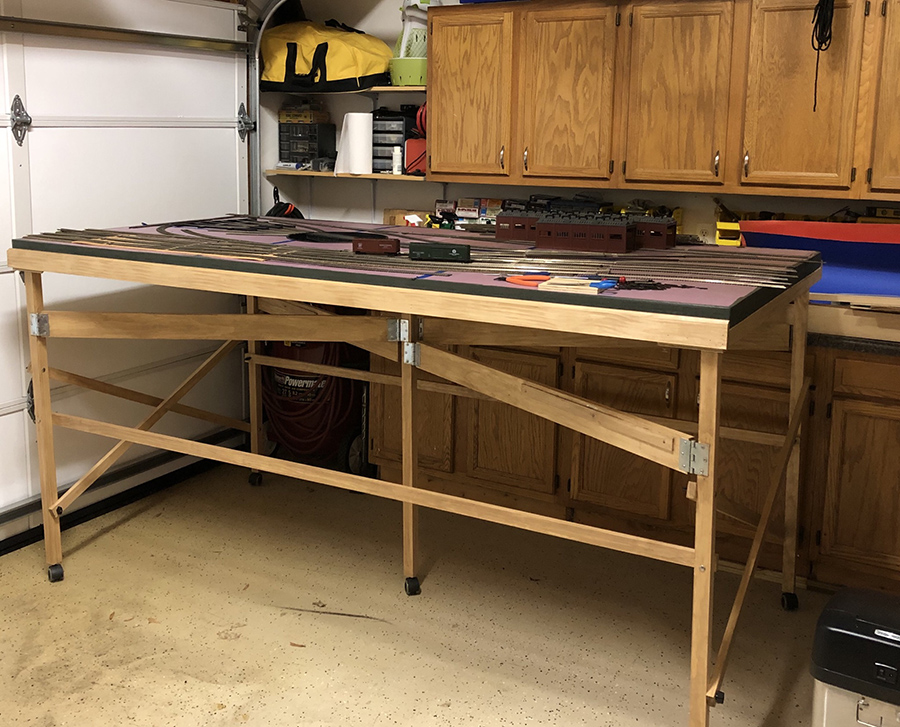
A note on my bench work – I did add a second cross brace to each side of my portable legs. I needed to crank on the T Handle knobs hard. to keep the legs true as I move it around. By added the other cross brace I now have a true ‘X’ brace and everything stays aligned nicely.
Thanks!
Bill in Virginia”
A huge thanks to Paul for sharing his HO scale stone walls, and to Bill too. I do love seeing how your layouts are coming along and how you make stuff. Thought Paul’s wall was excellent.
That’s all for today folks.
Please do keep ’em coming.
And if today is the day you get started on your layout, the Beginner’s Guide is here.
Best
Al
PS Latest ebay cheat sheet is here.
PPS More HO scale train layouts here if that’s your thing.


Great idea for making a stone wall.
Perry in New Orleans
Bill, I used different codes of rail – code 100 for cheapness and robustness in the hidden sidings and code 75 in the scenic area – but have found that, despite the minimal height difference and ramping up the 75 on thin card packing layers over about three inches at the transitions, if anything is going to derail this is the most likely place, so I wonder a bit about using different cork underlays, you’d want a good smooth transition I think. Best wishes,
Rod
Please excuse my ignorance but how will the tracks connect electrically? joiners or feeders? i can’t understand how joiners will all meet perfectly. And how many modules are you constructing?
Hi Bill in Virginia here. First I love Pauls technique for the rock walls. I’m going to. Use his method at some point. Great way to make them!
To answer the questions posed so far I’m going to use s combination of ways to transition. I have already sanded a couple of HO cork lengths to go from HO to N Scale cork. Use about a 100 grit sheet of sand paper and work in about 4 inches and sand until you get a smooth transition. I will also use wooden shims you can get from a lumber yard to make transitions from the N Scale cork to the foam base. Totally agree it has to be smooth to prevent derailments. My track is all code 70 so very important to minimize any sudden changes.
Electrically I will be adding feeders to the underside of the tracks and not the joiners. As can be seen with the switch layout I’ll have to insulate the rails heavily in a few areas to prevent electrical problems. I’ve removed enough ties at the ends of track segments that I can solder feeders there and not interfere with regular or insulated joiners.
As for how many modules I’ll have my plan is two at this point. I have the lumber acclimating to my garage now and will build the second table and frame over the upcoming holiday. I do expect to add at least another module later on but I only have room to set up two in the garage at the same time.
Hello to Bill in Virginia A four foot by eight foot table is hard to imagine as a switching layout. It is difficult to reach across to anything
A suggestion I have for you is make the turntable section one table and extend the layout by the rest of the trackage. NOW you would have a place for trains to travel and do switching. Please take this as constructive idea. Naturally you may do as you wish.
Don in Cary North Carolina
Bill in Virginia I would like to see what industries and or business you are planning for your layout. What a great beginning start.
donj1044 in Cary, NC
Just a suggestion on the switching layout. Make a base pattern of the Buildings you plan to put on the Layout. This will allow you to move then around to determine Clearance for your rolling stock. It was easier to do this before you attach the tracks and road bed, then find out you do not have enough clearance.
Is all or most of the mainline going to be returnable? reason is both ends end abruptly straight. What degree curves are you thinking about.
Thanks : Robert
Bill again :-). For the suggestion of using a template that is exactly what I’m doing. In the picture showing the overall layout you can see some red card stock behind the layout just for that purpose. Laying it out before hand makes dure what you want fits where you want it. Great call out!
As for curves. Any where I have big locomotives running will be broad. Switching much tighter. As a switching layout all lines going off table go off scene into my imagination at this point. The future modules will connect to all the track going off scene on either end of this segment. I have that figured out already on how to connection so many tracks at once.
For the size and reach question I will use a walk around throttle for the layout. With the layout being portable on wheels I can easily position so I can get around it.
Love all the questions, thoughts and comments!
Very nice work to both hobbyists!. Want to see more Bill as it develops.
Paul, that is a new technique to me for using “foam core” and I have some bridge abutments to do. I also wonder how these brush forms would work with hydrocal or scupltamold . They would probably have to begin to set up some so the removal of the tool does not mess up the pattern. Either way, it is a neat technique worth pursuing. It certainly looks good on your layout.
Another good idea that to Al and his website.
MN Dan
Reminds me of my mother’s cookie cutters! Bruce in NJ.