“Dear Al.
I am attaching a few pictures of my HO layout which is still WIP You may like to share this with your subscribers/members.
The main layout is 12 feet x 4 feet. The marshaling yard is a separate 2.5 feet x 10 feet layout but with a railway line connecting into the main layout.
Most items are hand crafted by me. In each picture, I have described some key items that have been hand crafted and are cost effective and quite innovative (I think!). Therefore, I thought it would be of interest to railway modelers like me.
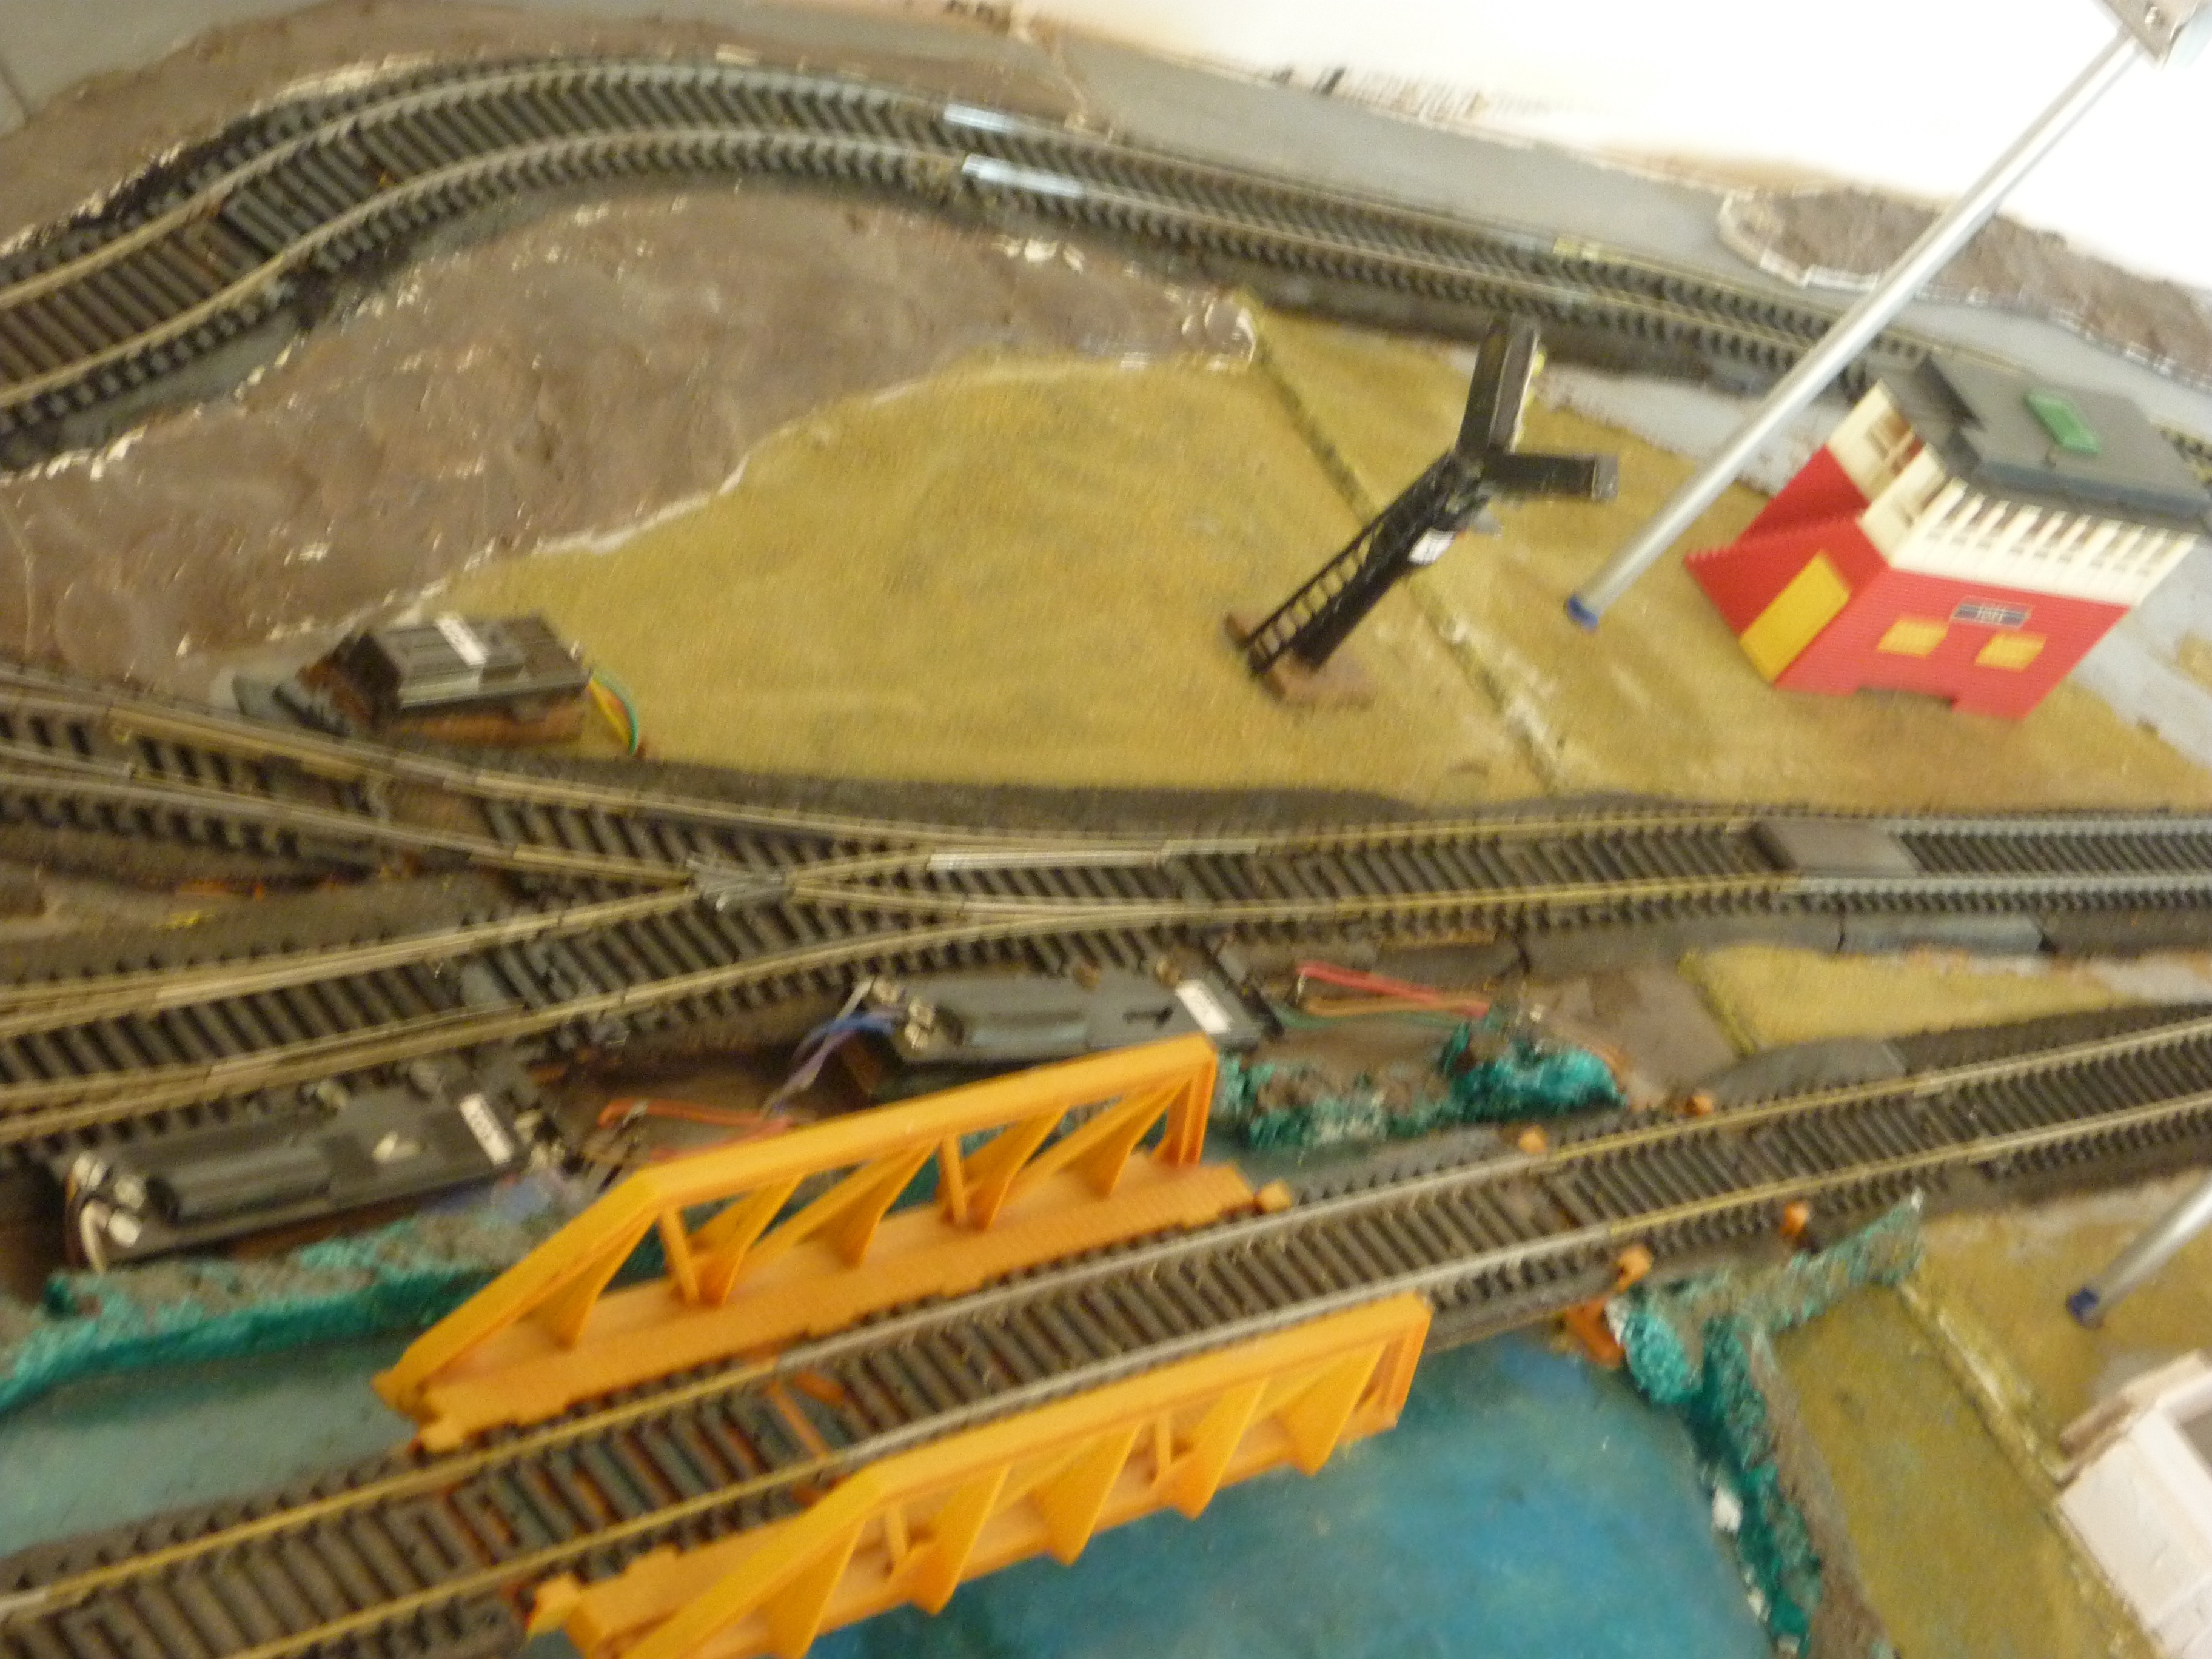
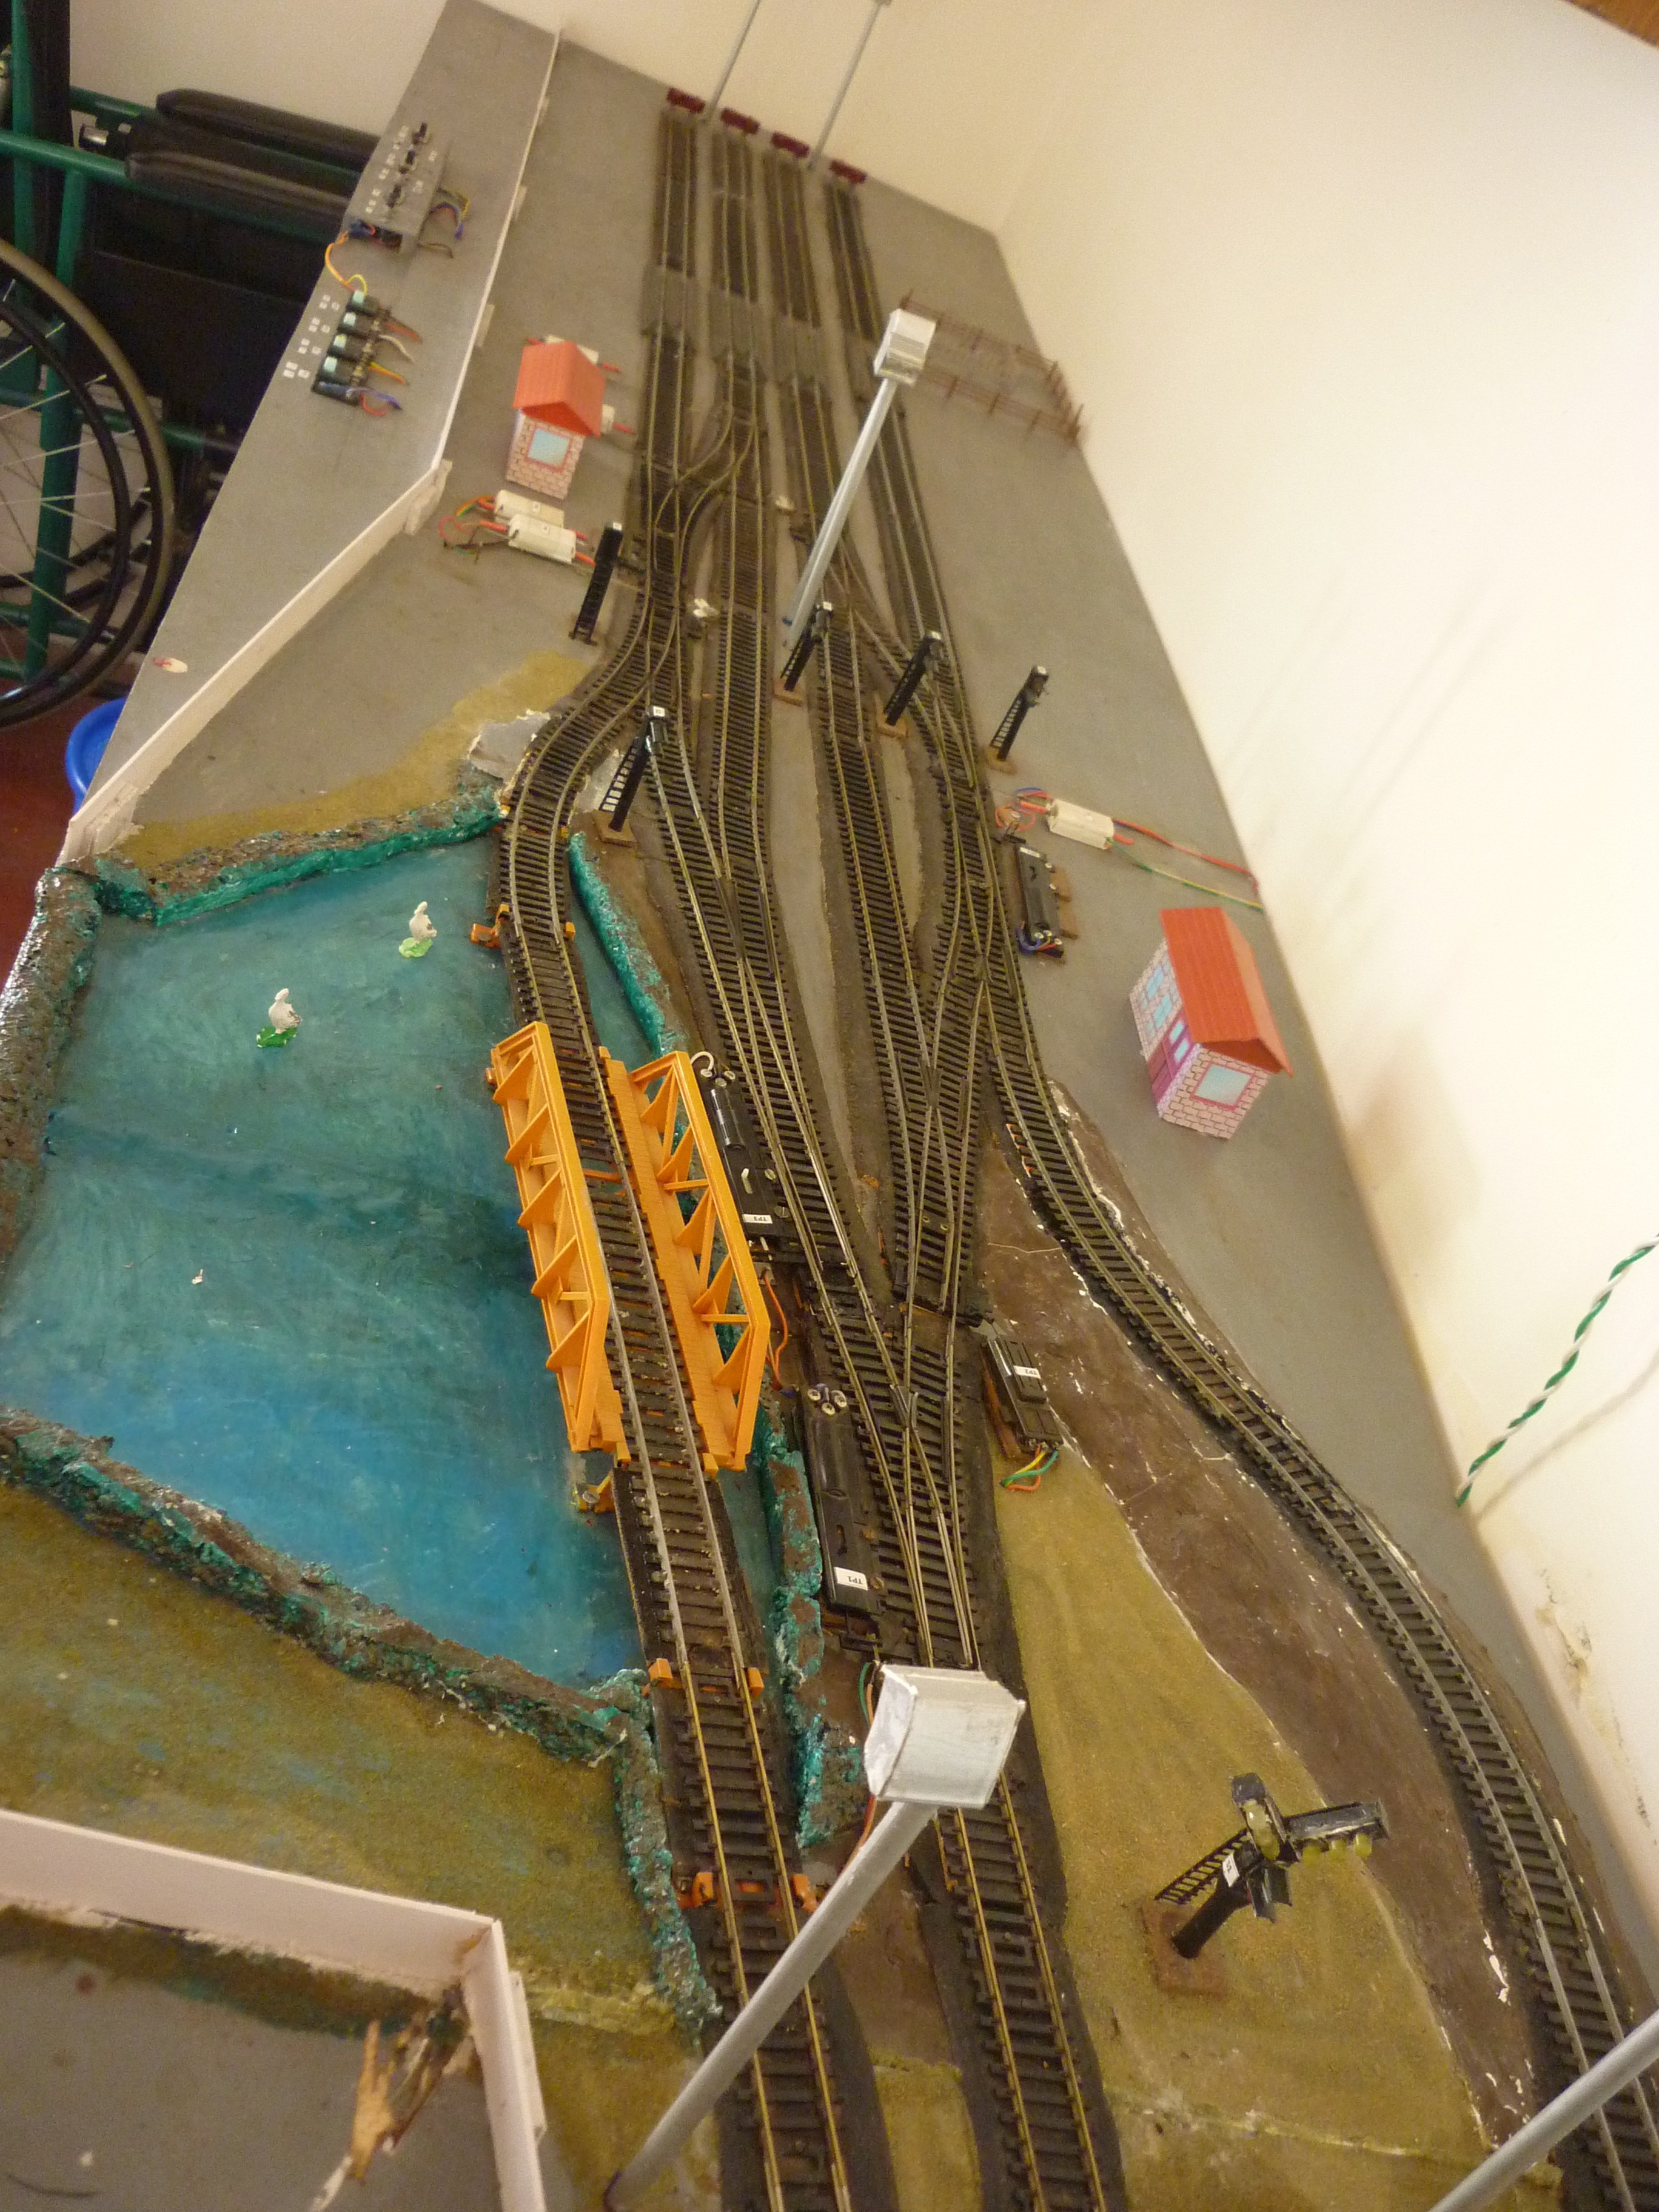
Picture 1 &2: Is the marshalling yard hump with the Kadee magnet for decoupling the wagons. The bund of the lake is of thermocole and painted to give the effect of the lake. The silver color posts are yard lights – the barrel of which is made of ball point pen body and the lamps are 3 V LEDs. The hood of the lamps are made of plastic (made from conduits used for concealing wiring in houses). It cost me ten rupees (Rs.) – ie. (one-sixth of a dollar) to make one.
The white small boxes by the rail side are solenoids built be me using a soft core and copper wire (cost Rs. 15). This replaces the Atlas turnout switches which cost USD 12 a switch not accounting for the SPDT switches to operate them.
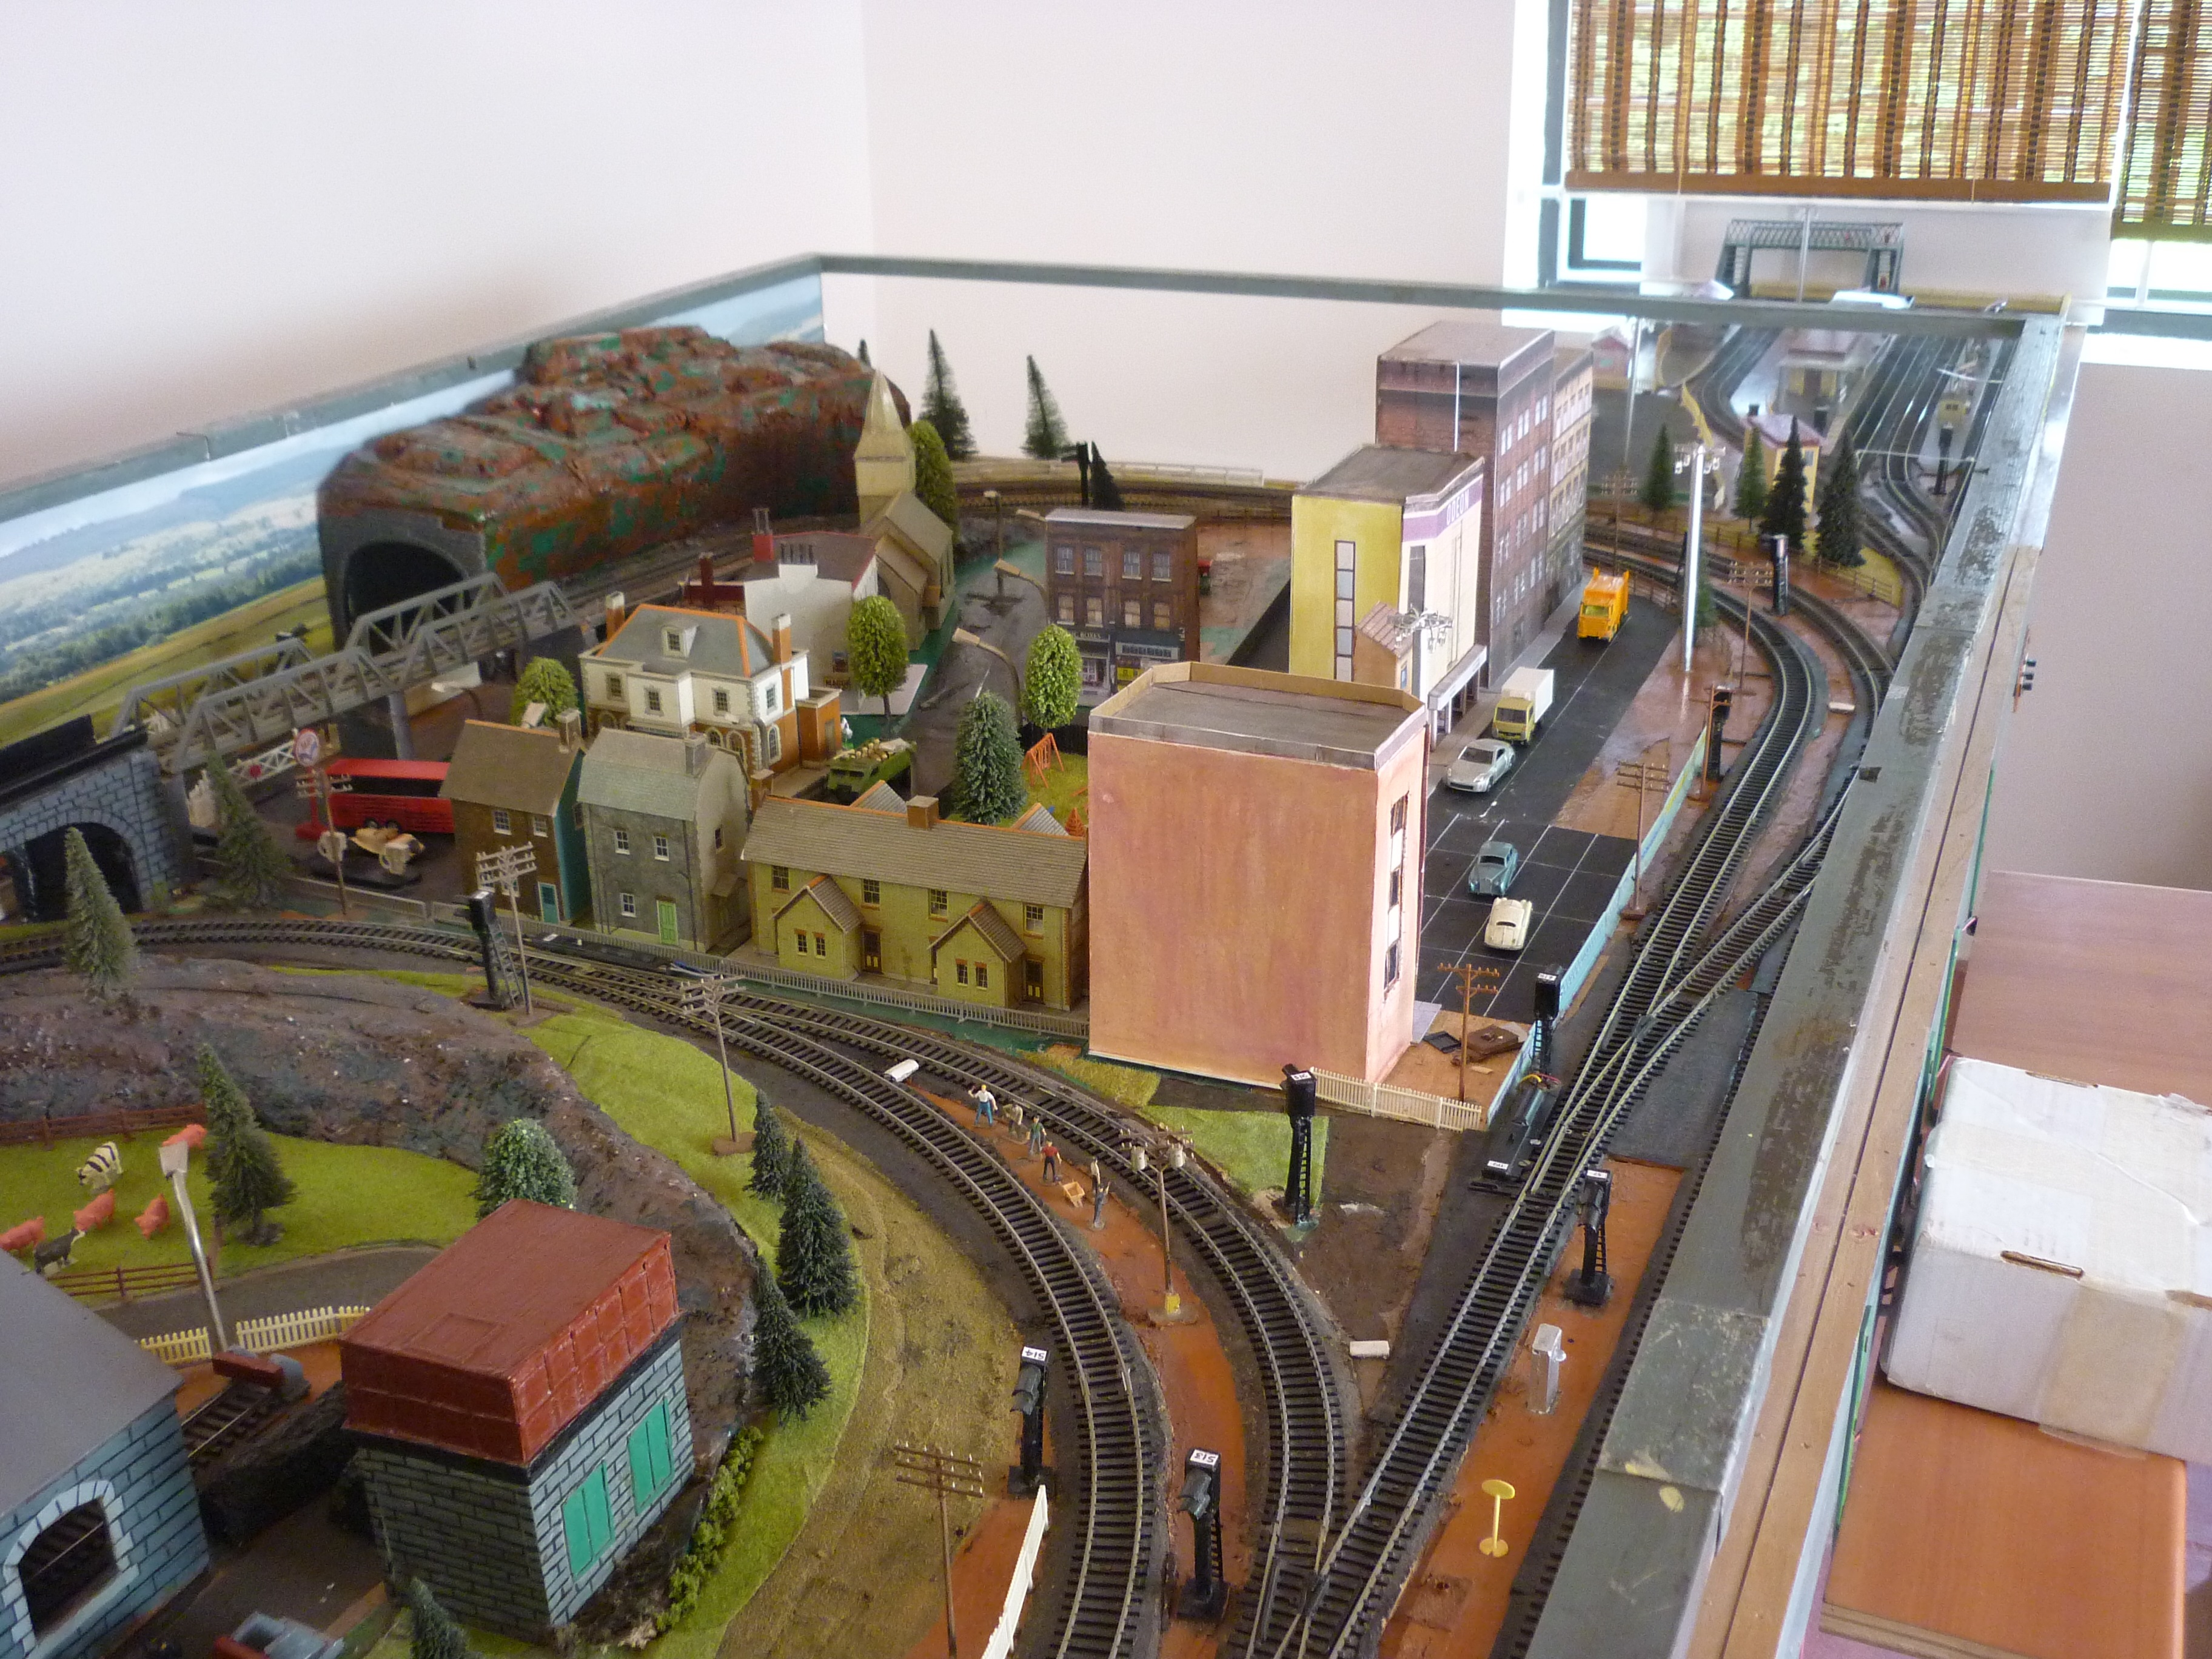
Picture 3: The red structure at the bottom left is the water tank which sits on a building. This is made of scrap pieces of plywood and hand painted. The protrusions on the sides of the tank depict the welded flanges of the water tank. A better view can been seen in picture 6.
Buildings: kits downloaded from internet and made using cardboard
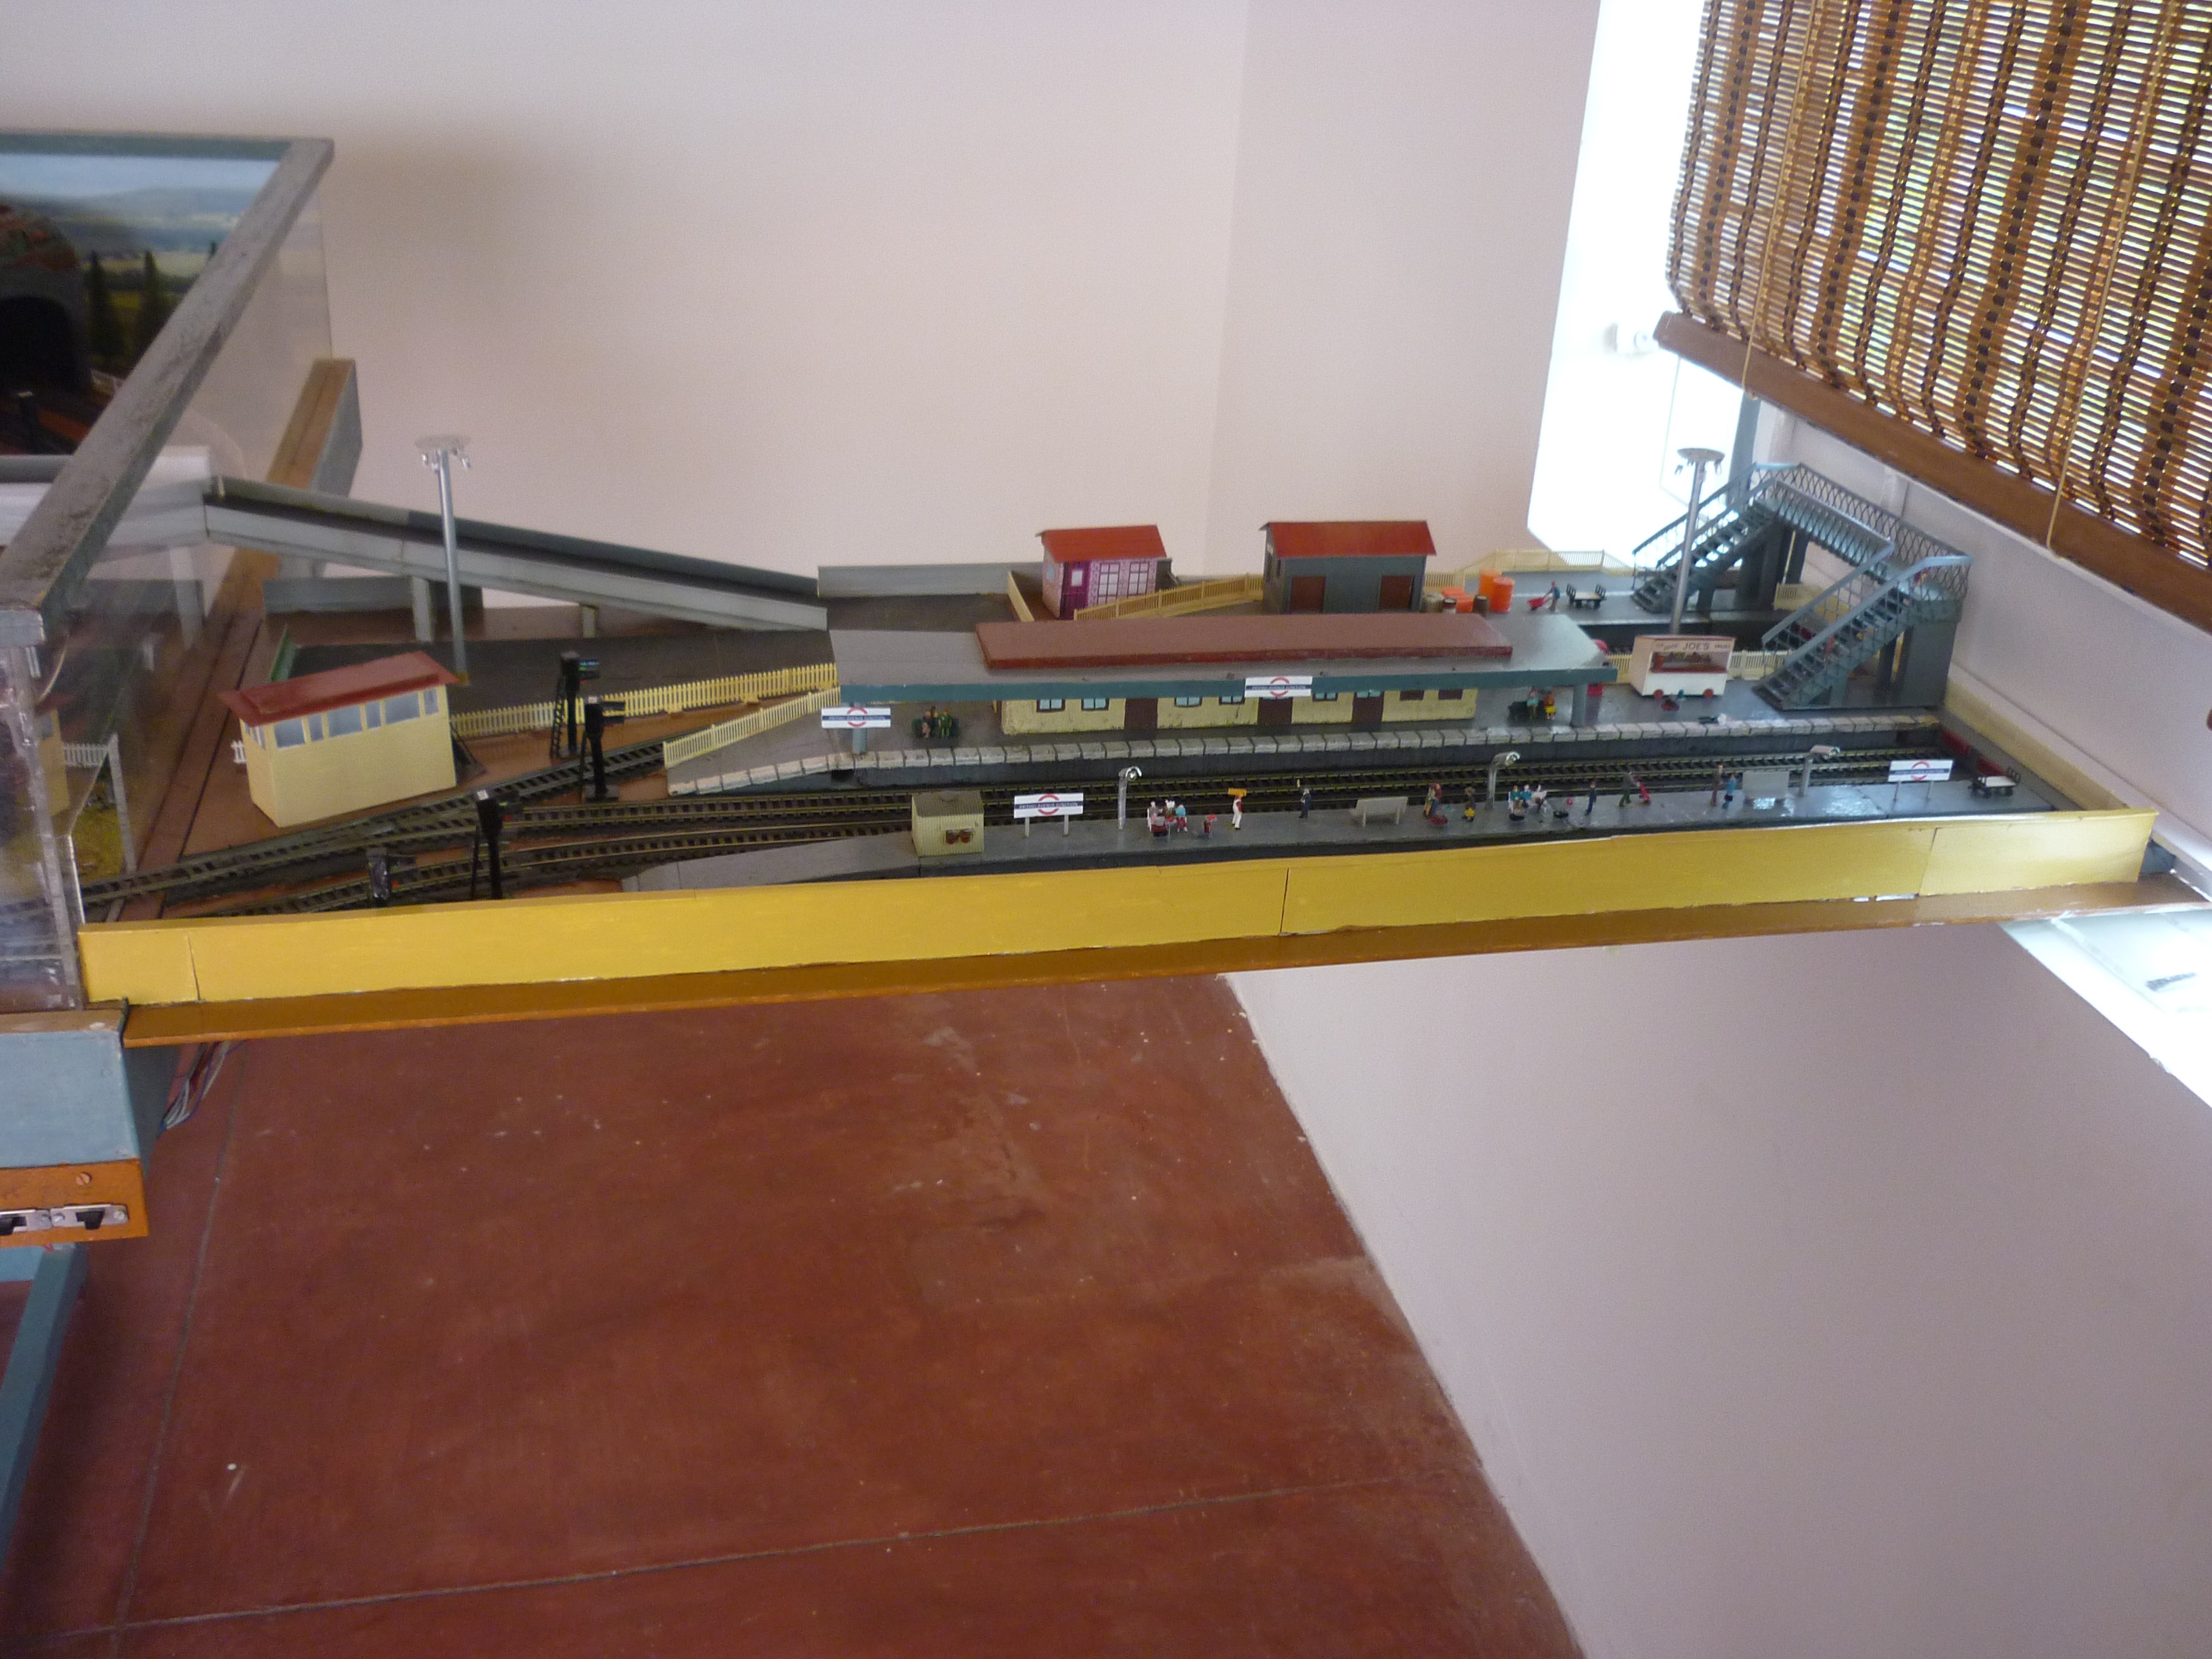
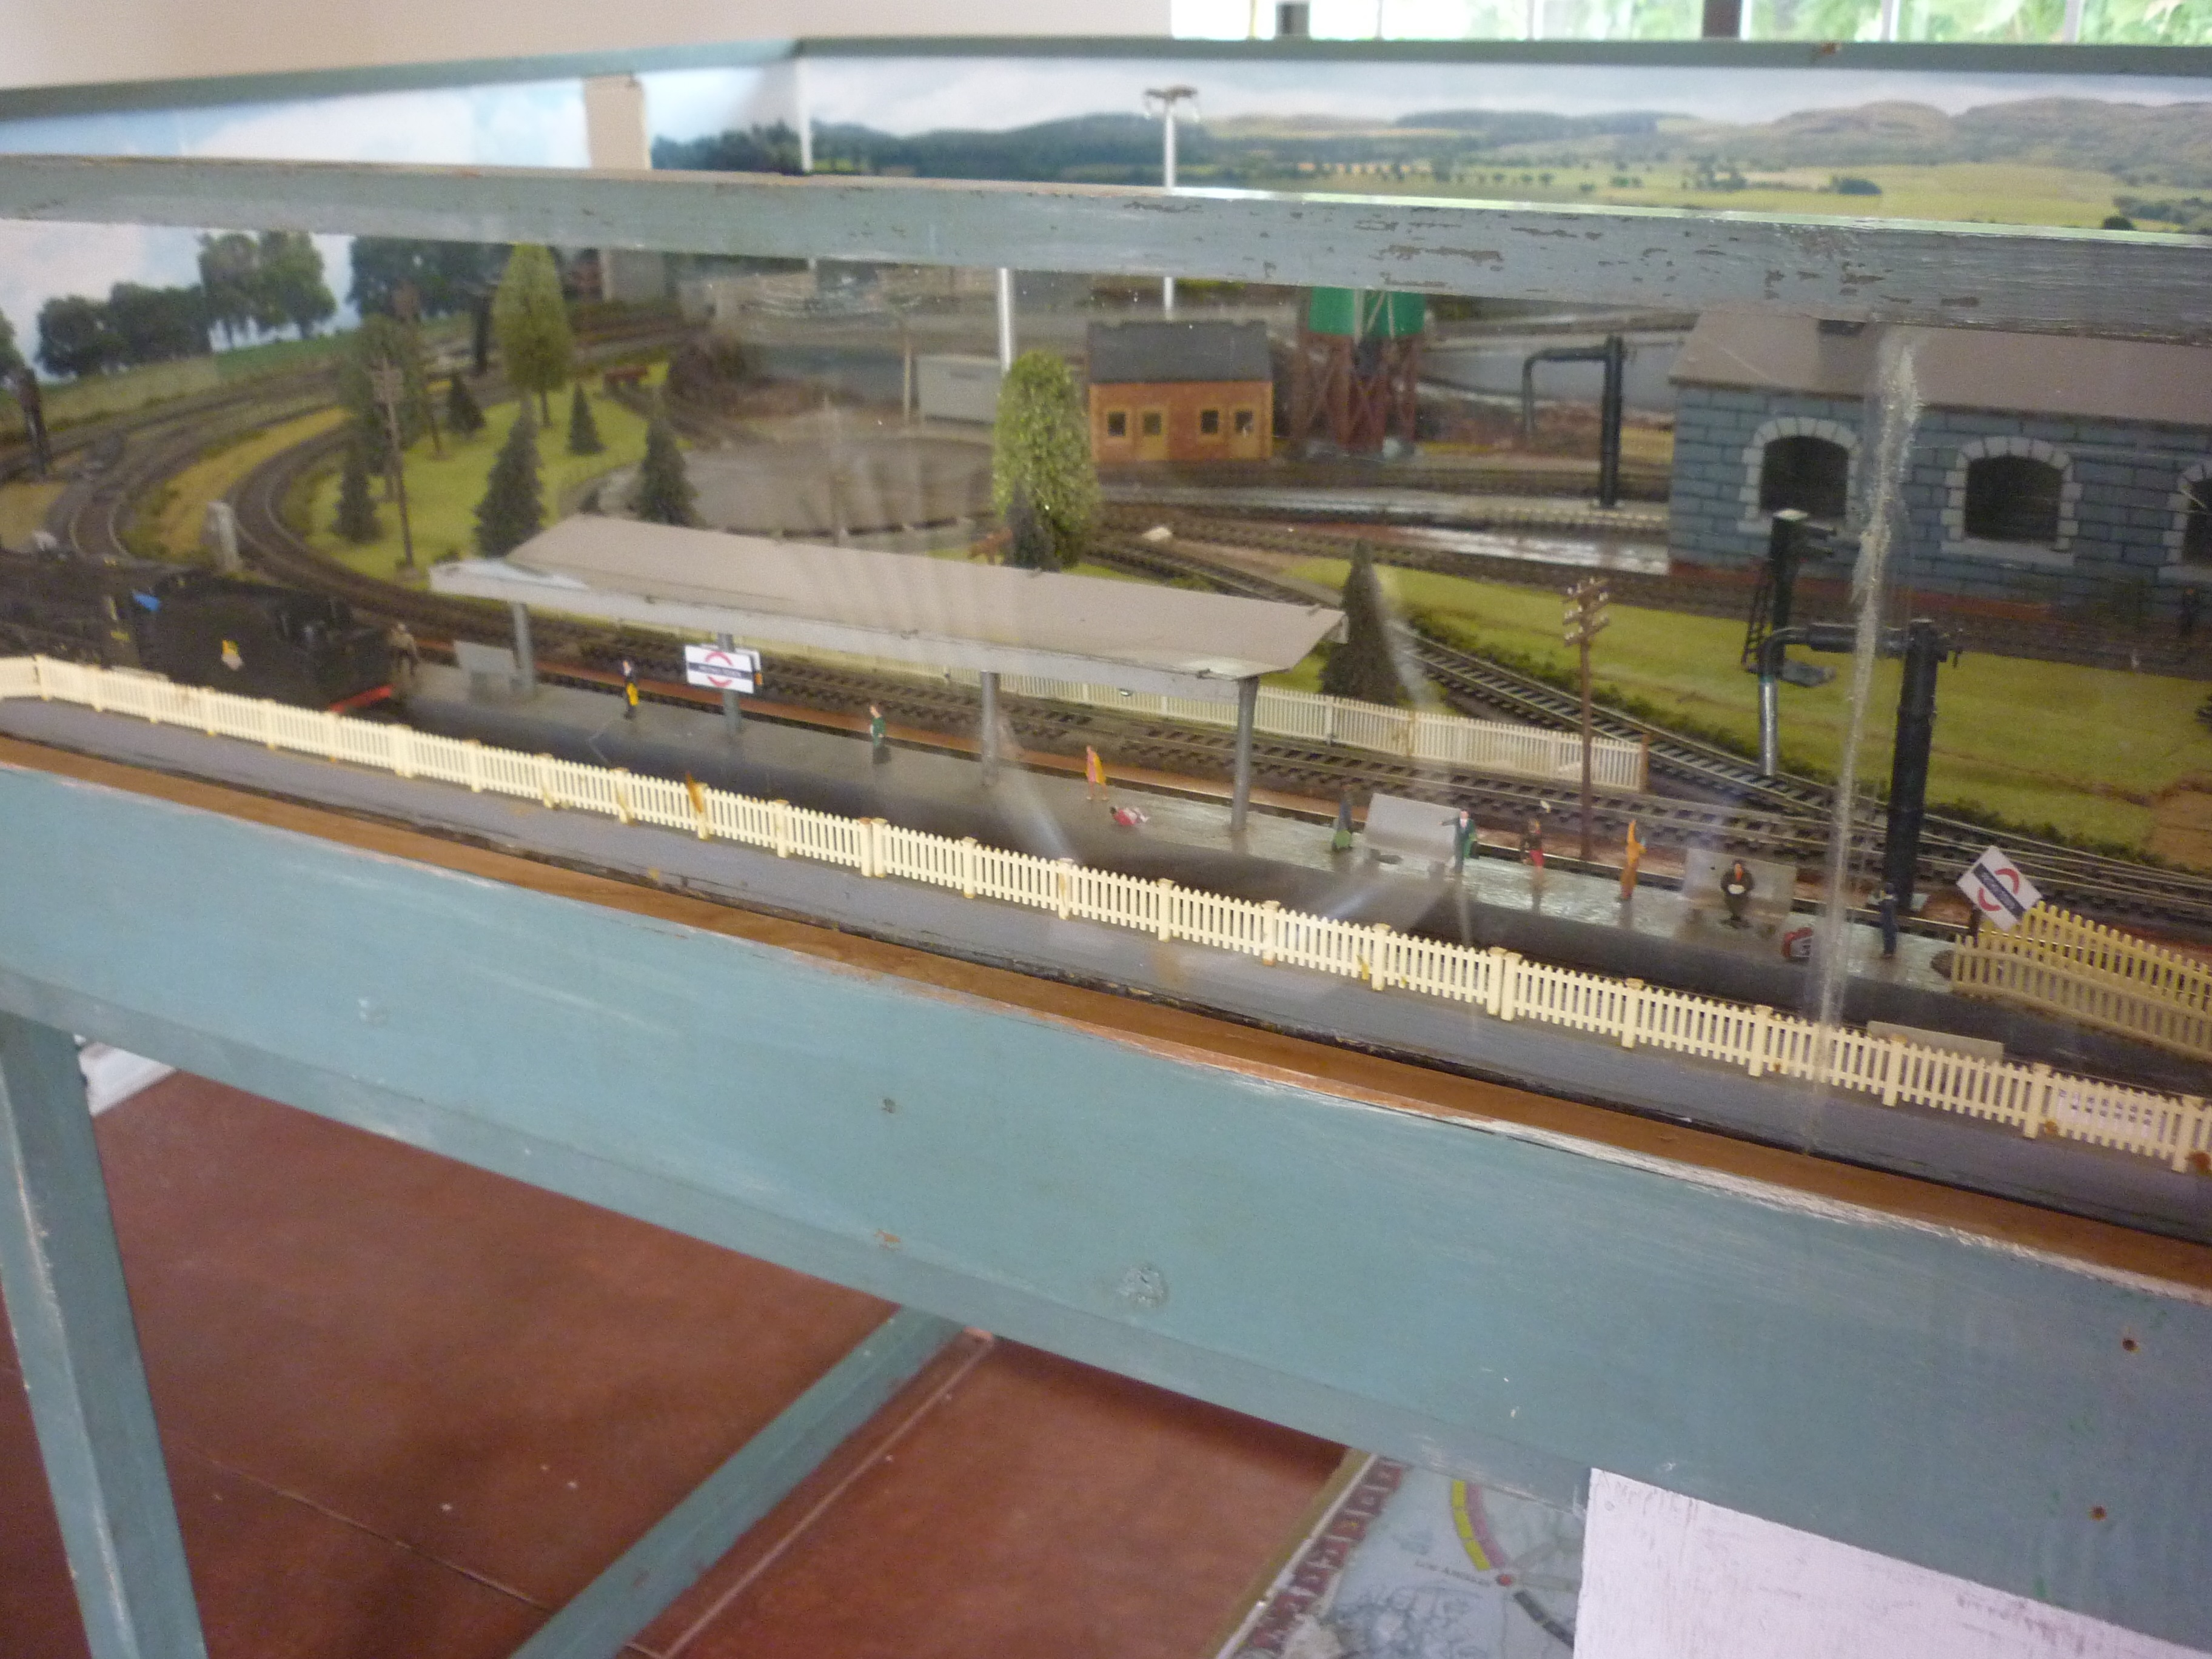
Picture 4: The signal cabin on the left is made from plastic sheet. The station and platforms are hand made from scrap pieces of plywood.
The station and platforms have been made from plywood and the main platform is lit with LED lamps ( located under the roof of the station building.
Working hand-made signals: The body (stem) is made from ball point pen body. The top head is made of plastic conduits used for wiring in houses. The LEDs bulbs are 3 volts. The shade for the lamps are made from ball point pen body (sliced to a third). The ladder is made from broom stick (India specific I suppose), but can be done from tooth picks. Cost to make is about Rs. 5 each.
Working station lamp posts : made of bent used refills of ball point pen. The hood is of the ball point pen body.
Foot Over Bridge: made from scrap material and wire mesh. The individual steps are a single ply cut to size. The silver high-mast lamps are again made from ball point pen body that serves as the post and the canopy on top is a plastic cap made from scrap piece of plastic.
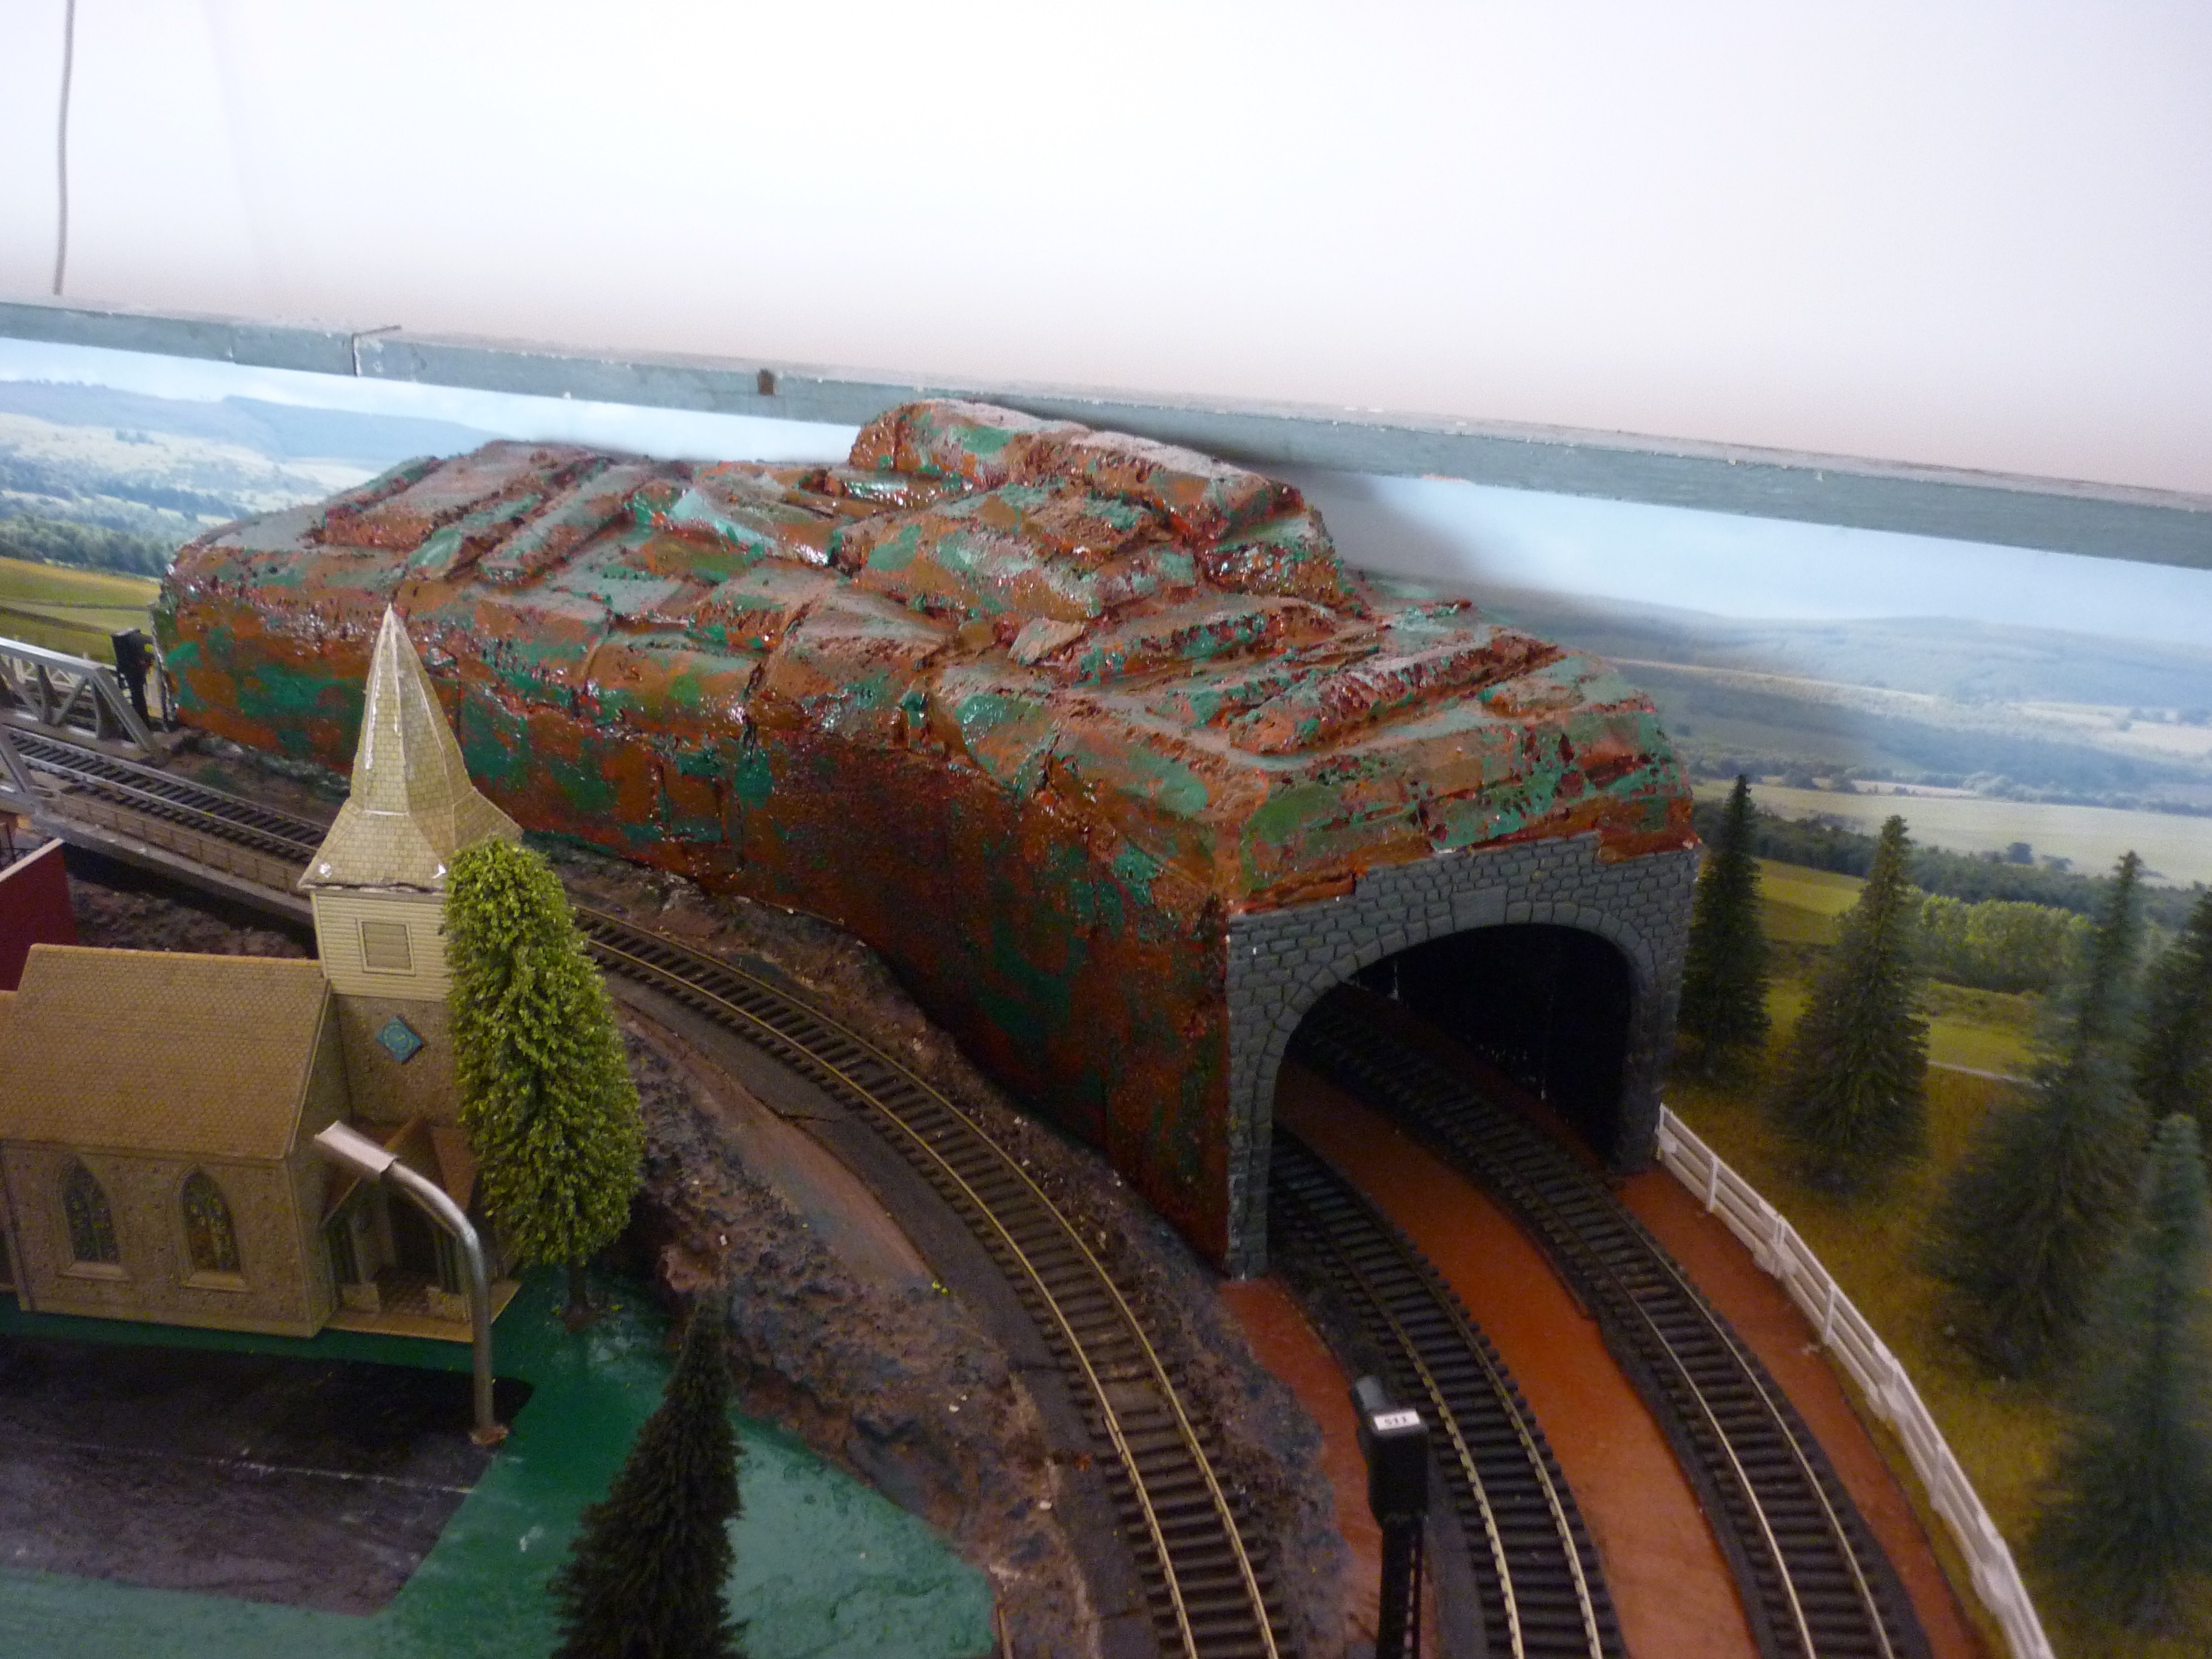
Picture 5: The Tunnel is made from thermocole. To prevent the solvent in the paint from burning holes in the thermocole, the tunnel was painted with diluted PVA and then when dry, was painted with oil paint.
Street lamp posts – again made from ball point pen refills.
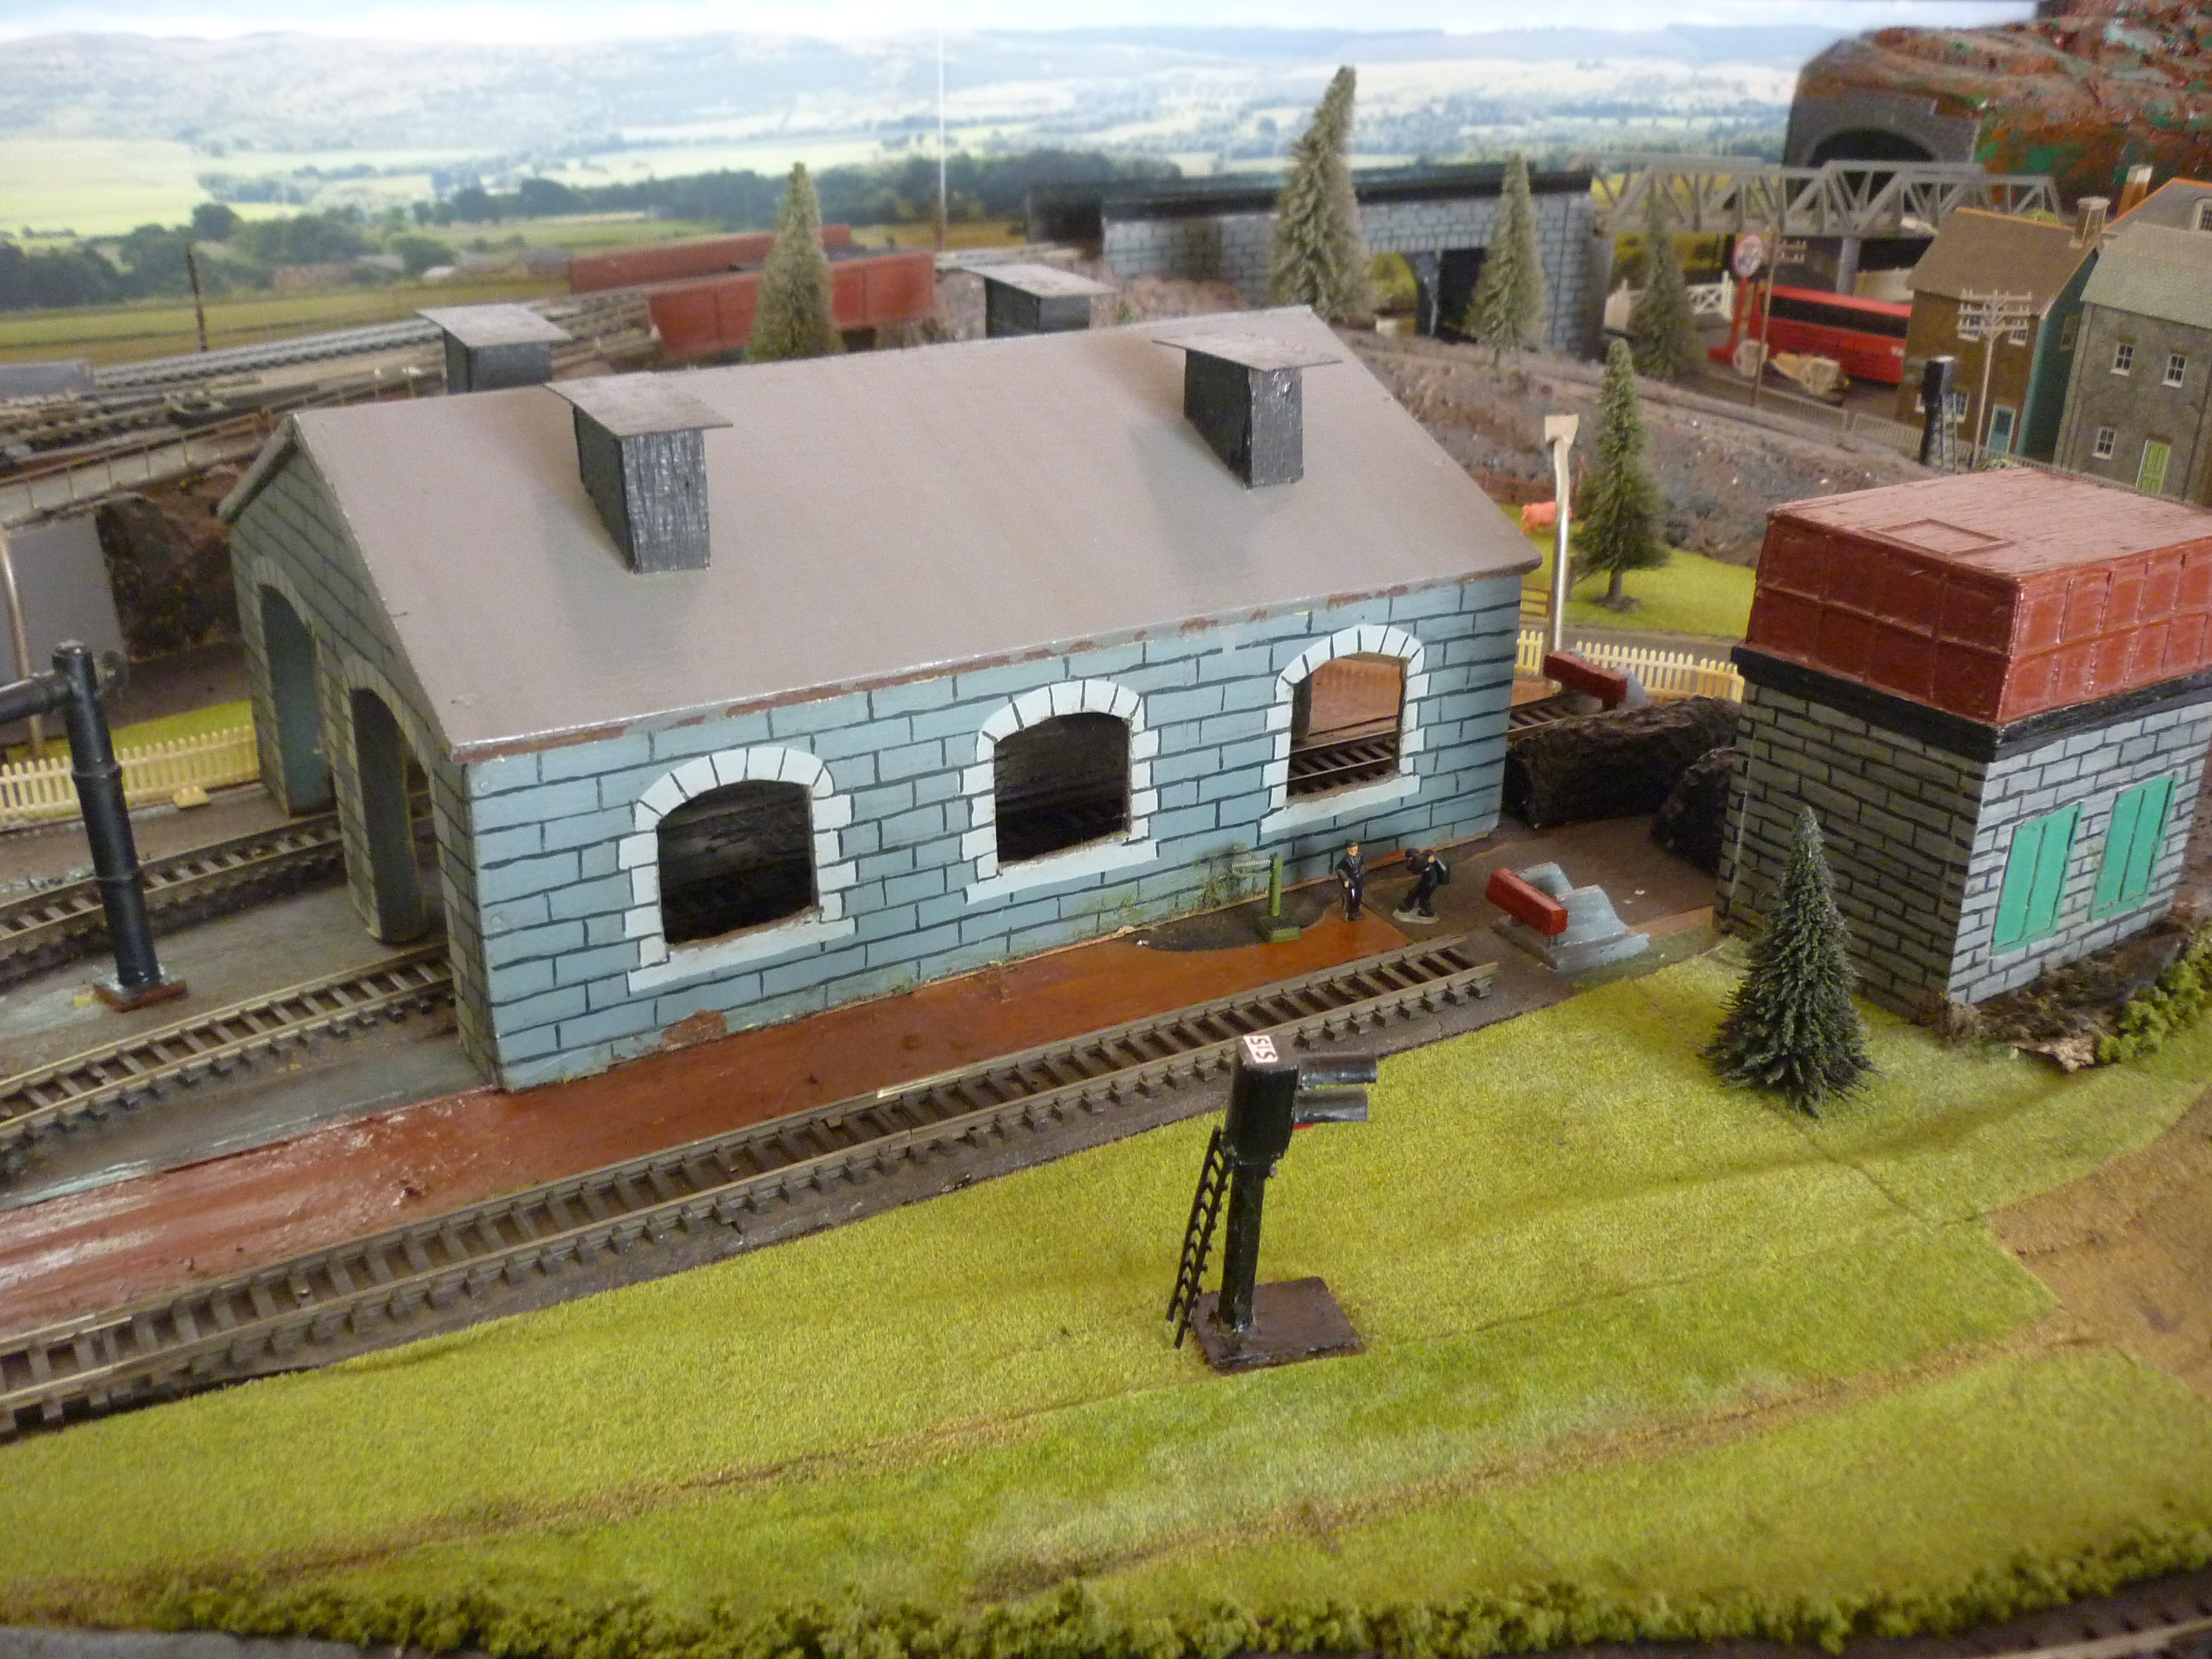
Picture 6: Engine shed made from plywood and hand painted. The bridge in the background was hand-made and hand painted. Again made of scrap plastic and wood.
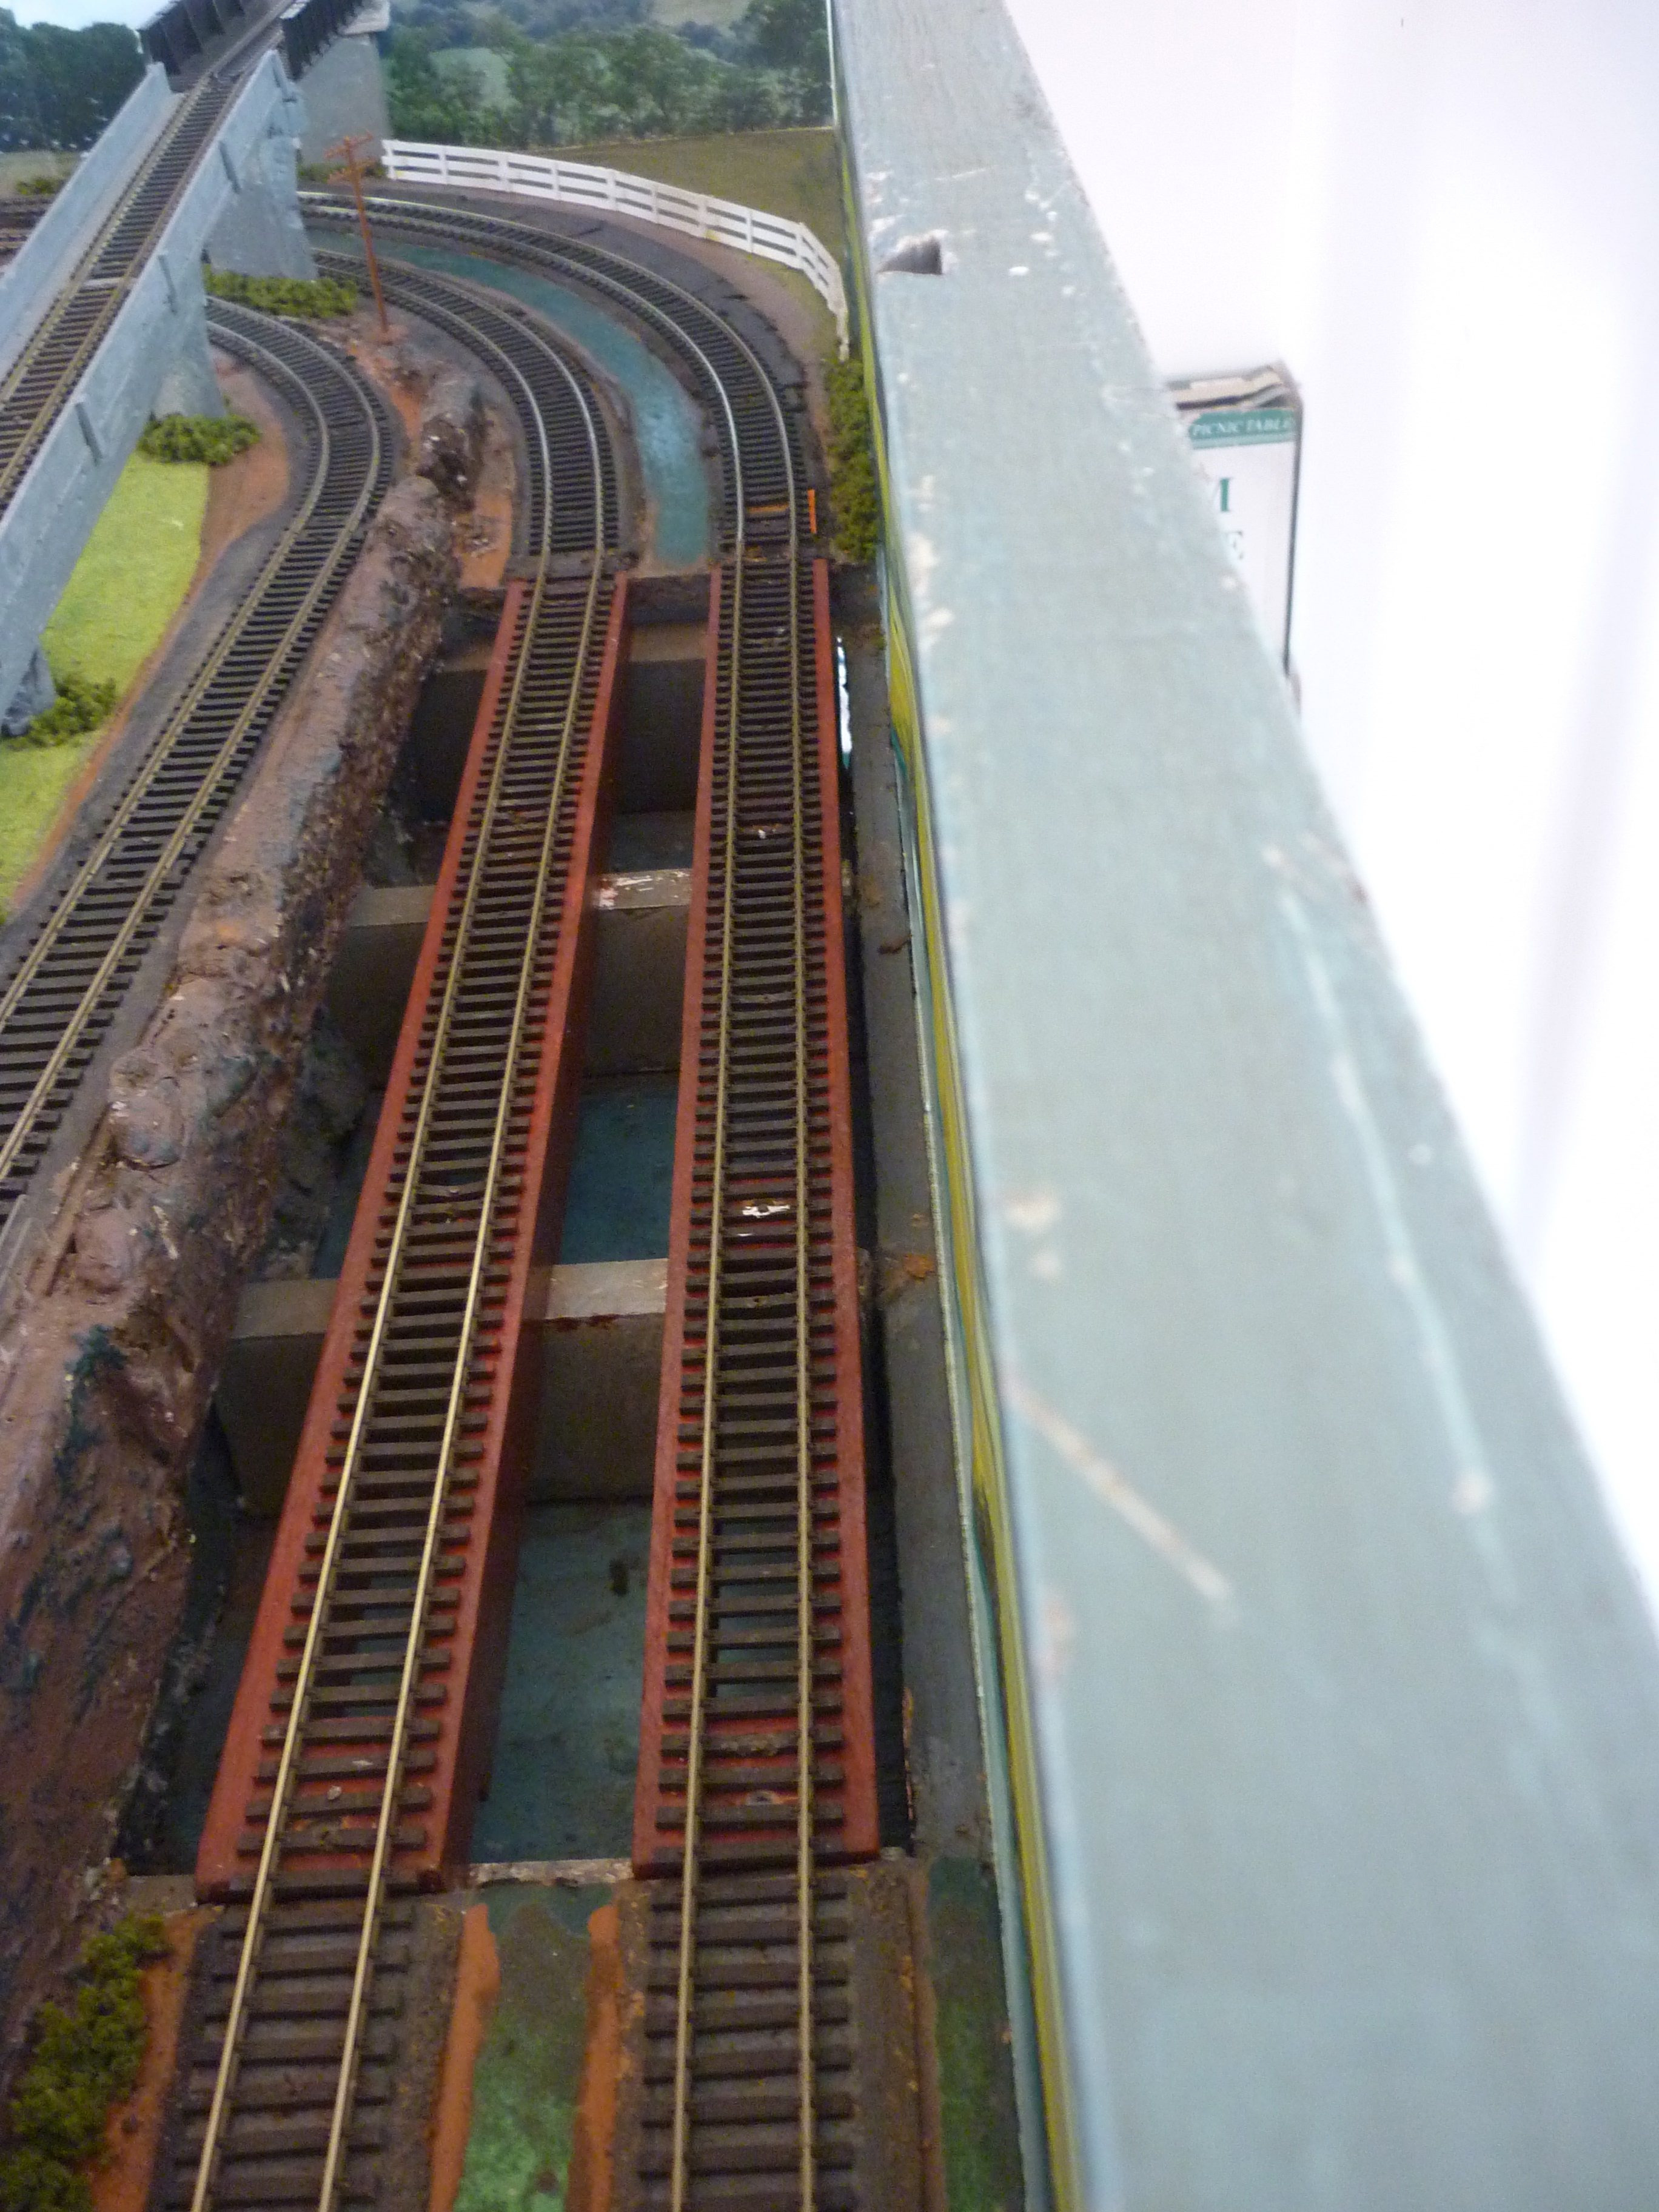
Picture 7: girder bridges – made from plywood resting on 1” thick wood painted in grey to make it appear like piers.
Picture 8: Station and platforms – hand-made with plastic roof. The Lights underneath the roof are wired though the tubular support pillars.
Water crane for steam engines. This is made of tubes of different sizes bonded together with Mseal – a two pack solvent. The rims on the body denote the flanges and are made from paper tape cut thin and wound several layers to the desired rim protrusion level. The water spout is made of plastic sheath.
If anyone is interested in knowing more about any of the handmade stuff, I will be more than willing to share how I did them.
Thanks for viewing the photos and I hope you enjoyed them.
Kind regards
Sundaram”
“Hi Al , just loaded this on youtube, shows that class 33 now fitted with sound, also a bit on how far I have got using the ECOS controller.
Regards
Dave”
Big thanks to Sundaram and Dangerous Dave. Keep’ em coming.
Best
Al


Wish I could get the Kahunna bundle already in n scale since I cannot reduce sizes on my computer. Too bad. Would love to have them. If someone could do it for me I would buy them.
Have always loved Dave’s layouts. Only problem for me is that I cannot understand his accent.
What a lovely man you are, always good to see and hear you, and wonderfull layout as well.
Sundaram’s very well done.I make a lot of my own stuff as well. More injoyment building your own.Keep up the good work.
Dave I always get a kick out of your layout.wish mine was half as good.I have no problem understanding the accent as im Canadian.Thanks ton’s Al for such a great site to learn and share.
wow Sundaram’s originality is unparalleled….and Dave, well, Dave’s layout is the ultimate for all pf us…and I have no problemo checking ooout Dave’s canuck accent, eh?
thanks Al !!!
First of all, I have the right computer programs and machine to reduce the pictures (or expand). I am willing to give it a whirl and see what we can do; I don’t however want to interfere with the side business Al has or intellectual property laws.
Having just spent USD 700 to get my computer “un-hacked”, I am a bit leery of posting my e-mail address on-line. Can you or do you have some sort of cloud account we could use, or a Drop Box account?.
Secondly to “Dangerous Dave”, I have to echo the sentiments concerning your accent. You have already taught me a lot just by your videos, but I think that I could learn a whole lot more if I could understand the narrative.
I am not trying to be facetious, Dave, but perhaps sub-titles.
Barry
Sundaram’s layout is nice overall. The switching yard is especially interesting to me. How about a diagram or even a photo from above?
I enjoy all of the input that I read on this site, even though I can’t have the pleasure of having my own setup. Keep up the wonderful dialog and pictures, so poor soles like myself can live vicariously through your vivid imagination and work.
Aloha,
Richard
EARLIER MESSAGE POSTED – 1.43pm
I believe if you firstly have a look at the Peco Site where it tells you to make sure your PRINTER is set to 100% for printouts, the POINTS printed out are the SAME SIZE as the HO Gauge, I do not think it would not be so hard to REDUCE the Percentage to be in line with N Gauge.
I 1st thought of getting N Gauge, then the EYES are no good and the Fingers are too big
Sundaram, what a great way to use up all those little bits and pieces that we collect and have sitting around in trays and boxes. I have just moved my plastic collection into a bigger box, perhaps I better get busy turning it into scenery.
Hi Sundaram,
Beautiful work done in a small space.
I am from Mumbai India and would like to get in touch with you. Please share you e mail address.
Regards
minoo
Great layout, whereabout are you located, The name sounds Indian , hence is the layout in India.
I ask this I have several Marklin Analog seys from the 1955/1965 era, and would like to see the layout if it is in India.
I am located in Pune India
Graet Layout,
Regards,
Kumar
Those who are interested can surely make use of the photos.
Dave’s layout- a great professional touch. It would require a great deal of dedication and passion to achieve what Dave has been doing and of course not to forget the vitamin “M” ( money )!.
I especially like the loco sounds which are quite specific to each loco that Dave has.
I recently got Digtrax’s PR3 XTRA for downloading the locomotive sounds to suit the locos I have. But for some strange reason, I am unable to download the required sounds ( even the 8-bit ones not the 16 bit) on to my SFXO64D sound decoders fitted in the lococ I have. Only the generic Steam and Diesel sounds can be recorded. Digitrax have not been able to resolve this either.
Can someone help? Else USD 80 spent on the PR#XTRA is a waste.
Hi Dave, the sound is set to be very loud and over rides yr voice, hence not hearing you, yr voice is some what bassy as well, which you cant do anything about. As for understanding you i have no problem.
Sorry all about my voice , should speak slower and will try in the future , it can be difficult trying to speak and control the camera and trains at the same time , suppose it would be better not having the sound on the Loco“s when speaking …will try next time …Dave
Sundaram’s creativity is a joy to observe. I am going to get back to basics on my own layout after seeing what he has accomplished. Way to go!
Steve
Hello Sundaram Where are From. Can I know about yourself
great layout like the yard. video Dave is great. thanks for the email.
How nice to see some Indian modellers, such a fascinating country for railway history and practice, I would love to go one day. Nice job Sundaram, original and interesting.
Dave, don’t change a thing, just add the odd burst of Ilkley Moor. Then people can look up the words online and start to get their ears round the accent.
Re: Dave’s accent: It’s lovely to hear a bit of home!
If your computer won’t make reductions, try a local library. Ours has a copier that can be adjusted in 0.01 increments. HO to N 0.54. They charge 10 cents.
Sundaram: Great tips. Being “cash challenged” as I am, I will be taking some of your tips to heart. As an aside: I travel a lot and for some reason started collecting the writing ball point pens that every hotel provides. Now most of them don’t work because the ink has dried up and your idea of using them as lamp posts will move them from the “throw-away” box to the “keep for model rr use” bin. Thanks so much for a great idea.
Keep up the good work.
Terry
USA
Nice work Sundaram.
Can we see a schematic track plan of the 4×12 section?
Thanks, Matt
Sundaram…what a great layout ! Your creativity is impressive and its obvious that you take delight in re-purposing those bits and pieces that would otherwise wind up in the trash. You and your layout are what model railroading is all about…having FUN !
I hope you enjoy your layout for a long time.
Dave, in New York
Sundaram………..Great Job………. great looking layout…….. I love your ingenuity in scratch building much of your scenery and details. Great ideas.
Dave……. I love your layout…..I look at the detail that you have put into it and I look for ideas for my own layout. Keep it coming.
Gary M
Well Dave – I really enjoy hearing your northern accent – keep the videos coming. Unfortunately today’s video suffered from the sound balance favouring the Diesel engines over your voice! I am sure most of the problems people were having were to do with you being drowned out. Apart from that it was another useful video.
Allen Collier says he can’t scale things on his computer. Download GIMP. It is a free and very good art package and there is almost nothing it can’t to to a picture or diagram. It has a steep learning curve but then it is free after all! I scale OO down to 53% and then I can get 2 pages on one A4 sheet. I don’t use Al’s models because they seem to be mainly USA based and I model in England but there is plenty of free stuff on the web.
Sundaram, loved the way you made use of the simple materials available. Wonderful, but simple and detailed layout.
Hello AL,Dave, Sundaram…and Other Fellow Modelers:
Sundaram, Great Ideas of your creative ingenuity you have shared with the rest of us. How to Reuse common everyday household and business items for model RR Projects..
IDEAS: (1.) You could use dull color paint, oils or acrylic paint on those building printouts you are using. To make the buildings weathered. (2.) The bases of most buildings when placed on top of the layout base, have openings along the edges. Perhaps you can add scenic material to cover the edges. (3.) ANOTHER Idea for Pillars, Cement or Metal Posts, Piers.. I use Disposable Single Use BIC Shavers… when they are too dull to use,, Cut the Blade Structure off the plastid ribbed handles. SAVE THE Hollow HANDLES [3.5″ x 7/16″ (0r 9 cm x 1 cm approx.] and the Blade Guards. [1-7/8″ L x 1/4″ W ( 5 cm L x 1/2 cm W approx. ](a.) You can use the long ribbed handles for Metal or Cement Posts, Pillars to hold the Roof of Buildings up, Use them for Train Shed Pillar Supports. (b.) Can Make Pier Supports using them, for a Harbor Scene. (c.) Loading Dock Pier Supports, (d.) Harbor Walls, by inverting them side by side, Painting them Grey Color. (e.) Tunnel Supports, Or Mine Supports. (f.) The BLADE GUARDS have a narrow cut out on one side that allows an ATLAS Snap Track Piece to be placed between the ends,, for support. OR Place the solid top down to elevate the track 1/4″ [or 1/2 cm ] up from the layout base.. Handy of you want to cross a shallow depression or swamp, streamy area. You have to paint them dark colors to use as pillars, etc. since they are Yellow Plastic. (4.) WOODEN COFFEE STIRRERS: 7.5″ L x 3/16″ W x 1/16″ D [ 19.20 cm L x 1/2 cm W x .005 cm T]. (a.) Can be used as trim along foundations, Loading Dock or Station Platforms or top of Harbor Pier Planking, Planks for delivery wagons, handtrucks, Scaffolding, and Sailors walking onto a boat or ship from a dock. OR (b.) Have enough to go around the outside of a water tower,,, using a cylinder and covering it with them length wise, cutting them to fit. I have been collecting the Bic Single Blade Shaver parts for years.. Also can be used as flat car loads.. Just some thought of using common items instead of just throwing them away… ~ AND For Dangerous Dave, Keep Up the Good Work on the Videos.. Perhaps you can Turn the Locomotive Sound Down or Just Off wo we can hear that Great Voice of yours doing the narrative. Mike, in N.H. USA…
Sundaram, What a creative mind you have to make such an amazing layout from simple everyday materials. Thank you for sharing your photos and your clever ideas for saving money.
Dave, Another great video. I don’t have much trouble understanding your accent (I suspect due to watching a lot of BBC TV shows.) I really appreciate your showing us the Ecos controller. I just saw one advertised here recently at about USD 700. Looks like a neat system but a bit out of my budget.
That’s what mine is kind of going to look like.
Hey Sundaram,
I really like the extension you built that spans from your layout to the attachment at the window sill.