I got this question in from Palmer, on dead rail model trains.
I started flicking through the posts to help him, and then I thought, this would probably make a good post on its own. So here you go:
“Dear Al: I am 84 and a combat vet of somewhat limited mobility. Therefore I have elected to avoid crawling under my 6″ by 10” layout by going to “deadrail” (battery powered in lieu of DC or DCC.
I enjoy your tips emails and would appreciate any info you could give me as to what components to buy as to reliability.
Thank you: Palmer”
Who can help with his dead rail model trains components? And then there’s the business side of a layout:
The first thing that popped in to my head was the chair Roger cobbled together. It’s at the bottom of this post.
Then, I thought if Palmer does want to have a tinker with some live track, you can always turn the table upside down, like they’ve done here.
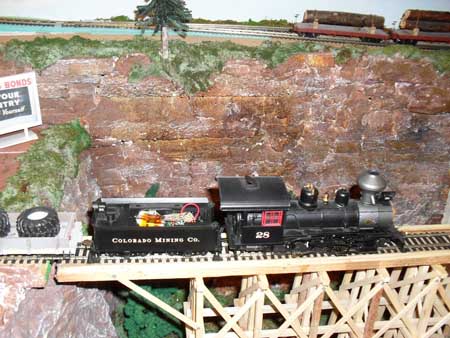
And Rob proves that battery powered trains still make a great layout – his looks great.
When it comes to tips in general, there are hundreds and hundreds on the site, just like these, and these… and these. (There are some real gems in the comments.)
But do you know what? The one tip I wanted to include, I can’t find. It’s this: to save yourself dropping parts in your lap, or on the floor, turn a large box on its side – place this on your table and work in that. This way no parts can ping off and be lost forever on the floor. Clear plastic box is best obviously…
Well, that’s my lot. Can anybody else help Palmer and his dead rail model trains? Please post below and let’s so what we come up with.
Rob’s post might help too:Battery powered trains.
That’s all this time folks.
Please do keep ’em coming. And thanks to everyone for the comments on the Beginner’s Guide.
Best
Al
PS Latest Ebay cheat sheet is here.
PPS I do know the difference between “your” and “you’re”. Honest. But sometimes I’m just in a hurry. Other times I’m just half asleep. And sometimes both, like today.

Hi Palmer,
Perhaps you could consider this.
I am building my layout at something approaching eye level for a couple of reasons: –
1) I think that the best way to view a model railway is from that height. (When people go to exhibitions they tend to crouch to get that realistic viewpoint).
2) This affords easier access for wiring underneath the layout. I use a chair on castors (computer chair) to manoeuvre along the layout.
You would of course have to use a small platform whilst you position your layout above. I use a light weight 2 tread ladder/platform that works well.
Good luck with your project and best wishes.
Dennis.
Heart surgery has left it very difficult for me to bend over. In building a new layout I simply drop the wires down through the board, hook it with a coat hanger and bring it to the edge of the board where I terminate in chocolate block (Terminal Block to those west of the Atlantic. I simply wire from the blocks to controllers, switches etc. Or to each other.
No need to crawl around attaching drops to busses.
A lot of railway modellers in the UK use battery power with radio control, in fact I have seen r/c model actuators being used to change points, lot cheaper that purpose built point motors. I have seen one layout where the re-chargeable batteries were charged up on the layout, so need to remove them to re-charge.
No track cleaning, no wiring, must be the way forward!
I saw a great idea for saving small parts from dropping on the floor but I cannot find the link again. It comprised an apron with the bottom attached to the edge of the bench with Velcro. When you drop that vital little spring it falls into the fold of the apron instead of bouncing into oblivium.
Palmer,
David Barrow had several articles a few years ago in Model Railroader about building Dominoes. There are two advantages that I see/saw in his design. One, it by default makes a more linear layout (good for operations) and two, you can work on each domino at the workbench for all the wiring and everything like that with the Domino turned upside down. I have built my layout that way and do like the results. However, it does become more difficult to remove a Domino to work on it if you make changes down the road. Not impossible but just takes a bit of time.
If you are interested, I have copied most of the articles and could send them to you as PDF files. Or I could provide the Dates of the MR Editions where the articles appear. Just let me know. That way you would get a feel for the technique before making any decision. If you already have your layout built this will not apply of course!
I have also see articles where the wiring was put on the font side of the legs of the table. Then do as the second reply suggests, run your wires down from the top, keeping them long, reach them with a coat hanger or some sort of hook, bring them to the front, and put your terminal blocks and things on the front. You can mount the terminal strips on the legs or you could actually build boards that went from leg to leg to use for mounting. This technique does not help if you are installing under the table switch machines. If I were to start over I would run all of my Buss wires on the front of my legs or table structure so that I could sit in a chair and do all of my connections right in front of me,. No looking up and under!
All for now,
Dan Foltz
NOTE: It indicates that e-mail addresses are not published. If interested perhaps Al can get us connected “offline”.
When I was a kid, my Dad fixed up a 4×8 setup for MU Lionel train that was hinged to fold up on my bed. Of course, the one problem with that was the train and everything loose had to be removed to fold it fold it up. But you could rig up a system of ropes and pulleys to raise your layout up to a convient height to work underneath.
I also am a disabled vet and have had had trouble moving around, When I got out of the service I was a mechanic and moved along the floor on what the called a creeper. I still use that same idea today to move along my boards to get underneath.
I thought that this might give you an idea of what might help you get around underneath with more mobility.
I’m going threw the same thing with limited mobility it’s gonna be a hard one to figure out!!!
I feel your pain I to am a military vet with limited mobility and what I did was put my whole layout on a lift. The whole layout is Frame and all goes up and down by a cable system.. I will send in some photos when I get a chance
hinge it on one side and use hyd. lifts likes those used on the hood (bonnet on the east side of the Atlantic) to help lift it.
Ben
Nebraska USA
Harborf Freight tools has a bicycle lift for $7 US. You could hook up 2 of em to lift your table.Bernie
Palmer you are one in a million! As a physician helping combat vets here in the United States, it is a pleasure to see these young warriors overcome many obstacles many of us take for granted. Our bodies and brains are very flexible when it comes to mobility. We often stop doing things because of pain or because we feel it’s too much trouble. Never give up Palmer. Do not let your body pain control your inabilities and the things you love to do. As explained earlier to a young gentleman (Jim) who was 78 years old. We make excuses not to do things in our lives which contribute to many of us not to do anything at all. But your mind says ‘You love doing these things or if I were younger I could do it.’ You have to push the boundaries of everyday living to the point where you are comfortable doing what you love to do and then maintain those levels of flexibility. The pain will go away and you will certainly feel much better. Whether your an athlete competing or getting up there in your golden years, the competition never stops for survival. Thank you for your service!
i have my layout on a 12 volt winch system. I just raise it up wen i need to get under it for wiring etc.
Hope this helps
A jewelers apron it pretty easy to make. I bought a white kitchen apron and sewed the loop portion of the velcro about 2/3 of the way down the side and then placed the hook portion on the bottom of the table. Adjust the location of the velcro depending on how much of a “basket” you want in front of yourself. This has saved me a LOT of time on my knees searching through the rug for that little spring I dropped. And the screw, and, well you get the idea.
For the physician above, thank you very much for that article. I’m early retired do to disability. Nothing major, just constant pain in arms & legs. In a sling right now, from surgery. But I have been putting off starting a layout for years. Your article really hit home for me. Thanks again.
Palmer, keep moving forward!
Al, I’m glad you aloud me to stay part of this group!
I built my layout in the former attic bedroom of my cottage 28 years ago. At that time I was very fit and agile at 40 years old. My baseboard is 39 inches (1 metre) high. The room is 25′ x15′ and although not continuous, the branch line runs all around the room. There is a chimney breast that protrudes into the room and my boards go across it. So there’s a small space, 36″ x 14″ for me to squeeze up into to change scenery items etc. As the years have progressed, I make sure I have my mobile phone on me in case I get stuck. Each year I get stiffer and crawling about gets harder, but I would not sacrifice the Elmton Branch Line.
I’d personally help if he’s in the Milwaukee , Wisconsin area.
small size is not good for HO scale cuz too curve on tracks unless it is trolley.. Bigger room is best for high speed train or passenger cars can handle better in less curve tacks.. You agrees ??
84yrs? i’ll be lucky if i get that far. palmer i really can’t be of much help. i put my layout 30″ high. i’m 70 and 5’1″ my layout is that low because i want to see at bird’ eye view and can reach cars in case of a de-railment. i’m disabled too, from ‘nam. what i use is an auto creaper. works for me. i also use a “headlight” or hanging worklight. legally blind don’t help much neither. but try what i suggested. might work for you. i model HO. what works really good too, is micro-marks magnifying viser. multiple magnifications with lights. terry
use a “headlight”, hanging shoplight, or micro-marks magnifying visor w/lights. floor creeper. i’m 5’1″ legally blind. 30 ” high works with my 20″ long arms. terry
They are all very good tips. I hope they help palmer.
Well I’m 81 an just starting my ho layout. I made my table 3’ x 7 ‘ x about 40” high and when trying to figure out the layout of a working yards, it just didn’t give me room. I then thought I still have my Three rail platform tables from back in the early fifties that dad built for Christmas for us. I am going to add one of them which is 4’x5’ in size. I also have limited mobility due to back trouble and art’ in most of my joints. I saw an article of a gentleman using a creeper with a back rest built on it in a 45* angle to use for working under the layout. This is what I’m playing to do. I am going to add a board or some thing on the sides of it to hold tools and stuff so when I get down I don’t have to get up to much to get other things, as that is my major problem.
Many years ago I was at the main train station in Cairo Egypt and toured their railroad museum. Among the exhibits was a historic model train setup which I found unusual. The layout was powered by a bare wire on each side of the track and the engines had brushes on each side of the cab that made contacts with the wire and thus provided power to the engines. The trains ran around the layout with sparks flying and the only drawback was that the bare wires were (I believe) 110V a.c. which meant a shocking experience for those who accidentally touched them. If I remember correctly the layout was originally owned by the British Ambassador during the occupation.
If there are any of our members in Cairo and if the layout is still at the Ramses Station, it might make an interesting pictures/story for others.
Terry/Idaho USA
I giess this RC and battery thing is a closely held secret. one person responded about the battery/DEAD TRACK thing. That is a very big game changer and I have looked into it but can’t get an answer as to who does this conversion. If anyone has more detail I would sure like to know all the ins and outs. I am sick of stalling locos and cleaning track.
At 86 years, I too needed to eliminate crawling under the layout. I do similar to the post above, in that I bring all the leads to the edge of the layout, but bury them in a horizontal hole or slot in the foam base. all connections are to terminal blocks. So far, so good.
To: Palmer: I too am old, a vet, feeble and somewhat disabled. (85)
I put my 4X8 foot Z European layout on 2″ foam, pink insulation board. You can cut furrows in the foam with a Dremel or a sharp knife to string wires and cover them up with masking tape which won’t be seen after landscaping is finished. I also build modules for scenes and wire them while they are being built on the workbench My largest (a castle and farm scene is about 18″ x 4′ built also on foam. It only has one wire coming to the control center. Track wiring can be done like mentioned above with the furrows.
I also have a friend who put his whole layout on an “A” frame arrangement that the whole layout can or rotated to an angle to work on the wiring. One problem, you have to fasten everything to the surface or it ends up on the ground.
Good luck and keep chugging! Ray
Having read the foregoing contributions I am humbled and impressed by the offers of help and supportive comments by the contributers. What a friendly pastime model railways is. May we never run out of steam – or diesel or ‘leccy.
Hugh P from Scotland
Hi Palmer,
I contemplated going the battery power way myself and as a result I found a website which is dedicated to just such a need, the site is listed below,
http://www.protocab.com
They are battery and wireless model railway control specialists.
Hope this helps.
Hi Palmer
You can get more information on Dead Rail at this site https://www.deadrailsociety.com/
They are the go to source for all things Dead Rail.
It’s something I’ve been looking into myself . Kind of pricey but then again the benefits outweigh that cost.
Palmer
God bless you. My HO 4 ft x 12 ft layout is made with a light frame- 1×3 & 1/4″ ply on top, at 26″ above the floor, then 1 1/2″ hard board insulation ( not the pink stuff) 9″ above the ply framed 16″ OC -in the 4 ft direction- using the hard board as joists. All the wiring is above the ply, between the joists and along the face, and you have a fabulous storage space. I was concerned about warping but in 3 yrs that did not happen. All my additions will be this way. Never had to go under the frame. Gives you so many options for different levels also.
Deadrail -Cons-
1. The engine keeps going after a derail. The engine could wipe out all your scenery close to the track. Total vigilance when running.
2. You cant buy a factory made set up. IMHO HO is too small to house the battery, receiver & a decoder if you want sound & DCC options. You have to McGiver this stuff yourself which I dont want to do. S scale or larger. A must for outdoor G scale.
3. Very pricey
Pros- You dont have to clean the track as well as DCC but you cant let gunk get in your engine wheels and points so you dont have to clean as often- not as great a feature as advertised. Smooth running -yes, until you derail because gunk got into the points.
Hope this helped. Keep at it and let us know your progress.
George from LI, NY
Palmer, I’m only73 but don’t like crawling around under any of my three layouts that are under construction. For my 5.5 ft. x 6.5 ft. Christmas layout, I set it on a motorized adjustable-height desk that allows me to raise it up to 48 inches above the floor for wiring the underside while sitting in an office chair with casters so I can roll around under it. It can also be lowered to 30 inches for reaching across from the top side of the layout.
For my 4×8 ft. + 2×5 ft. practice layout, I bolted a 1×4 inch board to the wall studs about 3 feet above the floor and attached the 9 foot long side of the layout to the board on the wall with heavy-duty 4 inch door hinges. This arrangement allows me to lift the whole layout up on one end to about 6 feet above the floor so I can reach all the wiring under the layout. For clarification, my layouts are quite light weight because they are mostly 2 inch thick pink extruded foam board with a minimal frame of 1×2’s and 1×4’s around the edges.
I’m not sure how well either of these methods would work for your 6 x 10 ft. layout depending upon how heavily it was constructed. I have a 6 x 12 ft. test layout out in my workshop similarly built of 2 inch foam board, but it is setting on a 5 x 9 foot ping pong table at the moment for support. Getting under it to run wiring could be tricky and I’ve considering just routing slots in the top of the foam board to run the wires without having to get to the underside of the layout.
Good luck with whatever method you choose. Sorry, I know nothing about radio control or battery-powered locomotives.
I too have similar problems and can appreciate your concerns. I am 86 and, moving into a new house, decided to build a new N scale layout. With limited space and agility I decided on a shelf layout 24″ X 10′ 4″ that is on one wall in our Den. With sturdy shelf brackets, soundboard base with 2″ of foam, it is strong and light. All of the wiring is embedded in the top surface of the foam, just as Ray Z PA has suggested. No more working under the layout. The big plus is that, with the wiring on top, it forces you to do neater job!
On the subject of battery powered trains, as said before, it is not for HO, N or Z scale. On previous layouts I always had a problem with dirty track and problems with running trains. Then I stumbled on a fellow from Sweden on YouTube and his advise on keeping track clean was just to run the trains once a day for at least 1 hour. I tried that and so far I have had no intermittent running problems—and the lights in the coaches don’t flicker!
I wish you all the best, it is great hobby…Bill
keep up the good work
Try the DeadrailSociety.com for supplies and help. I believe there are also some groups also.
That chair is for working under the layout. Get a furniture dolly/mover from the home center. Mount a kitchen chair on it. Preferably one with square legs so you can secure it to the dolly. These dollies usually have larger wheels so they roll easier.