I have a collection of tips for model railroading today, all from you lovely lot:
“I found a good use for the wrapping that tools and screws and such come in. It is almost perfect for glazing in the print out buildings.
Hope you can use this.
Guy”
“Alastair,
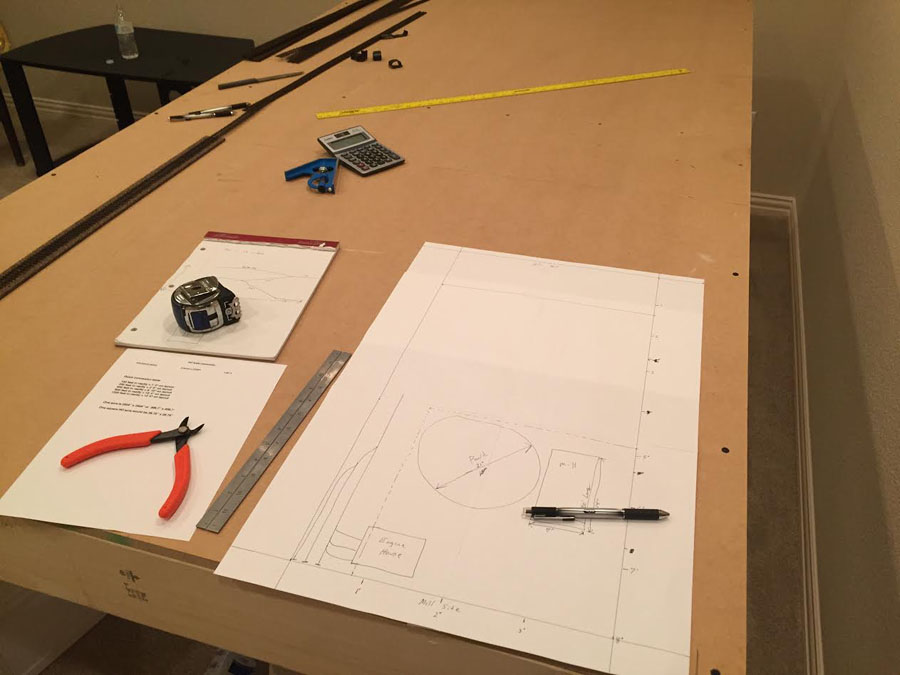
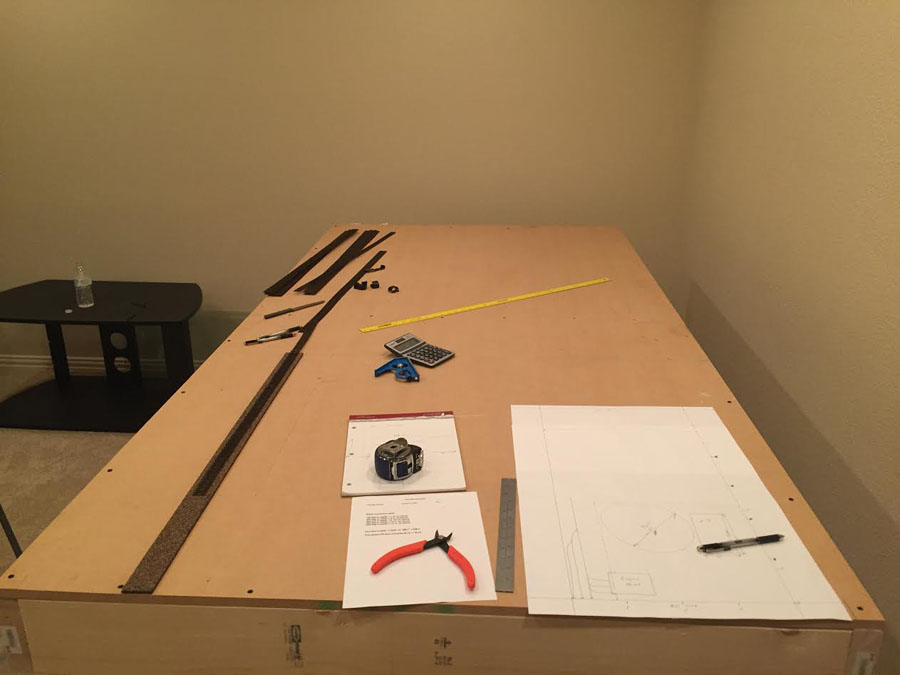
My grandson and I have started our railroad project. The photos aren’t much but everyone says the first thing to do is get started.
We are doing an HOn3 logging theme as I was raised in the Pacific Northwest. I had built an O27 and S gage layout as a young boy. We have built a 4×8 base and we are currently planning the layout.
Working with my grandson is allowing me to teach him how to plan things and then lay them out. Soon we will be building and running trains.
Best Regards,
Lynne”
“Hi, From Joe in Fayetteville Georgia.
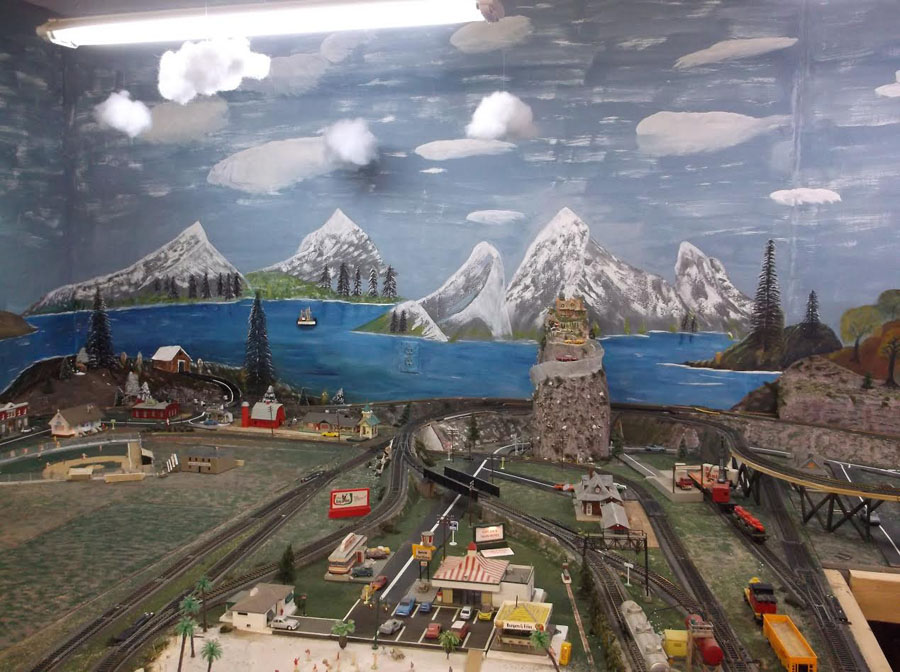
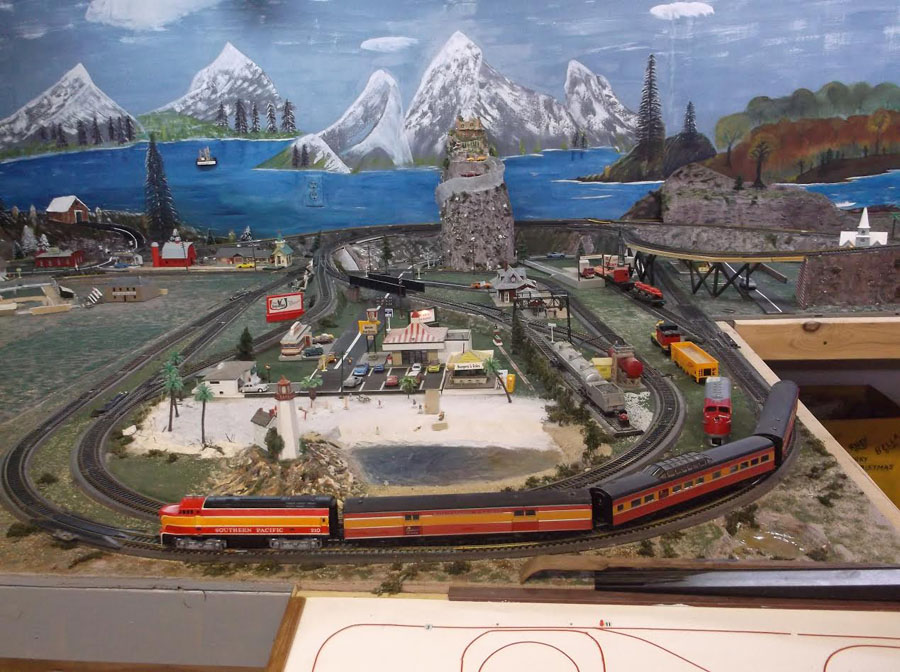
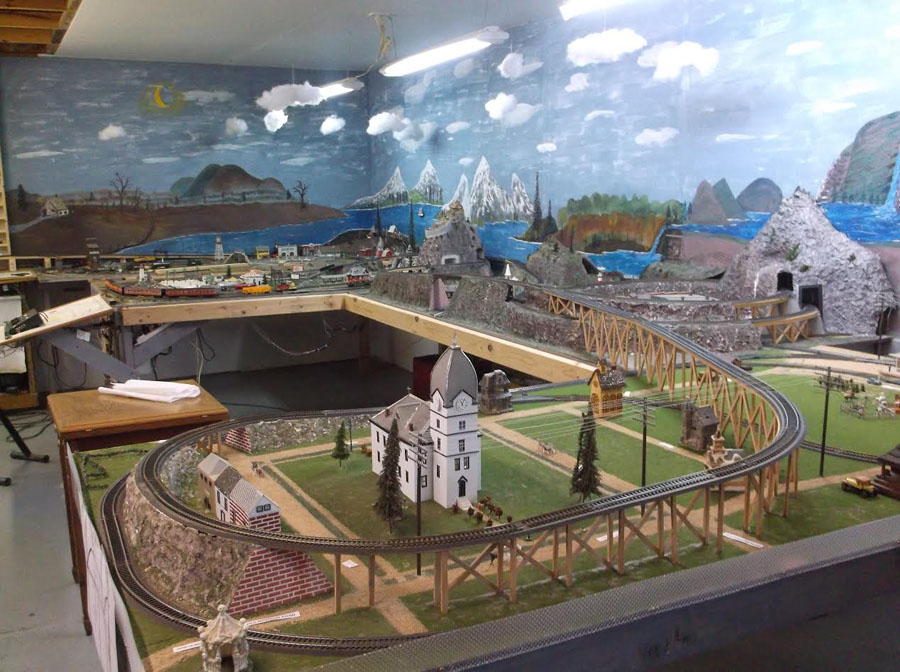
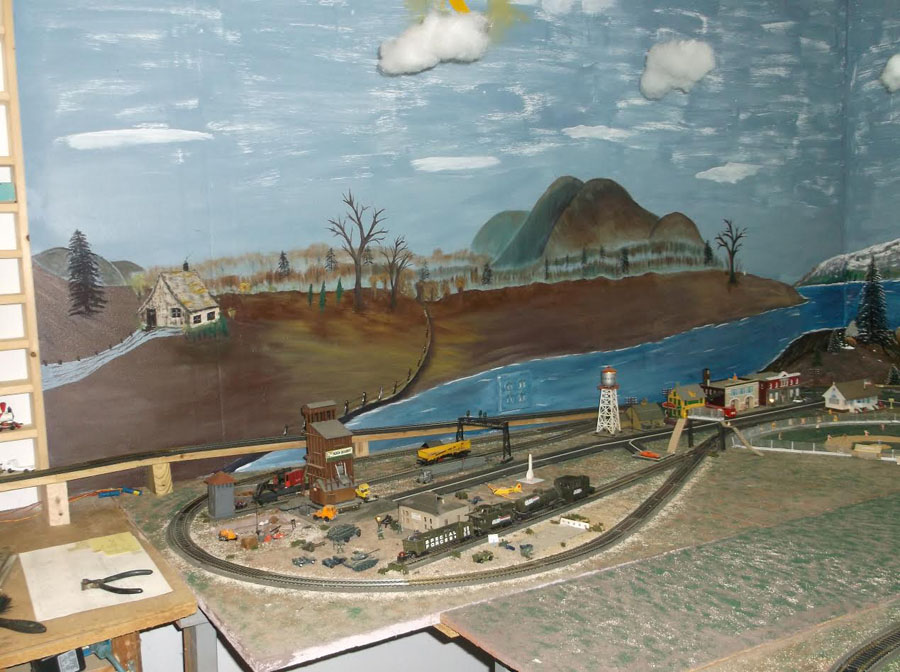
Years ago I wanted to do paintings so I purchased the “Joy of Painting ” book of Bob Ross and that go me into wall painting for my train layout. I am sending pic’s of mine.
I had a 25 x 25 workshop with HO scale and with dual manual operation. I have since moved into a smaller home and let all of mine go with the sale of the old home. As you can see with the layout you cannot tell where the layout to wall starts.
I even have clouds made with pillow stuffing hanging from the ceiling with fish line.
KEEP THEM ROLLING
Joe”
Tips for model railroading:
“A reader recently asked for help in deciding which to use – code 55 or code 80 N scale track.
Since you are asking, I must assume you are aiming for a realistic looking railroad. Let me preface my answer by stating that I model in HO, and I am using code 83 vs. code 70 and code 100.
I think code 100 is too big, out of proportion. I think code 83 looks OK, especially on the main line. However, I think code 70 would look more realistic, especially since I am modeling the 1930’s.
Code 70 should be used in yards and sidings. With code 83 I have had no derailing problems due to size. Code might present problems with larger flanges on older rolling stock.
My suggestion would be to create two dioramas, one using code 55 track, and one using code 80 track.
Other than track, they should be identical, about 3 cars in length and about a foot wide. Use roadbed, ballast, and grass exactly like you plan to use later. Place two similar cars, one on each diorama. Look at them both from multiple angles, and see which looks better in your eyes. Repeat with two engines. Now you can make your own decision.
It also depends on the era you are modeling. If you are modeling an older era (pre-diesel, for example) then light rail may look better. Also, using code 80 on your mainline and code 55 for sidings, then the contrast would contribute to an overall more realistic layout.
Once you are finished with the diorama, add a back to them, add basic scenery, and use them to display your models.
Keep on training,
Carl in Kansas”
“Good day Al!
After getting back into model railroading after patiently waiting for 34 years, I was shocked to see how much the model railroad hobby had gotten expensive.
Thankfully I had purchased over 300 feet of atlas track and 36 switches back in 1983 and it was boxed up until February of this year when I started by long awaited layout. So, I was determined to make use of this track versus wasting it and purchasing something new.
As I have been re-educating myself on all the new stuff out there, I have also been wanting to make this affordable and see what options are out there to some of the more “expensive” items.
Now, first, I totally support quality products (as I have been in electronic retail & repair for more than 30 years with a brick and mortar store), but I feel there are times and situations that a cheaper alternative may be more fitting. I have been looking at a few inexpensive products I found for N scale and thought for a few bucks, lets see if they live up to what they appear to be and if not, I have learned my lesson. I have sent you photos of 2 products that I found and ordered and have been pleased and there is more to come.
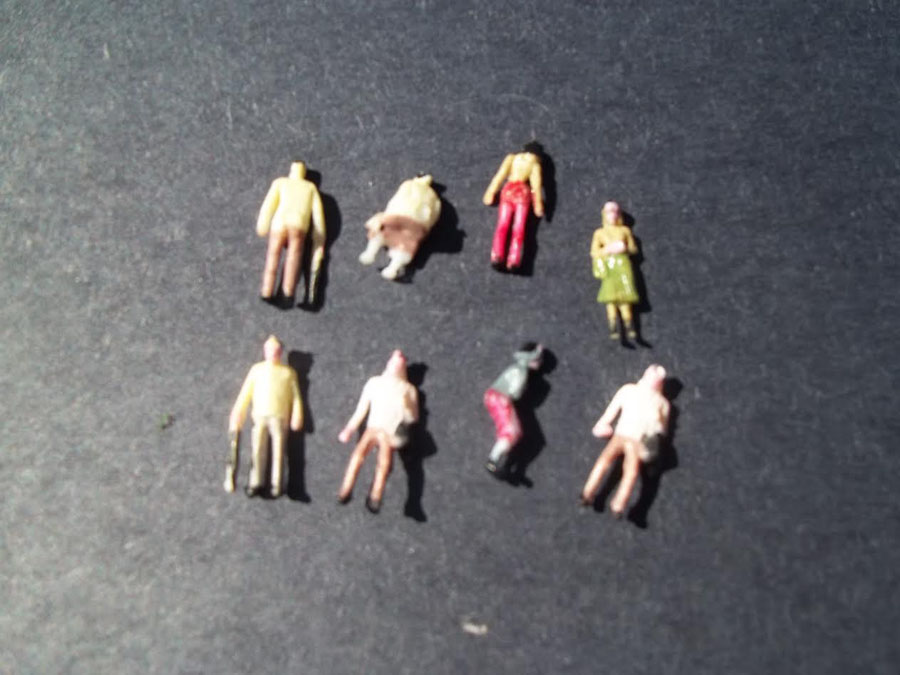
I ordered a package of 100 painted people that was labeled as 1:150 scale (Europe N scale size). I just received them and I am very pleased with these. I measured many of them and they range for a person in the real world being 5’6 to 6’6, so actually they are not bad at all. Most were in the 5’6 range. Some people are sitting as well as standing. I thought this is a great bargain for $13.99.
I also have been making my own trees which has been fun, but again wanted to see what options where out there.
I found 24 trees for $5.99. Well, I must be honest, they were a little cheap looking out of the bag but I did give them some dressing up with spray adhesive and various colors of shredded foam and in my opinion, they now look pretty good for a mid to background area and especially mixed in with other trees. They are plastic and the trunk and limbs are brown but I plan to probably paint the main trunk a little to tone down the dark brown color.
They measure out to 2-3/4″ tall (1″ of that being the trunk) so in the real world this would be a 36′ tree…well within scale. This was a bargain for basically 25 cents a tree!
I have more items on order and will give you my opinion on those when they arrive. I wanted to share this for those who may want to try to save some money and have some cheaper alternatives where the more expensive items may be to far away to be appreciated.
Thanks,
Kevin”
Tips for model railroading:
And I got this in from Joe. It’s a problem that crops up time and time again on the site:
“Alistair,
I have been reading your messages and have found them very helpful. I am a Jamaican and am building an HO scale railway with some unique Jamaican scenes. As I advance I intend to send you some photos.
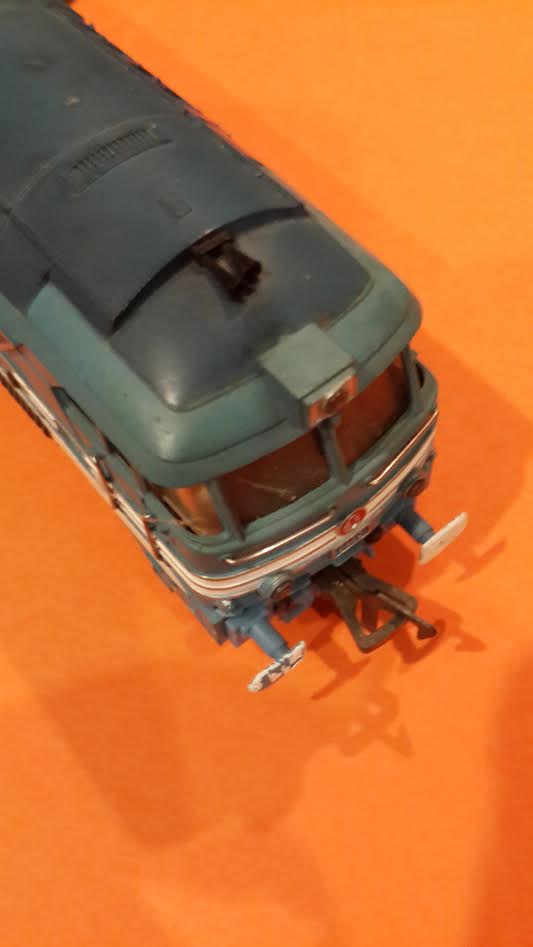
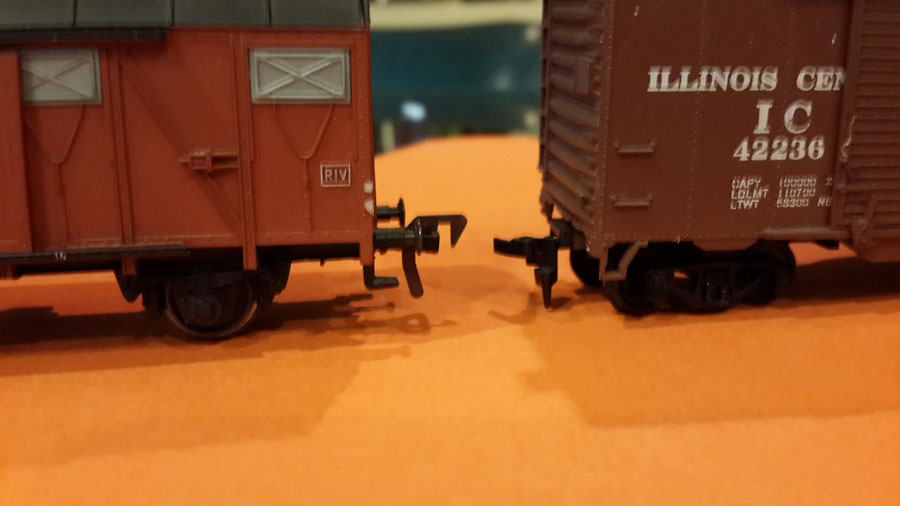
For now I have an immediate concern. I have acquired a set of very old Fleischmann engines and coaches, made I believe in Germany probably 30 or 40 years ago. I am adding to the collection by acquiring some contemporary engines and coaches and would like to interchange the wagons & coaches, but the couplings are incompatible.
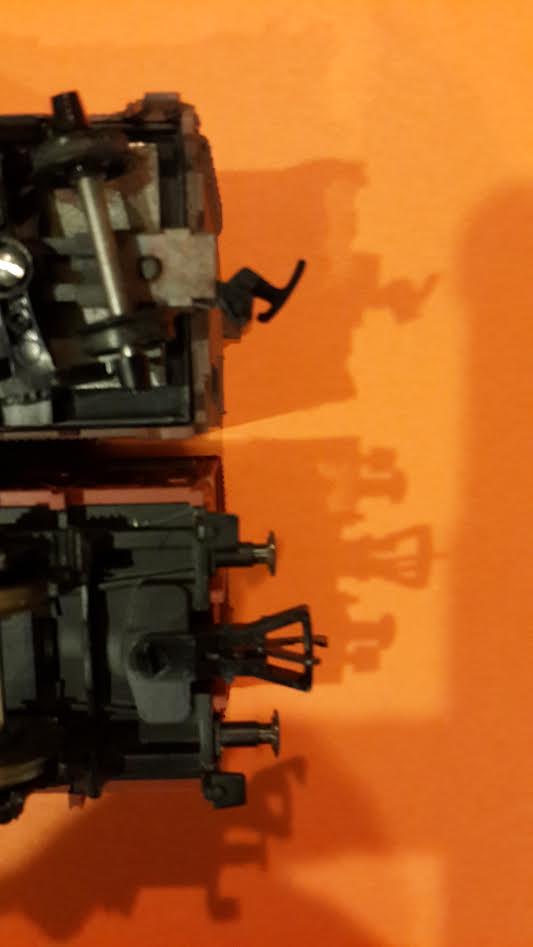
I have attached 3 photos showing the difference in couplings. Can anyone help with a solution to this?
Thanks,
Joe”
“Hi Al–really enjoy your daily e-mails. Here’s something that I’ve been thinking about for a long time (but haven’t taken any action), and was wondering if any of your viewers had done it:
A 3 gauge layout–the gauge closest to the viewer would be O, a little farther back would be HO and in the distance it would be N. The idea is that the further you are from anything, the smaller it looks.
In my ideal layout a train would begin at the O gauge station, run around and disappear into a tunnel or something,go into a reverse loop and stop.
Meanwhile out from the other side of the tunnel would come the same train in HO gauge which would then do the disappearing act at some point and resume as N scale.
Each of the gauges would have a hidden reverse loop and automatic stop/start relays so after the N gauge makes its rounds, it would reverse itself and return in the opposite direction and of course when it goes into the hidden part of the layout, would turn into an HO version running in the same direction.etc.
Theoretically it sounds kind of neat and I don’t think it would be difficult to construct. As I said I’m just wondering if anyone has already done that and any problems they encountered.
Regards & keep up the good work
Terry”
Can anyone help Joe? And I know some of you out there have done exactly what Terry is suggesting. If you have, please do send pics.
Loved Lynne’s missive – I couldn’t agree more, it’s all about starting.
And poor old Joe, moving and having to let his layout go. Sadly, I get too many mails saying that!
Some more tips for model railroading and layout pics next time.
That’s all for today folks.
Please do keep ’em coming.
And if you feel like you’re missing out on the fun, the Beginner’s Guide is here.
Best
Al
PS More HO scale train layouts here if that’s your thing.
Need buildings for your layout? Have a look at the Silly Discount bundle.


For Joe…
You have a challenge but a fixable one…
Some of your cars have a hook and loop system that is popular in Europe…
Others have a “Horn Hook” that was popular for train sets in the United States about 20 years ago… Before the patents on Kadee couplers ran out…
One can build cars with one style on one end and the other style on the other…
The other choice is to standardize. Given that “Horn Hook” couplers are getting harder to find I would suggest either seeing if you can find a source for the European hook and loop or else standardize on Kadee (or a Kadee clone)… Given that you live in Jamaica, you may need to find a friend who can ship what you need to you….
Also, Nice tip on building the dioramas to test rail size….
I am more than a bit “old school” and I model in HO also…
I have tried code 70 and code 83 but prefer the robust reliability of code 100. Clever use of paint can do wonders to hide the excess size of the rail… I got that hint from an article in Continental Modeler many years ago… An Australian group was using HO track to represent both “Standard Gauge” and “Wide Gauge” through the Outback… Clever use of paint fooled the eye into believing that one track was wider than the other even though in reality they were the same gauge…
John (California)
Hi Al
I am sure the questions asked today must be able to be answered by your many readers. My point is regarding the coupling question; there are many options on the European market, but the answer may well be to go down the Kedee or clone route, in order to cut expensive imports and excessive postage/delivery. Whatever he chooses I wish Joe every success and hapiness in developing his layout, he should also get some reliability out of his choice of Fleischman, they are very good
Steve
\it depends on your rolling stock. Code 55 will present difficulties for rolling stock with old style (pizza cutter) wheel flanges hitting the ties on code 55, and some newer wheels also. code 83 track looks not too bad, specially if you weather it. Hope this helps
Alistair,
I have a question, I’m a novice, with a large box of HO track, how can I determine what code it is? I have conventional track with plastic ties as well as the newer Bachmann E Z Track
thanks for your help and all the great ideas and photo’s!
Greg
interesting, never thought about in that way.
anyone know where I can purchase a HO scale mine “donkey” or mine locomotive. It needs to be operative.
Re: Rail Size I am 94 years old. I need code 100 for re-railing. and Paint is the answer for “hiding” the size.
i went and used a tape measure to measure track. the new ribbon rail is actually bigger then code 83 ho. this rail is in use for most main line starting in about late 60’s and early 70’s. rarely is the big ribbon rails used on anything except the main lines the old jointed track is still on almost all siding fiddle yards ect. If you really want a photo realistic rail system mixing a set if different rails sizes would be very similar to real trains. the steam era trains used a much smaller code rail then the later diesels and also much shorter cars.
As to trying to determine what code track you have. The code number is the height of the rail. There are relatively inexpensive micrometers or calipers for sale that can be used. Code 100 track is .100 inch height regardless of the gauge. Code 70 track is .070 inch height regardless of the gauge. Hope this helps.
Norm in York, PA
Joe,
The 11:07 post basically addressed your coupler dilemma I would suggest you use the body mounted knuckle couplers. Look into the McHenry couplers, as they make various ones for passenger cars. I have had success changing the hook and loop like you have to the McHenry couplers.
Hello Al
I’ve to the point of designing the Railyard and have limited space. I’m wanting to put separate power so it can be run separate from the 2 main lines. However I also have several spurs and sidings. I know these also are separate.
The question is can I put something to work the Railyard and not have power to the spurs and sidingsand then switch to the spurs and sidings having the yard cold without having to have separate power transformer for each one?
Reason I’m asking as I’m running straight DC and the power transformers are for engines over 50 years old and I had to purchase 2 on special order. Cost is the factor and don’t really want to buy any more if I don’t have to.
Any suggestions?
Thank you and many blessing
Chris L.
Since I decided to get back into the model train hobby (2yrs ago), I have purchased all of my so called needs over E-Bay. I have yet to actually finish a layout, and I have accumilated more then enough stuff for several layouts. (over $2000.00 worth).
If you watch what you are buying, you can get some neat stuff. Trees, people, led’s, and such can be purchased from guys on e-bay in China, for nearly nothing and the shipping is free. Figure that one out ! ( Shipped from China—delivered to your house by the postman, and no shipping charge !
Nearly all of my freight cars are unused, new, or in like new condition. You can purchase built up bldg’s. for less then ones that you have to assemble.
When I was a teen I had an American Flyer set, but graduated to HO gauge. Due to space, etc., I now have a (small) N gauge set, which I hope to run in the near future. My question is this: What do the various rail ‘codes’ signify (I’ve never been able to find reference to this question), and do the codes mean the same thing in ‘HO’ and ‘N’ ?
Herb – Long Island, NY
For Kevin
PG Hydrangea flowers when dried and the petal parts stripped off make excellent bases for trees using spray adhesive and ground foam. You are trading labour for money but the results are great. Many weeds work just as well.
Have you seen the packages of 50 cars and the package of 6 metal buses on Amazon. Watch out for very expensive delivery charges on E-Bay.
Alistair has also posted a multitude of great money saving tips. I am in agreement with you that the hobby has become for too expensive despite the fact that companies now want kids to get involved.
For Joe,
I’m a late starter, and a pensioner, so funds are a bit limited. All my rolling stock was bought second hand on ebay, most sold as “Not working, for parts or repair”. (All of it is now running except for one Locomotive I used for parts to fix another similar loco.)
The point is that all this stuff had a multitude of different couplers, much the same problem as you have, but quite a few more different sorts of coupler.
I decided in the end to standardise by fitting everything with Kadee couplers. The advantage of these is that Kadee make a range of coupler heights and lengths, which makes it fairly easy to find one that will suit just about any vehicle that needs one. My stuff are now all fitted with Kadee Whisker type couples of various sizes.
Buy the Kadee #206 coupler height gauge at the same time. They don’t cost much, and they make it very easy the set up all your couples to the right height.
Hope this helps,
Cheers,
Maurie
a few great questions and answer this has really helped me out I am still learning so I cant give any advise but keep it simple keep the costs down by making all your own stuff and really enjoy don’t get serious.
Yes, the code numbers apply to the real size of the rail, regardless of what scale you’re working in, so code 70 say, is always smaller than code 100 no matter what the gauge is. And yes, I have had issues with some of the old “steamroller” heels on eg early Lima stock on my code 70 HO layout, the eep flanges hit the chairs.
Rod
Now where did you get 100 painted people for 13.99?
Hi Chris L
You can certainly you can put power through to your yard sidings and mainline, just make sure you have a separate switch on each power supply to the track, as you gain more experience you can group the different tracks you may want at the same time through a group switch. Play around with the different combinations Chris and enjoy the hobby
Steve
I want to use the paper printout buildings that Al and John promote on my o-27 layout with S scale instead of full o-gauge. Can I use a regular inkjet computer printer? Does someone know what is the largest per cent enlargement you can use and get things to fully print just in case? I guess I could experiment and let other folks know but why reinvent the wheel if you don’t have to.
Joe. I see horn couplers and fleischmann European. You are mixing both which is difficult as neither have an nmra housing. The fleischmann engine is a sncf from the 1960s all metal and very powerful. I would purchase some fleischmann passenger or freight cars for this. Fleischmann did make a conversion coupler to fit to the hook and loop in the sixties for their American prototypes but from past experience was very in reliable. You can not fit a kadee to a fleischmann reliably and fleischmann couplers are very reliable. Fleischmann also makes an automatic uncoupled track
Where did Kevin find trees for 5.99?
For the question about using different scales. This very idea was used at last years NEC model show England . I think it was Swiss, but it must be filmed somewhere on the net
Just a reminder that in N gauge only code 55 has single & double slips. Also angle of points is different between code 80 & code 55.So your desired layout may control your decision on which track to use
Brian. Torbay. UK
In response to the questions of where I purchased the trees for $5.99 and the 100 painted people for $13.99, they both came from AMAZON.COM. The trees are by MagiDeal….MagiDeal 25pcs Miniature Plastic Trees for Model Railways N Scale Train Layouts 1:150 – Trees were actually $5.48 and there may be a little tax and the shipping is free. The People are by SZZJ-INC…1:150 Scale N Gauge Model Painted Figure for Street Building Train Layout (Pack of 100) and they are $13.99 with free shipping. Both are China imports and will take several weeks to receive but well worth the wait. Do NOT order the other painted people on AMAZON that is cheaper…the paint is poor! I have cars and light poles on order and will advise if these are worth purchasing.
I also purchase the cheaper “accessories” such as trees and figures, etc. from other sources, e.g China. Not because i need to but I refuse to pay rip off retail prices here in Australia, or even online for things that are hugely inflated in price. I know business is business, and profits have to be made, but model railway accessories are as bad medical supplies…doesn’t cost that much really to produce, but because people “need” them, manufacturers and retailers stick their prices right up, because basically, there is little, it any decent competition. The cheaper stuff can easily be modified to look as good, if not better than the brands that many rave about. The cost of Woodland Scenics at some retailers for example, is beyond belief. If they were selling motor vehicles they would be investigated for price fixing or collusion with other sellers, for having an ongoing monopoly on certain products. “A bit cruel” I hear people saying? Well try getting decent prices in Australia. And excuses like “oh we have to import and pay extra for Customs” etc. is a cop out. I imported goods from overseas for many years, and the cost is negligible, and does not justify the huge mark ups. Greed is a word that comes to mind, due to the specialised area goods are aimed at.
Hi gang, thanx Al for putting all this great info out there for us to learn from. As for choosing track gauge, nowadays my enjoyment of this hobby is watching trains go round and round. Code 100 works well for me, fewer derailments, easier to put rolling stock on tracks, easier to work with.
Terry, google “disappearing Lionel train”. It is an old article from Model Railroader. A long train goes into a short tunnel and doesn’t come out for a few minutes. You should be able to adapt the plan.
The way a layout should be- fun, anything goes…
Of coarse everybody knows you can use Crystal Clear or even Elmer’s White glue and a tooth pick to stretch a window across anything. Meaning locos, buildings, cars & trucks… looks very good and is transparent enough imho. Seems to have the same stretching adhesion, traction and thinning characteristics as soapy water and the bubble pipe used when a child.
Regards, Rich
you guys are amazing
Your not so bad yourself Kramer.
To Chris Leseberg:
For DC wiring, all you need is several toggle switches to control the routing of power to your rail yard and sidings. You can find them fairly cheap on Amazon. You can even provide a separate switch for each yard track and siding, depending upon how finely you need to control operations. Or, if all you want to do is have either the yard or the sidings powered, but not both at once, a single center-off DPDT toggle switch could be used to route power to one or the other. The “center off” feature allows you to not have power to either one if you’re busy running trains on the mainlines.
To Everyone Else: Great work guys! The “code” of track rails is simply the height of the rail in thousandths of an inch. Hence, code 100 is 100/1000 or 0.100 inches high. Special rail joiners can be used for joining code 83 to code 100, etc.
Looks great.!!!!! I hope mine turns out good.
I love the water
Love the lake and mountains backdrop!
very nice trestle work.
To Chris Leseberg
I run O scale, like Will in NM wrote you can use toggle switches to cut the power to any area but you need to have insulating pins separating the different sections. I’m assuming you are not using DCC. I’m not but each section needs to be powered. It’s a lot of wiring but it feels great when you see it work the way you envision it.
To Chris Leseberg
Like Will in NM said you can use toggle switches to cut power to any section but you need to use insulating pins to isolate these sections. Makes for a lot of wiring but if you’re not going to use DCC which I don’t, ( I run DC on my O gauge set) it’s part of the fun when you get it to do what you have envisioned.
Terry,
I would think a series of “dog bone” tracks could be made to work. Perhaps just some loops with the train to be hidden behind buildings or scenery. Upon stopping the next smaller train would activate. Clever staging areas would make for several different trains.
DCC would probably make short work of the control
of stopping and starting the trains. The bad news is it’s going to take a lot of room. If that was the sole purpose of your layout it might be accomplished easier. Trying to cram all the loops into a layout to operate would probably be a pain.
Good luck!
Cheers
Terry