Cal’s been in touch with his HO track layout 4×8 – a very popular size.
“Alastair
Here’s my layout so far.
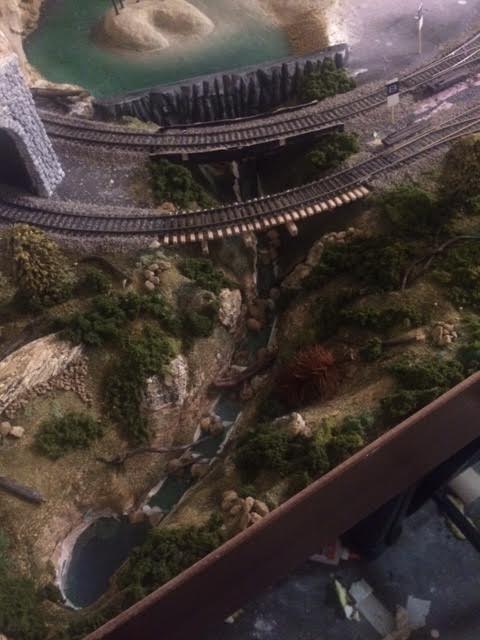
It’s a 4×8 HO scale and everything is scratch built down to the flocking except for the trees. Made my own flock, rocks, bridges, everything.
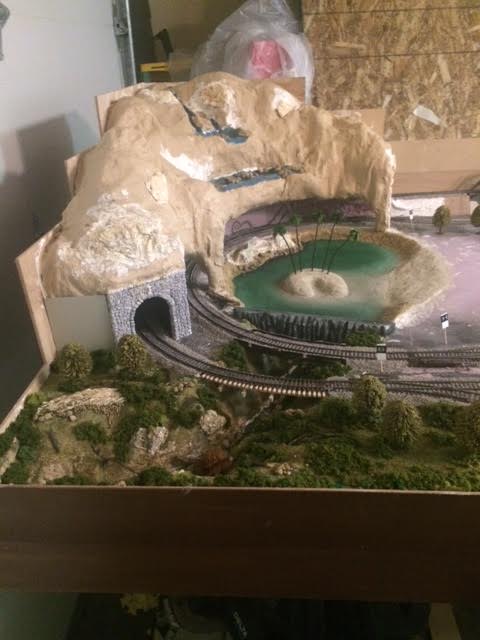

Here you see what will be a cascading waterfall cantilevering over the tracks in which the train will go behind. The waterfall cascades into the pond in which there will be a shipwrecked Gilligans Island SS Minnow on it with 7 figurines representing the castaways, a lurking monster in the waterfall and fishermen of course. The pond sits behind the dam which forms the stream and gorge.
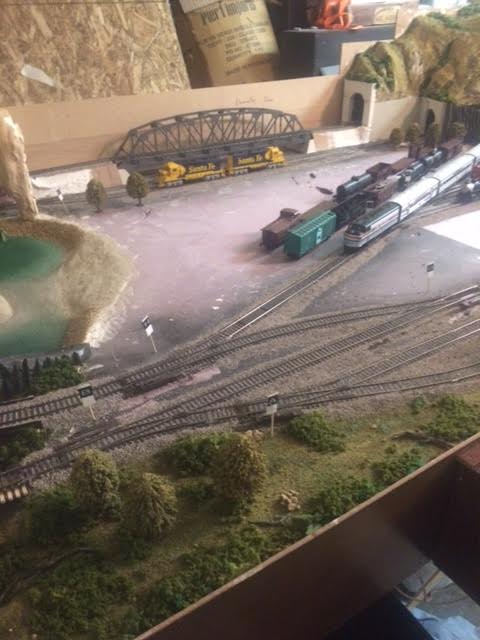
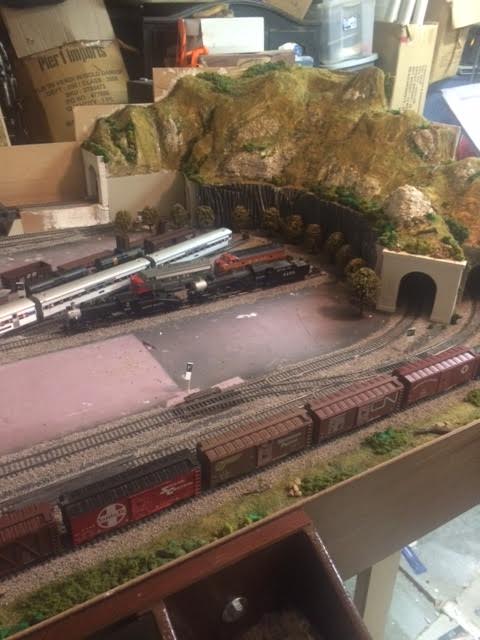
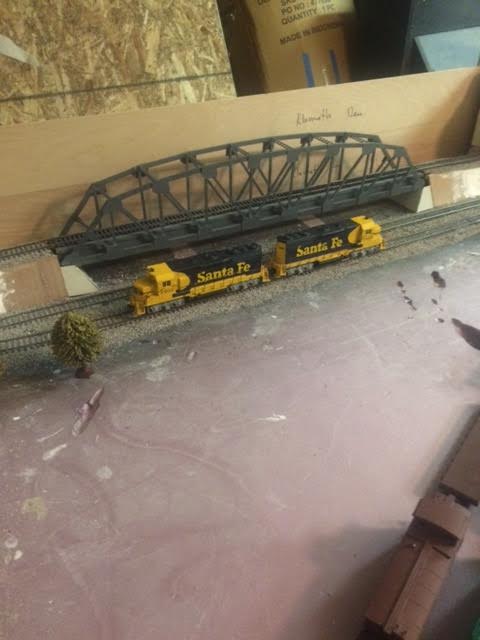
Here is the bridge I made from balsa wood.
I have some thoughts tho. I didn’t allow for a big enough yard because I thought it would be too cluttered by the time I added buildings and such. I don’t know just yet. I’m making all of this up as I go along.
I’m still considering adding a branch line where you can see I have cars sitting there with no tracks.
Anyway, I will send a video when I can and I will continue to give updates.
Any helpful suggestions from your readers would be a ginormous help.
Thank you
Cal
Oregon, USA”
A big thanks to Cal for sharing the start of his HO track layout 4×8. Can’t wait to see the next update.
Now on to Danny:
“I thought that you might find these photo’s interesting.
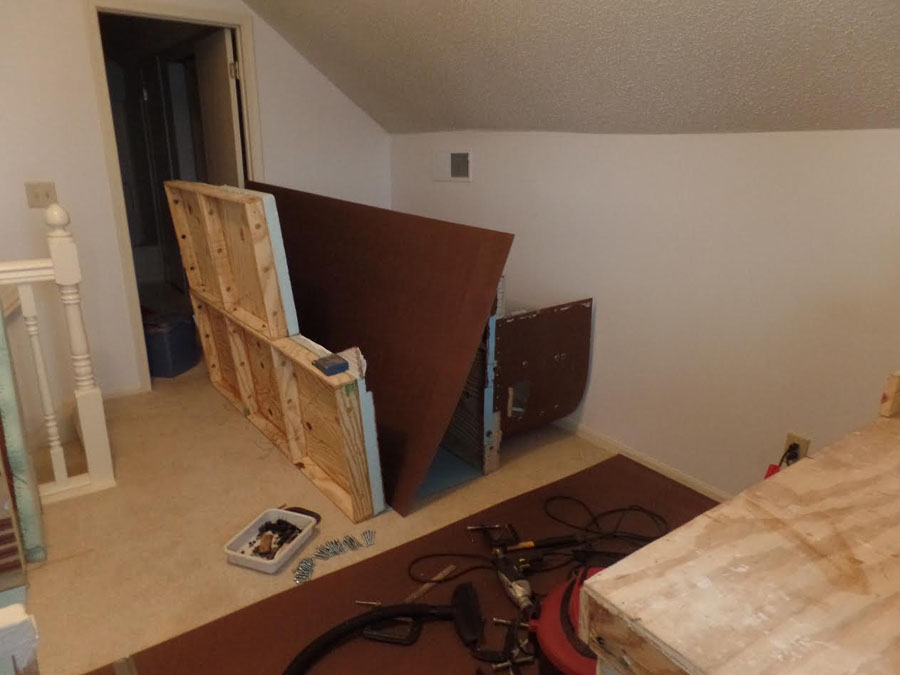
In the past I’ve commented on making your railroad with modules. I had a 22 by 12 foot railroad started in our basement when my wife decided we needed to move to a condo. We bought one with an extra 15 by 15 foot upstairs bedroom, closet, and bath.
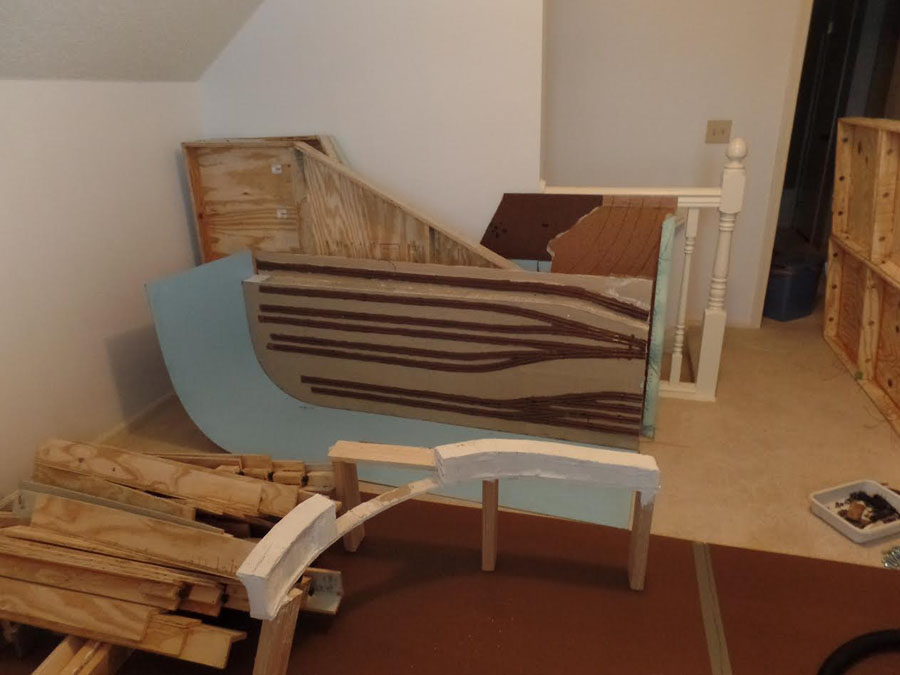
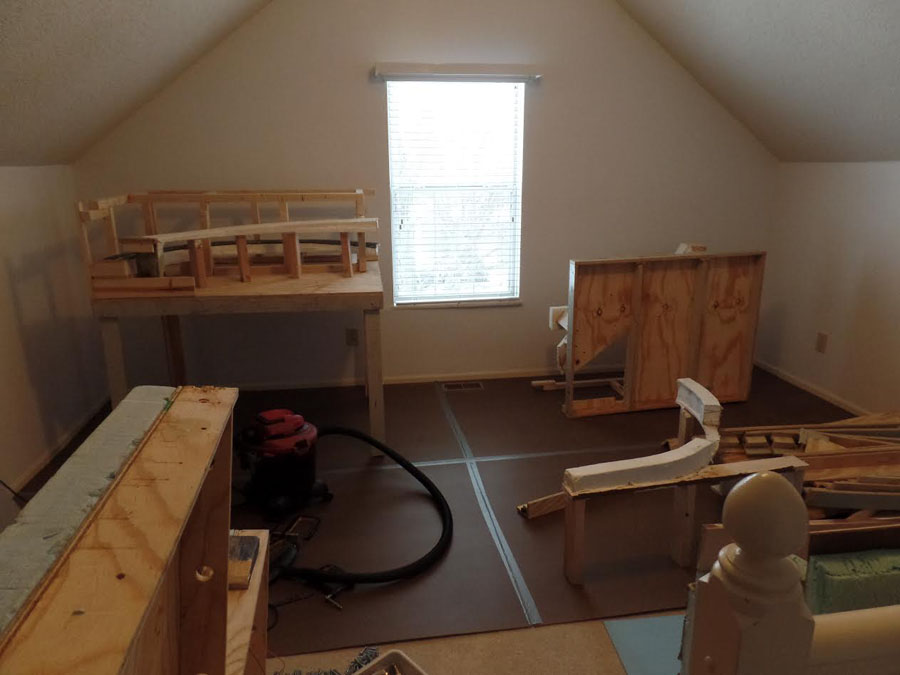
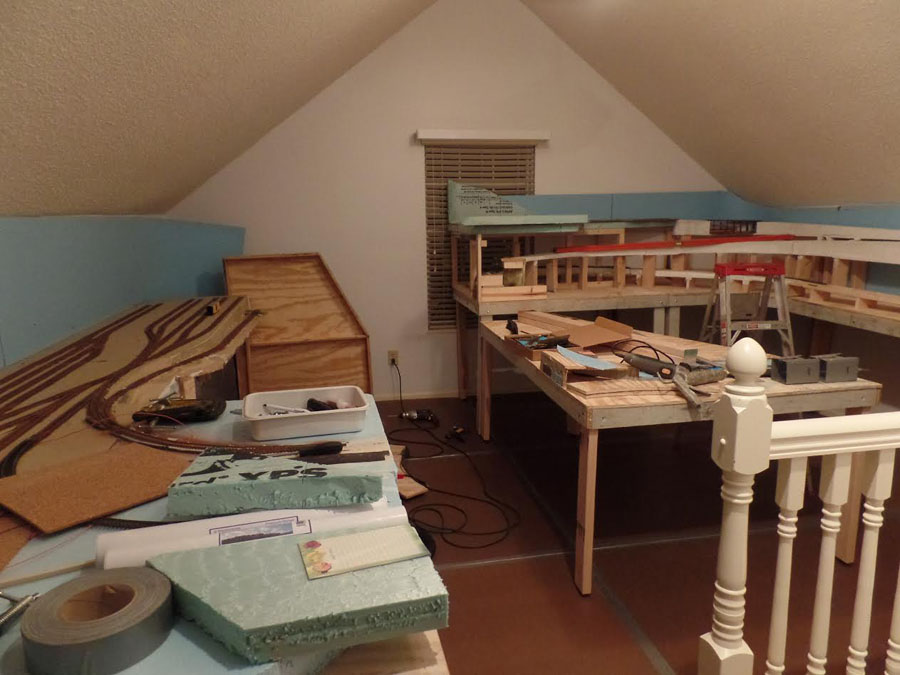
the first three pictures show the parts as delivered. The forth shows them in place. It was putting a puzzle together. The new layout is much different then the old but all modules were saved.
The photos show a new 2 foot square module in the corner, a 2 by 6-6 in the front left and a 6 inch piece added at the base of the angular section. A new corner section is shown next. Lastly the layout is shown in its current state. Much is left to go, but modules saved much time and money.
Danny”

I get asked a lot why I post ‘very unfinished layouts’ – and the simple answer is because it’s all about making that start, which brings me to Mike:
“Dear Al,
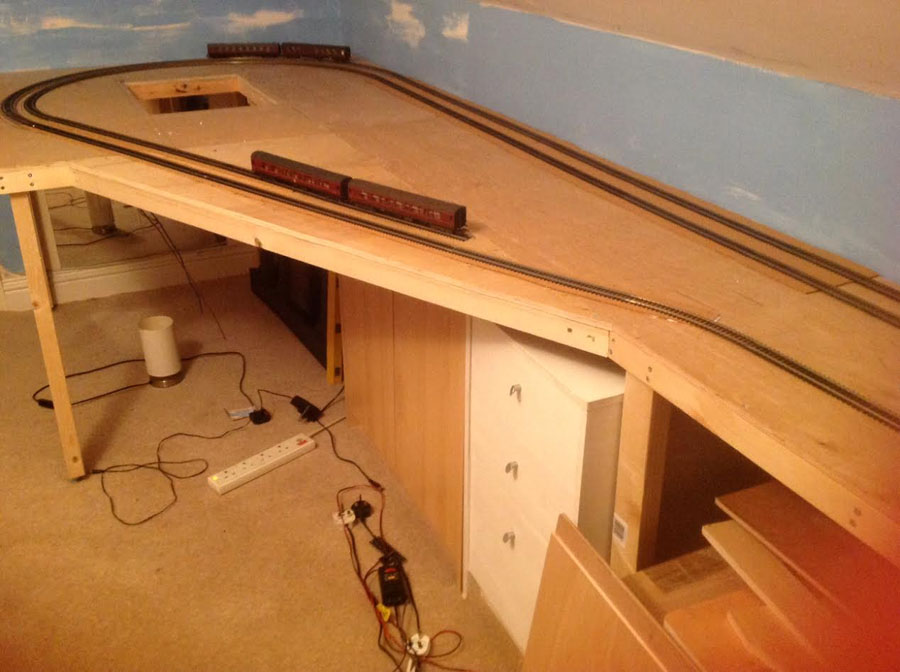
I never built a train layout before, even though for two years when I was 35 I managed the model train department of a large Model and sports shop in the north of England. 12 years ago I decided to build a layout in the loft of my bungalow after having it fitted out with a new floor, two velux windows, insulation and a wooden loft ladder.
I managed to build almost all of the base boards but no further . My wife was diagnosed with terminal Cancer and died within the month. I found that I could not live in the house any more and moved to an apartment. The woodwork had to be dismantled and consigned to a Skip when I sold the house. The track, locomotives, rolling stock,DCC control system had to be packed away in boxes and put in store.
7 years later I met a lady through an online dating agency and we became an item as they say. I sold my apartment and moved in with my new partner, taking with me all of the model railway gear and my precious tools. These all lived in the garage for 3 years until last September when we bought a house in Essex by the sea.
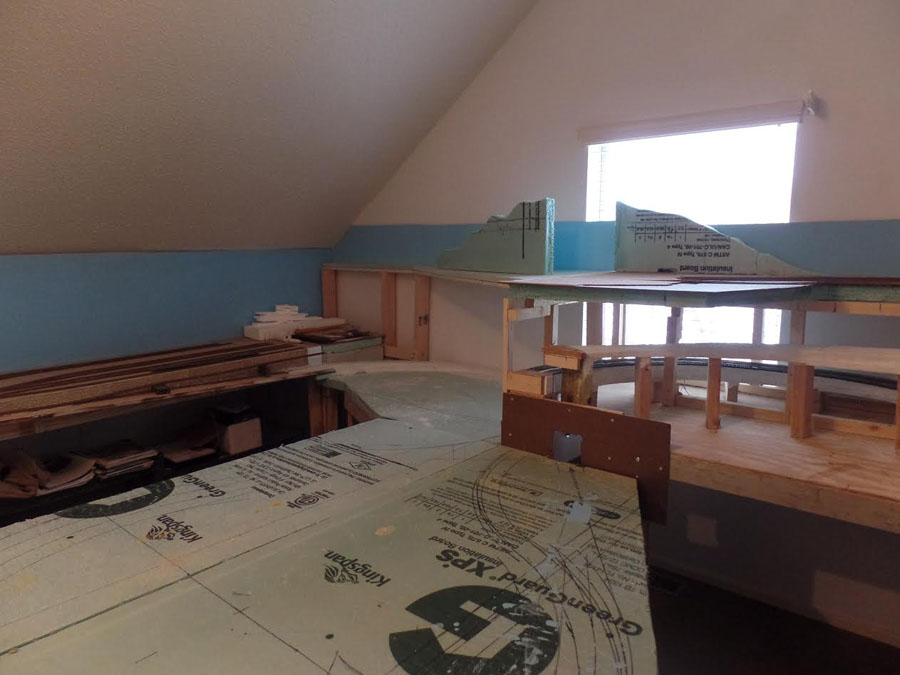
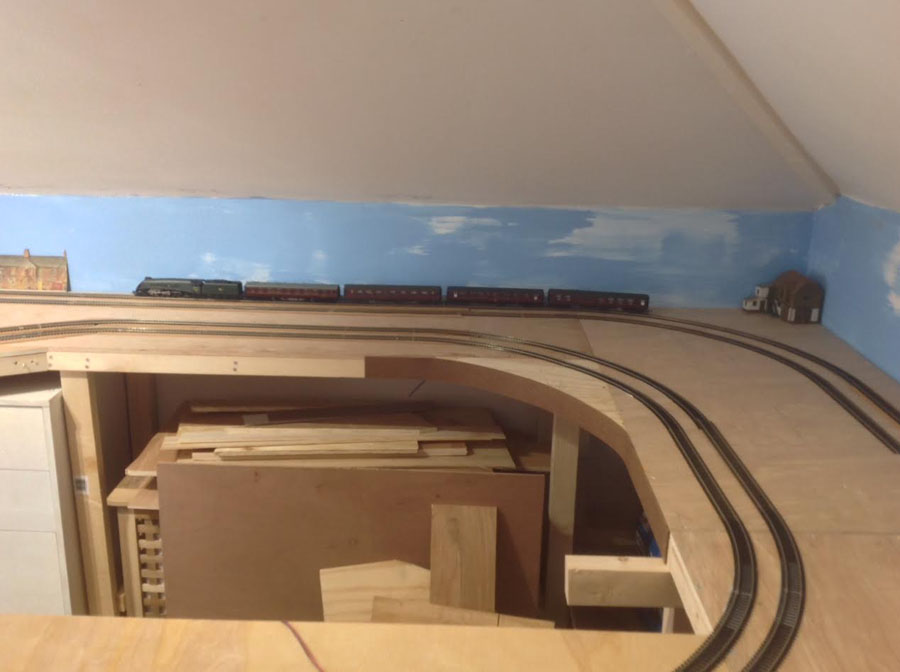
This bungalow had been kitted out with two upstairs loft rooms accessed by a wood loft ladder. Both rooms fully insulated and velux windows. At last I could start again and I am well on the way to build a large 12 feet by 15 feet layout . Track is now going down and I look forward to many hours of modelling. In the end age will stop me. I can shoot up and down the loft ladder well enough at the moment but in five years I will be 90.
I have this time built the layout in sections bolted together and the power bus will plug together so that dismantling the layout will be possible and each unit is small enough to get down the loft ladder when the time comes.
I have recorded the building process in pictures and I enclose a few.
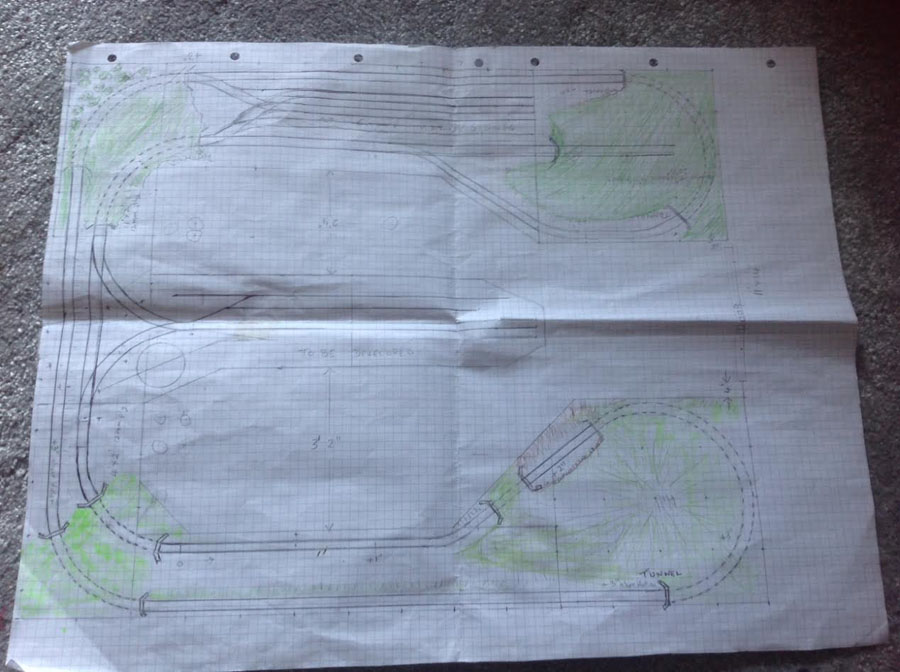
One problem that cannot solve involves the triangle junction that connects the folded oval to the terminal station. I have purchased two Hornby reverse loop modules, but I,m not sure where to install them.
Can any one help?
Your sincerely.
Mike”
There’s something about someone talking through their layout that brings it all to life. Can anyone help Mike?
That’s all this time folks, a huge thanks to Cal for sharing his HO track layout 4×8.
And don’t forget the Beginner’s Guide is here, if you want to follow Cal’s lead, and get going on your layout.
Please do keep ’em coming, it’s getting a bit thin on the ground this end.
Best
Al
PS Latest ebay cheat sheet is here. A lot of HO stuff at the mo.
PPS More HO scale train layouts here if that’s your thing.


Nice job, Cal. I am working on my layout as you are: making it up as I go along. I find it less like work and more fun if I don’t follow a preconceived plan. Cheers! NJ Mark
https://m.youtube.com/watch?v=0LPOC43nJMI
Sometimes less is more when it comes to laying extra tracks, on the full size railways there are often constraints of siding lengths, what types of rolling stock can use which lines, etc., which makes you plan ahead or need extra shunting to form up the right loco on the right train for the customers. At Bridgnorth for instance the main siding only holds six coaches in clear, but we often run eight coach trains, so two have to be split off and stored in another siding also used to store some main-line diesels, it makes for a right pain in the neck full size but all the more fun in miniature.
Rod
Very nice. The fun is in the building. What did you use for your base board?
A very good layout, with interesting track design. I am curious. Did you use 18″ radius and 15″ radius?
Nice piece of work for the size Cal. And on a budget too. Good job.
Steve R UK
Very nice. My grandson and I just got started with our layout the other day. I know he will enjoy watching this video to get ideas.
Great design started. Like that you’ve made most of the materials yourself. It is a lot of work but makes it more meaningful and gives you great satisfaction to look at the end results. Keep up the great work.
I would have liked to see trains run, because the devil is in the details, and erratic operation is the bane of model railroading.
I enjoy seeing these American train layouts. Other than for that Berkshire steam locomotives (my favorite steam locomotive) N-Scale model back about a year or two ago, I am wondering whether anyone has a model HO Berkshire locomotive layout? I need to take my HO layout out of storage and re-assemble it, as mine layout goes back to the early and mid-1980s.
This is a beautiful layout! I am looking for a good small space layout. Can you send me a drawing?
Thank you. Arthur L. Moon, Waynesville, NC
Be care full of the too much track in a small area , it is easy to over do on a small base and using a large scale bigger than N or Z scale !
Even N scale can get cluttered if you are not watching how close you set mains
and sidings .
George
What materials did you use to form your mountain
nice work!! keep sharing.. show us a long shot AND TRAINS RUNNING!! thanks..
All in all very nice for the size.
One comment from “the director”: If you are using your phone for your videoes please hold it horizontally. You may notice that movie screens and tv screens are not vertical. Go for the BIG picture!
Thanks for your consideration!
Beautiful layout Cal. Keep up the good work. Hopefully we’ll see a full color, everything rolling video when you’ve completed the project.
This is the first time I have seen a tropical area on a layout ! Gives me ideas !
Good detail. loved the bridge. excellent job.
great video very pleasant to listen to. great size and I like the layout nice and simple thanks for sharing.
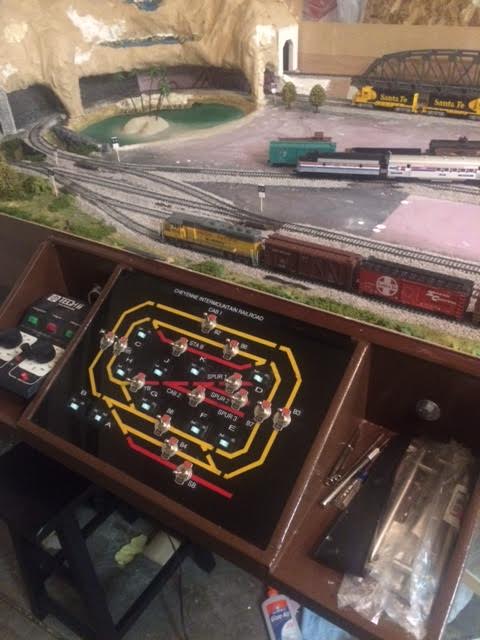
Great stuff and I really like the control desk layout.
Nice layout. I like the details. Am using the same method no plan plan and it’s fun.
can anyone tell me how small a track can be used for an HO scale train? How sharp a curve can it use? I wish to build a small train track with a Christmas village inside it. I would then enclose it an use it as a coffee table. So, how sharp an oval can I use for HO?
how sharp a curve can an HO layout use? I want to build a track that would fit on a coffee table or such.
Thank you everyone for your comments and suggestions. I am planning a complete video in the next few days. Explaining everything from the bench work to road pacing and buildings.
I used plaster cloth over cardboard webbing for the mountain on the right. I used spray foam with plaster cloth over the mountain on the left. I needed to make a cantilever of rock so I used a water noodle for the form.
I used a 15″ radius. Can’t run longer locomotives is really the only bad part. I do have a video posted with two trains running.
Good morning Al from Denver Colo. i have not gotten your post for 3 days now did i miss a renew date ? If so please let me know i will fix it. ASAP.Thanks and good tracking Burt
Great start. Nice detail too. Hope to see more.
Jim AZ
Thanks for all the detail. I appreciate your pointing out mistakes. I am starting a layout and am a real beginner so your insight is helpful. Continued success.
NJTom now in SC
Cal answered the anonymous inquiry re minimum radius, but for clarity, a 15″ radius will handle short locomotives and short cars (as most freight cars), 18″ probably fits most locos and rolling stock (incl. some longer passenger cars, and a larger radius would not meet the needs of the questioner who wants to put a village inside. My question for Cal: how did you do the waterfall? Did you paint inside some kind of clear plastic packing? (Did I miss a description somewhere?)
Cal: Still photos don’t matter — portrait or landscape orientation is okay; but videos DO matter — PLEASE, orient the camera horizontally, so the image fills the TV screen (I don’t like turning my 80″ display on its side!!). As a person who has spent a career in motion picture and television production, this is one of my pet peeves. To me, vertical video is like peeking at the world through a picket fence, and I cannot watch them comfortably. Bad video. But very good layout — do the world a favor and redo the video in 16:9 mode. The world will thank you for it!
a video of different spots around the layout is of little use if one can’t see the track layout itself – before getting cluttered with buildings, scenery, etc.Still photos of close-up are the same would be nice to see the area around the feature to see how it was integrated.
Suggestion – stop publishing layouts by size if they aren’t accompanied with a drawing of track, switches, etc. THAT information would be more useful for the builders. The most recent email from Cal is nice once you get the tracks designed and laid!
Cal. I’m new. I’m using your layout as a basic start. I’m using the scarm program. What I’m not understanding are the 2 inch riser or high that is marked. Does that mean all track is 2 inches higher then my base? In your pics it looks like it’s flat. How do I build it up? Thanks Eddie from Millen Ga
I have used 18 in. radius for my 4x8x6 L layout The GG-1 does not
Like anything smaller and minimal even grades. The mainline is 18
and the internal can be less for Switchers and shorter stock and locos
I would love to have a print-out of this layout. It looks like something I would love to build.
Cal…..nice layout….great work on the mountain and bridge.
HO the way to go ! Lookin good so far.
The
Critic
Very nice job and you built your scenery from scratch. I used 22” radius curves on the start of the curves and used18” for the rest so I could accommodate a passenger train on the outside loop of my HO gauge layout on a 4’x8’ layout I had in my bedroom as a kid. I regret that I don’t have any pictures of my layout. I could run two train at once and used plastic rail joiners and did blocks system as well and had two throttle packs one for each train.
Due to lack of space in my guest bedroom I have switched over to N scale. I built a 3’x7’ table and have the track and switches but have not started laying track yet.
Making it up as you go along? Yep – I get that. My Quail Valley RR was done the same way. Made it a LOT more fun!
Does anyone know if the Woodland Scenics Just Plug lighting products are compatible with Walther’s Scene Master lighting products, and if so, does it matter that Walter’s only has black wires and Woodland Scenics has red and black. I’m not an electrician, but I’m pretty sure it matters. I wanted to test the first installation before I ran the wires, so I called Woodland Scenics first. The “tech rep” essentially said “don’t know if it would blow out all the lights.and we can’t guarantee it”, and that I should call Walthers. I wasn’t able to reach them, so I thought I’d try here.
Nice Job Cal nice looking scenery well done.
Cal: That’s a wonderful start on your first layout. I like the curves in the track plan and your bridges and trestles look great! Very nice to see someone with such creativity in the scenery. I’m not sure I’d get excited about a Gilligan’s Island scene but it’s your layout, so go for it.
To Rick Hamilton: Generally, lighting circuits don’t care which is the positive and which is the negative wire, so long as they’re all the same. However, with some LEDs, it does matter which wire the resistor is wired into to keep from blowing out the LED. If you have some of each the Walthers and Woodland Scenics lights, it would be pretty easy to do a few experiments using say a 9-volt battery as power source to see which is which on the feed wires. I only have the WS Just Plug system, so can’t answer for the Walthers lighting products.
Will in NM, actually, it does not matter which leg the resister is placed for LEDs, you just need to have one for the LED to survive.
Polarity to the LED DOES matter. Reversed will not hurt anything, they just won’t turn on.
You are right, the just plug series is handy, as the wiring is covered for you, else, pay attention so you don’t let the smoke out of your toys. Have fun!
Looks great.!!!!! I hope mine comes out that good.
Cal, often the “making it up as I go along” stuff ends up being the best stuff! Have fun!