Paul’s been in touch with his very own model train room:
“Hi Al,
I have been receiving your emails for several years now, and found all the hints, tips and suggestions extremely helpful.
I got my first train set when I was about 6 years old in the mid 50s: a Triang R52 Jinty and two carriages. Over the next few years I accumulated several trains and trucks and changed all my standard track to series 3 when it came out in 1958.
By the early 60s when I became a teenager I found other interests, guitars and girls! So the railway went in a box, where it stayed for many years.
It used to come out occasionally and I set it up and enjoyed seeing the trains go round again. And I always had the ambition to have a proper layout some day.
Well now I am in my 60s the time has come. First I went to model railway shows to get ideas and to see how things were done. Then I found your site and learned a lot from it.
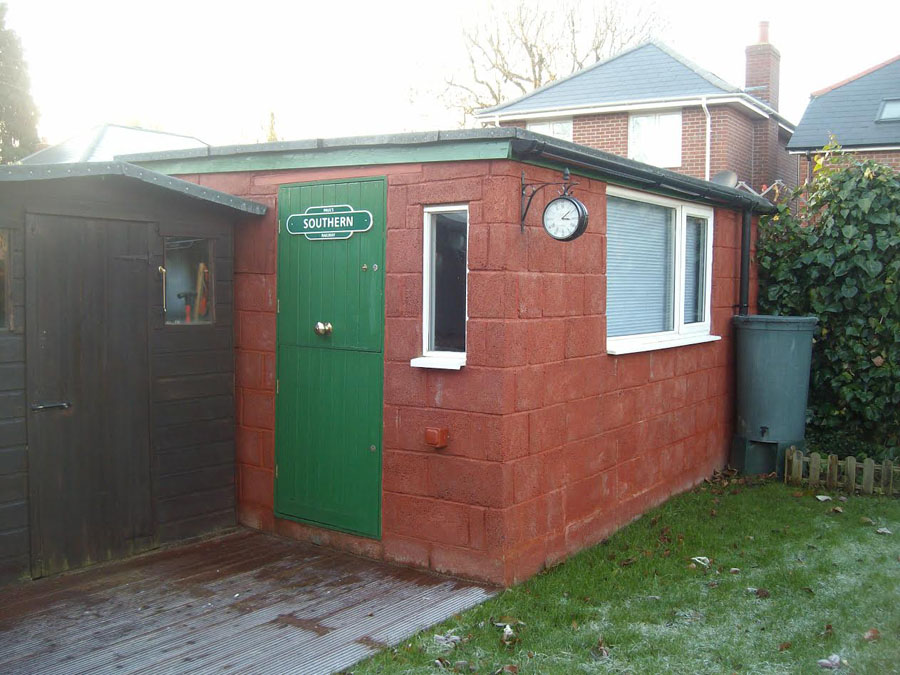
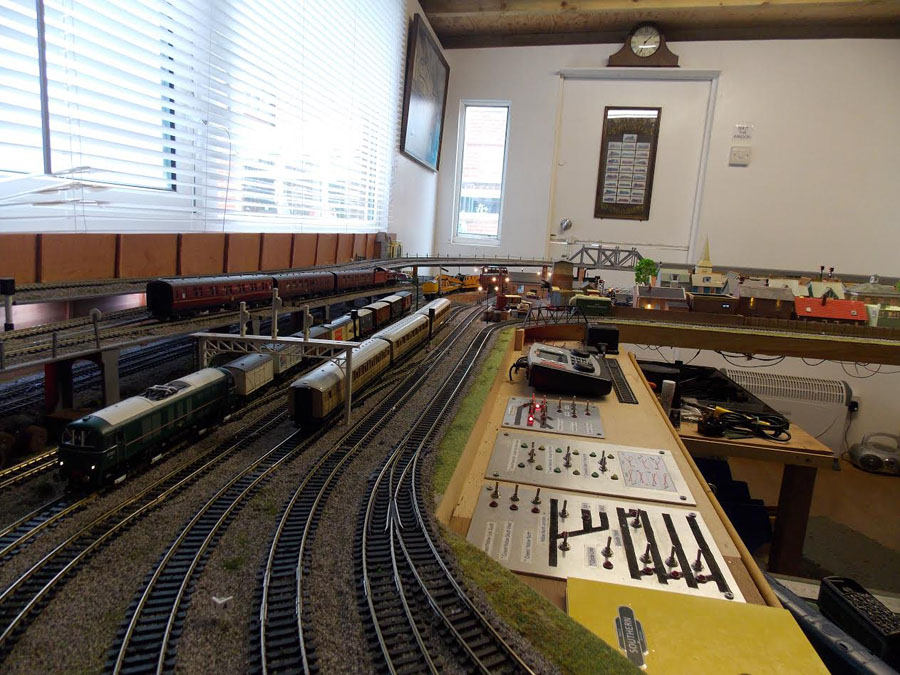
I thought of building my railway in the loft, but realised that in few years time I would probably find it difficult to climb the ladder. So I built a Train House in my garden. This was my first attempt at building so again I had to learn from scratch, by watching and reading. This took a year of slow but steady progress.
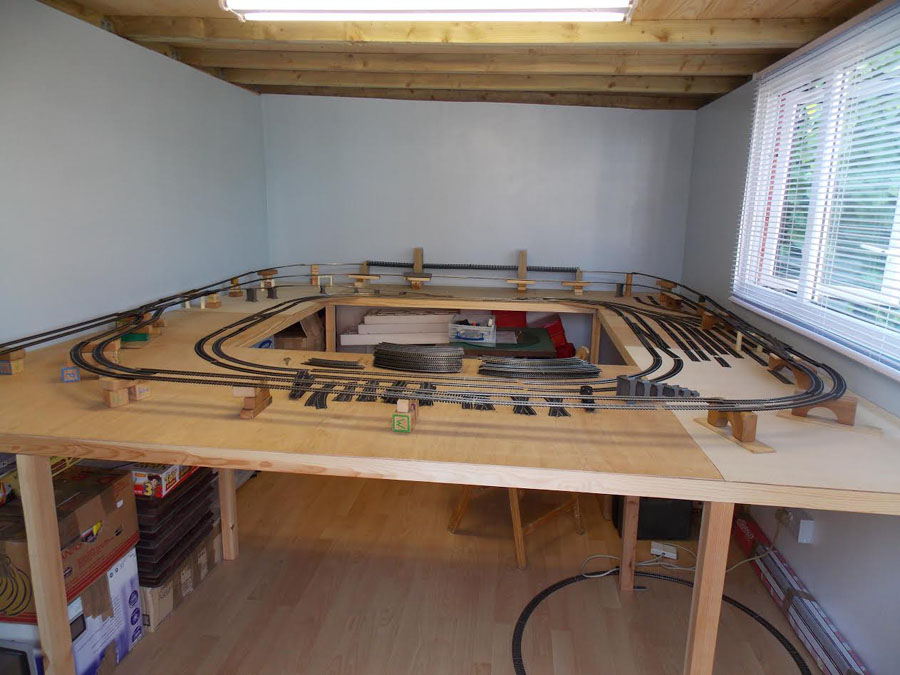
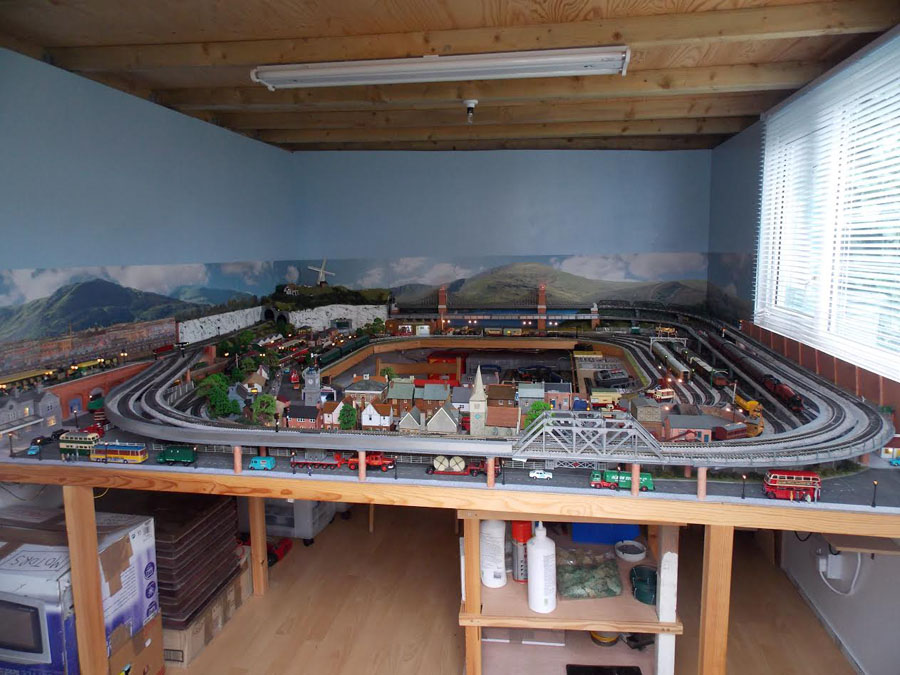
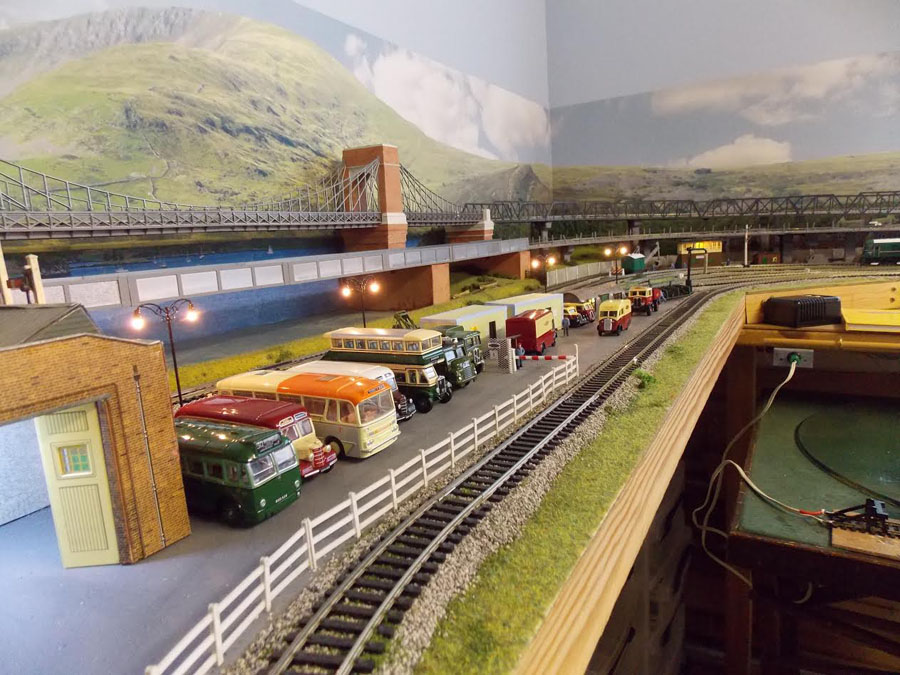
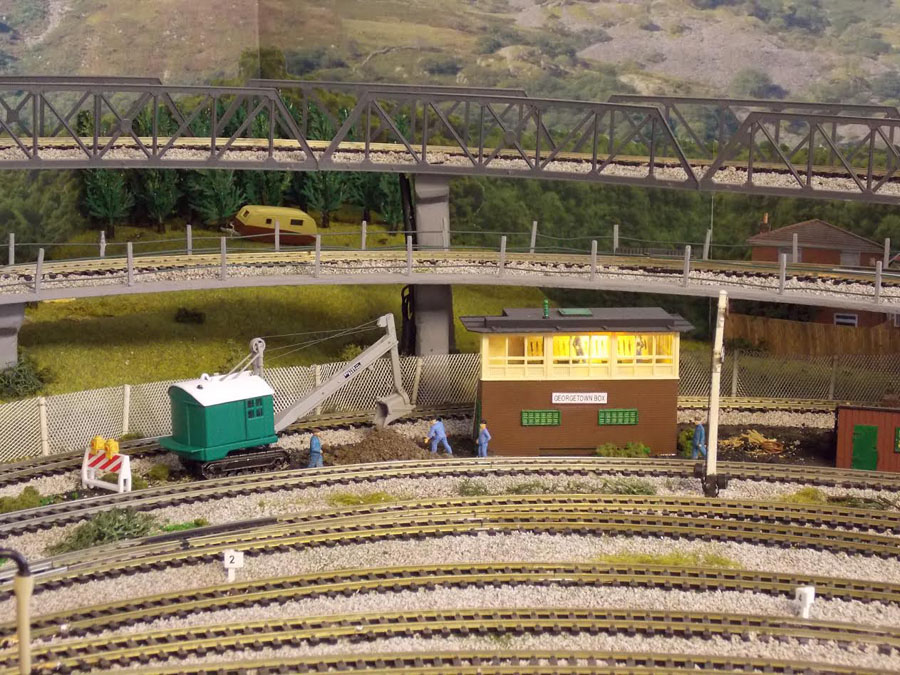
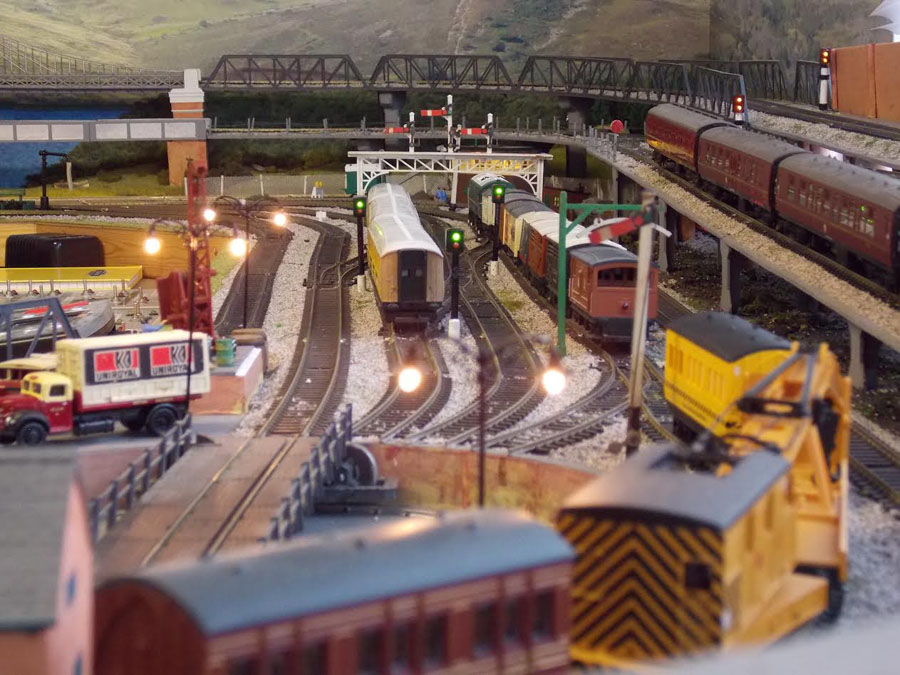
Then the trains. I wanted a circular layout with as many tracks as possible. I thought four would be possible. I also had always wanted a suspension bridge. So that is where I started. I had an overall plan in my head but more or less made it up as I went along, learning all the time as I progressed.
The first decision I had to make was analogue or digital? I had no idea about digital, it seemed very daunting, but seeing as I was starting from scratch it was the obvious choice. I had kept all my old trains for all those years so I wanted to see them working. I had to change all the wheels so that they world go on the modern track and fit them all with decoders. They said I couldn’t be done, but they all work!
When I started was to understand exactly what DCC was and how it worked and then to put it into practice. In hindsight I actually think it is probably easier than analogue, in the fact that all the engines are independent and you don’t have to have a lot of isolating track to run it.
I have finally completed it after several years work, and the addition of a fifth centre track.
This has been a very interesting and exciting project, working out the designs and the electronics and getting it all to work. Your contributors are right to not throw anything away, that was good advice. It really hasn’t cost a lot, apart from the obvious most of it is scratch built and the Chinese lights etc. are very cheap.
The scale is OO. I had aquired a few HO bits and pieces over the years but they didn’t match my old Triang engines.
In all, it probably took about a year to build the Train House and about 3 years for the layout.
As far as the cost is concerned the most expensive part was buying the blocks to build the house in the first place! Then all the plywood for the floor, walls and roof, then the trestle to put the layout on. This of course was all new, But in all no more than about £500.
As for the layout itself, I had a lot of track already so I only needed to buy a few extra bits and some points, mostly 2nd hand from eBay.
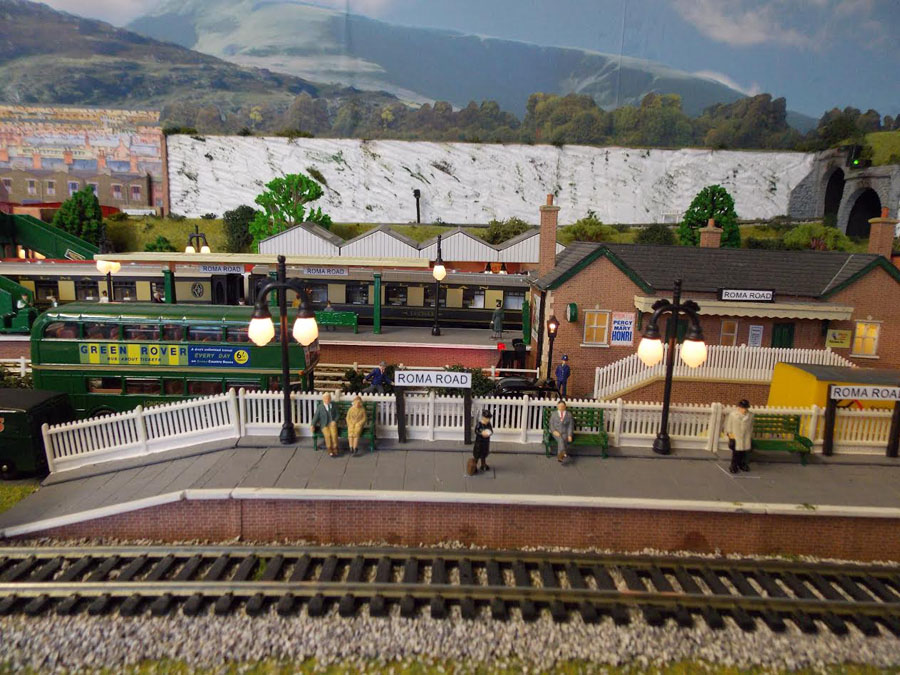
I bought most of the switches etc. from China. I bought some of the backscene, but made most of the rest by taking photographs and printing it up to scale on my computer.
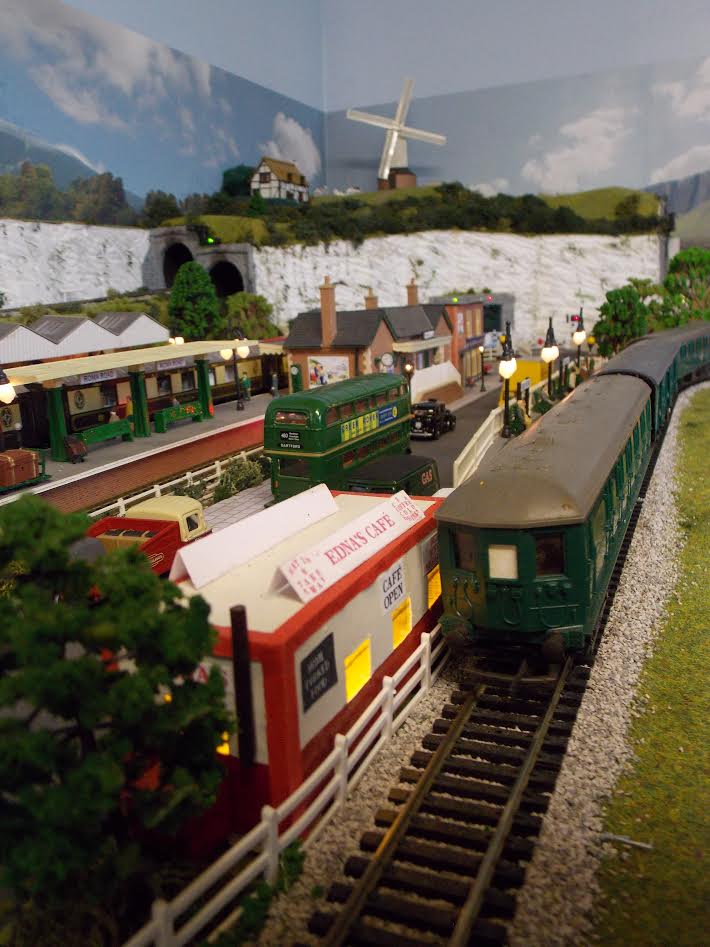
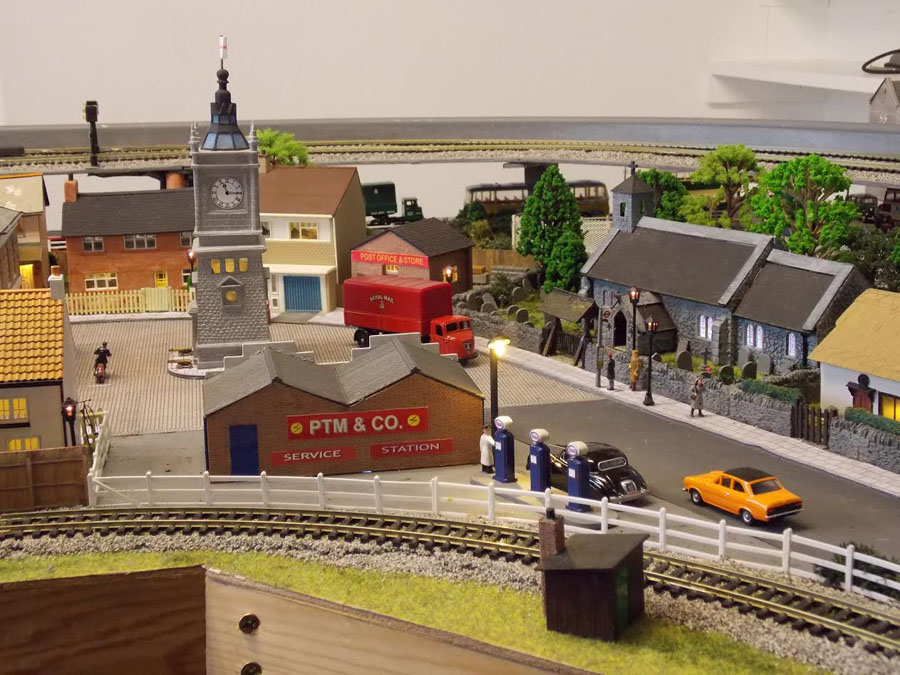
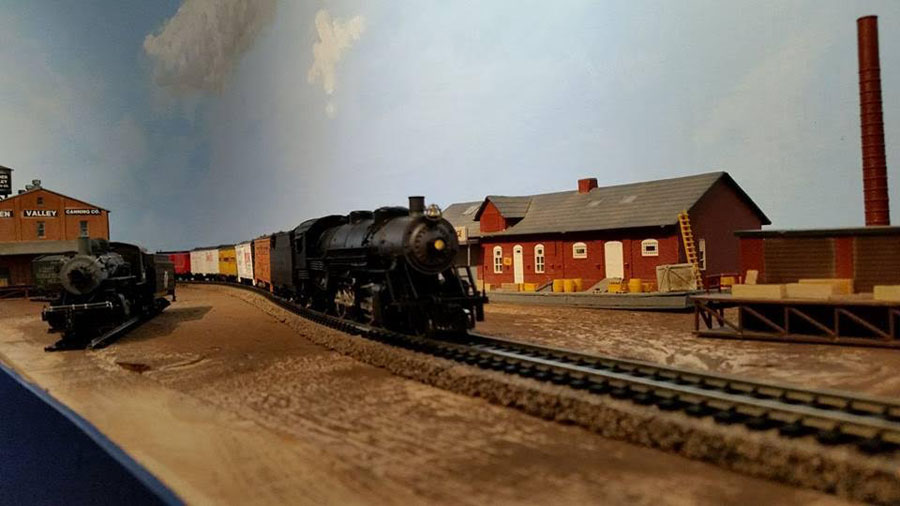
The main station was, as you can probably see, a Metcalfe kit, this I bought new. But most of the other buildings and scenery was made from revamped old 60s Airfix kits, some superquick kits I was given as presents, or as I progressed and learned how to do things, scratch built.
I bought replacement wheels and other odds and ends from local Model Railway shows. Of course the decoders had to be new.
The street lights and trees also came from China via eBay, very cheap and good value. I have not made a note of my expenditure but over the approximate 3 years I would be surprised if I had spent over a further £500.
In all a very satisfying experience. I am now a builder, an architect, and electrician, a carpenter, an engineer a model maker, a station master, chief cook and bottle washer!!
Regards
Paul”
Now on to Christie, with her model train room:
“Hi Al,
I’ve been following your site for a while getting ideas as I slowly build my first real HO layout. It’s taking a while.
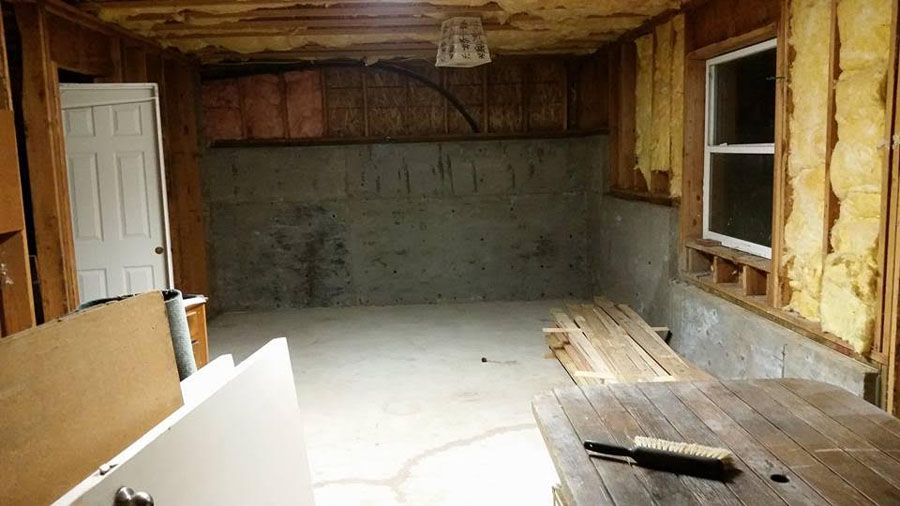
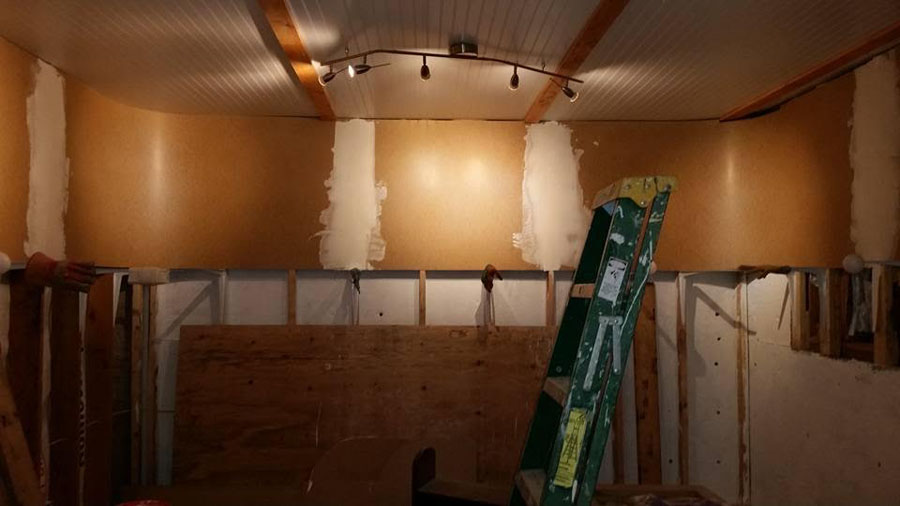
I had to start by actually building a separate room in my basement. I’ve had to learn how to build stud walls, anchor them to concrete floors, run power and build bench work on my own. It’s been a challenge with a lot of swearing sometimes. 😉 I;m proud of what I’ve built. My room it tight enough I get no dust even though my husbands hobby is very dusty. And my bench work is solid as a rock.
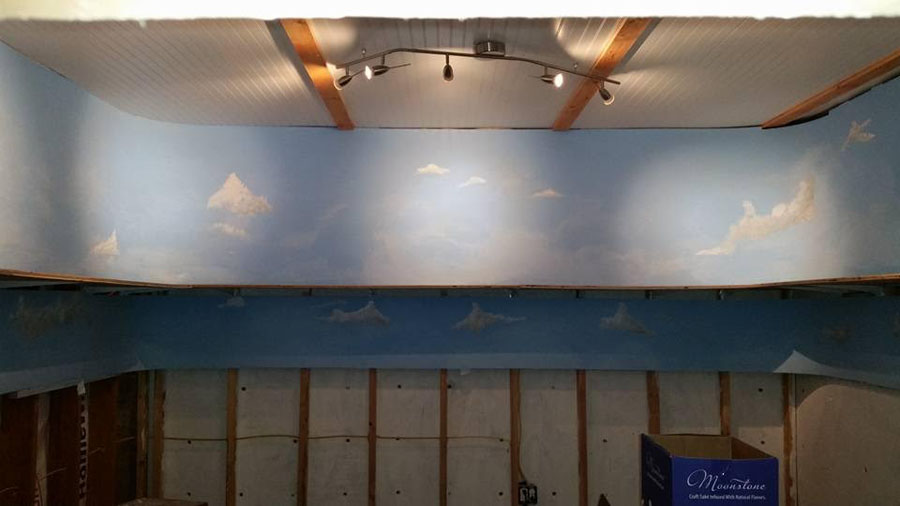
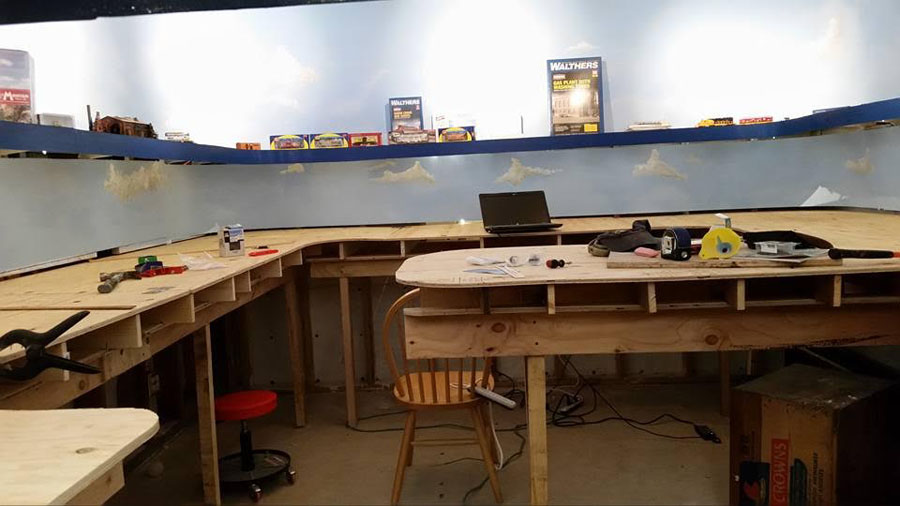
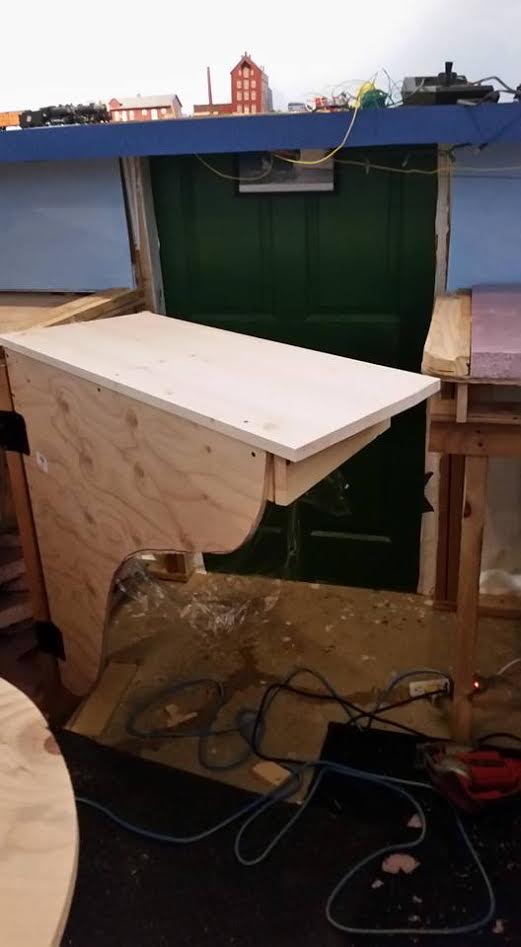
Thankfully I’ve had a friend who’s been able to come help occasionally. I have two levels, steam above and diesel below. So far we have the first circuit of track running on the steam. Right now I have most of the foam underlayment down for the diesel level. Once I finish the swing gate I can finish the foam and then the real challenge of serious track planning.
I don’t have a specific rail line I’m reproducing or era. Once I really have a layout running and don’t have the building costs I might start focusing down more. Right now if I can afford a working engine and some nifty cars I buy them.
Christie
Farm Wife”

What a model train room! I’m envious of all that space. Thanks to Christie. And it’s another great example of what needs to be done to build a layout: claim some space of your own and just making a start.
A huge thanks to Paul too for sharing his model train room. Embarrassingly, he mailed me some time ago and I managed to miss it. Thankfully he got in touch again, and I’m so glad he did.
It just goes to show there are two key steps for any layout:
1) Claiming a space for your own – even if you have to build it!
2) Just make a start!
That’s all this time folks, hope you enjoyed Paul and Christie’s model train room missive as much as I did.
And if you want to follow Paul or Christie’s lead, the Beginner’s Guide is here.
Best
Al
PS Latest ebay cheat sheet is here.
PPS More HO scale train layouts here if that’s your thing.

Brilliant Paul,
Great train house & layout….. well done!
Keith.
Absolute magic! Well done. I would love to see it in action.
Great to see but as with many layouts overall sizes would be a great help.
Perhaps contributors could also offer a track plan when available.
Keep up the good work and entries. Us beginners need all the help we can get.
Paul accesses the layout by crawling under to the centre space?
i went and used spray glue to paste the prints on const. paper now i will be cutting out the items and pasting them together wish me luck, one question can use a clear spray acrylic sealer to spray on the outside of the units let me know, thank you
Paul – Great job!!! I like the simple layout with the simple scenery – not jam packed with detail that takes away from the joy of running trains. Where did you find the suspension bridge?
Nice . its a true Man cave.
QUOTE:In all a very satisfying experience. I am now a builder, an architect, and electrician, a carpenter, an engineer a model maker, a station master, chief cook and bottle washer!!
What an adventure! The skills you have to learn make it all worth while. Love the building and the layout!
Great job! I too have a custom built Train “House” in my garden, but it’s used to house an N Gauge setup. Would be interested to learn what size (metric) your inside area is (??)
Very nice. Really liked the backdrop too. Lots of neat details. Have fun and enjoy your great effort.
Jim AZ
FANTASTIC!!!! Paul……Use a “Flat” spray to seal…Less gloss is better…Krylon and others are very good for this…Mike
wow what a story it should be in a book some where, I am in agreement with every thing shone and stated, but do agree lets run some trains, we can spend out whole life building stuff, adding model rc planes to my learning I know how to bend plenty of nails , my train layout it usa red neck cheap , and lets all have great time , dano fromarkansas
Great Job Paul, you can be proud of a job well done. I love the detail !
Paul:
Looks great. I also got my first train in the 60’s. I have a smaller space (about 100sf or 9 meters of area to work on. The big decision is the same one you had about DDC or using the variable ac supply (it is Lionel 0 gauge.). Obviously you have made the leap to DDC. I am very impressed you did that as well. Any advice where to get information on the conversion? I have heard a real mix of thoughts on this.
Any input from anyone is welcome.
Thanks,
Jim Beal
Very nice, lot of work, now weathering needs to be done.
nice work Paul
good detail and a very logically laid-out layout
we have a whole different meaning to ‘brick shed-house’ in america
hahahhahaaaa
keeo em runnin fellas
stjohn in long beach calif
A great railroad! Thanks for sharing. I’m still struggling after 30 years with claiming a space and starting! Boxes and boxes of equipment just waiting to be used.
Great imagination, building and layout. I quite the control board too. I am planning one for the new layout I am building. Rob
NICE JOB THANKS FOR SHARING !
Fantastic , it takes a lot of love for the spending so much time and work let alone
the absorbing of so much knowledge to achieve all this for the enjoyment of the playing and keeping ones self young !
That was a lot to say in one paragraph but it sums up our addiction to building models no mater what type we build .
I hope you keep going for a long time Sir !
Be well and stay safe Sir !
George
WOW !! That is one hell of a layout !! Surprised it only took 3 years.
Very impressive. You even had to build the Engine House!! I like the idea of a separate building to put the trains. Gives you a place “to go” and run them around. Great detail. Of course, I have questions! How big is the building you put up? And, how big the overall layout?
Pete-Still rainy Silicon Valley Calif.
Like to c more 4×8 ho lay out
Masterful job! Thanks for sharing.
Your train house is bigger inside than it is outside!
Very clever – care to share the secret?
Nice set of photos and great to read the details of your journey.
Nice Layout
Impressive!
Very nice!
Congratulations, Paul; you’ve done what most of us in your age group think of doing but never get around to!
Thanks for all the nice comments especially from the USA as well.
I’ll try to answer some of your queries. The Building is 14ft x10ft x 7ft high (I don’t do metric!!). It’s not quite a Tardis but I like the idea. The layout is approximately 9ft square, this leaves room at the front for some shelving. The base boards are 2ft wide on the 3 wall sides with some later additions for the circle line and the controllers, and the front one for the town is 3ft wide. And yes access is gained by crawling under the front (while I’m still able!!).
The back scenes are put up using good old fashioned wall paper paste. I used a lot of PVA glue throughout, diluted for setting the ballast. I also used pritt stick for the roads and pavements, some plastic cement on the old plastic kits, and lots of superglue to make the buildings etc…
The suspension bridge is made by Traing/Hornby. They haven’t altered the design at all over the years. I used my own computer made brick paper on it.
I learned about DCC by reading a lot of information on line. I agree it all seems very confusing to start with. But like most things the more you try the easier it becomes.
Thanks again to Al for this great site where I learned a lot from those who went before me.
Awesome post Paul. Your efforts have certainly paid off with a super layout. Thanks for sharing this to Al so he could pass it along. I love the story and pictures of your layout.
Cary B
PAUL: What an absolutley amazing project you have created!!! Thanks so much for sharing all you have managed to accomplish. Let me share a bit with you: After some time of “paying myself first” each month by setting up an automatic transfer of funds to savings account, I was decided to utilize $20,000 of it to have an addition built onto our home just for trains. It is 16′ x 18′, has windows on three sides, enabling us to see our back and side yards beautifully. (We live on an acreage in the Mississippi pines/oaks) There are track lighting and two ceiing fans, all with dimmers. We are using DCC, and love it. The layout runs on three sides of the room, and I hope to finish it THIS year. I’m not comfortable submitting pictures just yet, but when I saw your pictures and read your explanation, just wanted to share ours with you.
Recently, my husband added LED rope lighting around the edge of the ceiling, and that gives a nice night time effect. For Christmas, he gave me a video camera to mount on a loco, and a “Thunder and Lightening” set. It is awesome. The little speaker does a great job of giving us the gentle rain with a crescendo to a storm, complete with barking dog, birds and all.
All this is to say that I can appreciate your setup, and congratulate you on your accomplishments. You have a great layout, and this is the time of life to really enjoy it. I have waited since I was four years old to have trains, and my husband has been so supportive and helpful. Oh, yes, we are 80 years young.
Thank you once again for sharing your terrific project!
Marion
Paul’s building prowess is nothing short of remarkable. It’s an excellent layout in an excellent custom building. I like his moxie to be willing to tackle DCC (of which I never could).
Regards, Tom (USA)
Hi Paul, Great Job! Keep having FUN. In regards to DCC there is one important fact to remember. DCC takes a heavier guage wire than DC. So, if you have DC stuff you want to convert to DCC, you may need to change up the wire. Otherwise, choose ONE of your loops [outside one would be good], and wire it up independent of anything else. Make 2-4 ‘wiring blocks’ in the loop and install your DCC unit PER IT’S OWN INSTRUCTIONS. Not all hook up the same. Connect your blocks via feeders, to a BUS wire that runs to the booster, so that power does not drop from one side to the other. Make sure your frogs are powered properly and insulated, so a slow moving engine does not short or stall. Then, run a train on it! [Use the loop as a programing track.] Fast, slow, backward etc. When you are happy with that do the same with the next. Do not hook it up to the first just yet. Do the same with the third. etc. When there are no glitches anywhere, then hook 2 loops together. Then the 3rd. Saves major hassles and lets you run trains while working on another loop. Suitcase style connectors are great to use. Lee
Brilliant, well done and the shed’s not bad either. Seriously though, it’s very inspiring and it’s great to see good talent around.
Magical
Jolly good. Very impressive.
great photos very rewarding and inspiring thanks for sharing.
Paul, Thank you for your inspiring narrative of your model railroading. I have been lucky enough to have a full basement to call my own. However it was unfinished and I have had to start from scratch. So besides constantly gathering knowledge of model railroading I have been learning many of the trades ( carpentry, plumbing, electrical, sheet rocking etc.). I keep telling my wife there is nothing I can’t do but there is a whole lot I need to learn to do. Being retired this has given me great pleasure and what more can one ask for than to learn and have fun at the time. Half my basement is my workshop and the other half will be for the the R/R ( 26′ x 13′). Just have to lay the floor and put up the drop ceiling and my bench work will begin.
Having people like you sharing your adventure and Al’s GREAT work keeping all together is inspiring.
Thank you Paul and Thank you Al.
Reed from St. Mary’s county Maryland
PS. I was hooked the first time I saw what DCC could do for the hobby.
I am 83, have ‘done railways’ all my life. In 1973, I changed from O scale to OO scale when my wife gave me, ‘Oliver Cromwell’, my first locomotive of that scale for our first Christmas together. (Al has featured my layout on his web site). Some years ago I changed to DCC and, as you were told, I was also told it ‘couldn’t be done’. However, as a 50-year-old, Oliver Cromwell is still running and is in fact, one of my best runners. I don’t have the finances to spend on sound, etc., but OC handles all the basic functions without any problem.
Exemplary examples here also. Almost a shame to take up the footprints with unusable floor space lol. Same difference with myself though, either attic over garage or underground. But pool table down there also so it’s all good.
R
lots of work in a small space. good job.
Christe you have a great start for your model railroad. I like your backdrop and the clouds are very nicely done. Once you choose a location and era it will help you to be selective about engines, rolling stock and buildings.
Bravo! Great work, Love that suspension bridge.
Nice layout Paul.
Great job Christie, keep up the good work, your going to have a really nice place for a train layout and a great layout also.
Wow! Very cool. Lots of detail and craftmanship here in the eyes of the beholder as we gaze upon another miniature world, although its more like a town setting but I love it. Love the stone house with the grey stone wall and in the way you captured it. also, the town setting with the wrap around fence. Good job.
Where do you purchase your background scenery that I see on your layout. Are they pictures you have enlarged
Is there a website for this
Thank you.
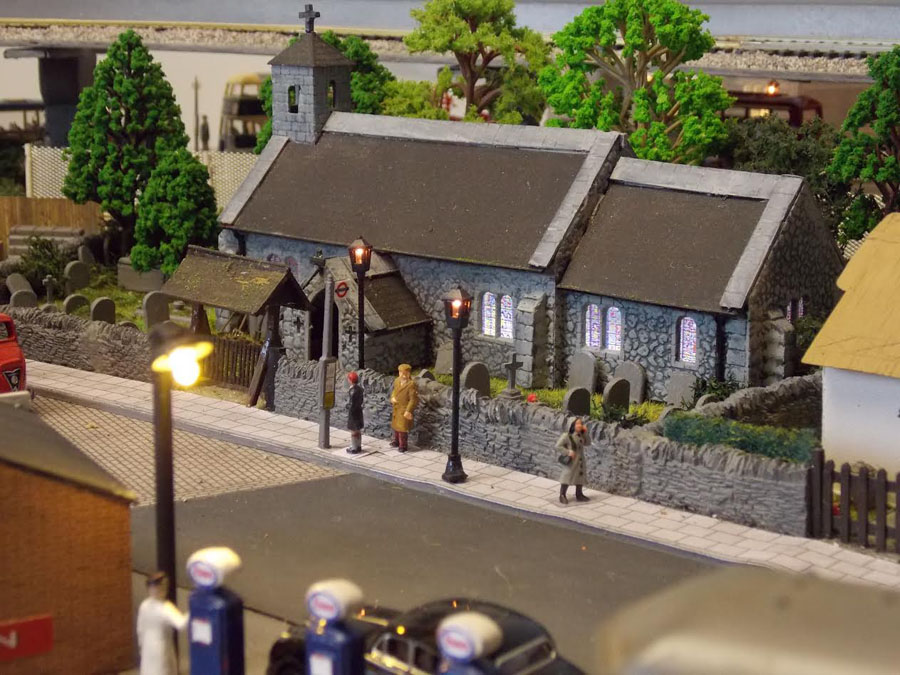
well done & the passenger trains are awesome, love the church.
Hi Alastair,
The idea of featuring train rooms etc, is great and very interesting for everyone. Out of all the wonderful railway layouts that have been sent to you I am extremely honoured and proud that you chose mine to be the first shown. Also I want to thank everybody that has sent such wonderful comments about my work. I think I answered most of the questions with my earlier reply, apart from the last query from Linda H. Yes the backgrounds are a combination of my own photos and some bought on line. There are lots of websites selling backgrounds which most of your contributors will be aware of.
As I stated this was my first attempt at building a model railway (and a house!) and I was so pleased with how it turned out I have not changed or added anything to it. I do however miss the building of it so I have taken to making model aircraft from kits, The 1.72 scale fits well with OO, so they are hanging from the ceiling in the train house. I will send a photo of them soon.
Once again many thanks to you Alastair and to all the people for their lovely comments
i like the swinging walk through, very nice.
I noted Marion saying she and her husband are 80 years old and still enjoying model trains. I am 76, but have a neurological problem that prevents me from going down to my train room. Haven’t been down in the basement for nearly 2 years. I hope to get back down there, but in the meantime, I still enjoy the hobby through Al’s twice-daily e-mails and everyone’s contributions. It’s a fantastic joy to read about all the great layouts and, especially, those projects still in the making.
Roll On, Model Railroaders! I’ll join you down the road a piece.
Sam
Two great stories about creating a space for your layout and then filling it. Good to see one (almost) finished and one still in progress
Great work Paul and Christie. Very impressed with your RR Christie. May I humbly suggest that you paint or model the fascia to blend into the foreground scenery? I always suggest that and if you try it I think you’ll like it. Maybe a brick retaining wall along the way. Or just a brown or camo paint job…at least just paint it black so it isn’t a distraction. Don’t get me wrong the blue color is striking…it just doesn’t add anything to the beautiful layout you are developing. Jus’ sayin’
Christie, great progress so far. Really important to curve the corners and you’ve done a great job on the background because of that!!
Bob with two layouts, but square corners!
Fascinating that Paul that you are so determined to not only build a designated building just for YOUR trains but you conquered the unknown and embraced DCC . Very determined indeed . Great layout with a lot going on in the scenes , many of us are just relieved that our counterparts will allow us a space in the basement or attic or sure room.
Good for you I say .
Farmer wife Christie , great to see your beginning, you too are evidently very determined . I firmly believe that having that determination is the sole element required to start . What a great start it is . You’re apparently quite talented with carpentry so I’m certain your layout will reflect that . Please do keep posting your progress as we are all anticipating the results and fruits of your labor .
Refreshing to see these particular posts today , very inspiring and encouraging, thank you both for sharing .
Christie, la really good start, the solid reliab le baseboard will put you in good stead and of course rule 1 applies. Keep up the good work.
Well done both of you, even buiding the building prior to building the railway from scratch with promising layouts.
What great train rooms!! Not a Man Cave or Lady Cave but a train cave. Nice work by both.
Paul and Christie, I’m so impressed by both of your layouts, especially all the preliminary work you each had to do to create a space for your layouts. Well done!
Great job Paul and Christie on your layouts very very impressive both of you!! Thank you for sharing your pics and ideas!! Chris- Michigan