Andrew’s been in touch, he’s shared how to build a corner tunnel for a model train:
“Hi Al,
Like so many of your followers I enjoy your blog. And like so many others have scrapped my last layout and started again (Photo Corner 1) using many of the tips and ideas that you have shared from other model railway enthusiasts.
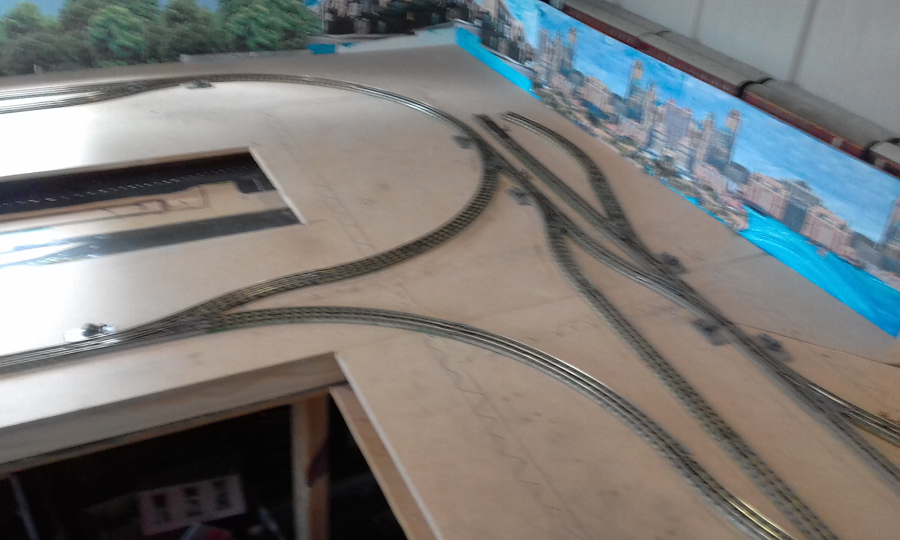
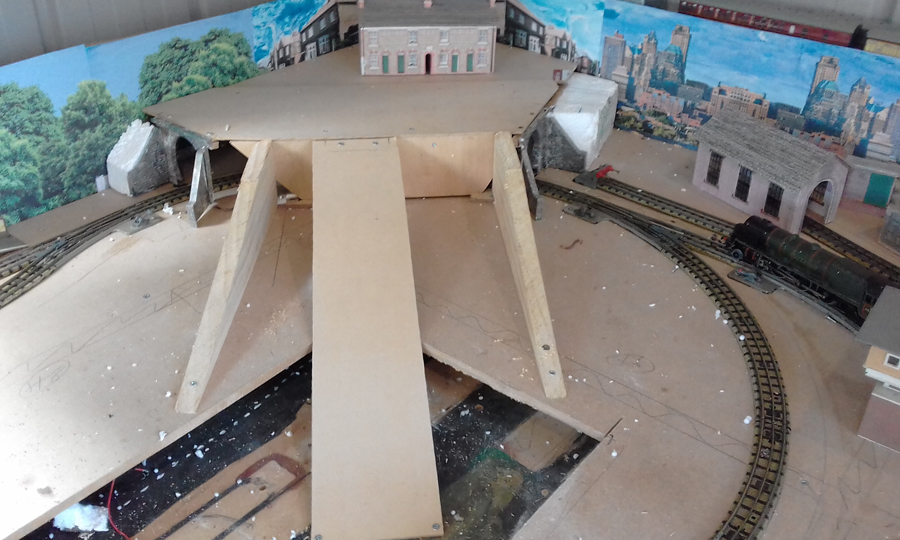
I attach a series of photo showing my construction of a tunnel in the corner of the layout. The curve is standard Hornby Dublo 3 RaiI that is fairly tight (15 inch radius) and I wanted to be able to remove the tunnel top in case of derailment and for track cleaning.
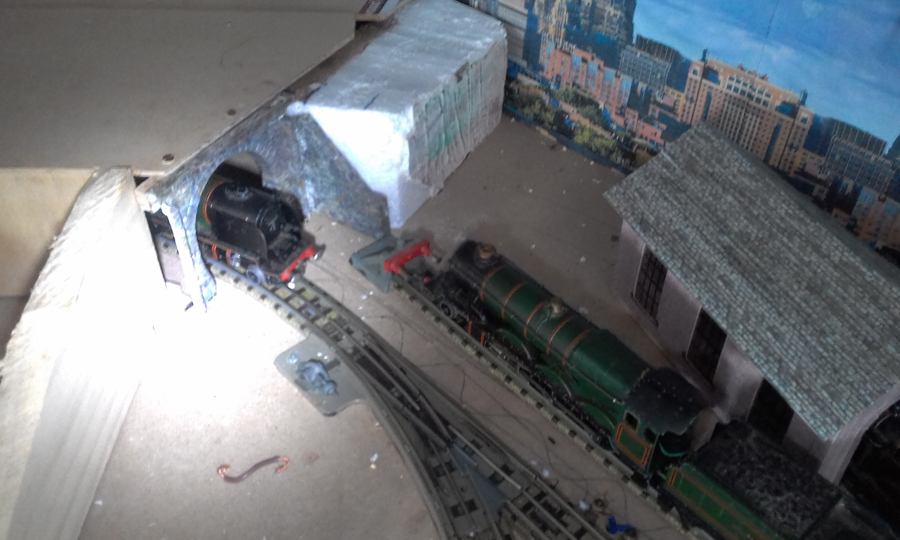
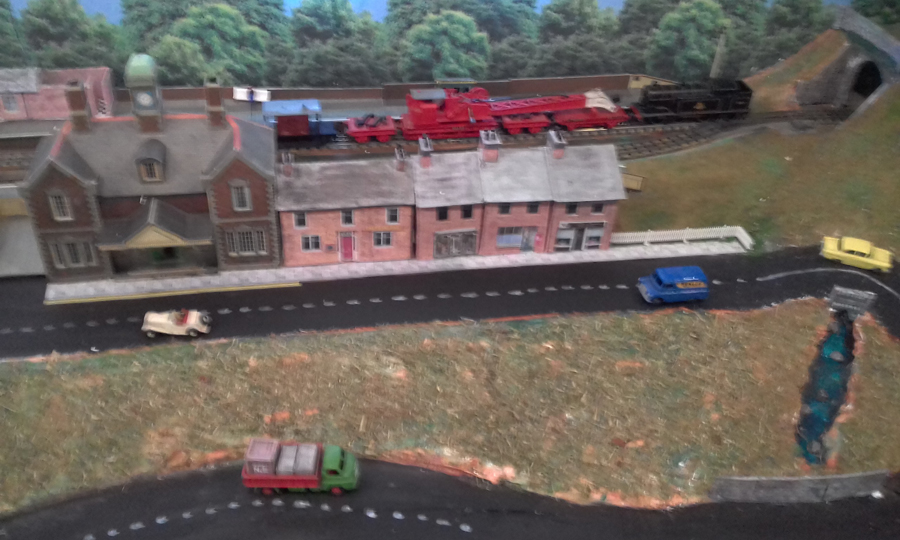
Because there is critical clearance between the tunnel walls and the overhang of larger locomotives on the outside of the bend (Photo 1A) and passenger coaches on the inside I needed to ensure that the tunnel would be in the exact same position when replaced.
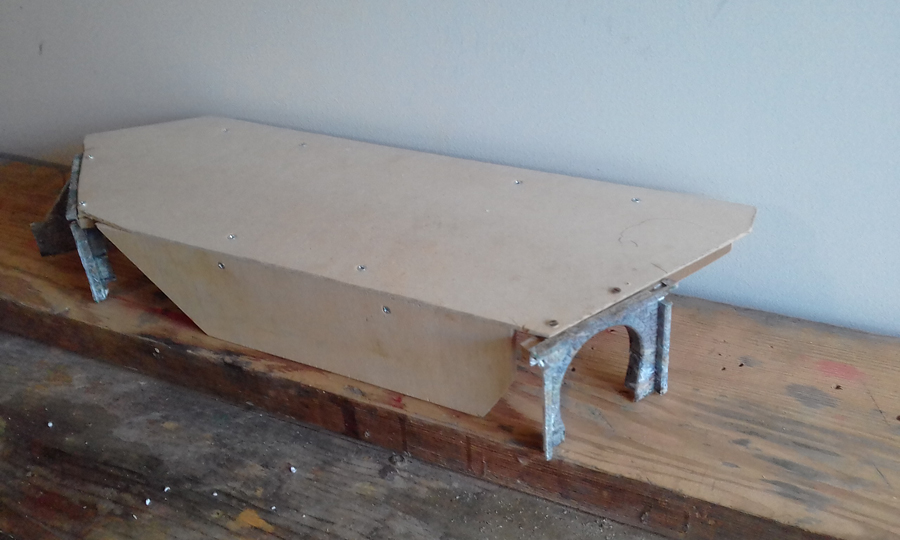
I made the tunnel from 5 mm ply (Photo Corner 2A) and used small pieces cut in a U shape on the baseboard to relocate the tunnel top (Photo Corner 2B)
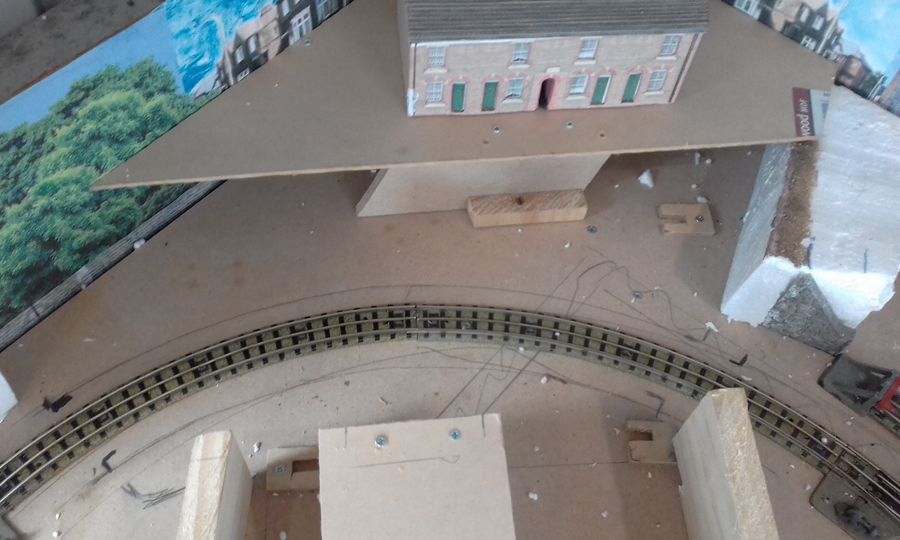
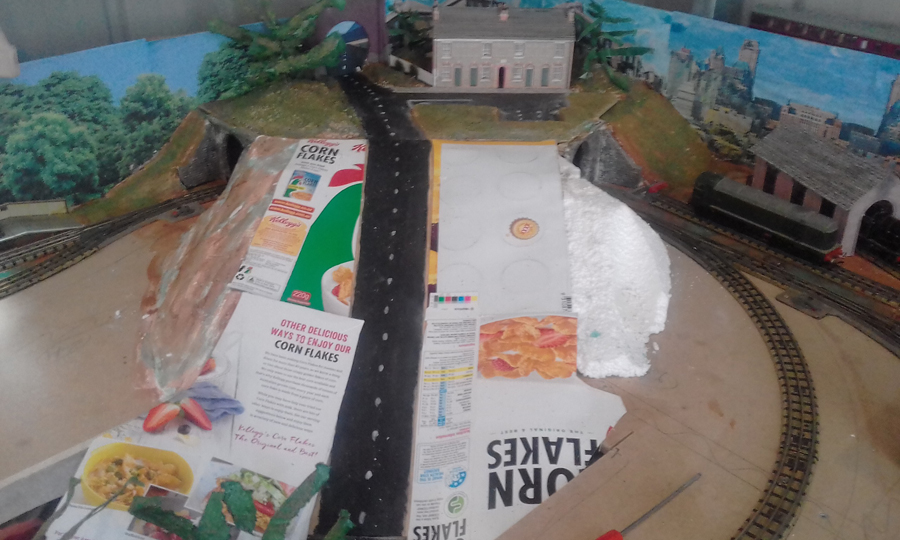
I used expanded polystyrene and wood off cuts to form a frame for the scenery (Photo Corner 3) filled with newspaper (Photo Corner 4) and covered with light cardboard (Corner 5) – A mistake – I should have put the shiny side down as the plaster did not like sticking to the shiny side and requiring a pre-coating of PVA to secure.
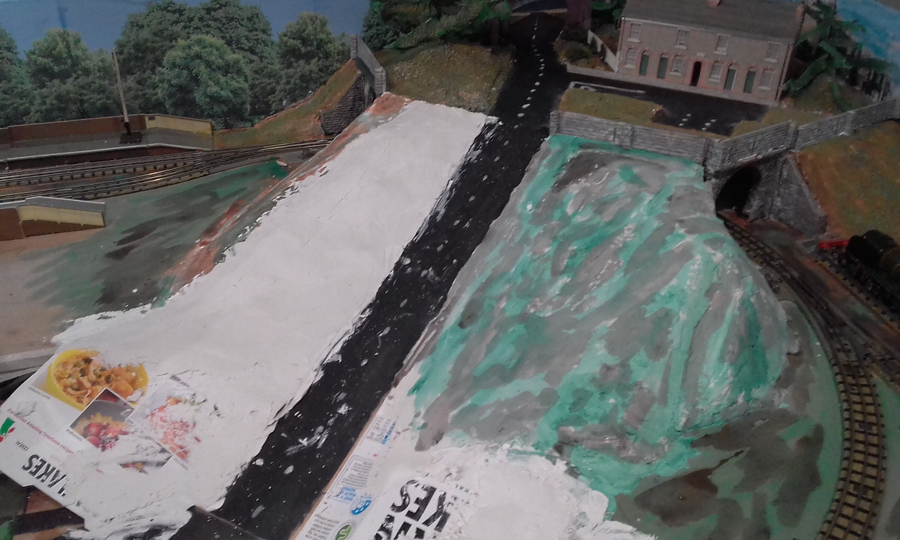
I gave a coat of plaster of Paris, the first time I have used this for landscapes and found it sets very, very fast. A mixed blessing and I am told that the addition of household washing up liquid will slow the setting time – Perhaps one of your followers will be able to confirm. (Photo Corner 6)
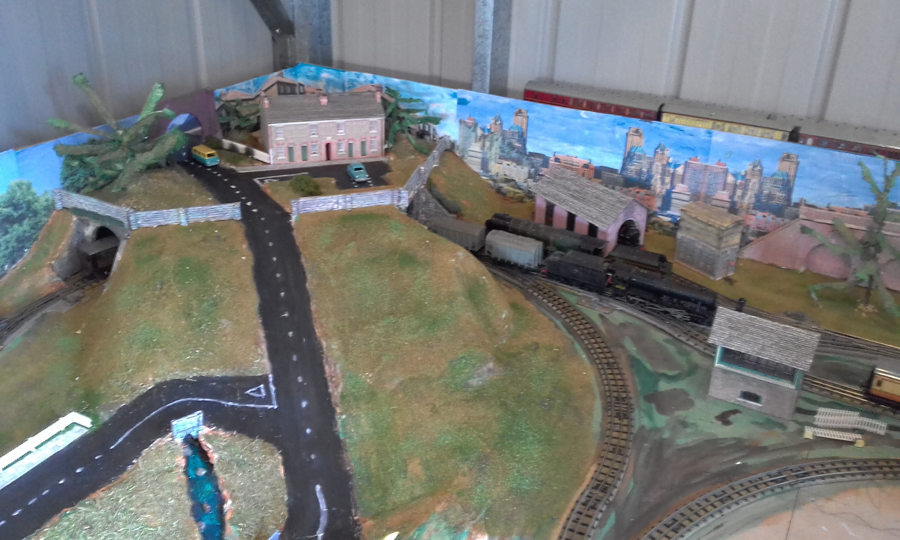
I first give a coat of diluted green and brown acrylic paints then PVA and coloured sawdust (Corner Photos 6, 7 and 8). I have a petrol motor grass mower that allows some cuttings to fly up onto the blade protection cover and dries them. I use these with a thick PVA solution to make a rough heath-land effect (Photo Corner 9).
A special ‘Thank You’ to Dangerous Dave for his road tunnel – I have plagiarised his idea which may just be seen at the back of photos 5, 7 and 8.
Also a thank you to Fred and his trees. Mine are not as good and made from old wire, kitchen paper, shredded and spray painted and may be seen in photo 8
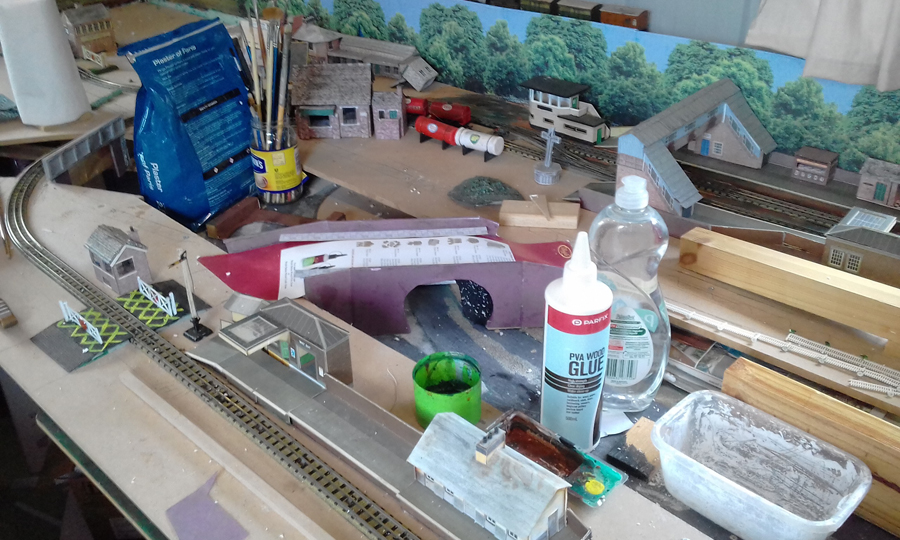
And I am a messy worker – (Photo Corner Mess)
Best wishes to you and all your followers
Andrew
Cooroy, Queensland, Australia”
(All images are clickable.)
1A:
2A:
2B:
Corner tunnel for a model train:


Corner mess:
A huge thanks to Andrew for sharing how to make a corner tunnel for a model train.
I don’t think he should worry, I suspect we are all messy workers. Besides, whoever has seen a tidy layout in the making?
That’s all for today, folks. Please do keep ’em coming.
That’s all for today folks.
Please do keep ’em coming.
And if today is the day you get busy with your own model railroad, the Beginner’s Guide is here.
Best
Al
PS Latest ebay cheat sheet is here.
PPS More N scale layouts here if that’s your thing.


Thanks Andrew. Good to see several stages and a good description of what you did. It is helpful when people also describe any problems they had, and possible solutions. Does the ‘loaded’ tunnel cover lift off easily? Dangerous Dave gets yet another mention. He has become quite influential!
Dustyk UK
Excellent Andrew, It’s good to see some HD 3 rail on here as well. I don’t think I’ve seen any before on Alistair’s postings.
Andrew would you be interested in a engine and coaches (3 rail) approximately 50 years old.
I enjoy work in progress photos. Gives a great view on how the final stage was accomplished. Would wonder about using old grass clippings . I guess if you cover them with a preservative. Be concerned about rotting and insect larva. Woodland scenics makes such nice stuff to do ground cover with
great fun andrew
keep em runnin fellas
stjohn in long beach calif
Thank all
Dustyk The tunnel is easy to lift off, care is needed to refit without damaging any of the scenery, fortunately it is not something that I need to do frequently.
Also thank you to the reader who offers his old locomotive. I do not need any more locos or rolling stock as the track I have is fully utilised.
In fact mine date back over 60 years, the 0-6-2 tank engine with 5 trucks and a guards van and an oval track with one siding was a Christmas present from my father. It grew over subsequent years until I started work and it got put into storage until I retired in 2014.
The grass clippings are dried so I hope no infestation remains, but this is a good warning – Thanks – Some time ago I did try drying and using old coarse ground coffee beans. The humidity of a Queensland summer caused mold growth so I will be monitoring the grass
Great to see vintage model trains here as well. Plus good to see them being used.
That’s great work Andrew. I wish my woodwork was a tidy as yours!
It’s also the first time I have seen Dublo 3-rail featured here and it’s great to see. It’s what I am modelling with, although I’m not as far on as you are.
My Dublo kit was also Christmas presents although I have added to it from eBay and it’s a tribute to the build quality that most of it still works perfectly, even after all these years, with servicing and a remag or two.
Another advantage of the old third rail system was you could have a triangular junction like that, or a reverse loop, without needing a polarity switching arrangement. I loved my Hornby Dublo dearly.
The layout shown in the ‘corner mess’ photo, with the road crossing the river straight onto a level crossing by a small station, reminds me strongly of St Fagans near Cardiff, where my great uncle was a signalman back in the 30s and I worked occasionally as a reliefman until quite recently. Lovely job!
Rod
Thanks for making it look Easy to have a Tunnel in the corner
Tom
Cherry Valley, Ca
Andrew
If you look up ” Mess” in the dictionary you’ll see my train layout & garage. LOL.
I use dried used coffee grounds but the secret is you have to soak them well, maybe a few times to get as much coffee out of them and then dry them. I put them in a pan in the sun & dry thoroughly. No mold. If you dont get that oily coffee out it is a bear to use but I like the look of dark mulch or loam and I have a lot of it.
Best is a dark ditch & I use a shiny varnish as water- Cattail type plants and you have a great scene.
Thank you fir sharing. Good to see old style matchbox toys as well layouts are escapism fantasy you dint need super realism to enjoy model railroading do you
Hello Andrew
Many thanks for your pics showing the tunnel in the corner of your layout. I’ve seen it at a timely opportunity because it’s just what I was trying to plan for my own layout and struggling to decide what materials and method to use. My ideas were leaning towards your own in order to use materials I already had and keep costs down. I can see how successful you own work is and I’ll use it as a basis for my own tunnel. A tunnel and hill is a sort of afterthought when I realised I’d got no access to a factory and residential area after laying the track without sufficient or good planning! However a tunnel and hill with roads solves this nicely and will enhance an otherwise flat baseboard. So Andrew you’ve been an inspiration.
Kind regards
Leslie (N Gauge)
The only problem I have with this tunnel is that the train practically goes through the basement of the house above. Private station stop? Otherwise great benchwork.
I am in the process of rebuilding my layout after a move. Loved the step-by-step photos. I’ll have some to share soon.
I will say though, it better not snow on your layout, you’d never make it up the road in one our winter storms.
Norm ..Massachusetts