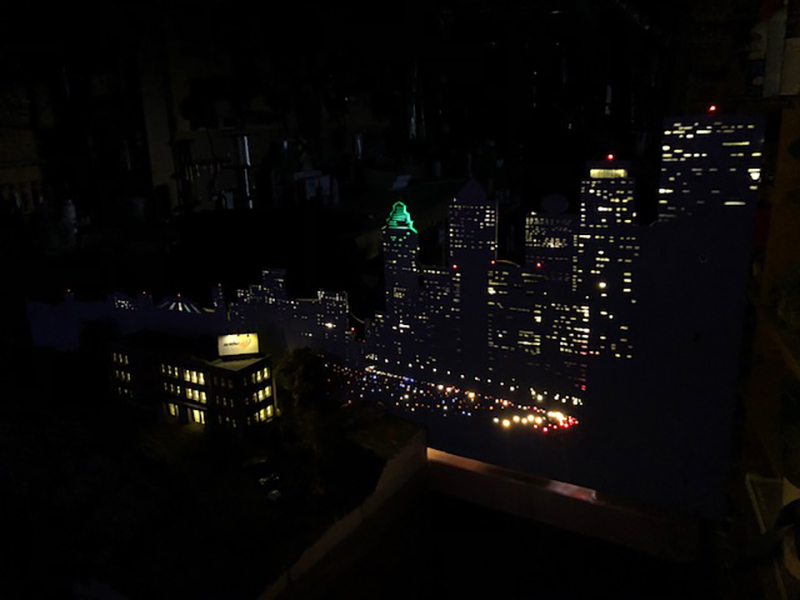
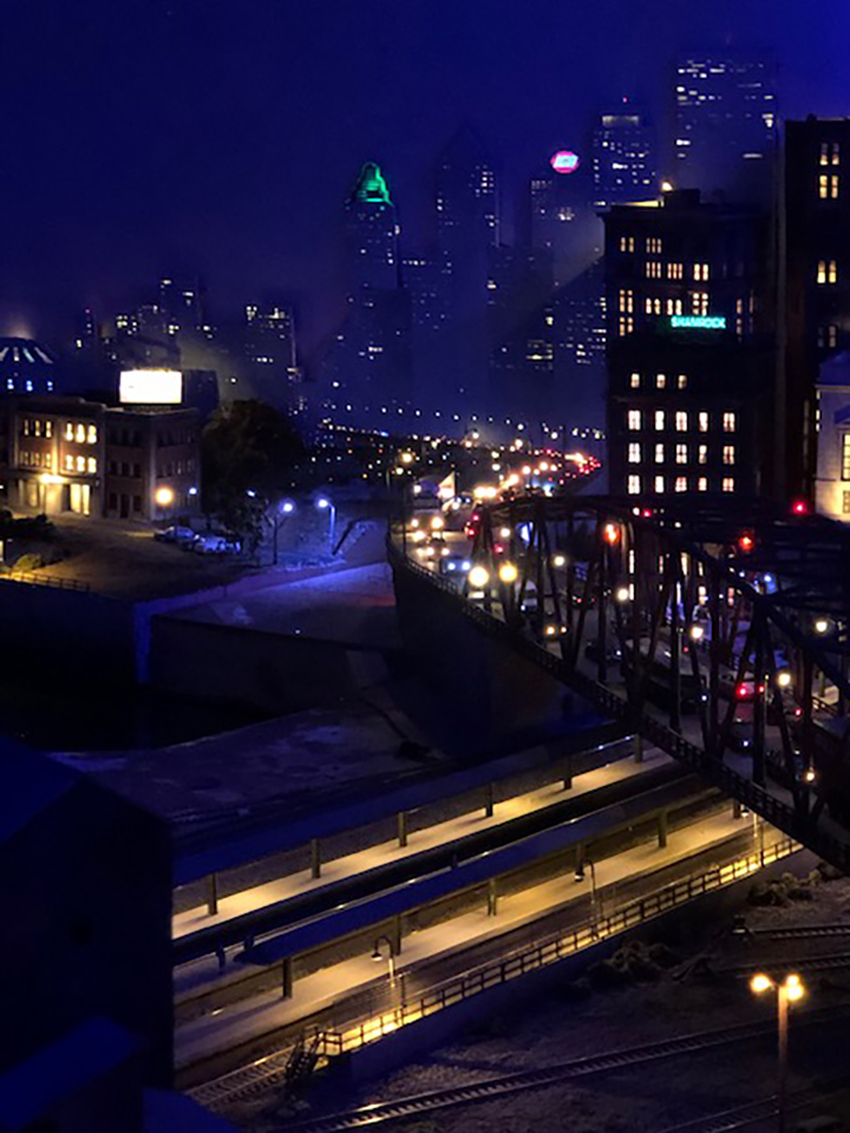
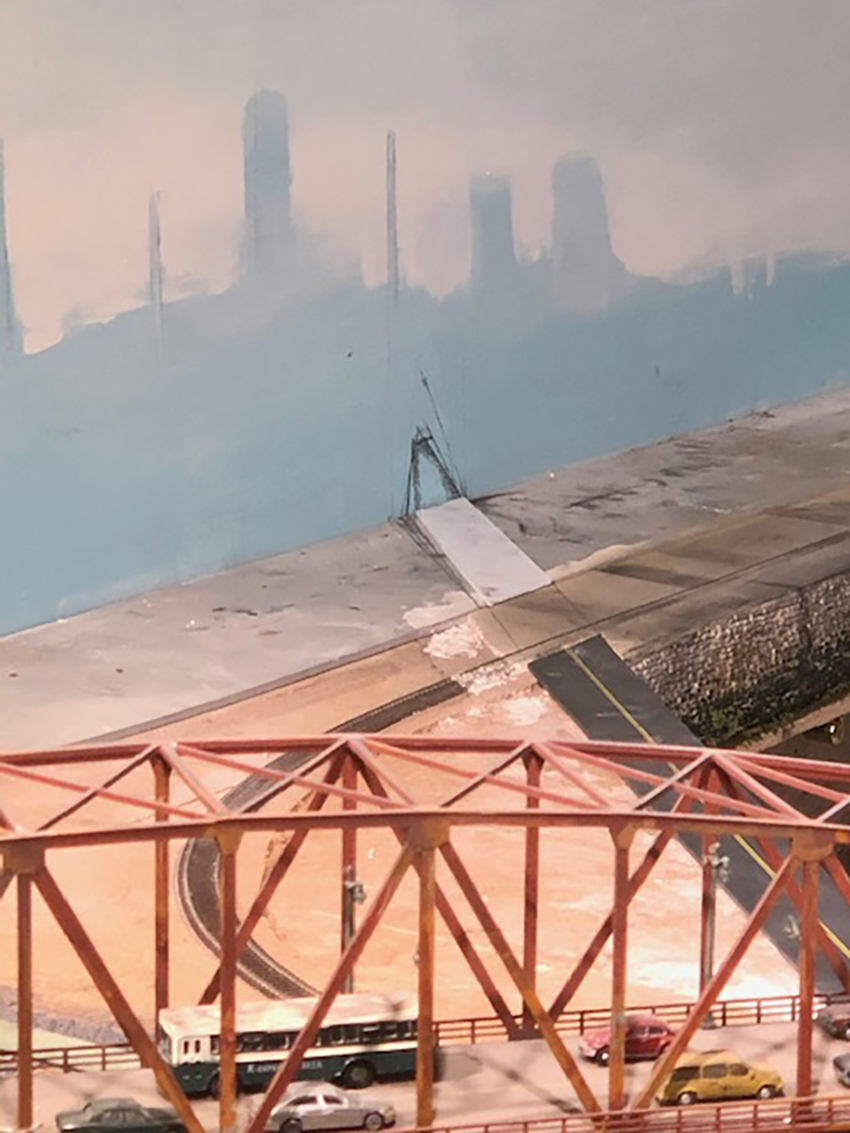
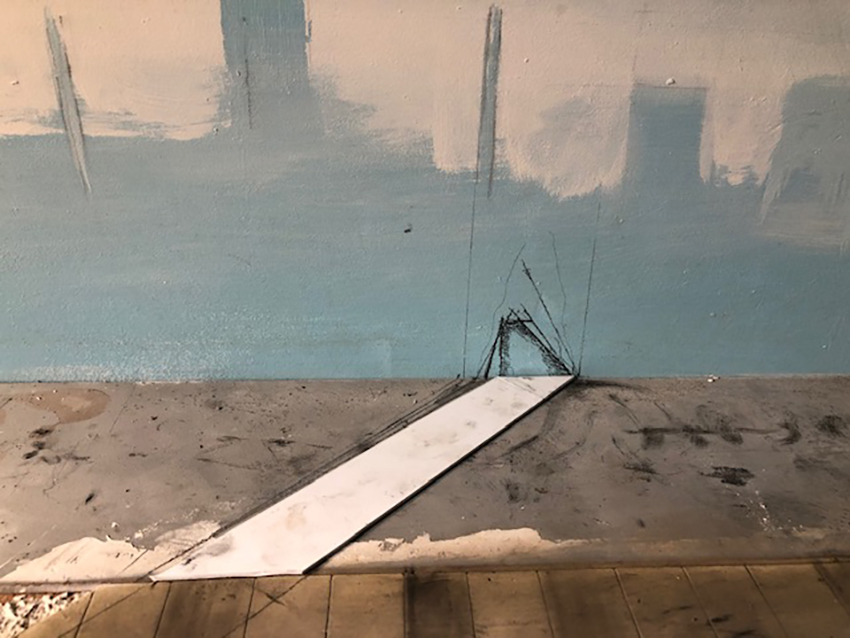
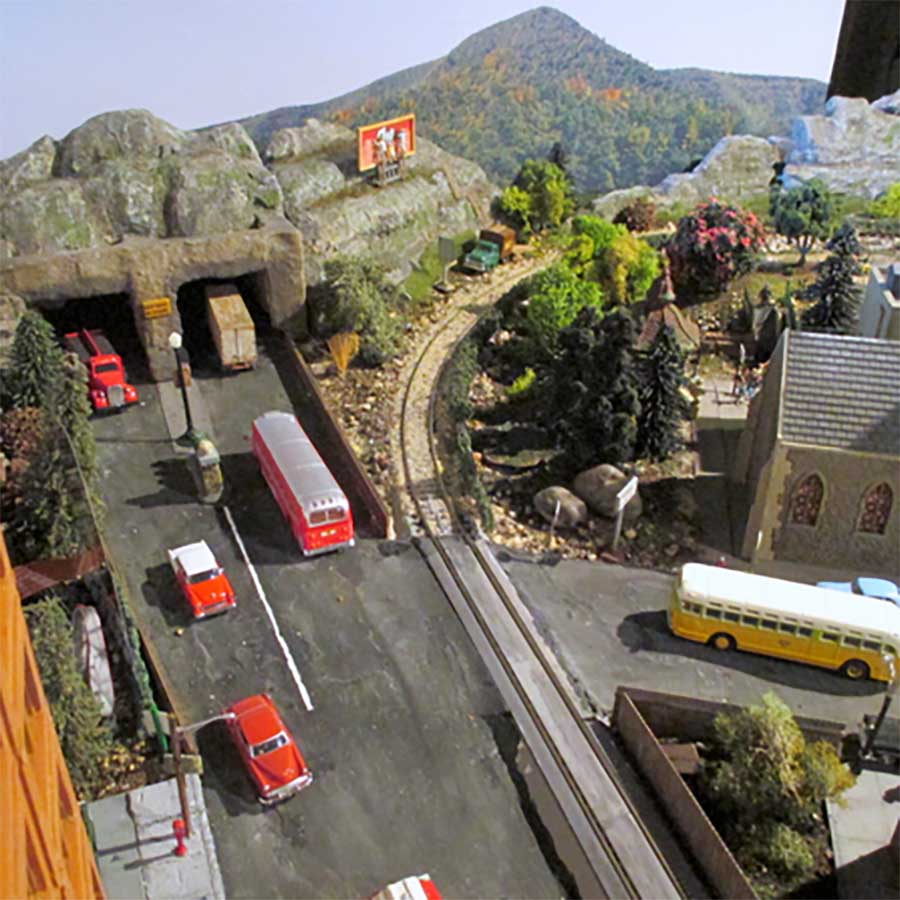
Check out the backdrop, for which some separate photos, and also some photos showing the weird perspective of my oil refinery access road through the refinery.
It always amazes me to see the kinks in a straight line you have to impose between modeled road and rendered extension on a vertical backdrop.
I think that the visual tricks of backdrop making are probably the most stimulating and satisfying parts of my project.
Amy questions, please let me know.
Fred”
It’s a bit of a squint to see Fred’s video, but sorry, not much I can do about that.
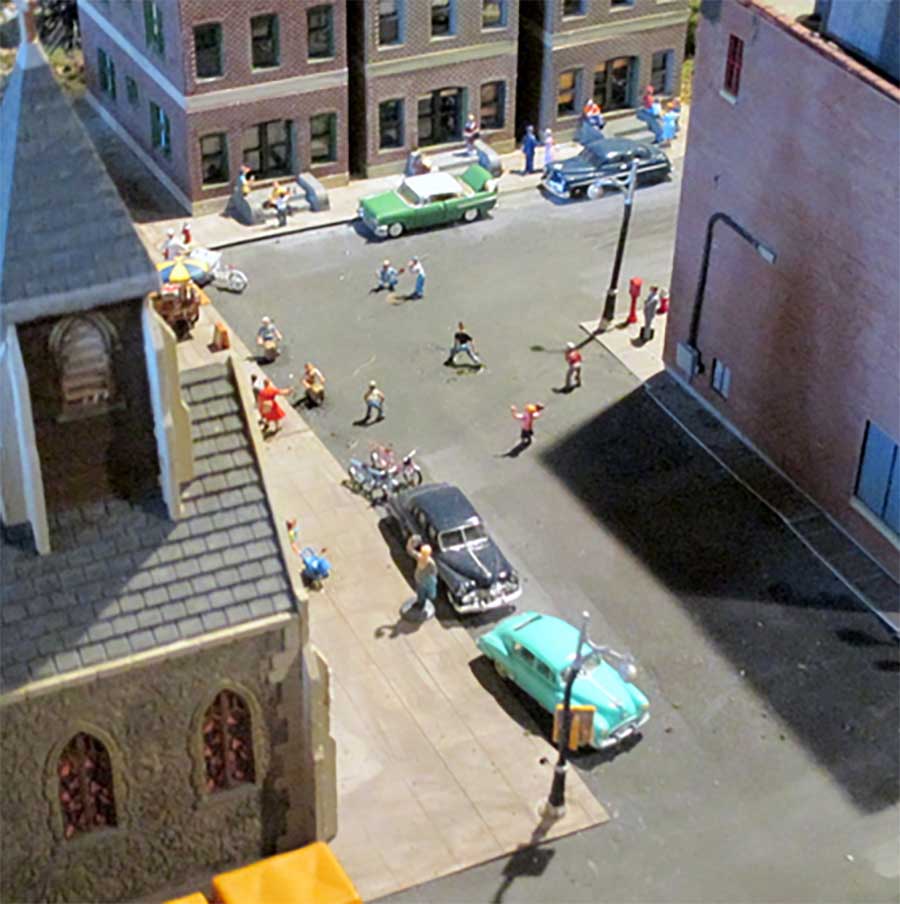
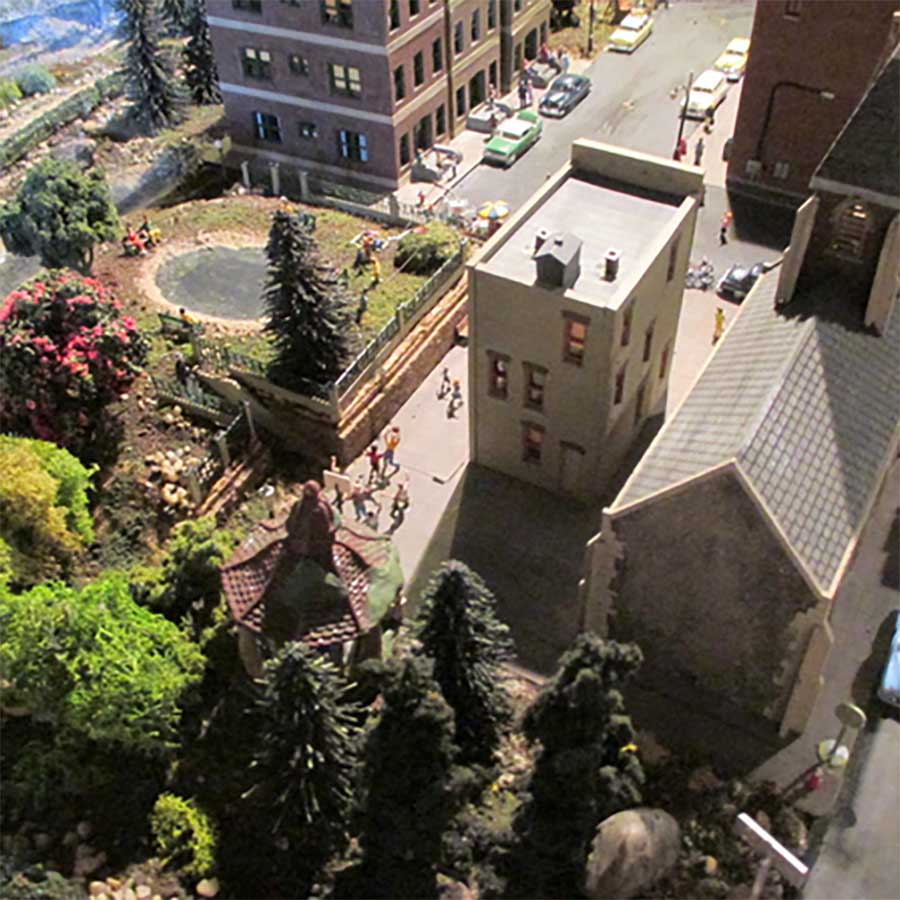
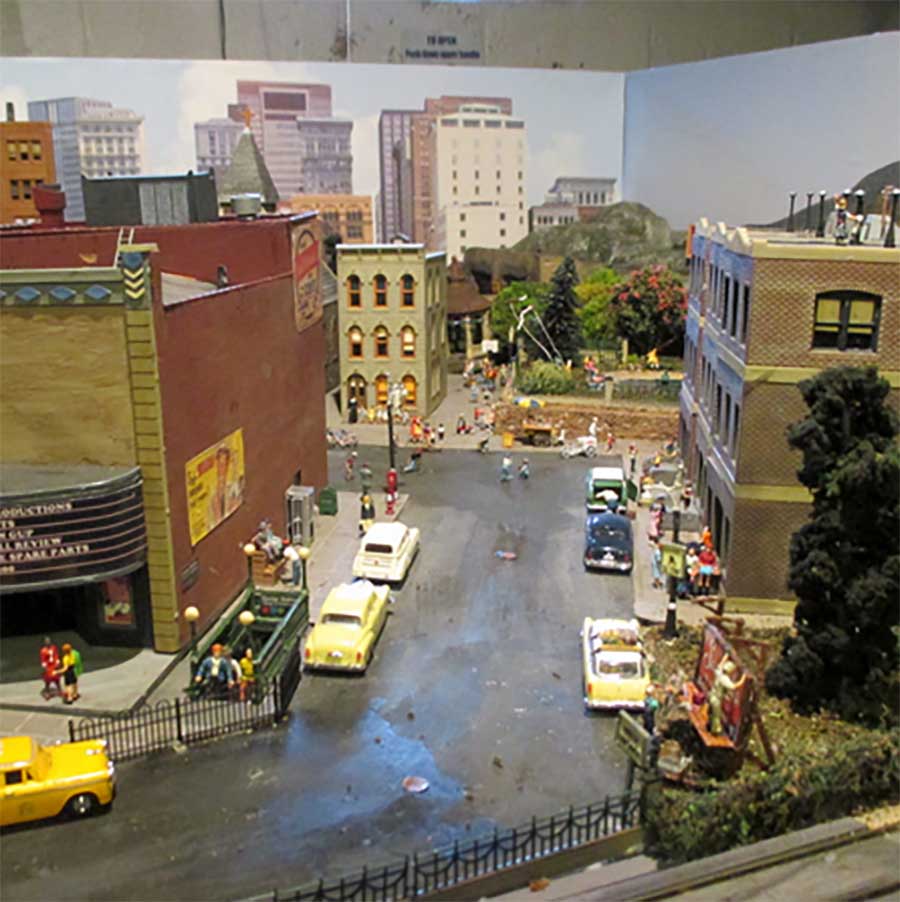
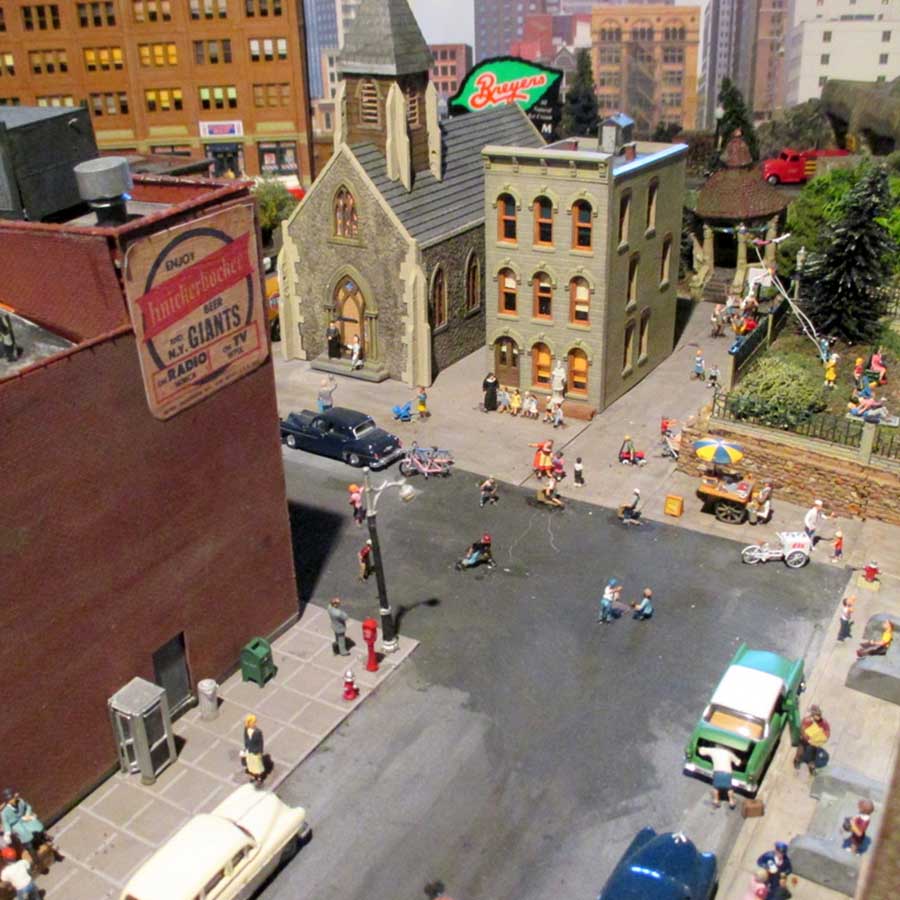
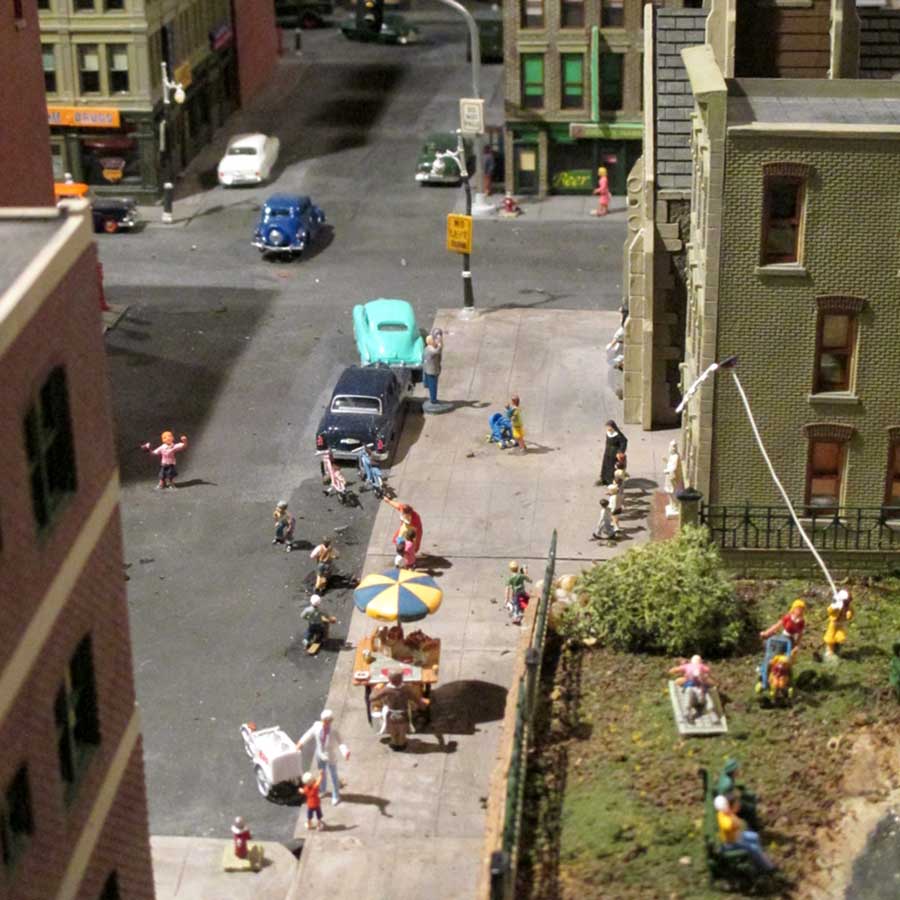
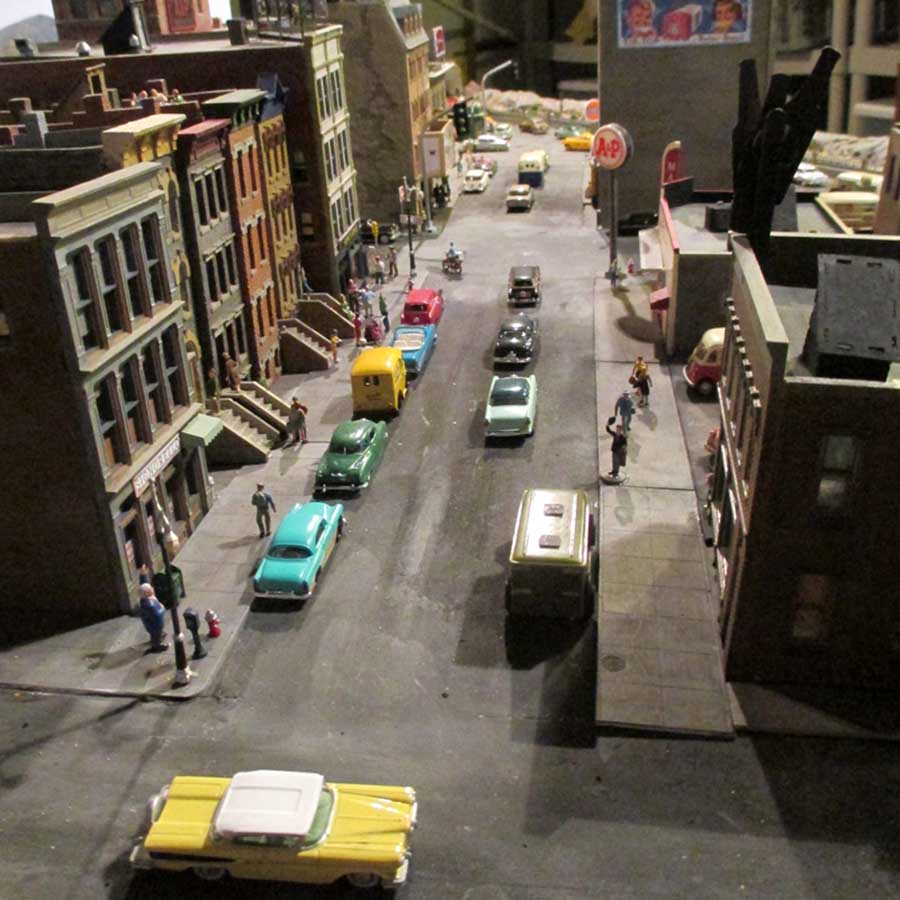
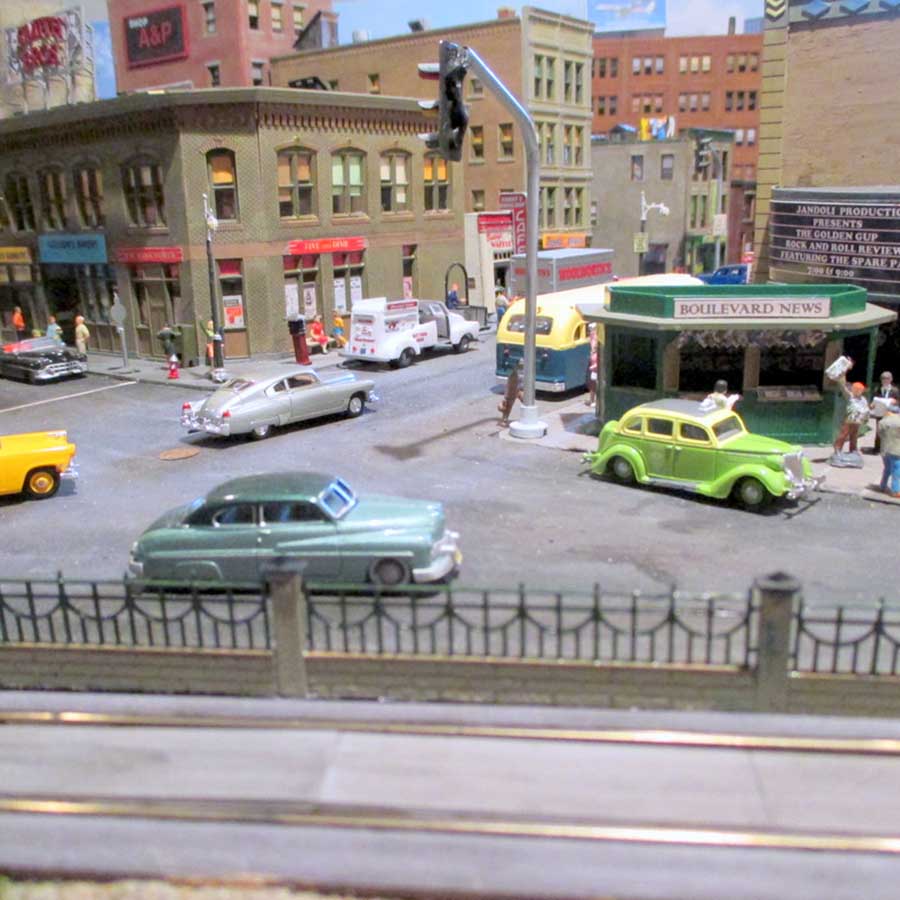
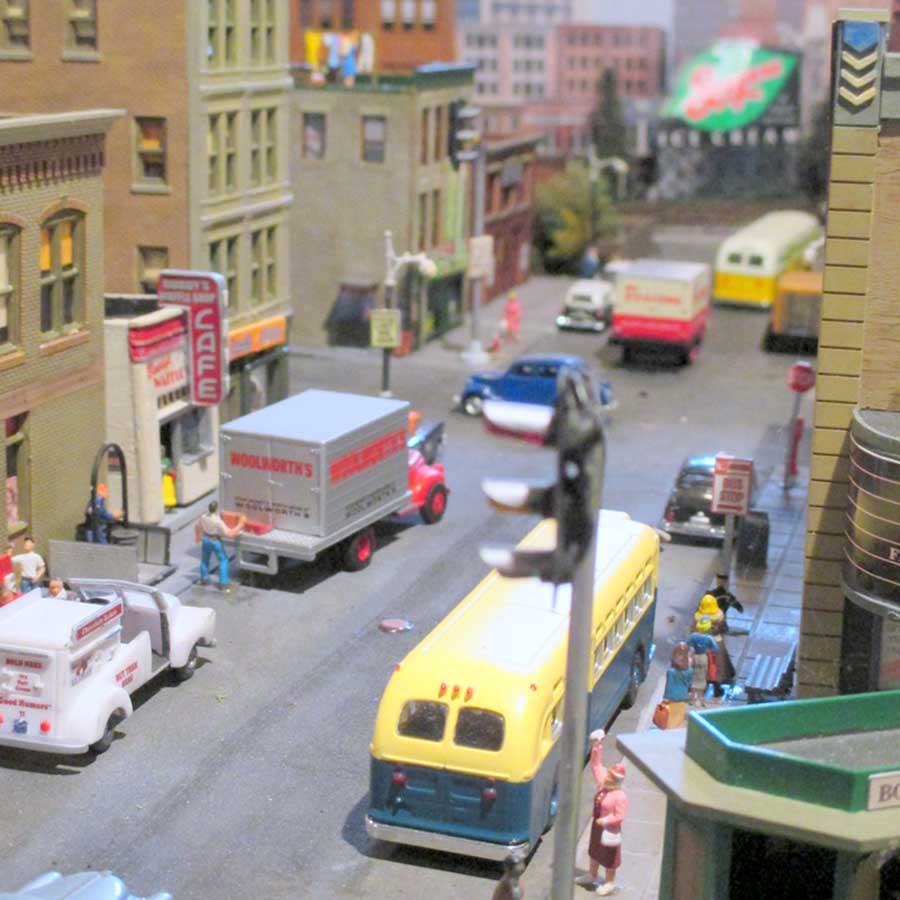
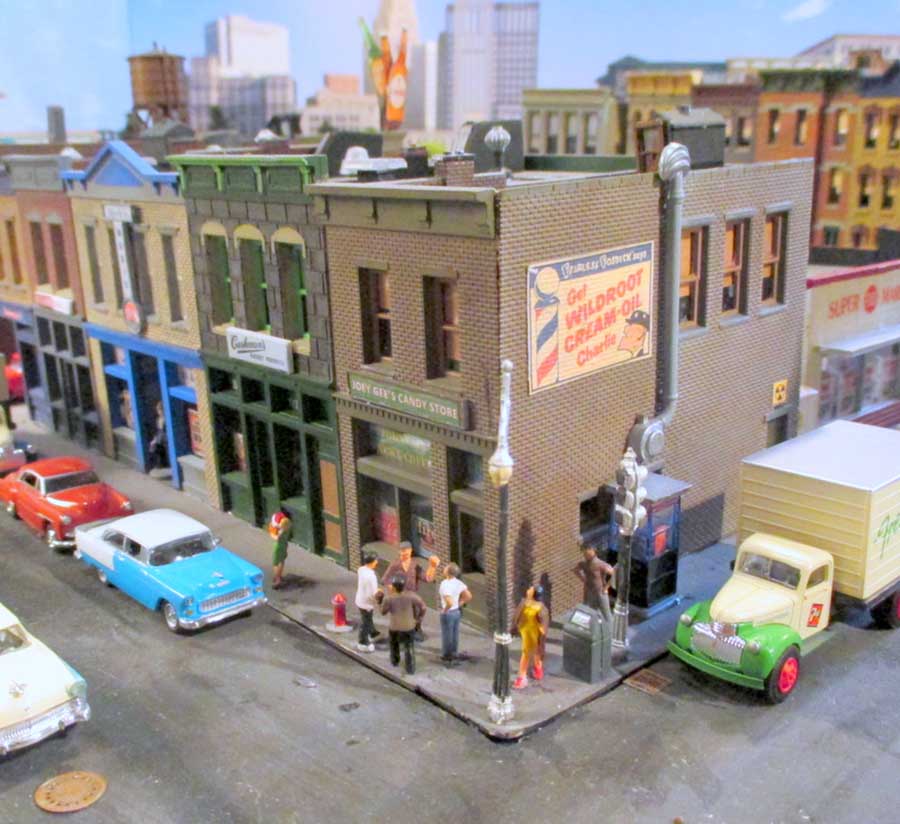
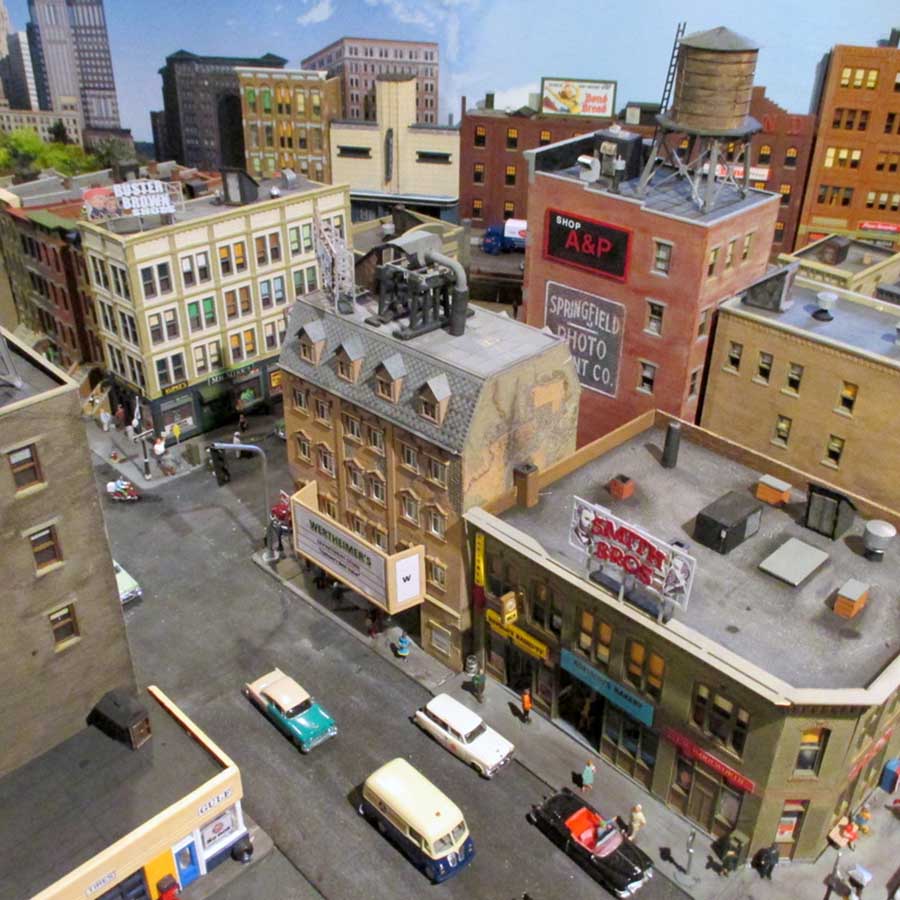
Jim’s been in touch with his 1950s HO scale model railroad:
“Hello Alistair,
This e-mail is as much a thank you to you and to the folks who contribute to your blog as it is an opportunity to share some information about my layout.
I started this layout when I retired and unlike many of the folks who contribute here, I did not have a layout as a young man. Growing up in a NYC apartment, well , there was just so much room.
A friend of mine retired a few years back and starting sending me e-mails of a layout he had started. I was intrigued.
But, I found the idea of doing a layout on my own and being an electrician, a carpenter, a modeler, an artist etc. to be overwhelming.
With my friend’s encouragement and with all the wonderful information I was able to gather from the contributors on your blog, I forged ahead.
It did not take long for me to realize that it was really the scenery I enjoyed that is, creating the scene, building the buildings, laying out the street grid etc. Hence, my “railroad” itself is a humble trolley oval.
I learned that many modelers attempt to recreate their childhood home. Being no different, I created a New York City neighborhood circa 1950’s I thank the good people of Pittsburgh for allowing me to use their downtown as my backdrop.
But then again, imagination is what model railroading is all about. I have attached photos.
I hope you will enjoy them.
Jim”
A big thanks to Jim – love the detail. His layout has bags of charm and what a theme, your childhood!
Now on to John, because it’s that time of year again.
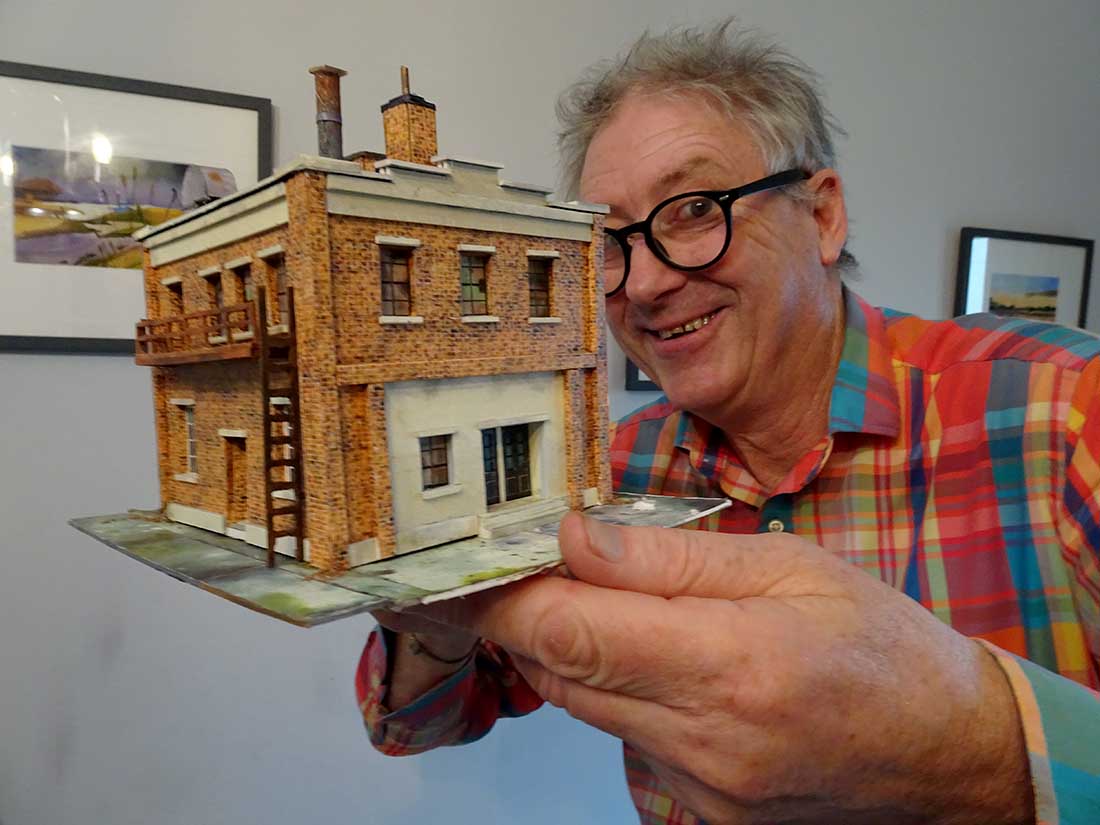
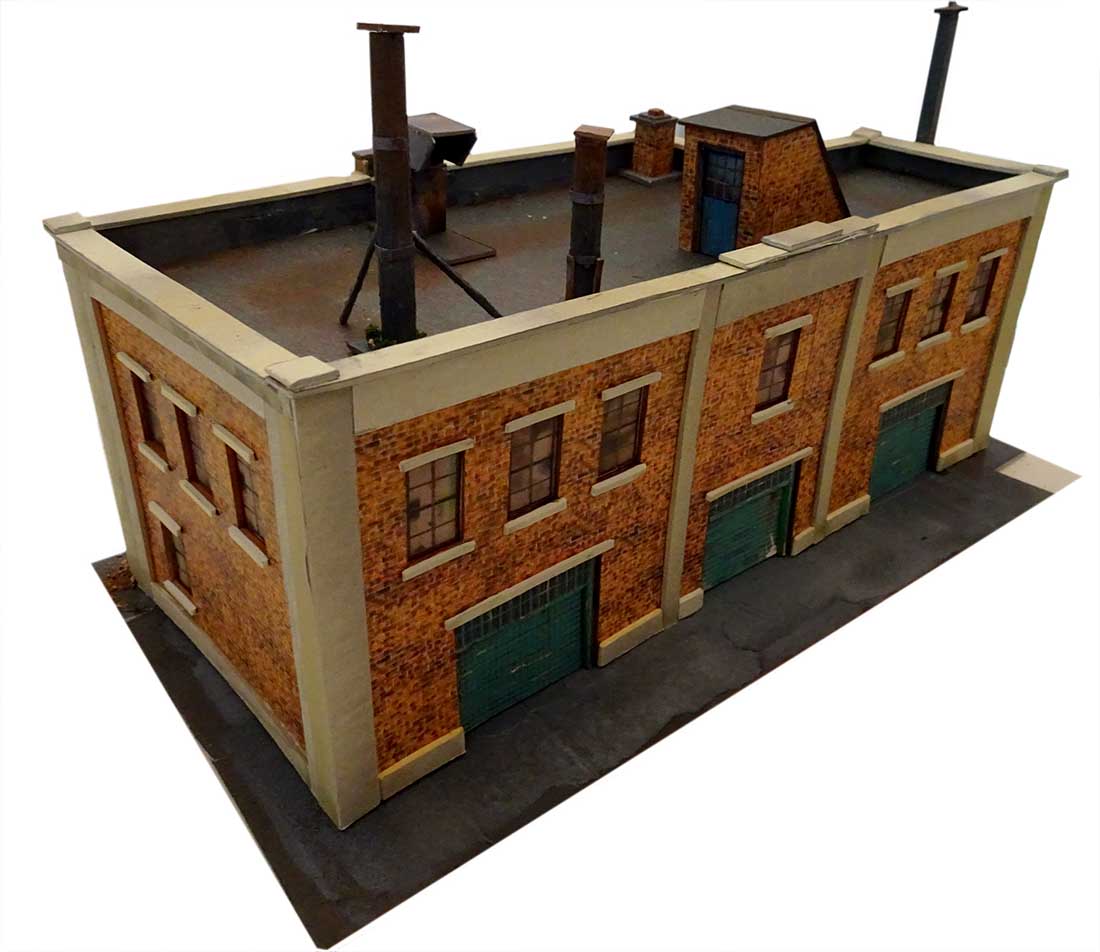
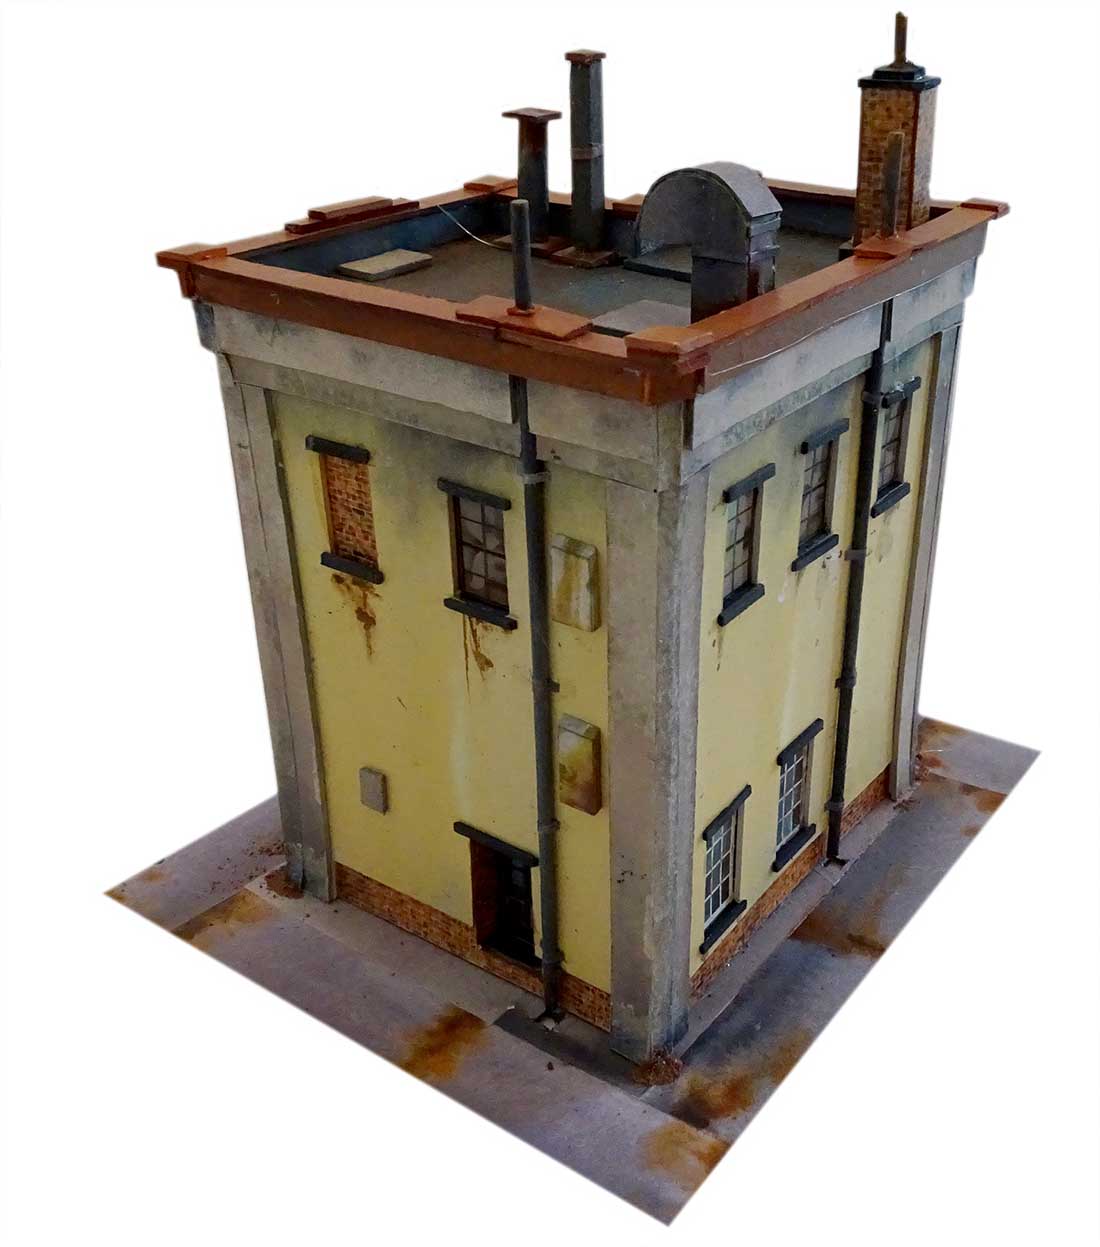
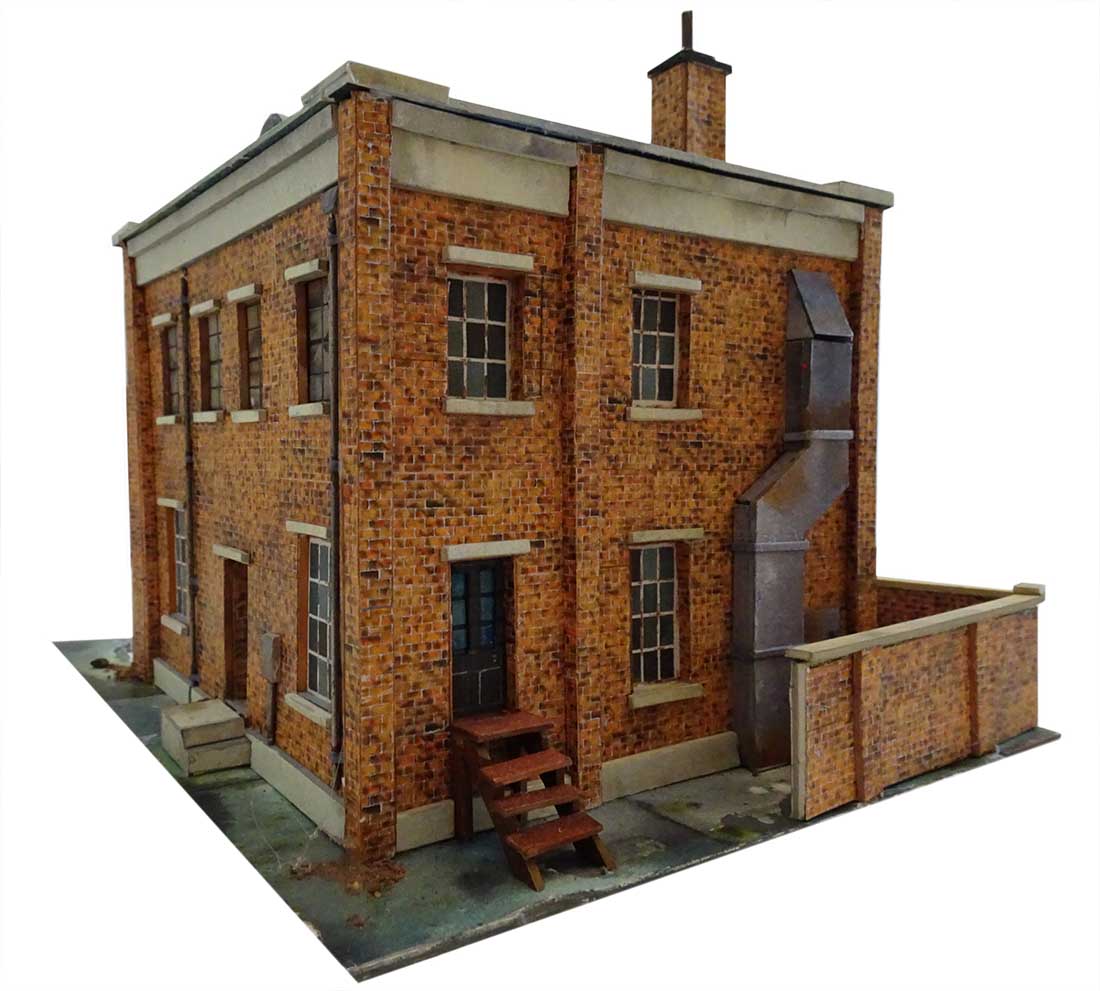
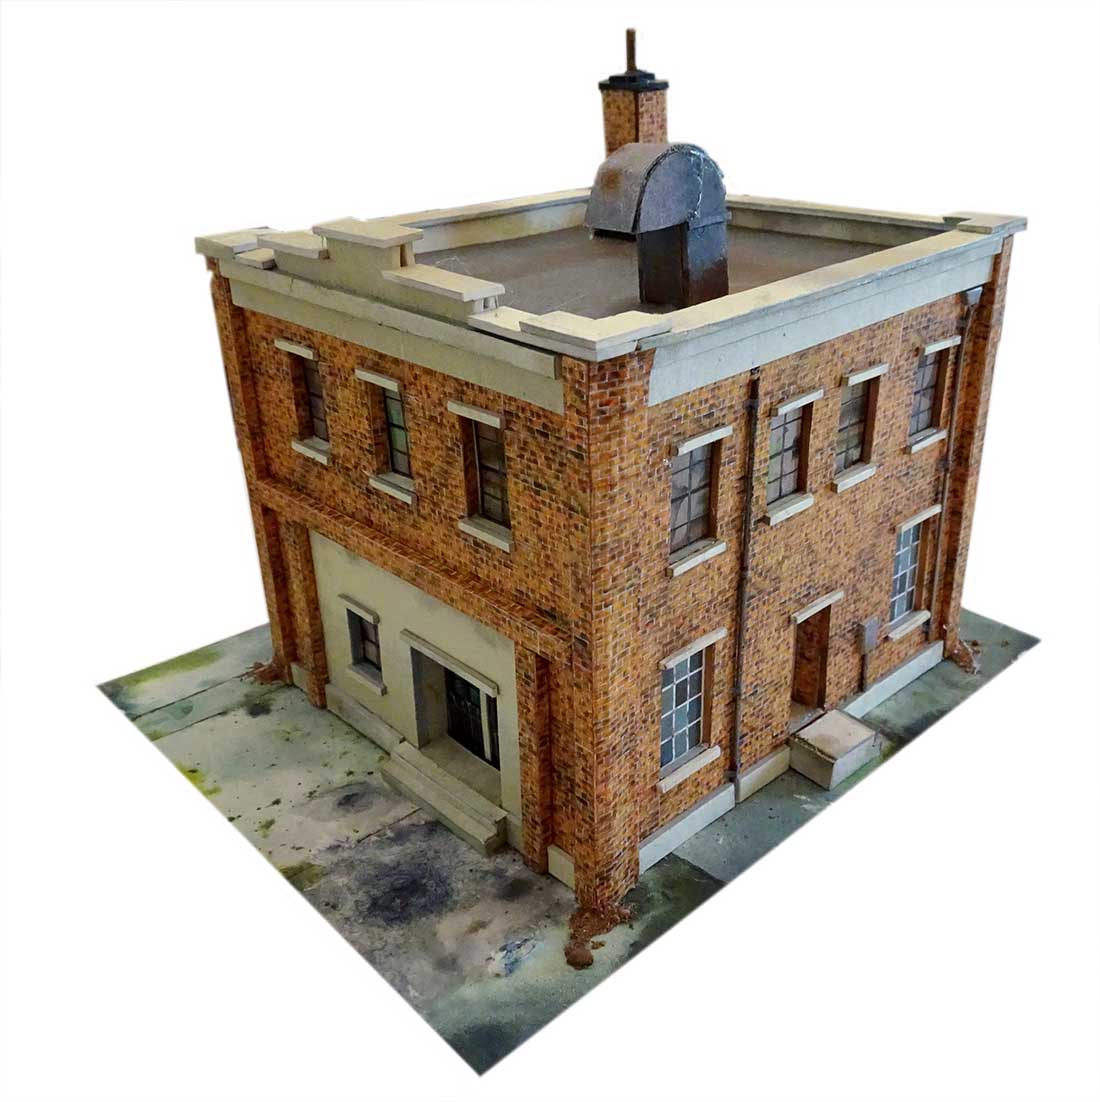
He’s been busy on the latest printable buildings, and as always, he’s done a great job of putting them together.
If you are unfamiliar with the printable buildings, you just download them and stick them together:
All the buildings are HO scale. Just reduce the print size to 54% for N scale.
You can print as many as the buildings as you like.
When you mix and match the buildings, you can get some really nice effects.
And best of all, you can get these three new buildings – and the latest track plan PDF – for just $9 over the next few days.
Volume 3 of the track plans is made up of another 20 track plans – all new, and featured on the blog, with the links to the posts.
If you’ve enjoyed the blog over the last few months or years, please do help it out and grab the new buildings and track plans.
To keep things simple, I have bundled the new buildings and new track plans PDF with the Beginner’s Guide, so even if you’ve already got the Beginner’s guide (I know many of you have), grabbing it again gets you the new buildings and the track plans.
It just makes it loads easier for me to do it this way.
And of course, if you’re new to the blog, and you’ve not got the Beginner’s Guide and all the bonuses, now’s the ideal time to grab it.
You’re saving $30 on the Beginner’s guide, and $27 on the new buildings, and $10 on the latest track plan PDF.
That’s a whopping $67 saving, and you’ll be directly supporting the blog too.
So there’s big savings to be had, and you’ll also be helping to keep the show on the road too.
Don’t forget, there’s a 60 day money back guarantee on all of the products – the buildings and everything else – so you really have nothing to lose.
Rob’s been back in touch, this time he’s been busy adding model railroad electric utility details:
“Hi Al,
This video strictly runs trains and with a quick look around a few newer things.
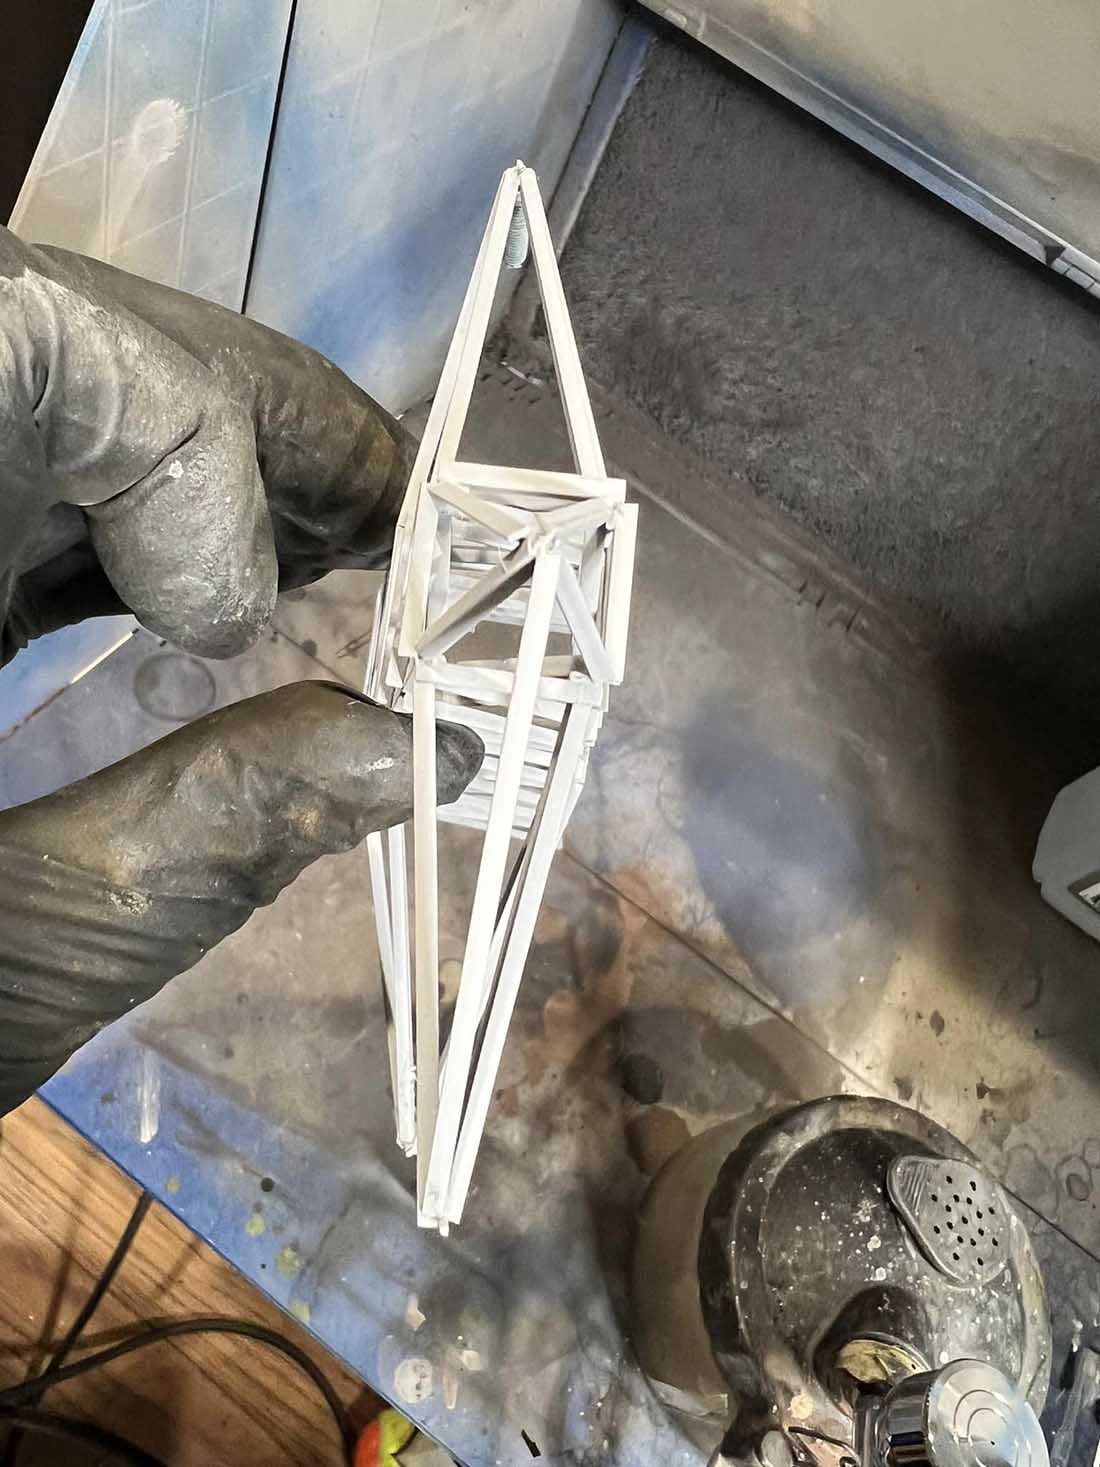
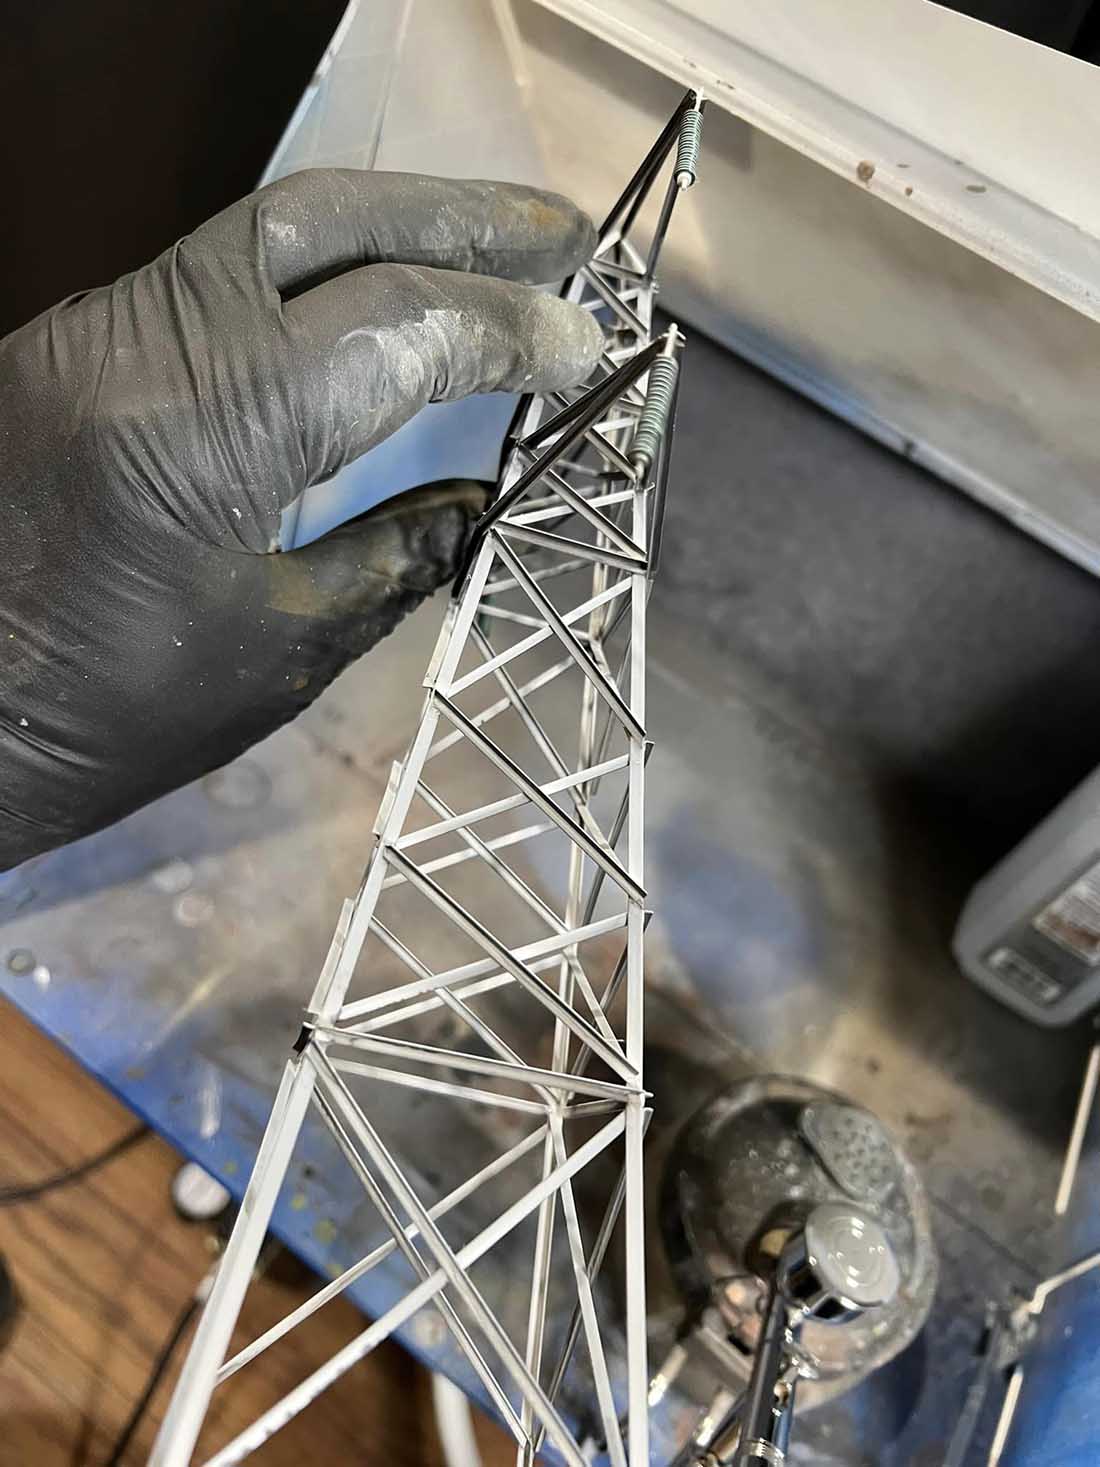
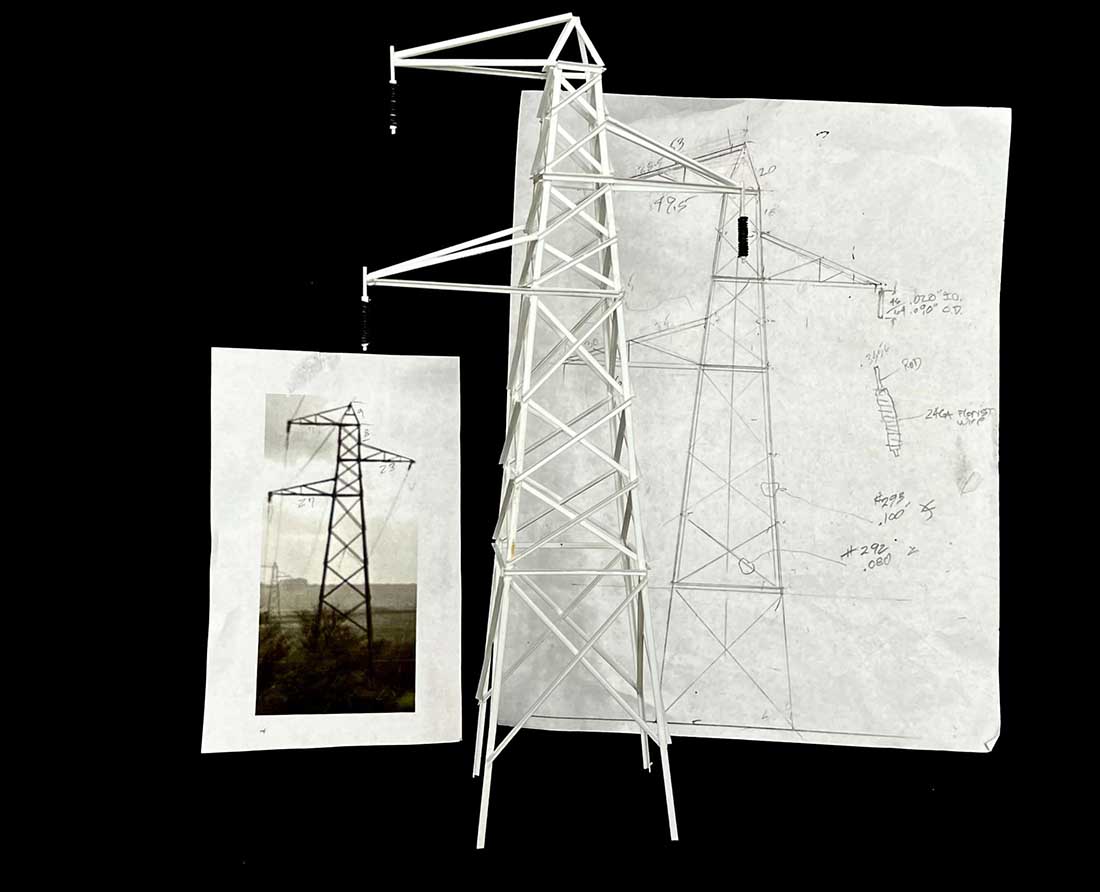
I got the high-voltage power cable pylons completed. There are 4 fully formed ones and I hung a single-sided one on the wall.
I tried a four-sided pylon on the wall but the shadows cast by it made it look confusing. A one-sided pylon seems to look better.
I was hoping the wall-hung effort would suggest the pylons continued off into the distance. I probably should have made it about 3/4 size so it would suggest it was farther away. Hindsight is 20/20. It still looks good.
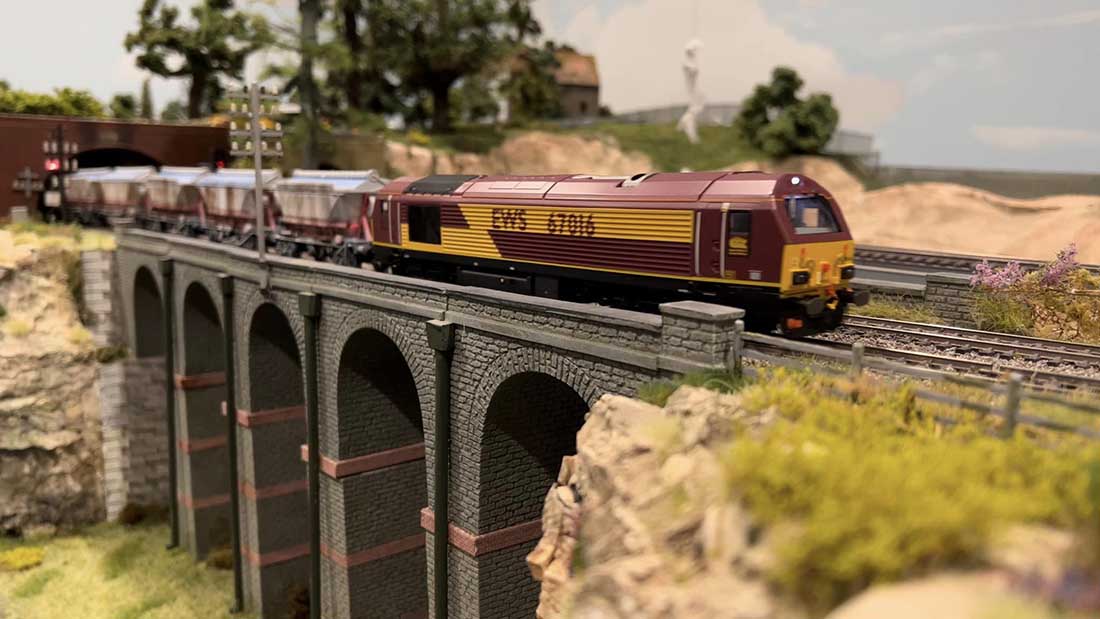
The class 67 is my bargain find. I was able to buy it used for about 1/2 price.
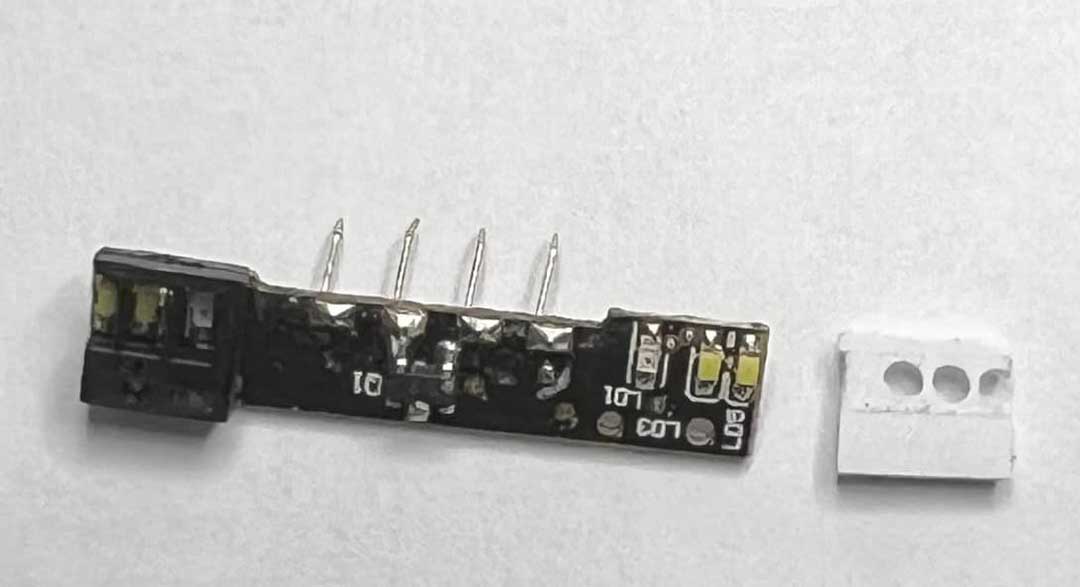
While installing a DCC decoder I noticed that one of the headlight/tailight shrouds was missing. I was able to fabricate one out of styrene plastic, paint it black, and then used cyanoacrylate glue to hold it in place. It definitely seems to be working.
The light shroud is shown before painting.
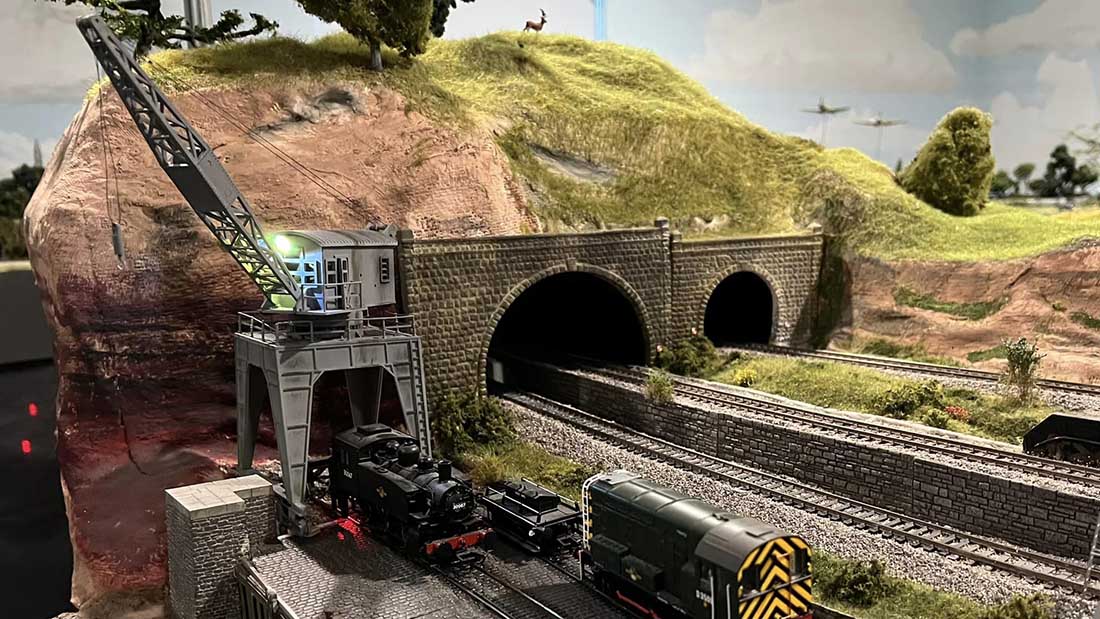
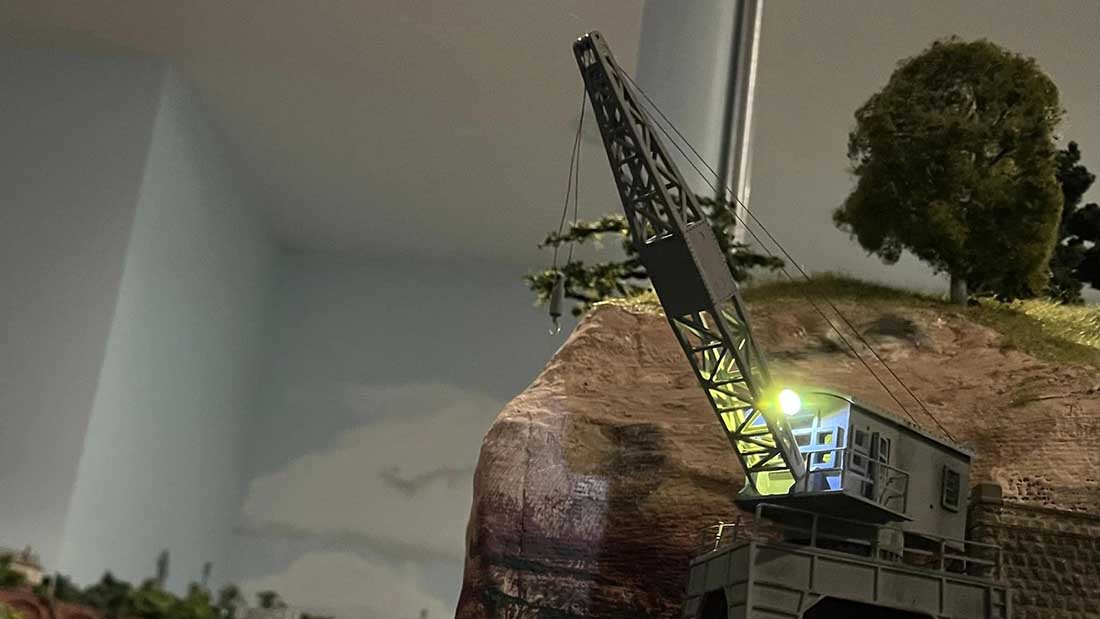
I thought it would be fun to add a crane to my harbor scene. The story goes that the old dilapidated crane was about to be scrapped but the local people who lived around there wanted it preserved.
The battle over keeping and restoring the crane raged on but in the end, it was preserved as a historic artifact and there it is. It was an easy and fun kit to build.
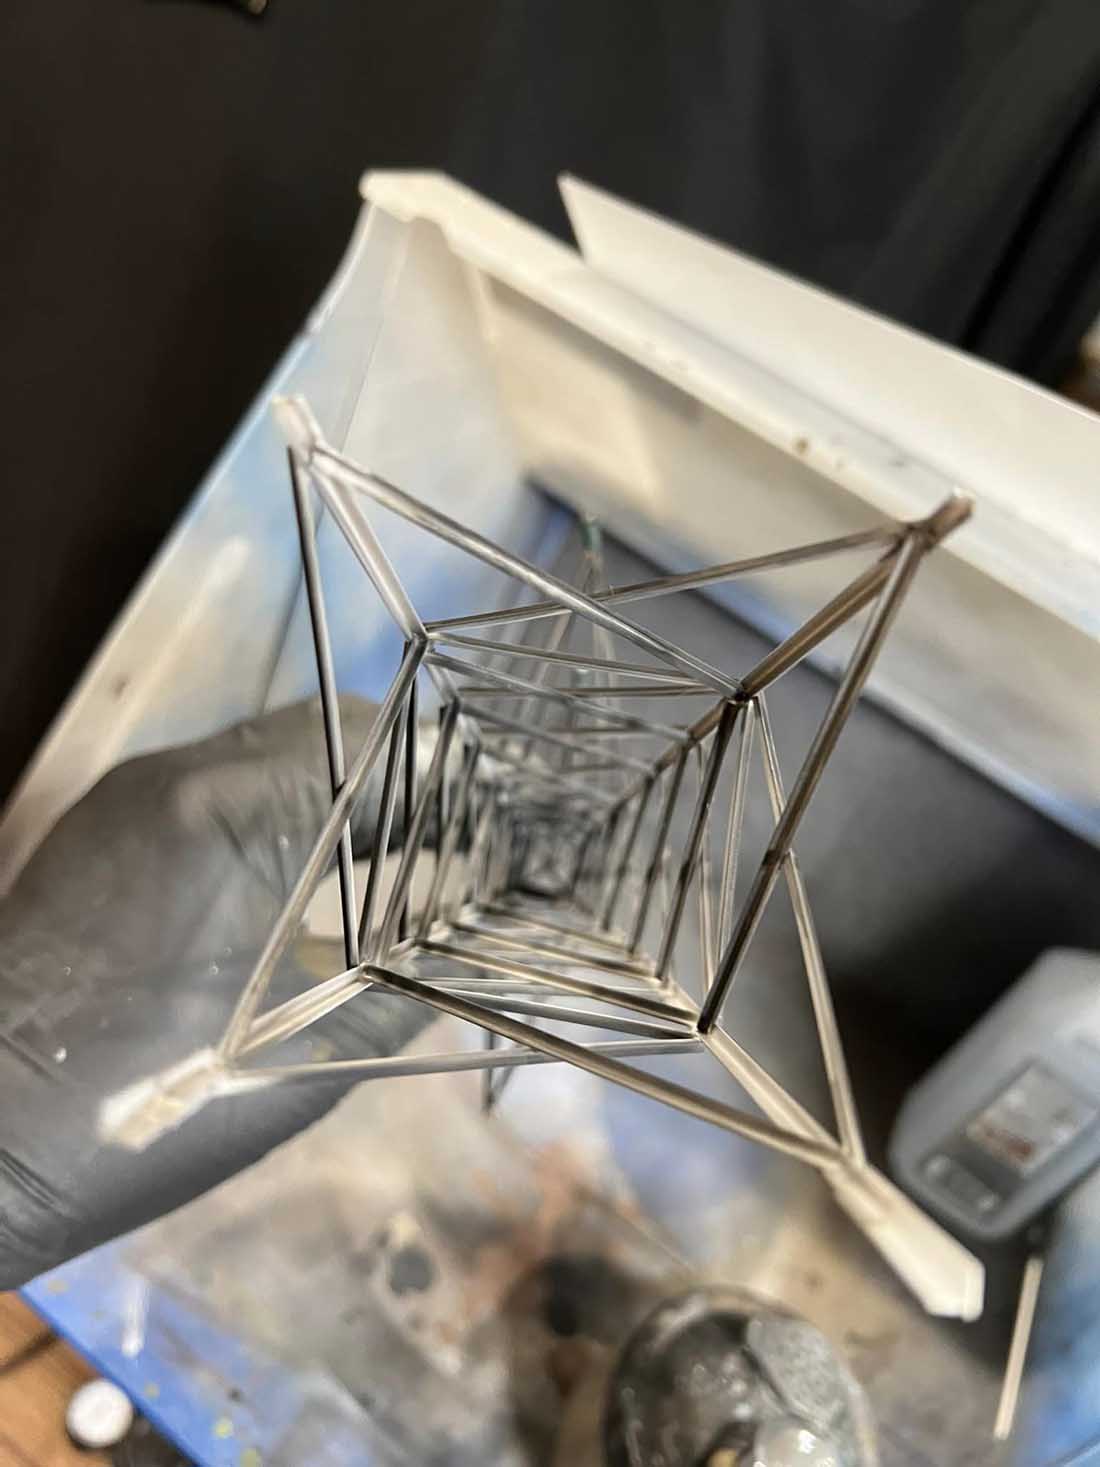
The series of photos as I rotate the pylon around illustrates a painting technique.
If you look closely looking down from the top the color is quite light, but as I turn it in my hand you start to see darker areas and when it is upside down it is very dark. This creates the illusion of shadows. These shadows, however, are painted on.
It is achieved by spraying black from the bottom up and then the light color from the top down. This technique can be used on just about any model.
Thank you Al, your efforts to keep your blog afloat are appreciated by all in the worldwide modeling community, in particular me.
Rob”
A big thanks to Hall of Fame member, Rob, for sharing his model railroad electric utility details.
And now on to George.
Not only is he taking the time and trouble to plan his layout, he’s making sure it’s his layout, with his rules. Quite right too!
“Dear Al
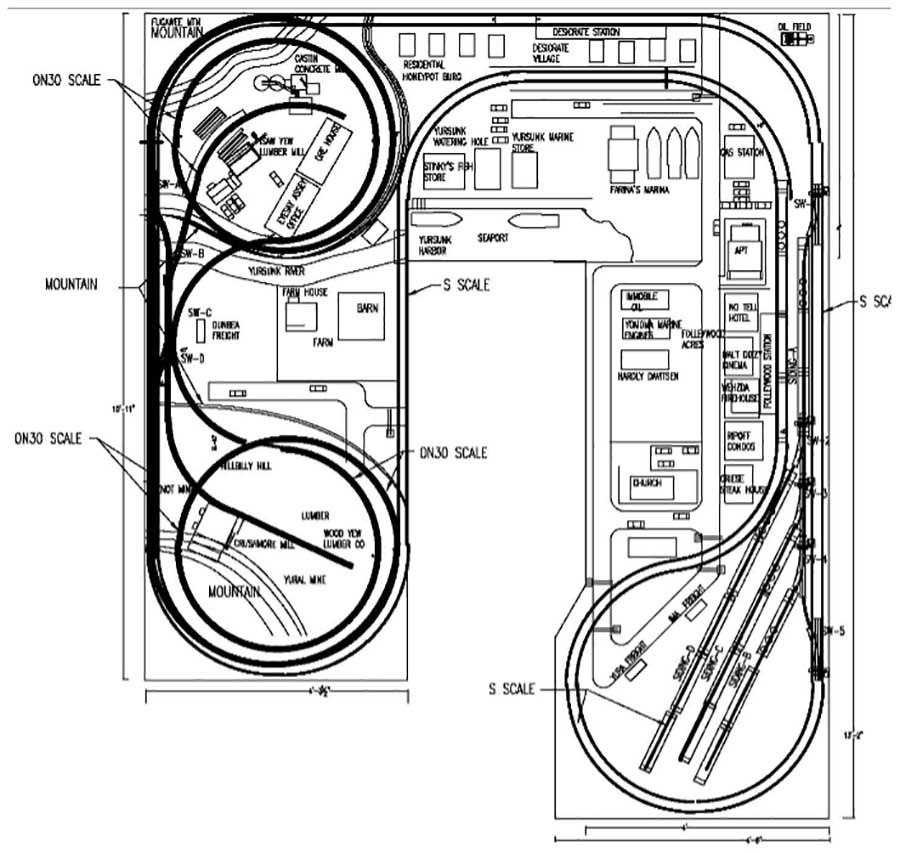
The following CAD drawing is of the S scale ON30 layout I have just begun to assemble.
It is a little different to decipher and I hope all can read it.
Basically it is two mountains on the left side which will feature the ON30 operation and the right side a flat S scale layout and trainyard.
The buildings closest to Follywood station are all 3D puzzles that are closer to O scale but I wont tell anybody. I like them.
I truly love my brothers on your blog and so respect the incredible work they do but I believe that every group needs a clown and I’ve elected myself to be just that. You see what I lack in building talents can escape scrutiny when observers eyes are blurred because of laughter.
If I am in fantasy land, making models from real things, then MY way is with humor. I had a blast giving names to the buildings and areas. BTW that’s ITZNOT MINE in the lower left corner.
There is a long story behind this layout and I will send that soon. My granddad’s farm was in the town of Neversink, NY where the Neversink river and reservoir are so the Yursunk river, harbor et al was thus created.
The barn is an exact 3/16” scale model of the cowbarn and the house also.
I just hope I can build this reasonably OK. Pics to follow very soon if I can rearrange the mess.
George”
A big thanks to George and Rob.
That’s all for today folks.
Please do keep ’em coming – it’s still jolly quiet this end.