“Hi Al
Thank you for all you do for the hobby!
It has been over 5 years since I last contributed to your site having built a Marklin HO layout when I was living in Illinois. You very kindly featured it on your site.
I have since retired as a Plastic surgeon, moving from Illinois to Santa Fe, New Mexico and had to break down the old layout, trying to preserve some of the landscaping elements which you may recall relied heavily on Woodland Scenics shaper sheet and plaster rocks.
I stored the pieces in a plastic container bin together with numerous containers of track, locomotives and rolling stock before transporting it all to Santa Fe where it remained in storage for 2 years.
We finally moved to a different, larger home in Santa Fe where I had enough space to spread the wings of my favorite hobby as it had a wine cellar (basements are extremely rare out here as there are no tornadoes). Wine connoisseurs will cringe at the sacrilege of turning a wine cellar into a train room, but not being a wine aficionado, I had no compunction about the decision!
The cellar leads off an outdoor patio and measures 23’x13′ with polished plaster walls, an arched ceiling and varnished brick floors. It is dry and perpetually, comfortably cool.
I removed all of the wine racks and installed a radon remediation system as the radon levels were high and I didnt fancy glowing in the dark over time! Anyone building a layout in a basement should check the radon as chronic exposure to high levels can cause lung cancer.
My old layout in Illinois had suffered from numerous issues. It had started as a simple 16’x4′ flat layout on homasote panels and morphed steadily into an E shaped layout with serial additions that posed grade and track alignment problems resulting in running issues.
Some grades were as high as 4% which challenged some of the heavier consists. While it looked quite good in the end, I left the background til last (major mistake) and had to paint the back wall while reaching long distances over delicate scenery.
I had also started the construction on steel sawhorse trestles which left ugly protruberances jutting out around the edges of the baseboards.
So, when I decided to begin afresh in Santa Fe, I was determined to use the tried and tested approach of careful planning and better technical execution. The result has been much more gratifying.
I cannot stress enough to beginner modellers, the importance of good planning, sturdy construction and meticulous attention to wiring, reliable power distribution and smooth running characteristics.
The time spent getting it right up front will save hours of frustration and misery in the future! Learn from the mistakes of others and try not to repeat them yourself.
I have to stress that I am not a “rivet counting” prototypical modeler. I run the trains I like because I find them beautiful, interesting or mechanically fascinating.
When I was 5 my parents gave me a Marklin 3-rail AC folded dog-bone layout on a baseboard with a small DB Prairie Pony loco & 4 freight cars. It gave me hours of pleasure for many years and I sold it to help get cash for medical school. Big mistake.
In my forties my interest was re-kindled and I began collecting once more. I tend to favor eras l-lll primarily but will spill over into more recent models if I like them.
My collection consists mainly of Swiss/German locos like the famous Swiss Crocodiles that hauled freight over the Gotthard Pass and the K.Bay.Sts.B locos of the old pre war Bavarian Railways (e.g S3/6 Rheingold) and earlier German locos of the DB like the V200 diesel.
In addition I have a modest collection of American steam and early diesel locos including the famous UP BigBoy.
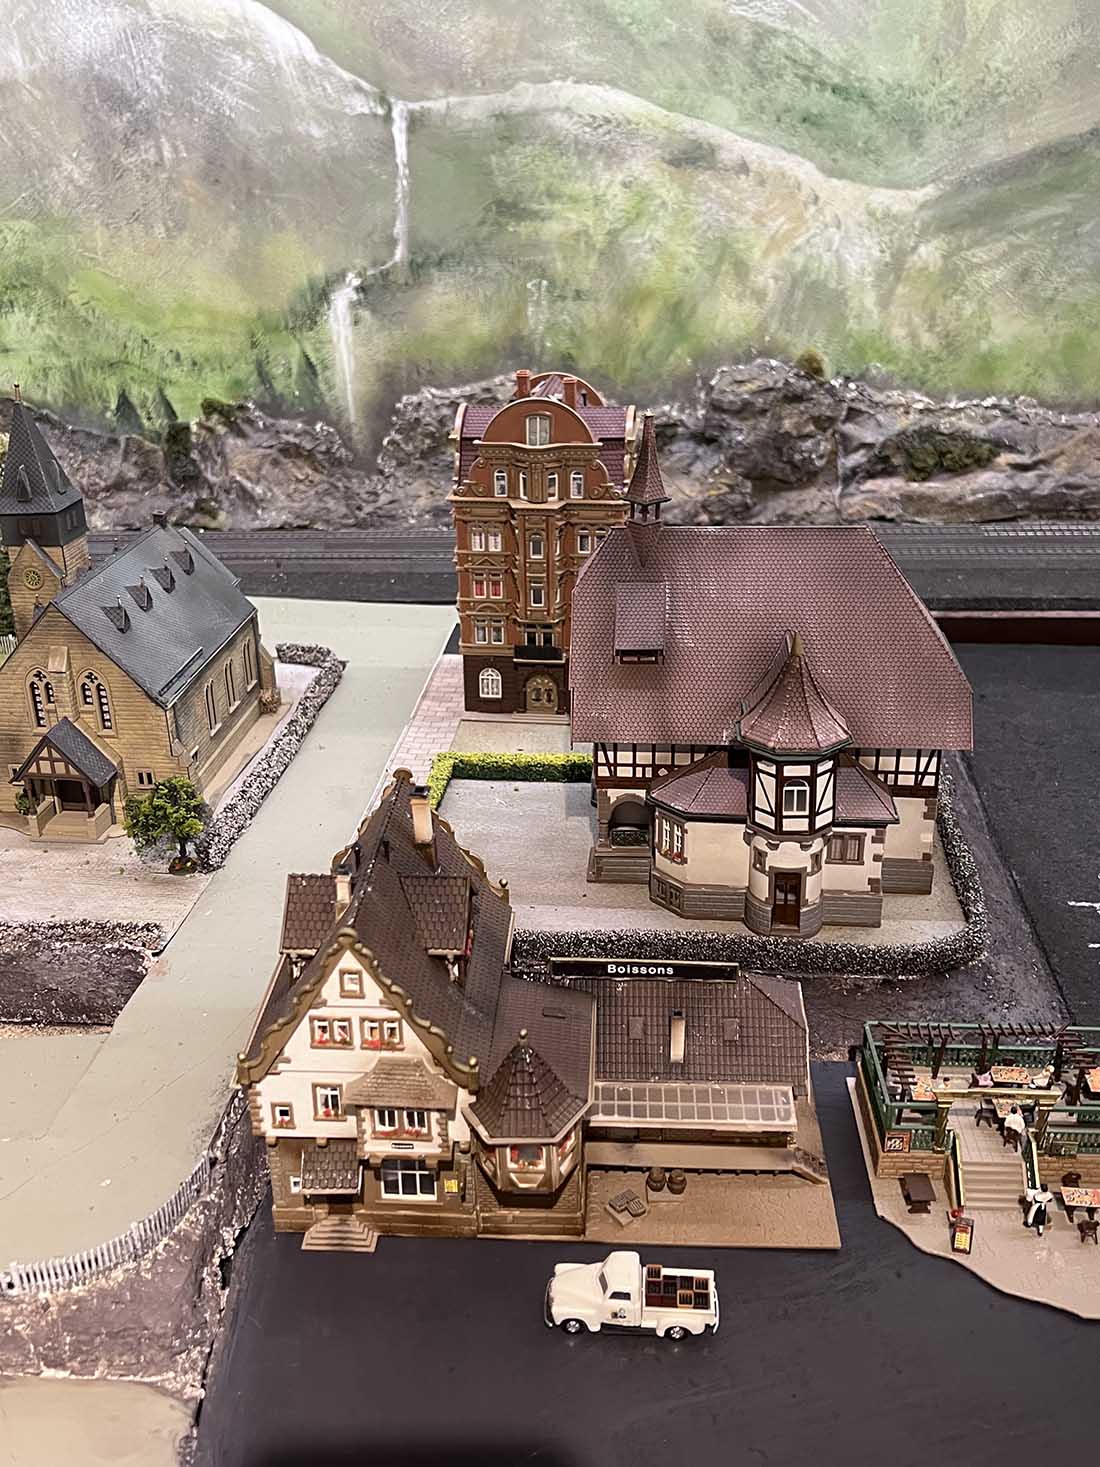
To further complicate matters I have a large collection of Swiss and German style buildings but couldn’t resist purchasing many of the beautiful kits coming out of Fine Scale Miniatures like those featured in the Manchester South Franklin Railroad and also some of Doug Foscale’s kits, many of which showcase 1910-1930’s Americana.
The question has always been how to incorporate all of this variety into a single railroad layout.
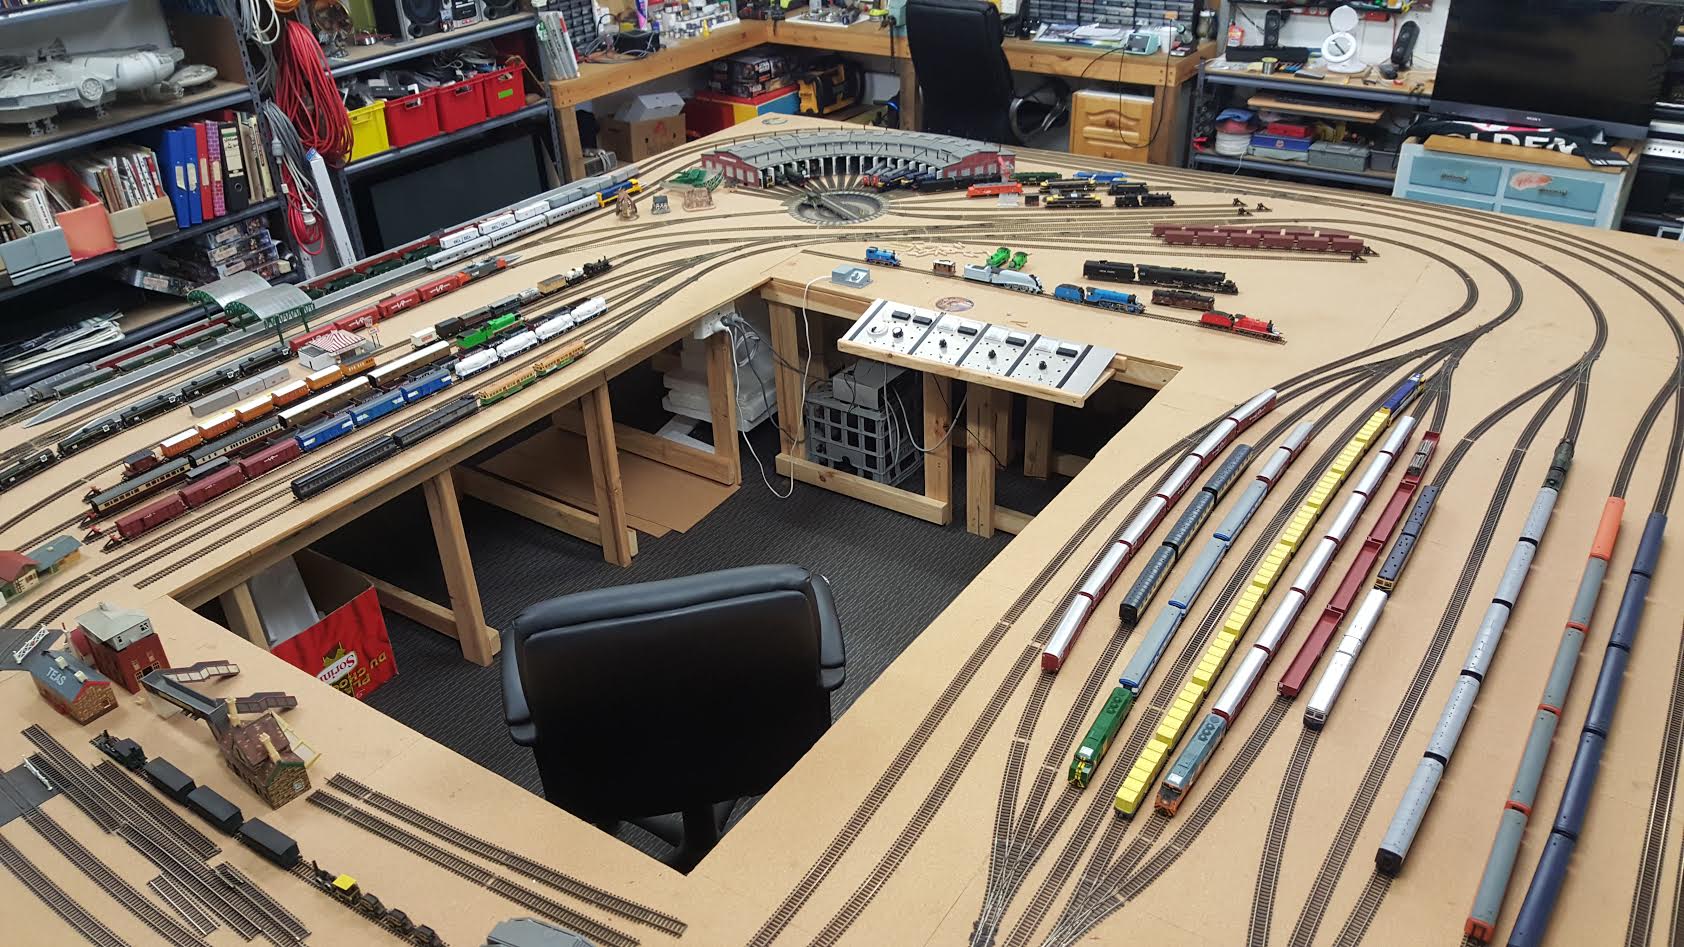
In the end I decided once more to blend the 2 by having 2 main limbs of the layout connected by a narrow bridge focal point.
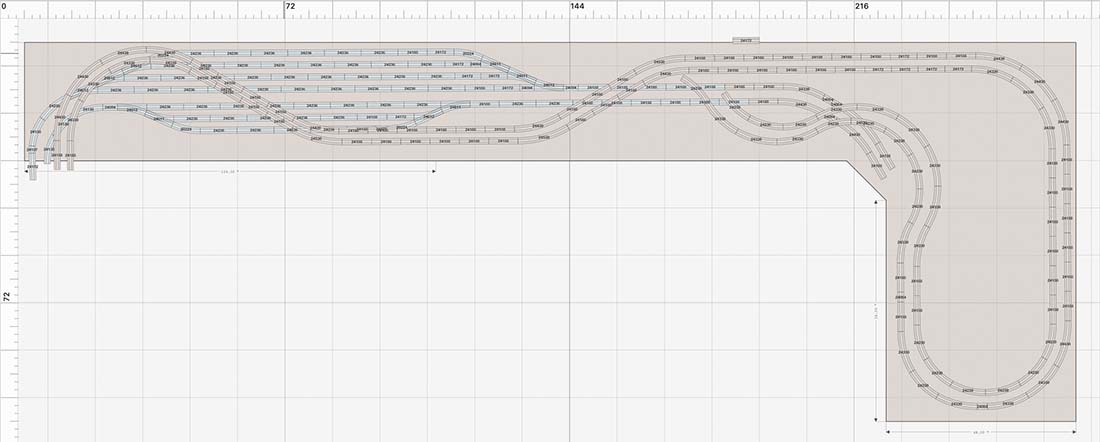
I have always been drawn to a particular track plan in one of Marklin’s excellent track planning books and I modified it to suit my needs.
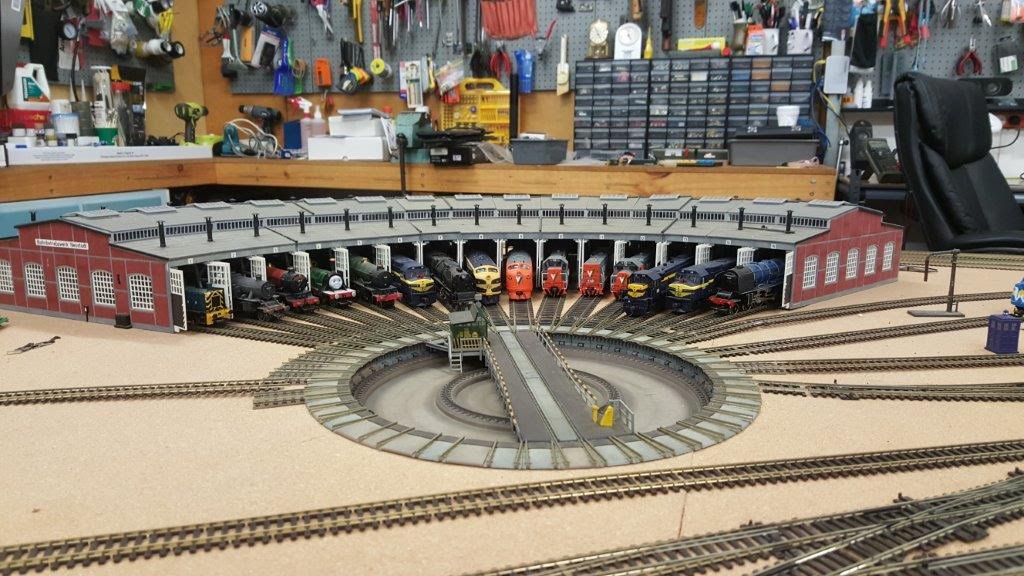
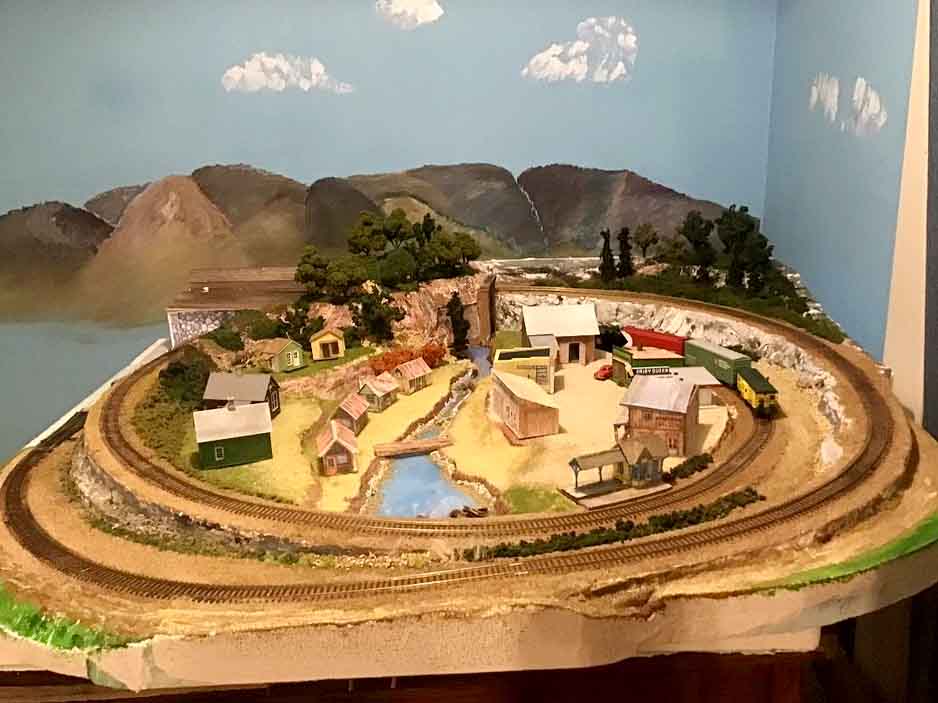
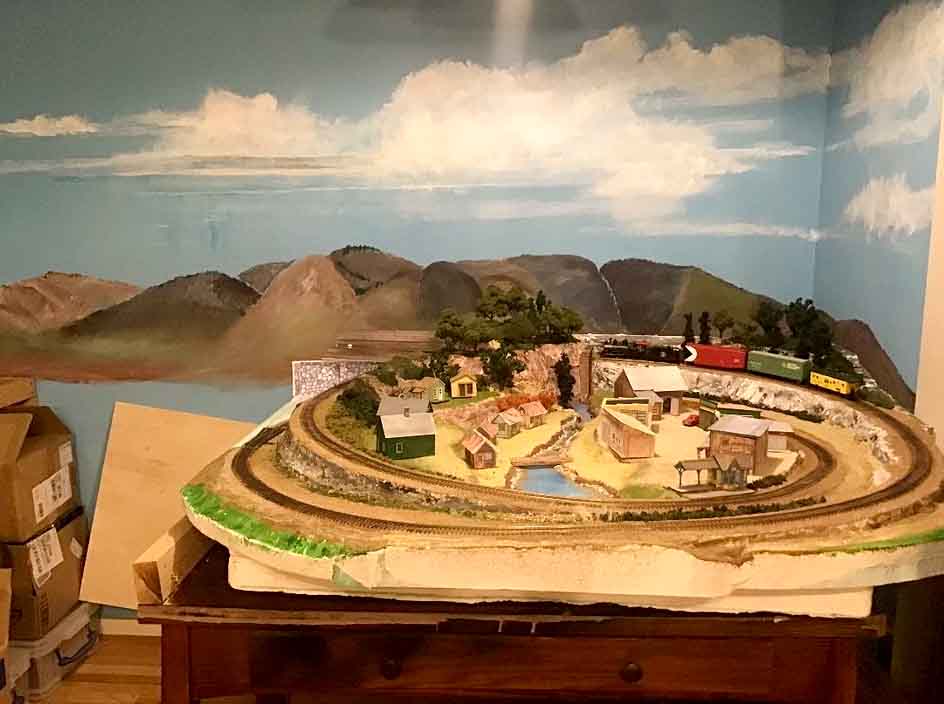
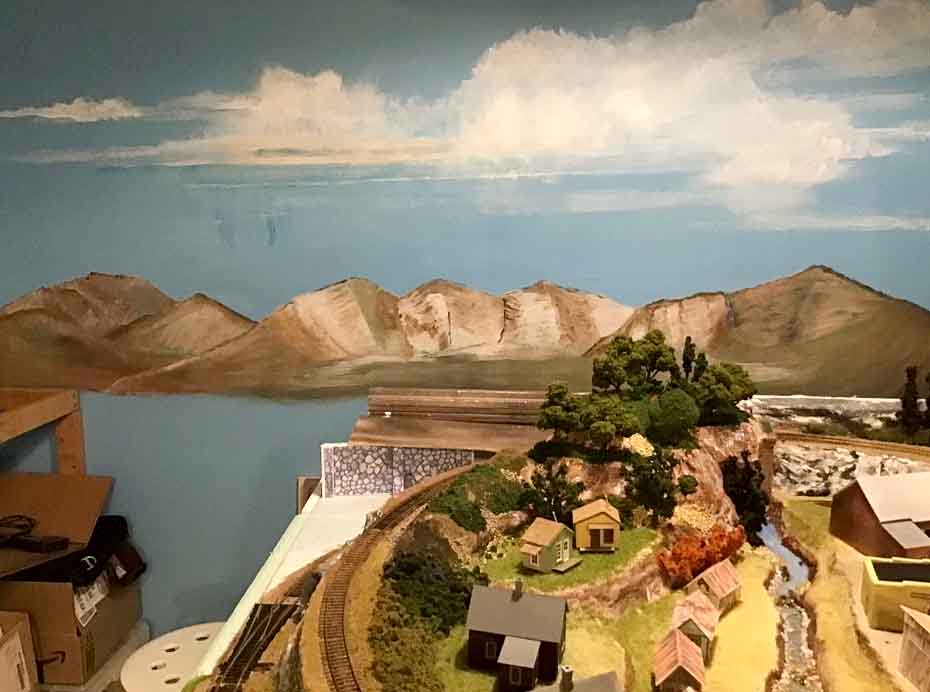
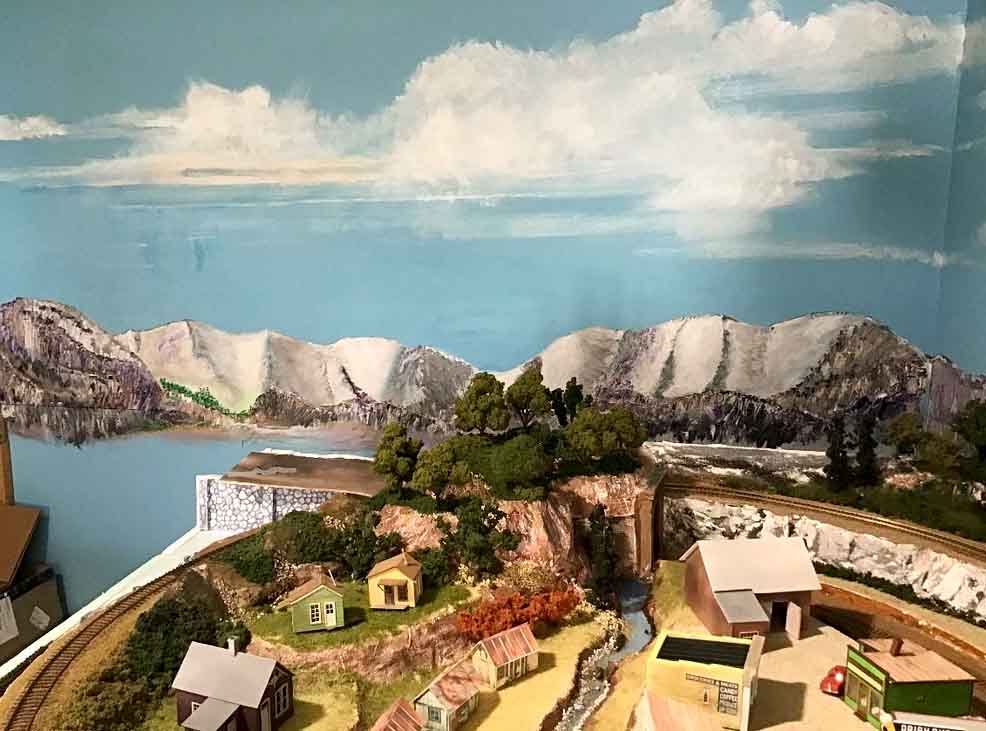
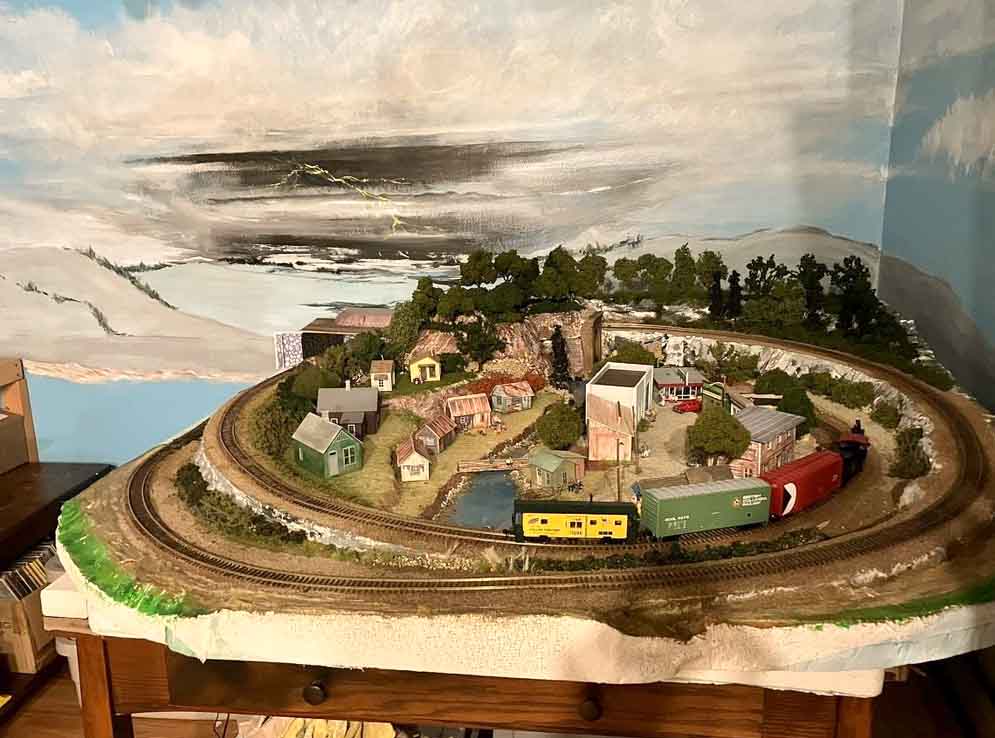
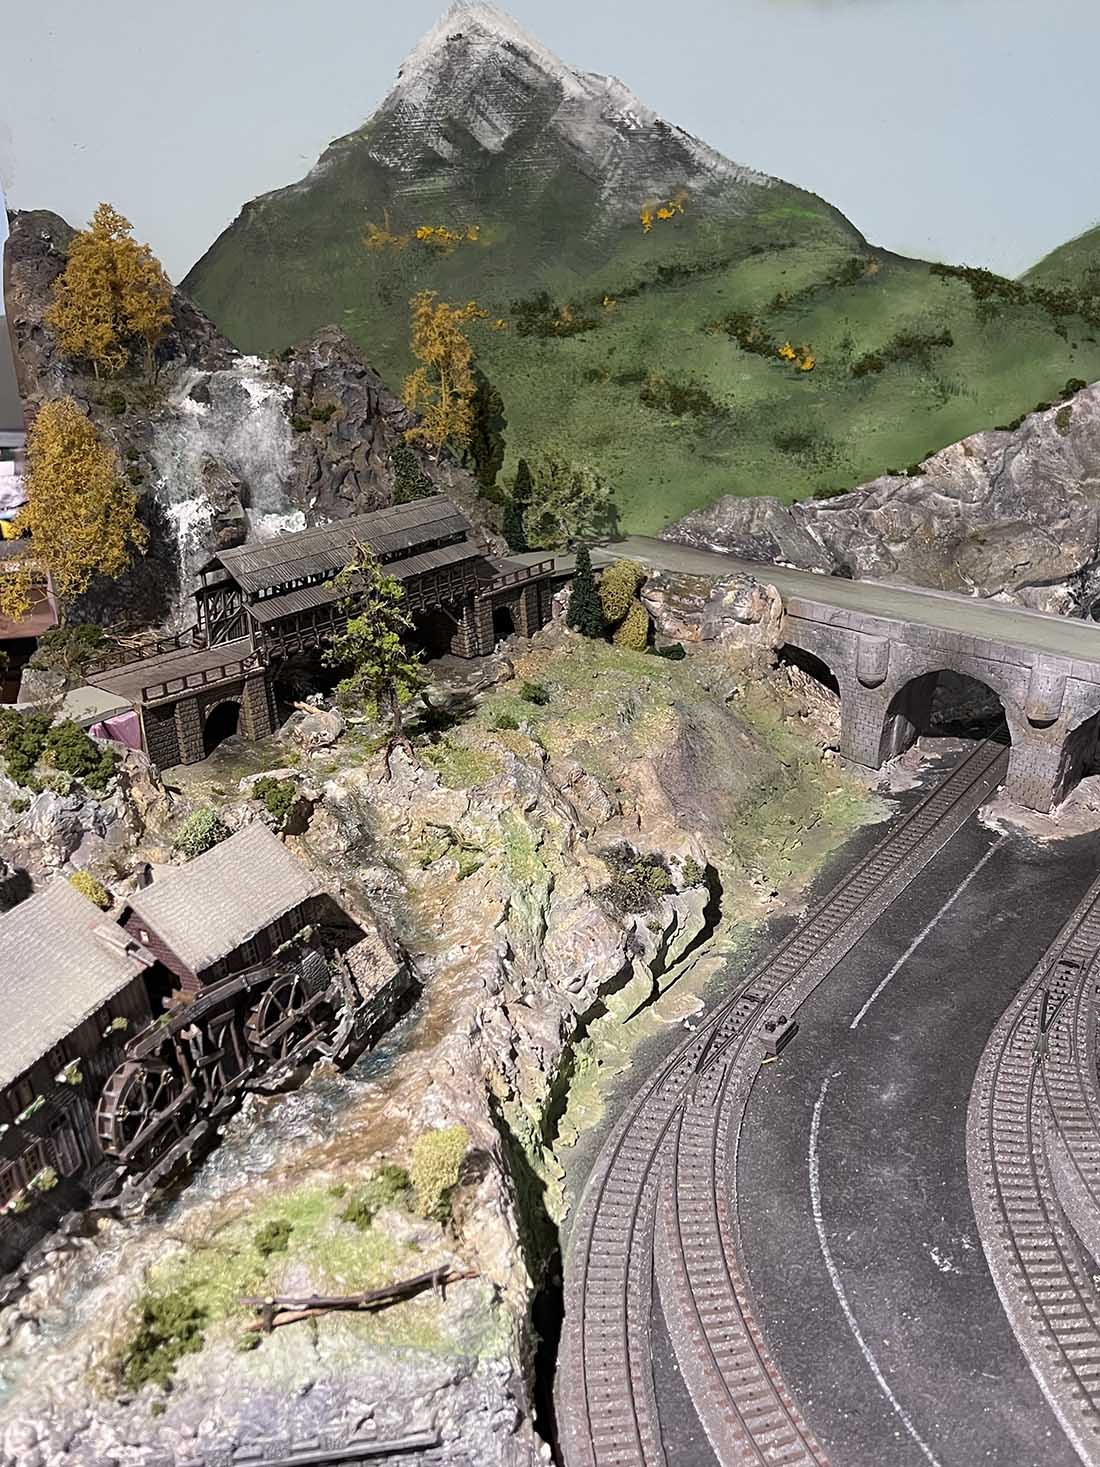
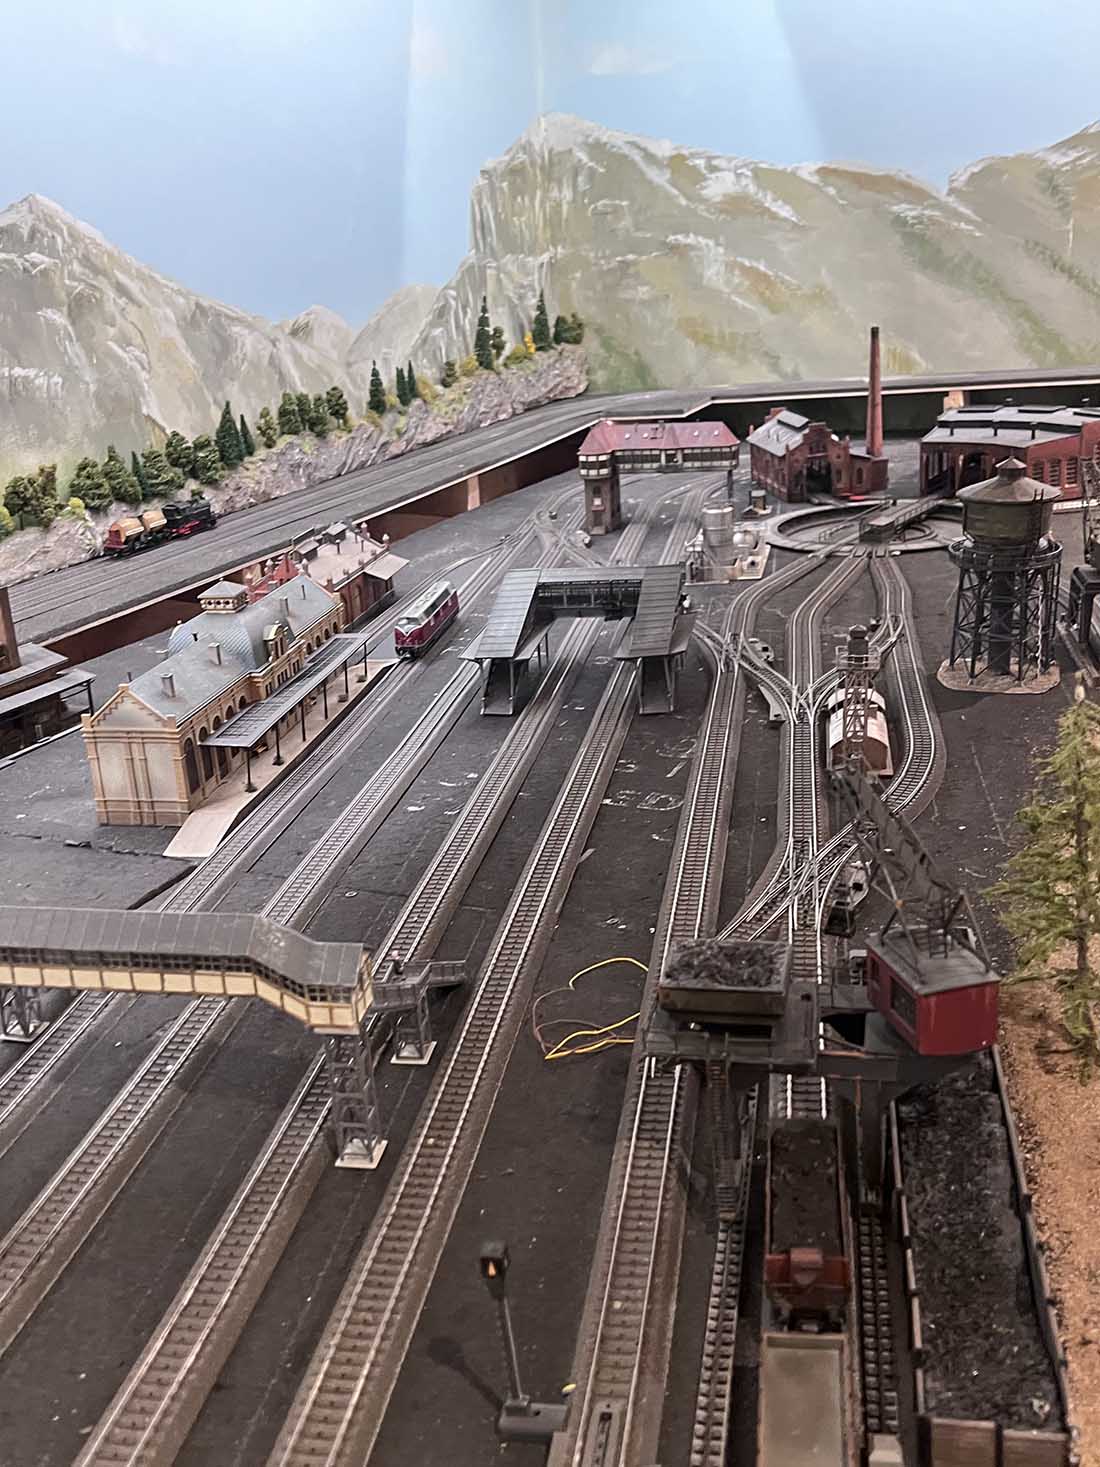
On the left or south side of the layout I have the Swiss-German border layout featuring a large through station with steam service including turntable, roundhouse, coal, water and sanding facilities.
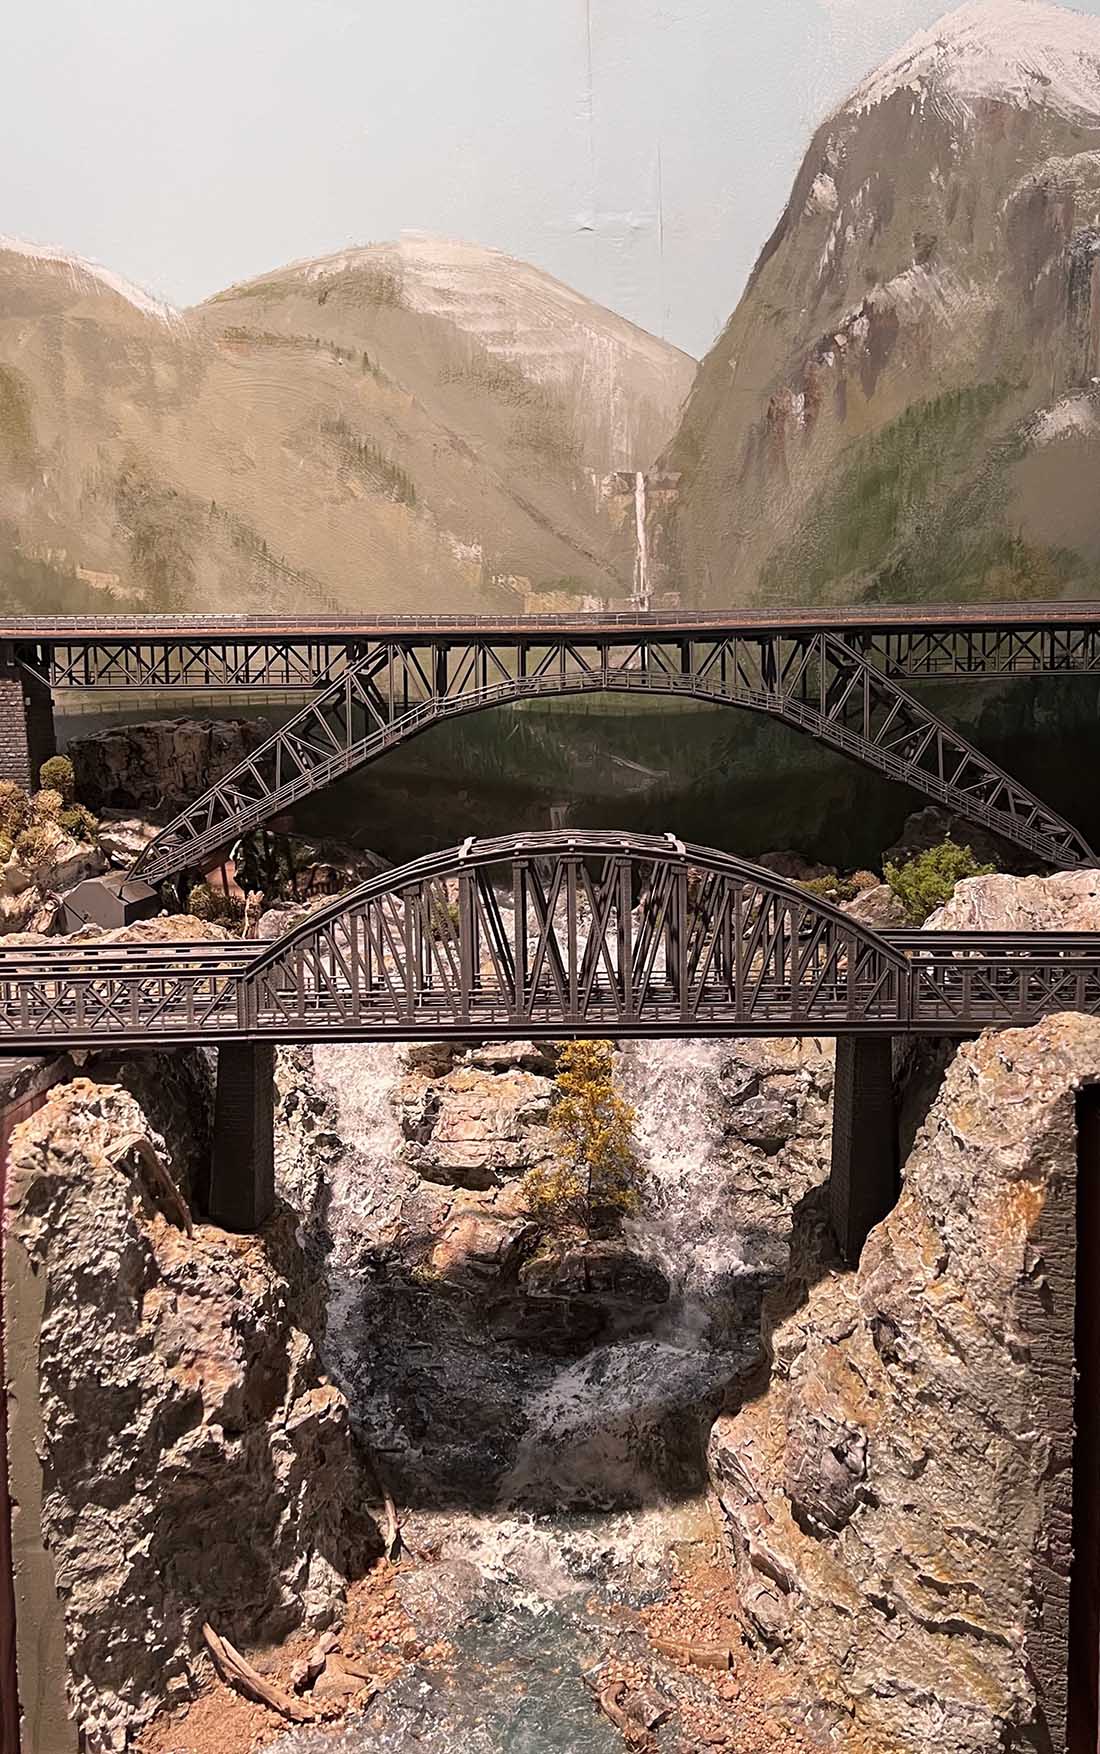
One limb courses round the periphery to disappear beneath the town running the full length of the room as a hidden loop to emerge through a tunnel before passing over the lower of 2 bridge structures.
The outermost limb runs east then turns north to run over a large steel span bridge before crossing to the north limb. These two limbs then pass along the north wall of the room at 2 levels. The upper level is exposed , runs through a small rural station then descends to what will become a 1920’s era US town.
The lower level passes through a tunnel to a 6 lane staging yard before emerging into a double main line leading into the US town with waterfront.
Who knows how it will turn out but I love the layout and its variability in terms of running options as things stand.
First I built a scaffold to which I screwed the masonite panels for the backdrop. I painted the basic backdrop before starting the framework for track.
To date I have built the entire framework, lain the track and set up a bus wire with feeder wires. Control is DCC using the Marklin CS2 system.
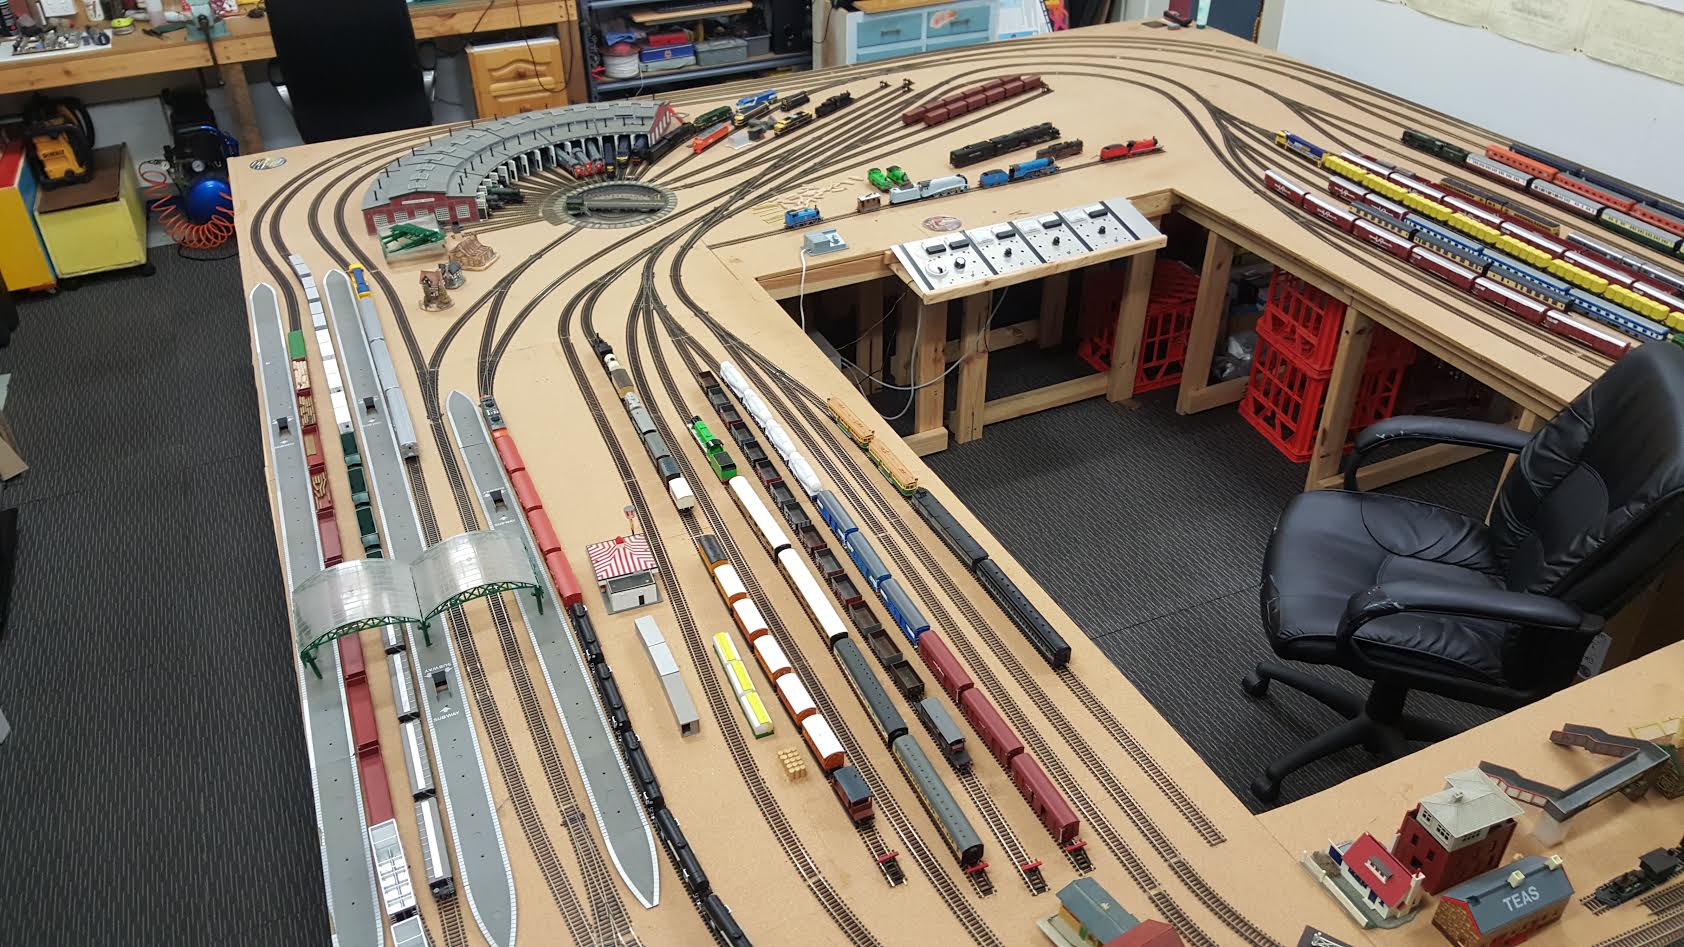
I have started landscaping the extreme east end of the south limb and will gradually work west then over to the north limb. To encourage myself along the way I built out the bridge sections which provide a visual focal point on the west wall.
I am enclosing some preliminary photographs but will start generating videos documenting the process from beginning to end as time permits and forward these to you for your readers’ interest. Being retired I have much more availability so progress will be much faster than before.
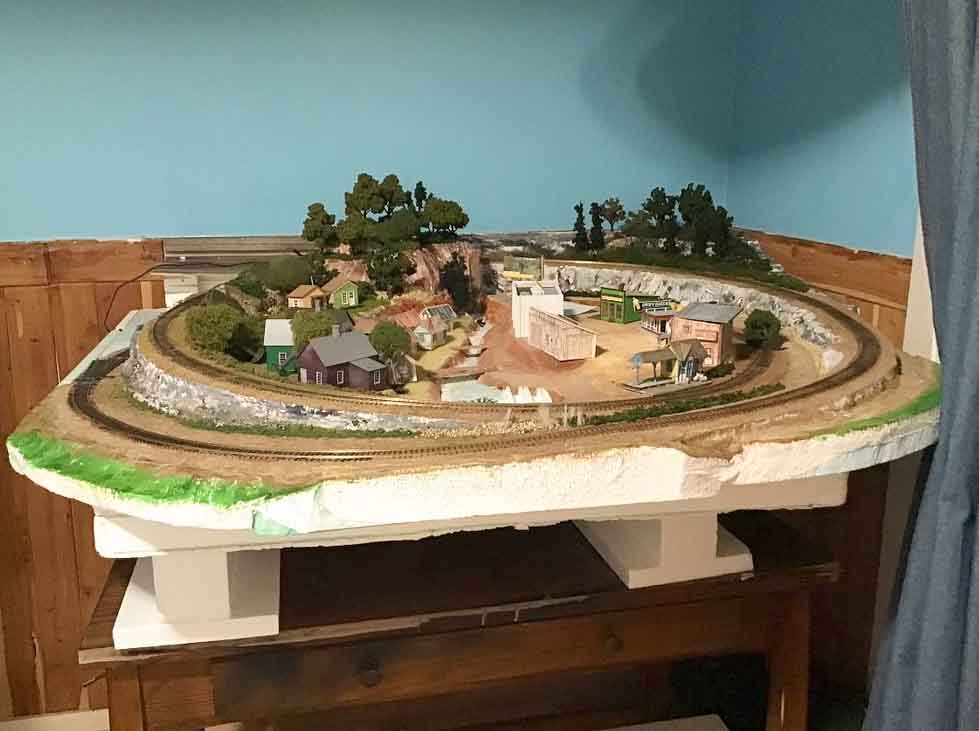
North Limb
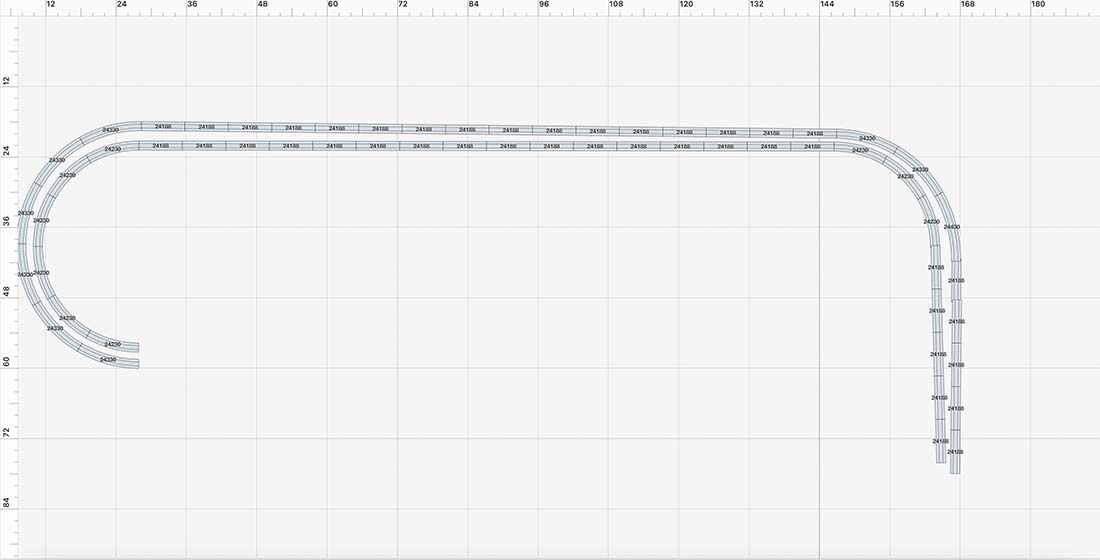
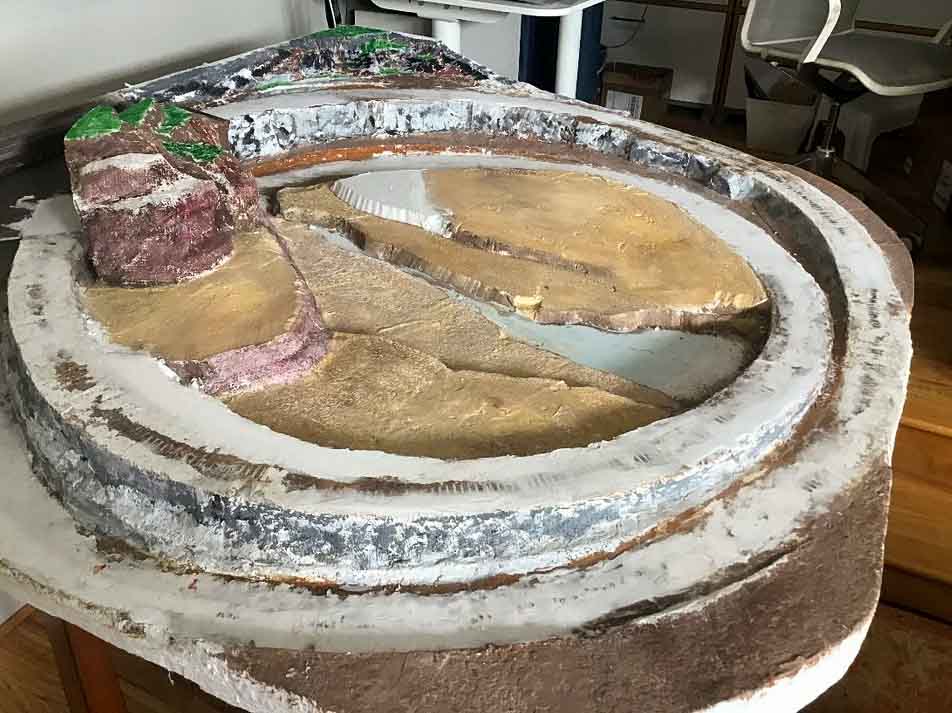
Sublayer
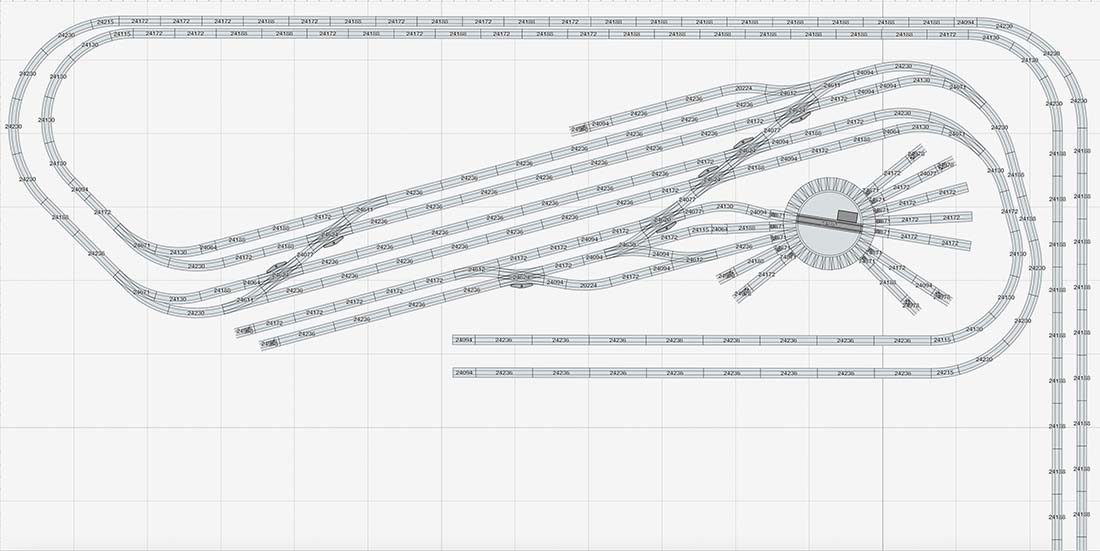
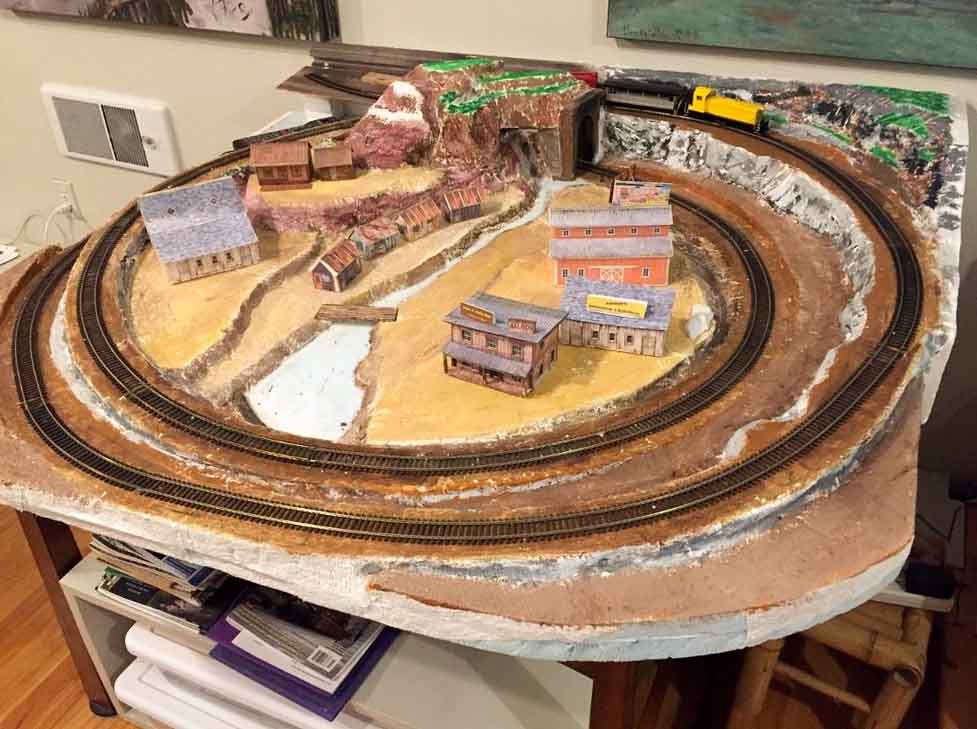
Finished HO scale Marklin track plan
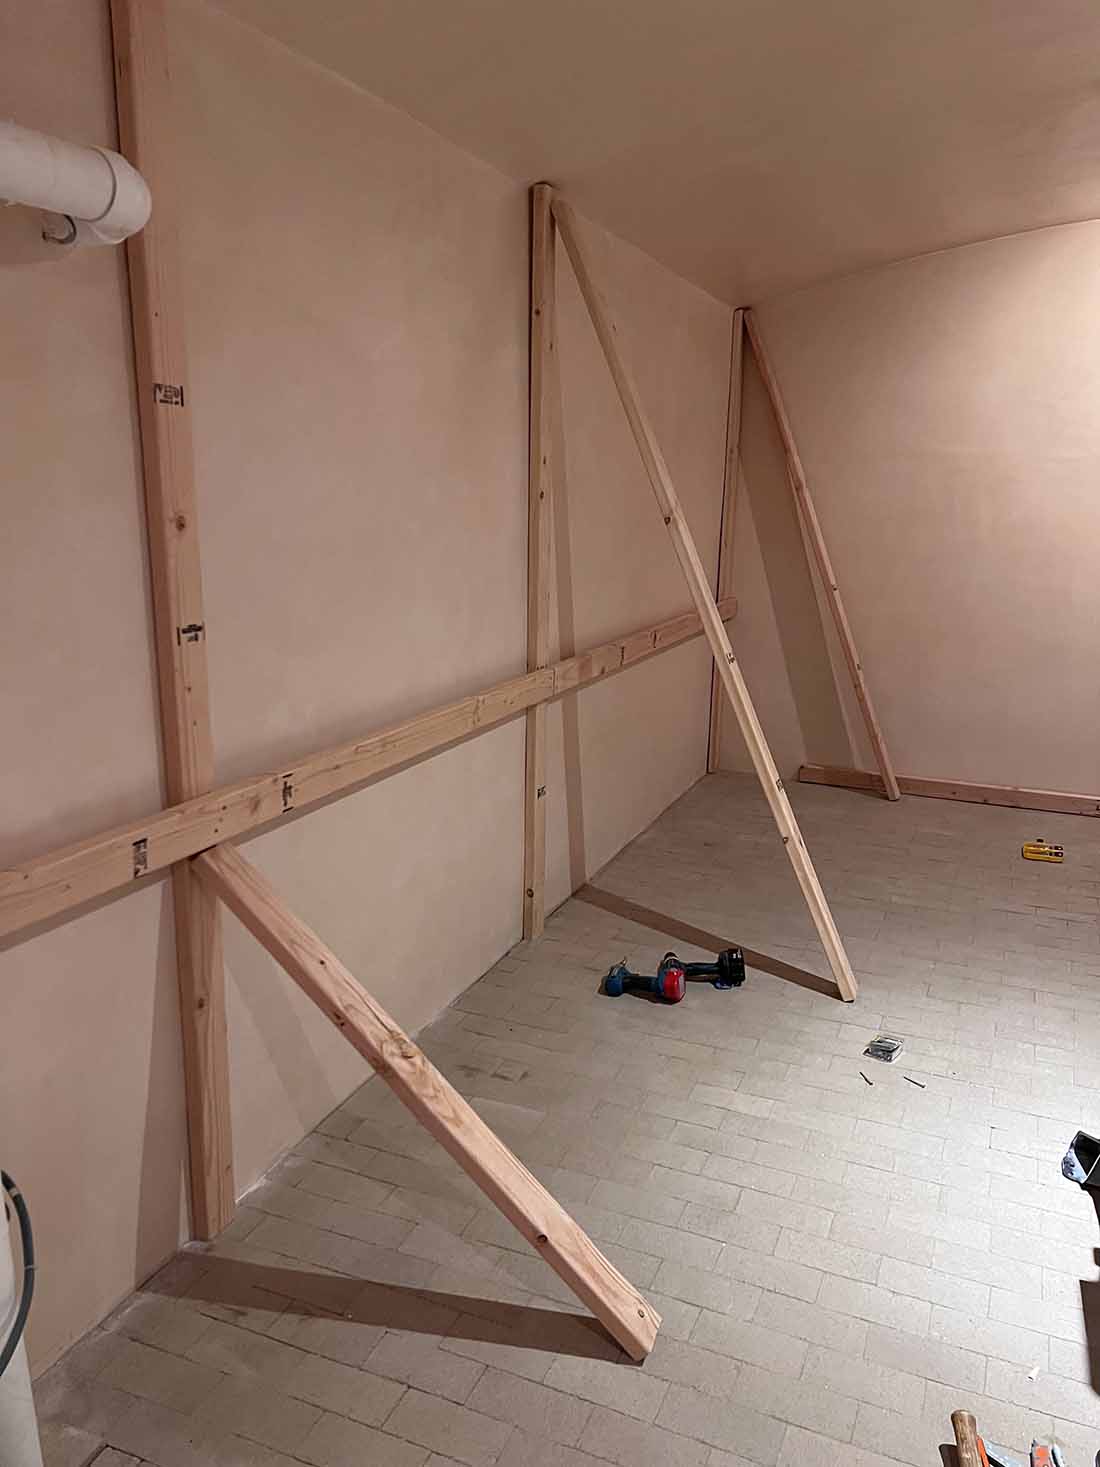
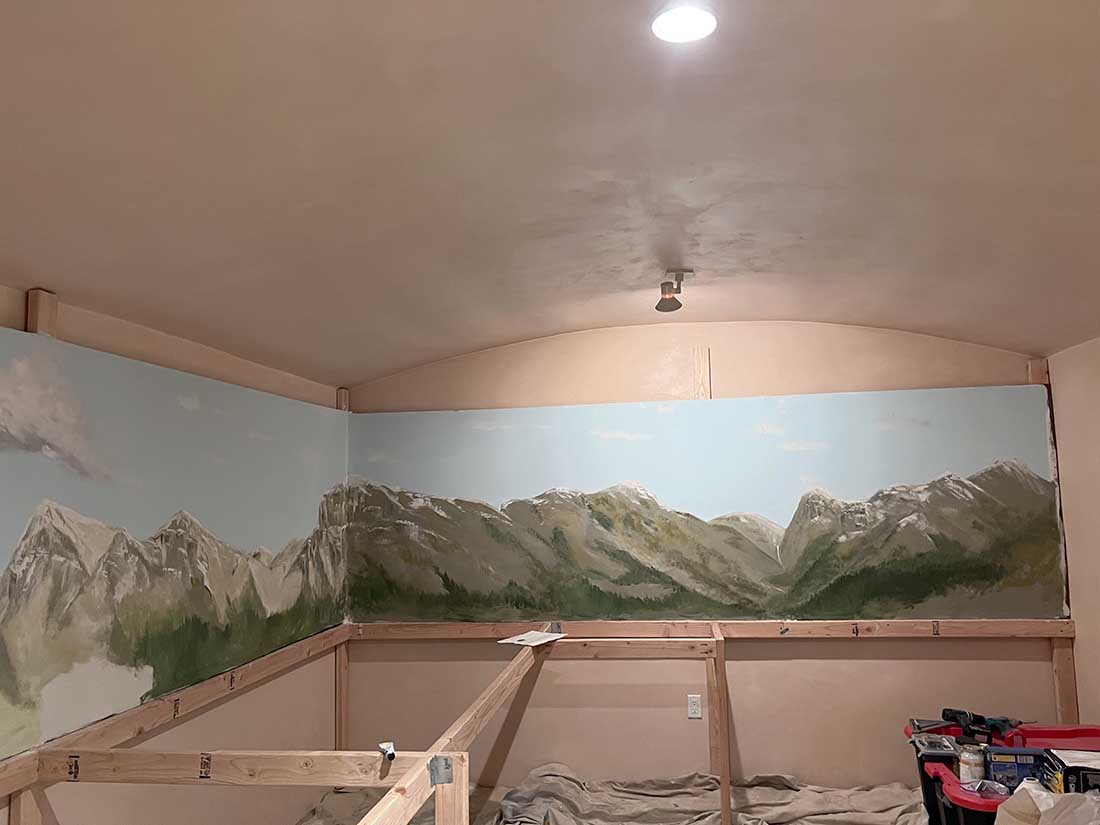

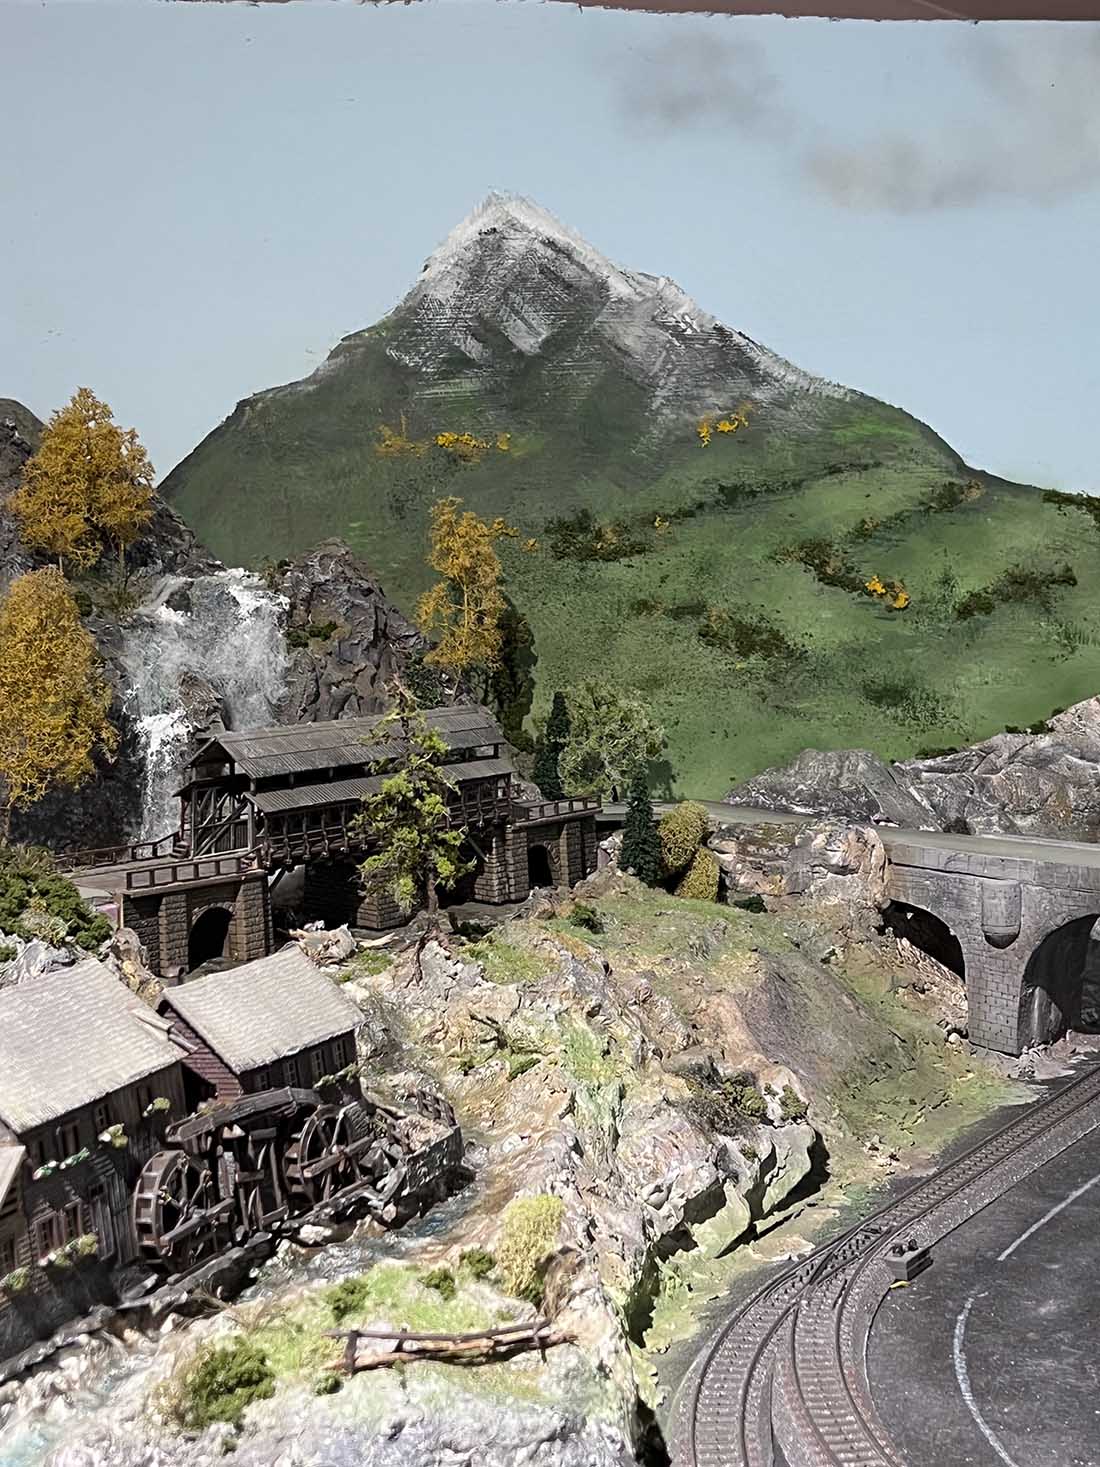
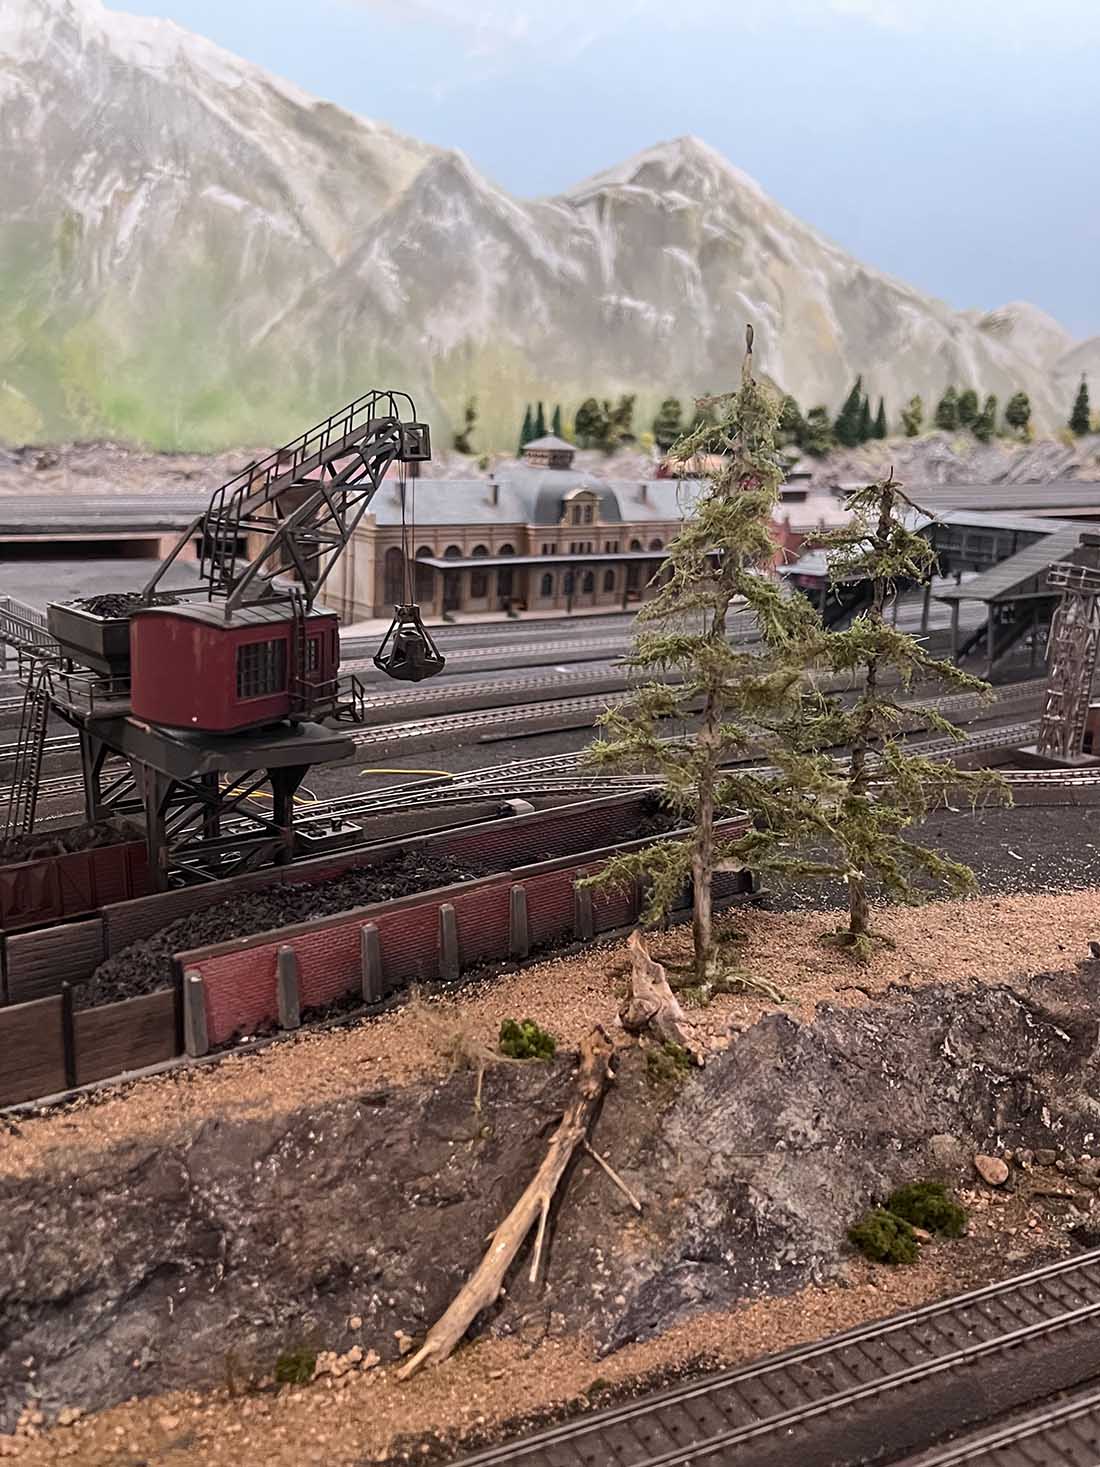
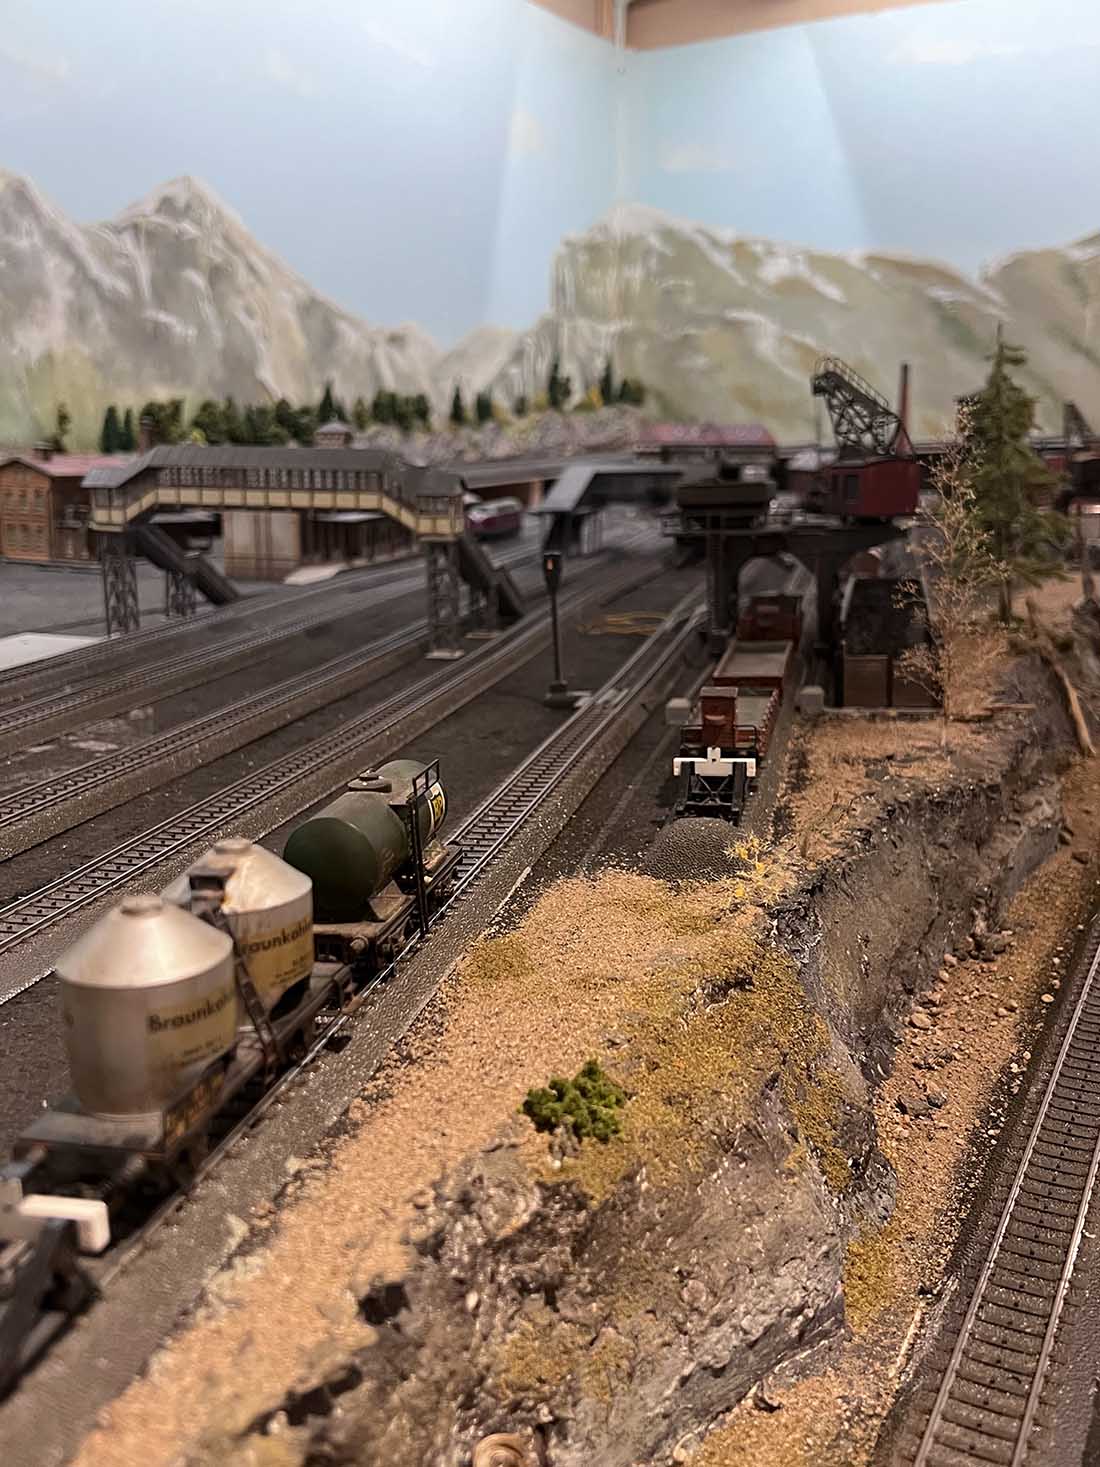
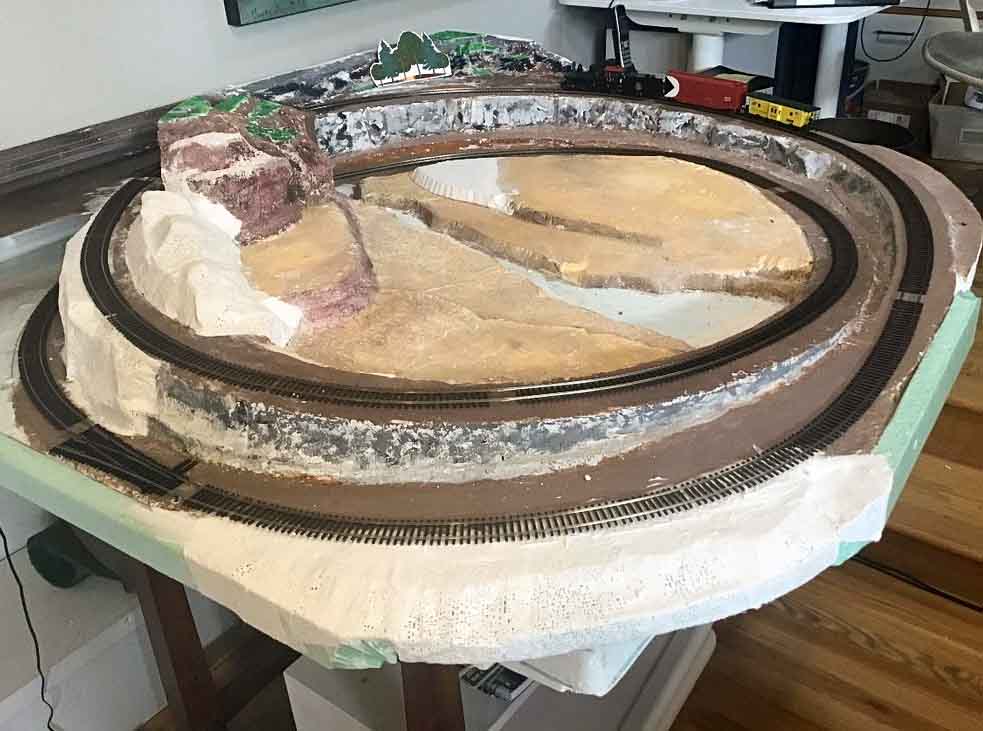
The pics I am attaching show the basement at the beginning, the early backdrop and where the west end of the south limb currently stand. The layout track plans also shown.
More to follow and happy modeling to all!
Best wishes
Glyn”
A big thanks to Glyn – what a project – I can’t wait to see this one progress.
That’s all for this time folks.
Please do keep ’em coming. Glyn saved the day today, but if you don’t hear from me over the next few days it’s just me putting my feet up because there is nothing to post.
And if today is the day you poke boredom in the eye and get started on your layout just like Glyn, the Beginner’s Guide is here.
Best
Al
PS Latest ebay cheat sheet is here.
PPS HO scale train layouts here if that’s your thing.