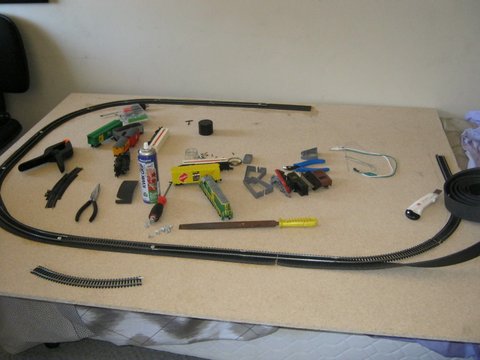
Richard has been kind enough to send in this fab narrative of his coal mine railroad:
“This begins a story that covers 35 years. I started designing this railroad in the early 1970s based on my love of train layouts I had as a child and began construction in the latter part of the 1970s.
My childhood involved S Gauge American Flyer trains but this project had to be more than just a circle of track on a 4 foot by 8 foot layout so I chose to build my current train in N Gauge to allow for a more realistic model in essentially a 2.5 x 8 foot space.
The plan was to have block and sector control for almost every 3 feet of track from a control panel with multiple DPDT rocker switches with a center off position. This concept predated many of the advanced control systems of today. This allowed for multiple power supplies to service up to three trains simultaneously.
The railroad concept was to be a logging and coal distribution layout from the forest and stone quarry at one end and coal mines at the other end to a distribution yard location in the middle section.
It would have passenger service provided to move workers to the forest and mine locations as well as a through route to distant cities.
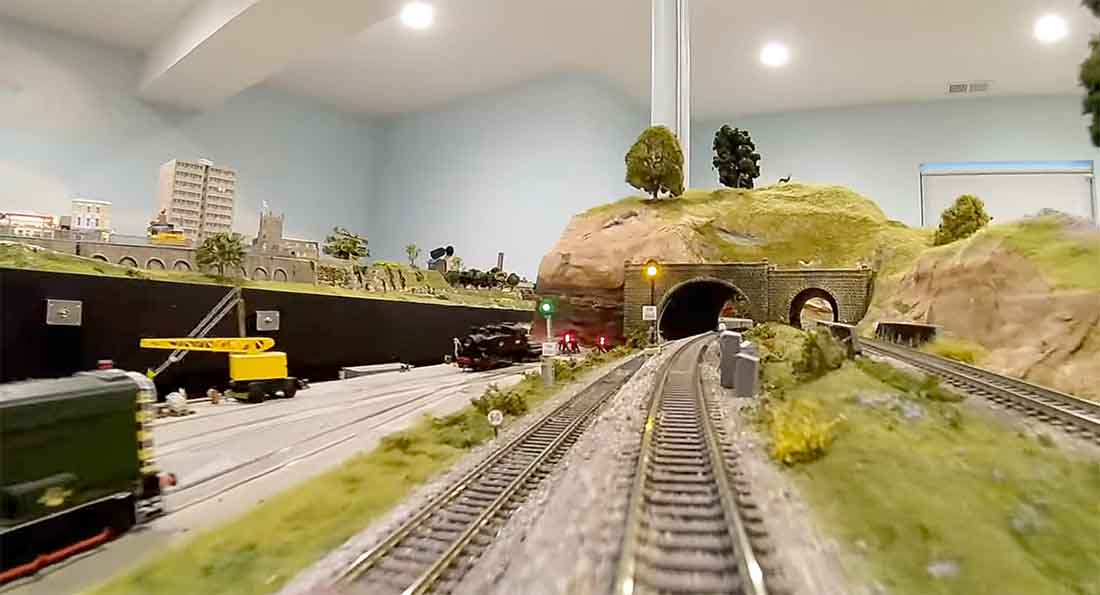
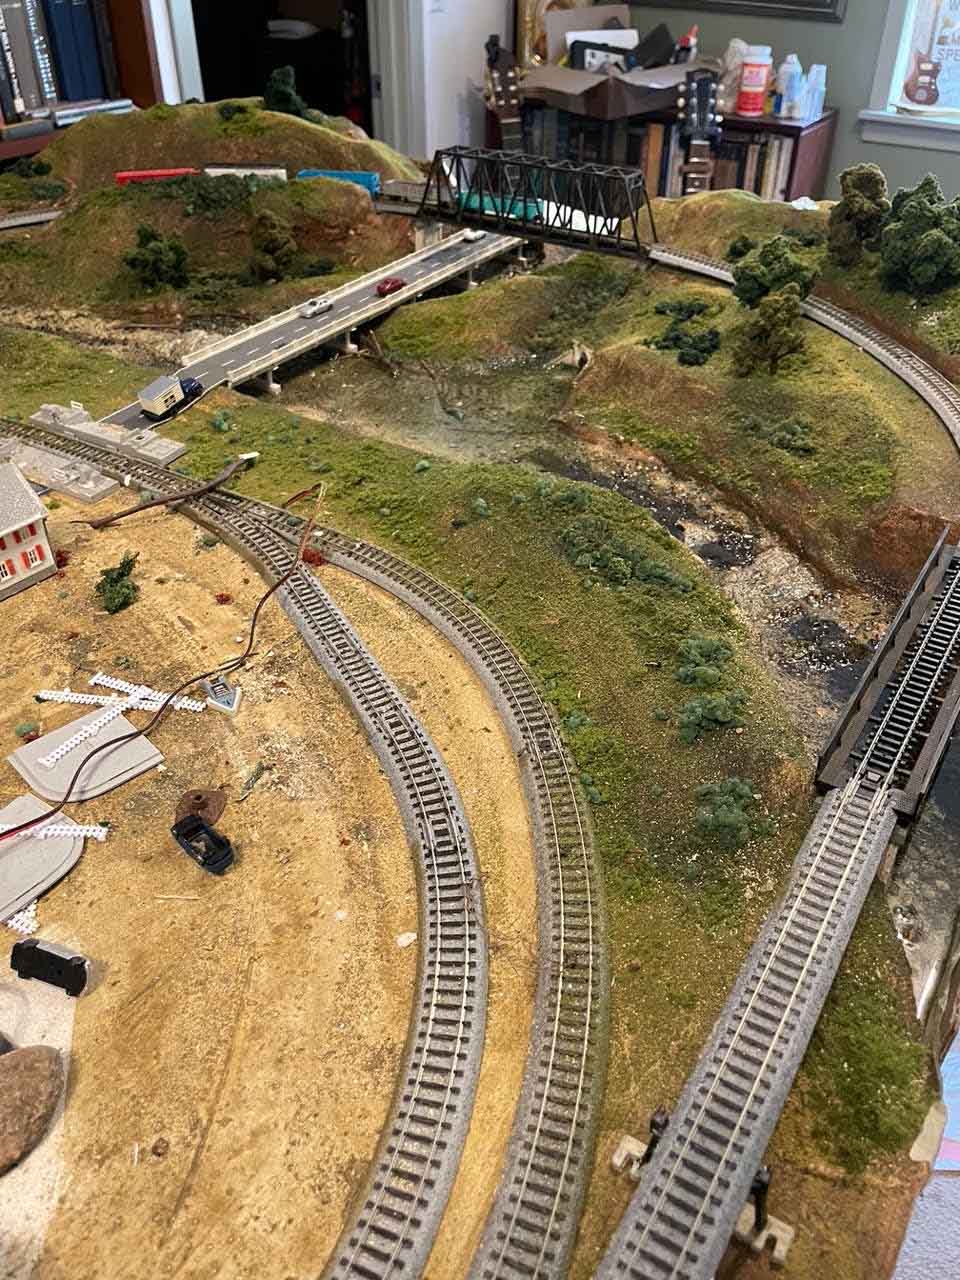
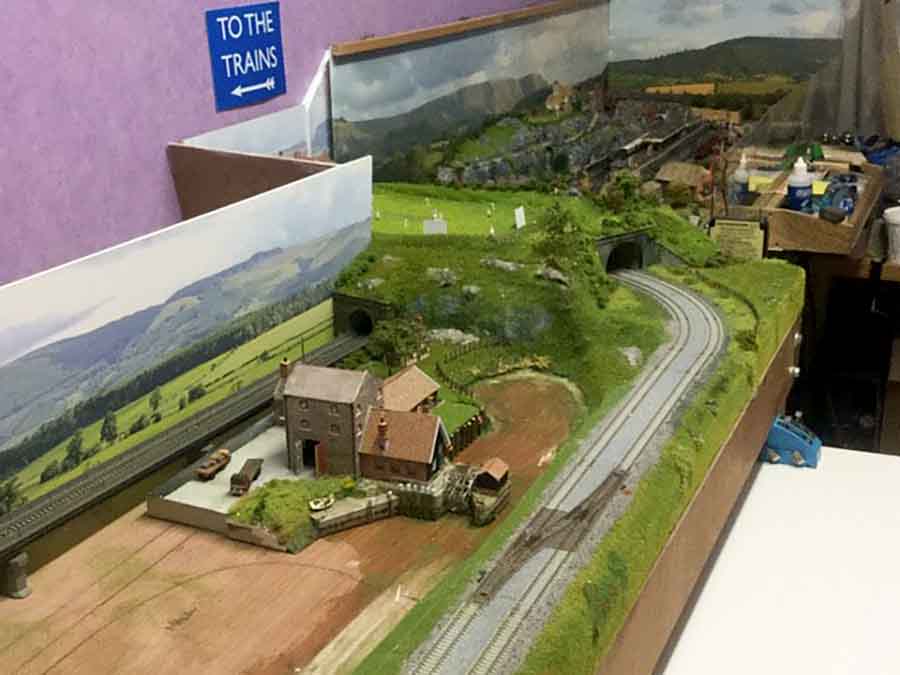
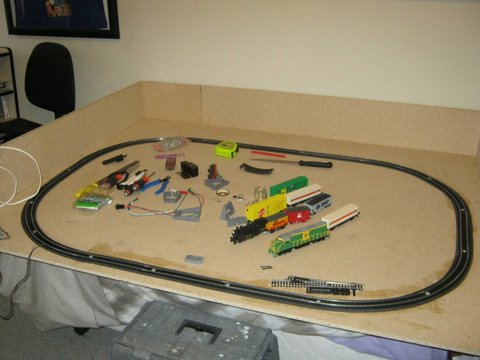
The railroad is an extended helix design that travels from one end of the layout to the other while rising in elevation to service the two industries. The railroad project was photographed throughout the construction phases to highlight the elements added in each phase. A layout sketch is shown in Figure 1 and the actual control panel is shown in Figure 2.
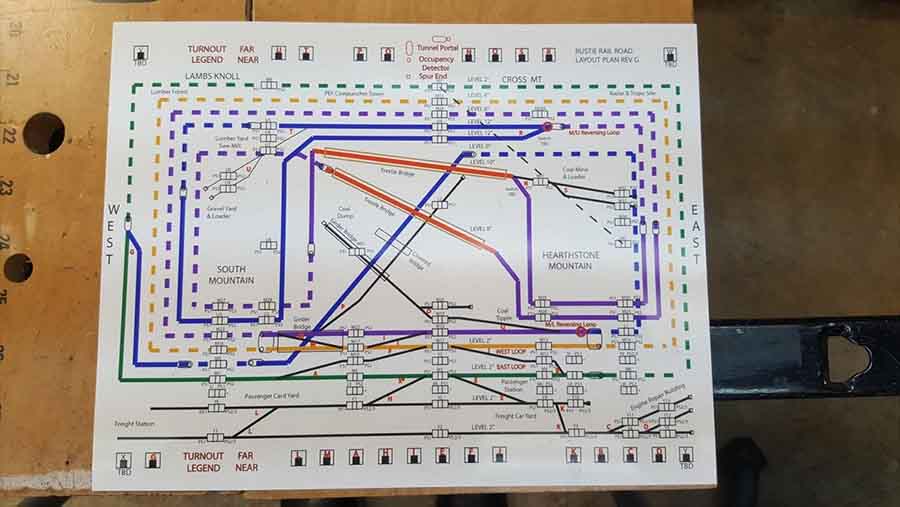
Figure 1 control panel sketch shows turnout controls at the top and bottom and block and sector switches placed throughout the layout. Dotted lines show track in tunnels.
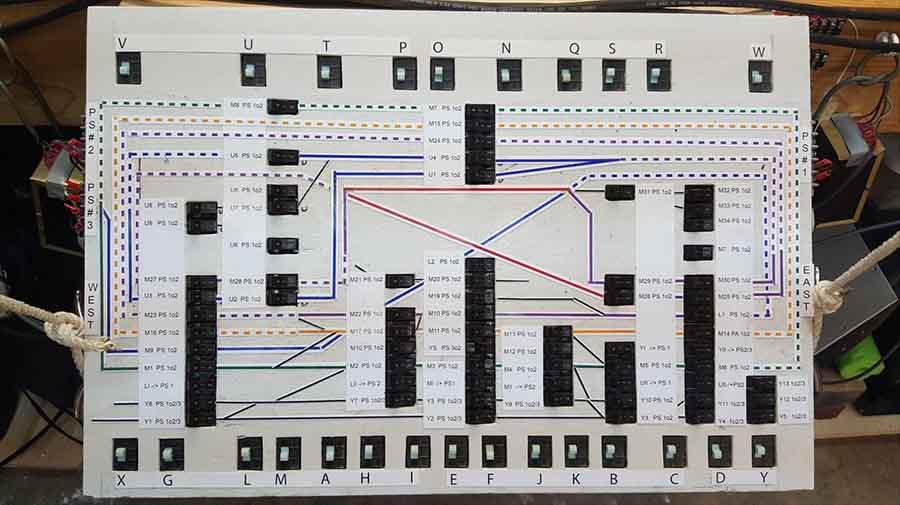
Figure 2 shows the actual control panel. The green, blue, orange, purple labeled tracks are stacked above each other in the upper tunnel areas to conserve lateral space.
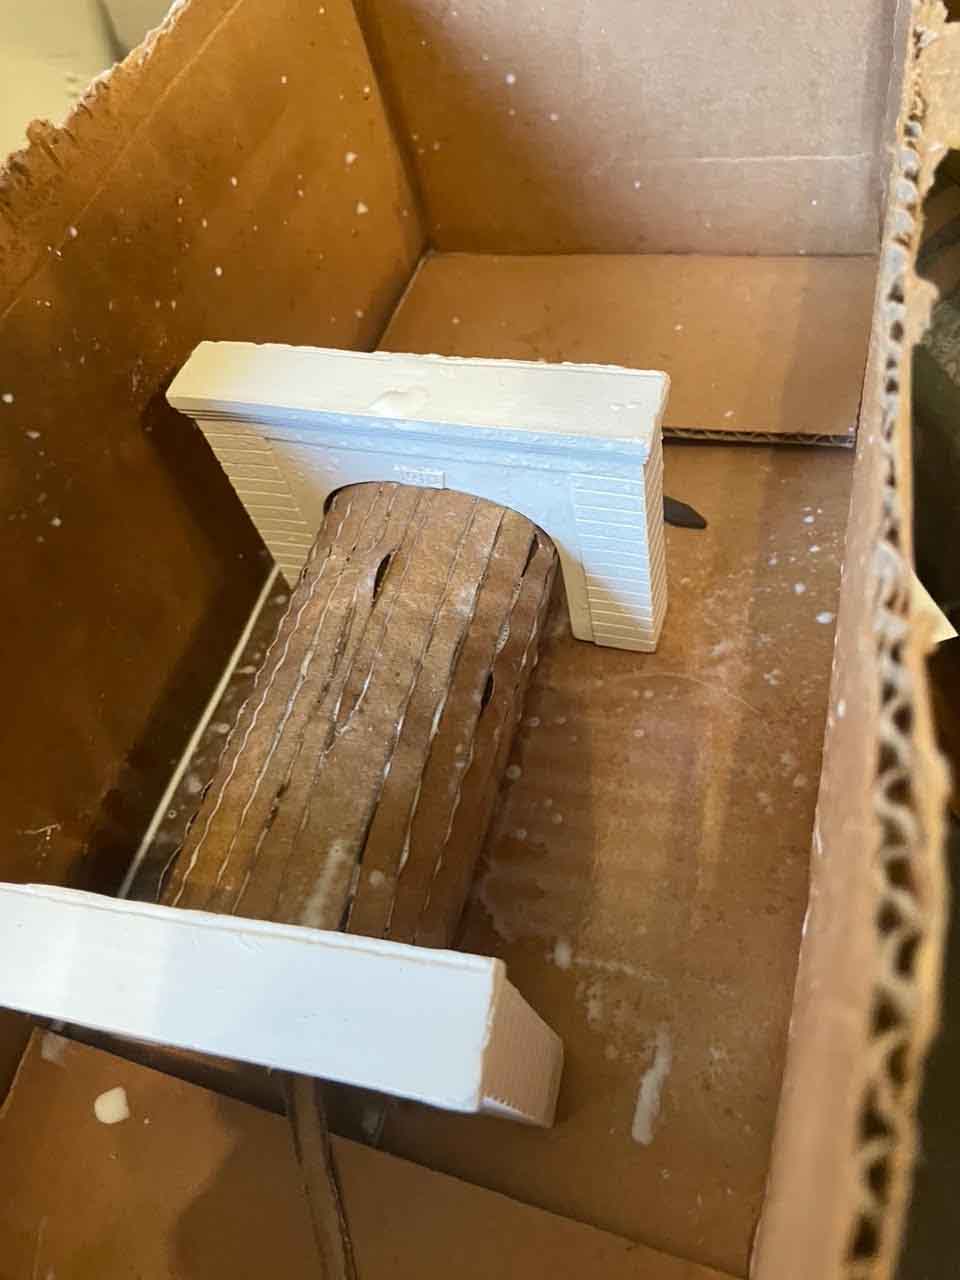
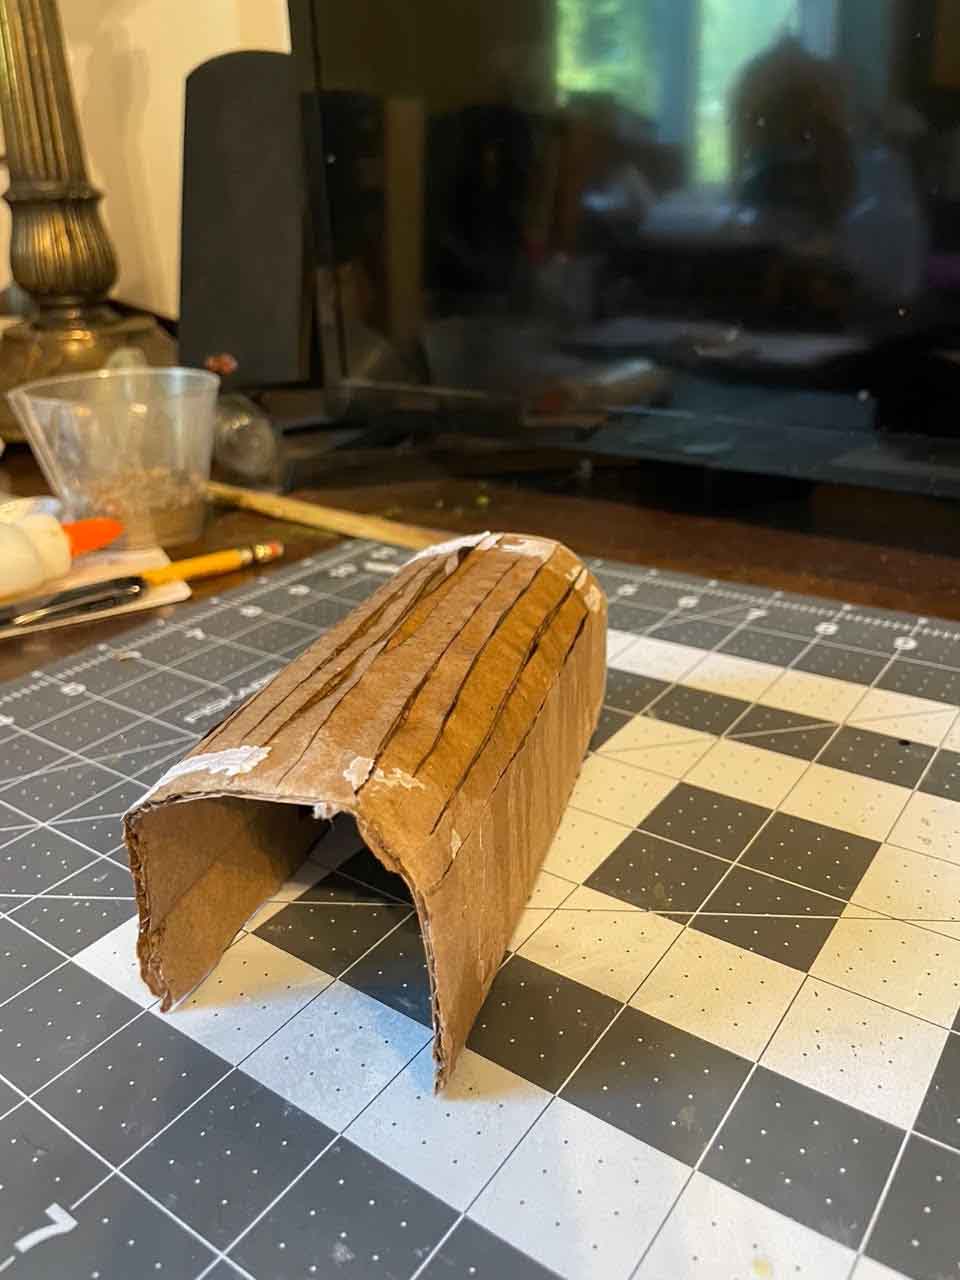
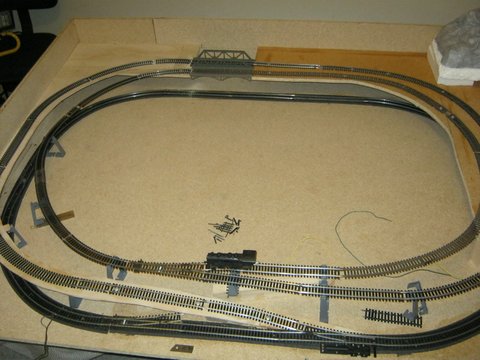
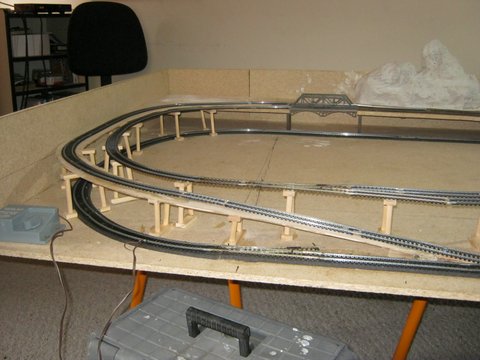
A number of lighting features and turnout labels on the actual right of way would be added later The first construction project on the railroad was to build two wooden high mountain trestles to span an open valley as one of the central themes.
It was designed and constructed as two balsa wood structures built from scratch resembling high mountain structures of the 1930s and 1940s in the US. I built the two long bridges in Figure 3 by estimating the span based on the railroad plan and sketch I had settled on much earlier.
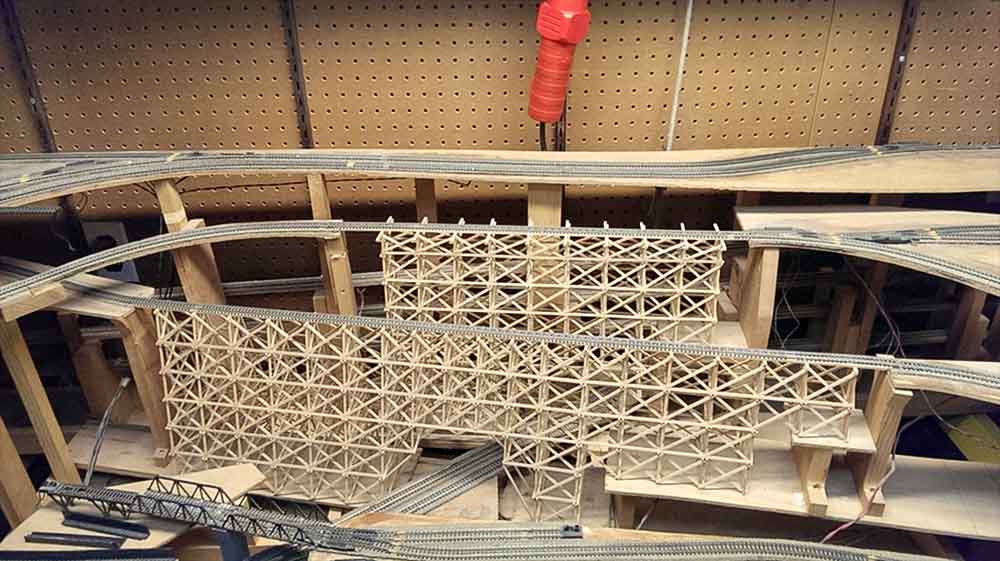
Figure 3 trestles located in the middle of the layout with no screen or plaster scenery.
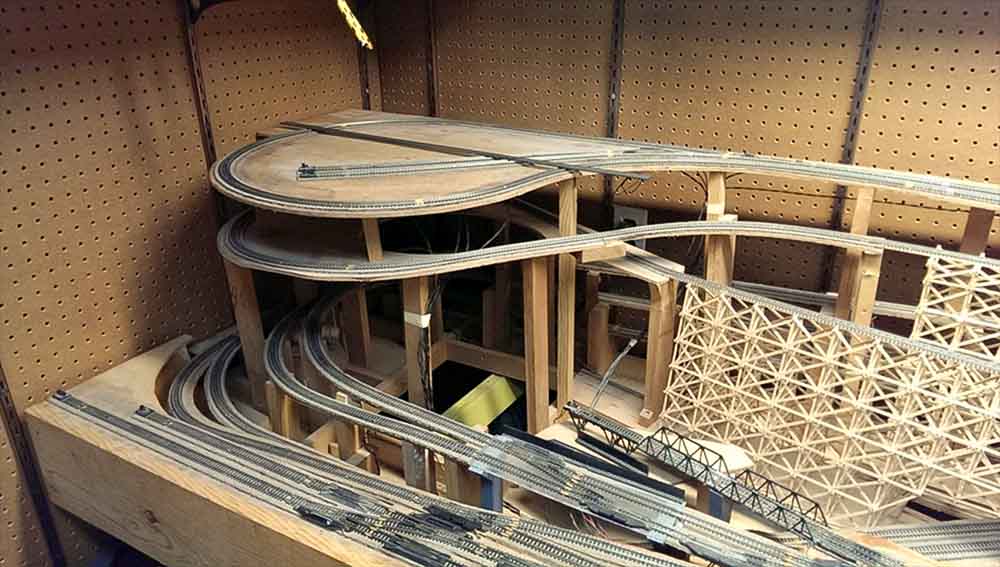
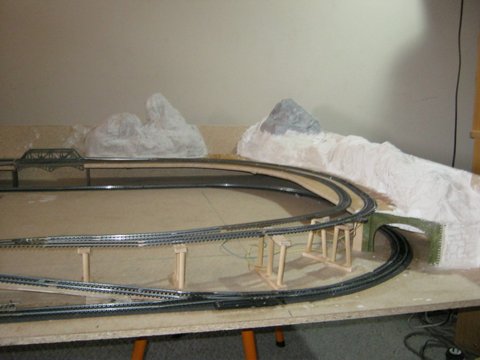
Figure 4 shows a shelf on the left side of the layout for the logging and lumber industry. A cavity beneath the railroad contains the wiring for all tracks and features.
The upper shelf in Figure 4 shows the planned location for the stone quarry and logging and lumber cutting industrial site.
A vertical panel is planned for the back side of the entire layout and would be removable to access tracks for maintenance within the mountains in case of derailment.
The upper shelf in Figure 5 shows the planned location for the coal mining operation.
Figure 5 also shows a shelf on the right side of the layout for the coal mining operation.
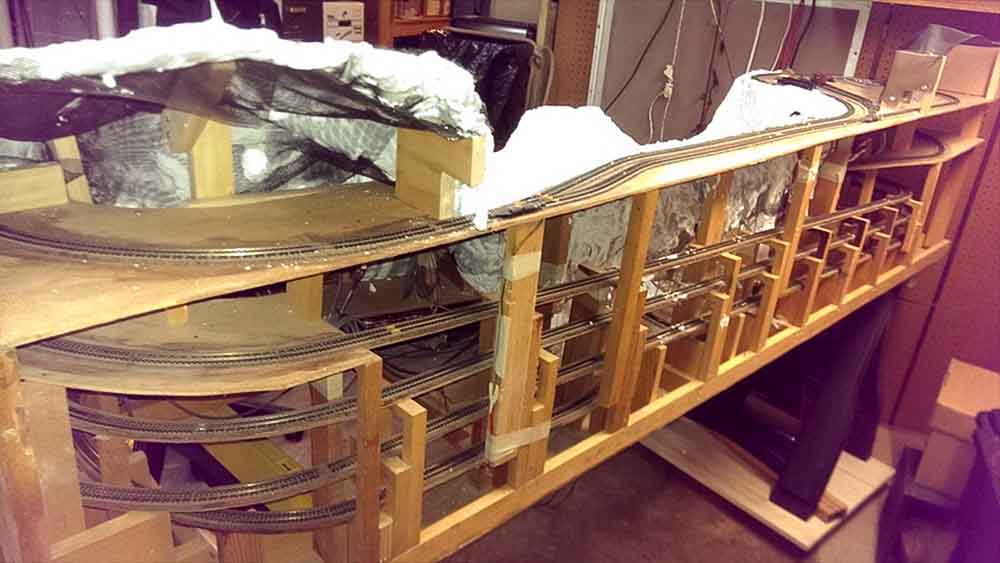
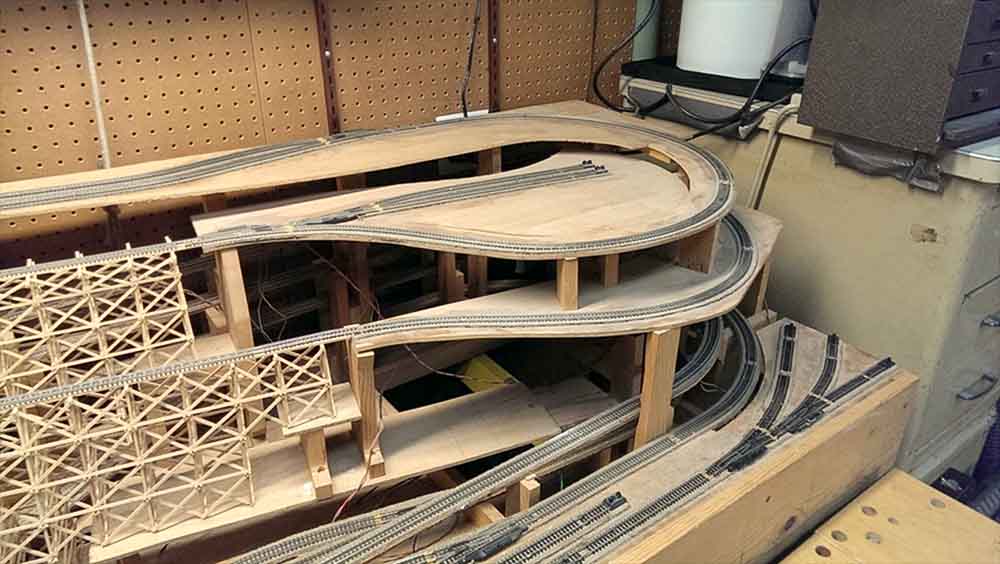
Figure 6 shows the back side of the layout with the cover panel removed. Tracks are stacked as part of the extended helix configuration and the block and sector wiring is routed and taped to the vertical risers that support the tracks.
The tracks are stacked at the back side of the layout before installing the back panel.
At this stage of construction, train and turnout operation was checked before adding screening and plaster scenery so corrections to the layout could be made without undue disassembly.
Unfortunately, career obligations, vacations to most of the US National Parks and biking for rails-to-trails recreation limited the time available to continue the railroad construction for at least 30 years until I retired.
After retirement, I was eager to begin working on the model railroad again. The delay, however, caused excessive track corrosion which impacted train operation. Track cleaning was taken on as a major unplanned event and seemed to solve the continuity problem and I moved on to creating my empire.
Nylon screening was chosen to support the plaster and was screwed to free standing support posts and to the existing railroad superstructure as shown in Figure 7, 8 and 9.
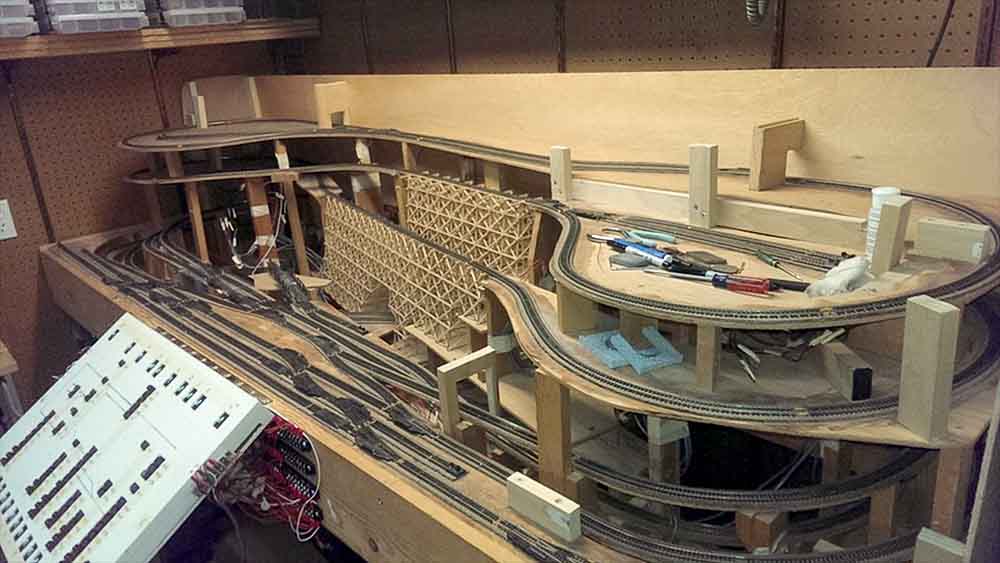
Figure 7 support posts for the screen and plaster
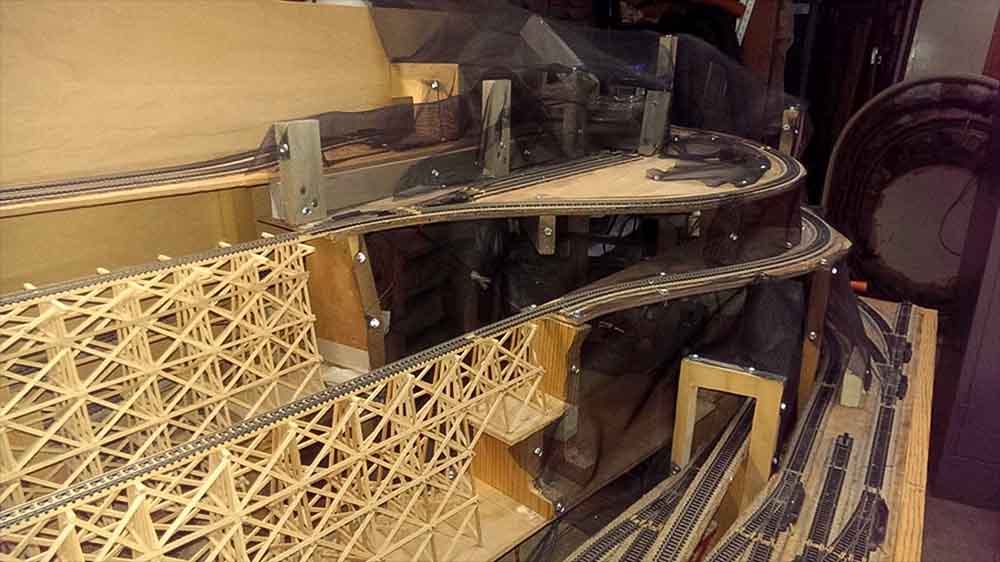
Figure 8 coal mining region with screen mesh in place.

Figure 9 stone quarry and forest logging and lumber region with screen mesh in place.
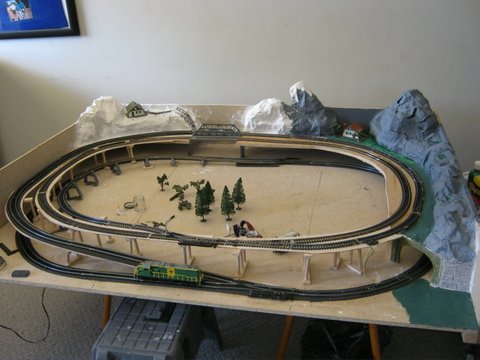
About 40 pounds of uncolored plaster was added over several months to give the railroad a mountainous terrain as shown in figures 10, 11 and 12.
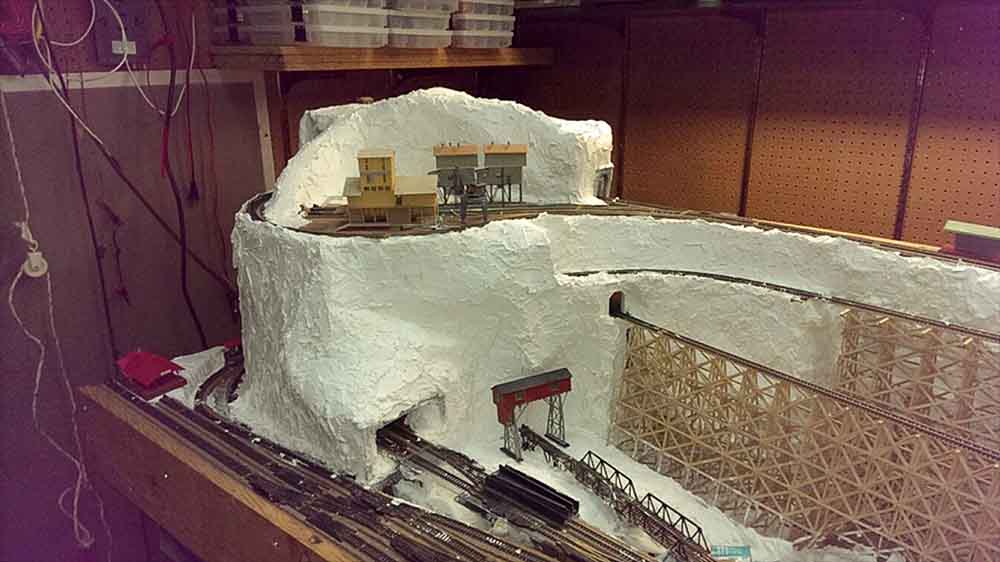
Figure 10 stone quarry and forest logging and lumber region with plaster in place.
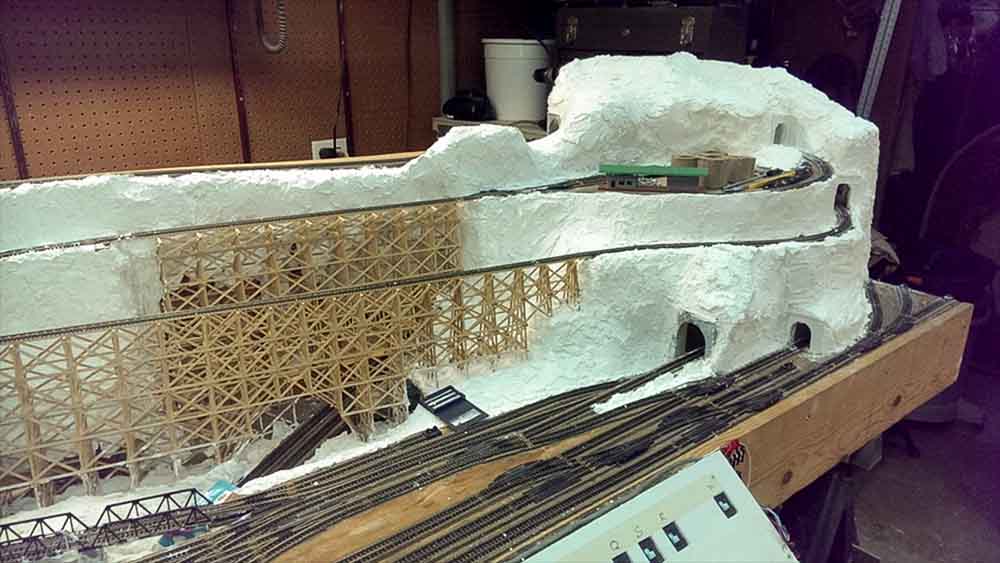
Figure 11 coal mining region with plaster in place.
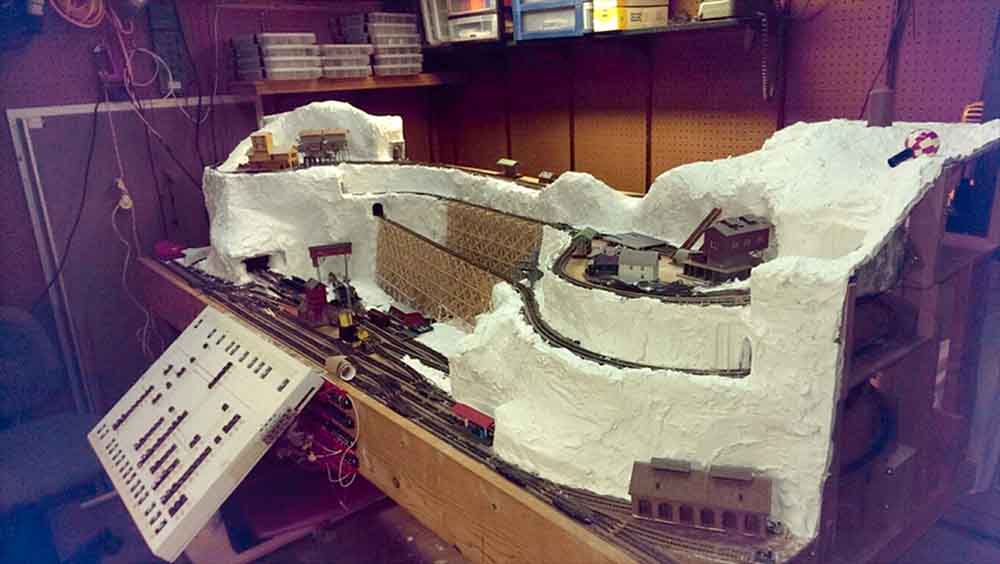
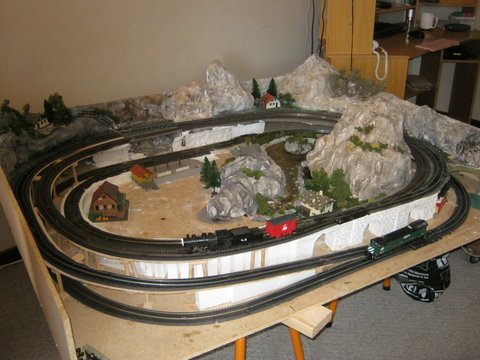
Figure 12 complete railroad with plaster in place.
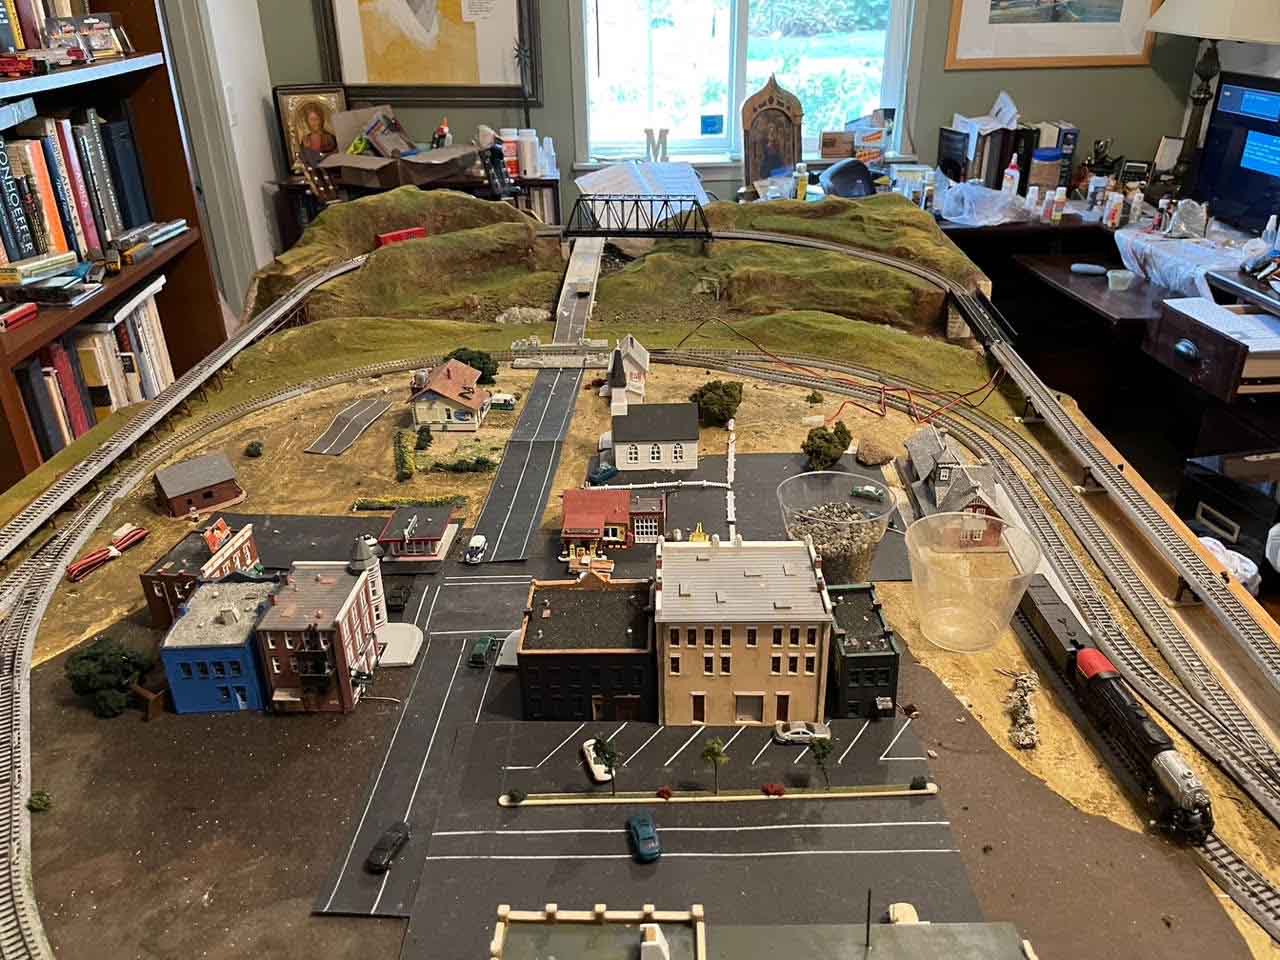
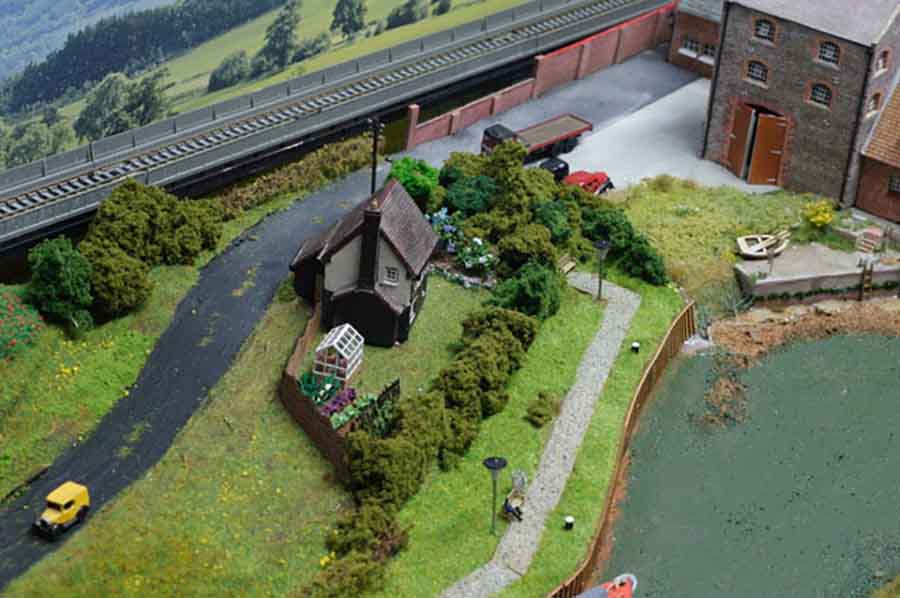
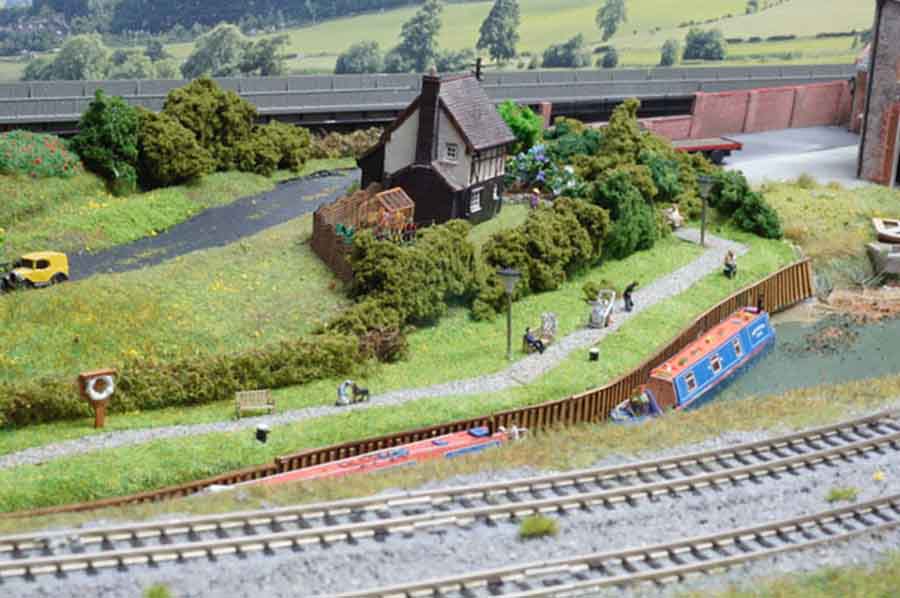
Ground color, buildings and selected regions of grass, bushes and trees were added to bring the railroad closer to a final presentation.
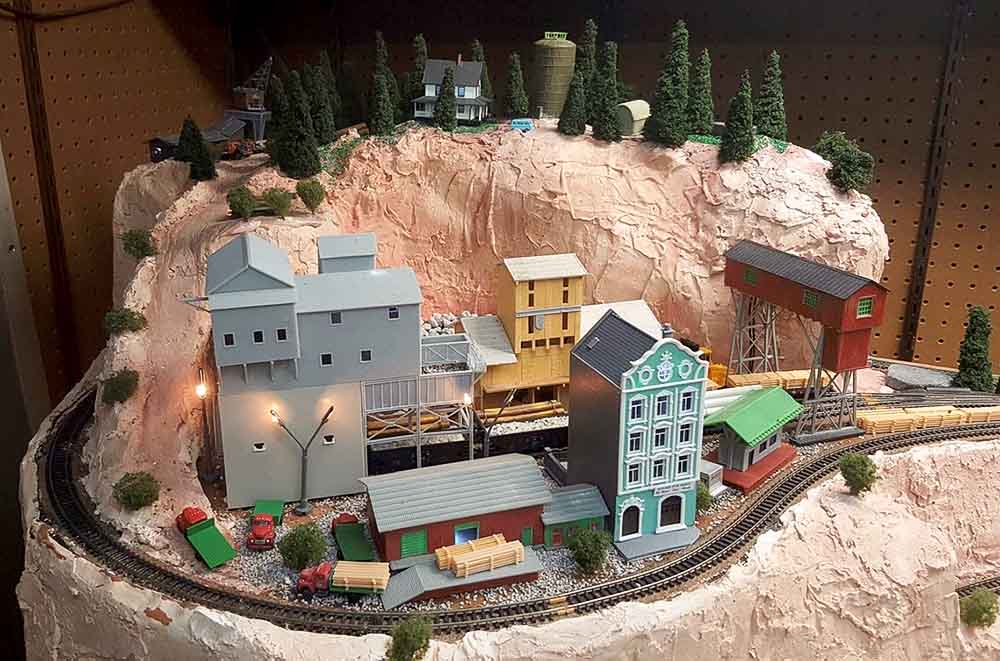
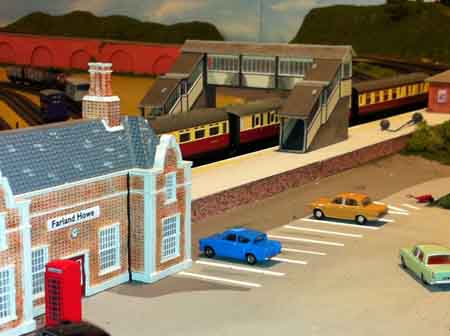
Figure 13 shows the completed stone quarry, forest logging and lumber cutting industry. A shipping dock and crane tower were added to facilitate movement of raw and cut lumber. A small rail station and hotel service the workers at this industrial site.
The log saw mill is high on the mountain top along with a green seemingly water tower on Lambs Knoll. Lighting has been added for a night operation.
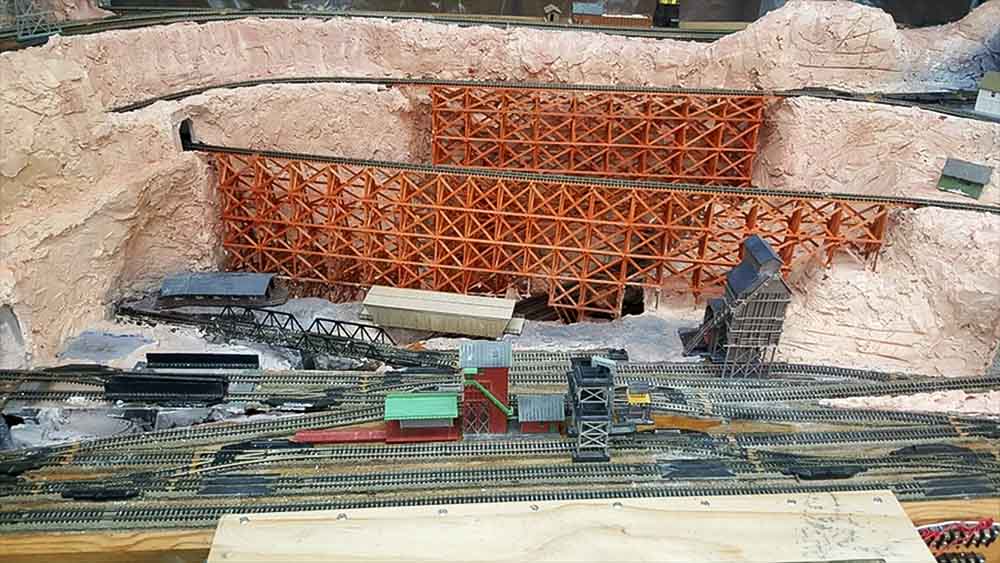
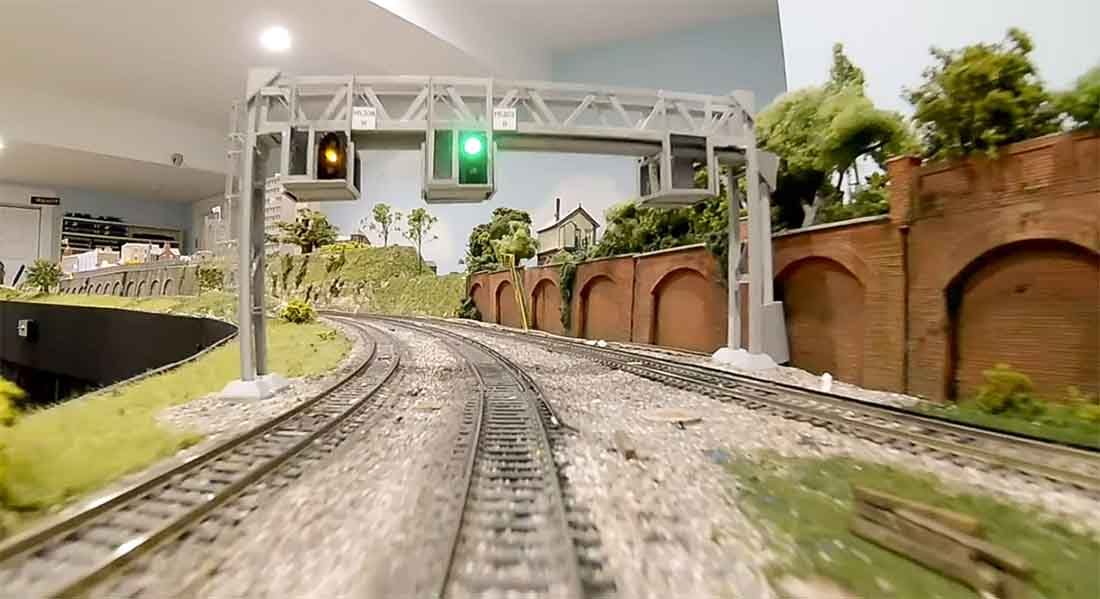
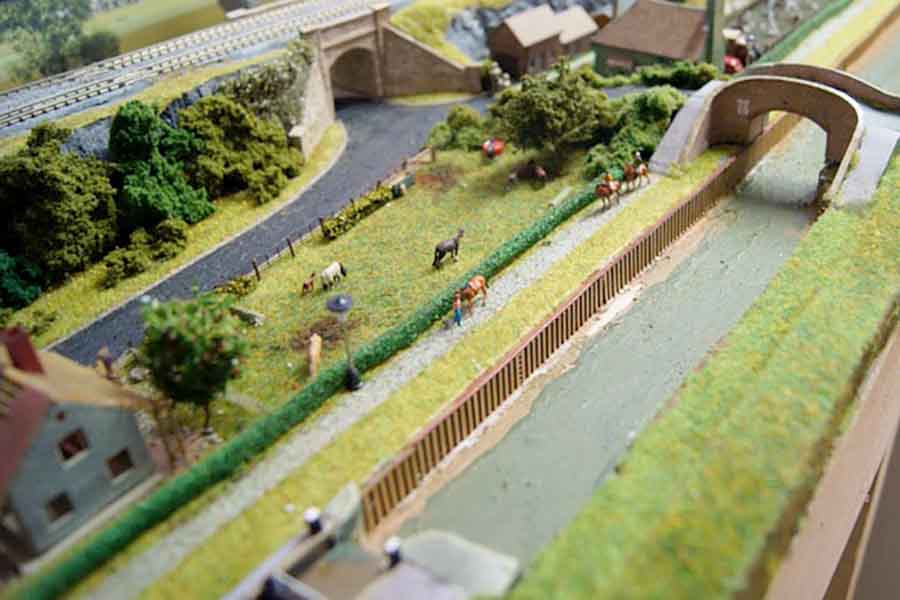
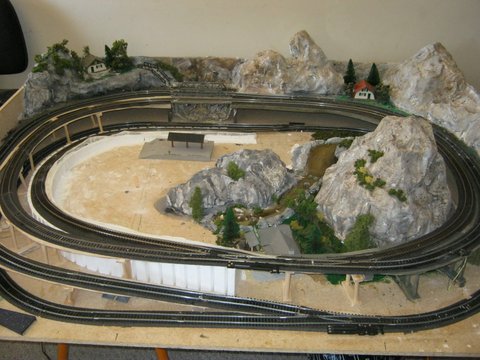
The trestle bridges were stained a more reasonable burnt orange as shown by Figure 14.
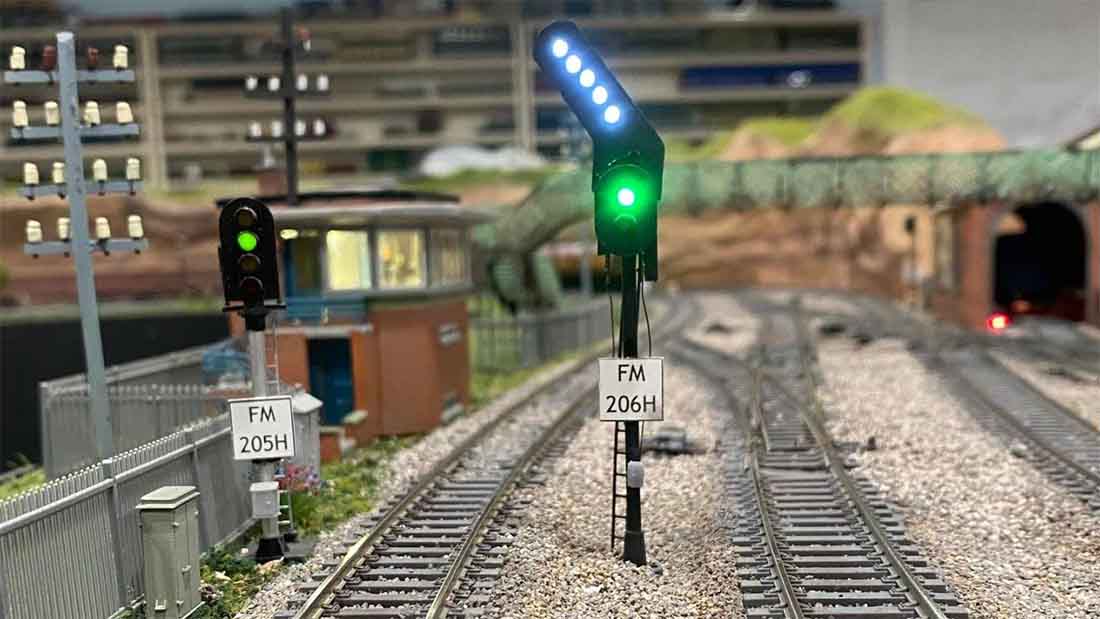
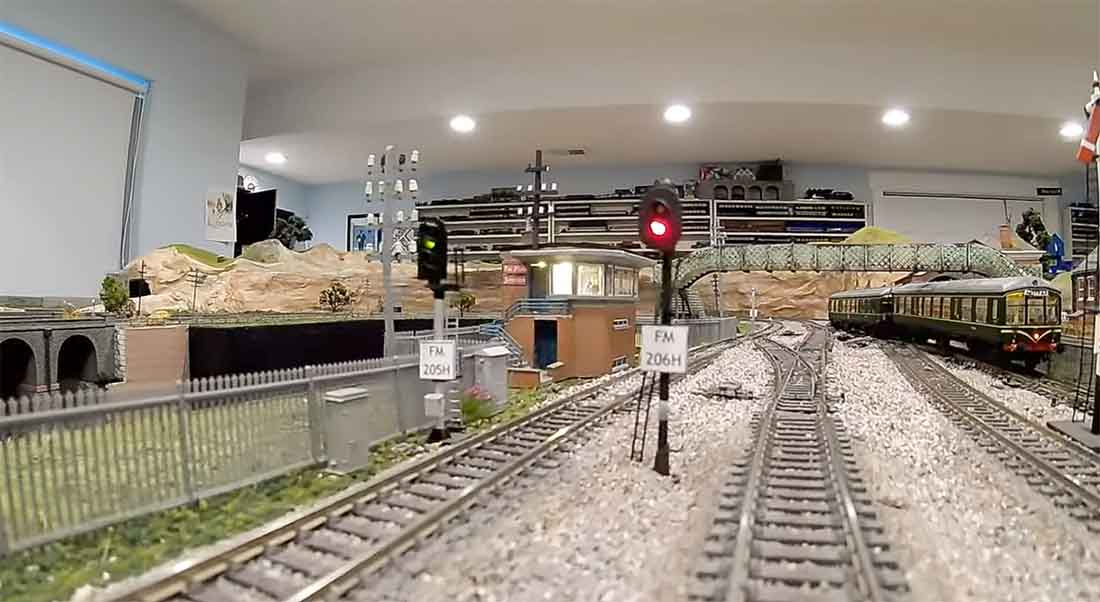
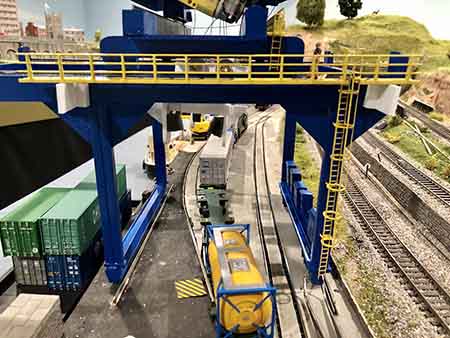
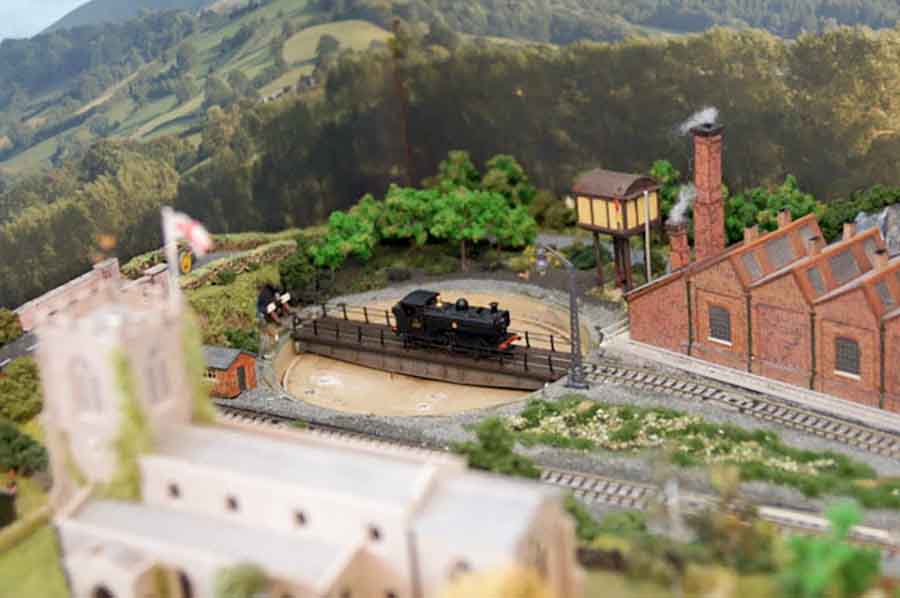
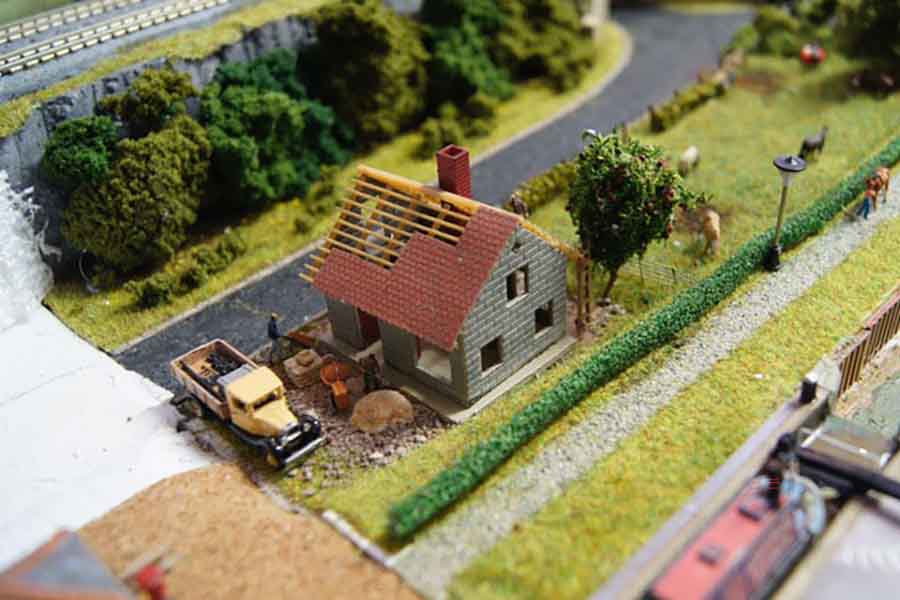
A coaling tower and coal dump station were added in Figure 15 to the yard location with an unlikely covered bridge to allow heavy trucks to move to either site. Colored posts were added to each turnout location as labels identical to that on the control panel for ease of operation. Rail cars have found their way into the yard at Trestle Junction.
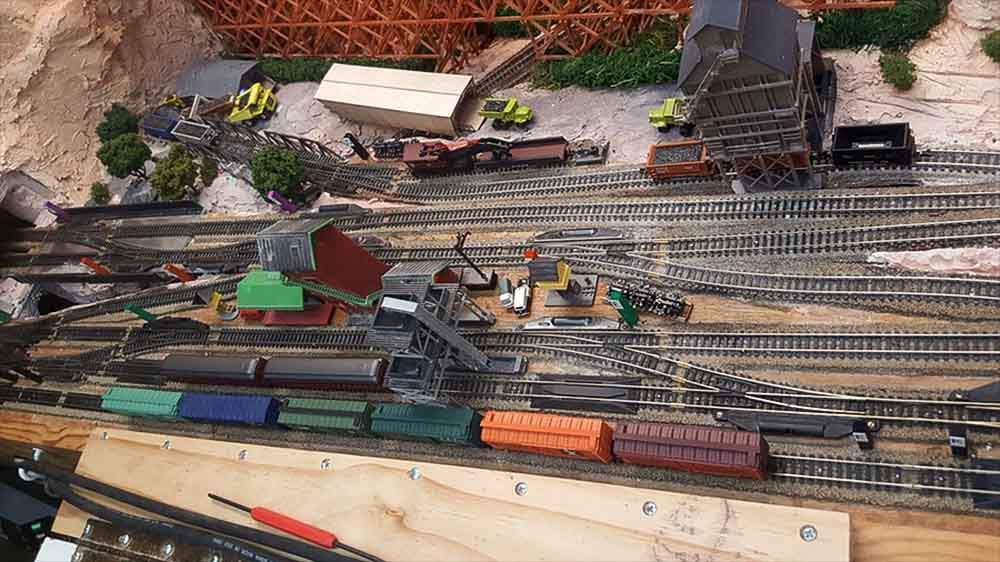
Figure 15 railyard and coal processing region at trestle junction.

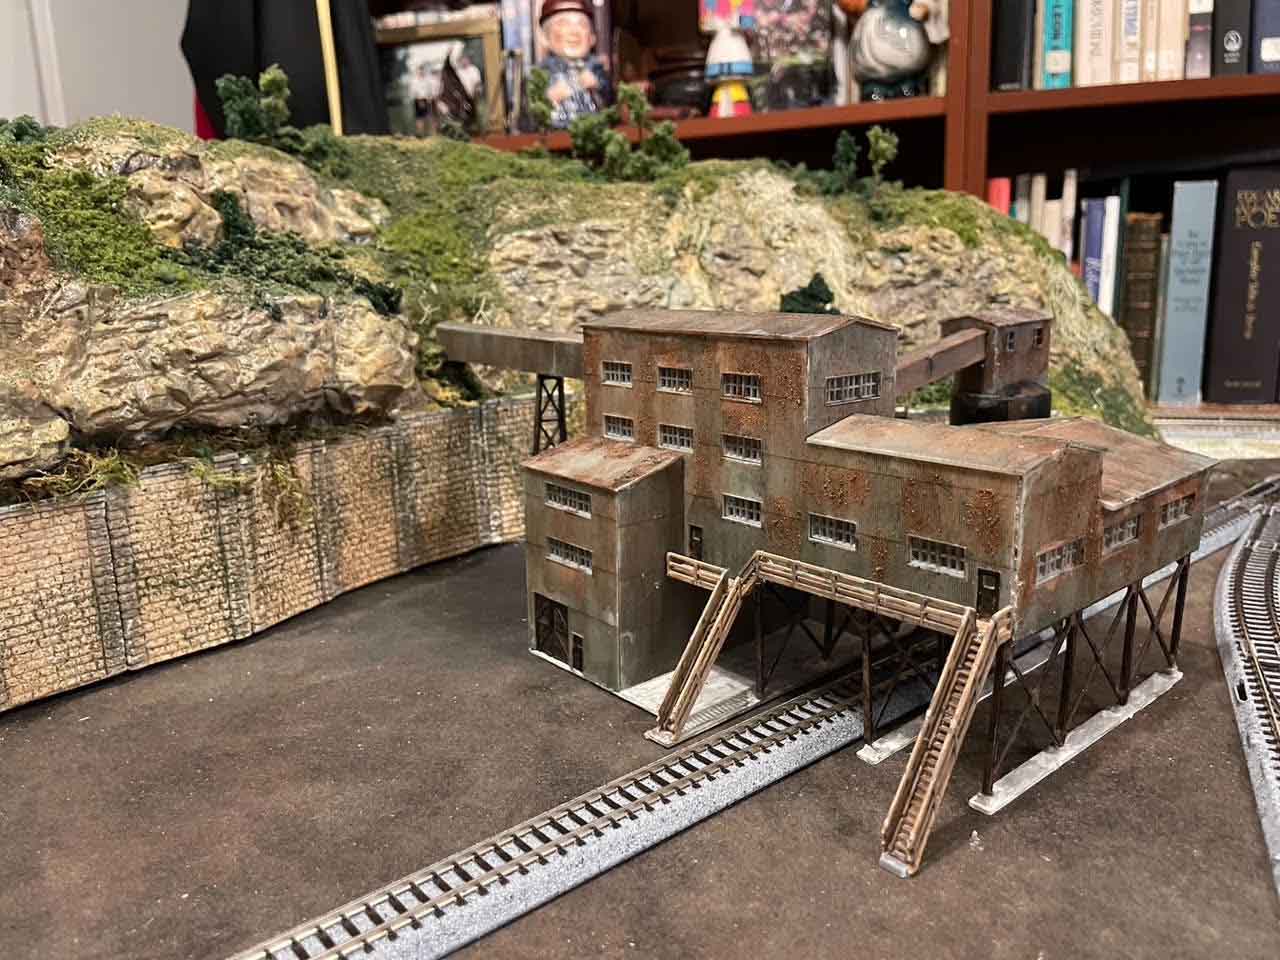
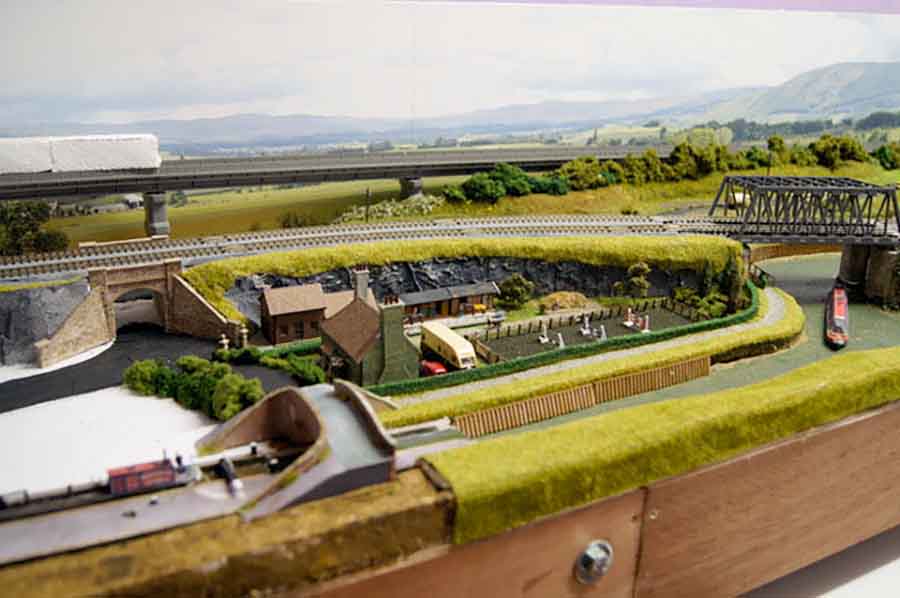
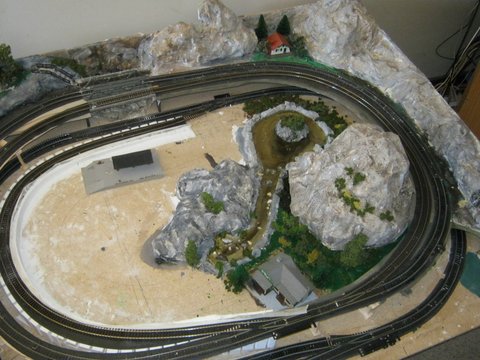
Figure 16 shows the coal mining region. It started out with a small coal mining operation and soon flourished into a major coal processing facility accompanied by a general store, hotel and rail station to service the mine workers.
The white tower at the far left in Figure 16 is a hardened but abandoned microwave relay antenna tower at Cross Mountain. Tropo-scatter communication antennas are shown on the right side of Figure 16 for the Hearthstone Mountain facility.
The radar dome was added for color but does not exist in the real environment just like the actual coal mining facility due to the high power transmitting site. Lighting has also been added to the night time operation of the modeled coal mining facility.
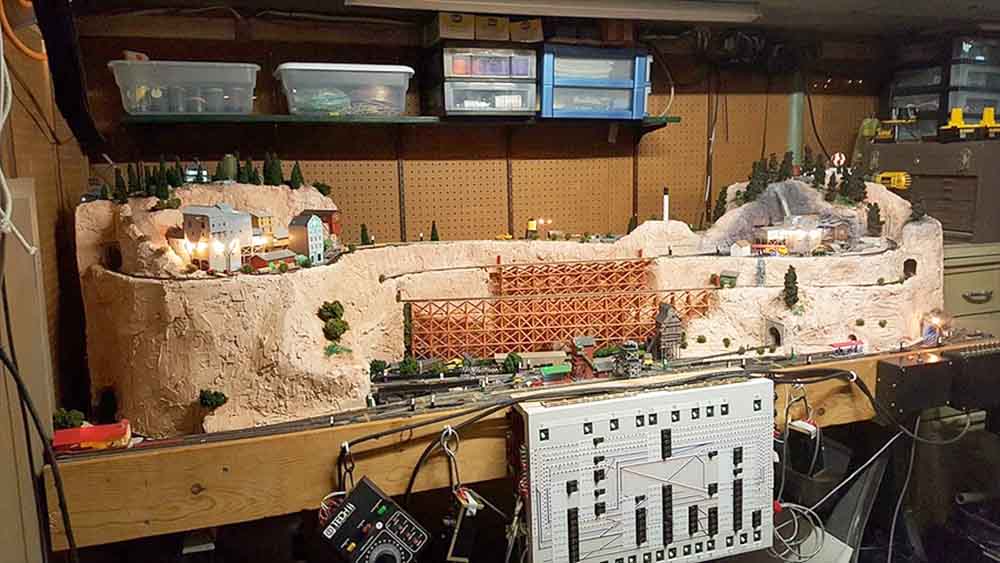
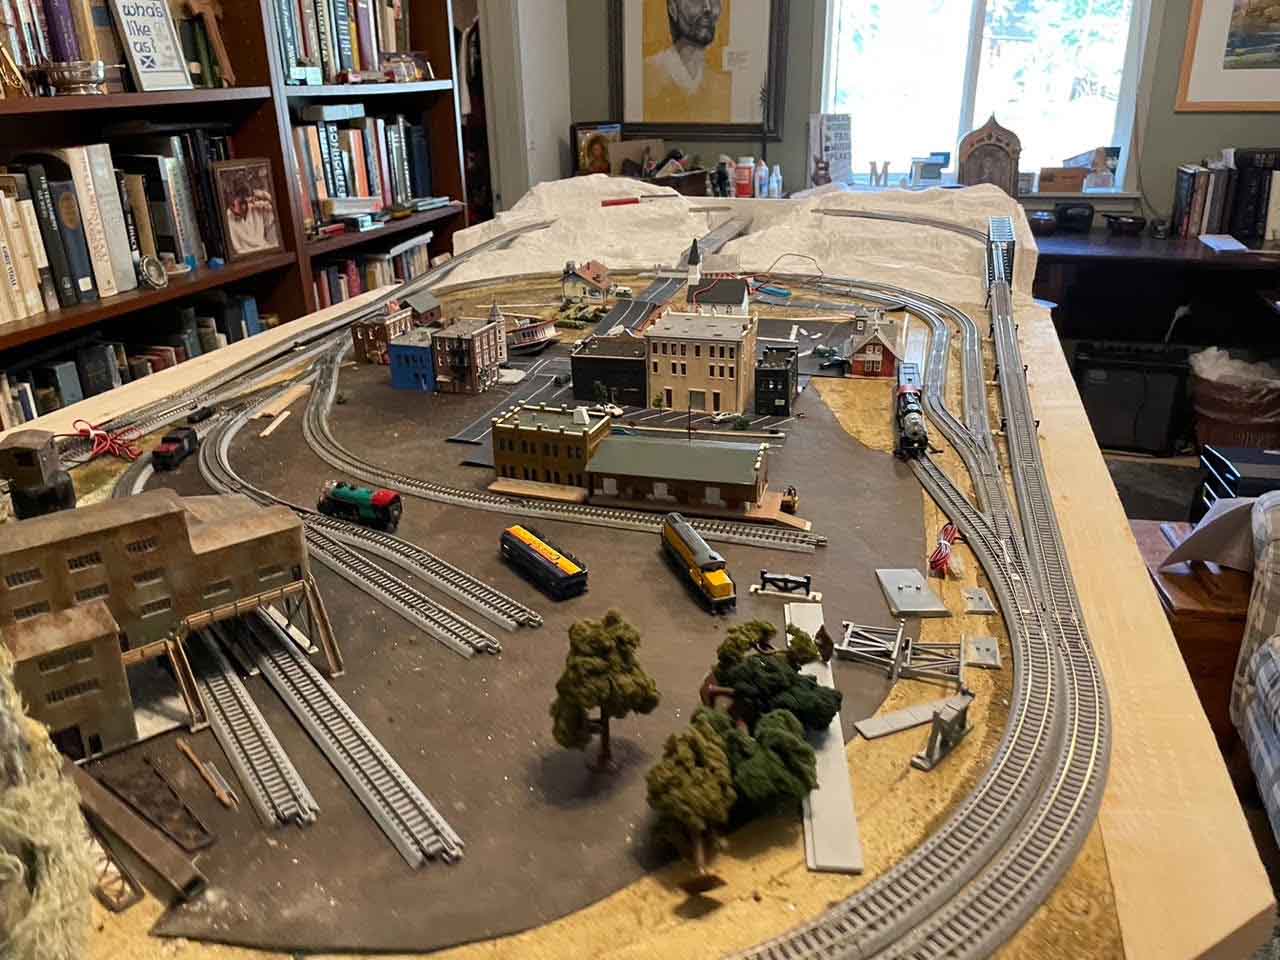
Figure 17 shows the completed cole mine railroad. Track conductivity was again becoming a problem and the cleaning process is now more difficult even with access to the tunnels.
Phase II
The Extended Helix Railroad is being modified to include another 2.5 foot by 4 foot section beyond the coal mining facility but at a lower level to enable trains to change direction without traveling to the top of the mountain and back down, a short coming in the original design.
Secondly, the deterioration of the track conductivity has led to a bold step into the future of model railroading. Research has led to the concept of battery power for train operation.
“N” gauge is quite small and limiting when trying to shoehorn in a battery power system into freight and passenger cars to electrify the engine motor when the battery cannot be integrated in a steam or diesel locomotive. A control chip and speaker must find their way into the tender of the steam locomotive or into the “B” unit of a diesel locomotive.
Both the steam locomotive tender and the “B” unit must be permanently connected together along with the battery powered freight or passenger cars. This means the train must always be configured with at least two or more battery powered cars.
Lithium Ion batteries have been made small enough to package two batteries into a passenger cars for a passenger train but must be configured in four freight cars or four flat cars for a freight train. Four batteries in series are required for a 14.8 Volt at nominally 1.5 A/hour. A controller must radiate the signal that controls the pulse width modulation used by the motor in the locomotive to efficiently control the use of battery power.
Lithium Ion Batteries have been procured for a 3.7 V and 1.8 A/hour rating. Military grade connector pins have been ordered to conveniently connect the cars together and charge the batteries when needed. The next expense is for the control system offered by Ring Engineering.
A follow report will document the expansion of the railroad and operation under battery control.
Richard”
A huge thanks to Richard – I can’t wait to see his update. Fab stuff.
That’s all for today folks.
Please do keep ’em coming.
And if today is the day you stop dreaming and start doing, the Beginner’s Guide is here.
Best
Al
PS More HO scale train layouts here if that’s your thing.
Need buildings for your layout? Have a look at the Silly Discount bundle.