The very talented Dan has been back in touch, this time a solid tip on soldering HO scale track.
Talk about belt and braces – no wonder he’s had zero derailments or wiring issues.
It just goes to show a little planning goes a long way:
“The value of thinking ahead.
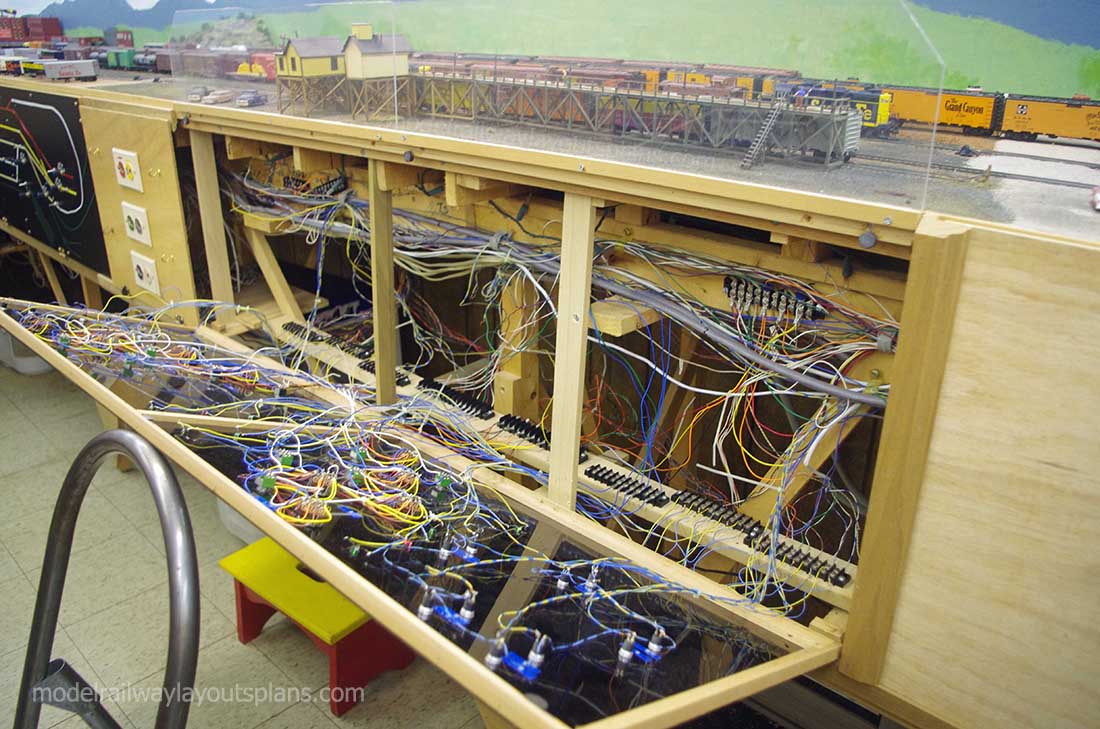
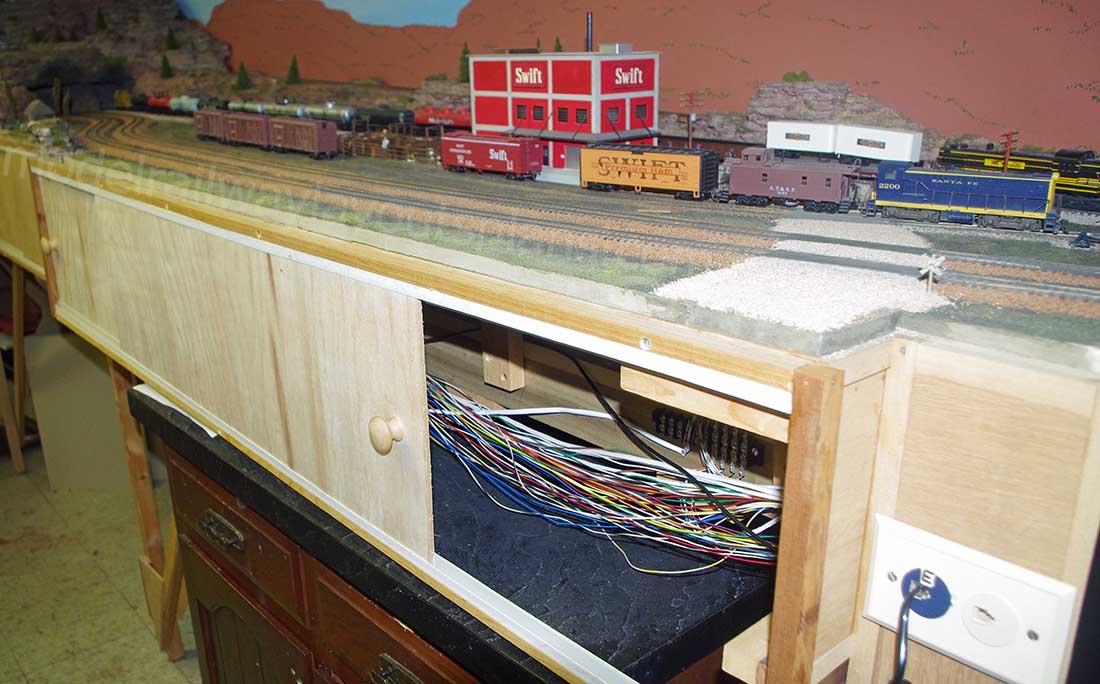
This series of photos will demonstrate that a lot of planning pays off. I knew that I would have a lot of tracks under the main layout.
There would be two mainline racks as well as three storage/staging tracks. The storage/staging are divided in half so six trains are in place. They are long enough to hole 30+ length trains.
This part of the construction process does not show up when finished. You might spend a couple of hours wiring or soldering and it still looks the same. I don’t have any images of the track laying process.
I will describe the process.
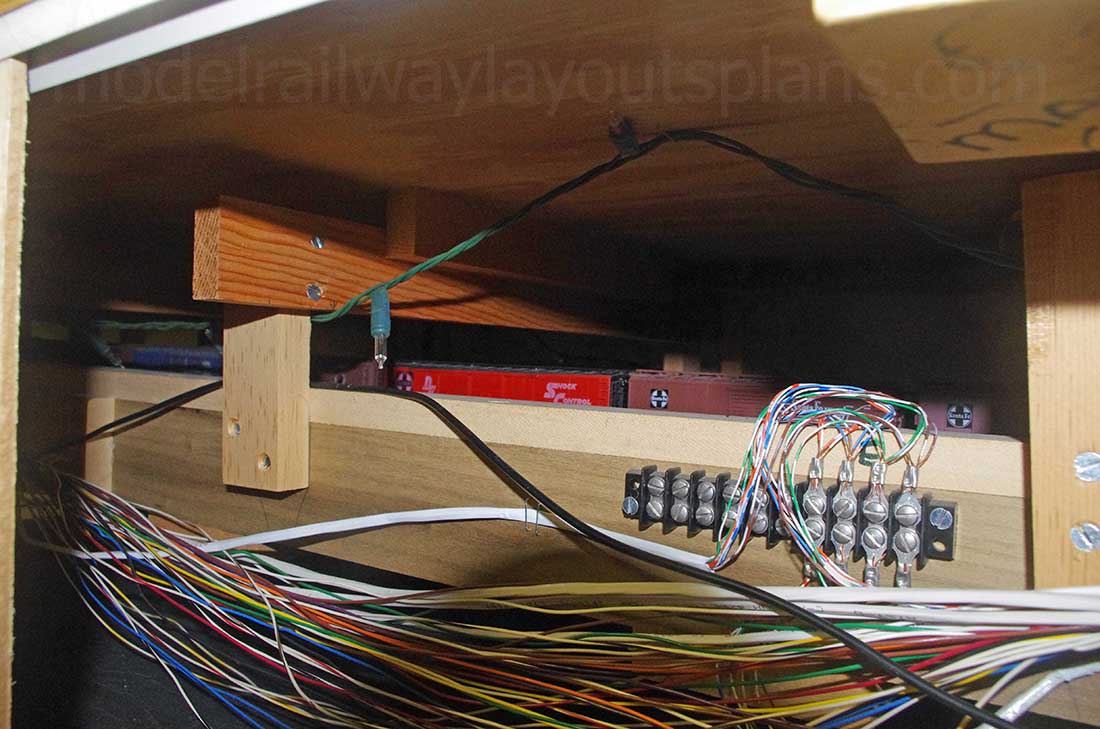
Every rail joint was soldered. Then I soldered wire jumpers between each joint. This way I knew the connections would last even if a solder joint might break. That can happen over time. I cut the blocks in where needed after the soldering was done.
A hard part came next. Waiting to put the ‘top’ over the lower tracks. Once done the lower tracks would not be fixable. To make sure everything was good to go I waited for two heating and one cooling cycle to pass.
The track work was done during the first heating cycle since it was winter when I did the work. I began putting the upper level on about half the way through the next winter. I have had 0 wiring issues and 0 derailments under the layout.
I had a response to my last post asking about derailments in the tunnels. The tunnels are short and there is access everywhere. I will show access to the entire layout.
I am entering a very busy period over the next month or so. I have a crew of 3 who will help me set up a G scale train at a local conservatory. The conservatory sets up the tables for us. We put down the track and do the wiring.
It is a rather simple track plan and flat. There is also a train around a large Christmas tree. We also check out the locomotives and rolling stock. One of us is always on call to check out problems during the run from Thanksgiving to New Years.
My model railroad club helps set up a 24 by 12 HO train display at a local bank. I spend the entire month of December at the bank. This will be my 32 nd year for the display. It runs during banking hours. The track curves have been replaced 2 times over the years. The outside rail wears thin.
I have gone through at least 20 locomotives. I change the locos daily. The newer locomotives require wheel changes over time. The newer locomotive wheels have plating on them. This wears off and causes micro arcing. A main source of the black gunk on the track.
I clean the track every 5 days during the time it is on display. I use the higher % alcohol to clean the track.
I will be working on some videos of the Santa Fe and Boston & Main layouts. I will send them to Al when I get them done.
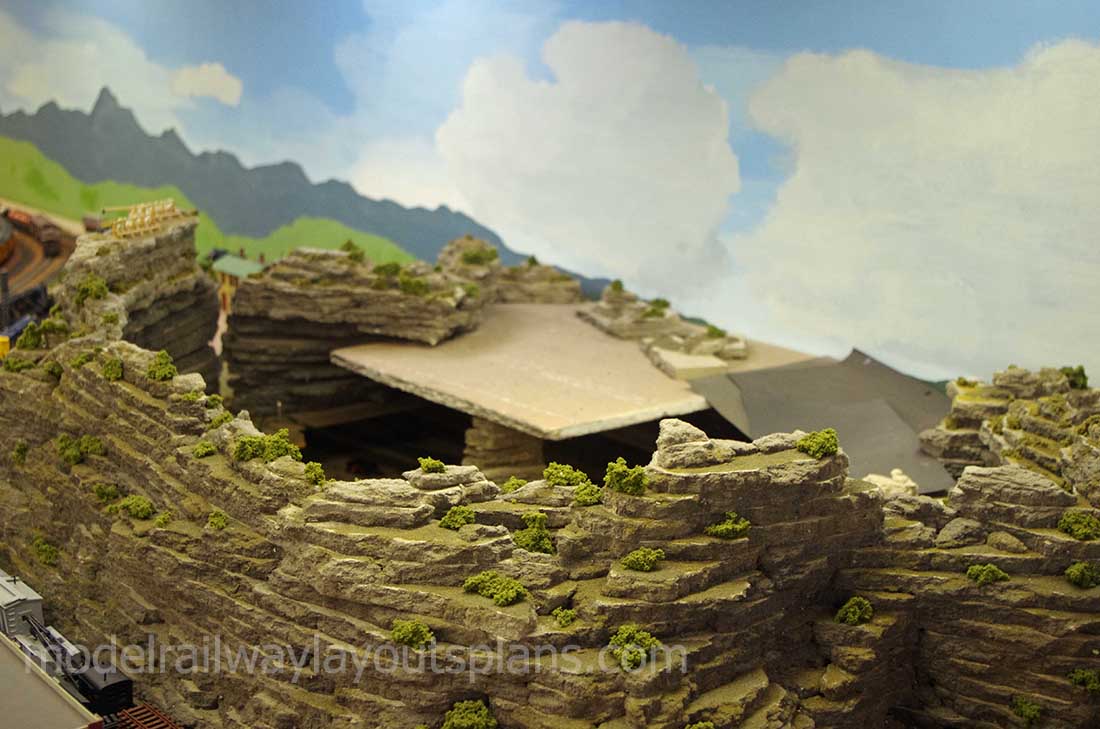
I used several ways to finish the layout look. I have interesting friends. One worked at a mill that did molding work. I got the cut offs. I made a basic frame work and used luan plywood and the molding to hold them together. I also used the fixable Masonite for the curved places you will see.
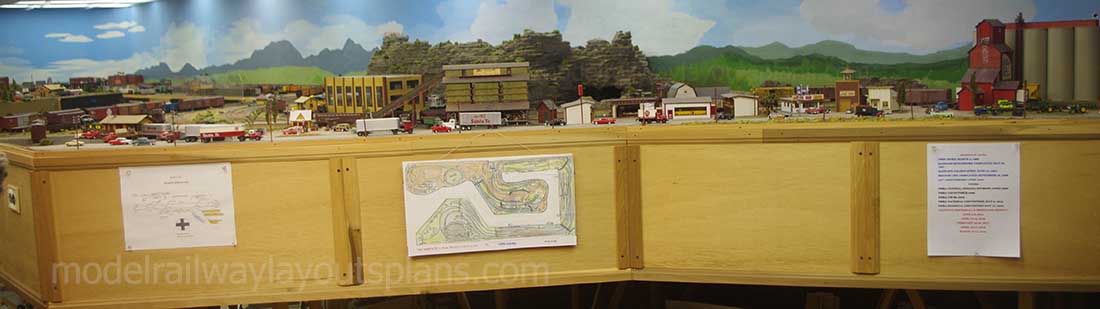
Where ever the access to track was not required I used solid work. The layout is fully accessible for storage etc.
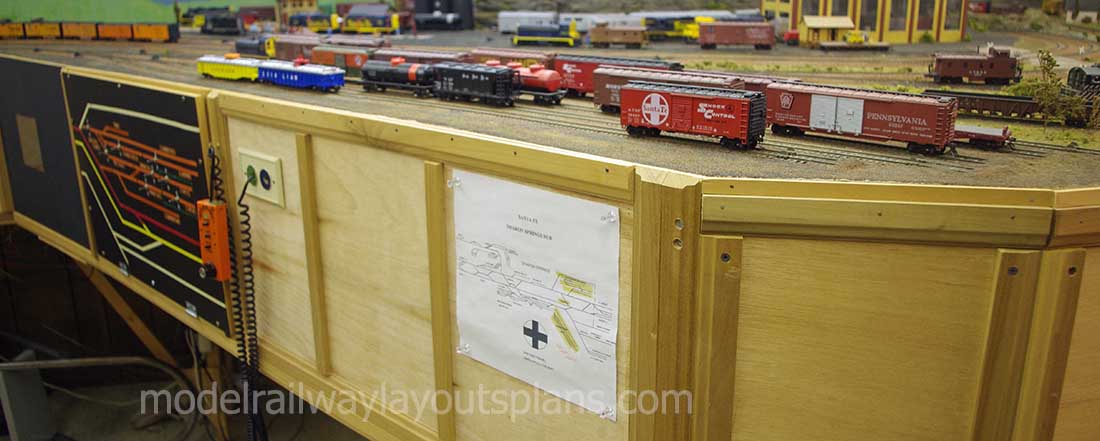
These are the local block panels. There is no track behind them. The phone jacks in the photo is for the Hogger walk around throttles I use.
Soldering HO scale track:
This panel is for the lower track. The run through and the storage/staging tracks. The colors represent east and west tracks.
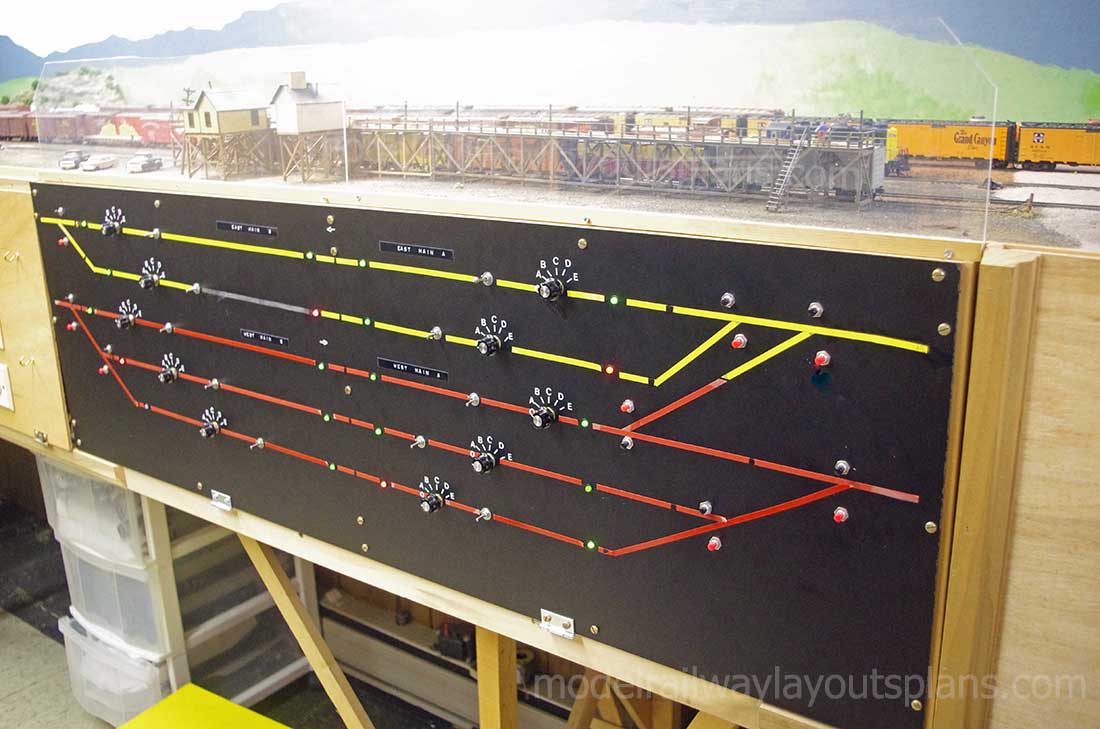
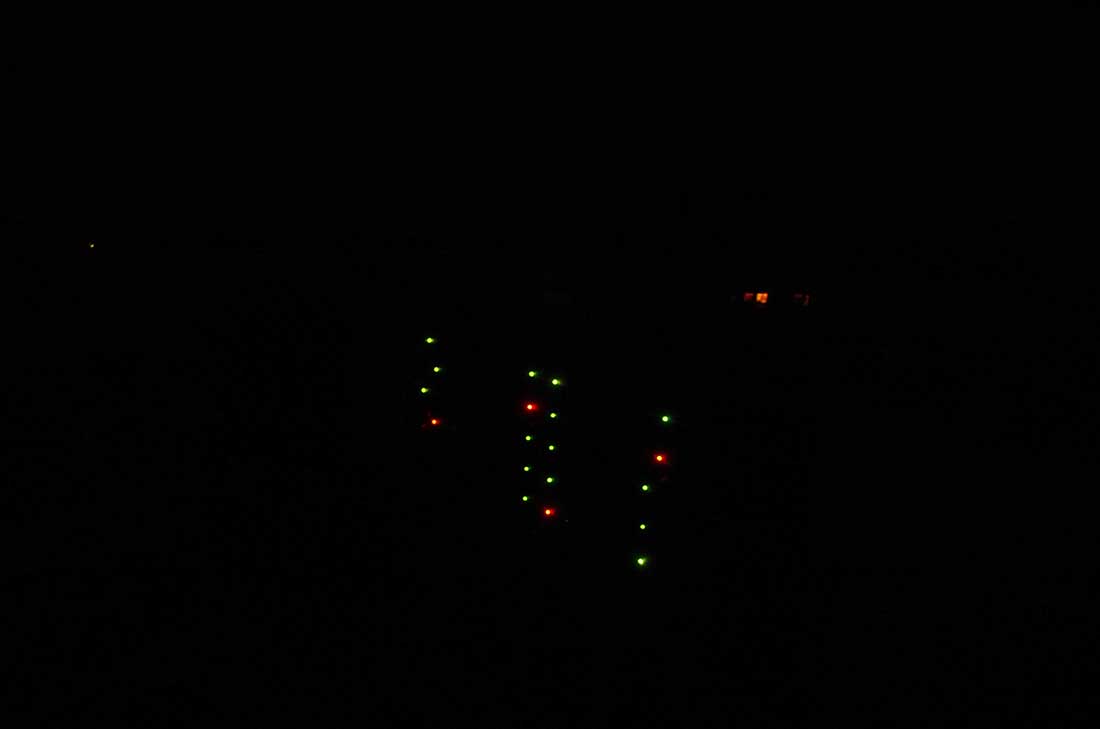
I use LED lights to show occupancy of all the tracks. There is an LED at the end of each block. If either of the LEDs is red the track is occupied.
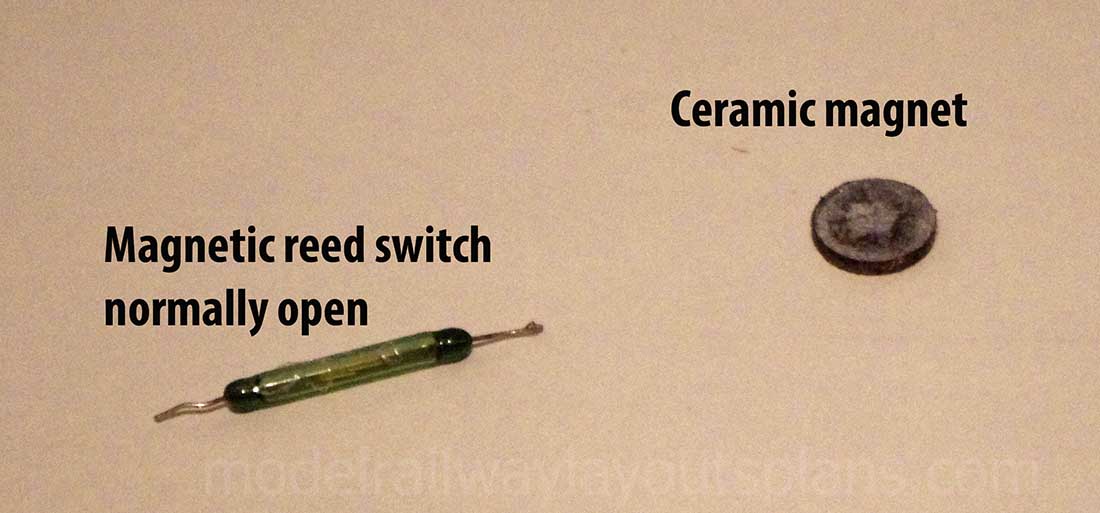
I use magnetic reed switches. The never fail. (40+ years so far) They came from a Western Electric Long Lines phone company. A panel was being removed for a more modern system. A friend who worked there gave it to me. The reed switches were removed by me and I have found a lot of uses for them in my layout and in making special effects in my planetarium. The magnets are ceramic. They came from a batch of experimental magnets. Another friend worked at a company developing them.
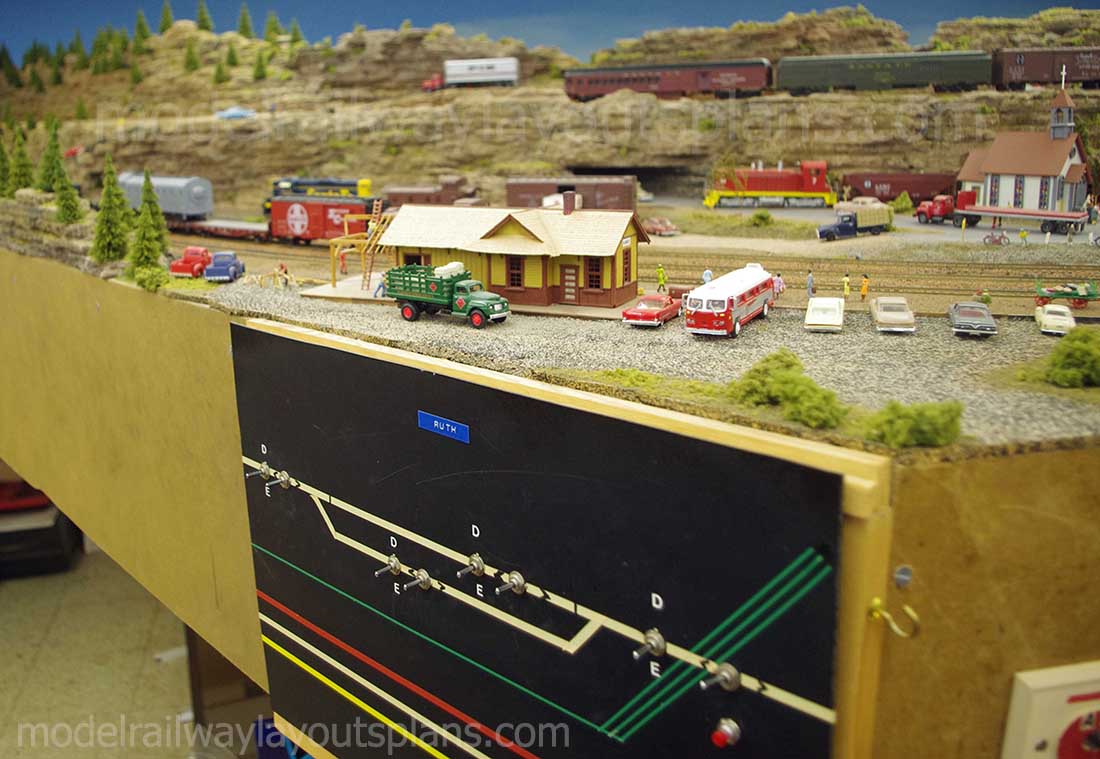
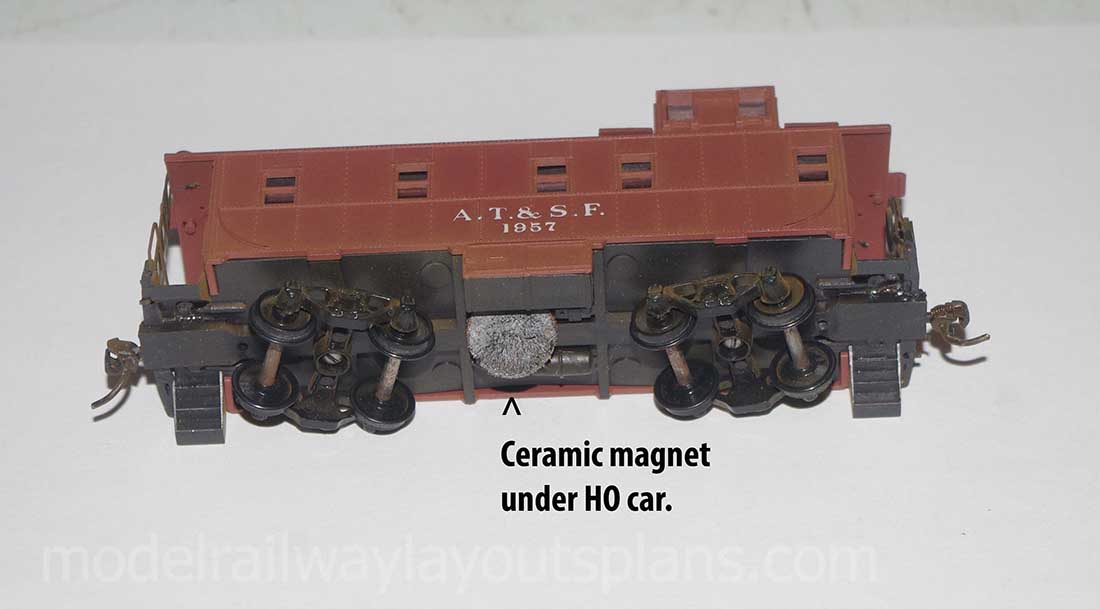
All cabooses, last cars on passenger trains, and locomotives have these magnets under them. The clear all crossings. The car weights are magnetic. It is just the cabooses that look like this. the other magnets are flat.
The reed switches are normal open. When a magnetic field passes over them they momentarily close. When parking a magnet (car or loco) over the LED it goes from green to red.
The business part of the panel. One of my brothers worked at a place that made x ray suites. The panels are cut offs of the panel material. There are rotary switches for the up to 5 possible power supply to individual blocks. I have records of each panel. This is also an access to the lower tracks.
A little farther along the layout.
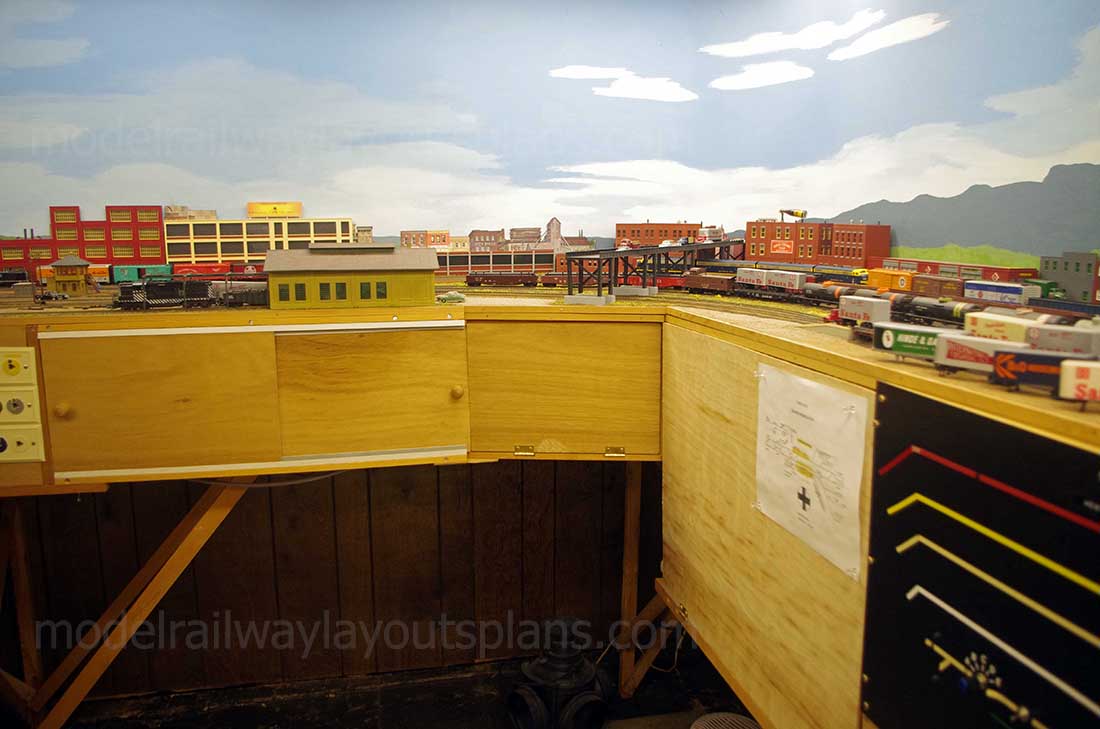
Here you can see the panels that drop down. On the right you can see the Hogger power packs. I wanted a walk around system. (This is way before DCC) MRR had some articles about how to make them. Parts were very hard to find. This was the answer. They were very expensive.
However, I did not want scrimp and then have to replace power supplies over and over. These have lasted 40 + years. They have been out of business for a long time.
I use the ceramic magnets to hold the panels in place.
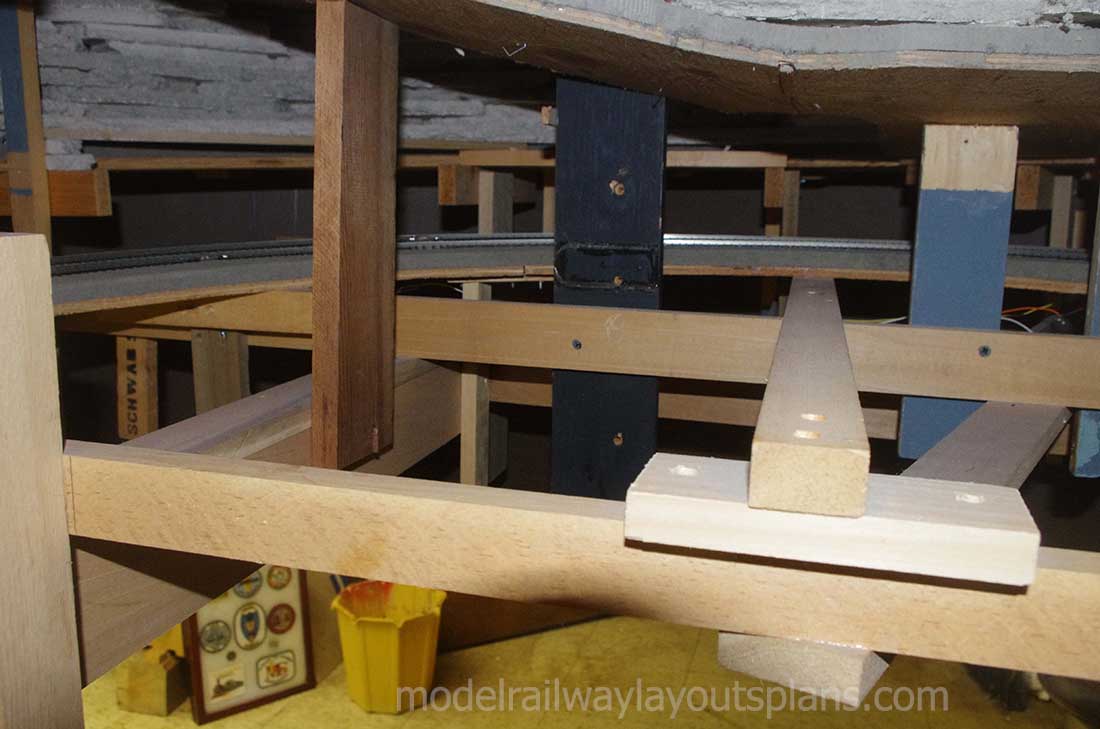
Here I made sliding panels for access. There are long pieces of 3/4 inch spruce wood. (I had some on hand from another project.) The panels are luan. This is a thin plywood. The part that makes the sliders is interesting. They are made from two panel edge protestors. They are “J” shaped glued back to back. One set at the top and one set at the bottom. They are fastened to the spruce strips and then you have sliding doors! Not expensive at all.

Behind another drop down block panel.
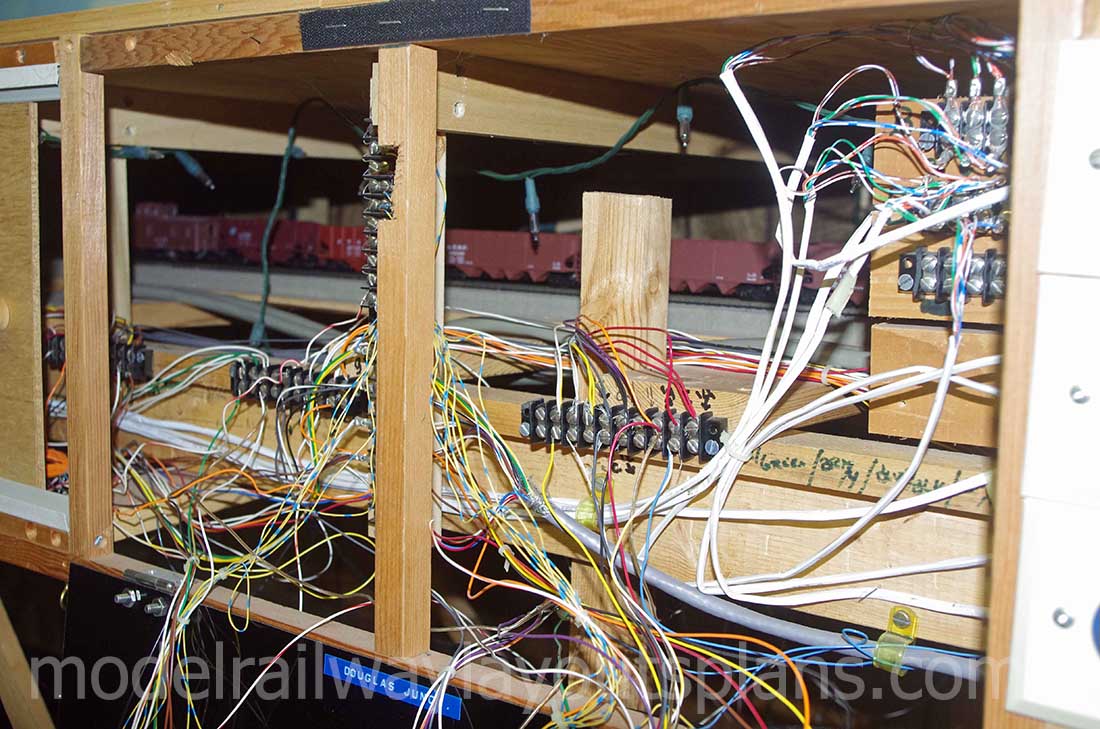
More sliding doors.
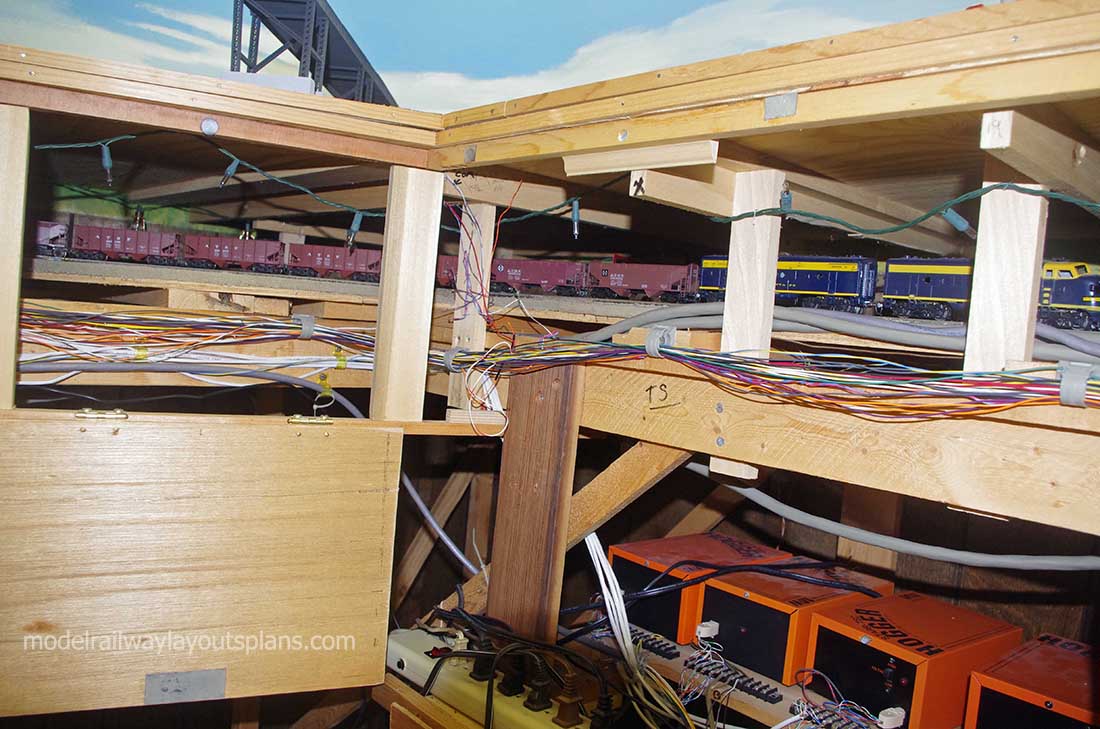
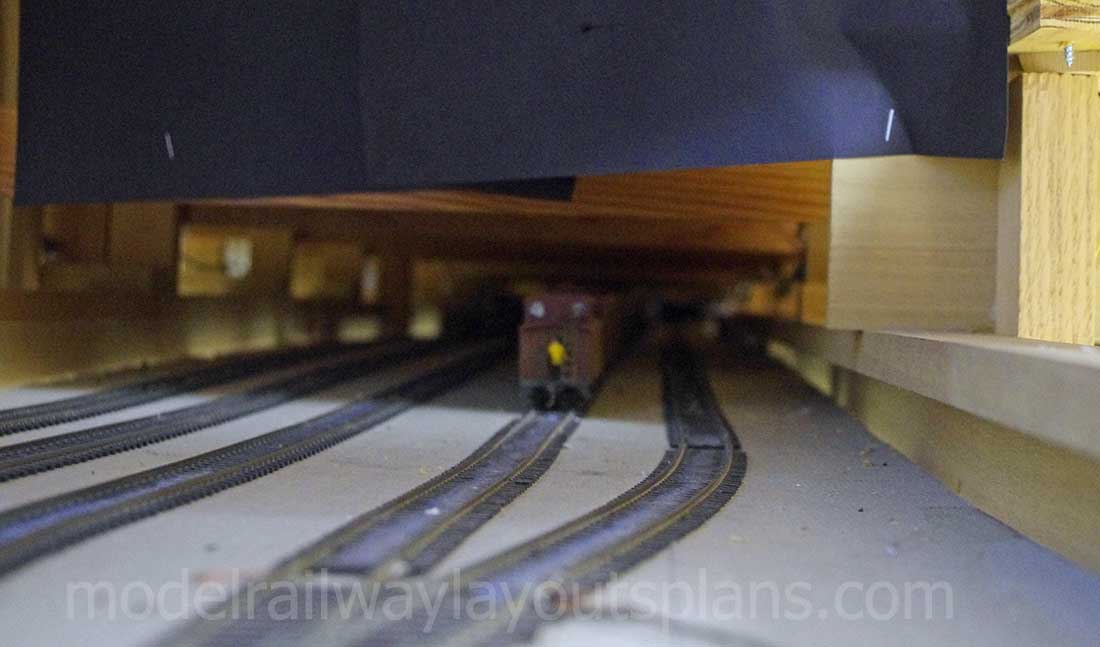
Behind the door in photo 14. It is tight but reachable. In the photos you can just see a string of white Christmas lights. The lower tracks all have lighting like this.
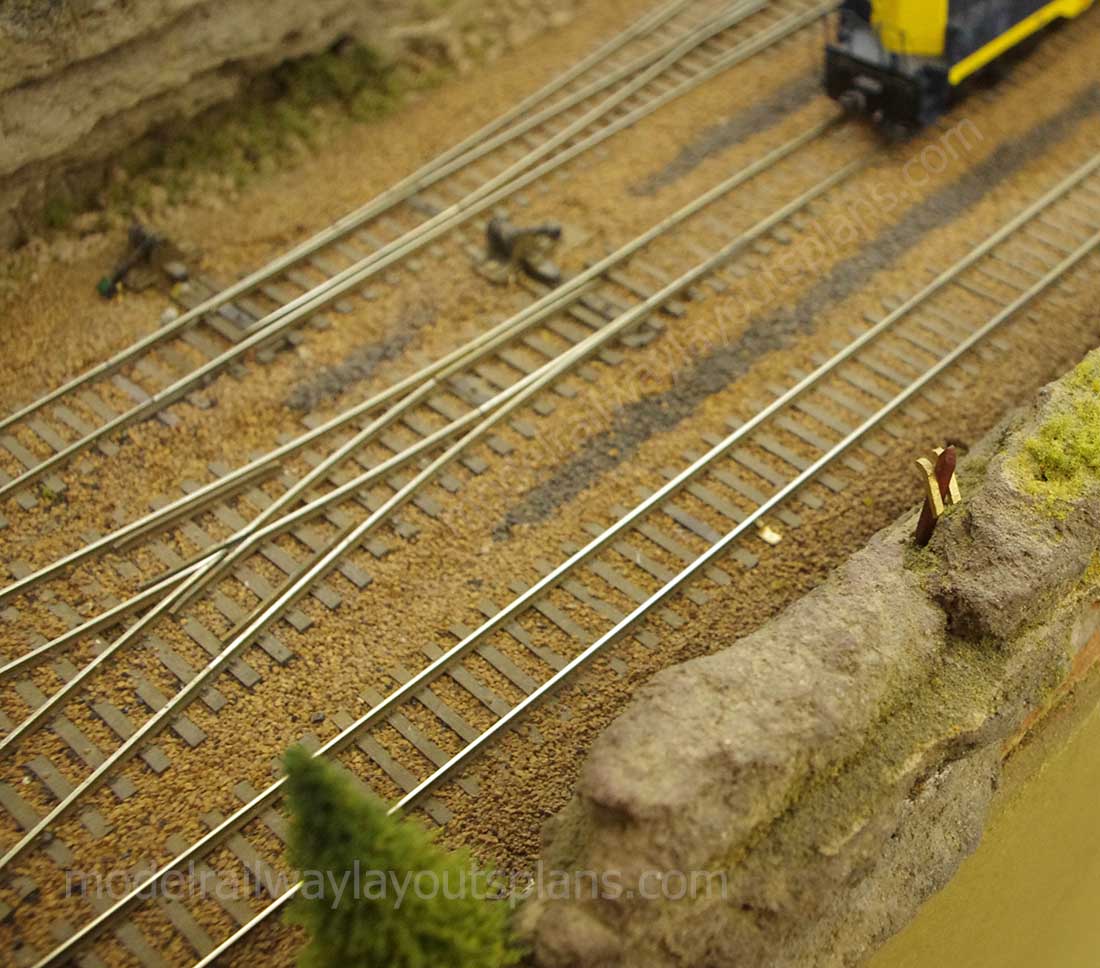
A part of the lower tracks. Very hard to see to the right of the caboose is a reed switch. To help see it the caboose is over a switch.
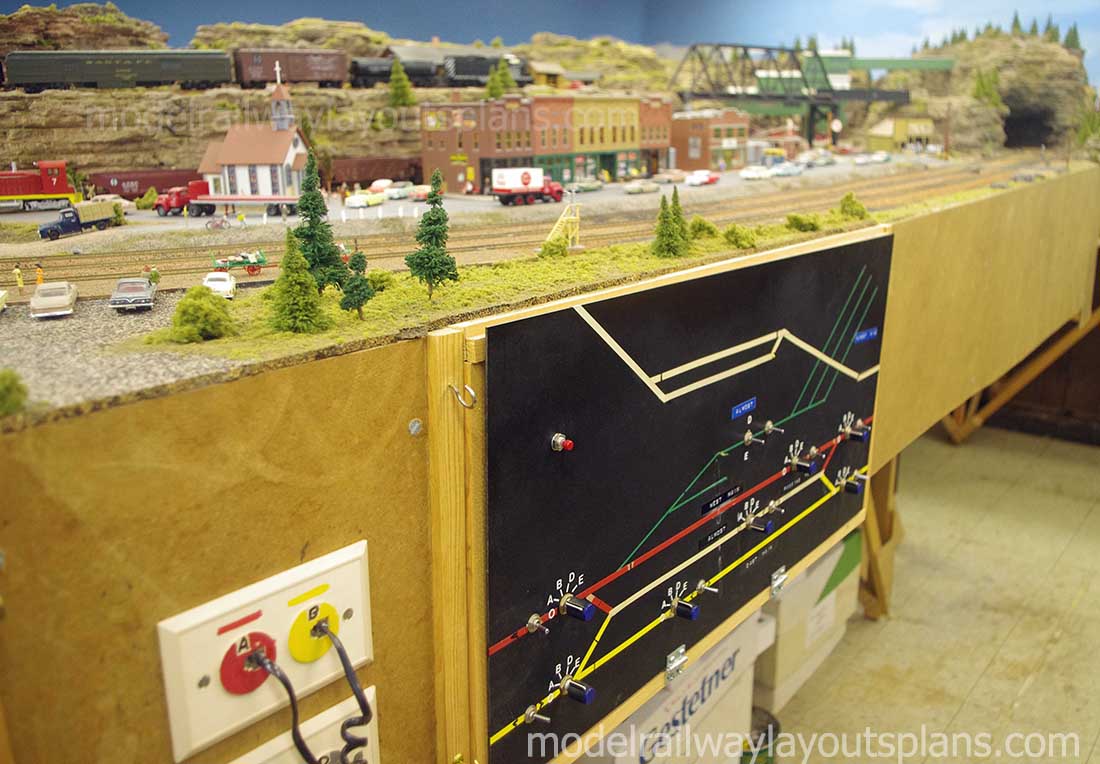
The panel for Burnt Lake. And, something very important. The yellow and red lines are the main lines coming up or down to the lower level.
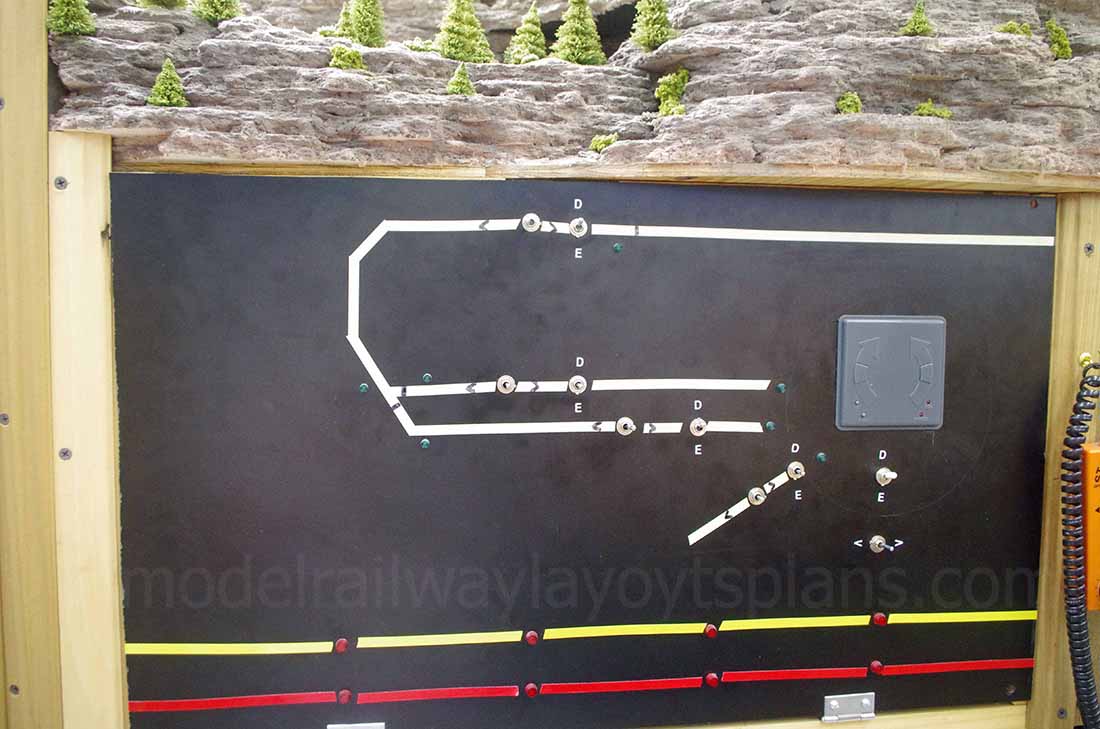
You obviously can’t see the trains because of the scenery above the track. The row of red lights are connected to magnetic reed switches. As a train passes over on the way up or down they light up momentarily, allowing you to see the progress of the train. Especially going up. This prevents anxiety and the urge to give the train more and more power. It never looks good to have a train blast out of the tunnel at light speed!
Something also that is very important. Since, the loco and the LAST car have magnets you know your train is still complete!
The view behind the panel. This area is also very open and accessible by ducking under this part of the layout.
The area behind the engine facility has a pop up space to access the track there.
Last but not least: the Golden Spike. There is a monument and a gold painted spike for all to see.
Thanks for looking.
This will be my last post for a while. I hope you like them, and I enjoyed the comments, of course.
Thanks.
SantaFeDan*”
A big thanks to Dan for sharing his soldering HO scale track tip of additional wire jumpers – the phrase that sprung to my mind after reading his post was ‘Prevention is always better than cure’.
I did enjoy seeing the parts of the layout usually hidden from view because it gives a complete picture of the what’s involved to enjoy your trains.
If you want to see Dan’s layout in all its glory, you can see it here:
In fact, when I was looking for Dan’s previous posts, I was surprised at just how many there were, and how helpful they are all too.
So I thought there was only one thing for it:
Please welcome Dan to the Hall of Fame – where you can see a list of all his posts.
We’re lucky to have people like Dan in the Hall of Fame to share all they have learned over the years.
Dan’s posts are always helpful, and I have found over the years, it’s the helpful posts that cajole folk into making that start.
I know the Beginner’s Guide has been a first step for some of you, so I asked Dan about it, and he said this:
“The Beginners Guide is a good place to start. A suggestion might be to try out one of the topics on a small trial basis.
As an example: a pond. Before jumping in on your layout do a practice small one. If you like the way it turned out go ahead and put a bigger one on the layout. Absolutely all of my scenery work was tried out before the “big” one got going. I still have the beginner photos.
As to the cost cutting tips. Never throw away something with possibilities. An example might be short left over pieces from a kit. I have several boxes of sprues. Kit pieces left over are never thrown away. I have built whole structures from left overs.
Go to train shows and pick up grab bags. I bought a bag of “people” at a show. There were at least 100 in the bag. It cost less than $5 when I got them. The folks are everywhere on layouts I have worked on. This way I don’t worry about cutting off an arm or leg for a figure to fit a specific place.
Dan*”
That’s all for this time folks – a big thanks to our new Hall of Fame member, Dan, for another helpful post.
It reminded me of Fred’s: Soldering advice for your layout.
And if today is the day you get started on your layout, the Beginner’s Guide is here.
Best
Al
PPS More HO scale train layouts here if that’s your thing.

nice buildings. ill think about it.
That a great layout you have built there Dan …very neat work with so much time and thought gone it to it , your electrics and joinery making it such a first class layout …Dangerous Dave
The wiring certainly compares with the telephone exchanges’ of yesteryear now. Brings back memories of the old government security systems I worked on. There was more 120VAC either generated or purposely on those lines, never seemed to hurt anything. Also still use the 4 conductor cableing myself for low voltage.
Would really like to revisit the hall of famers on daily basis here with repeats and anything new. If I commented before, hope pictures coincide with comments lol. Yes, know I can look up anytime but OK with me to say the least. Similar here to reviewing morning news these days but way better content.
So Again-Regards, Rich
Dan
Your contributions to this site are so appreciated because they are well done, inclusive and precise. You have accomplished so much in this Hobby and truly deserve being in Big Al’s Hall of Fame. Congratulations.
Great article, great planning, and astounding work.
Big Al
It was Thanksgiving Holiday here and I thank you for all your hard work.
Skol!
Dan, you’ve accomplished what many of us would have liked on our layout… an entire full length staging yard underneath. Hopefully this will occur on my “next” layout! Congratulations!
I am building a out door G scale layout that is elevated on steel supports that look like subways in a city no trusses above the tracks My partner worked out the difference between the expansion/contraction of brass VS steel will be about 1/4 inch per 100 feet I am just leaving the screws that are used to hold the track down just tight enough to prevent movement during operation to give it room for temperature swings All of the joints are soldered and have a tap every ten feet to supply power so no voltage drop .
Dan……. I don’t feel so bad now about how my under table wires look.
John……I love your work
Welder Dave, I failed to mention that EVERY section of track has feeder wires. I know it might seems to be over kill. But, there is no power loss along the way.
Thanks, Dangerous Dave.
Looks real nice, shorten your control panels a little bit and hinge them in at a 30° ankle to make viewing much easier. I think you’re really like it.
I have a DC N-Gauge layout with a single feed for power. It’s a double over and under loop with a total length over 30 ft / 10 m. No intermediate feeder wires! No issues with power to all parts of the track, including several spur lines and double ended sidings.
There are some secrets to achieving this:
– all my track is good quality flexitrack in maximum lengths (usually about 3ft / 1m), so the number of joints is minimised. There are no joints in tunnels or on bridges. Therefore no un-fixable electrical disconnects.
– the rails are the thickest conductors on your layout. Power loss through them is minimal if you get it right, and you may not need backup feeders
– rails expand at a different rate to the layout board, but need to be held down, but also free to move a little. Mine are double pinned direct to the baseboard either side of the ties (sleepers) to allow a little movement as the temperature changes. That also reduces stresses on the rail joints caused by differential expansion
– my rail joints are done with standard slip-joiners, but I clamp these tightly to the rails by using long nosed pliers to ensure good contact and reduce joint movement.
– all my points (turnouts) are insulfrog. The spur lines are only active when the points are directed to the spur. The rail contacts at the points need to be kept clean and in good contact with the mating rail to keep it all reliable.
– the double-ended sidings have an insulating joint somewhere along their length. This means a train cannot overshoot the siding unless both end points are correctly switched.
Hope this gives some ideas to others.
Plunko in Oz