Michael’s been in touch with O scale truss bridge:
“Alistair and all:
I thought it was time I provided an update on my O Gauge Slide Rock Bolter Railroad.
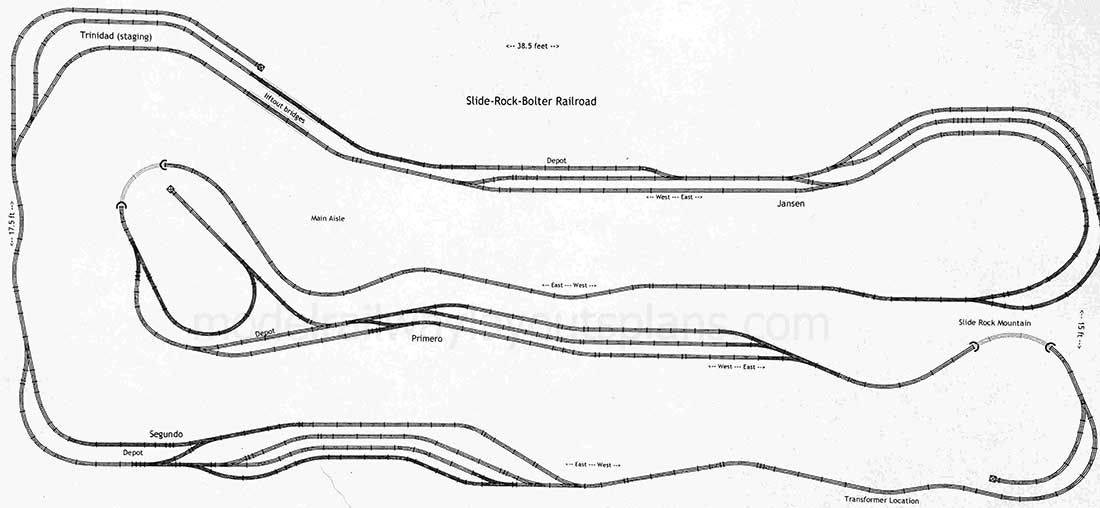
I always include a track plan schematic; it helps orient people to the layout; pictures alone never seem to adequately convey the whole layout.
In my last update I described how I was experimenting with 3D printed parts to scratch build O scale buildings.
The primary reason for scratch building being the difficulty I had finding suitable buildings that did not cost an arm and a leg. I have since scratch built three bridges for my layout and a large coal tipple.
O scale truss bridge 1:
The entrance to my layout is through a gap spanned by two lift-out bridges.
The first bridge started out as a 1x3x30 inch piece of lumber just to get the tracks working.
I then decided to convert it to a 30 inch girder bridge. All of the girders are 3d printed and then glued according to the bridge design.
The design is from scratch although there are obviously many prototypes and books to copy from.
The original piece of lumber is hidden within the 3d printed parts and provides strength and stability.
For quite sometime the girder bridge spanned the gap without any additional scenery. If you search around on thingiverse.com it is easy to find designs for individual parts that can be easily modified and scaled to fit almost any requirement.

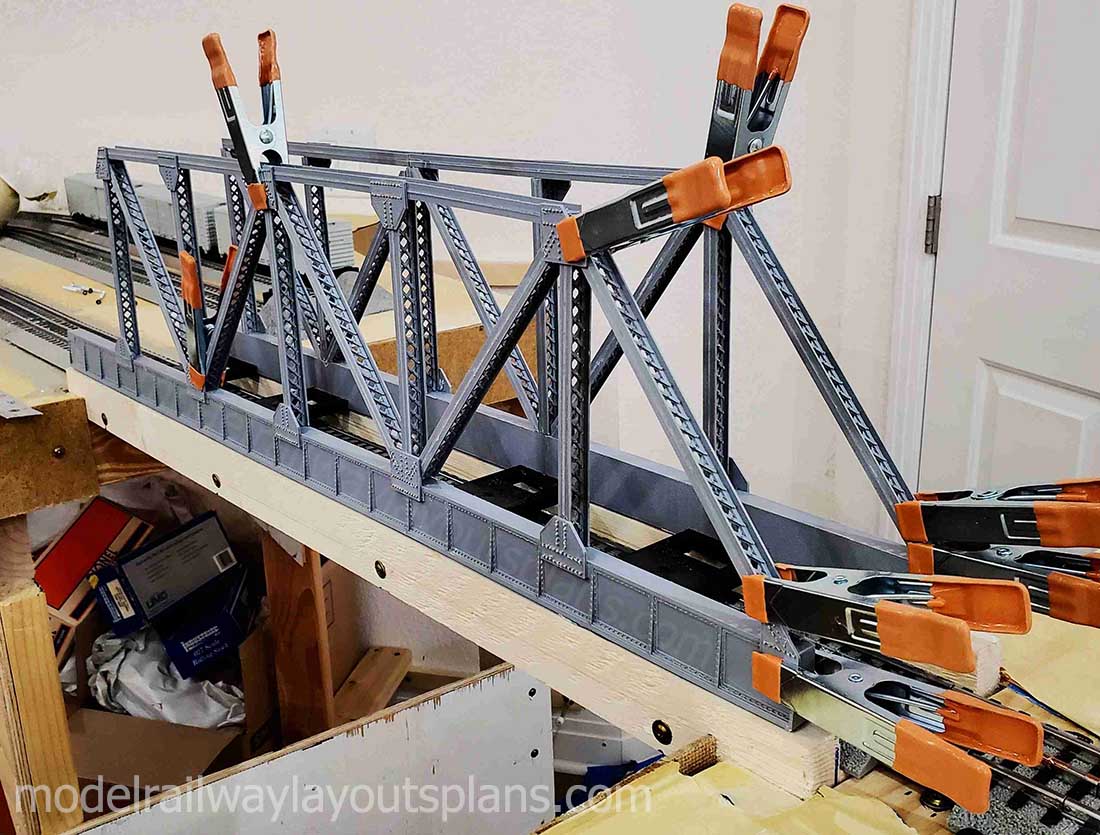
O scale truss bridge 2:
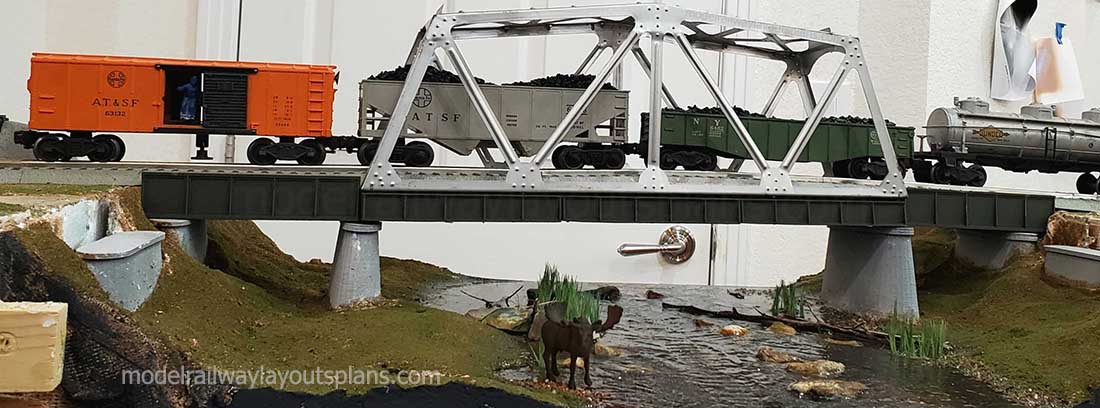
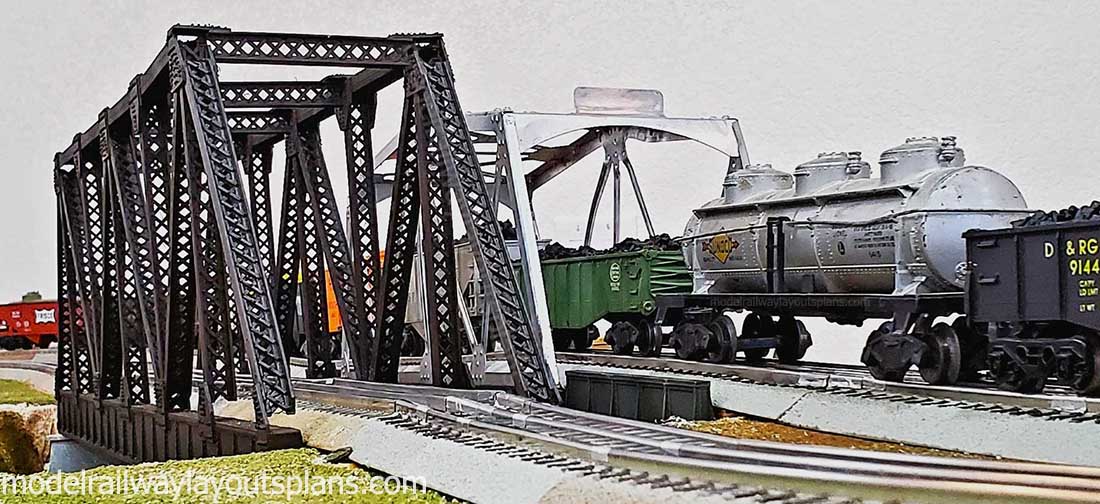
Then I decided to add a second bridge spanning the entrance.
For this bridge I wanted to incorporate a vintage Lionel girder bridge that I have been lugging around for almost 60 years.
The catch was that the Lionel bridge is only 18 inches long and the gap is 30 inches. This required building a combination bridge with two plate girder extensions on either end of the vintage Lionel bridge.
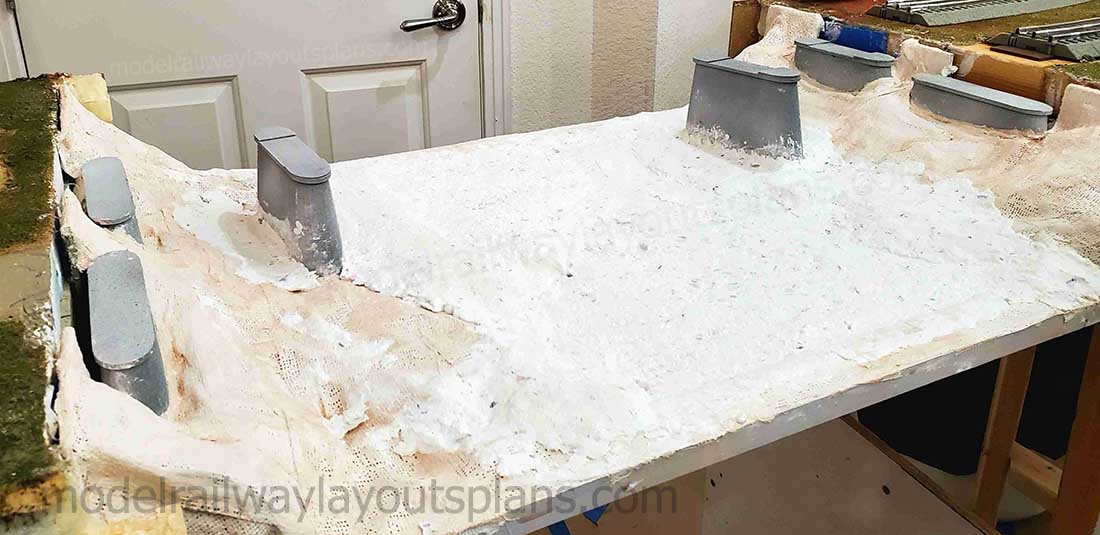
Of course, without concrete supports the plate girders would just be levitating in the air. Therefore, I also had to build some scenery with concrete supports and a river.
The river and the two bridges all lift-out when needed. The moose is 3d printed. The riverbanks need more detailing but they are good for now.

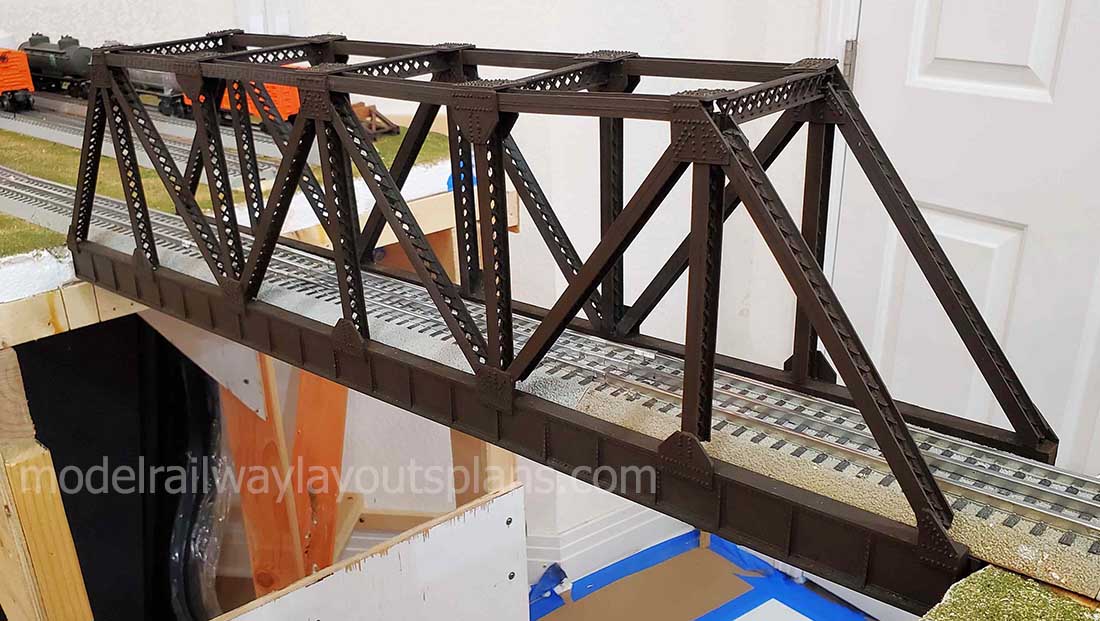
O scale truss bridge 3:
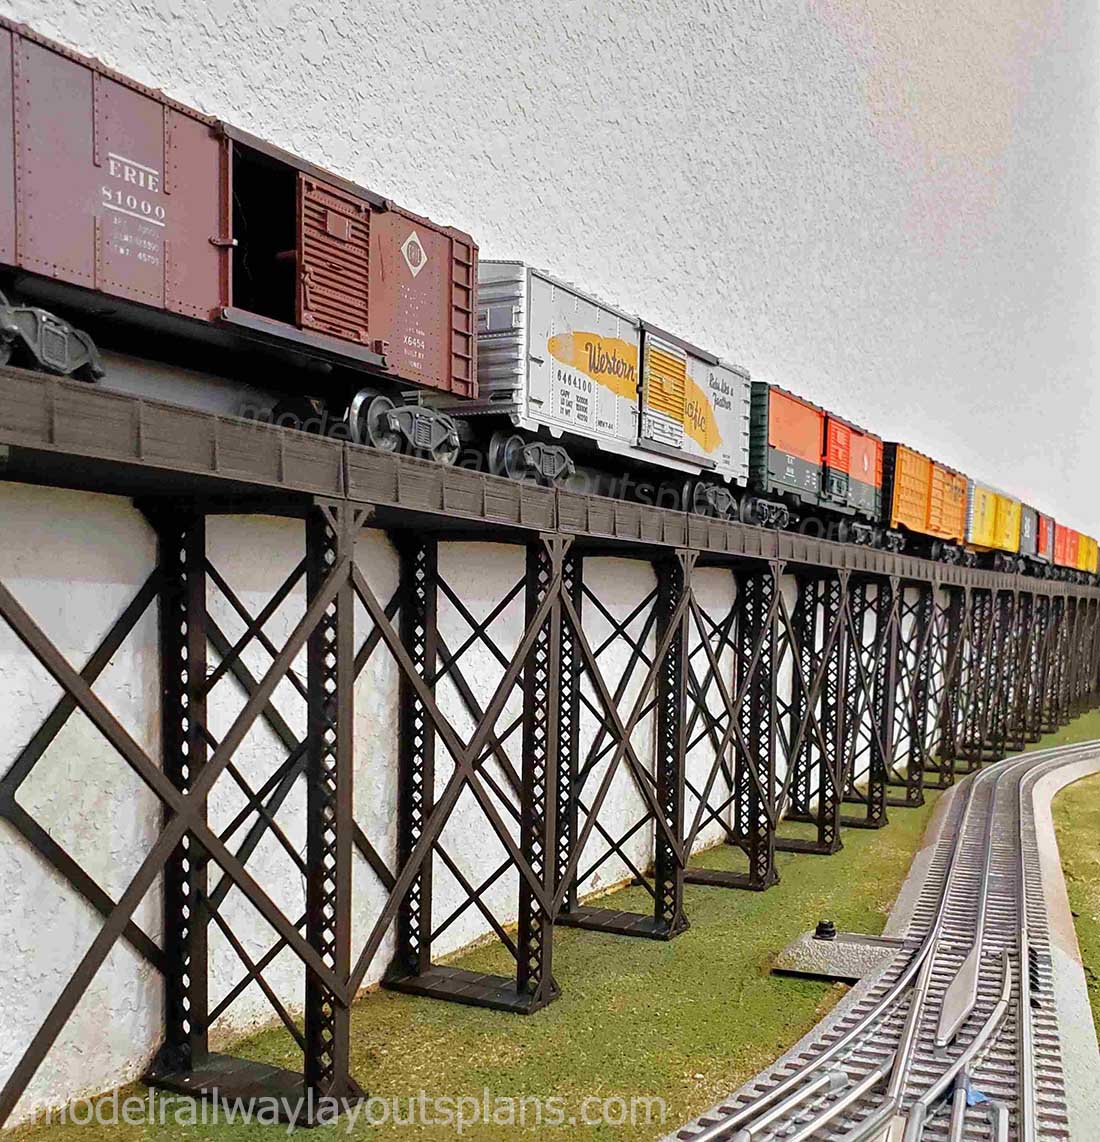
Next, I built a long plate girder trestle, which is really a “bridge to nowhere”.
The trestle is 10 feet long and is used to store up to 12 pieces of rolling stock when they are not actually running on the layout.
At any given time, I have about 75 unique pieces of rolling stock on the railroad and the storage trestle acts as a fiddle yard.
The cars on the trestle sit on original (rusty, dirty) Lionel 3-rail that I have had for almost 60 years. The trestle is located on the wall west of Trinidad.
I am considering building another storage trestle on the wall north of Trinidad. Trinidad is the main location where trains originate, stage, and terminate on my railroad.
The trestle is scratch built from 3d printed parts. Using the printer, once the design is set, you can just crank out parts repeatedly until you have all that are necessary to build something of any length. Nice! (It can take a lot of time to print everything – several days, up to a few weeks…)
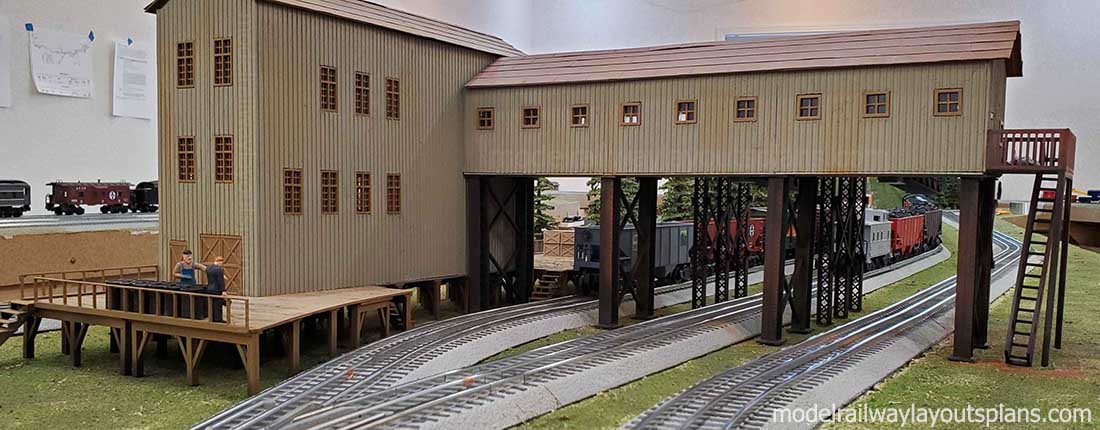
Coal Tipple:
The coal tipple is located at Primero. I wanted a fairly large building to provide some “wow factor”. It needed to be customized to my particular layout configuration.
The building is scratch built and has an overall footprint of about 25×32 inches and is 11 inches tall (100 x 128 x 44 scale feet).
It spans three tracks and has coal loading booms to two of those tracks.
The inspiration for my design is the Nuttallburg Mine in West Virginia. I located some nice drawings of the complex and used them as a guide for my design. (Google search for “Nuttallburg Mine Library of Congress”).
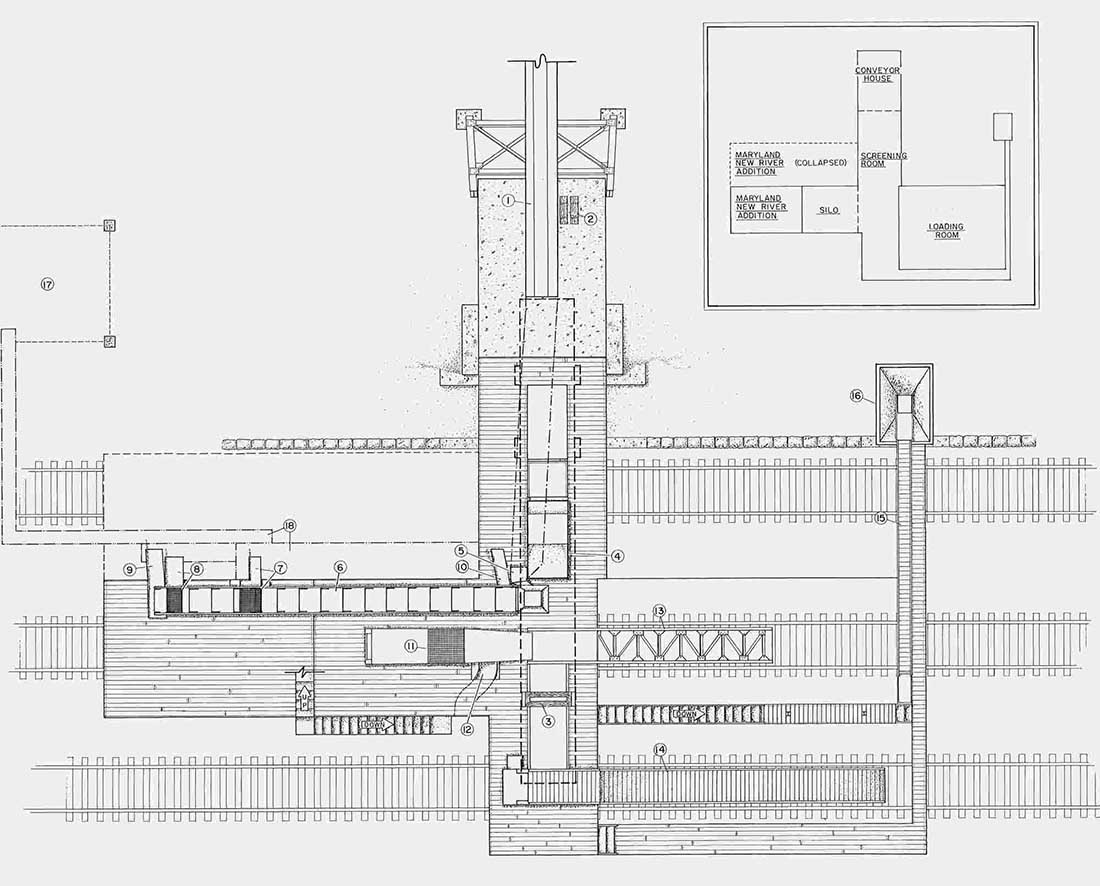
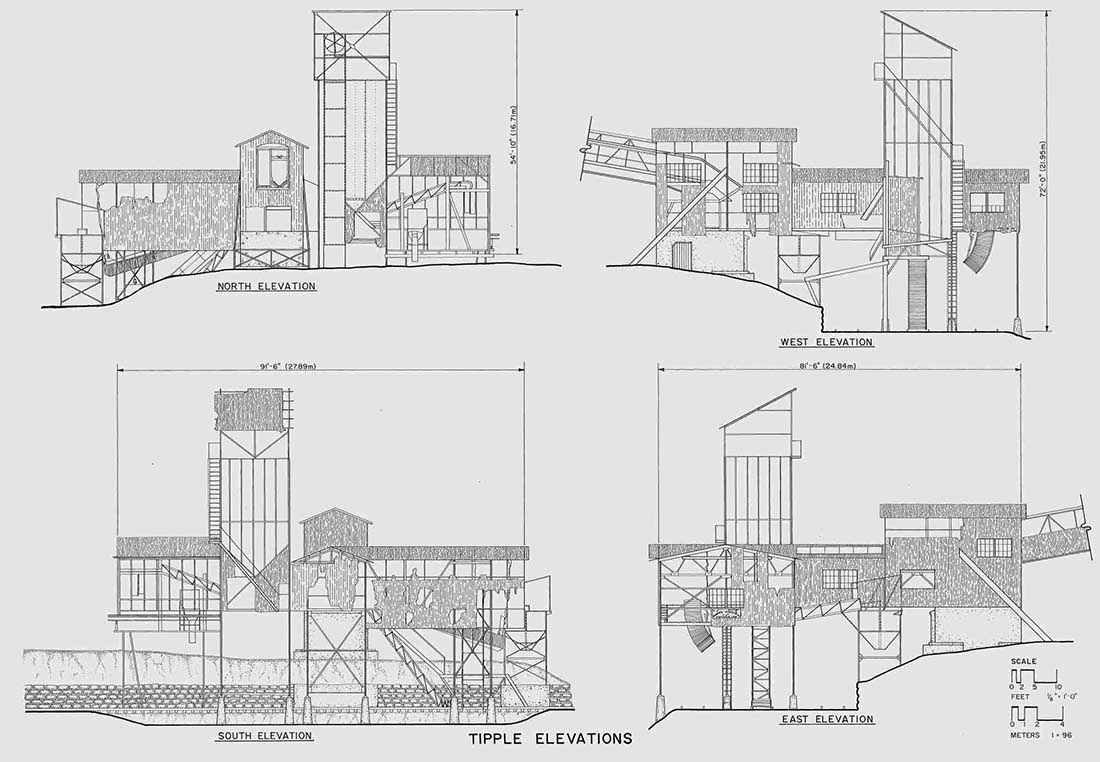
My design is only very loosely based on these drawings. I took many liberties to customize the tipple to my exact layout configuration.
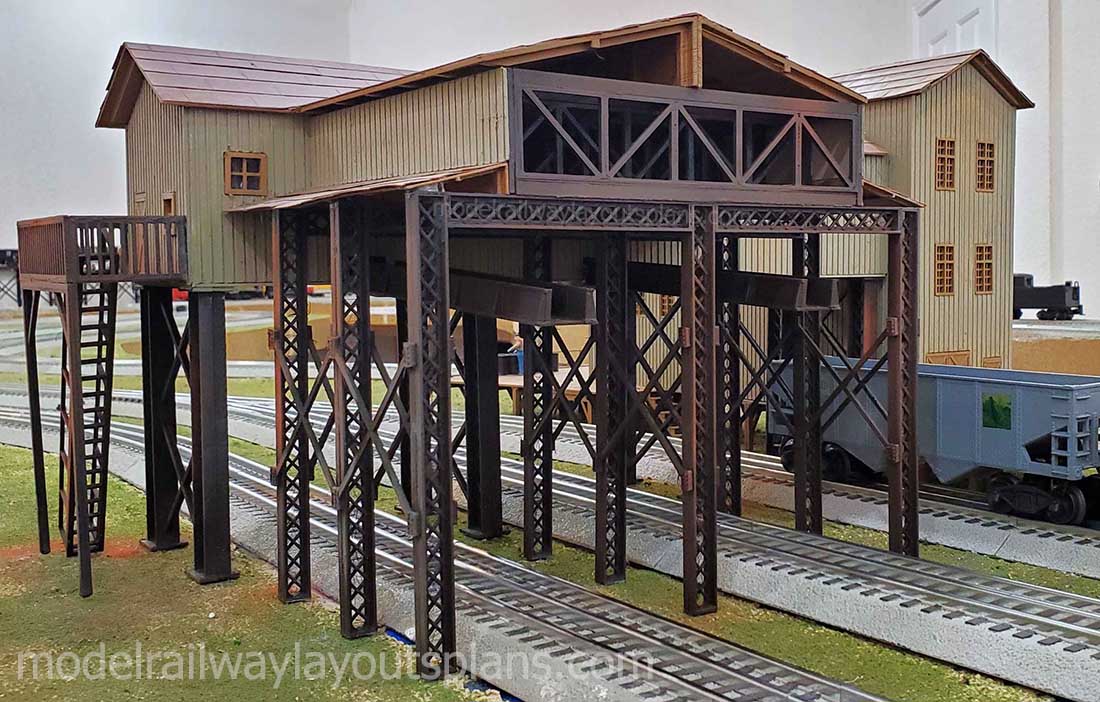
For my layout, there is a large processing building parallel to the tracks with the attached tipple spanning the tracks.
The coal booms are covered as in the prototype. In the prototype, the booms could be raised and lowered into the coal cars and conveyors used to fill the cars.
In my version, the booms are fixed at a height that does not interfere with the model trains running beneath the tipple.
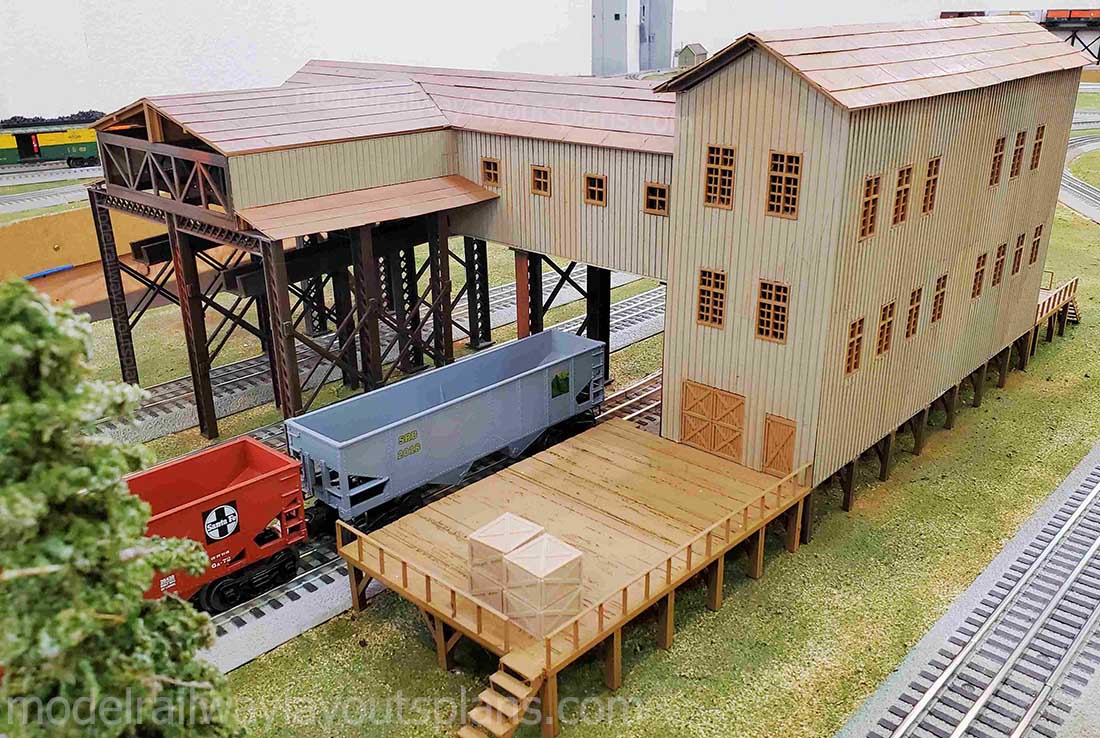
I have added two large loading docks at the east and west end of the processing building for equipment and resource loading.
One of the docks is curved to match my track layout. I did not include the coal silo from the prototype, instead I designed in a much larger processing building.
In the future, I plan to add a conveyor from a mine shaft-head building located elsewhere on the layout and feed it directly to the processing building. A similar arrangement exists on the prototype.


As a final note: the vast majority of the trees on my layout use 3d printed armatures of my own design – I’m using the 3d printer for as much modelling work as possible.
One of the huge advantages of using the 3d printer is the cost savings. I spent less than $20 on materials for each of the three bridges and less than $40 on materials for the coal tipple, even when considering all the trial and error necessary to get the parts to fit together perfectly.
I can print and fully flock 13 inch trees for about $1 each. You just can’t touch prices like that using pre-made parts. And with a good paint and weathering job, I can’t tell the buildings are plastic.
The coal tipple was a bit tedious every once in a while and did take a lot of time to print.
However, it wasn’t very difficult in the final analysis – everything is just squares and triangles scaled to the right size.
Throughout, I used the very simplest brain-dead piece of freeware software that came with Microsoft windows – nothing fancy at all! Anything the slightest bit complicated I probably found on thingiverse.com and modified to suit my needs.
Background info: the Slide Rock Bolter Railroad is named after a mythical backwoods creature that barrels down steep Colorado mountains feeding on unsuspecting miners, hikers, hunters, and tourists.
The layout is 3.3 scale miles of O gauge track over a 38.5’x17.5’ footprint.
I run vintage Lionel stock and prefer Santa Fe and Denver Rio Grande roads.
I have the Lionel 736 Berkshire and associated vintage railcars my grandfather gave me when I was five years old.
The cities on my railroad, Primero, Segundo, Jansen, and Trinidad, are real locations on the Primero Branch of the now defunct Colorado and Wyoming Railroad. The printer I use is an Anycubic Viper.
Enjoy!
Thanks,
Michael”
(You can see Michael’s last post here: 3D printed O scale.
A huge big thank you to Michael for sharing his O scale truss bridge pics – you all know how much I like an update.
It seems 3D printing is becoming a bigger and bigger part of this hobby as time rolls on.
That’s all for today folks.
Please do keep ’em coming.
And if today is the day you get started on your layout, the Beginner’s Guide is here.
Best
Al
PS HO scale train layouts here if that’s your thing.
Need buildings for your layout? Have a look at the Silly Discount bundle.

Isn’t that something. The detail, ideas and execution in O gauge is amazing. In fact this level of work makes trains stand out as having too high center of gravity and that along with the 3rd rail not camouflaged from manufacturers. Nothing can be changed there, these things keep improving and many not updating. DC to DCC is perfect example and the N scale couplers?? Nope, I’ll never change either lol. Another viewpoint is the layout is so well done, trains and track look more toyish. 😟
Typical with everything just to spend money of coarse. These days with N scale short comings and age, nobody can notice any difference there…
Regards, R
fatastic work and wonderful explanationv vereymuch enjoird well done
its a lot of work but worth it. very nice job. i love the tresstle and crossover.
Thanks for the details on the lift out bridges – I’m following a similar approach with my American Flyer layout (S gauge) – using the Thomas Viaduct on the B&O in Baltimore Maryland with 3 tracks as my focal point at the enter ace to the room – little ones can go thru the arch of the Viaduct, while adults pass thru the adjacent rolling lift section – your detailed description was very helpful
love the bridges & all the railyard, great workmanship
I love that you supplied a drawing of the inner workings of the coating process. Seeing the conveyors and the final chutes help define how the process works. Great build you did replicating the drawing. I also like that you have a continuous running line underneath for filling. All to often on other builds people build a coating process but only have a few feet to load cars. I get that size has a lot to do with persons layout, but yours is certainly realistic.
Thank you,
Greg
Large scales provide large amounts of detail! Now back to my N Scale layout…
Nice work with the Truss Bridge and supports for the building , also your 3 d printing for those trees is excellent
Hey Michael, Nice to see the O Gauge. I also am in the Lionel 3 rail application.
I certainly do realize that the HO provides for more track and scenery in the same area, but I built O Gauge to entertain 6 grand kids and it works for us.
Love the trestle display rail. I have similar side rails I use to line up different rolling stock so the kids can pick out their own train pull. We have many choices from realistic flat cars with cargo to box and tanker cars, along with a crowd favorite of flat cars with a selection of Dino’s strapped on for the ride.
This hobby covers those extreme detailed layouts that amaze us all to the fantasy of dinosaurs on rail cars for the kids entertainment.
Carry on to the men and woman who entertain us all.
Awesome work. The coal tipple was fantastic. Thank you for sharing!!!
Impressive work all around!
Real nice I grew up with O gauage. My set up is16′ X 1′ but I still enjoy them very much.
Fred
looks great. would like to know what the power source is as i have a lot of Lionel steam engines that were my dad’s. still running great.
That’s some amazing work , very finely detailed . Nice job , thank you for sharing your process and schematics , you’ve done this before . If it were all so simple we’d all have such stunning displays … Great job !
Great to see another “O” Gauge railroad layout……and very well done indeed!!!
Love the lift-out bridges made with a 3D printer. Mine is an MTH two track arched plastic bridge that I hinged at one end to provide access into the centre of my layout.
Love to see a video of the trains running.
Peter (Buco Australia)
Michael,
I am not usually a fan of Lionel three-rail O scale layouts, but I have to admit that yours is a definite exception. Your detailed explanation of the bridges and your execution of the concepts are outstanding! The coal mine and tipple are amazing! My grandson is into 3D printing, but I have to admit that it seems a bit beyond my comprehension. That’s one huge O-scale layout. Thank you for sharing it and please send more updates as it progresses.
Great looking project. I am interested to find out where you got your 3D girder print plans from> If you could share that would be great.
Thanks, Bob
A great job on working with vintage Lionel O scale. I have some Lionel O gauge that my brother and I received as Christmas gifts. nearly 80 years ago, still running strong.
Should have the girder work gray, more realistic.
Awesome layout Michael and girder bridge design. I wish I had the room for a large 027 gauge layout, but only have a small area for mine. I would like to know what type of 3D printer you have and where you got the plans for the girder bridge.
still love the trestle work, incredible work.
All I can say is holy shit !! Wow!! That’s a big layout for O scale how big is the room you have it in? Amazing the work you can do with a 3D printer the bridge’s and building look amazing nice job! Thank you for sharing Chris-Michigan
Fantastic work Mike. I’m an HO guy but luv all trains. I’m getting ready to start my new HO layout in new basement, wife wanted a new house, so have to start completely over. Pretty stoked, got the new wood shop just about set up, where I will build all of my bench work components and lots of other scenery structures etc. thanks for sharing Mike, I read almost everything about trains and woodworking. Happy training, have fun and a great day!
Michael, I huge thank you. Especially including a track plan which pulled everything together. The modeling skill set is truly impressive. May be the final push for me to enter the printing world. Great layout.
This is great work! As I get back into my American Flyer/S-scale, I am amazed (and excited) to look into more what 3-D printing can do…there is a lot of talent out there and it seems like these 3D print files can be scaled up/down to meet the specific needs of one’s scale/preferred train modeling. Well done to Michael, and to you Al, for all that you guys do!
Michael, Great workmanship on that bridge awesome. nothing like 3 rail, I have PW Lionel along with other brands. Again, Great Job!
Excellent job on your steel work. Also liked you reverse layout design.