Before you get busy with your model train paint – there is another way.
Peter shows us how he gets a fabulous effect on his locos.
You may remember Peter from his last post, which is here.
“Al
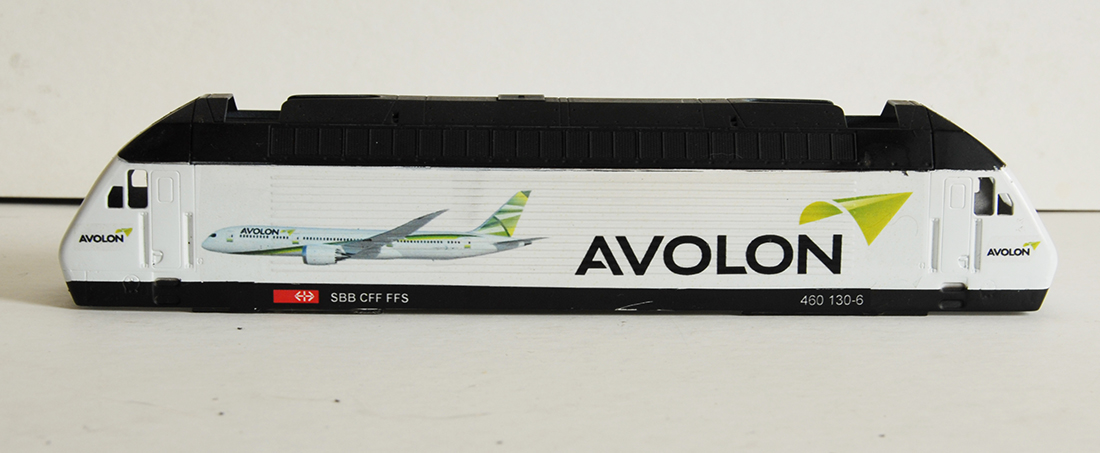
Further to the last article on transfers for locomotives etc..
When I used transparent A4 vinyl self adhesive paper…printed on the ink jet printer..
But this paper was too thick to follow the ribbed contours on the loco side…and just went across them.
There were a couple of people in Germany who were using proper decal paper..
And their results were exceptional…
I made contact with them and managed to get some information on how to do these transfers..–
I had to obtain the decal paper from a source in Germany who gave the thickness of the paper [12 microns] [7 micron paper is too thin and not easily manageable]..
No one I approached in the UK was able to give this information, out of dozens of companies I approached..
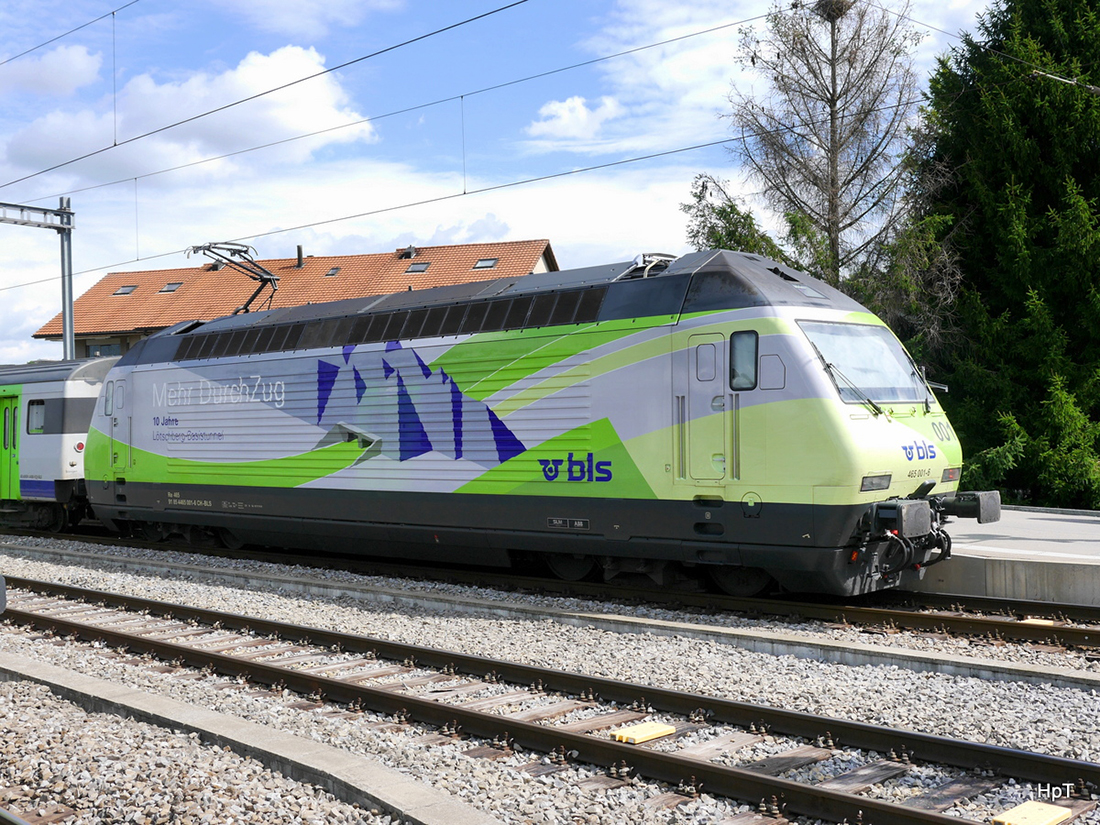
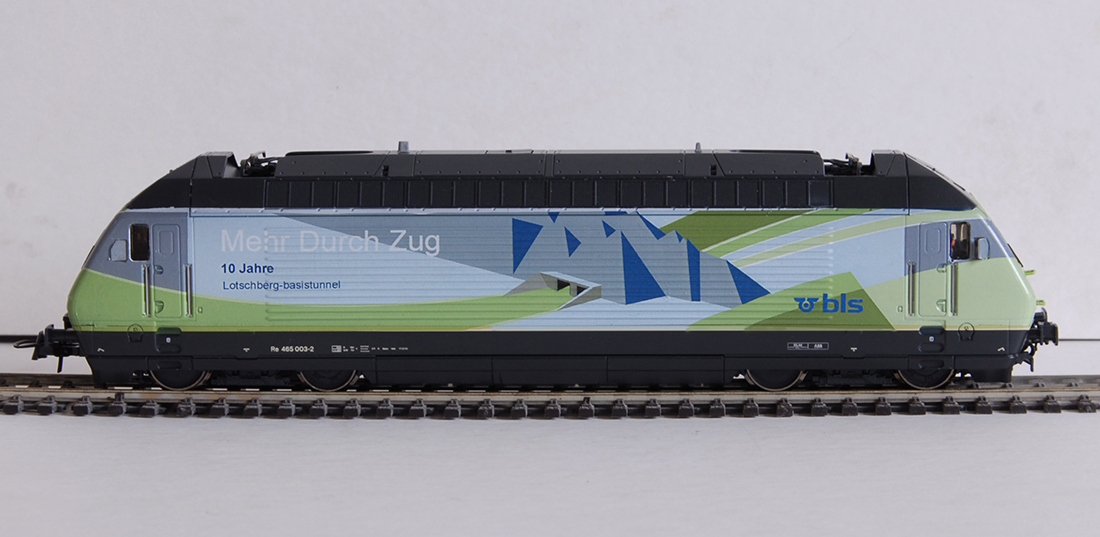
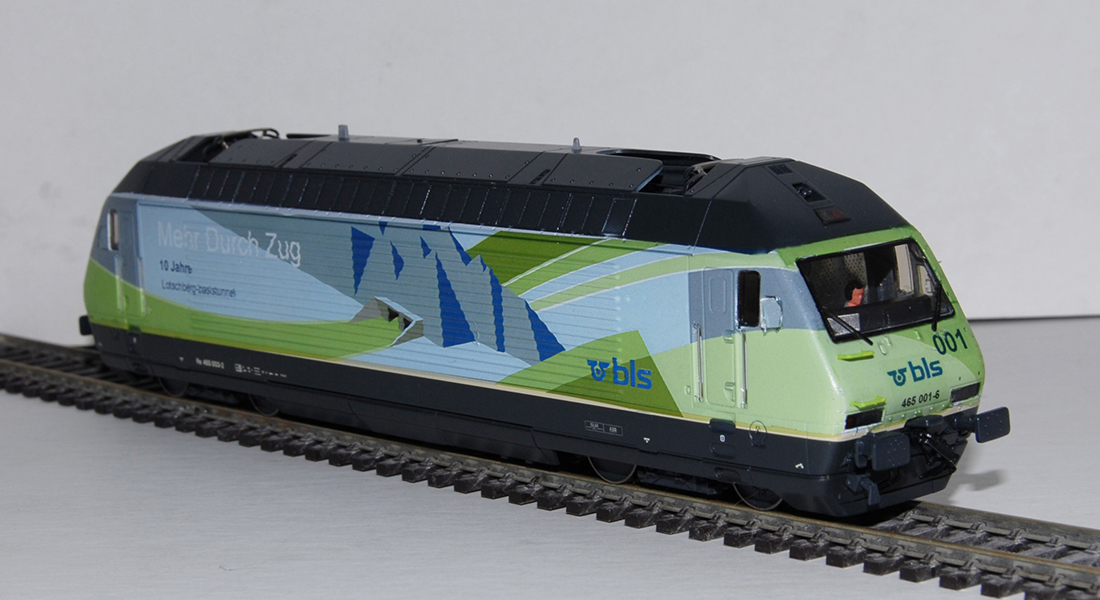
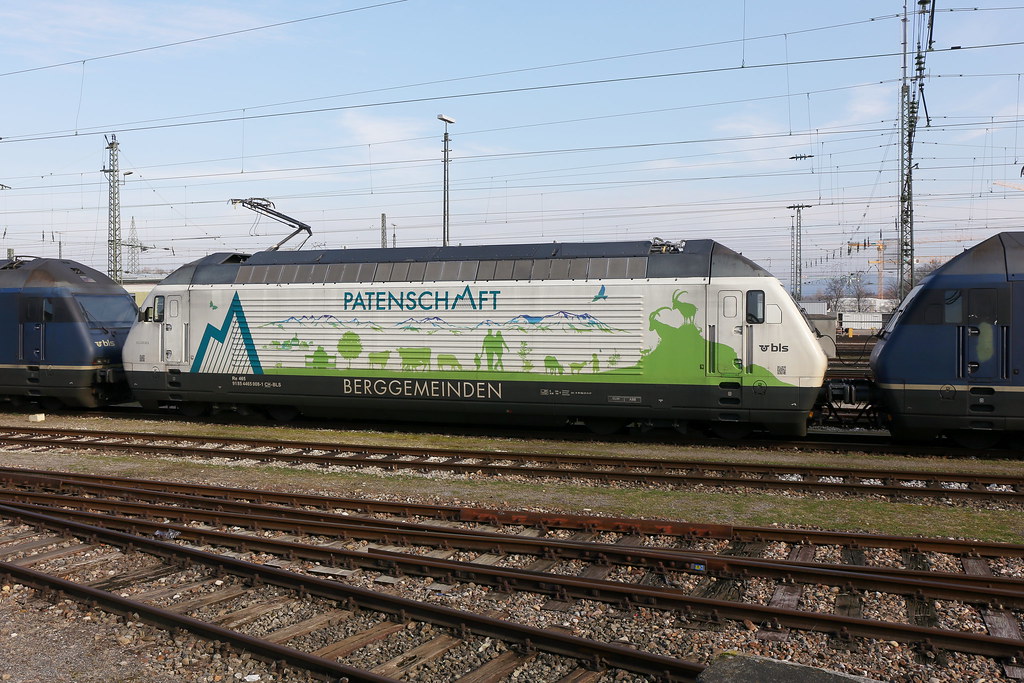
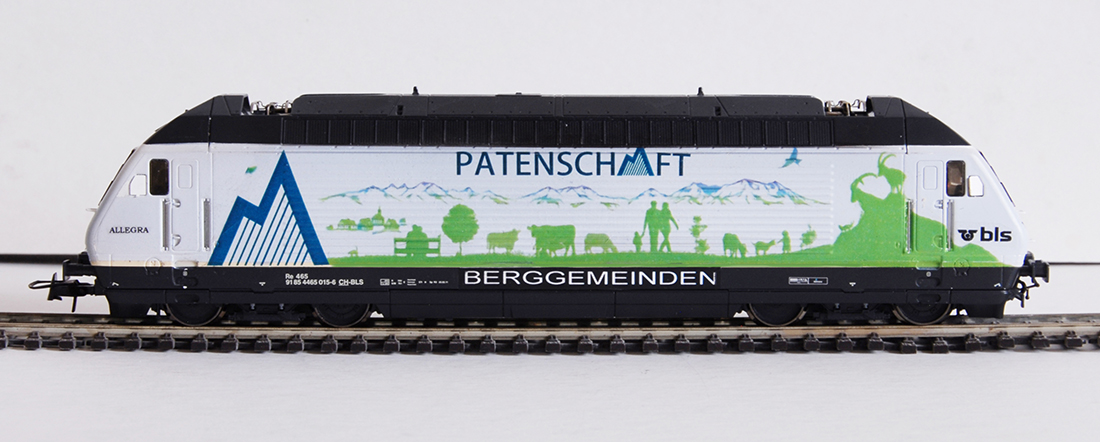
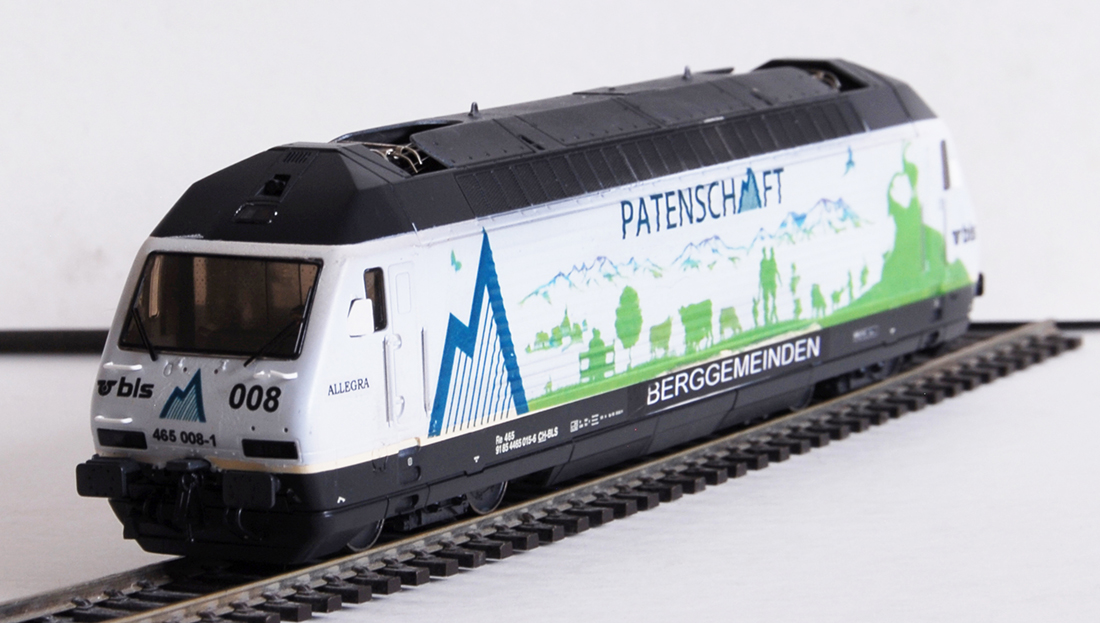
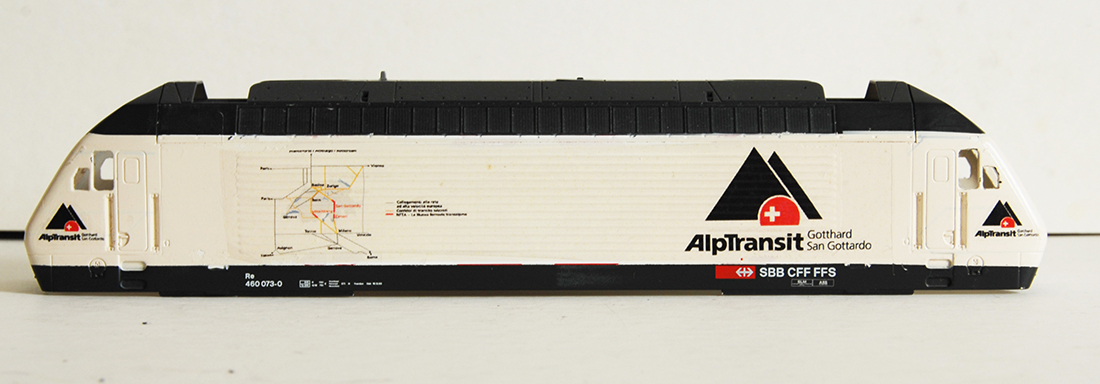
This decal paper follows the ribbed lines on the side of the loco..[Swiss re 460/465 loco’s]
The decal paper I purchased was for laser jet printing…hence the inks do not run when placed in water…
It takes a lot of practice and I am still on a learning curve..
With this virus pandemic, it is now difficult to purchase the paper and the printing shops I used are now closed..
The original logo’s on the loco’s have to be air brushed out, first with a grey primer and then white..
All the art work was done in Coral Draw..
Attached some pictures along with the real live loco’s
Regards
Peter”
A big thanks to Peter. Now on to Ivan:
“Al,
I was intrigued by the photos in the recent “Creating realistic interiors for your carriages” email article, I received recently.
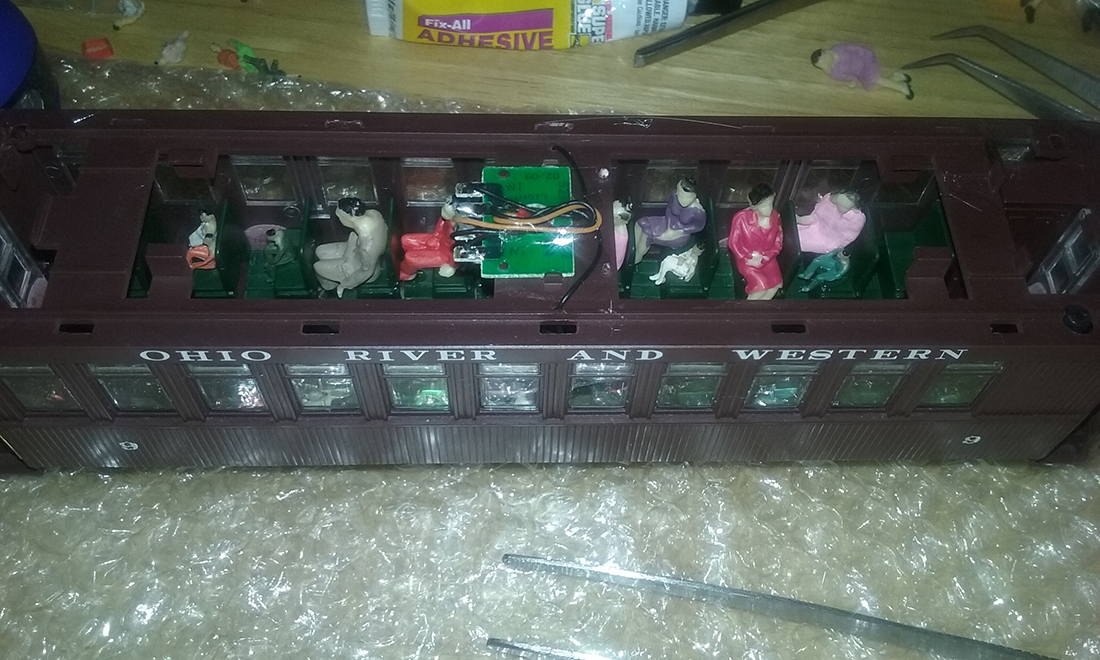
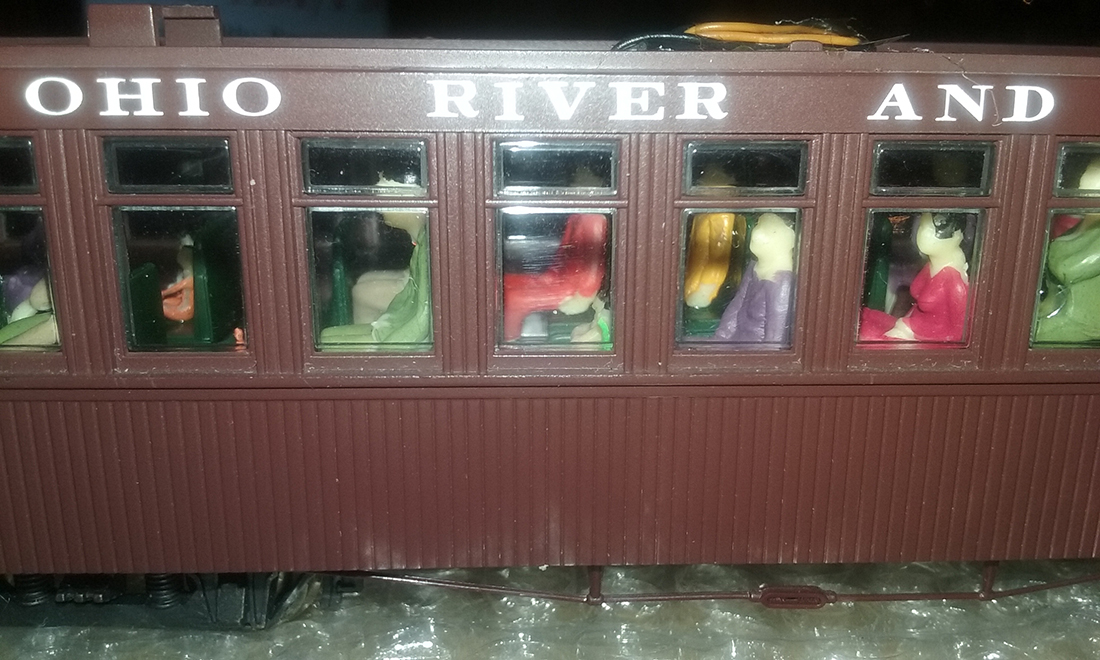
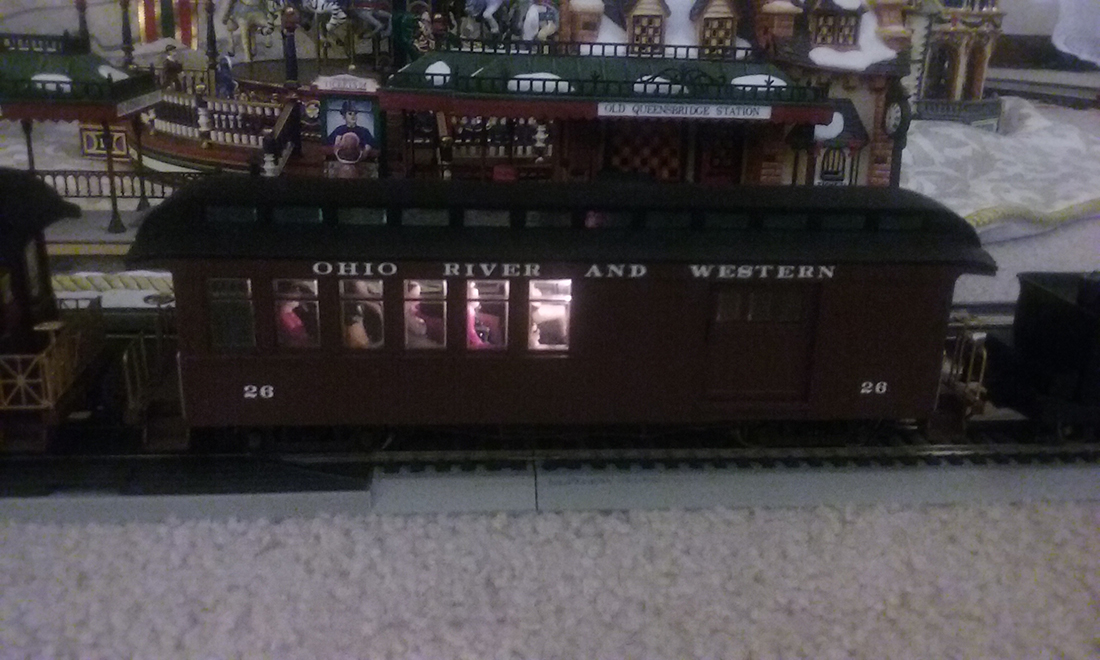
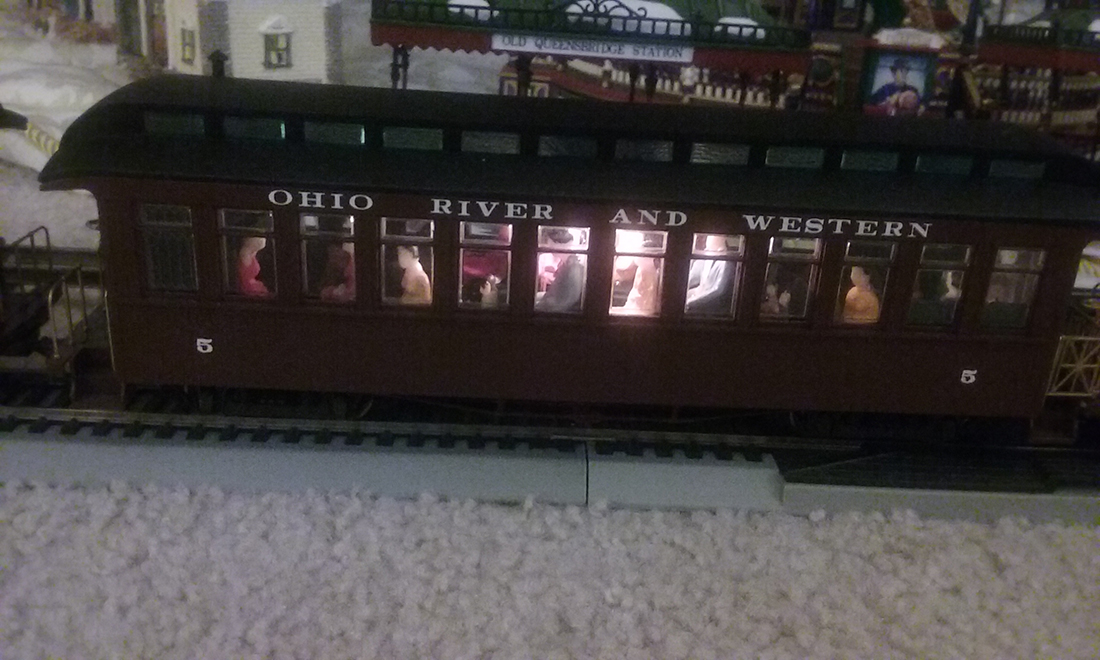
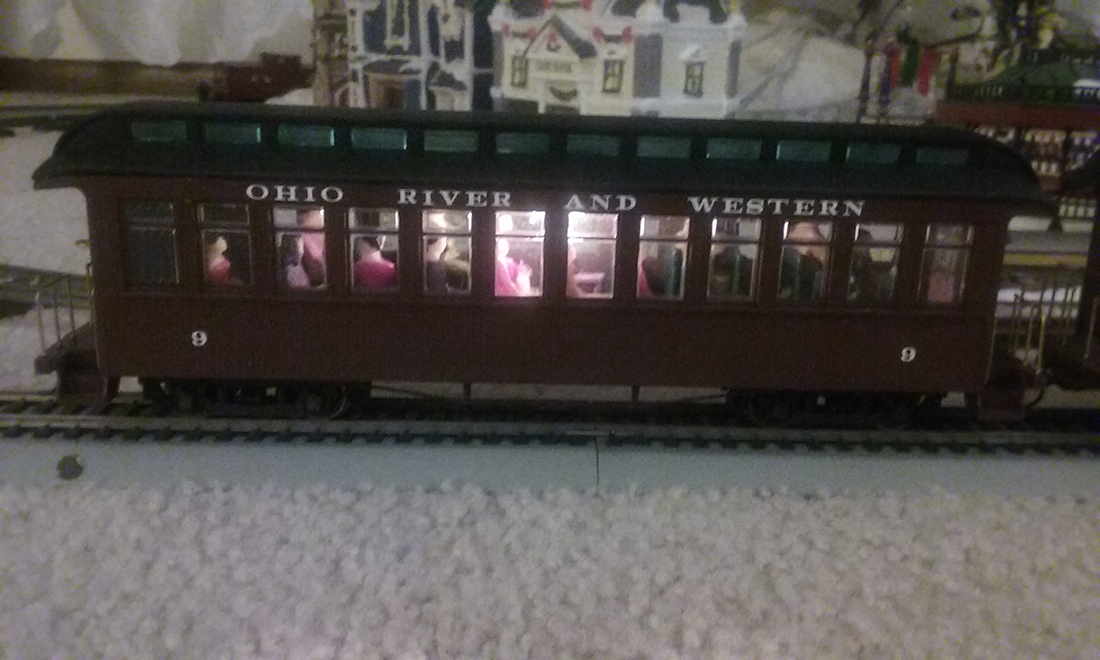
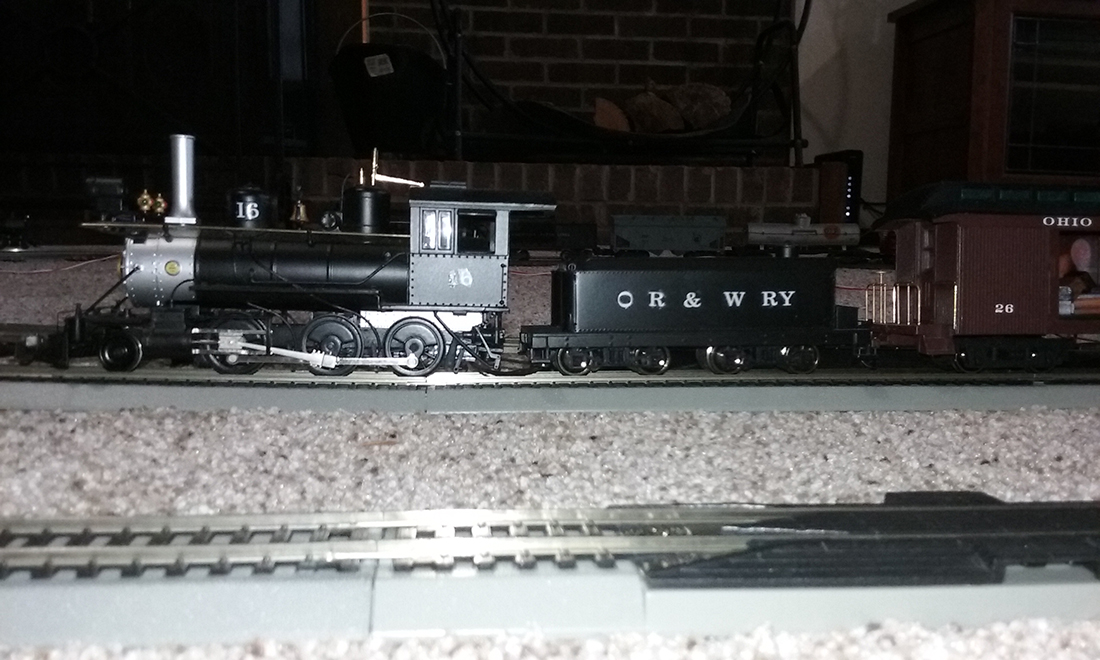
I too have made additions to my passenger train. Several years ago I purchased a Bachmann Industries “Ohio River & Western Passenger Train Set” On30 Scale.
I also run an American Flyer #293 S scale train set, from my childhood, around the tree. The Bachmann engine was #12. I contacted the Ohio Railroad Historical Society and asked them what engines ran on the OR&W RW line. The last engine built to run on the line was a 2-6-0 Mogul.
Last year, I purchased a new engine, painted and unlettered, and added DCC sound to it. I attached new letters and the number 16 on my new engine. So, now I have the last engine which ran on the line from Bellaire, Ohio, which is close to Wheeling, WV to Zanesville/Cincinnati, Ohio.
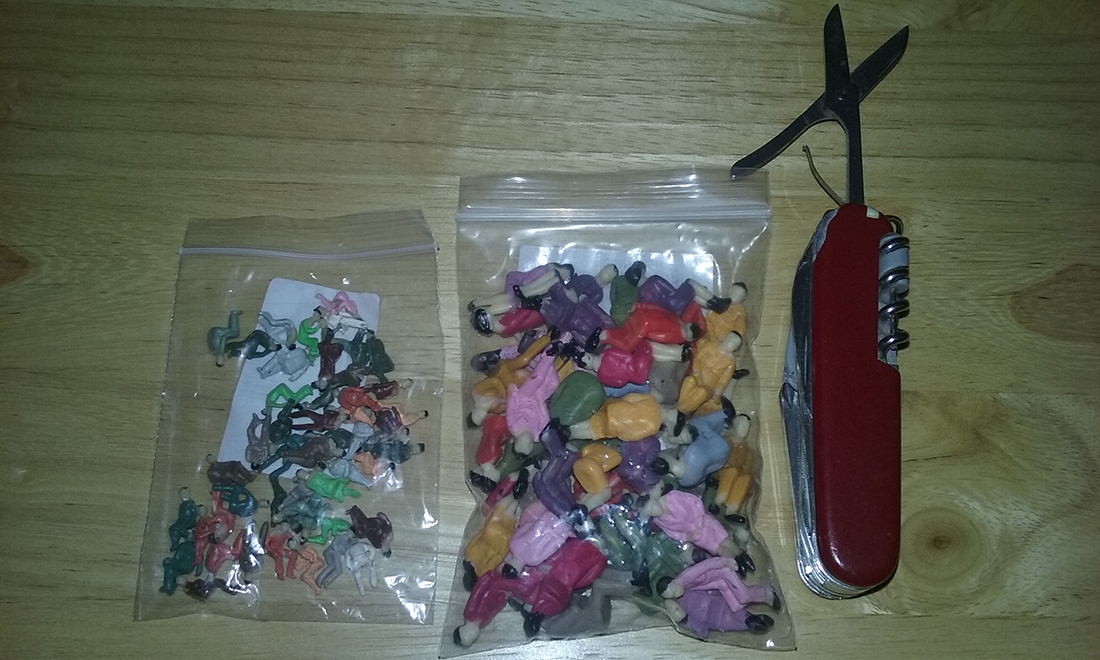
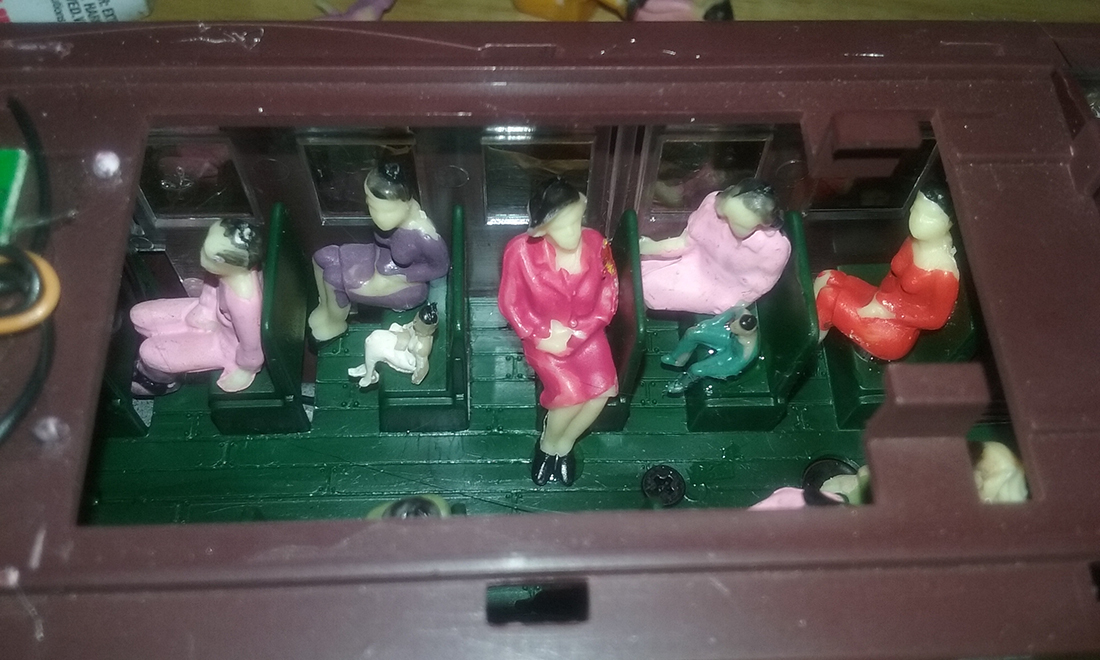
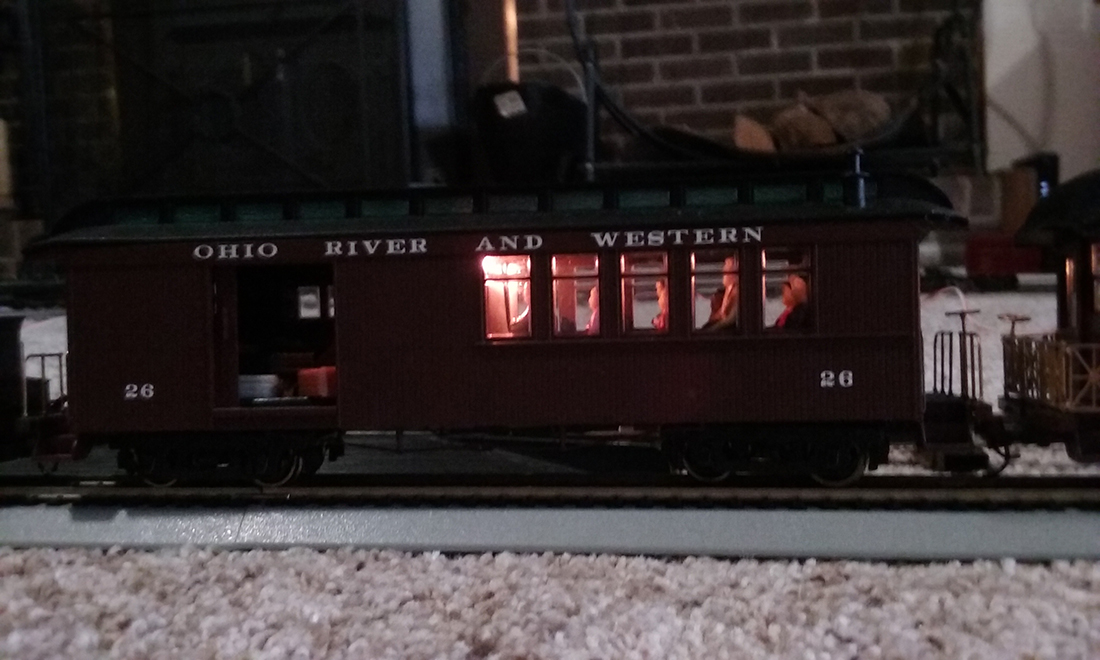
I noticed a roof on a passenger car was loose on one corner. I pulled up on it and it removed, exposing seats and pot belly stove in the back corner.
I ordered 50, O scale seated passengers and 50, ho scale passengers. When they arrived, I removed the tops on the 3 cars and glued the passengers, both adults and “children, ho” into the seats.
Various long tweezers are a must. Then I snapped the tops back on. The cars are lighted, so the passengers show up real well.
I also purchased O scale luggage to go in the baggage car. I am quite pleased with the results. I have ordered Engineer and a Fireman to add to the engine.
I have moved the trains to our family room downstairs and yes I still play in the floor with my trains. I am 71.
Ivan”
A big thank you to Peter for sharing his model train paint alternative. And to Ivan too.
That’s all for today folks – please do keep ’em coming.
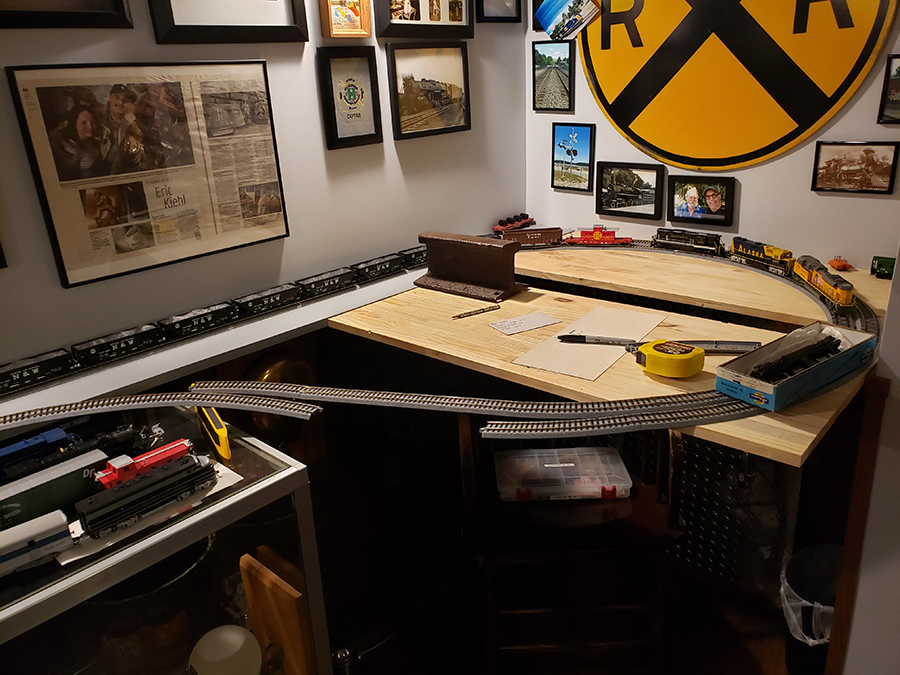
This begins with the insert with the finish edges which mainly is to cover the rough edges of the insert when put in place.
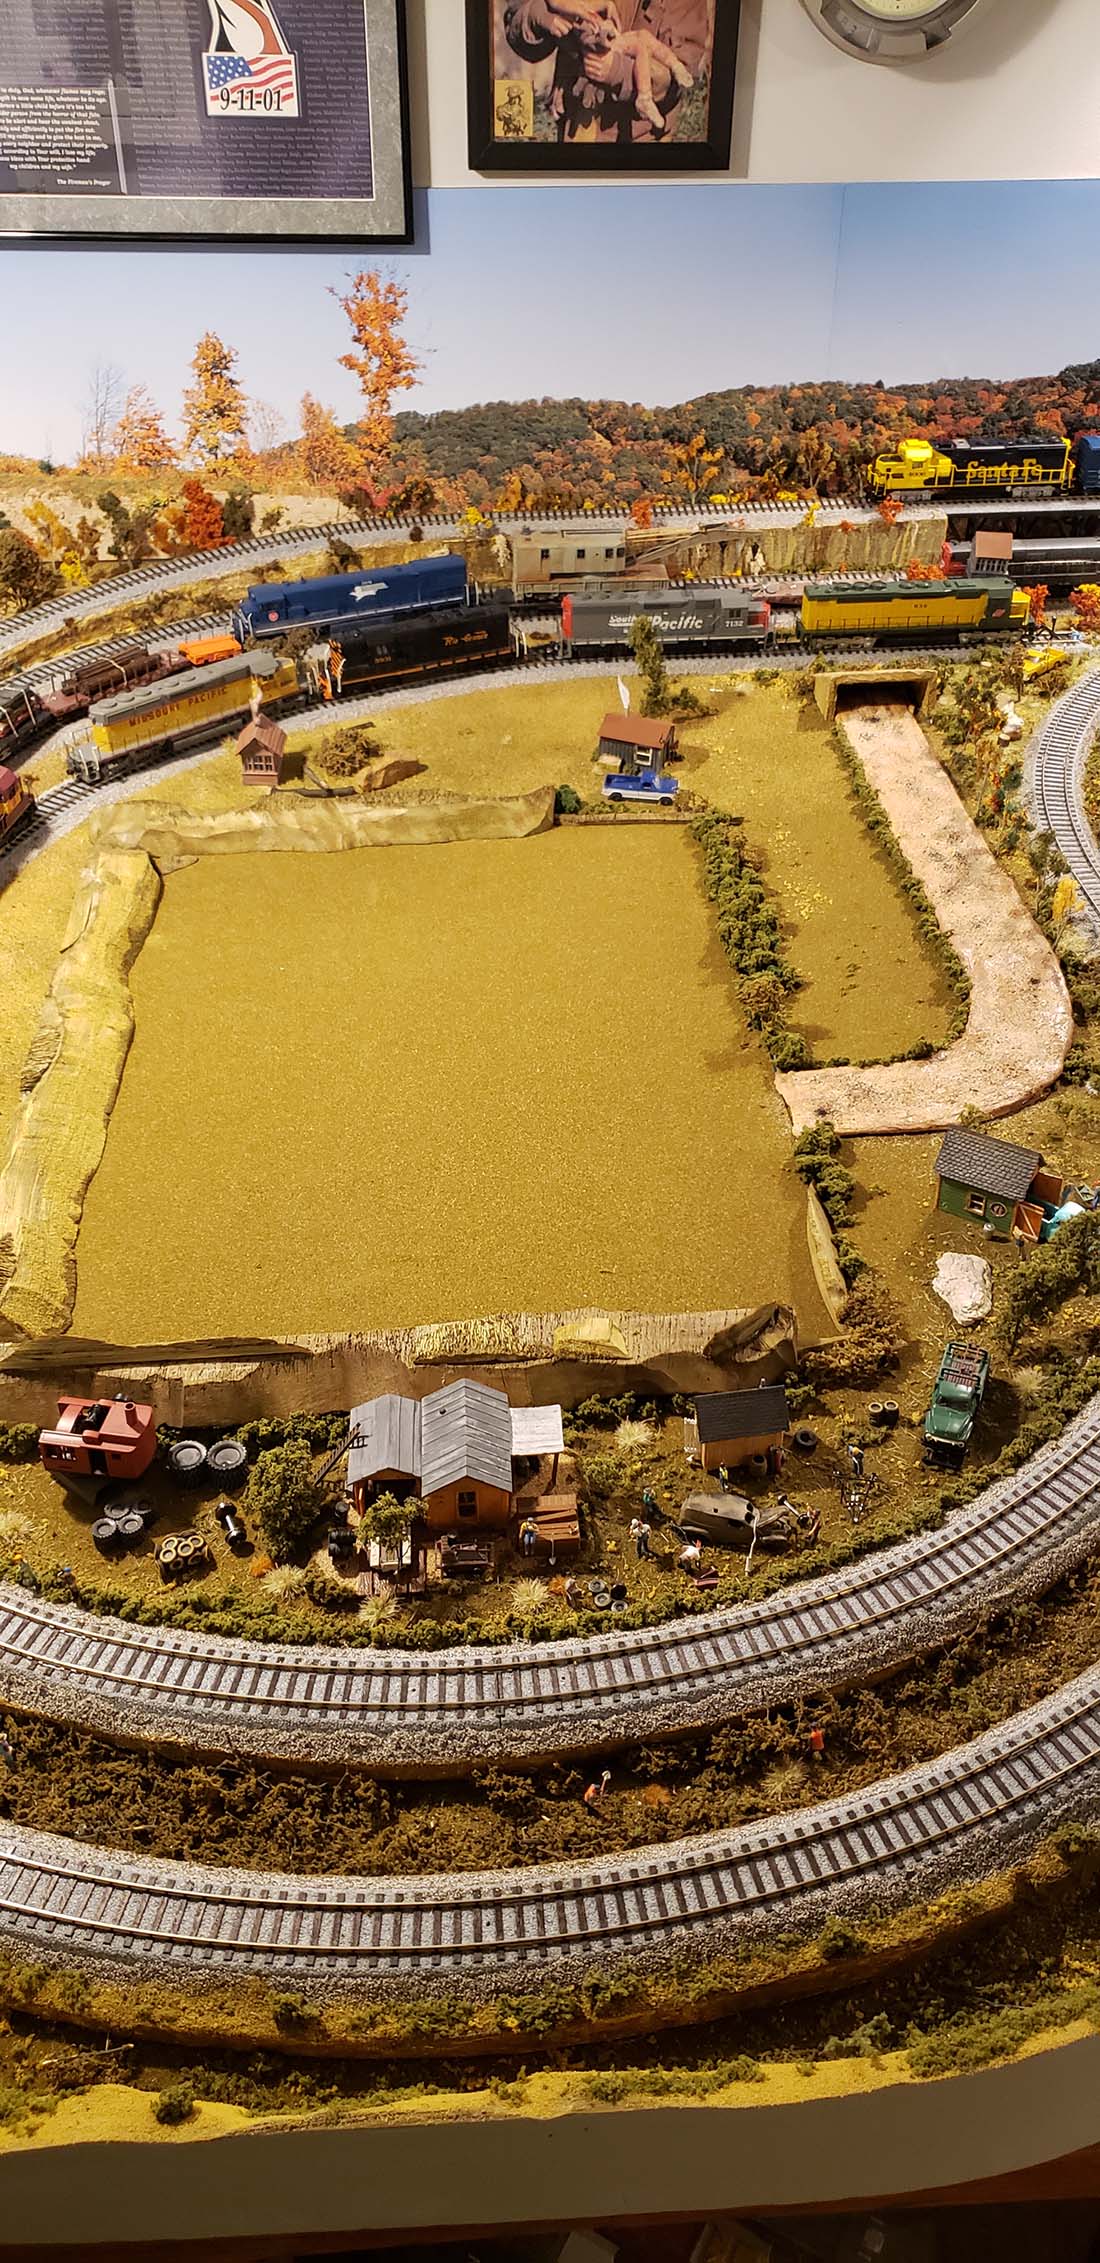
The next step was to check fit and adjust and put in place. Had to make a new road to the area also.
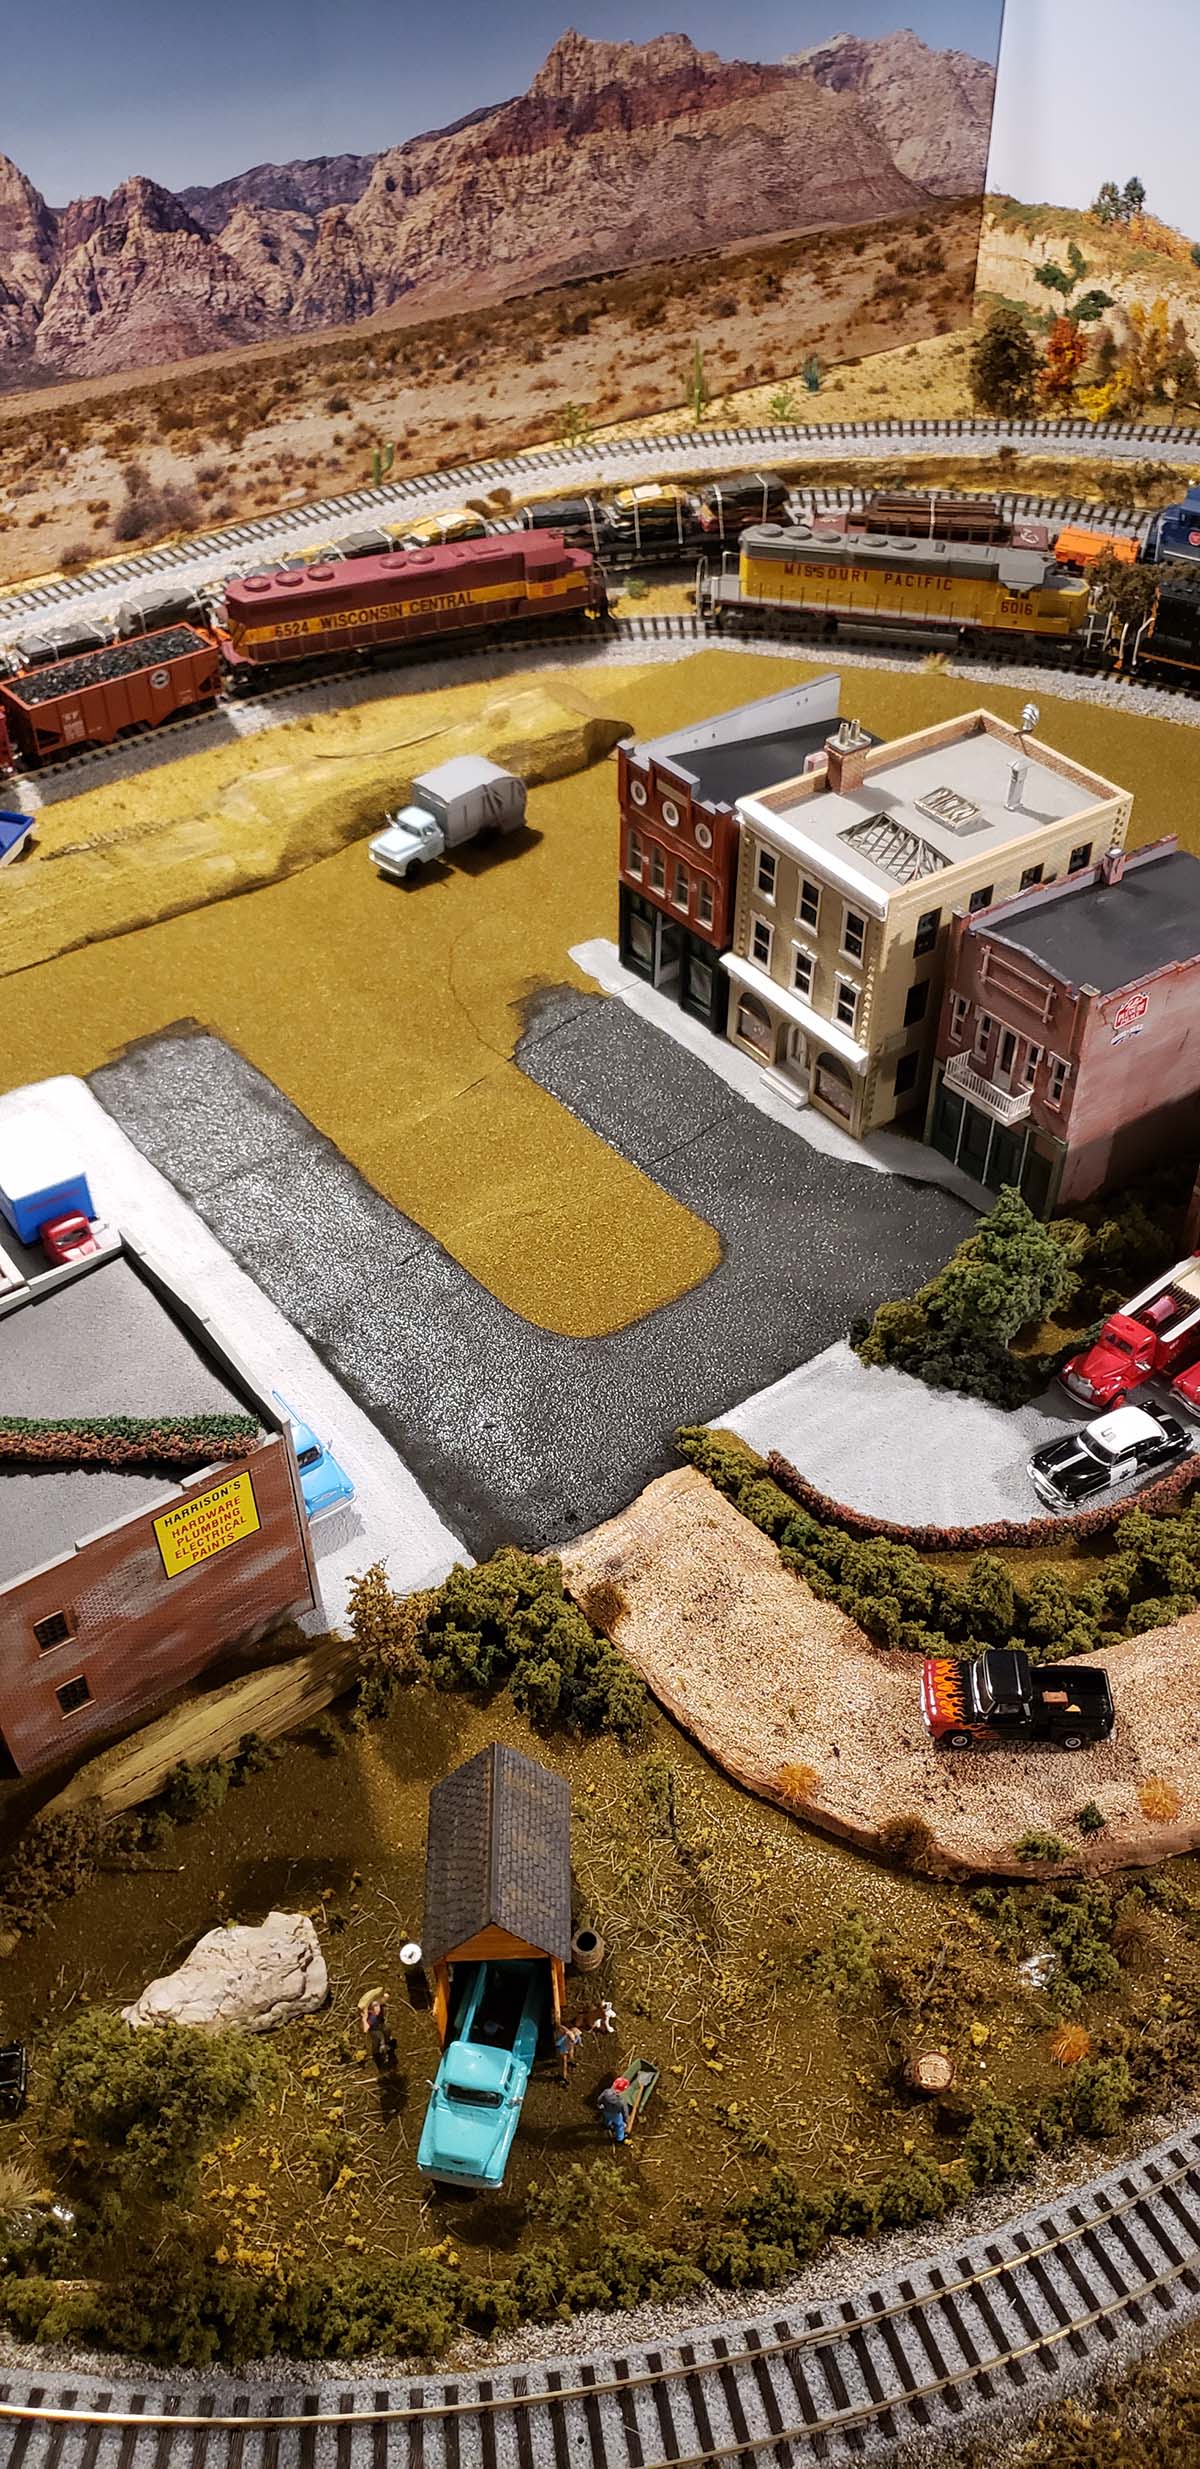
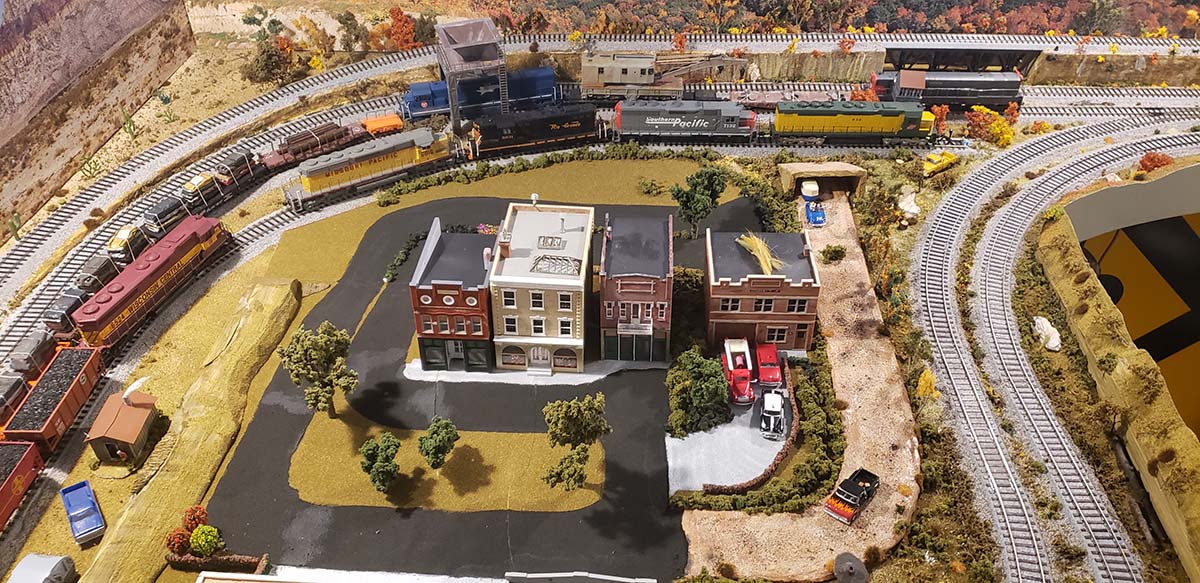
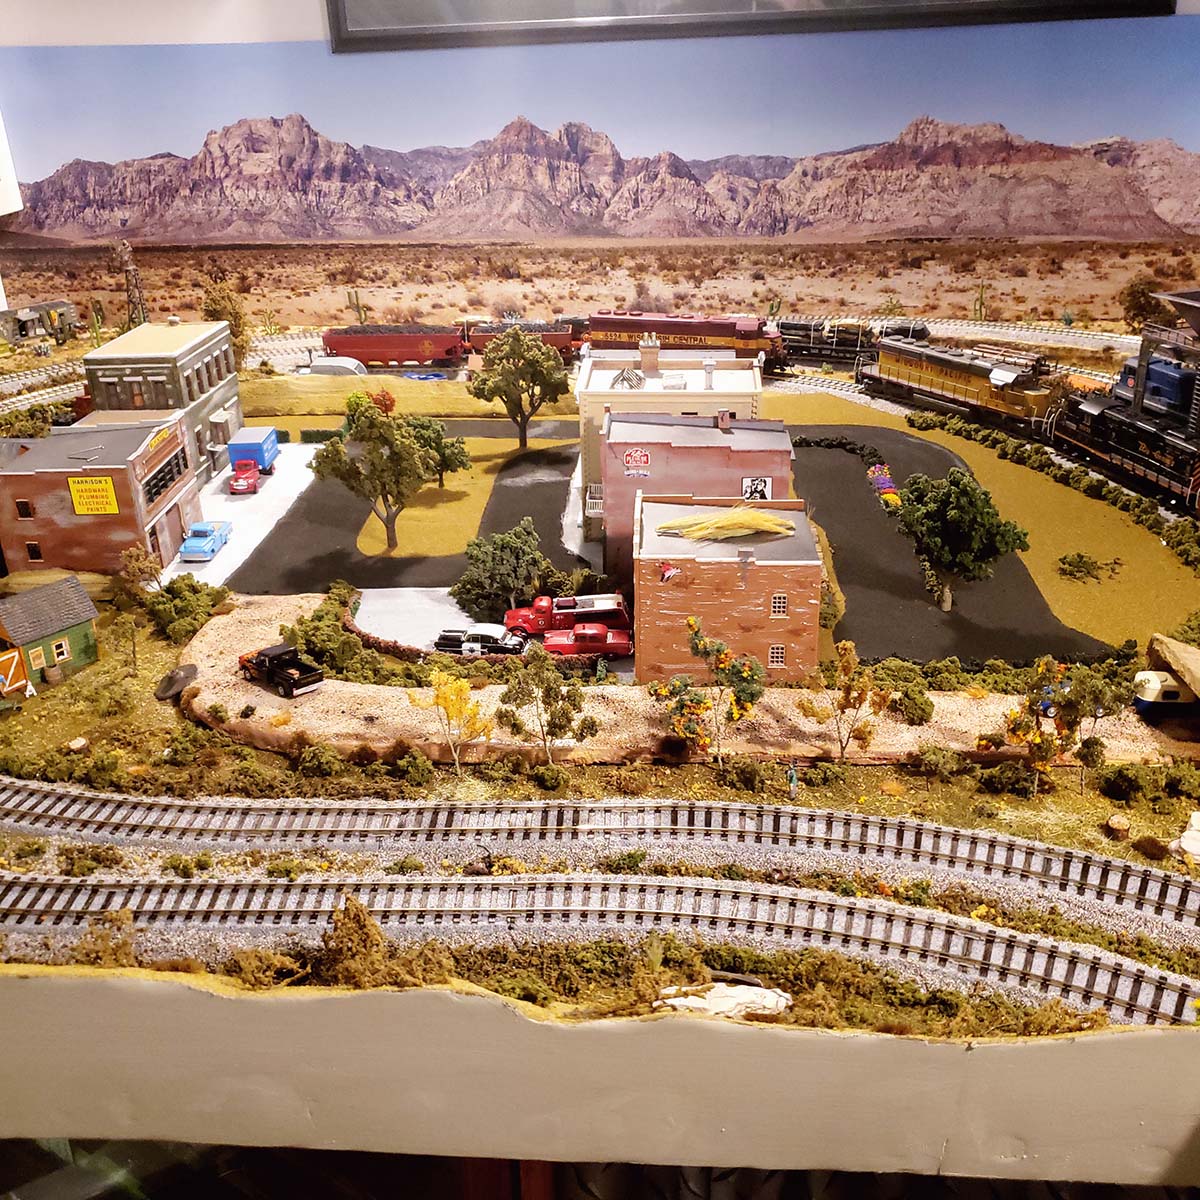
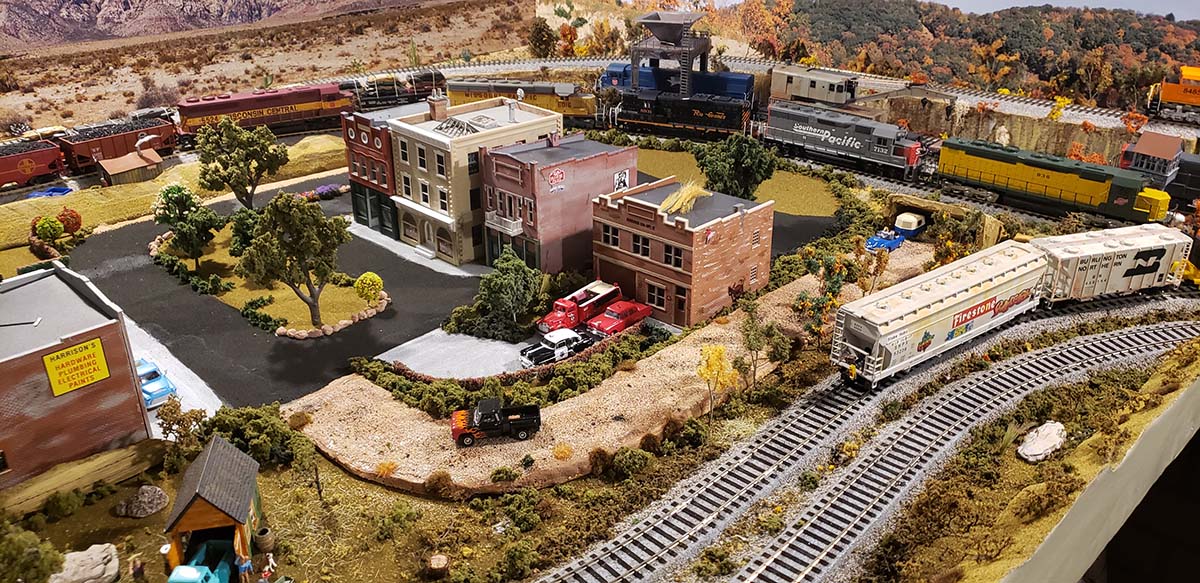
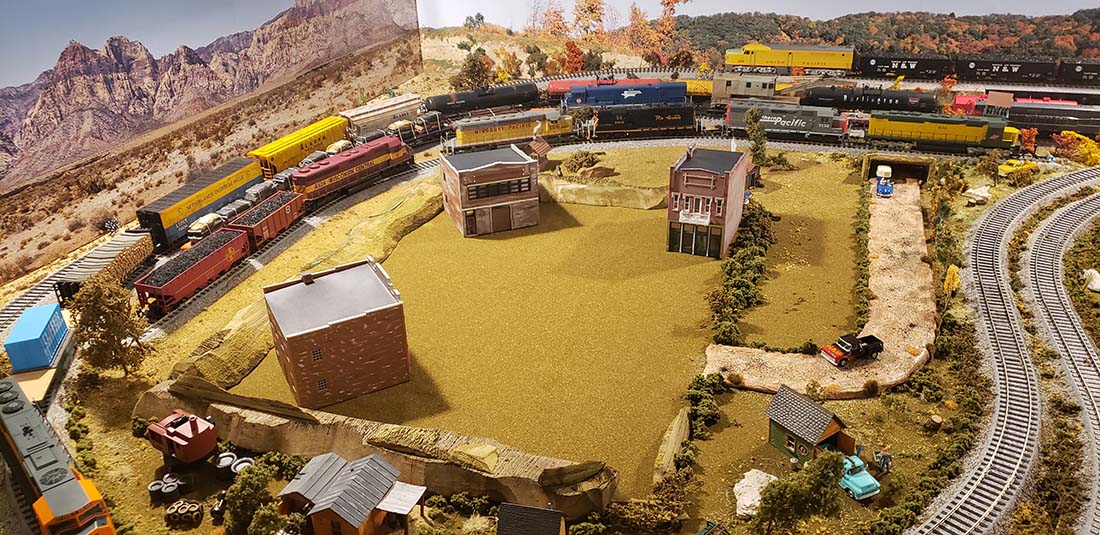
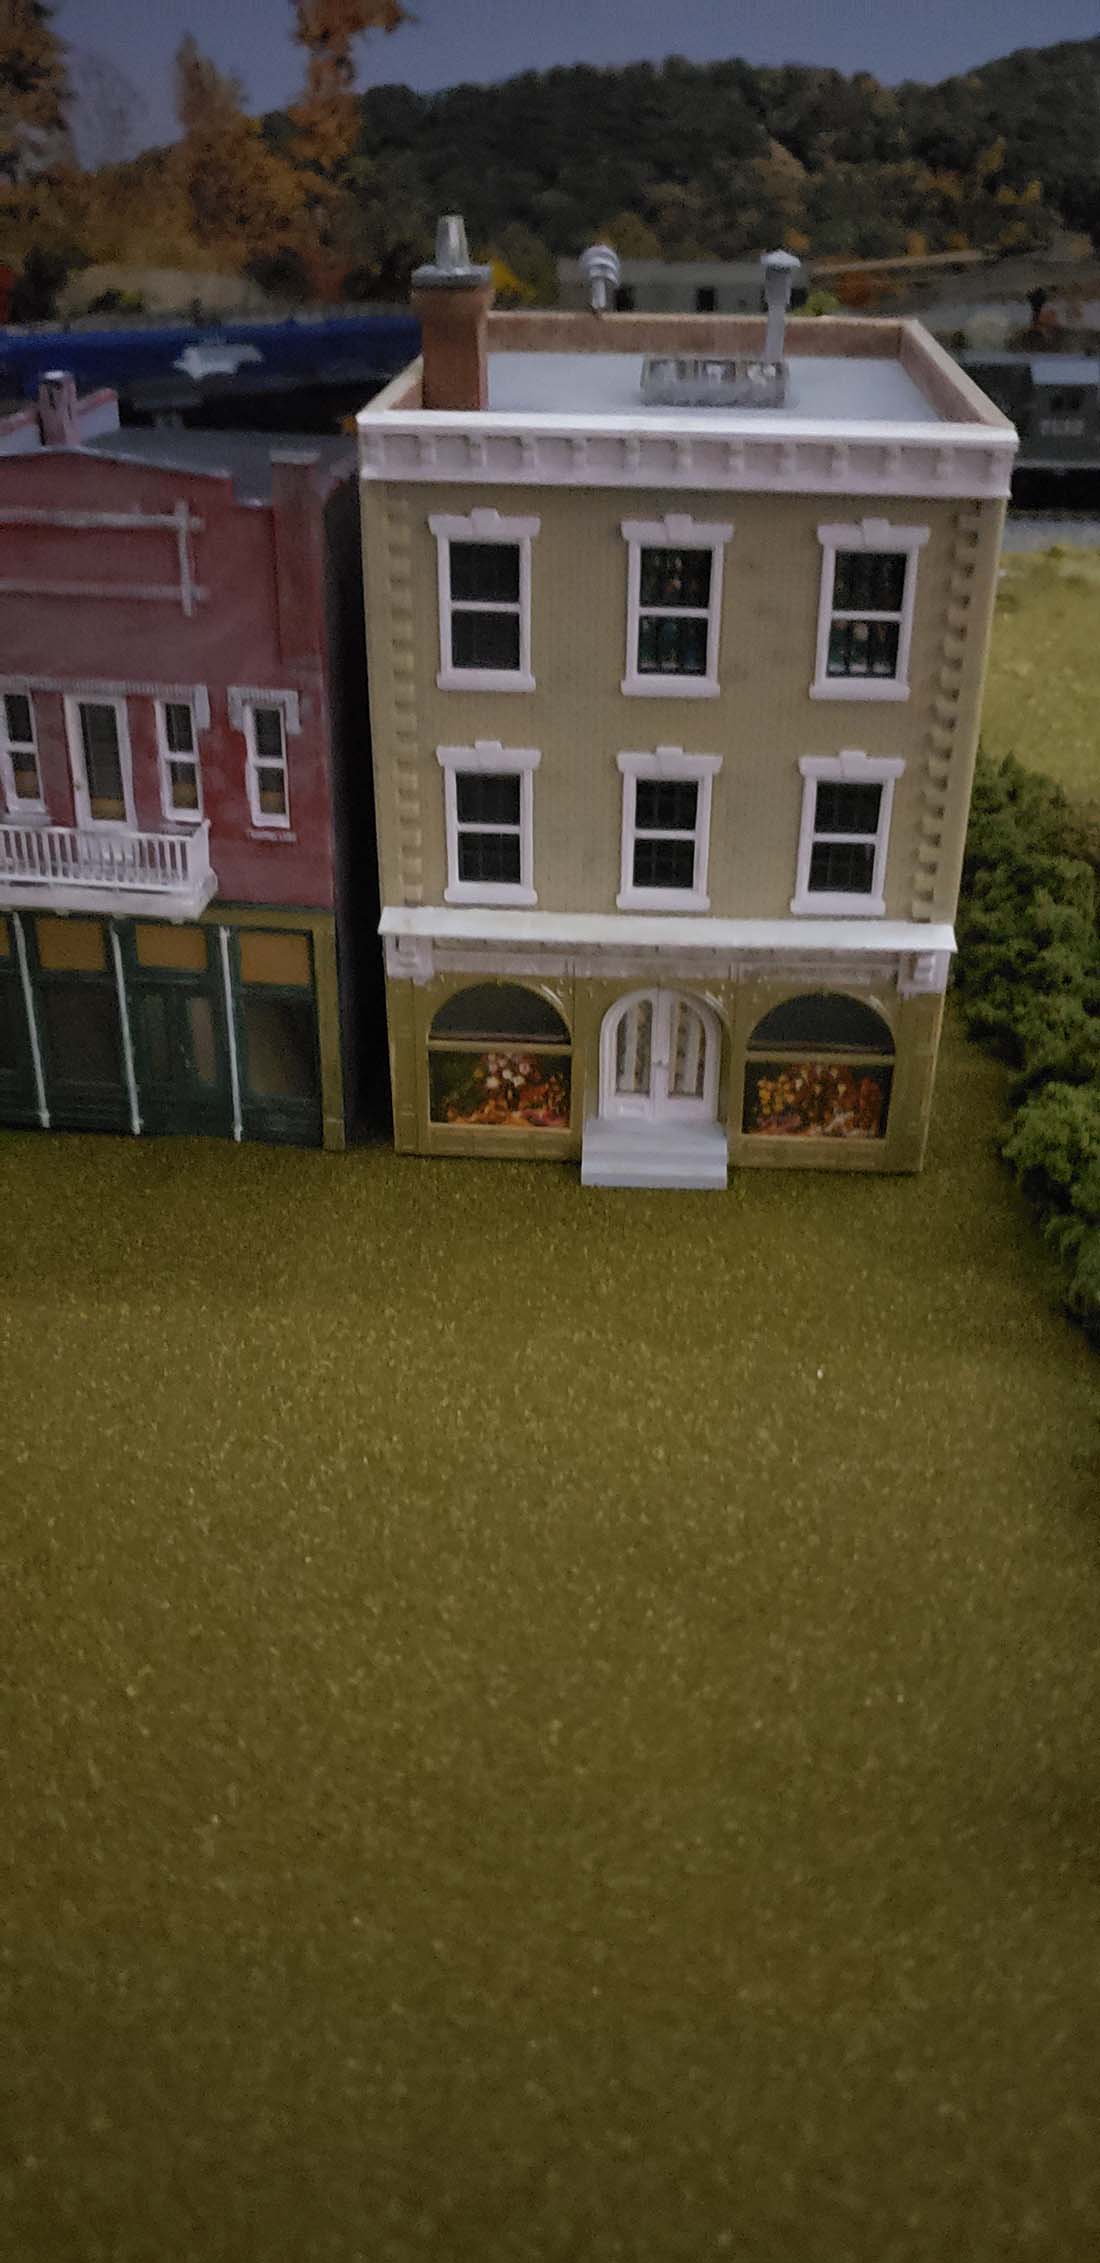
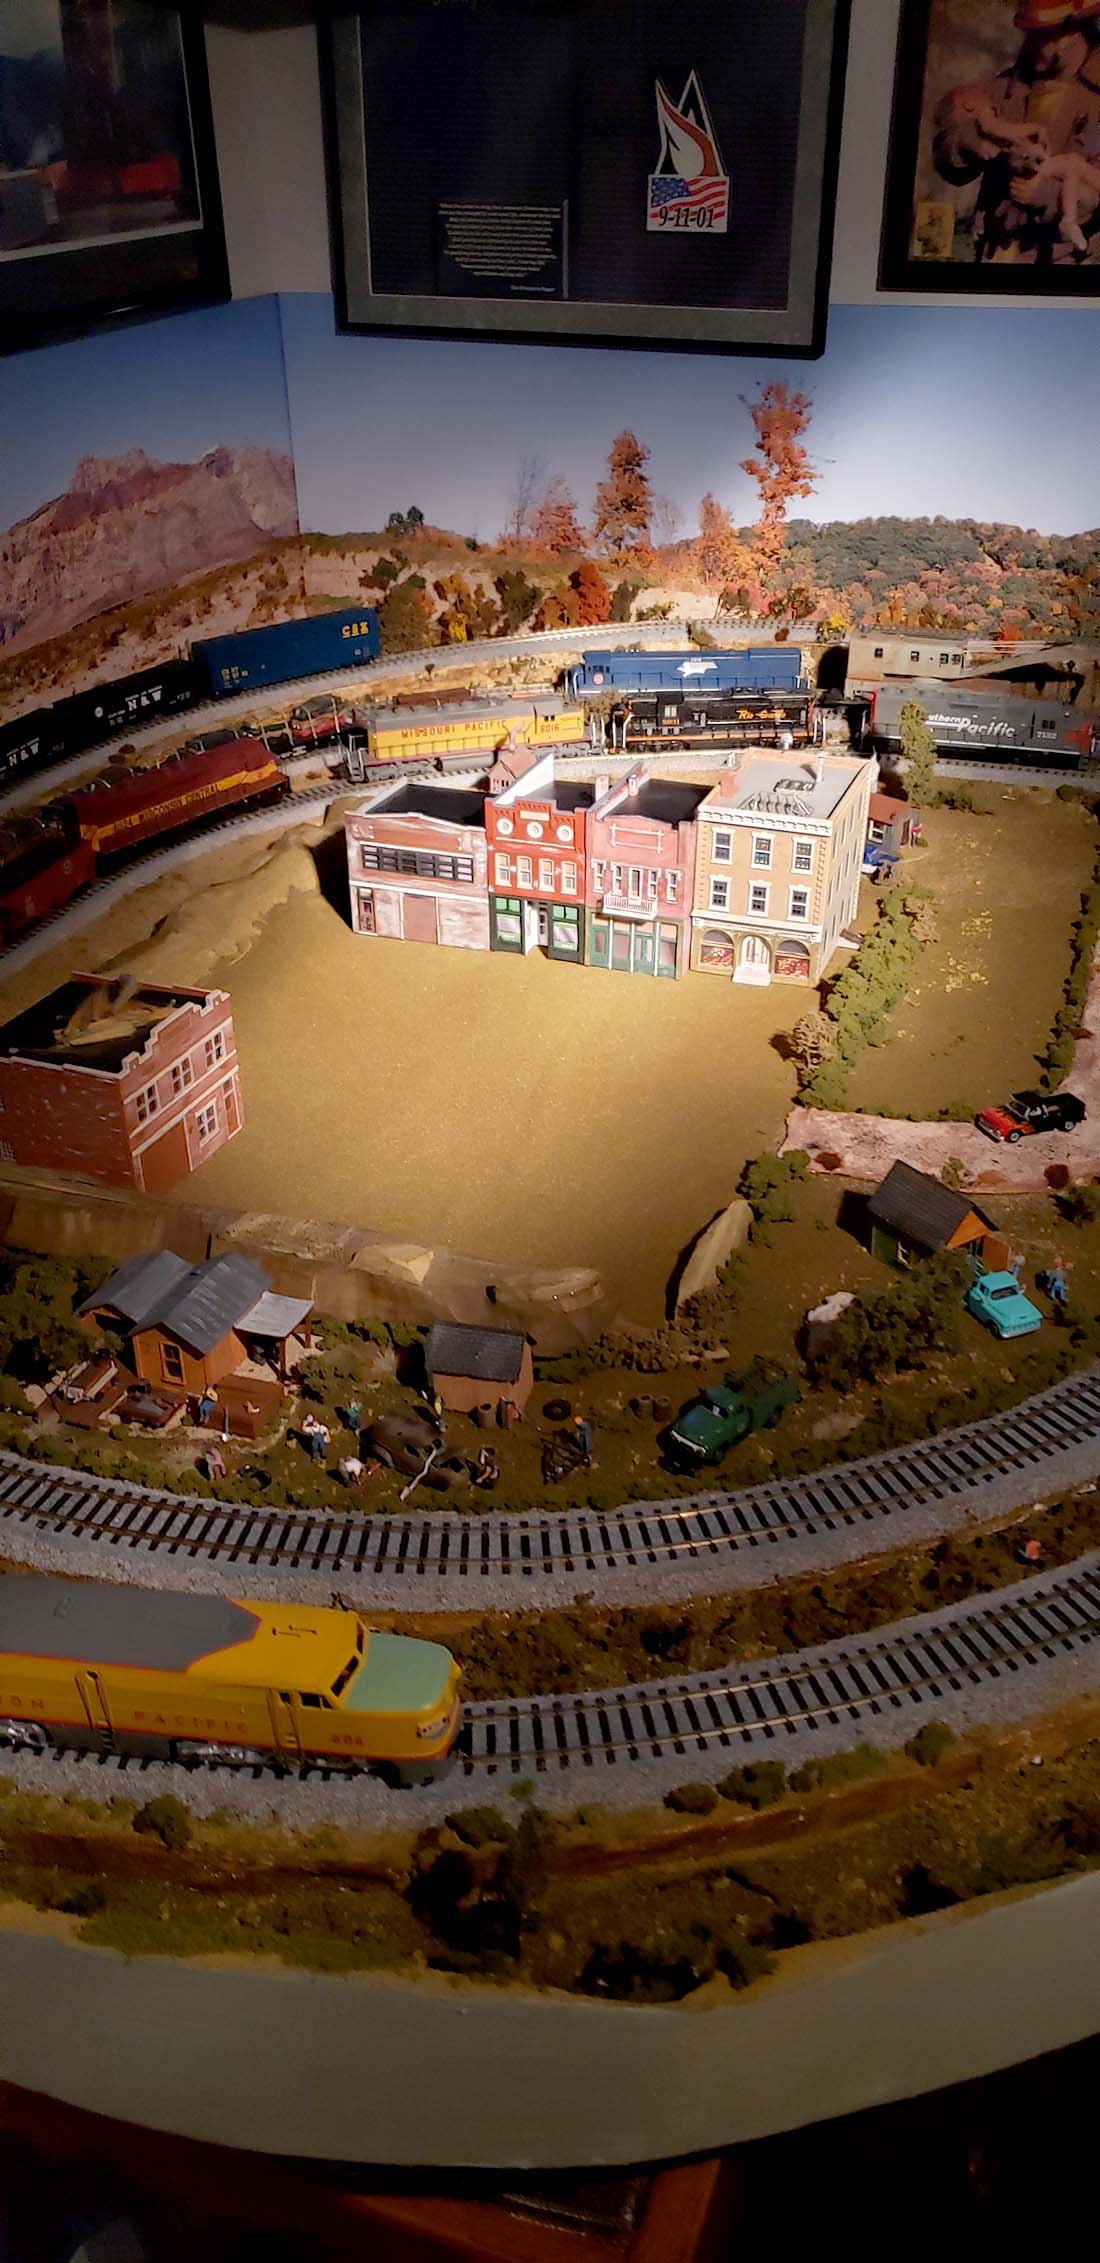
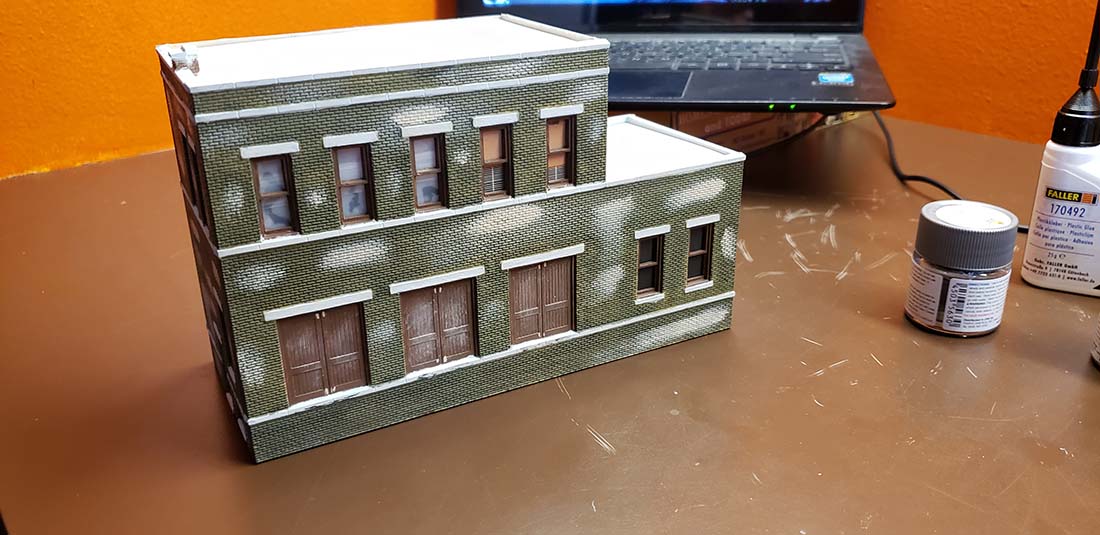
Then begin finding some DMP buildings to build, paint and weather to go with the new replacement insert.
With a few completed I messed around with placement and needed a few more. Has you can see something is coming to light with my HO scale town layout slowly.
This will complete part 2 insert addition, standby for part 3.
I will try to keep it interesting with a spin from gun shop and range to..
Thanks Al for sharing Its a great hobby that never stops, like you saw at Mark Twain Hobby shop
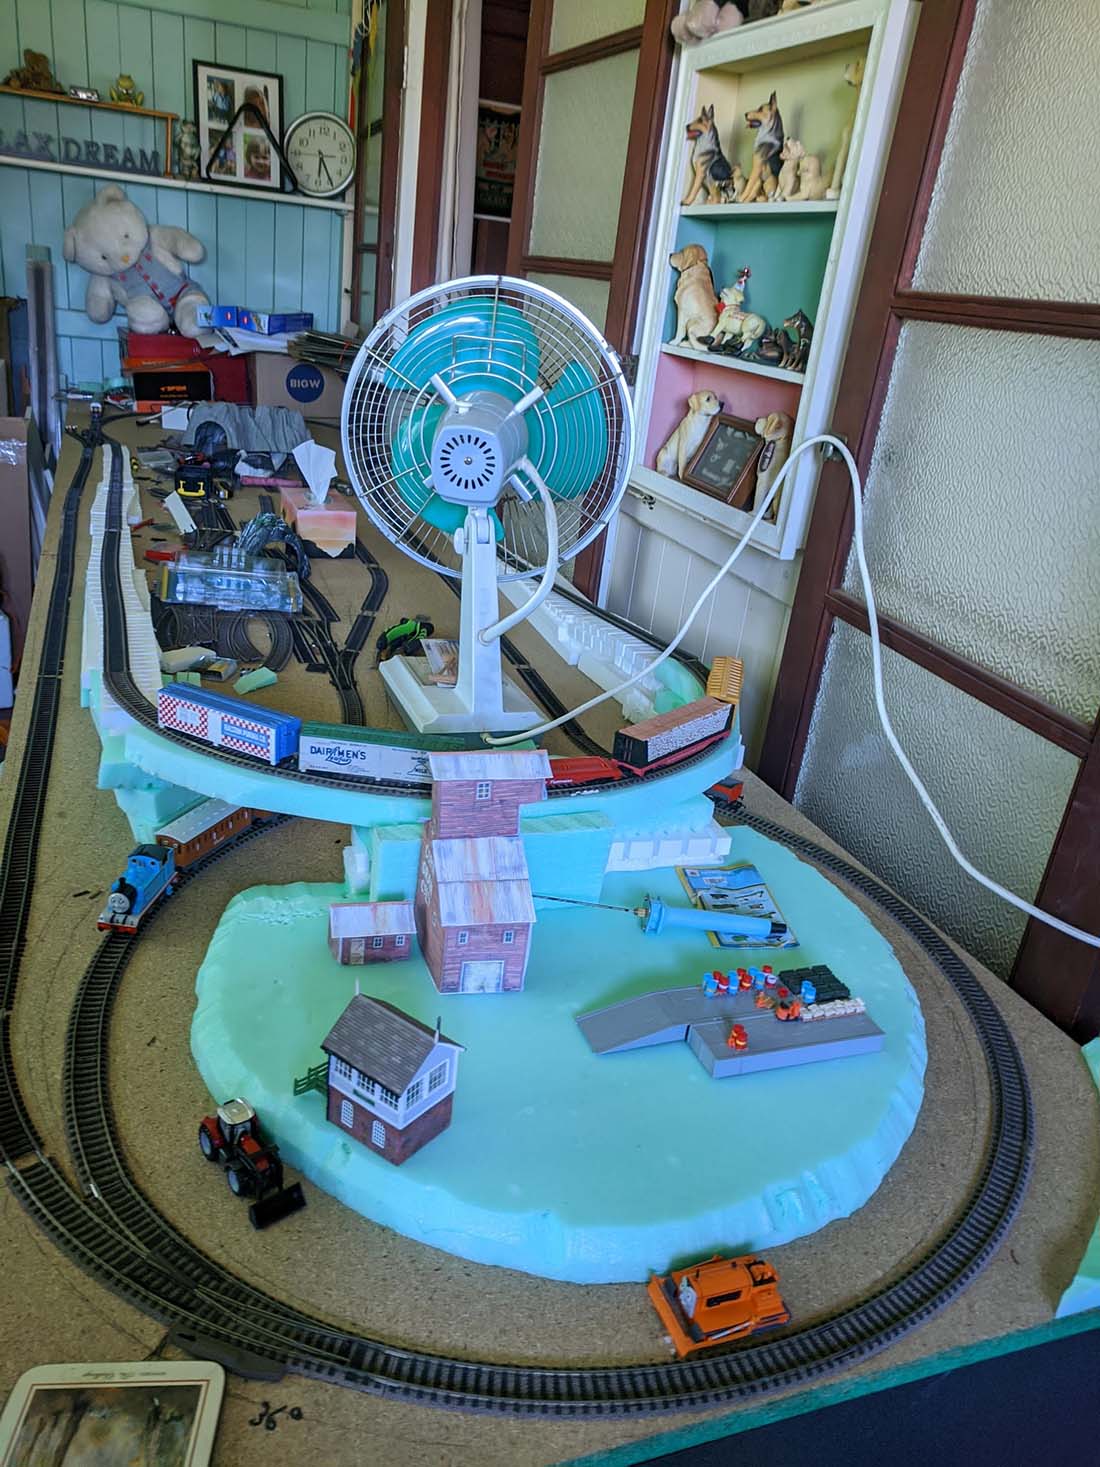
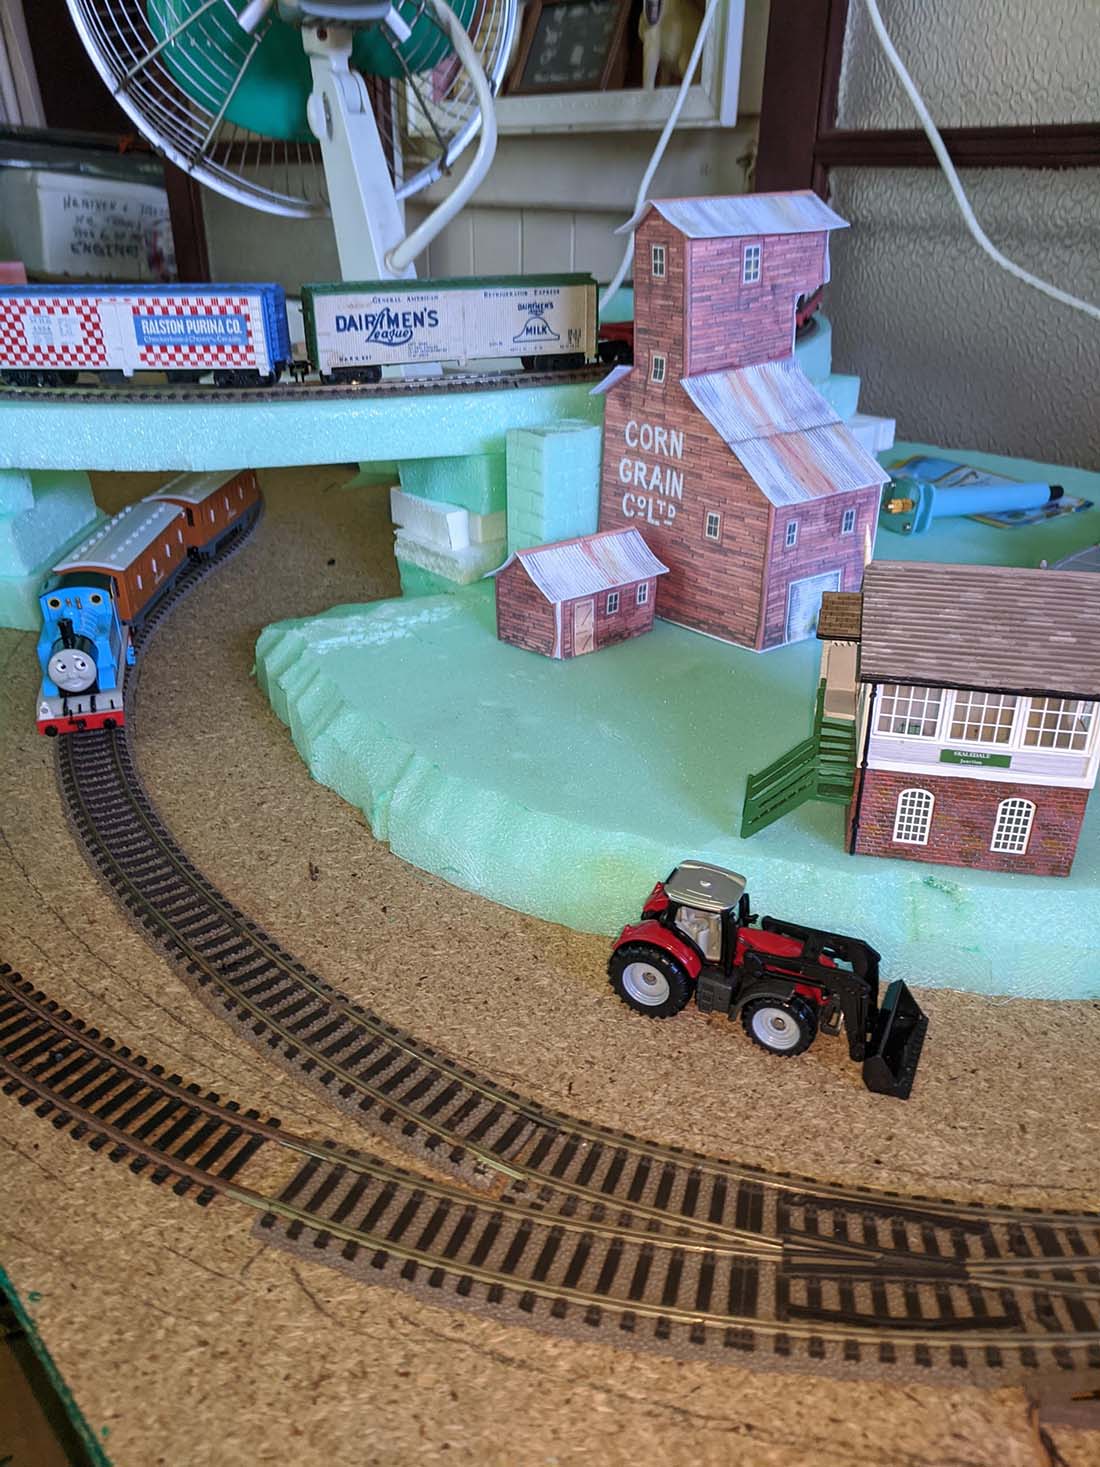
“At long last I have been able to upload these photos.
The top one just shows the lay out he has gone with since making changes.
The bottom photo is just of Terrence bull dozing the area for the end loader to pick up, as jason wants this as a goverment area for maintaining the ground of the track & park land.
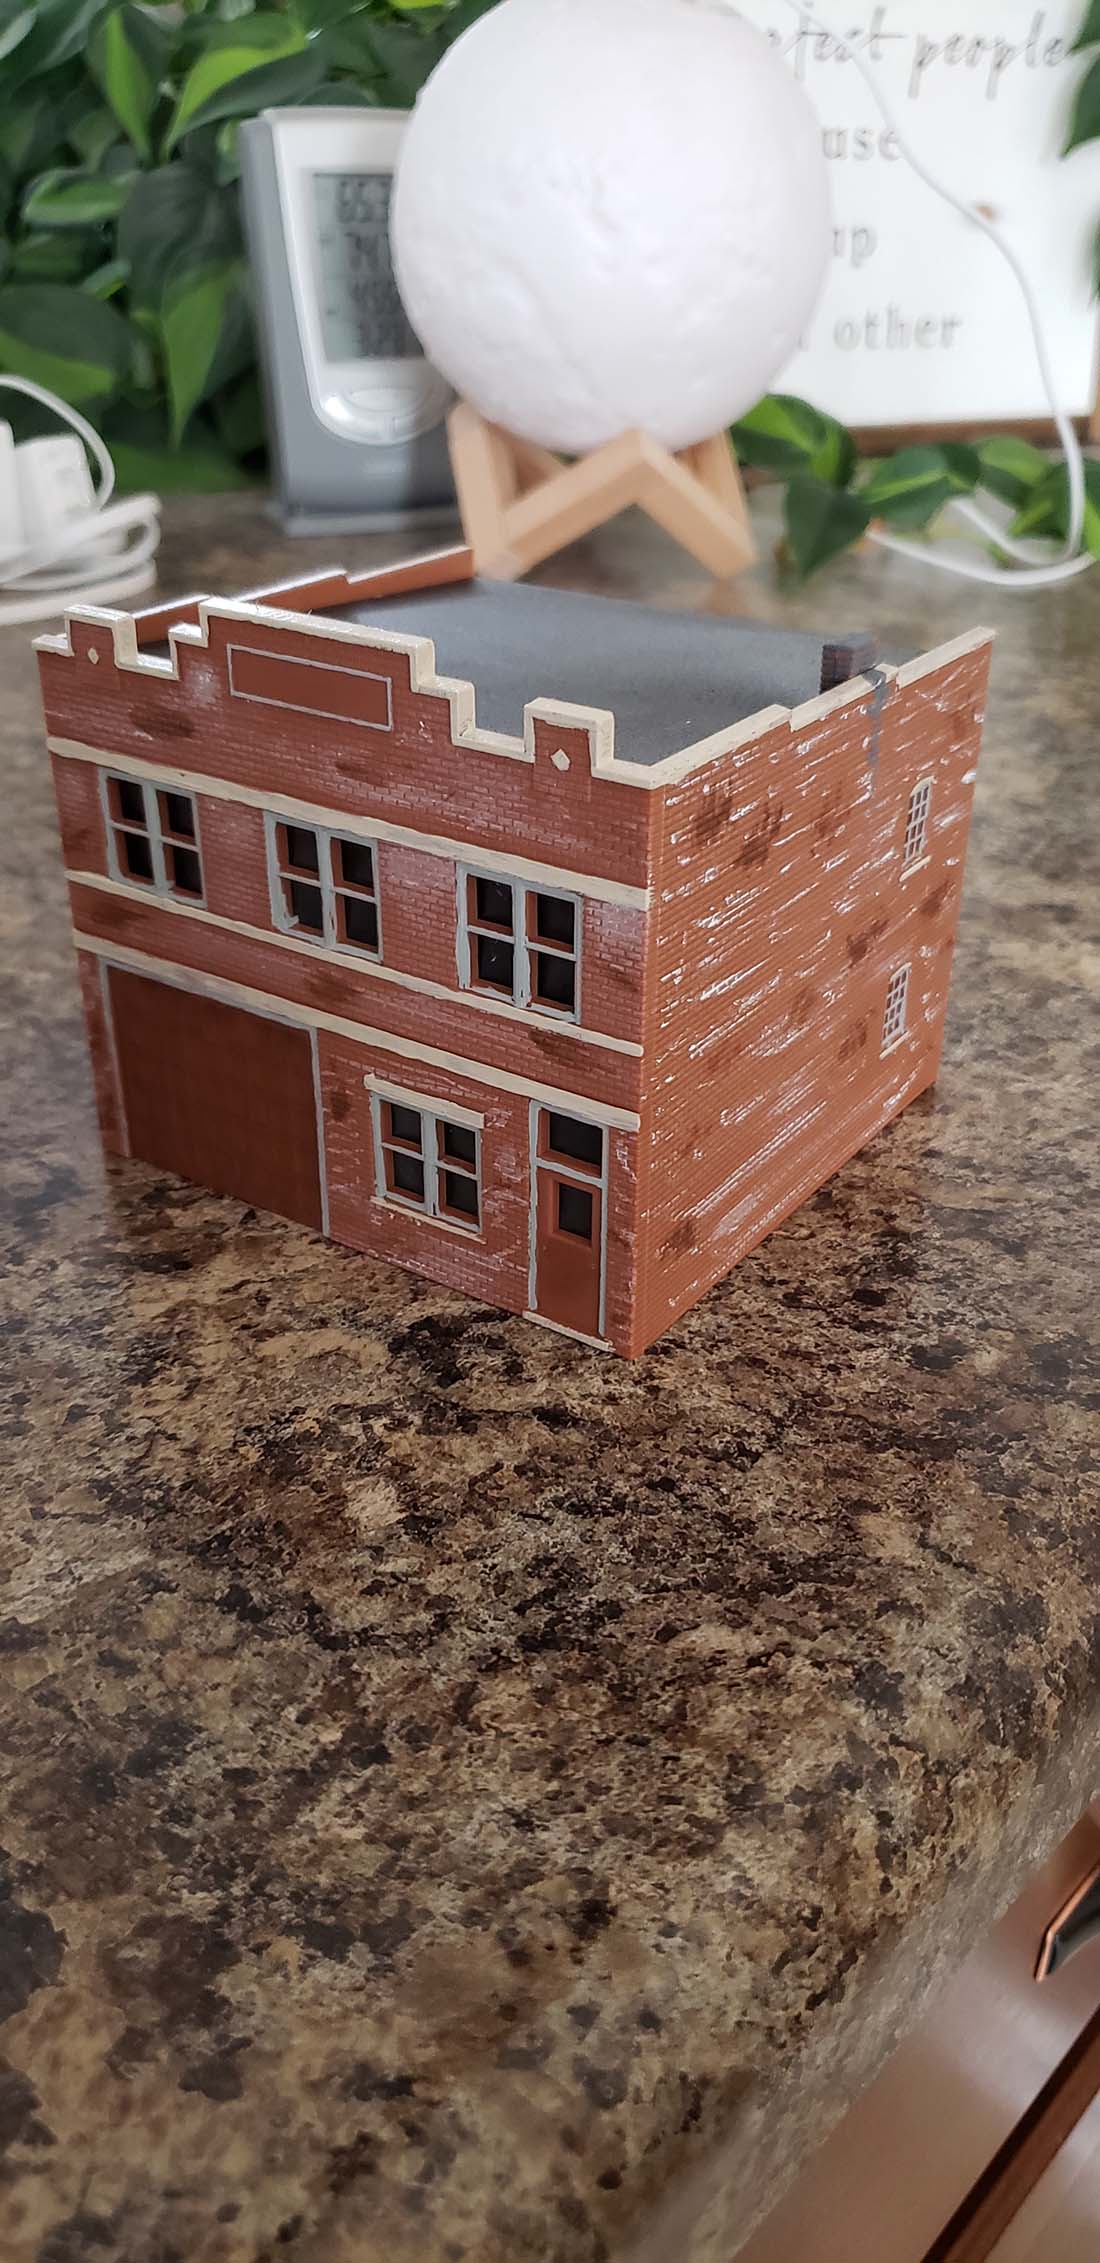
Thee cut out is just one I had printed to try my hand at it.
The control box are just sitting there out the road for now & will go into place when he has the area ready that the only reason they are sitting there.
Also tried power unit I had but Thomas could not move so I have to get another power supply or find out if this is working or not. First I thought I might see Thomas & the girls go for a little run but nope, so I put them on the siding for now all the carrages run around the track with ease. Just need power to try engines then.
I’m going to search internet to see if I can find a wharf some where to get a Idea of how to build one for Jason.
Do you know if there is a cargo ship in 1.87 scale around as I have not seen any.