Bob’s been in touch with is model train Christmas village:
“Al—
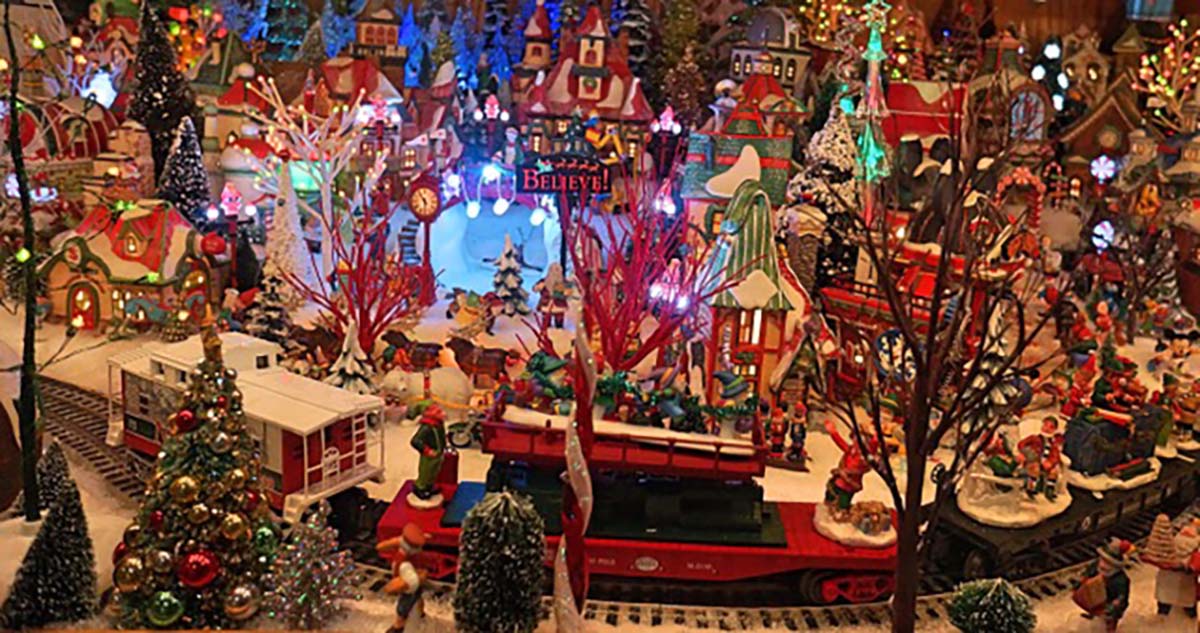
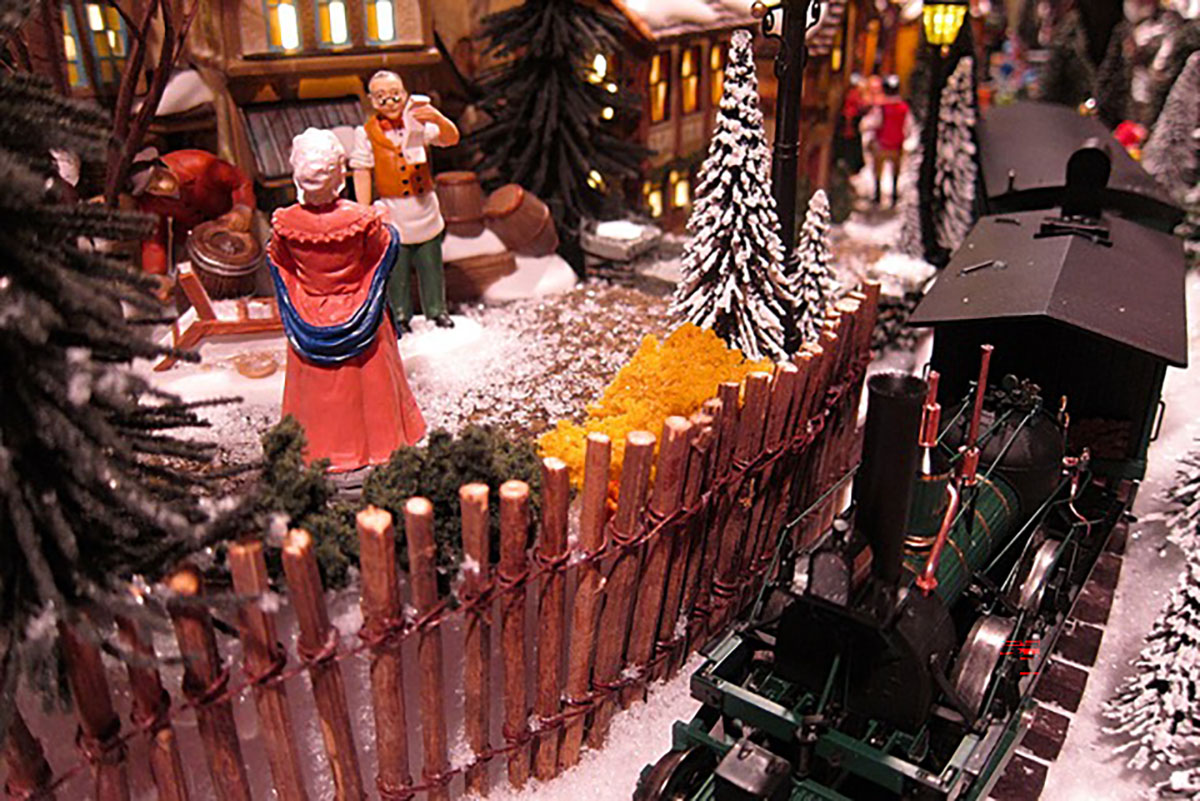
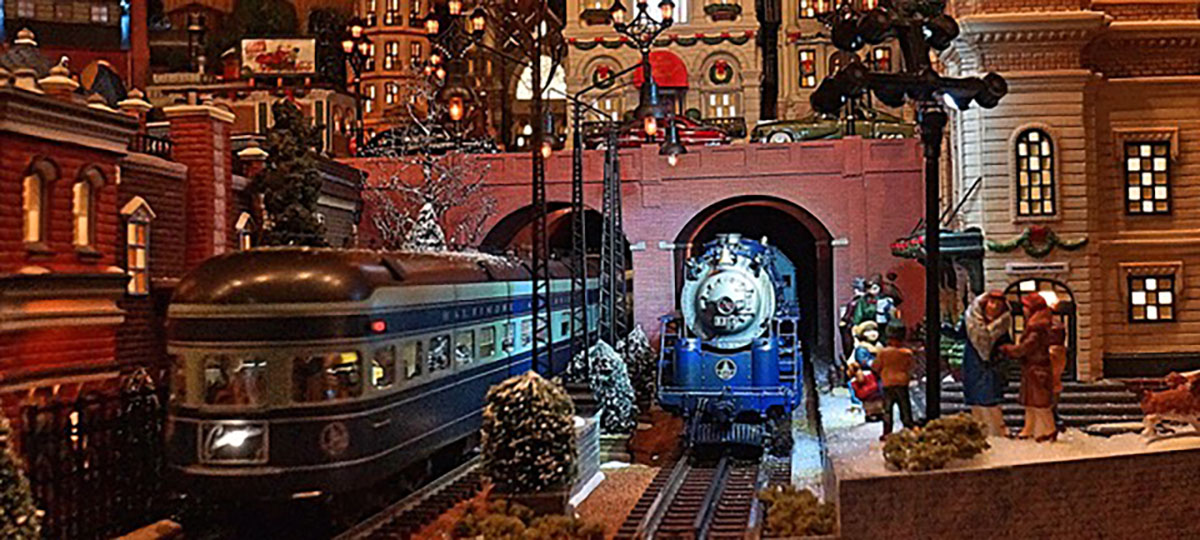
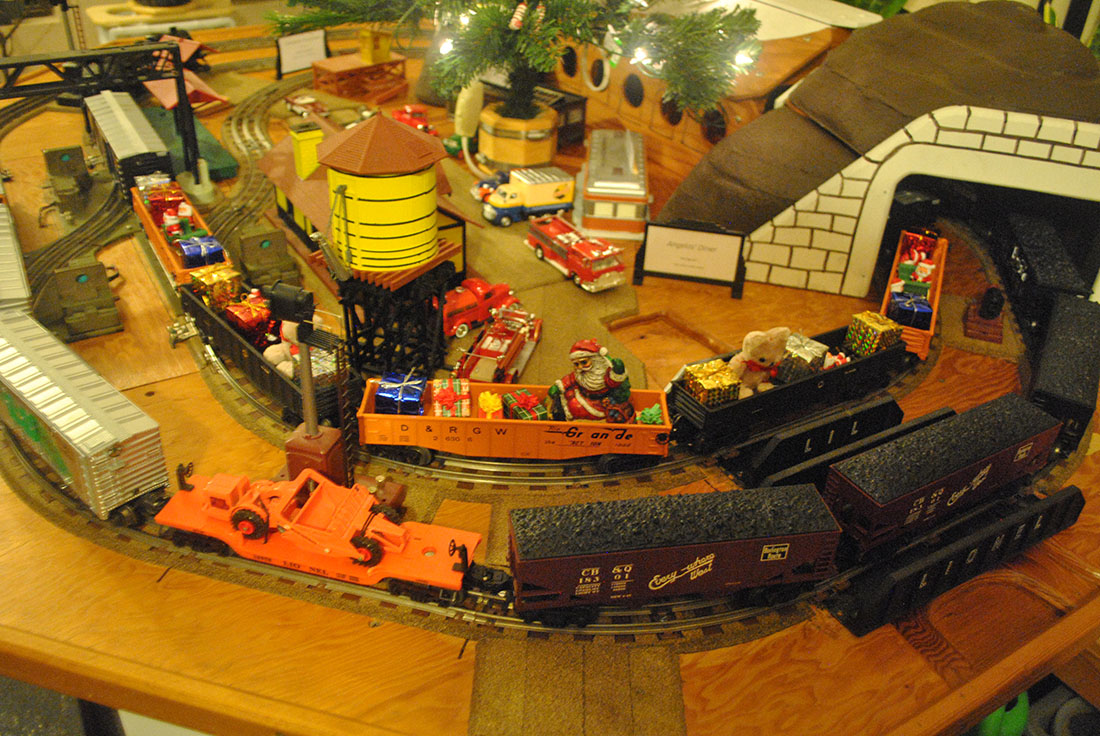
Here are a few photos from our Department 56 Christmas villages with trains.
The first is North Pole Village, then Dickens Village (that’s the John Bull from Lionel Historic Rail) followed by Christmas in the City Village.
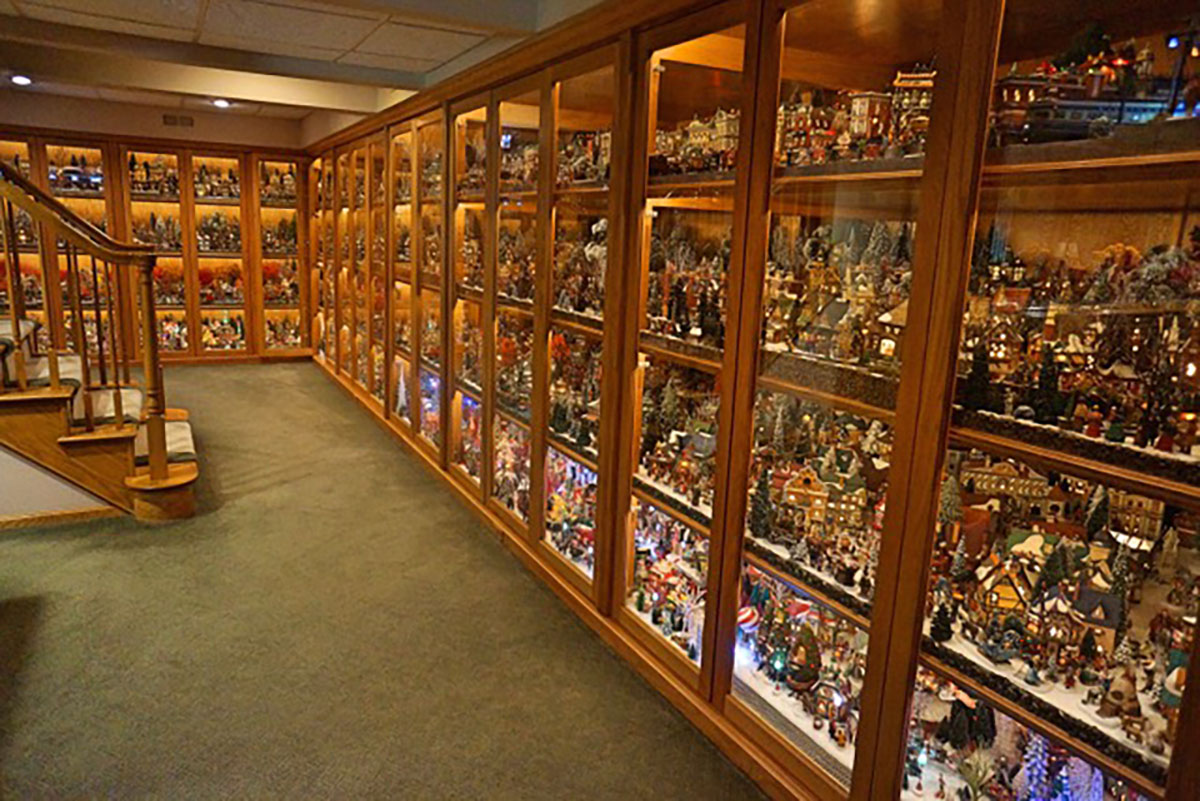
The villages are all behind glass (final photo) and over the years nothing has made us happier than having to clear tiny finger and nose smudges left by children (a few over 80) laying on the floor and gazing thru the lowest level of glass (home for the North Pole—Santa’s— Village) to watch the trains and animation.
The collection includes every item Department 56 has made over the years (more than 1,000 ceramic buildings plus many more accessories and residents) plus O gauge trains and has finally outgrown the space we have.
So the entire collection of trains and buildings is moving to the Colorado Model Railroad Museum in Greeley, Colorado where, as soon as their fundraising covers construction of an expansion to house the buildings with lots more trains, everything will be on display year-round.
As the Colorado Model Railroad Museum executive director often says, “what goes together better than Christmas and model trains?”
Bob”
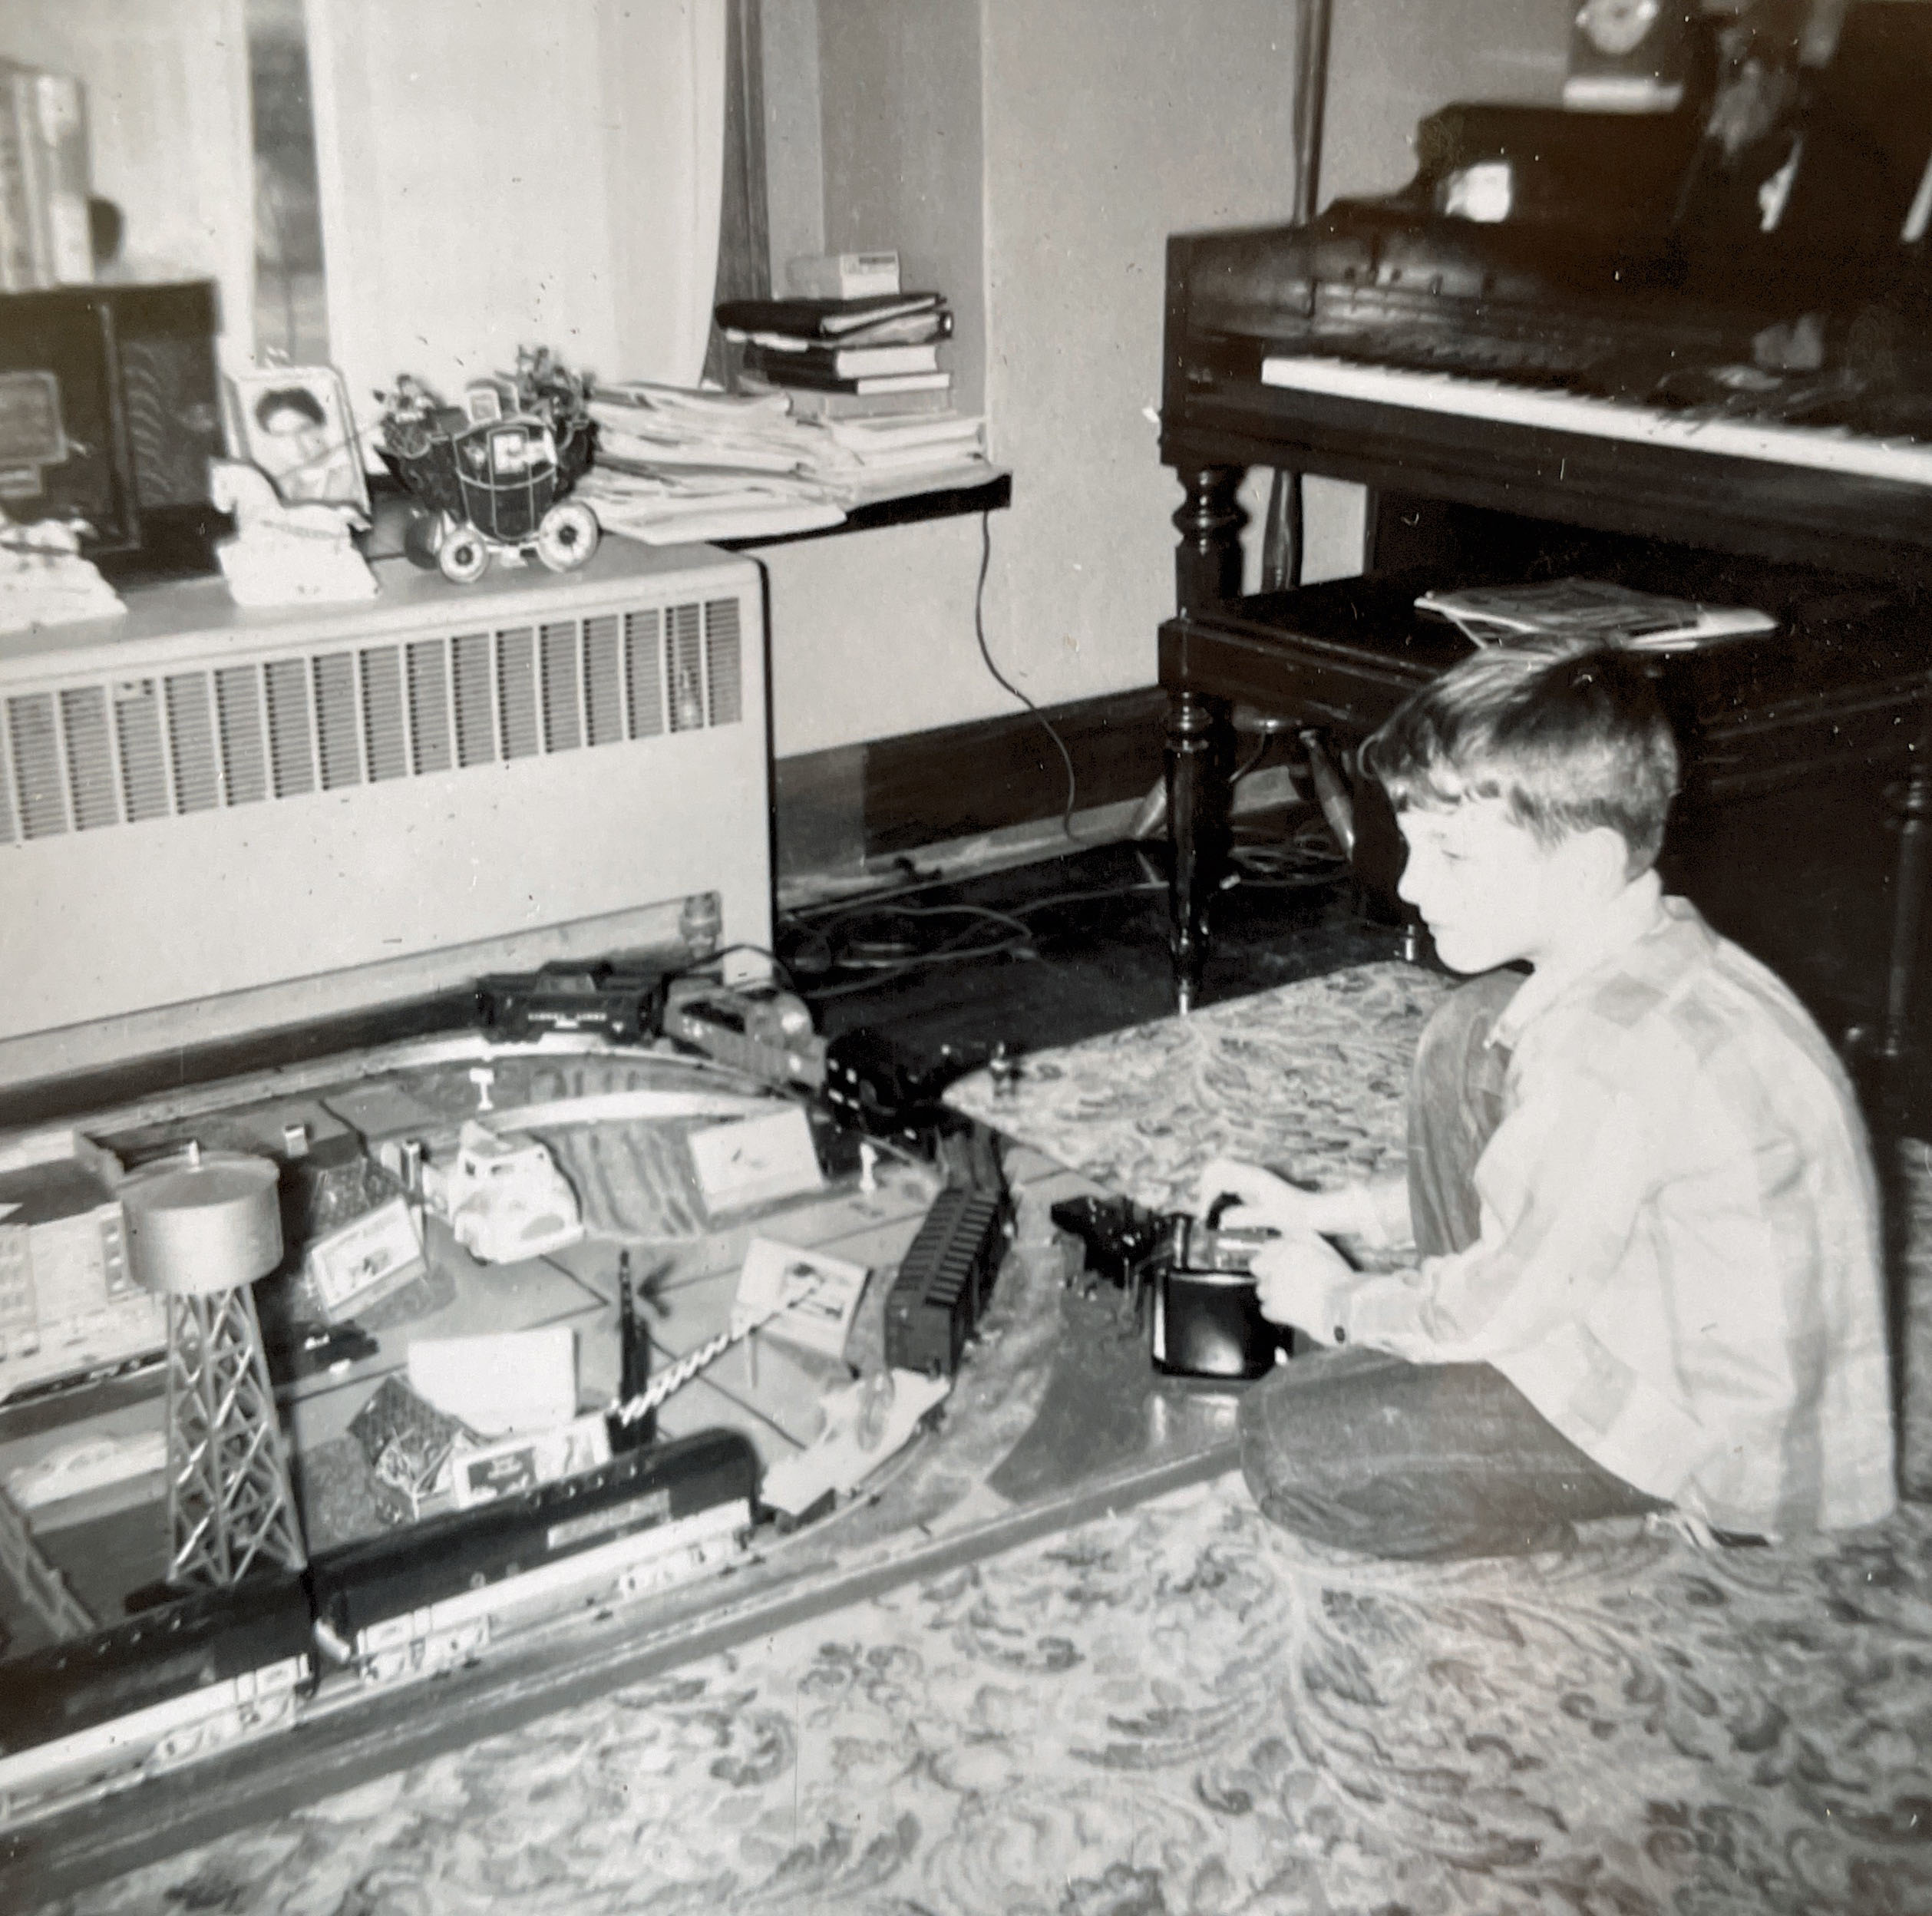
“I don’t have a Christmas layout, but I sure have a Christmas memory.
It was 1956; I was 8 years old. We had opened all our presents, or so I thought. I was quite happy with my “haul”. Then my mother said, “Oh, Bob, I think you missed one…” Well, of course, she had snuck an envelope under the tree with my name on it.
Inside was a bit of doggerel my Dad had written. It directed me to some location in the house (it was a biggish house: two full floors, plus a basement and attic). There was a wrapped box, containing the Lionel “Texas Chief”, along with another bit of doggerel, directing me to another spot. There I found another wrapped box, with the “B” unit for the Texas Chief.
This treasure hunt went on for awhile, until I had a whole train.
I said something like, “All we need now is a layout.” Dad smiled and took me into the dining room. There was a completed 4’x8′ layout he had secretly built in the basement over the past few weeks!
Some might complain that we should have had the experience of building it all together, but I was thrilled with the instant gratification of running trains right then and there. I had many hours of happiness with that layout for many years.
It also instilled a love of model railroading in me. I hung onto that whole set until both my parents passed away, and we cleared out the house. I brought it all back to NYC, where I now live, and eventually sold the Lionel to bankroll my new N scale layout, on which I have been working since I retired a couple of years ago.
Robert”
“Hi,
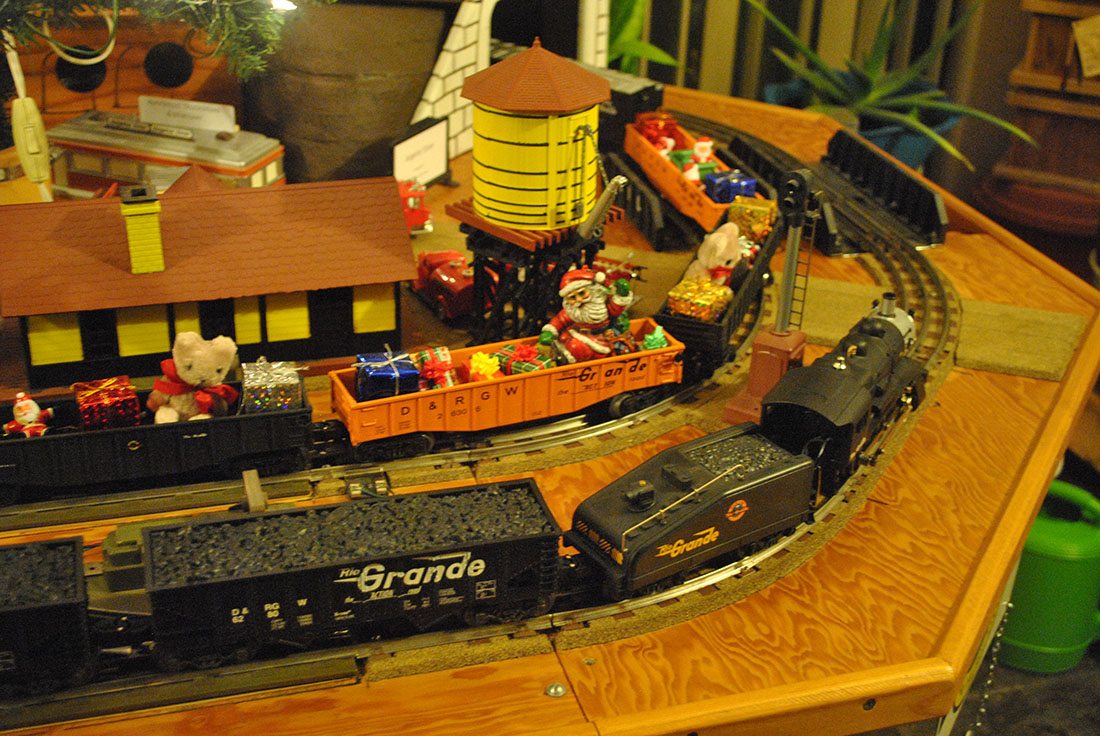
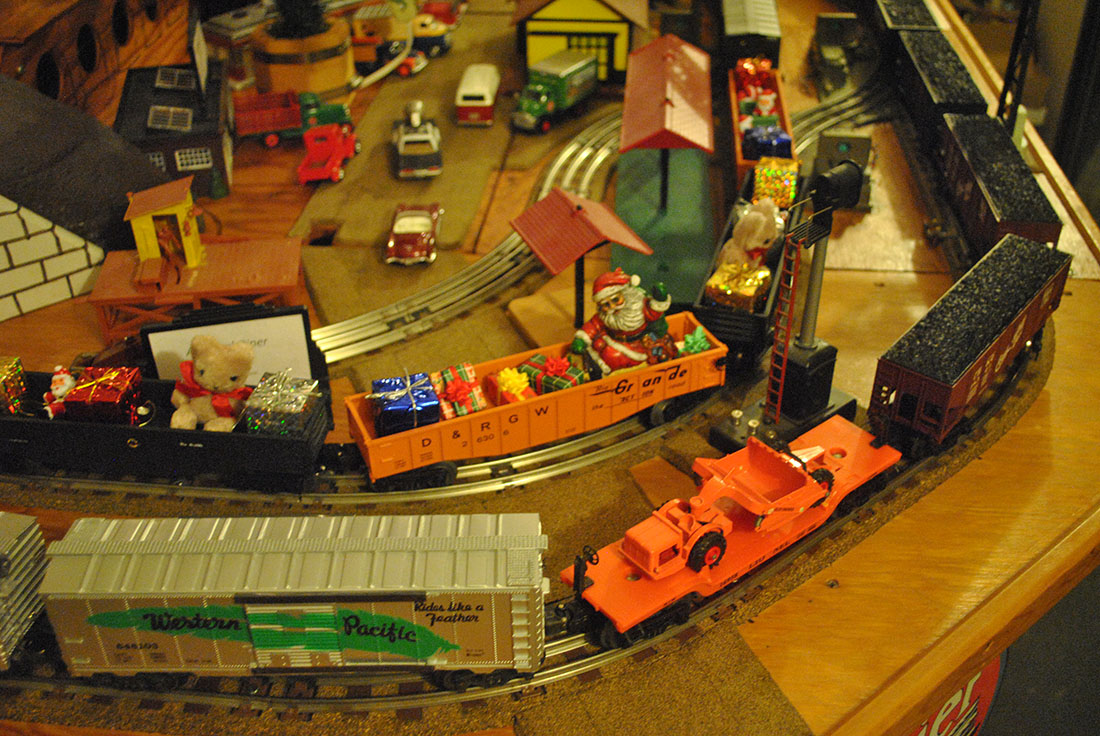
Santa Special: There’s a lot of coal in those 5 hoppers, somebody must’ve been bad.
The D&RG is pulling a couple WP boxcars, returning to origin?
The WP is pulling special duty with Rio Grande rolling stock.
Reindeer must be in the stock car, kinda cramped as one car had to be taken out of service with a bad coupler.
John”
A huge thanks to Bob for sharing his model train Christmas village, and to John and Robert for spreading the Christmas cheer.
Really enjoyed Robert’s story and old black and white picture – really does the capture the joy of Christmas.
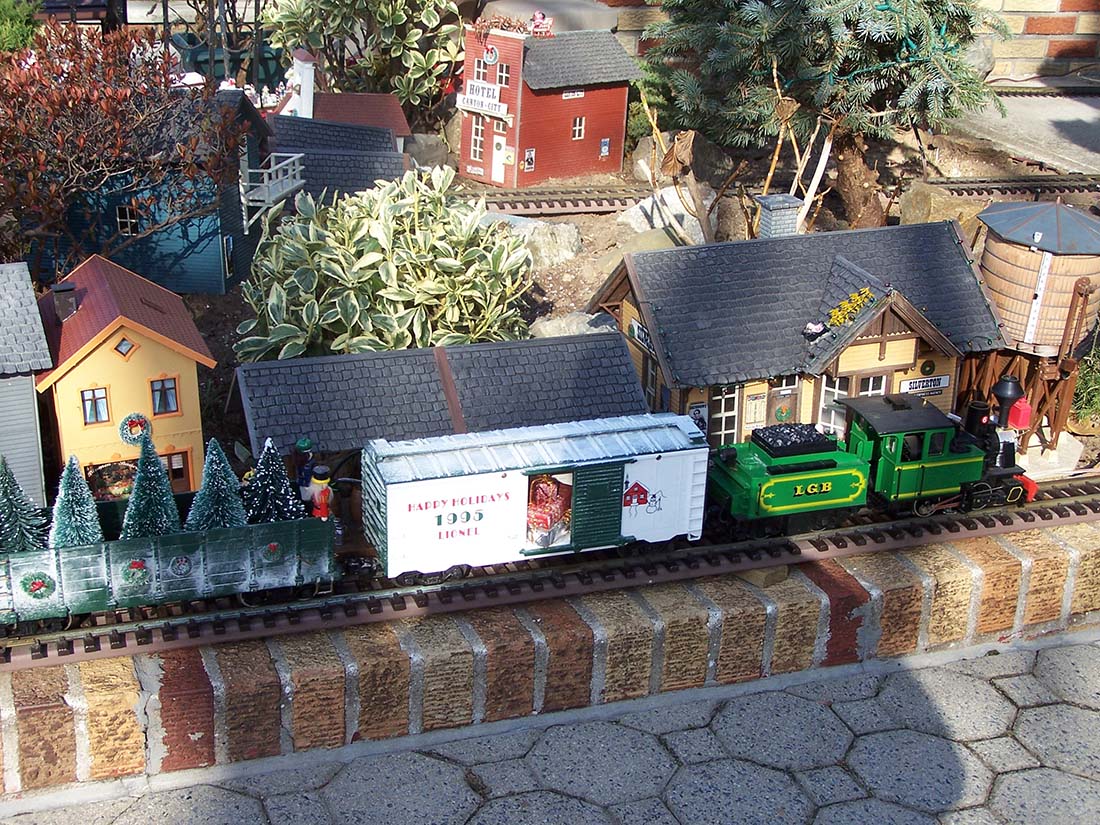
Bob’s been in touch with is G scale Christmas train:
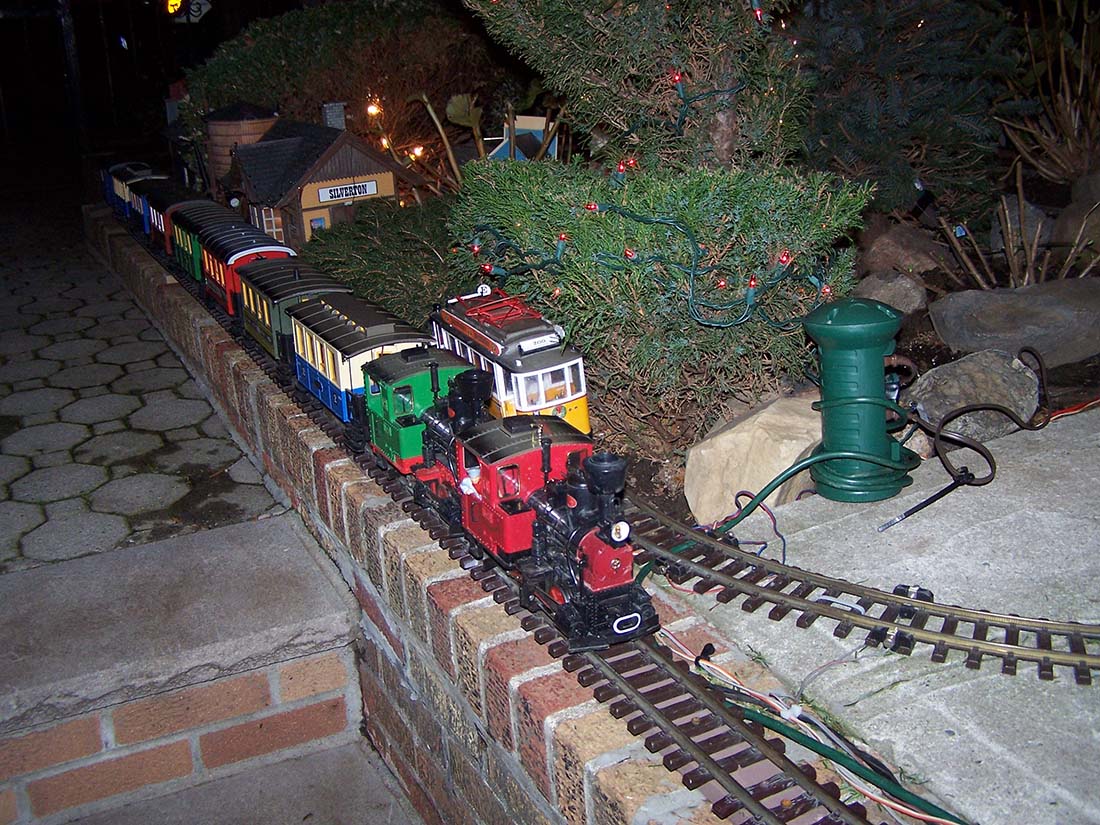
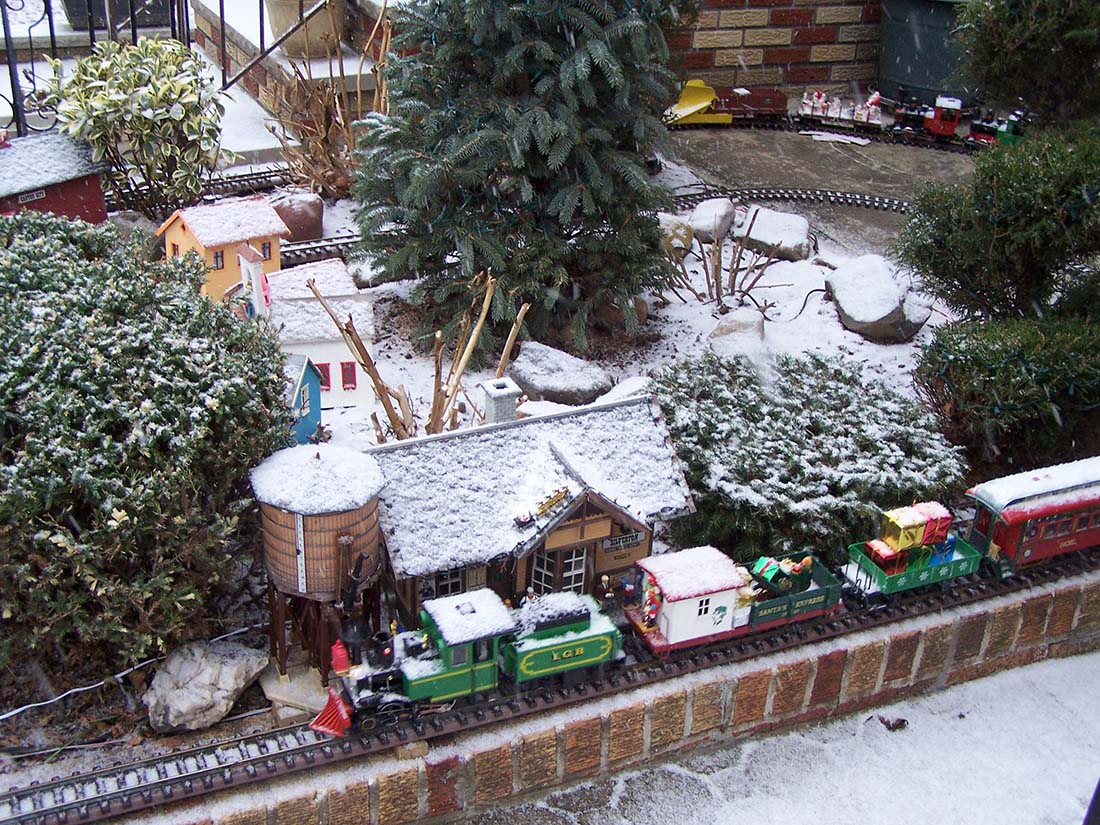
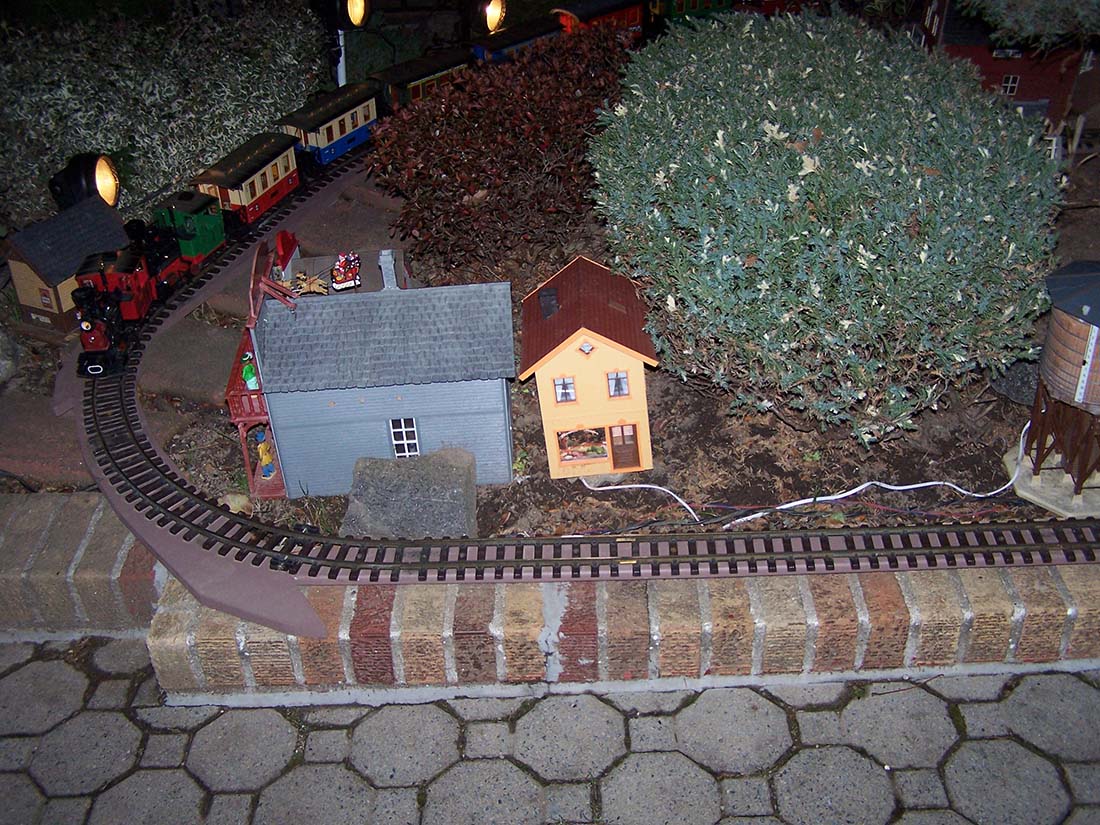
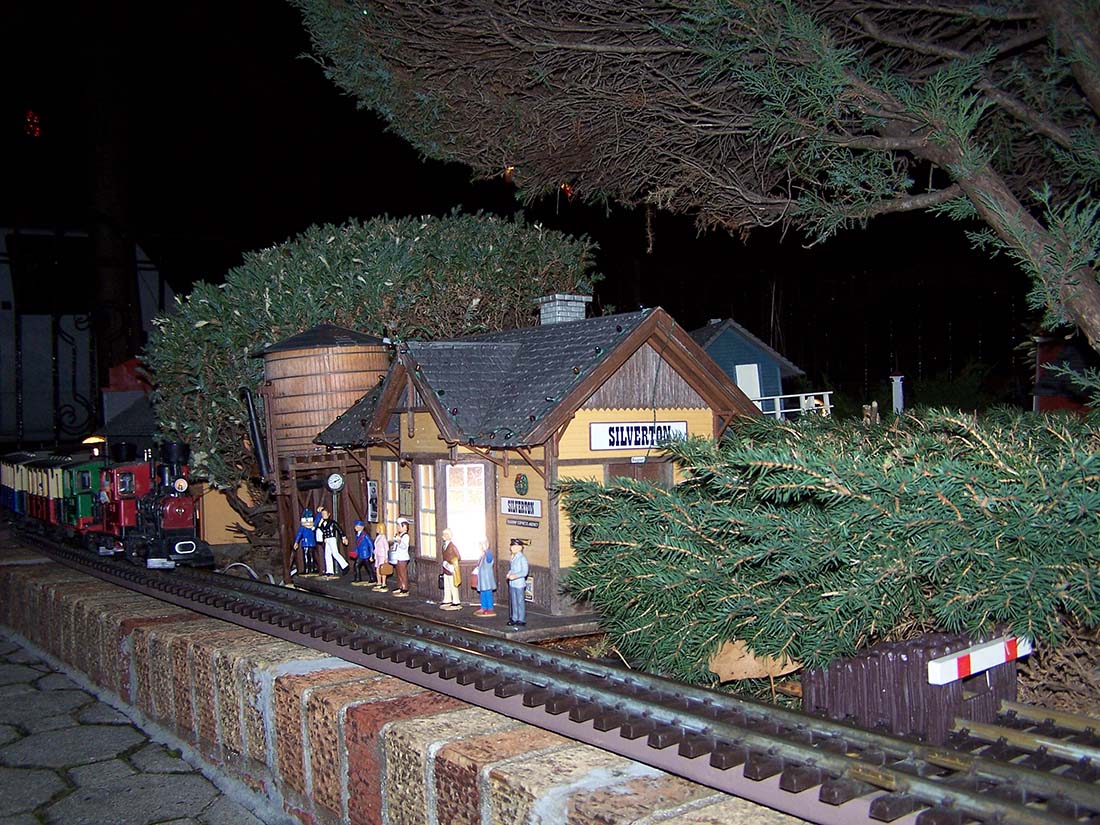
“This time of year my thoughts turn to my outdoor G scale Christmas display that I set up for 35 years. It all started about 40 years ago.
My son Keith was about 14; he worked in TrainWorld Brooklyn. My wife and I went next door for a Christmas Eve toast. When we got home, Keith had an LGB starter set running around the living room and dining room.
He said Merry Christmas Dad, the set is yours! That Christmas we set the set up in the back yard. It wasn’t much, just the track. We lived in a row house that didn’t have a basement; which is why the 0 Gauge was packed away. The front garden was a rock garden. The following Christmas I negotiated to use the front garden.
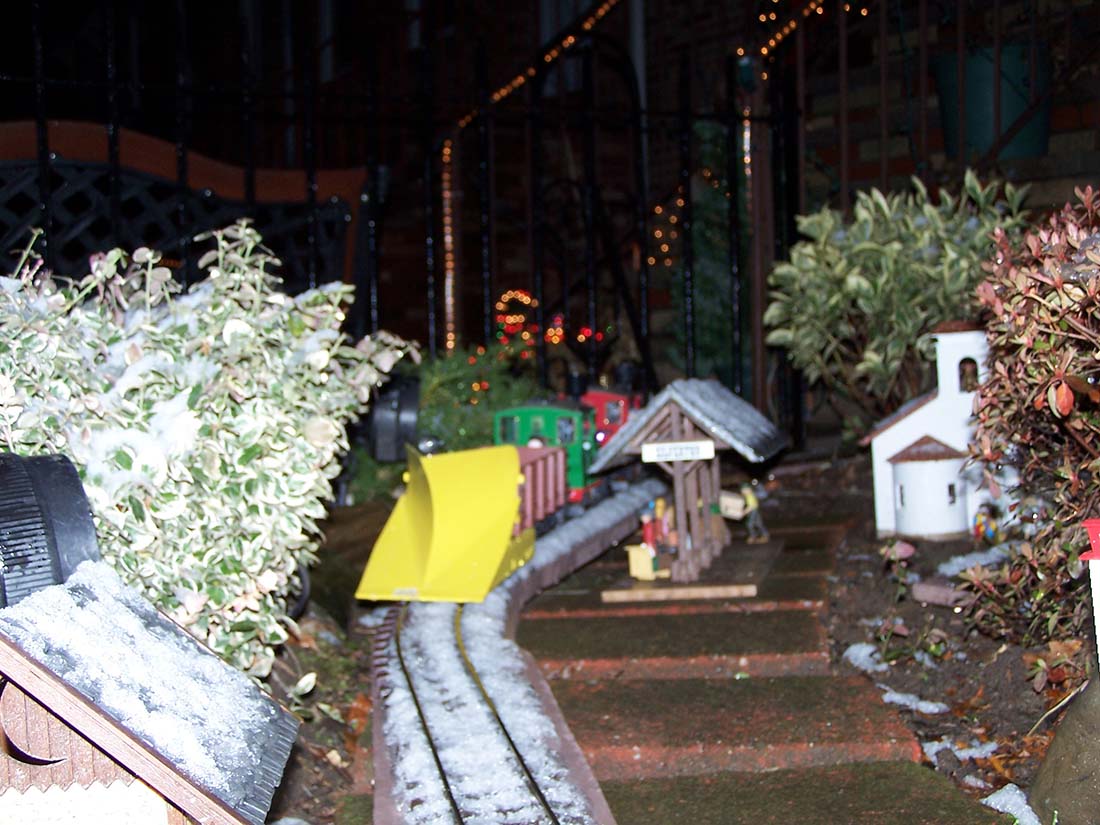
I purchased used LGB track and proceeded to construct a railway snaking between the rocks and plants in an oval at basically the outer edge of the garden.
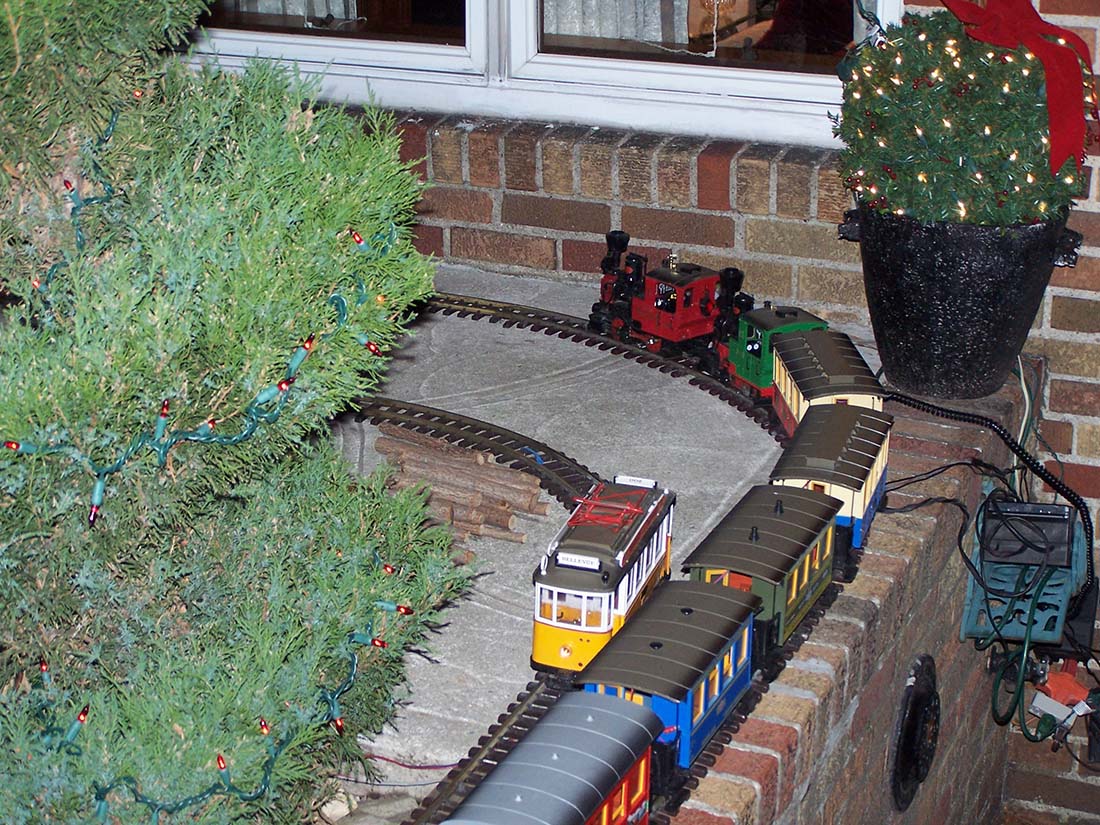
The garden was bordered by the house, a wrought iron fence at the sidewalk, a wrought iron fence and my neighbors stoop on one side; and a very low brick wall on the other side. (A “stoop” is a Brooklyn term for a set of brick steps at the front of a home.)
I used the brick wall as my roadbed for one side.
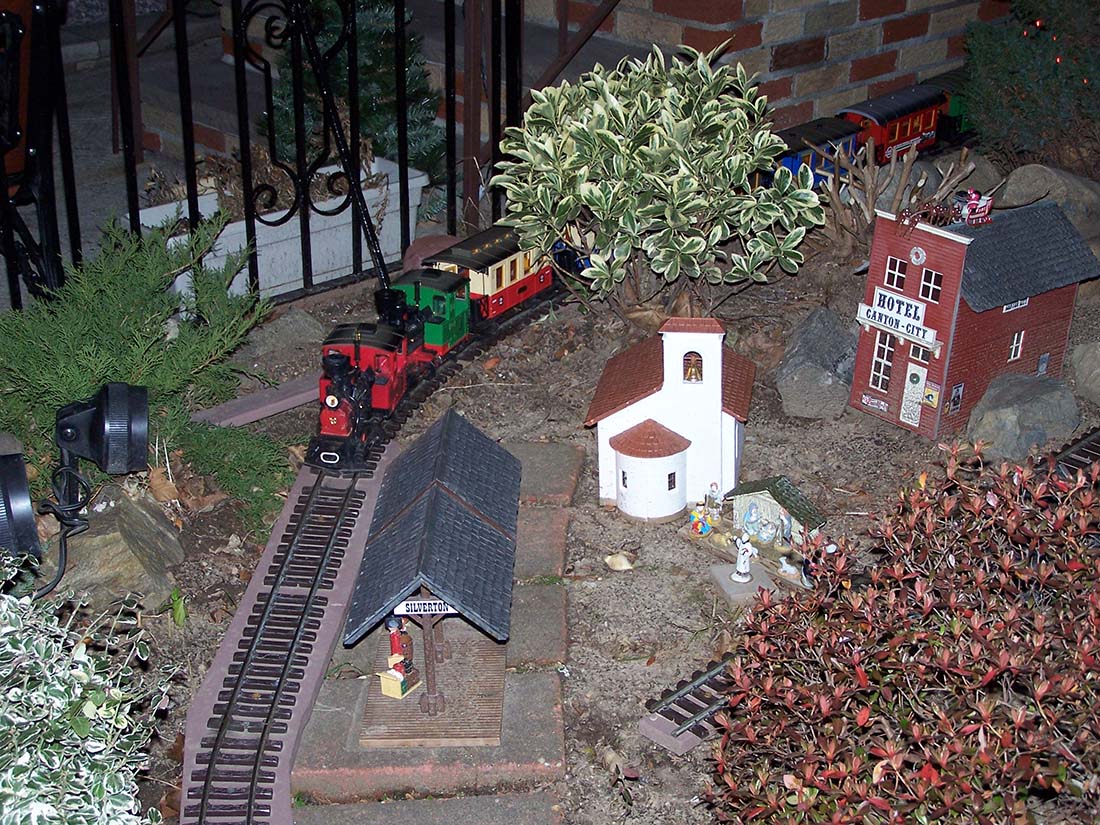
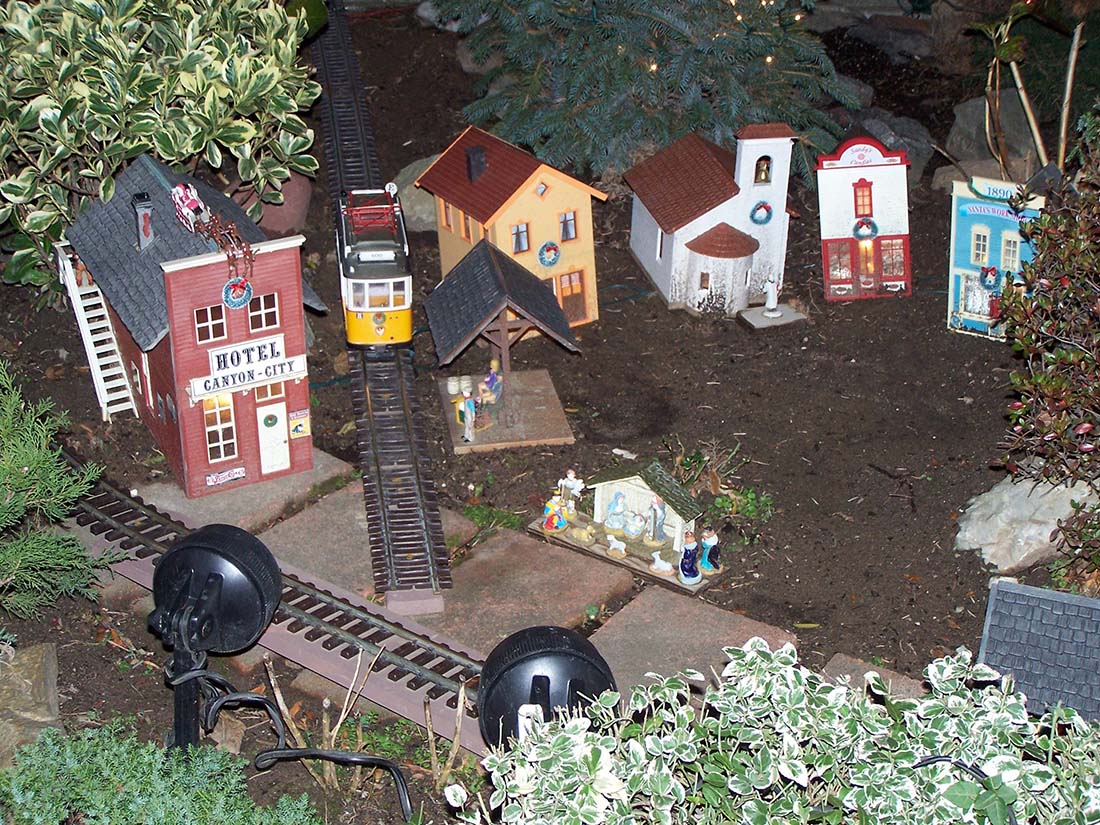
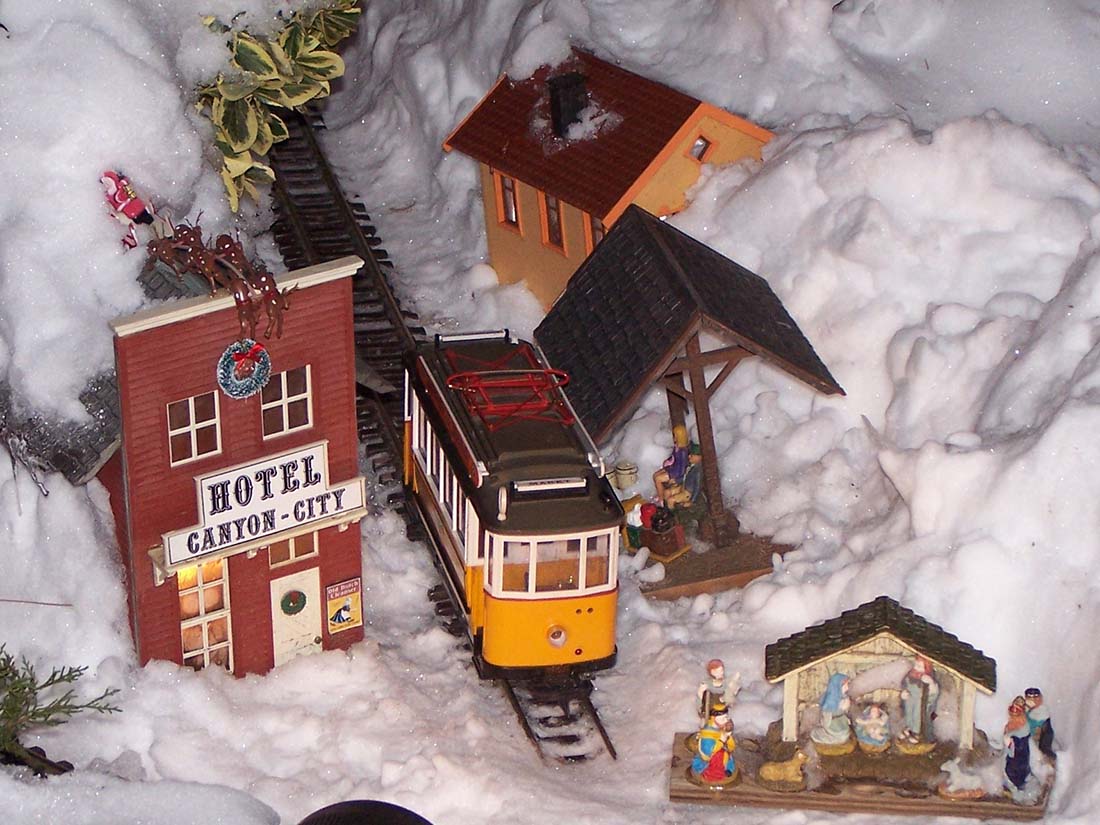
I bought a church and a house at a show; they were very light and had to be wedged between rocks to keep them from blowing away.
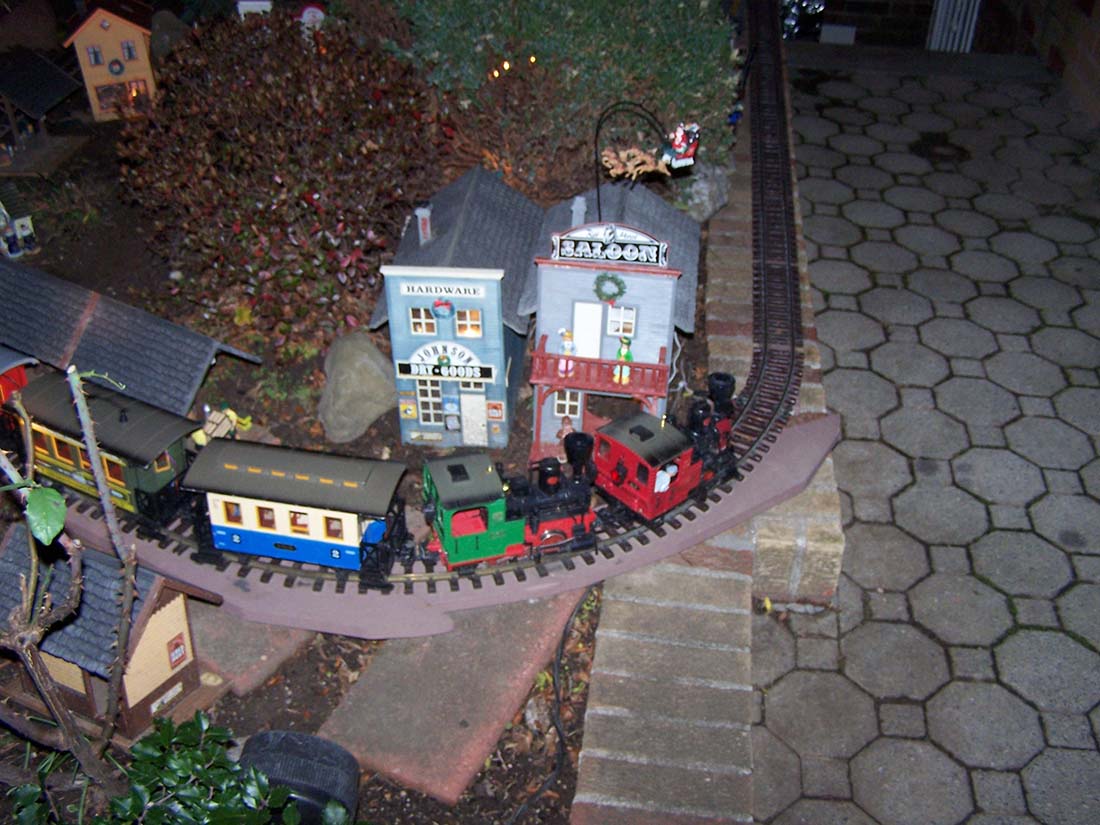
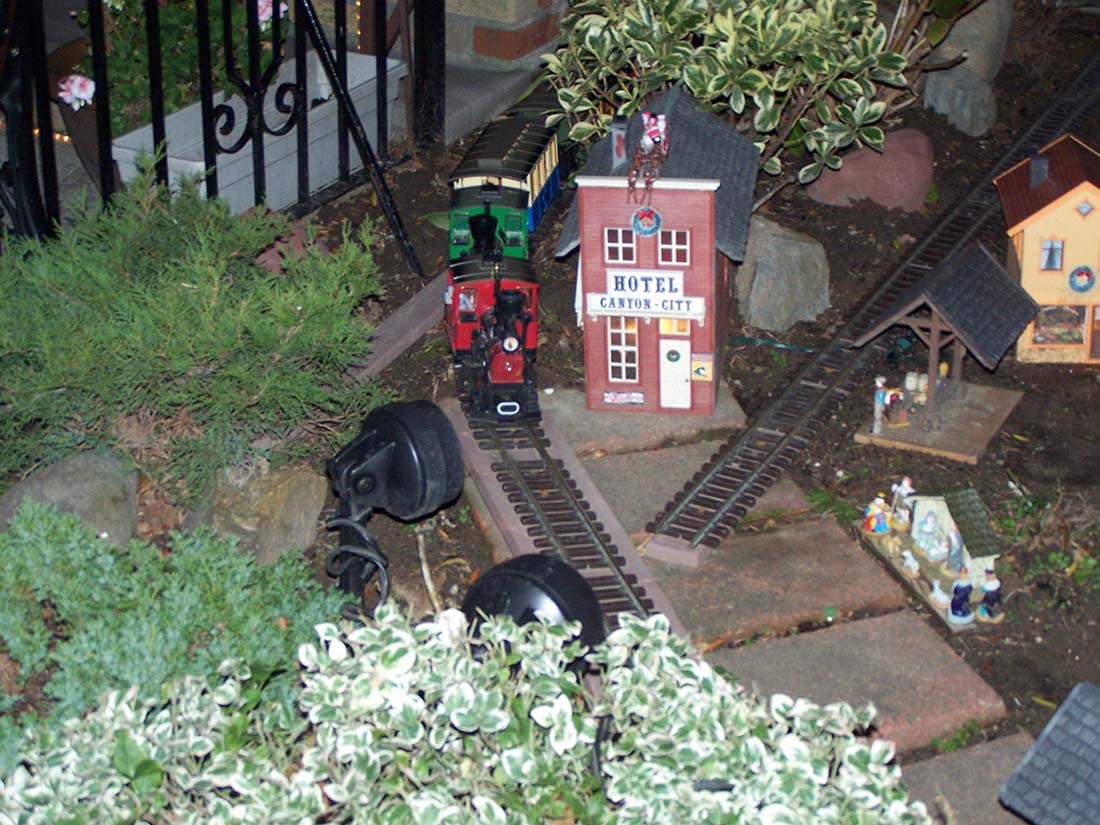
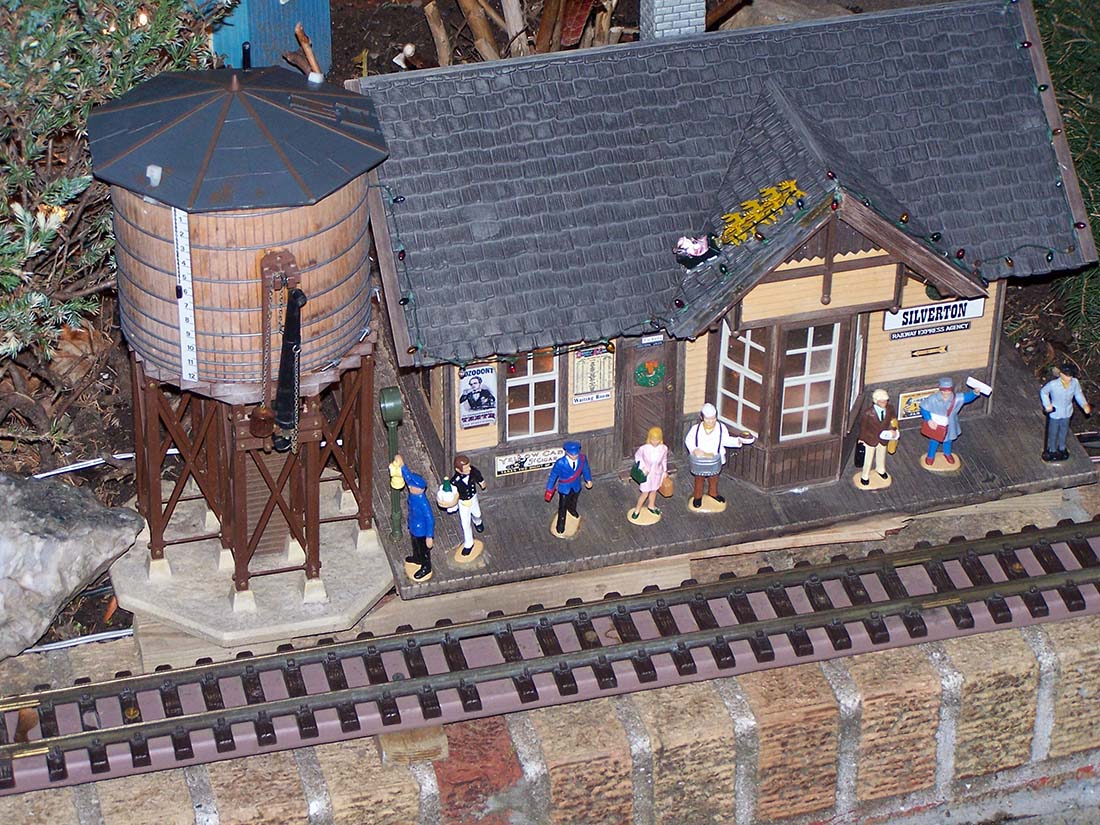
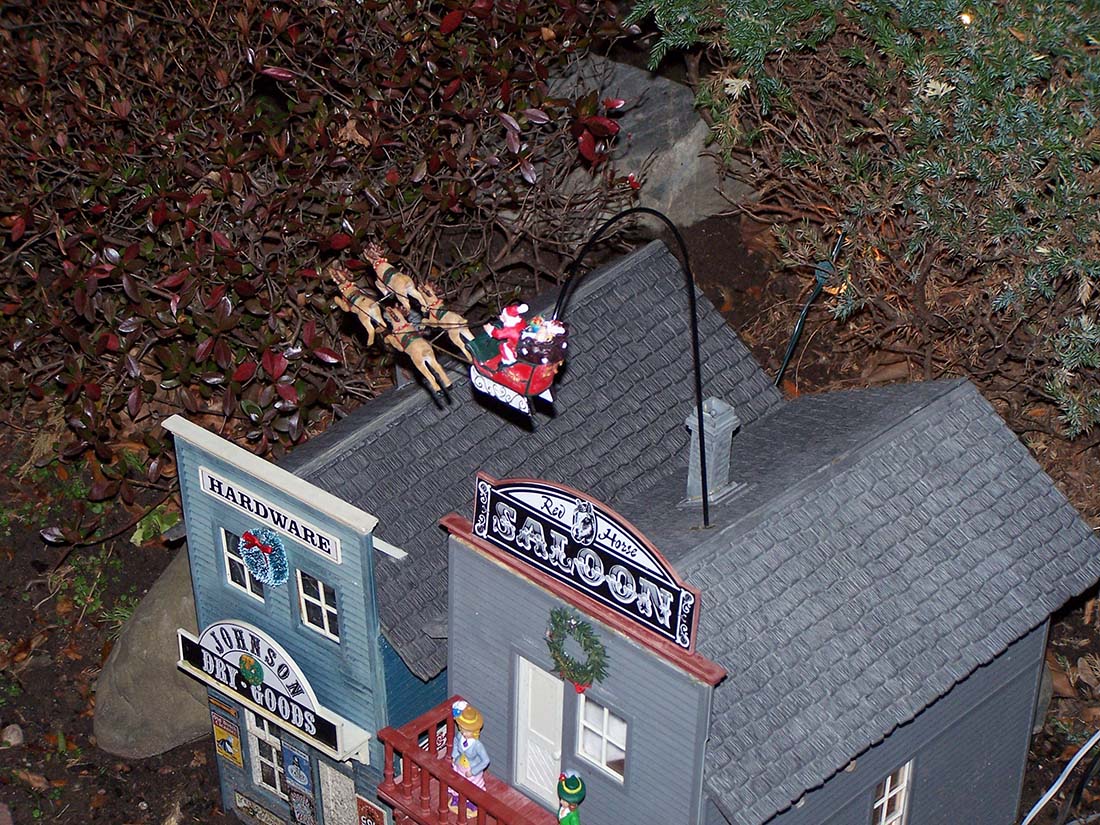
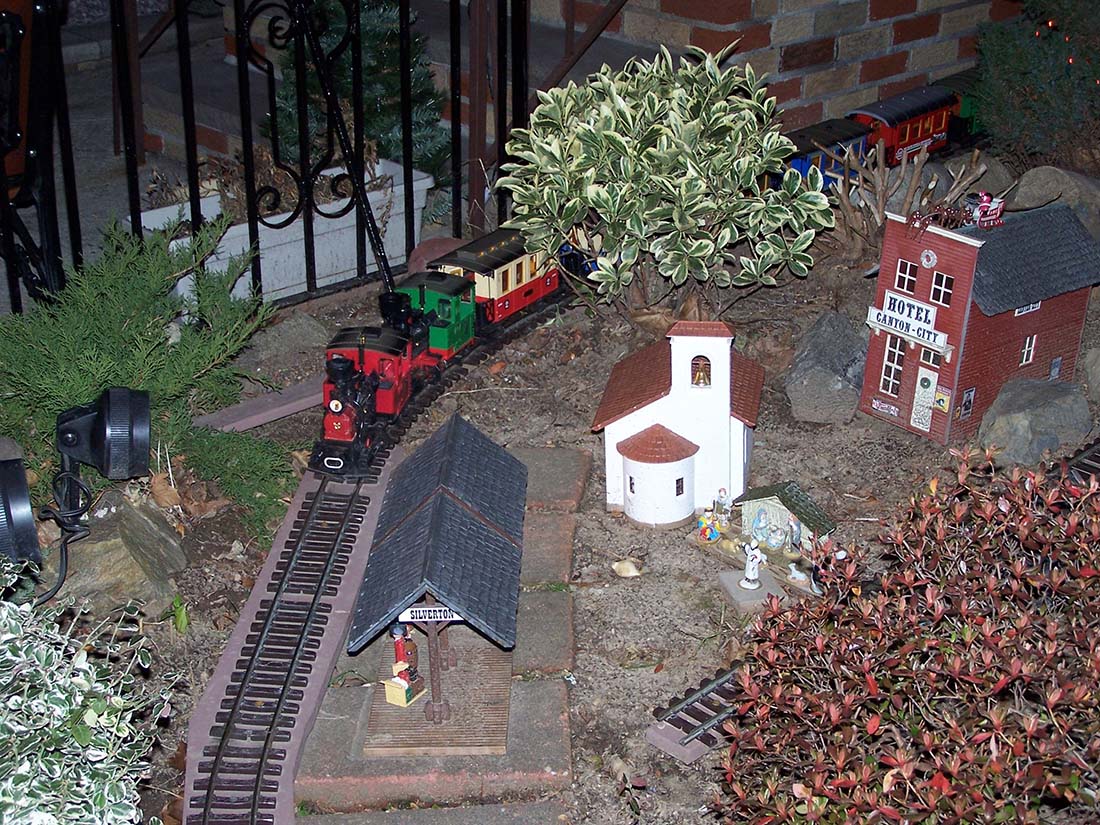
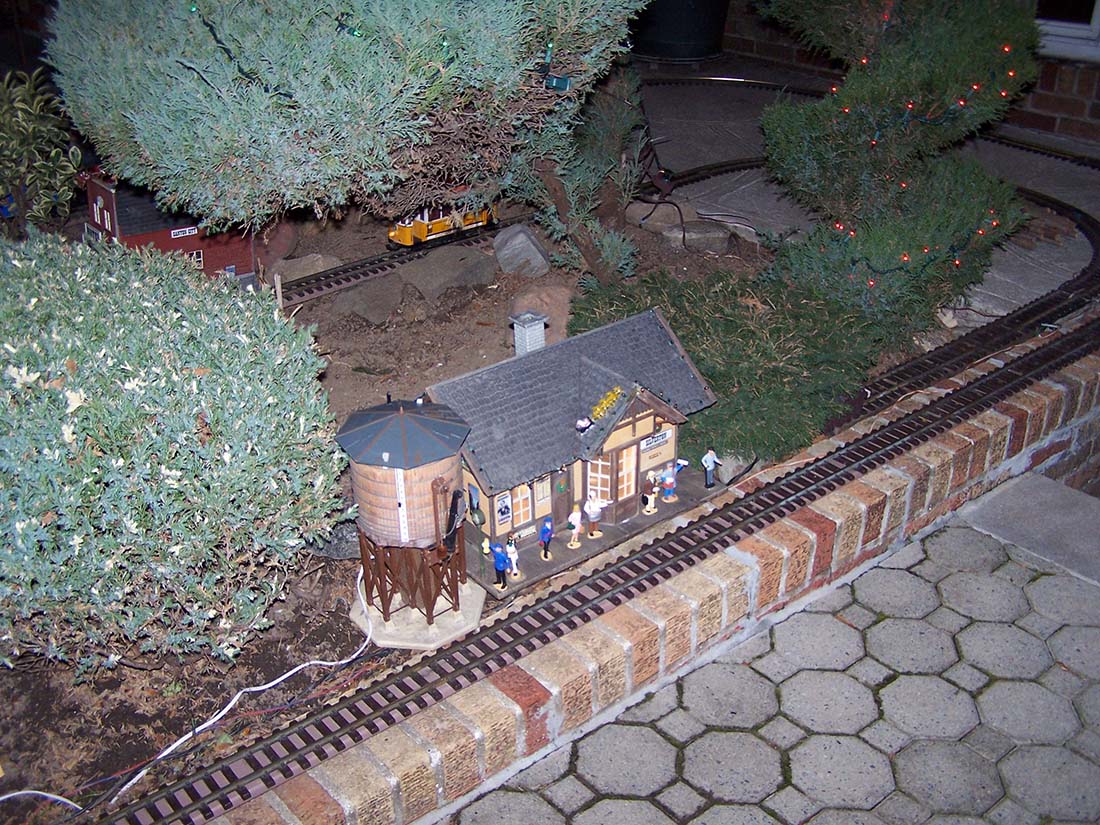
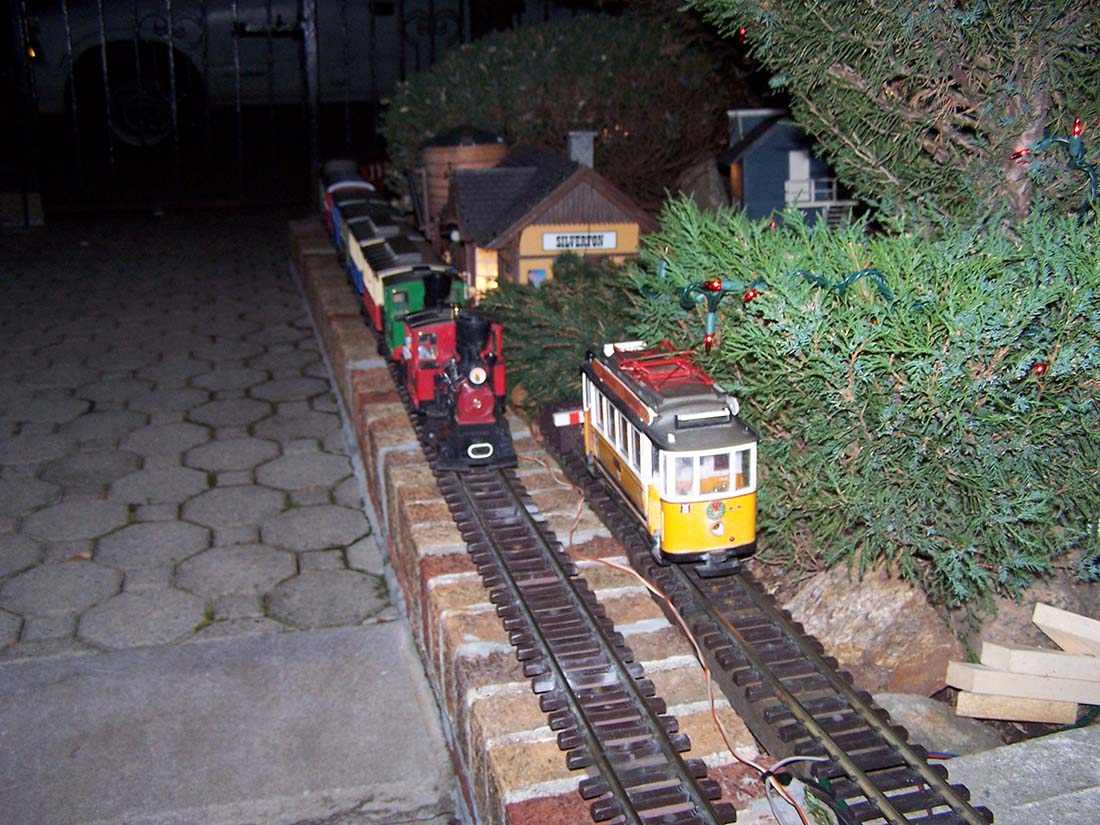
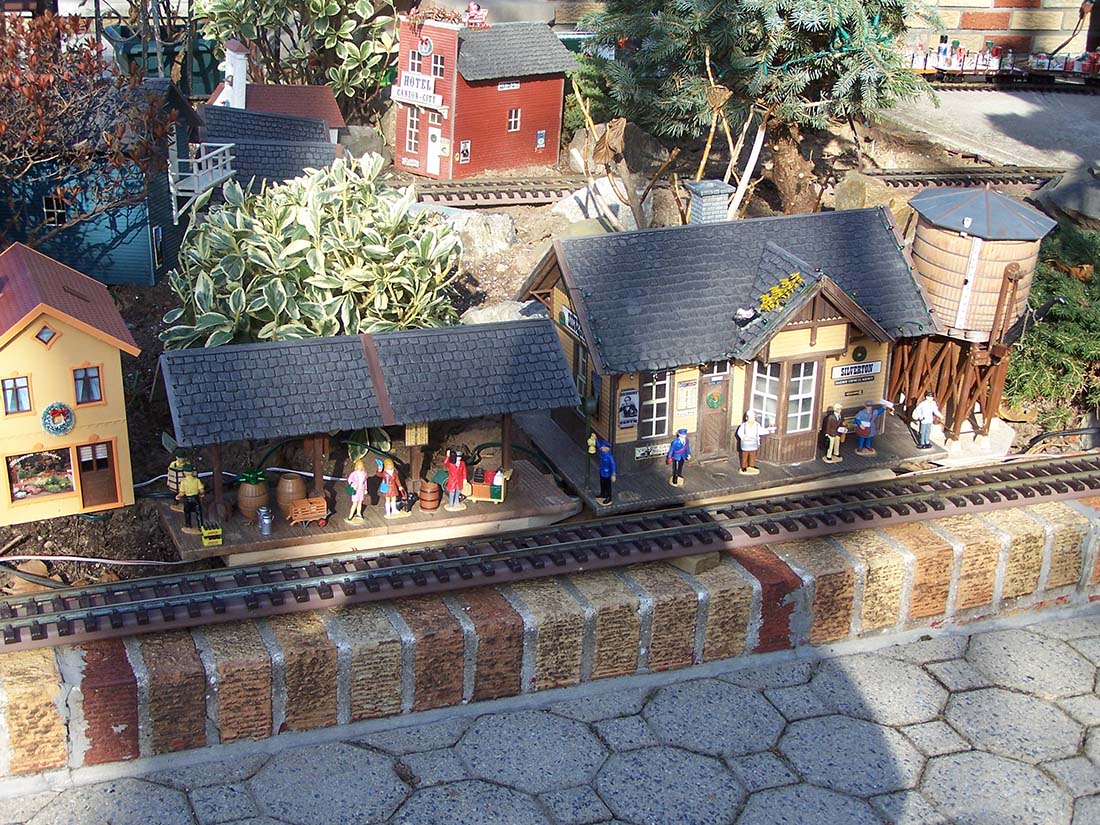
A few years later a friend was breaking down his layout and offered all of the buildings to me. They were all the premium heavier buildings; including the church, station, water tank, hotel, and saloon.
I started mounting the track on 1x3s and then only had to make track connections at the corners. The next year another friend came upon a deal of LGB engines. He passed on the savings to me and I picked up the Colorado Southern, and a smaller American engine that also had a powered tender as well as a trolley.
I set up a track that ran up the middle of the garden and then curved to meet the “Main Line” at the station. I purchased a reversing circuit, so the trolley travelled back and forth laying over at each end for a few minutes.
I picked up some American passenger cars and began favoring the little #2 and 2 passenger cars less and less. Then one day my Dad stopped over and when He saw the number 2; he told me that he rode on that engine as a boy. He said that his Grandfather was the engineer in a factory in Germany. That’s when I knew that #2 would be part of the Christmas display for a long time.
I had picked up some American style passenger cars to run with the Colorado Southern. I soon learned that the tight turns and slight grade from the front of the garden up to the house was too much and the engine was slipping. I eventually traded the passenger cars.
I started the routine of trying to find a different 4 wheeled passenger car every time I went to York.
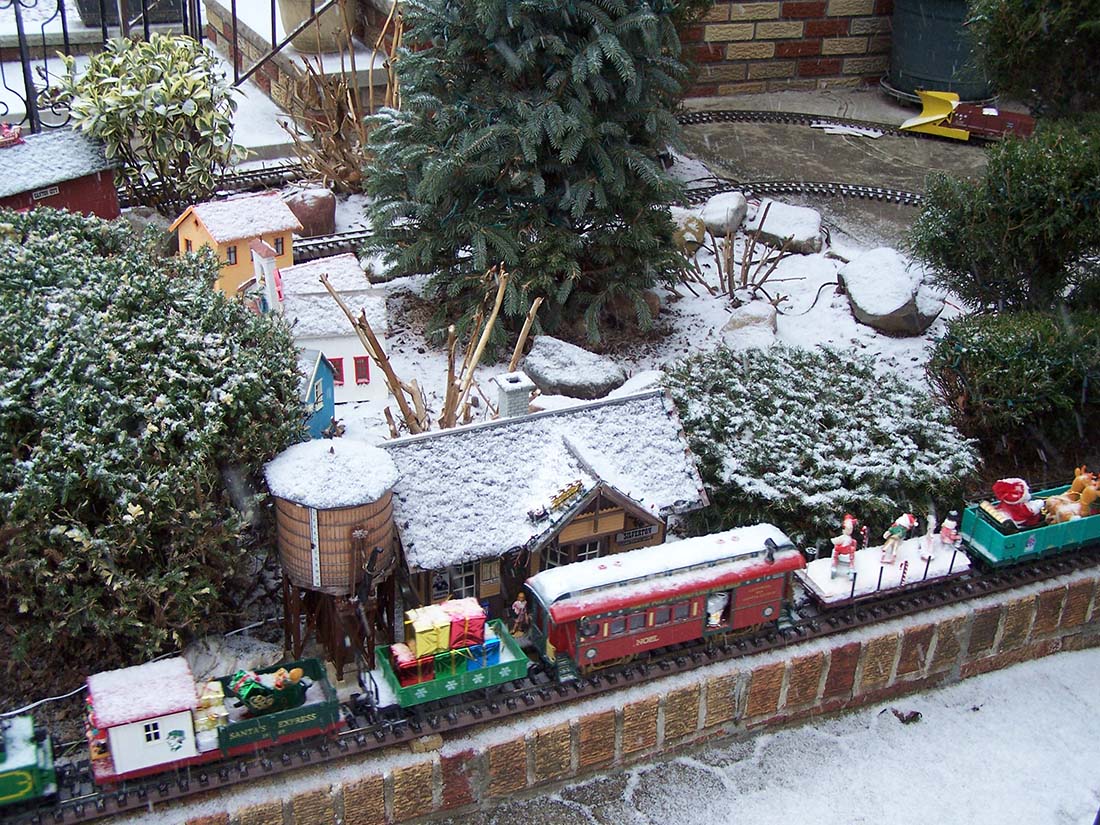
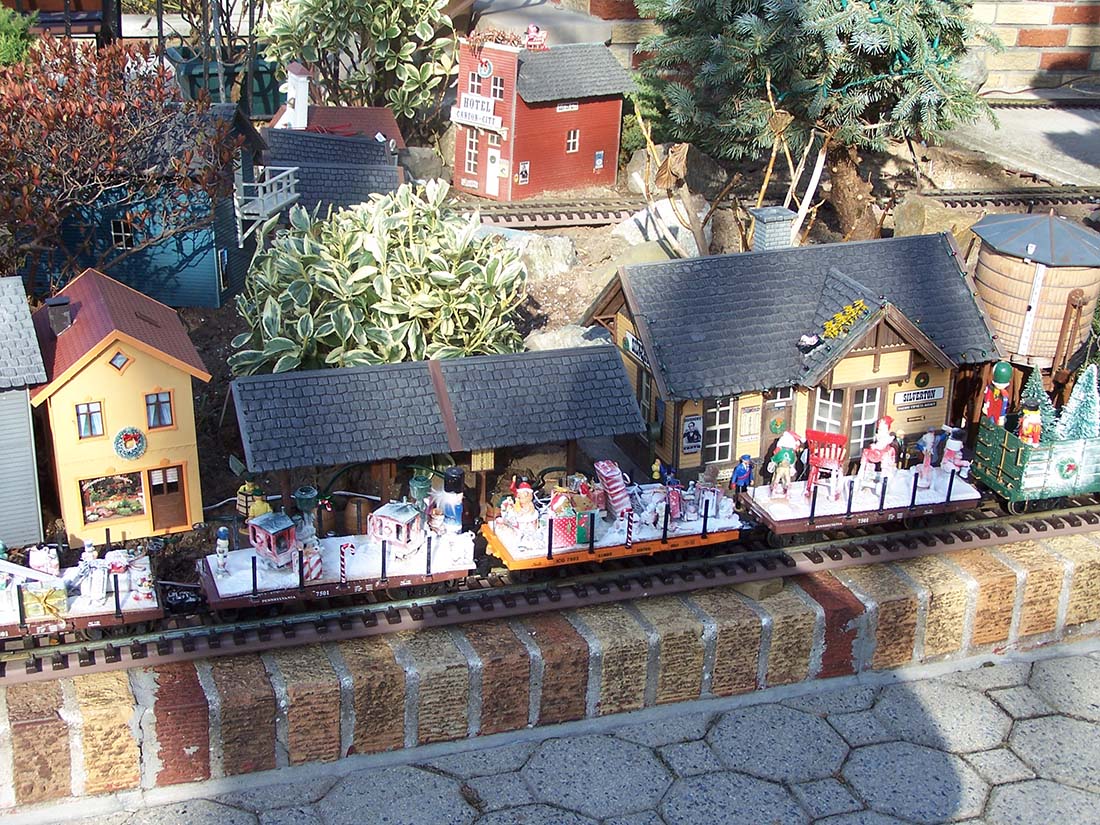
One year I decided to create a Christmas train. I got a deal on 5 Lionel large scale flat cars. I made a Lionel large scale box car the conversion from hook and loop to knuckle couplers. The Colorado Southern was on the point.
Other cars that were added along the way included; a high sided gondola which I stood Christmas trees in, an REA heavyweight combination car, a gondola with Santa in his sleigh, a work caboose with gifts, and a Christmas caboose. Of course the weight issue returned so the little #2 was added on the end as a pusher.
The CS had a bell/whistle feature that was activated by magnets in the track. My wife objected to this because she thought it would annoy the neighbors. I took apart a floor toy that had a nice sounding sound system.
I mounted the small circuit in a plastic box that screws came in and attached it to the wrought iron fence at the walk. I connected it to mini speakers from a tape player. When people came by I told them to ring the bell and blow the whistle. I had quite a lot of traffic in front of our home during the Christmas season.
I settled into a routine from year to year. I reached an agreement with my Wife that I could have the garden starting the last weekend in November or first frost which ever came first; and my wife wouldn’t plant any perennials in my right of way.
So starting a few weeks before Christmas I would run the #2 passenger train, which grew into an 11 car train, until a few days before Christmas. Then the Christmas train ran until New Years; followed by a logging train headed up by a Bachmann Shay.
The G scale Christmas train flatcars became log cars. One year I had a business trip at the end of January. The trains were in; but the track was still down. There was a snow & ice storm that froze the track to the ground until late March. This resulted in an amendment to the agreement. The track would be removed by January 6.
Most times the trains ran in the evening till 11 PM during the week, and 12 -14 hours a day on the W/E. The last 3 years of my work were at home except when I was travelling. So the trains would run from lunchtime till 11 PM.
My home office was in a rear BR; so I had a camera positioned at the front BR window looking down on the garden. It was hooked up to a 5” TV on my desk.
It took about a minute for the train to make a full circuit; so I would glance at the TV every so often. If I saw the train I was good, if I didn’t I’d wait the minute for it to appear. When it didn’t I would go down and check it out.
It amazed me that some days it would run 12 hours without a fault and others were a disaster. I soon learned that the LGB hook and loop couplers were very finicky. Depending on the strength of the plastic centering spring it made a difference which hook was on the left and which was on the right. Set up the wrong way and one car would derail the other on a curve.
Squirrels, blowing leaves and small braches were also causes for derailments.
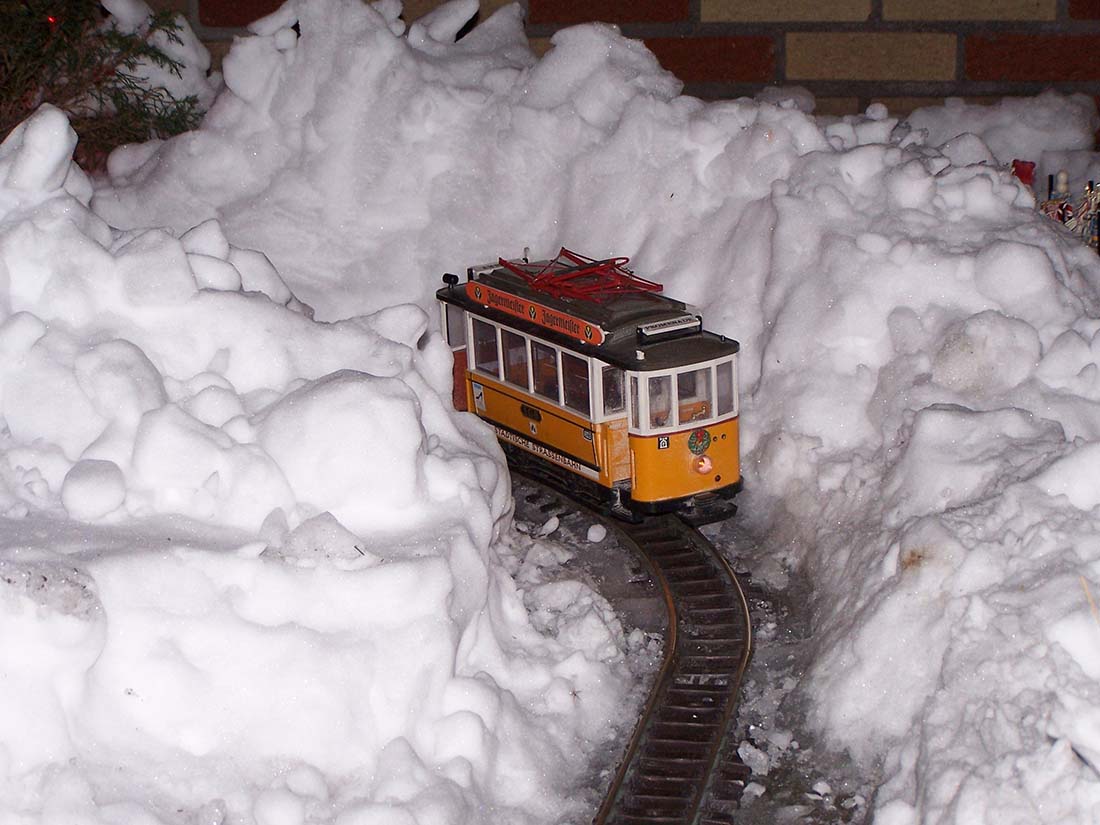
The trains ran in all kinds of weather; although there would be changes in the consist depending on the weather. A really windy day would sometimes reduce service to a lone trolley car running on the mainline. Snow wasn’t a problem unless it was wet and heavy. I would add an engine to keep them running.
Sometimes it would be a lashup of 3 engines just to keep the line open; all the while hoping that the snow would stop before 11 PM.
Freezing rain was a killer; a glaze would stick to the track and that halted everything. There were times I would try to fight it by using an alcohol sprayer. Sometimes I won.
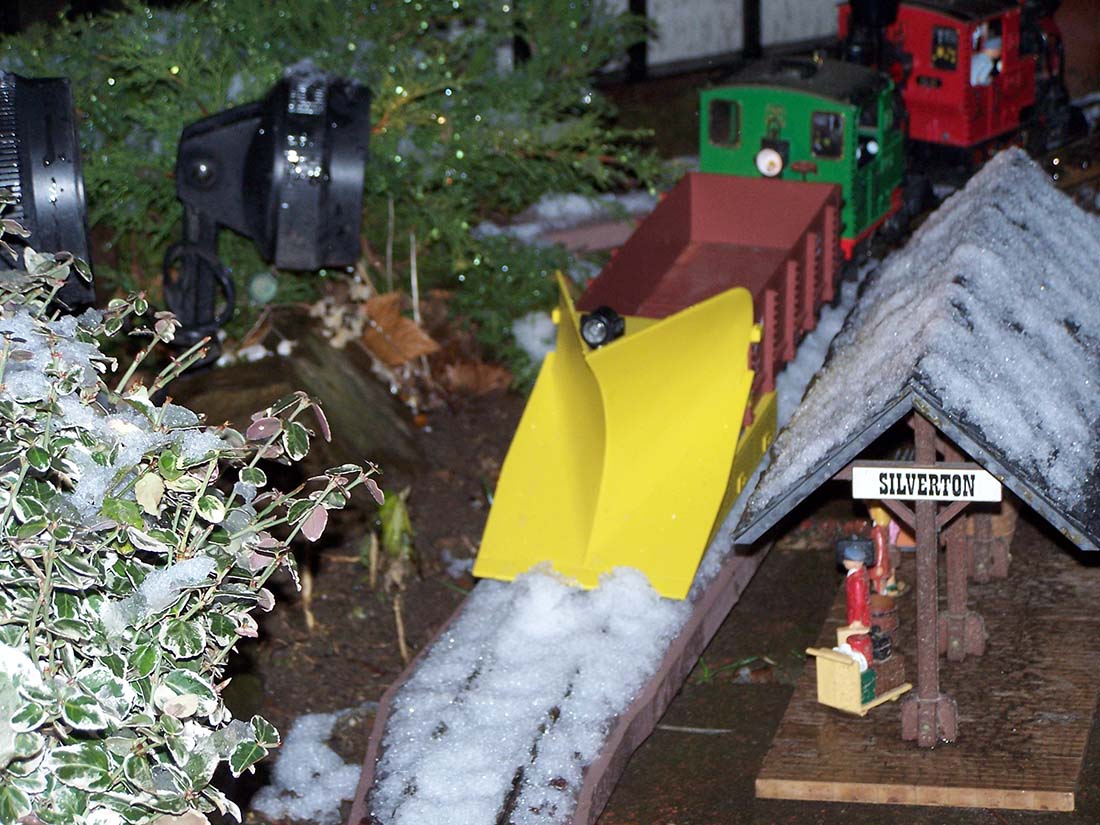
The snow would take over when I shut down for the night; I had a wedge snow plow mounted on a gondola. I put a brick in the gondola so it wouldn’t derail when it hit a drift.
It all came to an end a year or two before we moved to NJ. There was snow an ice in the garden and there was a derailment at about 9PM. I gingerly tiptoed around the rocks and got it cleared; all the while thinking, if I fall how will I ever get up.
When I got back inside and settled in my chair; I texted the kids and told them that they had to pick up the G scale after Christmas or it would be sold. End of an era.
Three days after we moved into our new home; I was invited to join a group that was forming to put a Christmas layout in the community clubhouse. But that’s a story for another day.
Regards,
Bob in Colt’s Neck Crossing, NJ”
A huge thanks to Bob for taking the time to write this with the pics and video and share his G scale Christmas train.
The Christmas posts really do show how much this hobby spreads to the rest of the family. Suppose it has to when it’s taking up the garden or the front room…
Please do leave a comment below if you want to share some Christmas cheer.
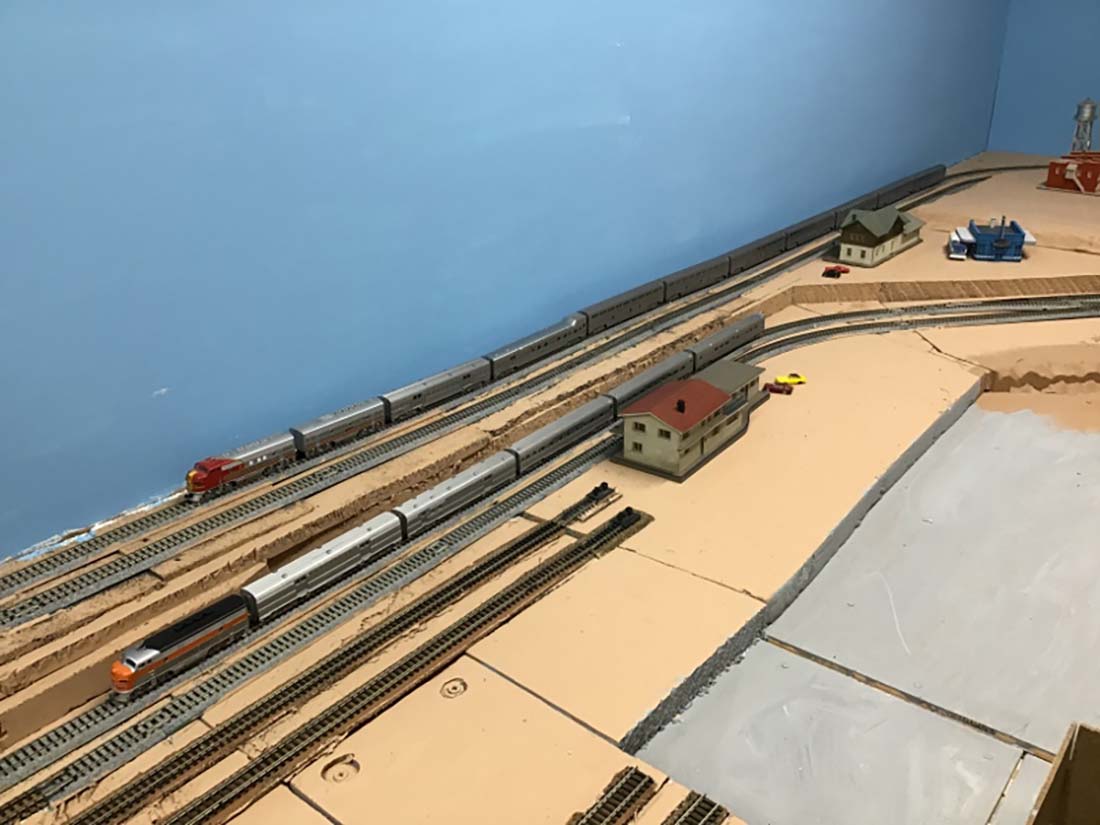
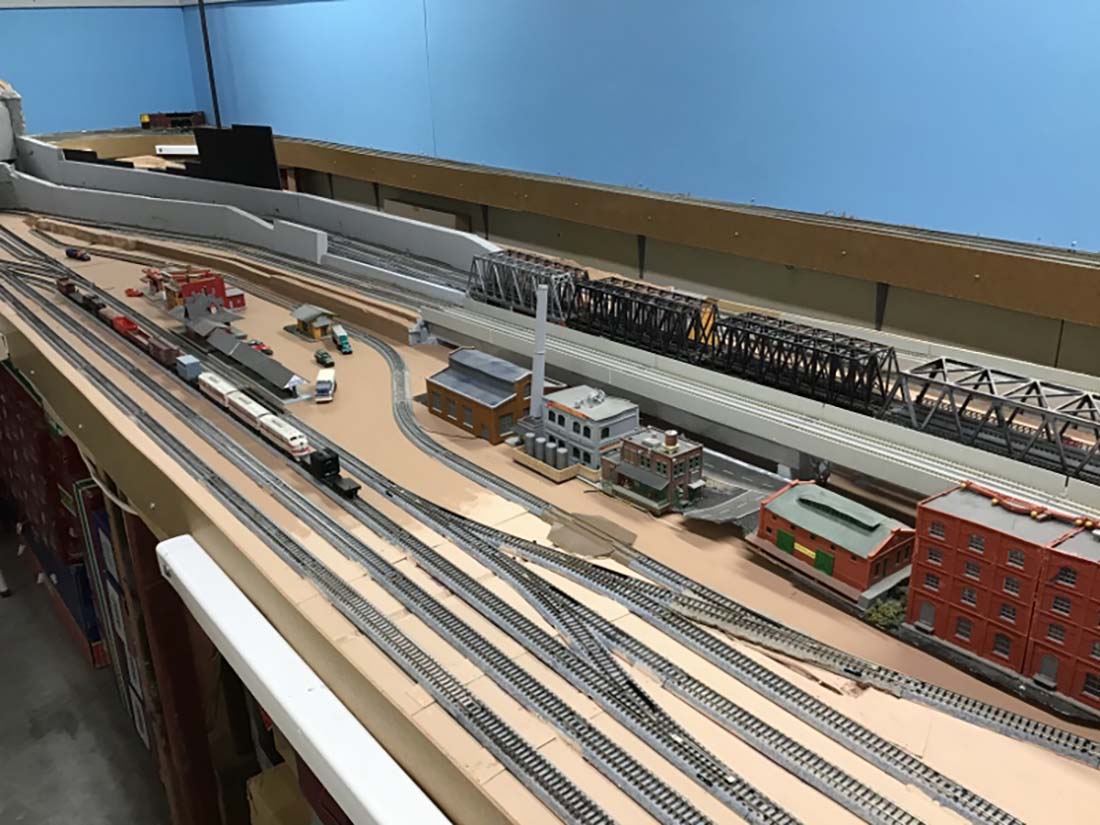
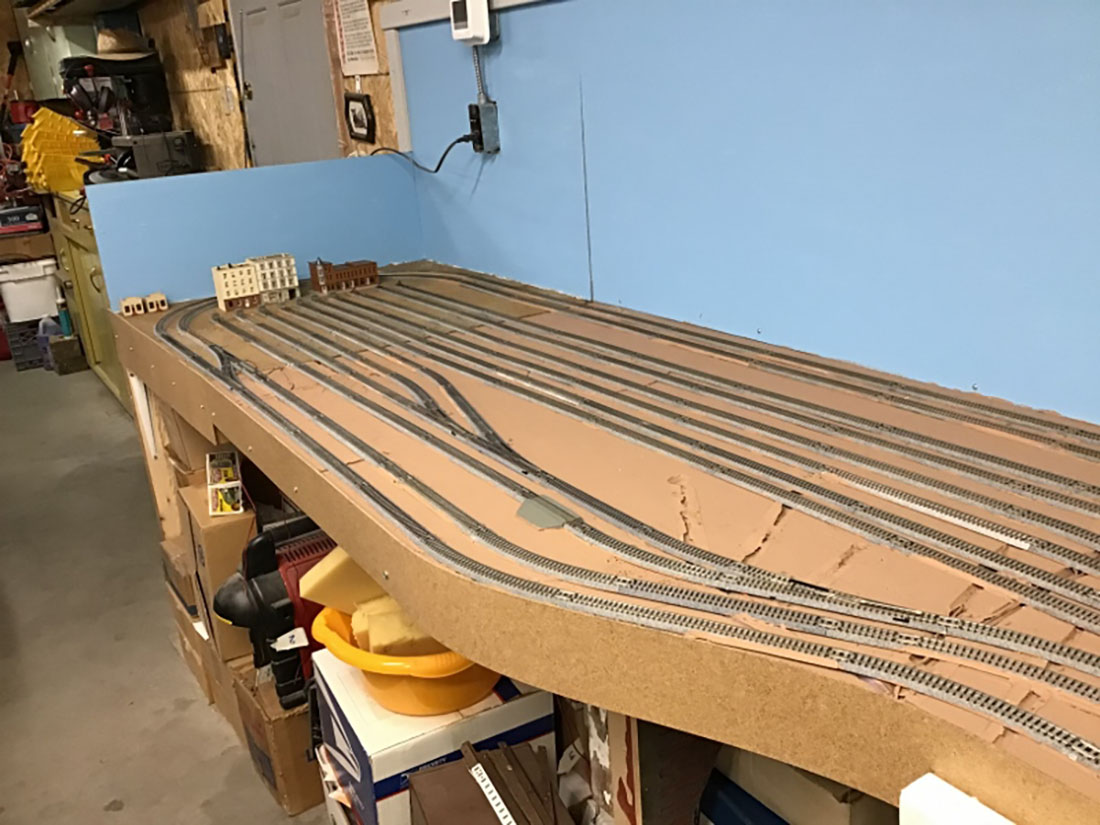
Obviously I have tons of work ahead of me to gain realism.
I am happy that all track is now operational and without derailments and dead electrical spots.
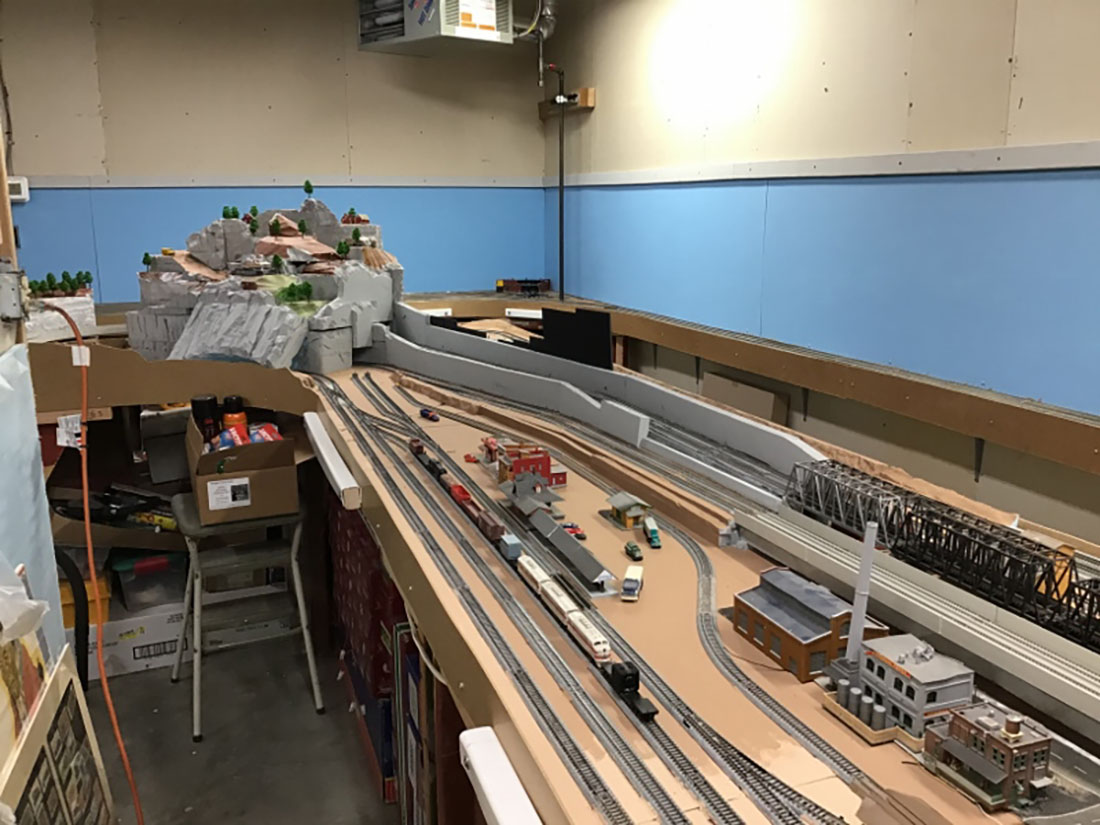
All backdrop panels are up and painted a basic blue for now.
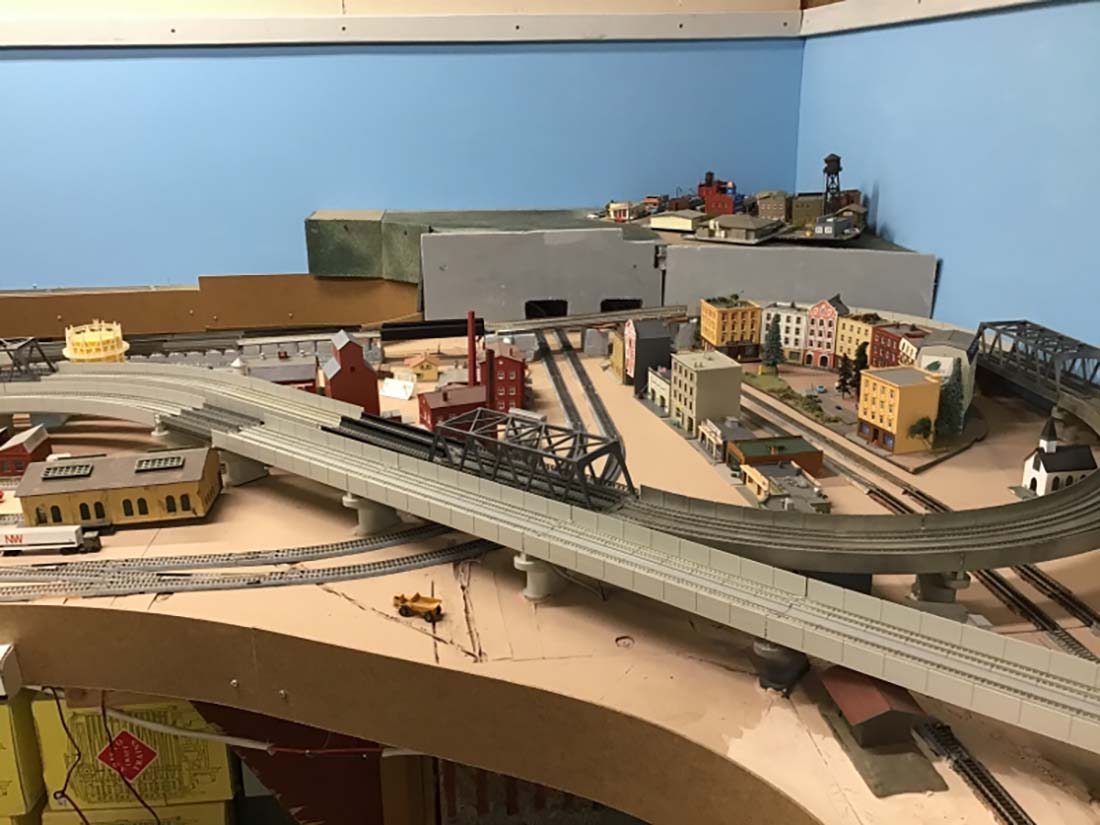
I like the way our famous Dave used trim for his backdrops, so I trimmed the backdrops and painted them gray.
All styrofoam bases have a coat of paint now. Of course there are a few sneaky spots I missed but they will get covered.
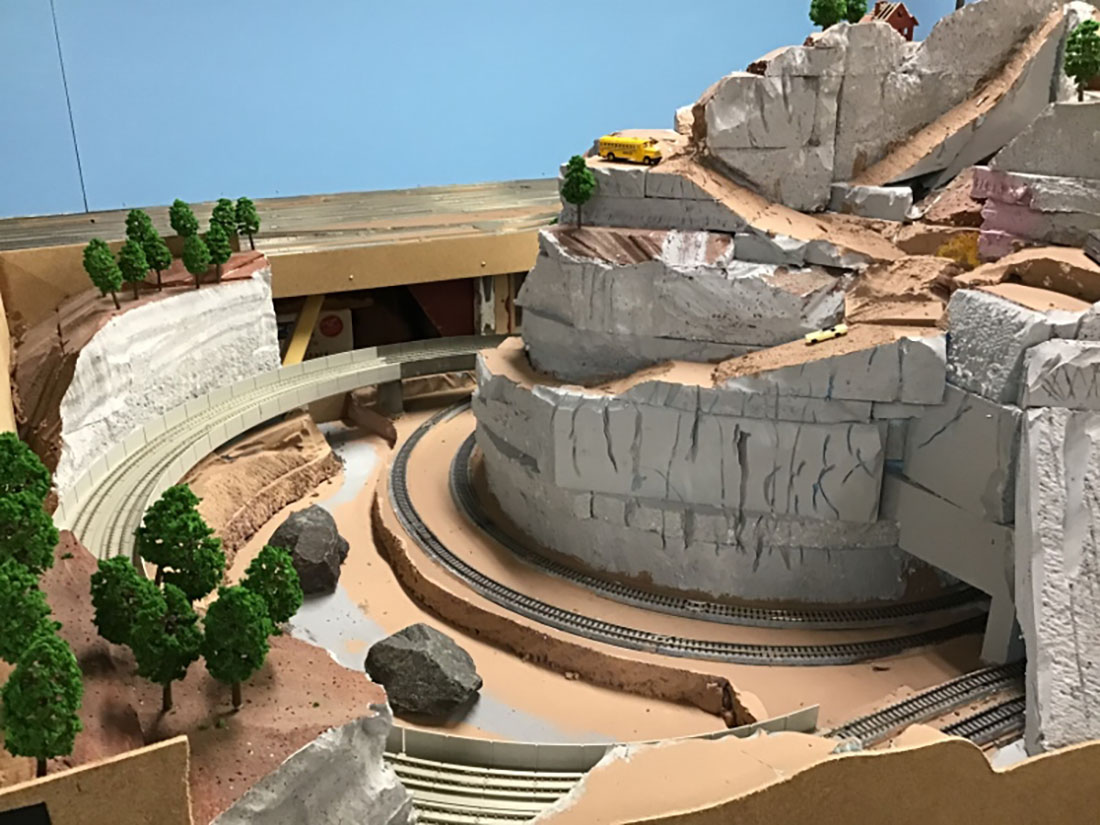
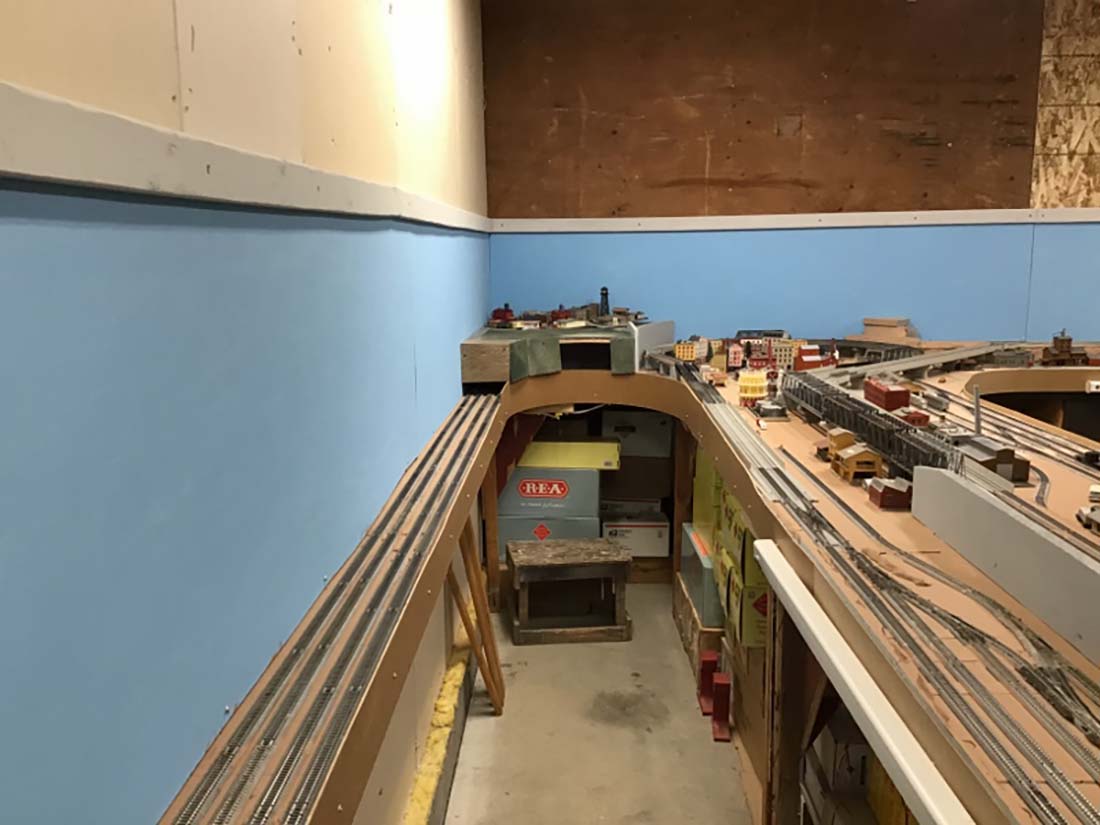
Also carved a steep backroad going up the mountain in the river gorge out of Denver.
You will note a school bus sitting up about 2/3rd of the way up.
With the aid of a couple heavy 4 wheel drive vehicles, the bus was helped up to that vista point. The bus driver got cold feet and would not drive it back down, it will have to be air lifted out of there unless a local driver is found with enough nerve to drive it out.
We’re searching for a short 4 wheel drive school bus now, to take the mountain kids to school. My 6 year old grandson likes it, he also planted pine trees on the mountain, he put good thought into where to place them.
My grandson is helping me plan out where roads need to go now. So much to do, it is a joy to have him help Papa.
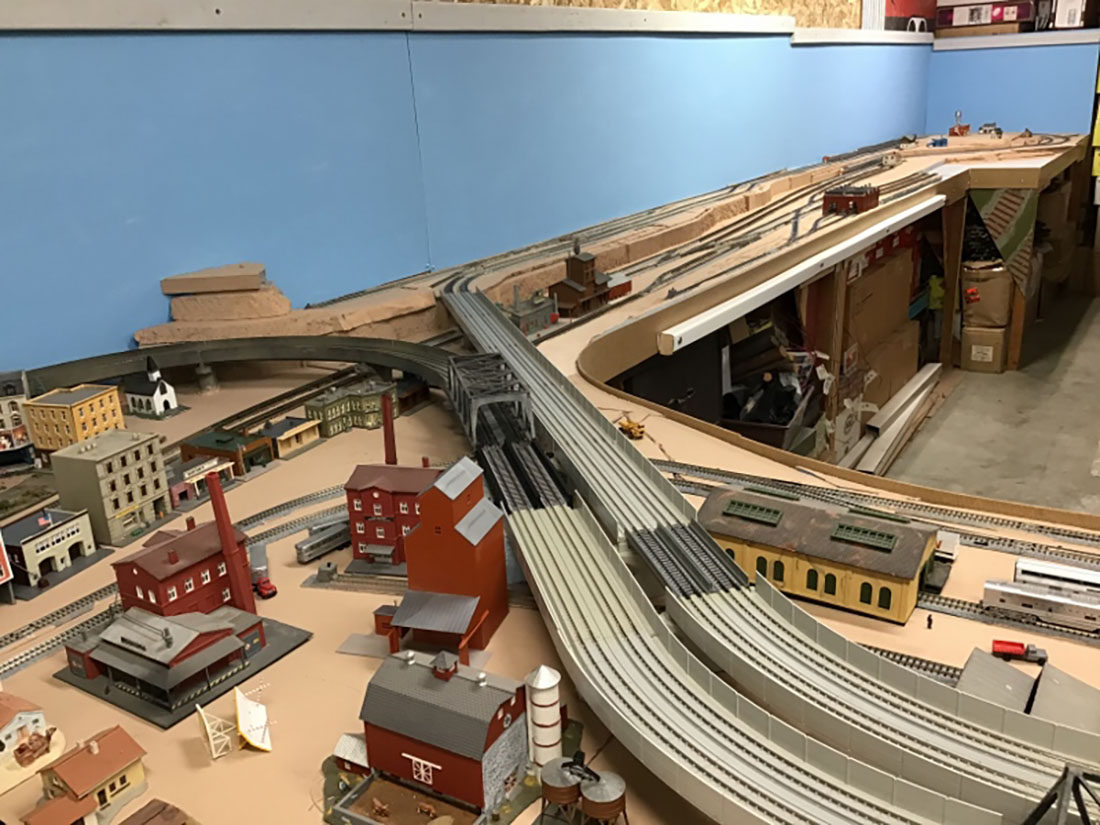
Closeup of Oakland area
Looking at West end of Denver
Looking down on Denver Colorado
Another look at Denver
River gorge out of Denver
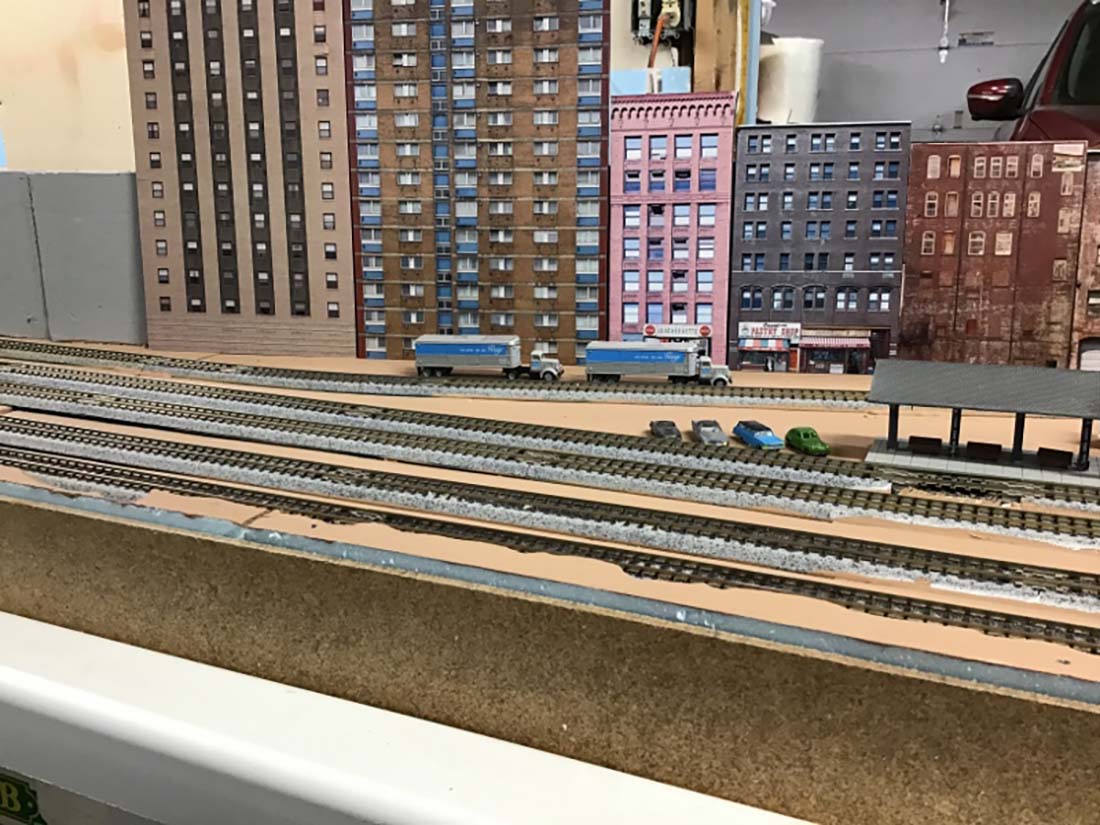
Looking at Salt Lake City
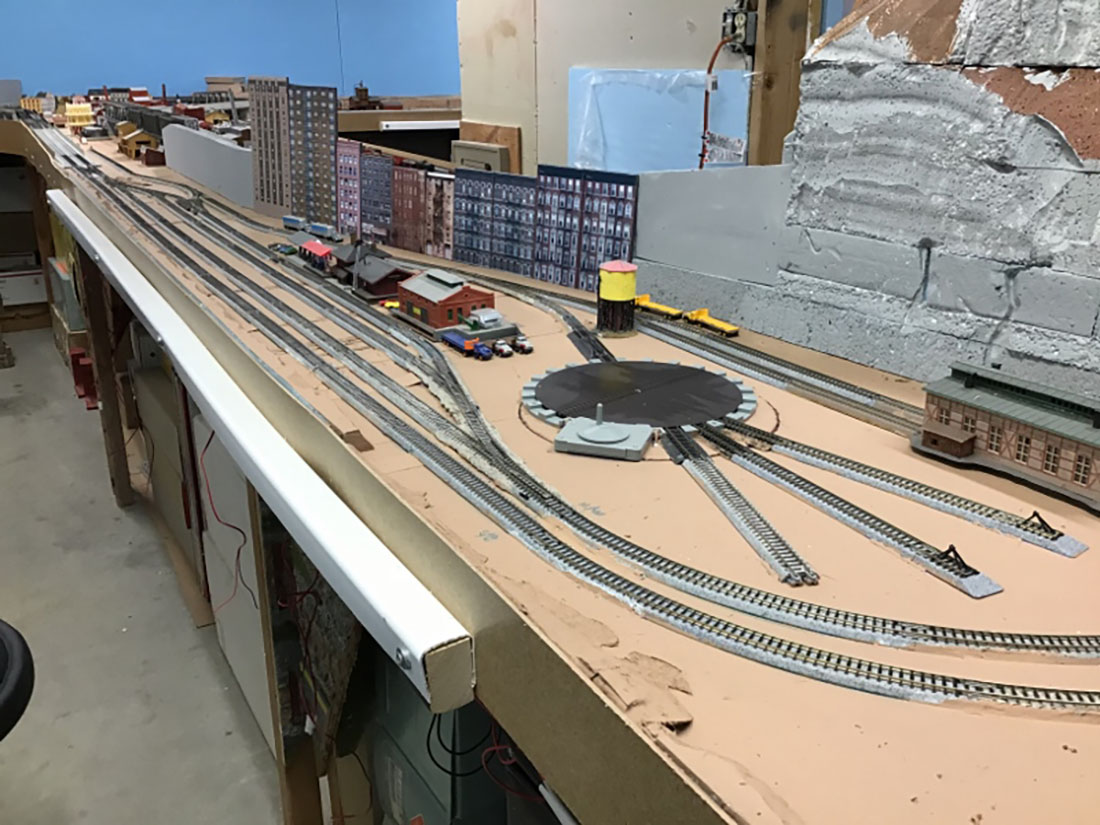
Looking at Chicago
Looking toward mountains from Chicago area
Looking toward Oakland area from West of Denver area
Dick”
A big thanks to Dick for sharing his N scale Zephyr layout – you all know how much I enjoy an update.
That’s all for this time. Please do keep ’em coming though.
And if you want to make today the day you start on your very own layout, the Beginner’s Guide is here.