N scale model train scenery

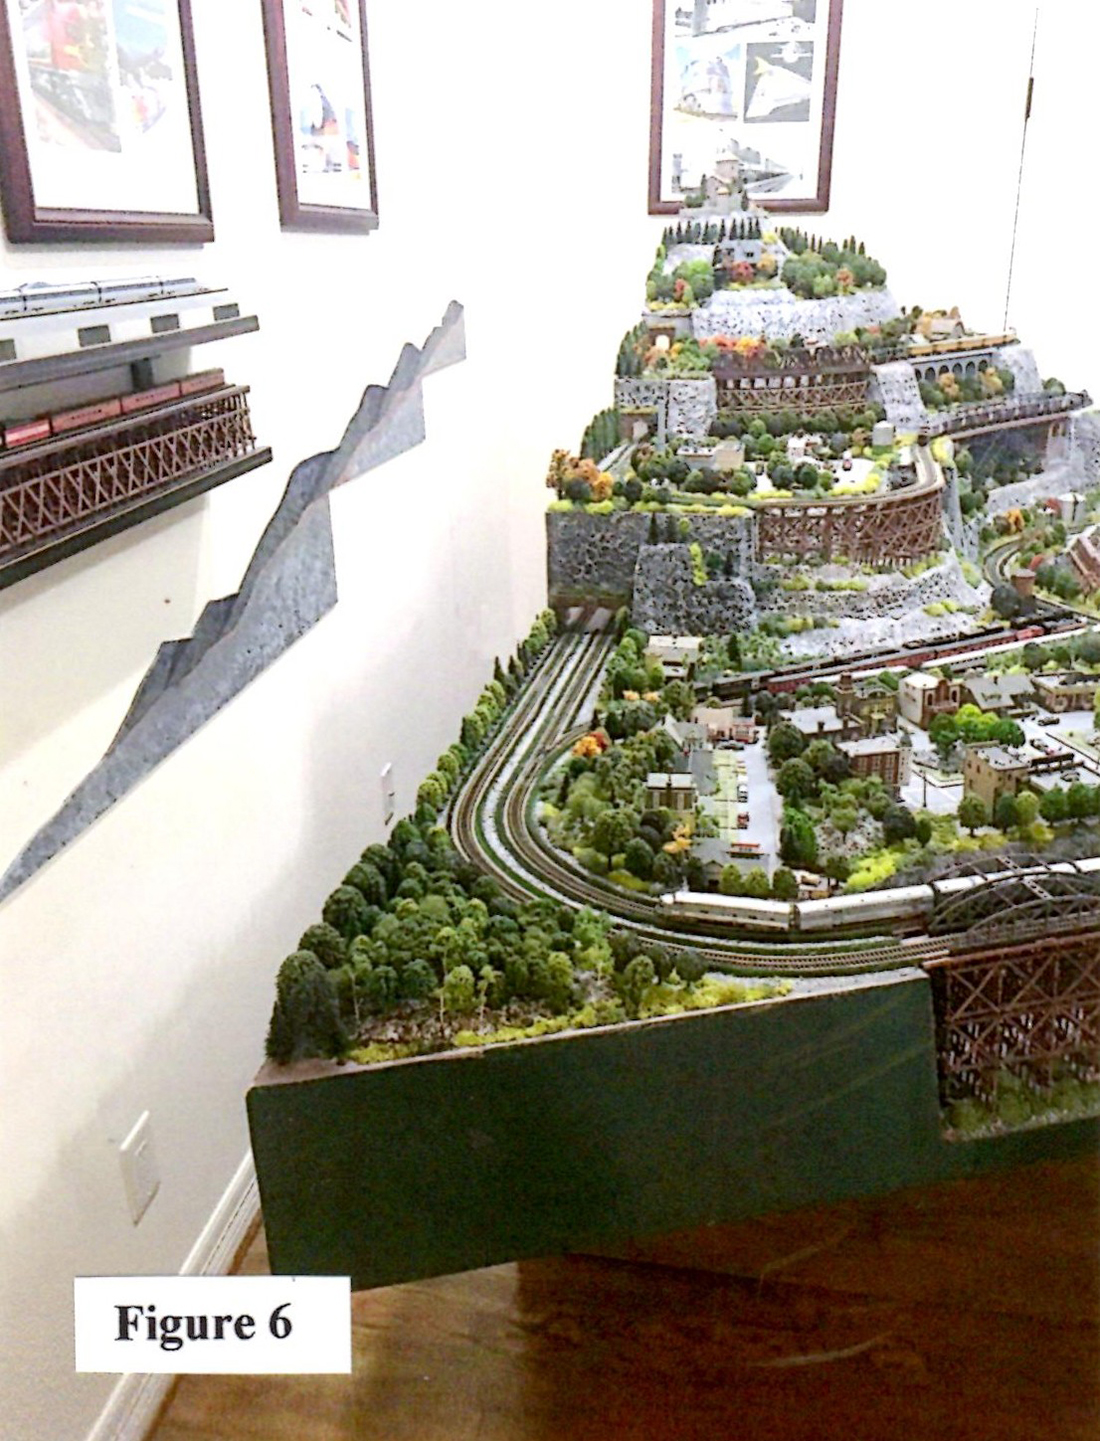
The talented Bill has been back in touch, with his N scale model train scenery.

You all know how much I like an update – and Bill never disappoints.

(His last post is here if you want to get up to speed.)

“Good Day to you Al,

Every morning I continue to check my personal email first thing to see the great posts submitted by fellow modelers that you share with us.

I have not missed a single day since discovering your site now almost three years back.

I took some vacation recently and I spent a good portion of the time in the garage.

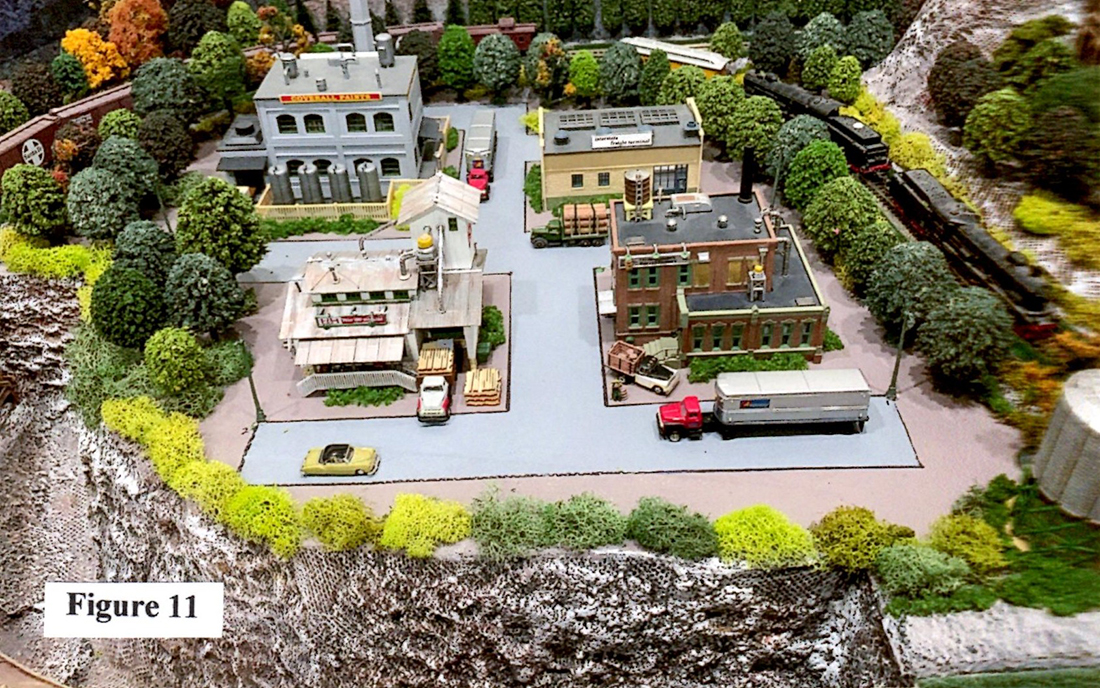
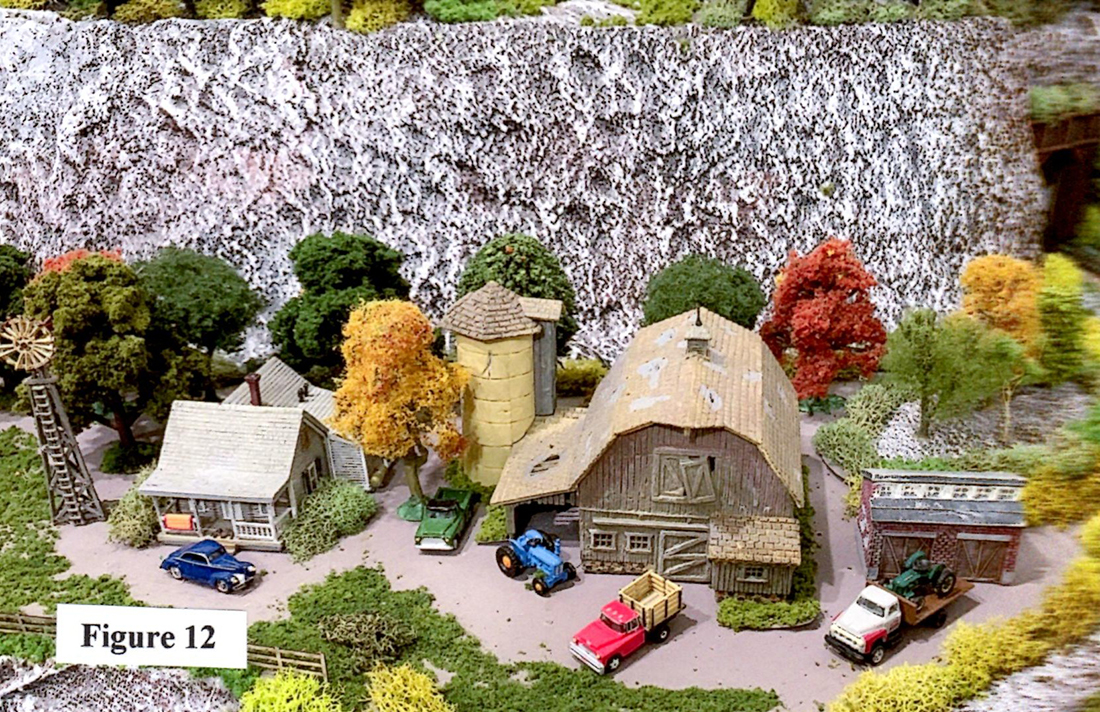
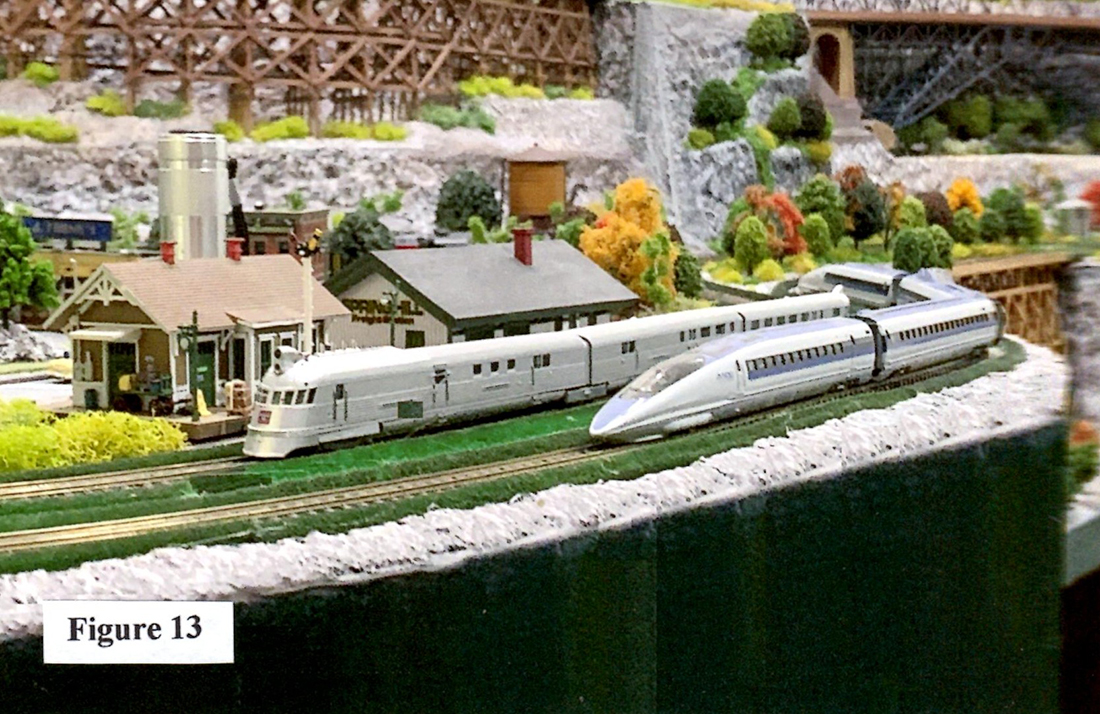
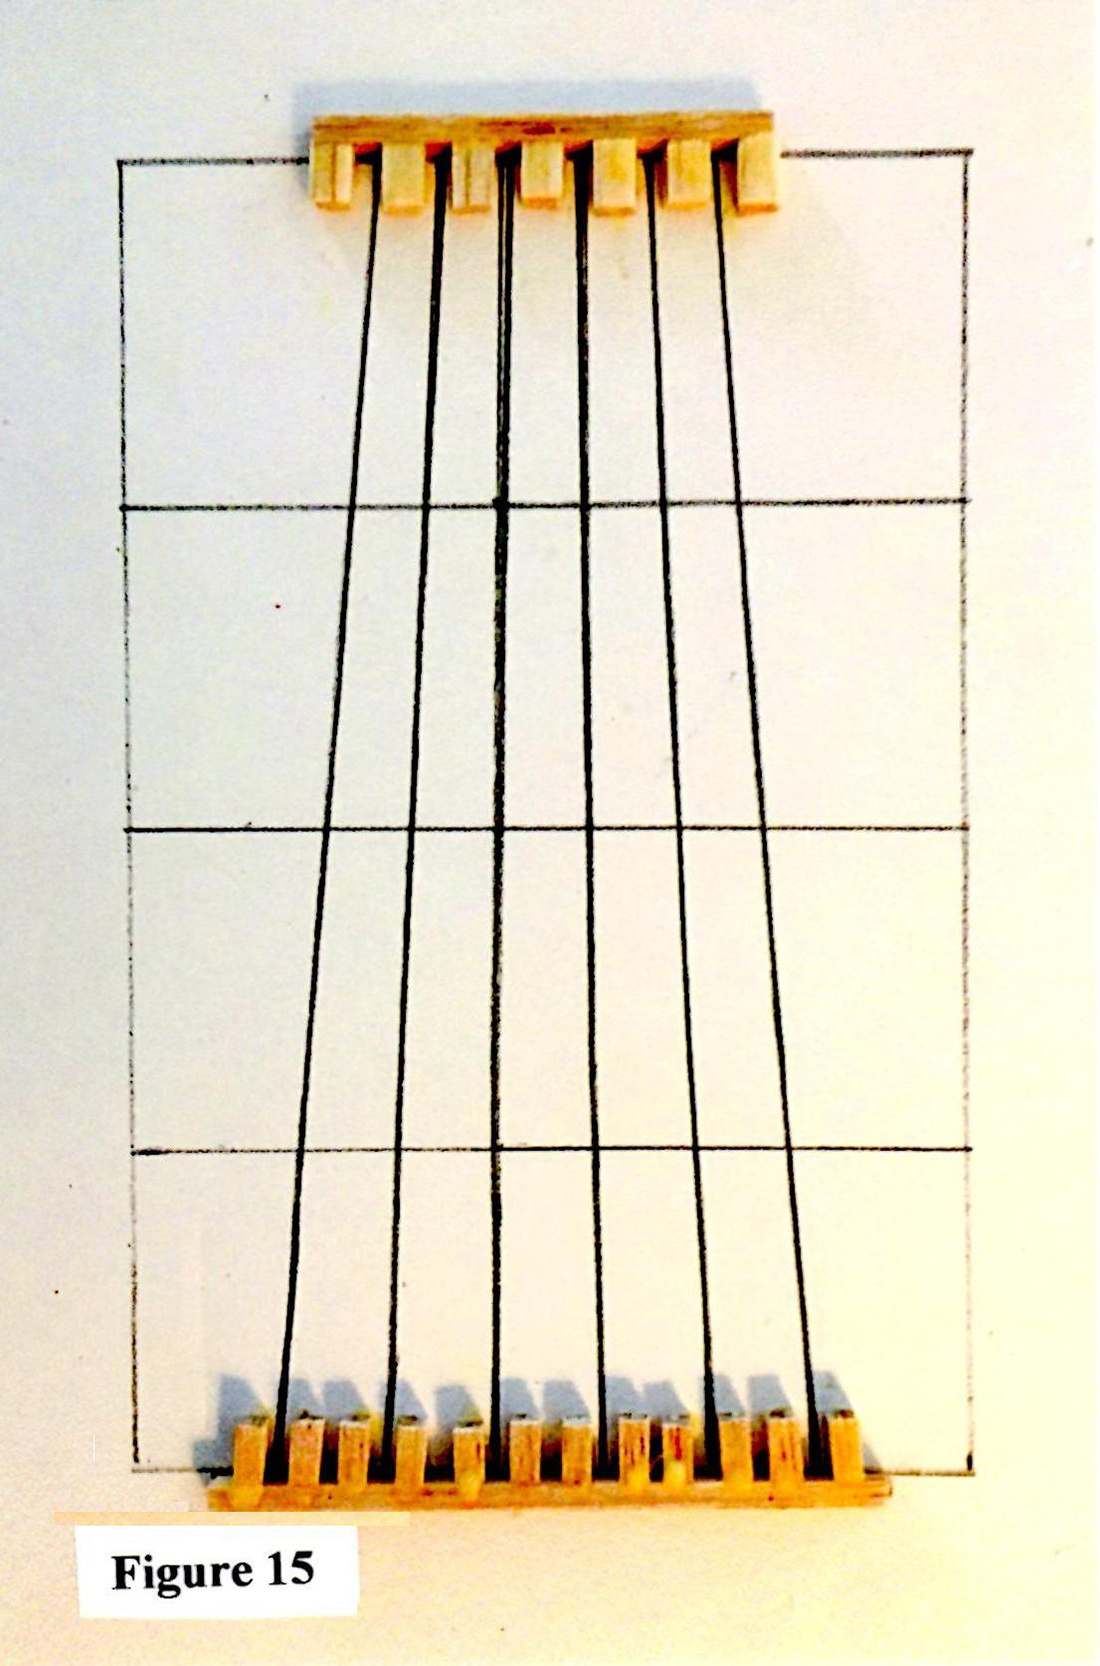
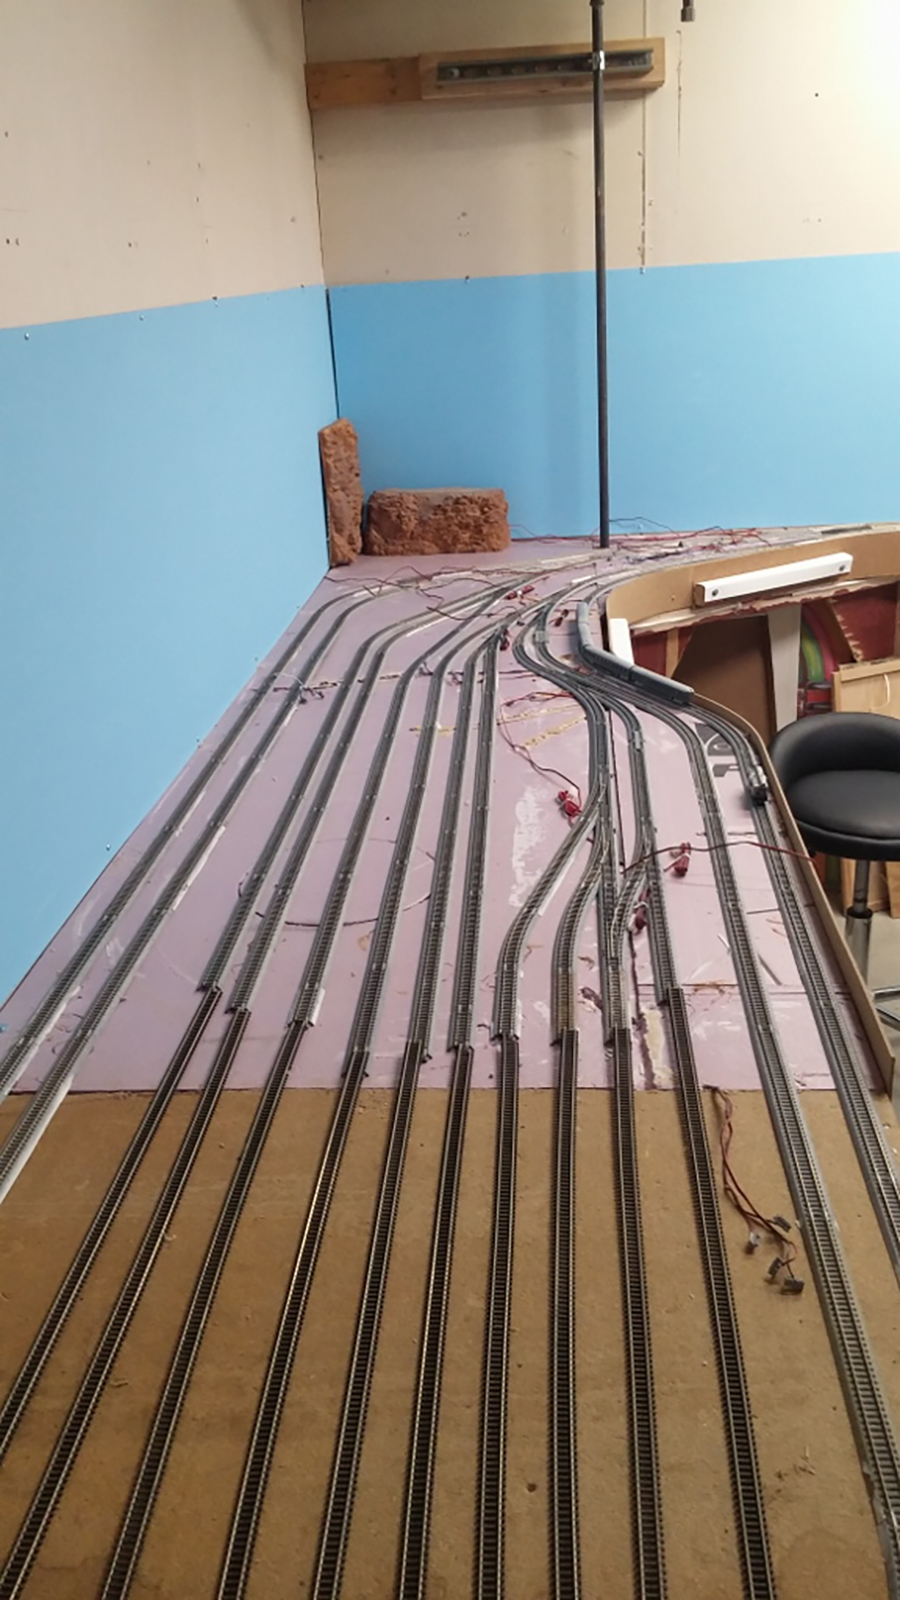
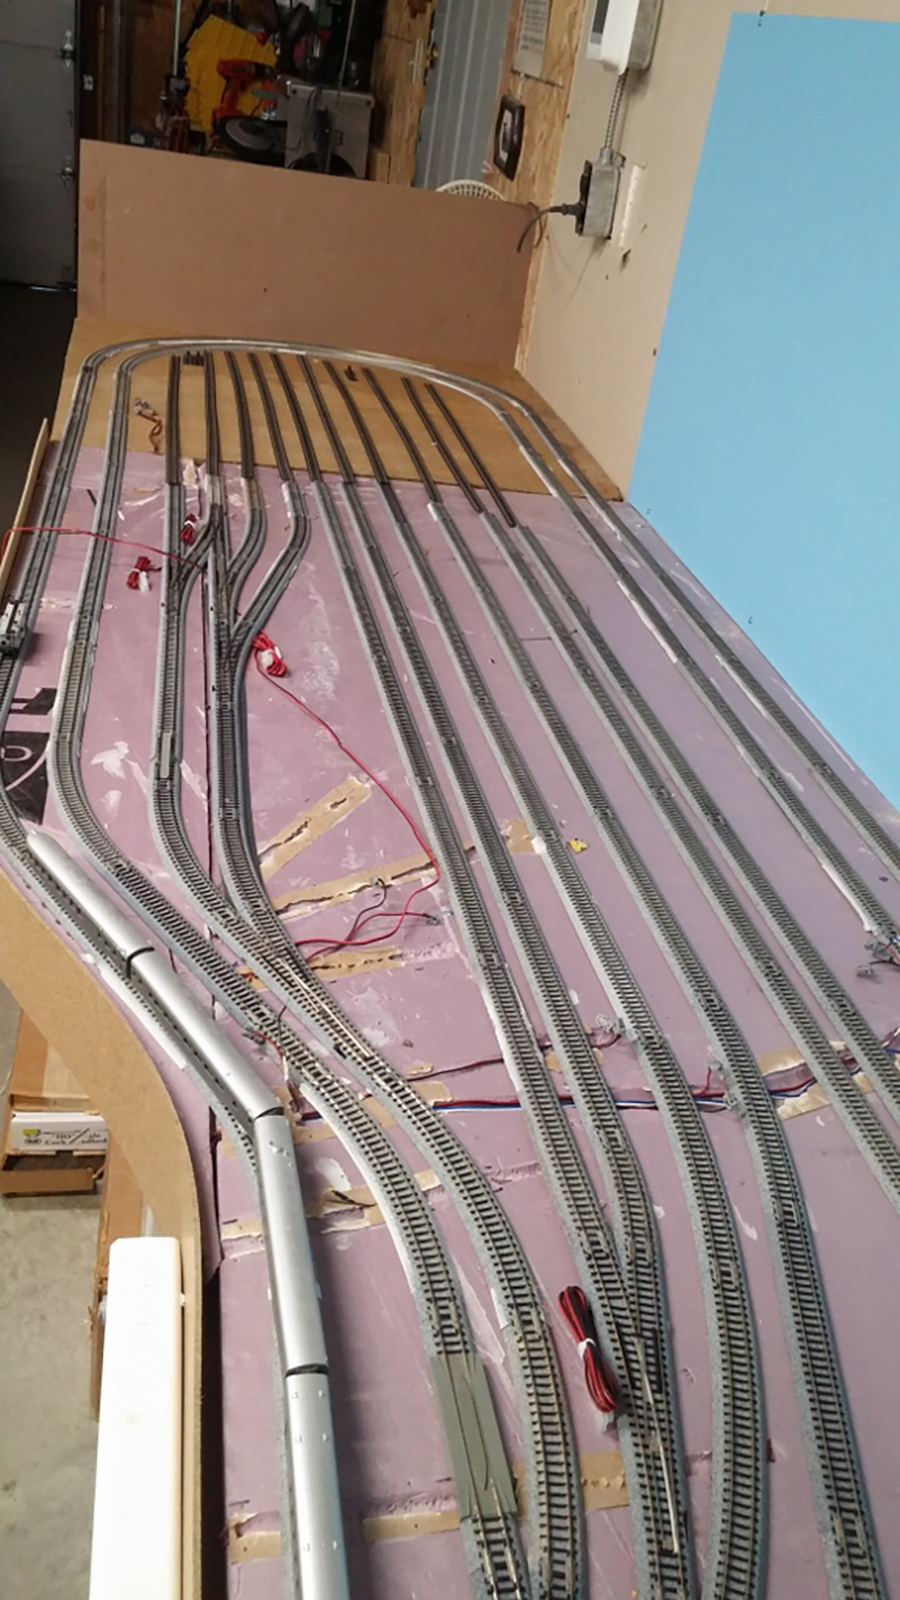
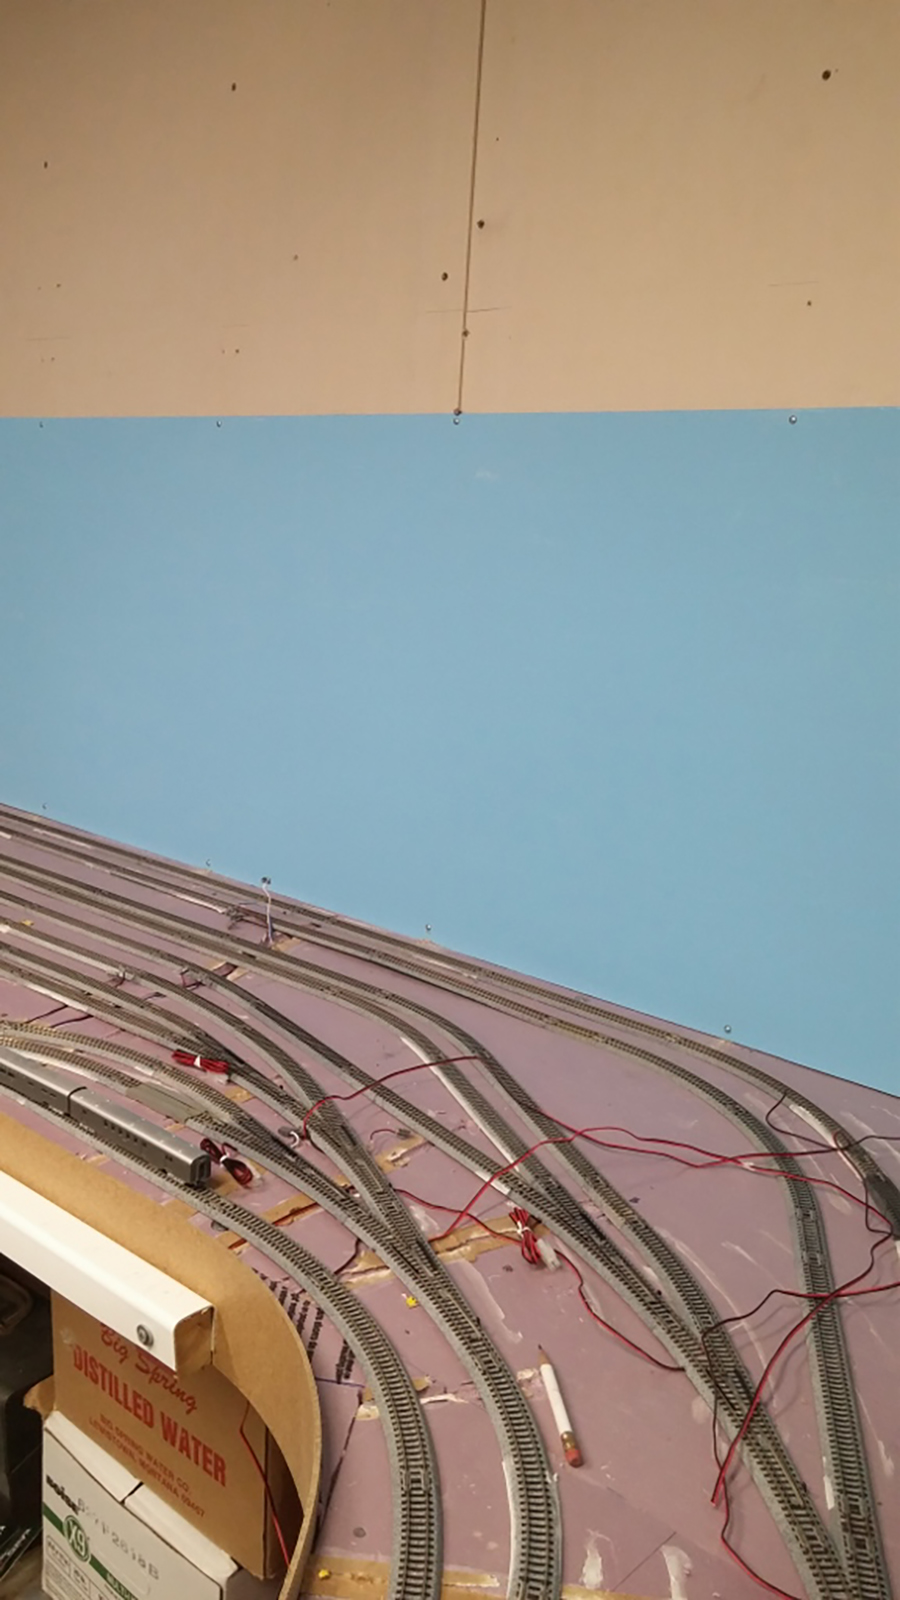
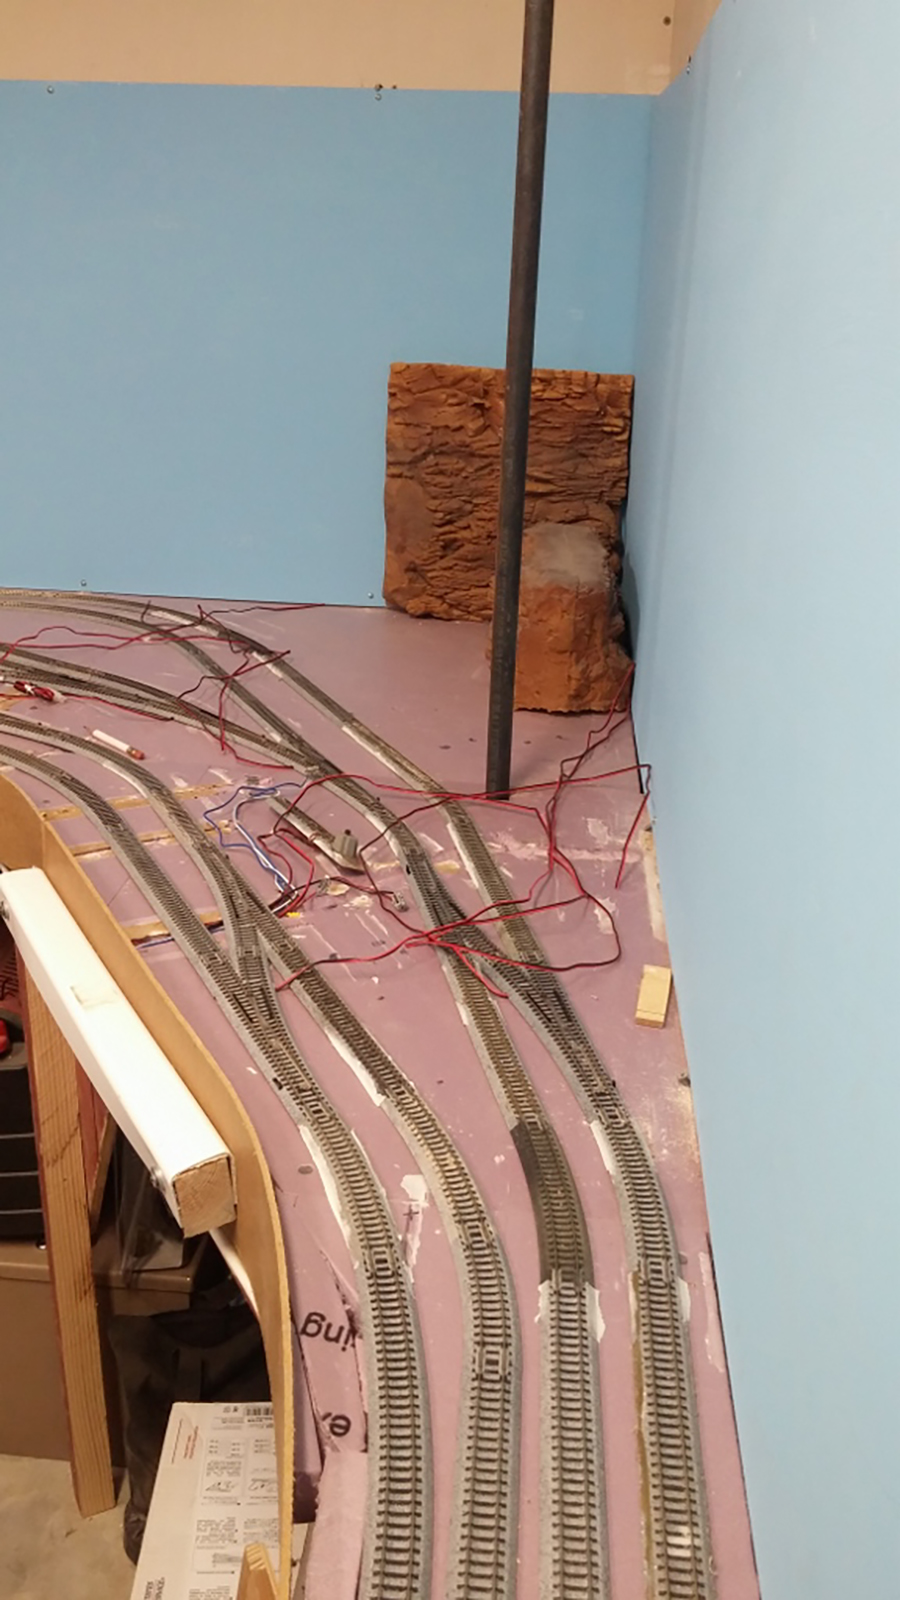
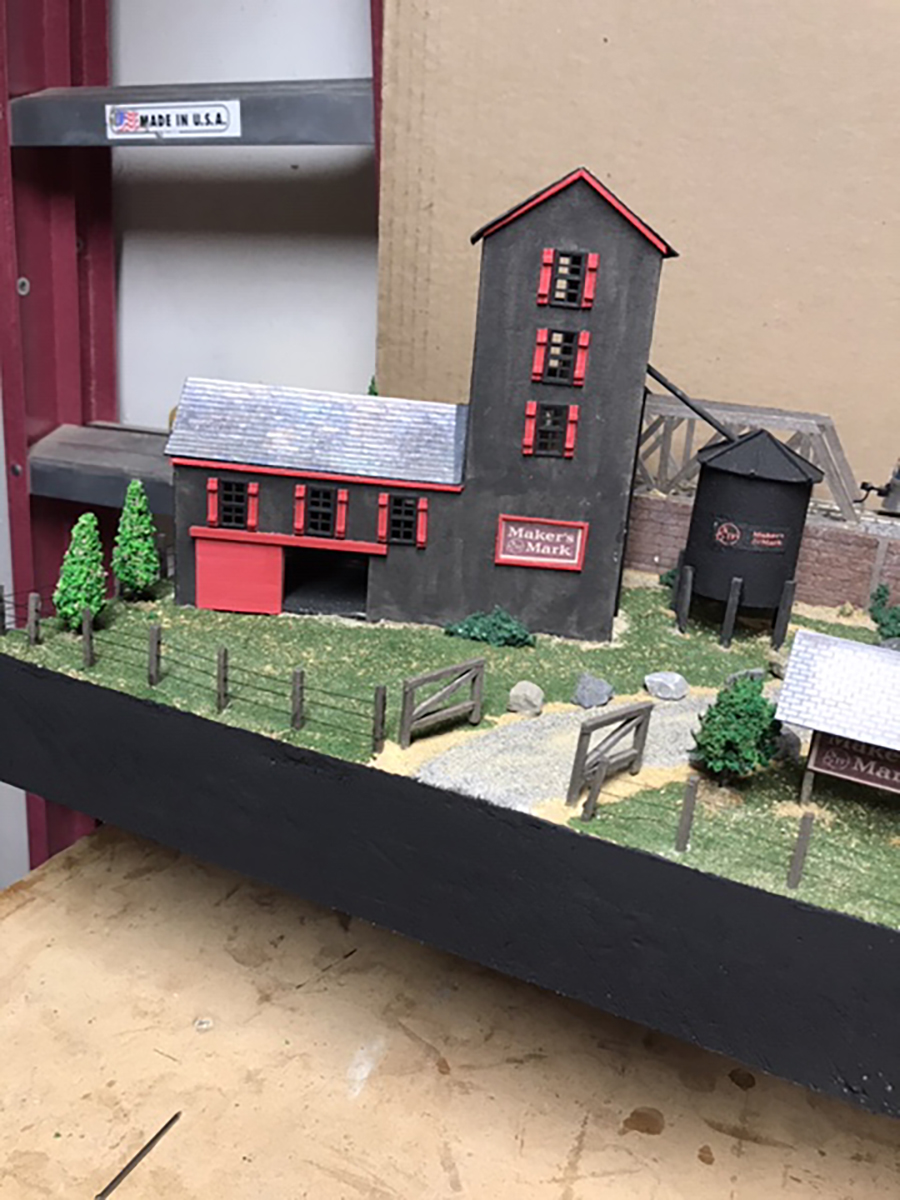
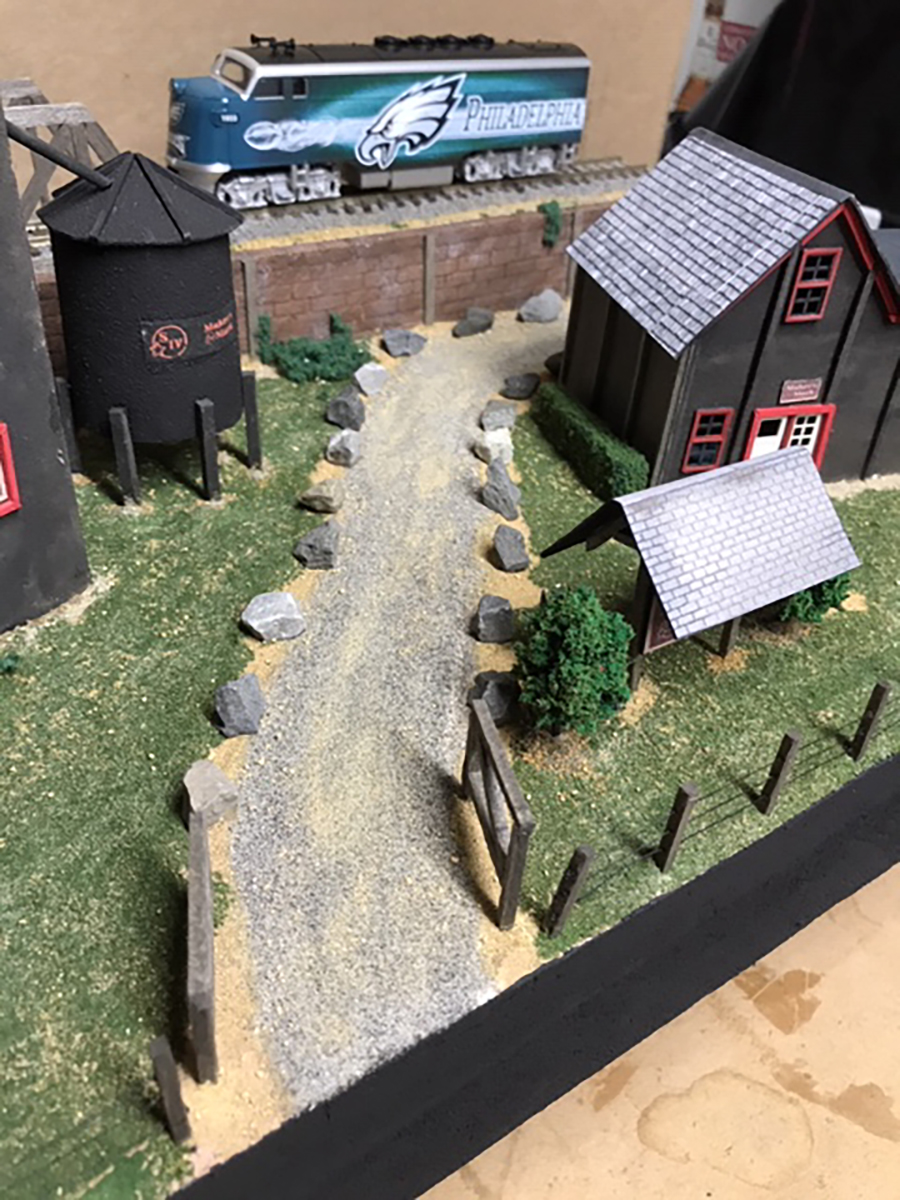
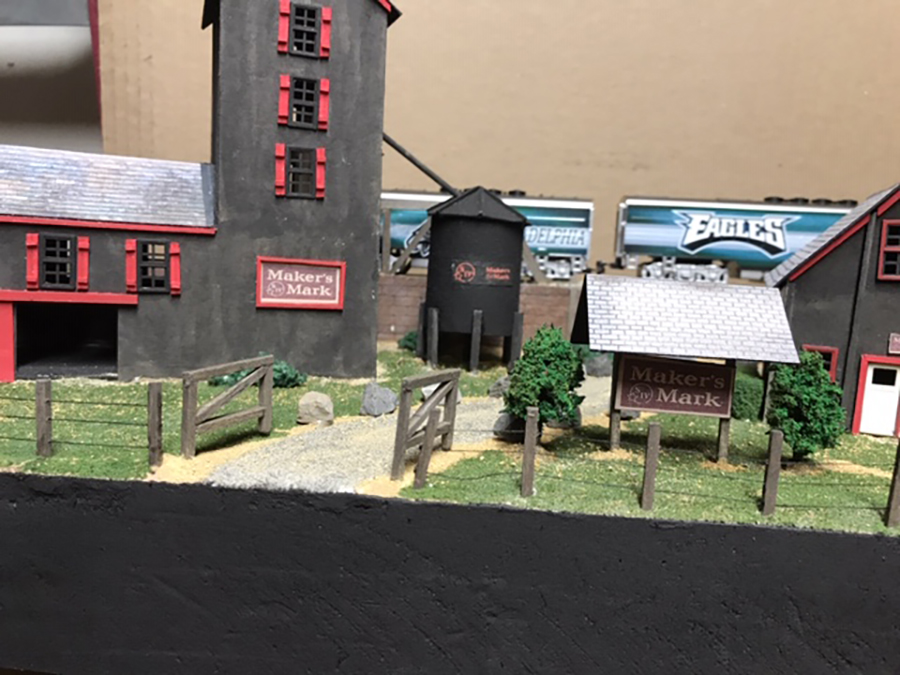
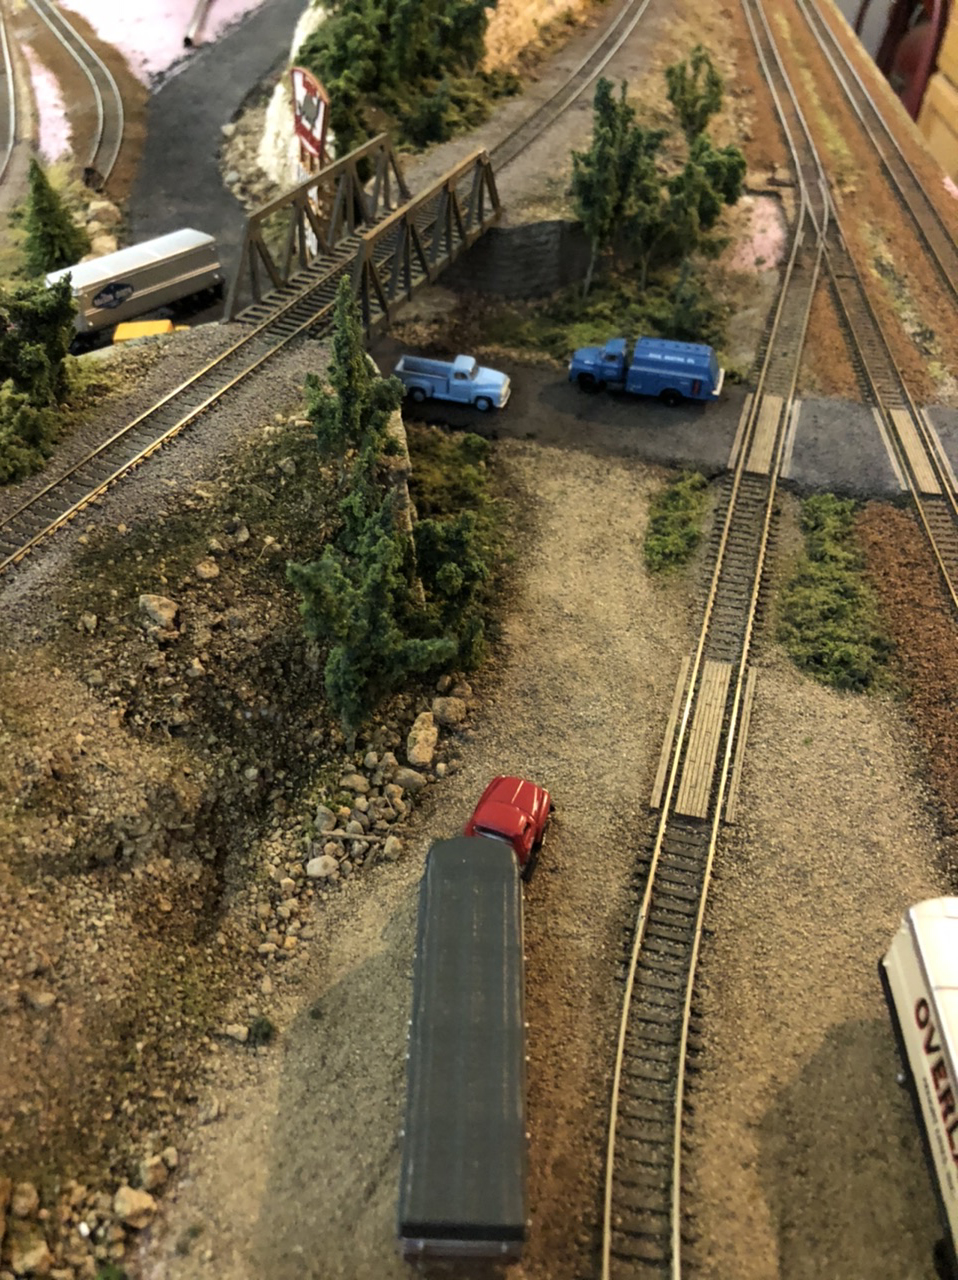
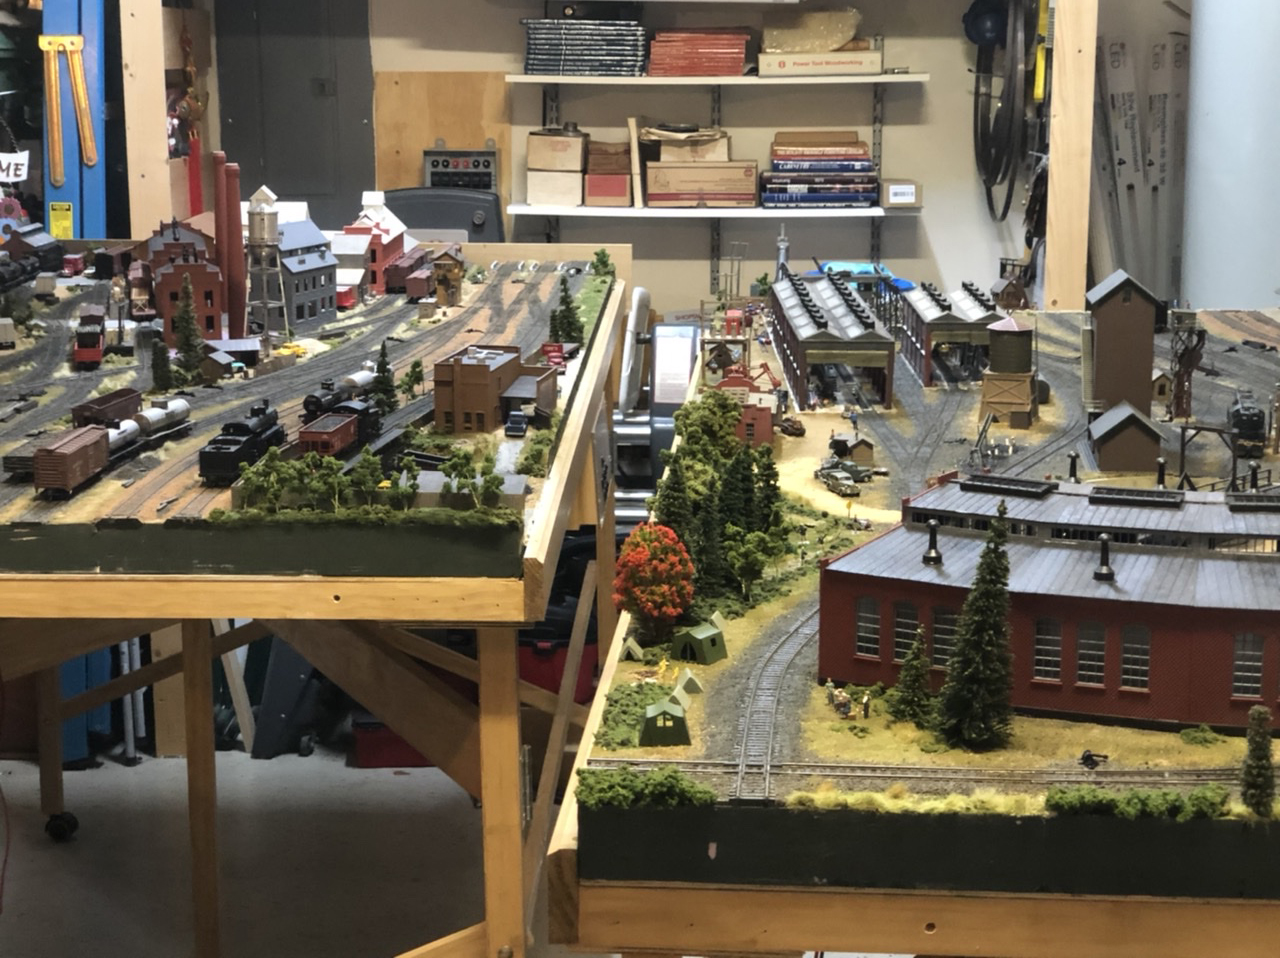
Most time has been spent on the N Scale layout doing more scenery including adding in roads and details.

One quick tip to share is to use craft pins for posts in N Scale. I cut the tops off and leave about a one inch long pin.

About half of that I’ll paint white or rust with enamel paint.

Let it dry overnight then use a slightly thicker pin to crest a pilot hole to insert the painted pin. They are perfect for use in n scale.

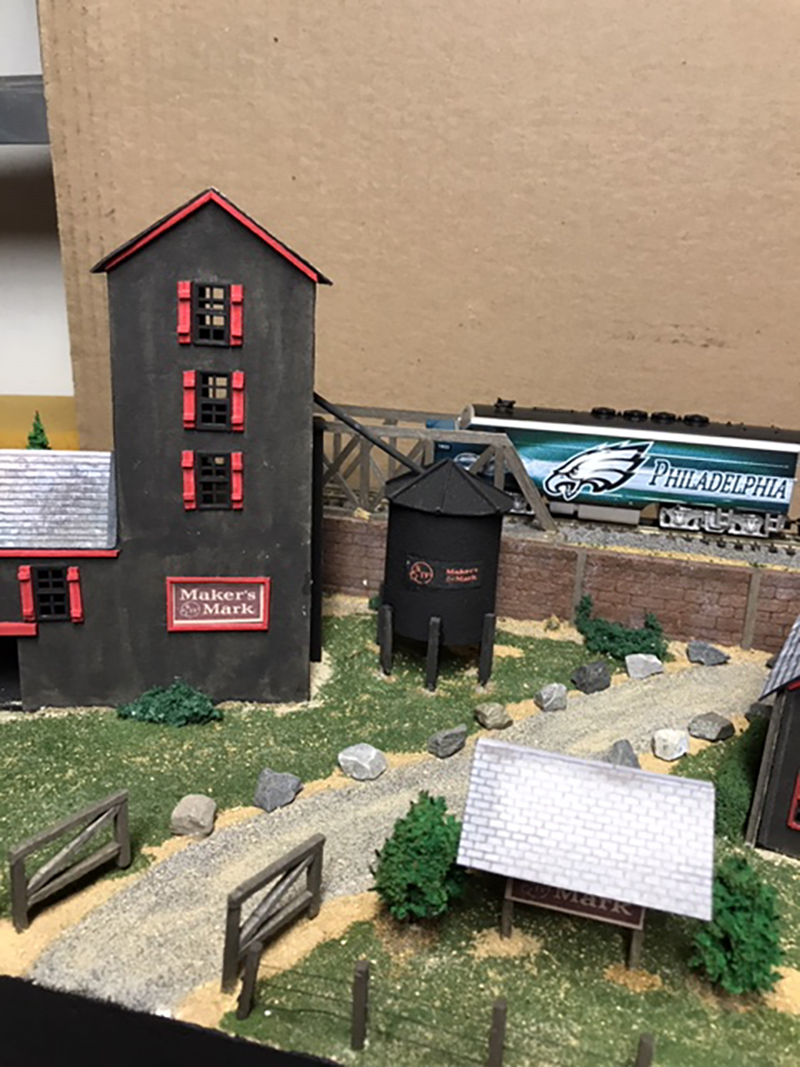
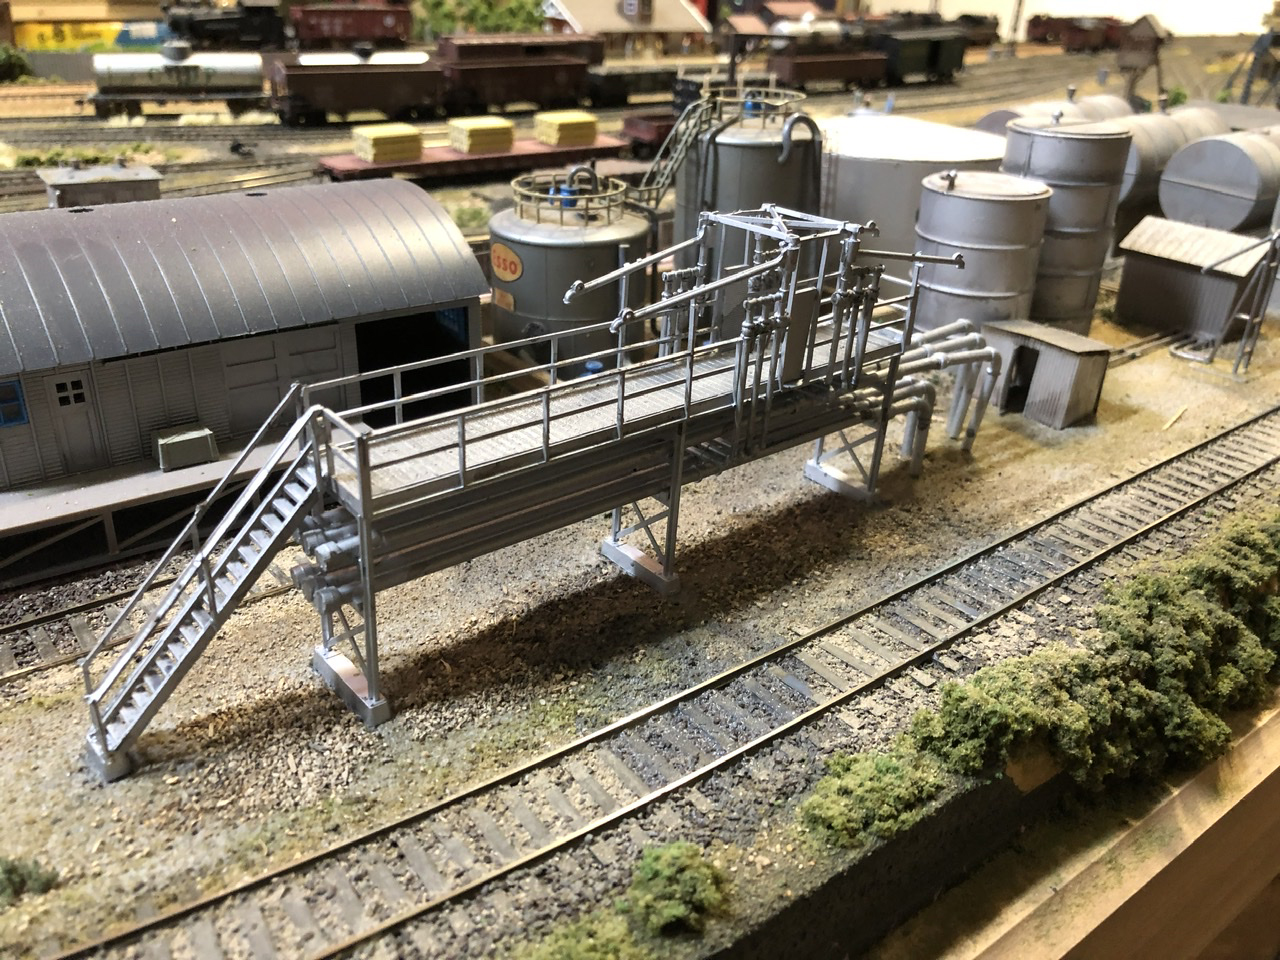
I also spent time working on my HO Scale switching layout and finally finished the fuel depot and got rid of the pink foam board from that area of the layout.

I’ve attached a couple of photos. One shows the fuel depot now and the other my n scale.

I’ve also attached a video showing the new scale and scenery and road construction and the other work on the HO scale layout.

I’ve not been traveling for work so I’ve had plenty of time to spend working on the trains after work and on the weekends.

Cheers and be safe!

Bill in Virginia”

N scale model train scenery

N scale model train scenery

N scale model train scenery


And now onto Geoff:

“Hi Al,

Here are inexpensive resources I like to use.

I am near Toronto, and model North American Railways. So I am passing on a few tips I have used for N Scale model train scenery.

One cheap and cheerful resource for ballasting, that is better kitty litter, is using Brita Water Filters for ballast. When the filter is finished its cycle, allow to dry for a few days to let the water drain out. The contents are a black and a greyish white colour, and is very fine and ideal for N Scale in its many appelations.

The second is my choice of paint for buildings, freight cars, and painting the track. I like to use ‘plastic compatible’ brown coloured automotive primer paint. When applied, it looks awful, then dries very thin. On buildings it will hold water based craft paints, and a water-ink wash for weathering buldings.

N scale track is so disproportionally tall, that I am in the habit and practice of paining track. My choice is to ballast first, and then paint the track. To paint track, let dry and clean the top with a left over piece of cork roadbedding. It wipes off easily, and if in the switch/point blades is cleaned with a Q-tip. A black water-ink wash then makes the whole thing appear more interesting, once scenery is applied the appearance is interesting. I can send photos of examples if need be.

A third tip is using WAHL hairclipper oil applied to the top of the tracks for sustained and clear electrical contact. Use a left over piece of cork to clean…

Like any new technique, experiment on scrap first.

Hope these are helpful

Regards

Geoffrey”


“Al,

as a follow-up to spray painting the ties brown, IF you take a drinking straw and using a sharp knife,
slice the straw length wise (put a slit in the straw) this will slide over the rail and give some protection while spraying the ties.

Cheers,

Glenn”


“Hi Al.

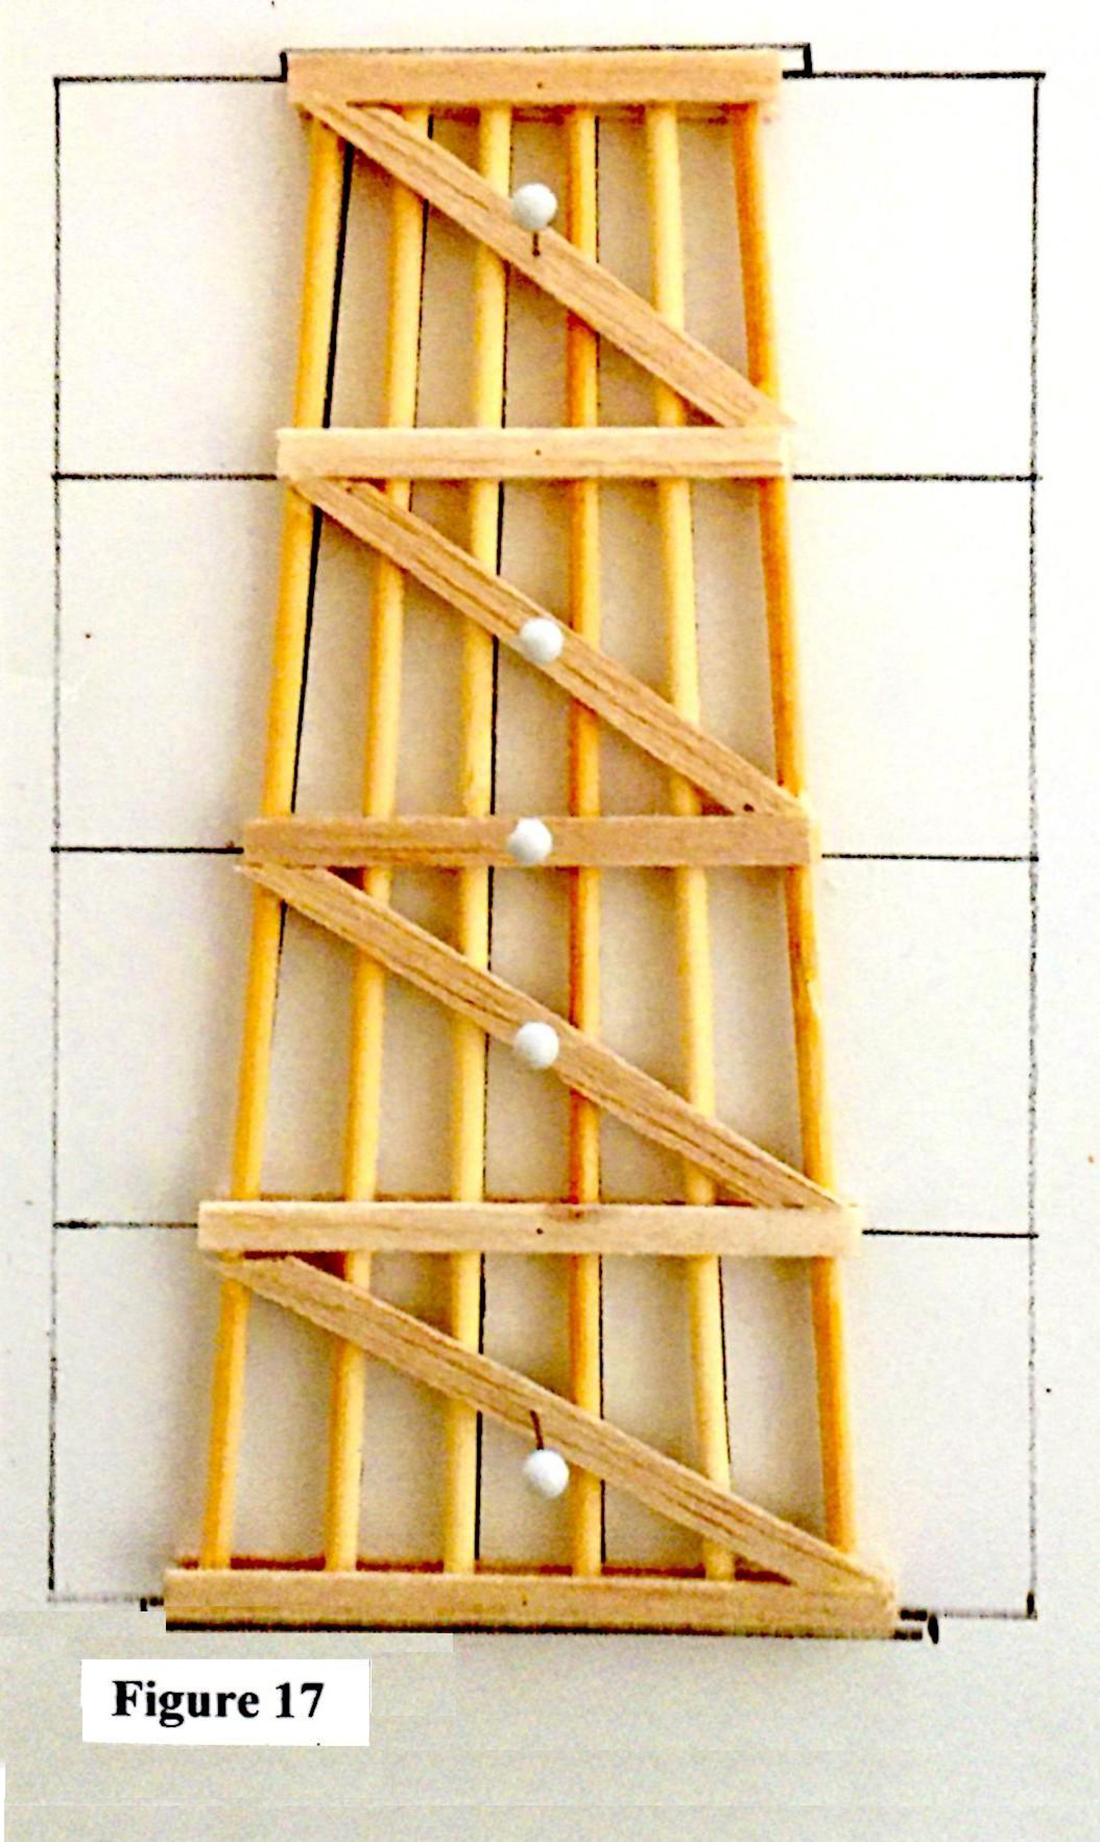
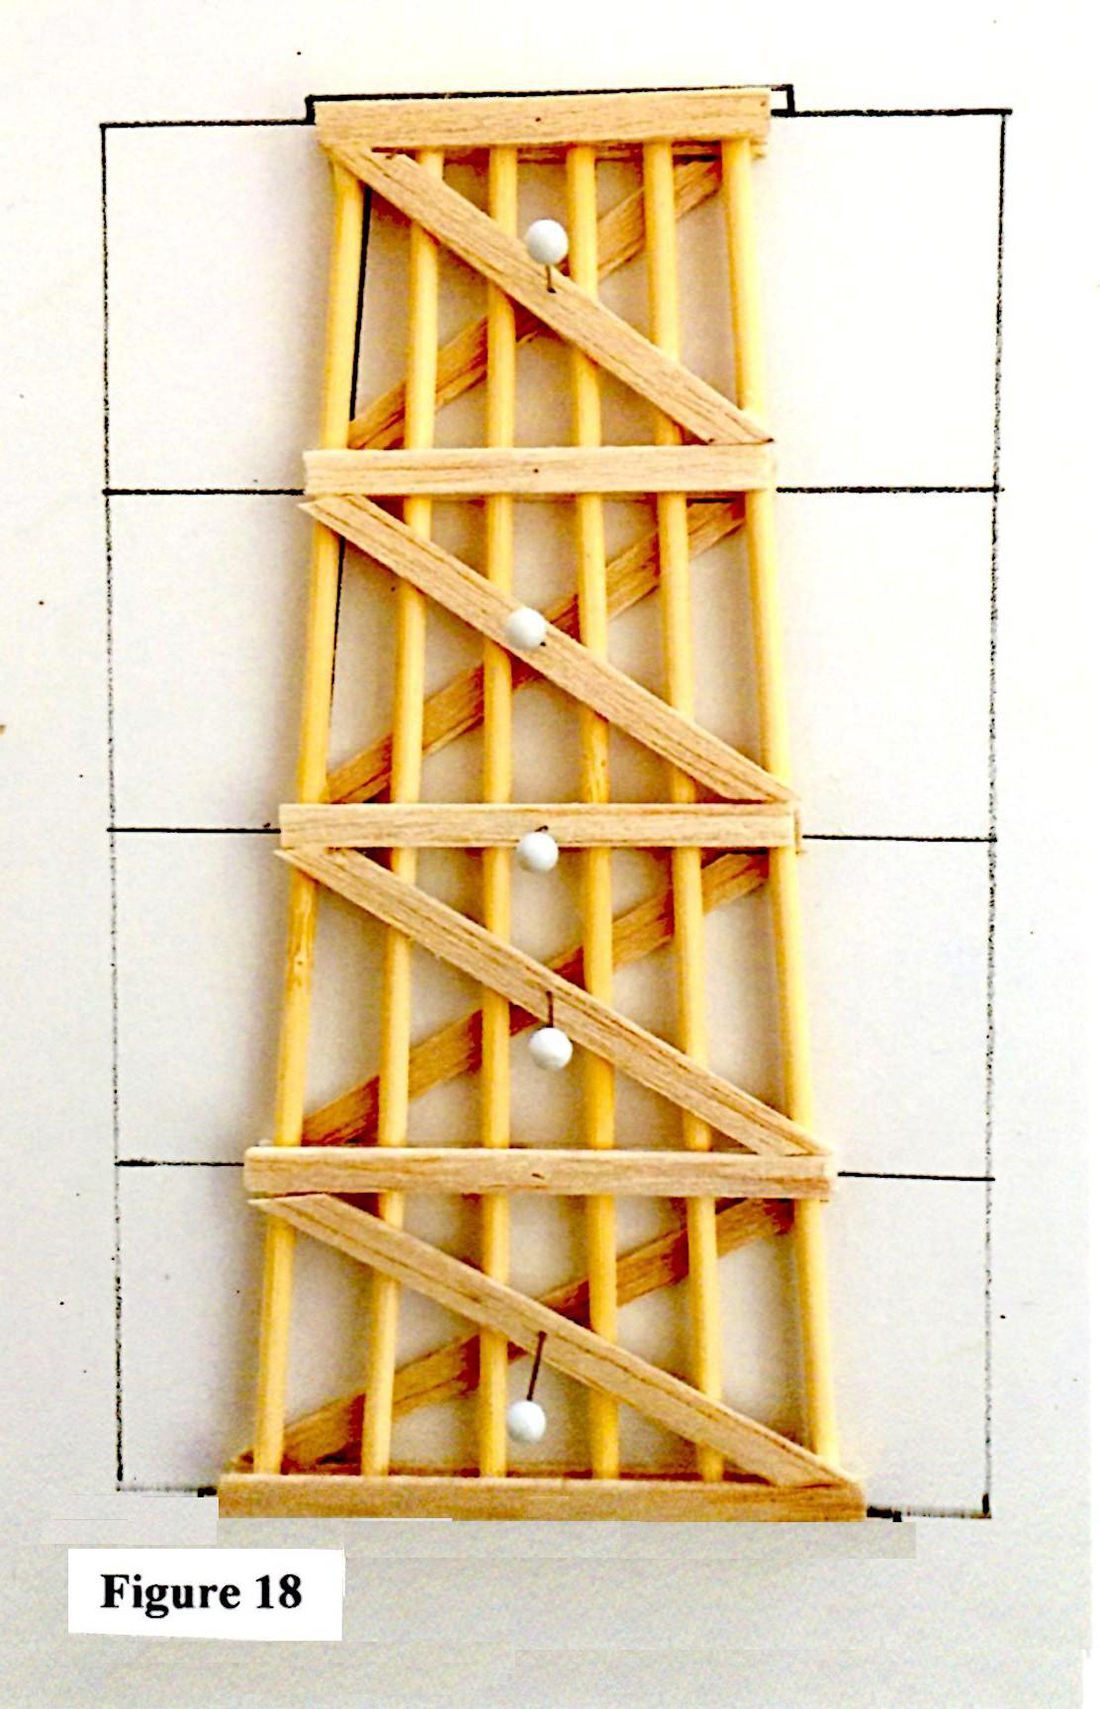
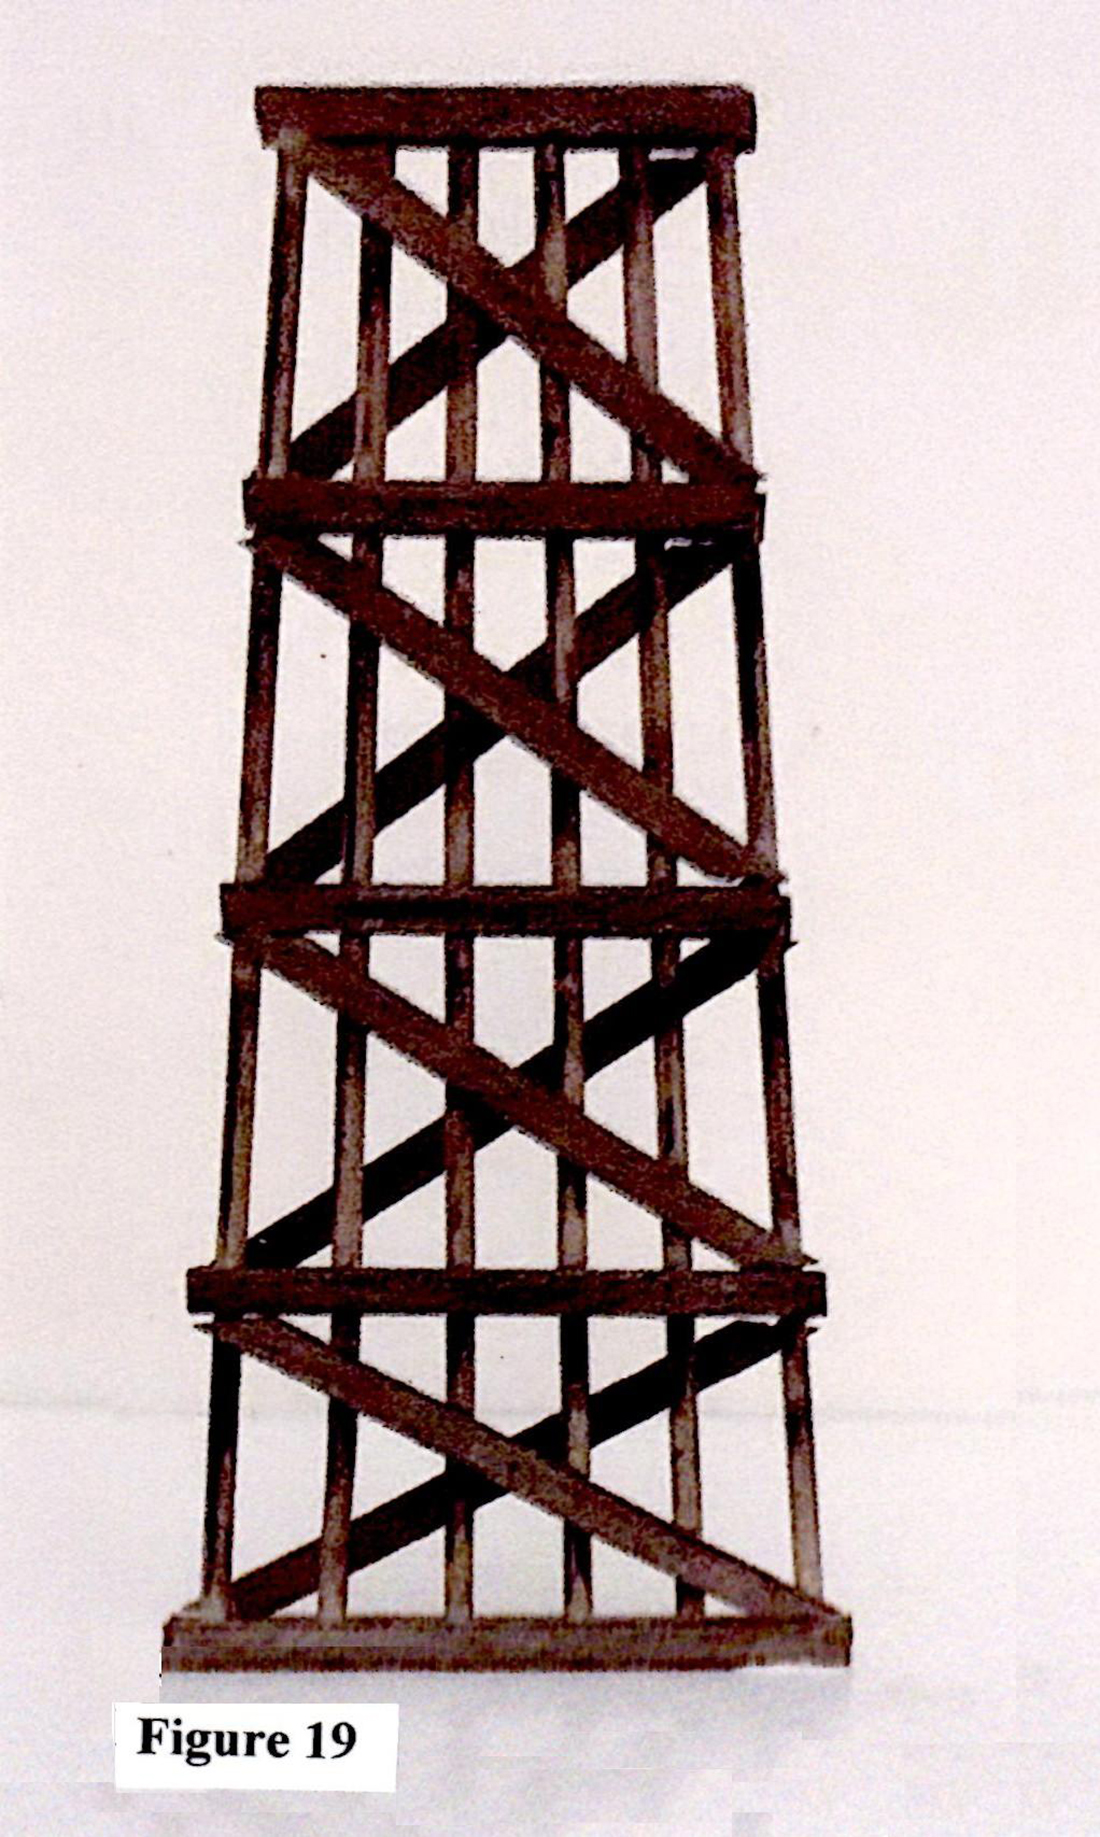
I see a few people are interested in telephone or power poles.

Maybe i can lend a hand on showing how and sort of kit you need. Really simple to do once you cut and set up, most slow and tedius work is the tiny pins you use on the cross members to hold the tiny insulators.

Start with a quarter diameter dowel you find in hardware stores.i cut mine 6 inches because i put 1 inch in my styrofoam base.on the dowel measure from one end, half inch and drill a tiny hole careful.

Take a popsicle stick and cut it into 3 lenght wise strips. Take the best cut piece and measure 2 inches in lenght and cut.

Now find the centre and careful drill a hole. Your going to notch the pole you drilled to fit that cross beam.

Now take a black or white plastic with a metal core electricle twist tie and strip it. Those are going to be cut long anough to carefuly pin it to the side of that popsicle stick in picture instant glue them on. Leave a space but barely when you add the 3 insulators on each pin, they come in diffrent colors.

Where you drilled the post the first time move down to the desired spot you want to plant your scrap radio compasitor acting as a trasformer.leave the pins on the compasitor when cut out of radio.look in radio for a cooper wound resister as seen in picture.now move down to desired spot for transformer and mark spot.

Now take some more thin metal scrap from radio and cut a tiny metal bracket on post. Sorry for picture. That metal bracket will hold your transformer.instant glue trasnformer to braket and instant glue bracket to notch post.the metal silver wire you see in photo is thin flexable weilding wire to make tiny fuse brakckets you see in other photo.

To make fuse take sewing needle carefuly wind cooper wire you salvaged to tiny coiles as seen in photo.you will have to trim them as you go.you will see in photo a piece of food tin.cut into tiny tiny strips and use a finger to even out.those will act as cross beam member supports and also bracket for fuse as seen in photo.after happy with how it is install cross beam with insulators in top notched post and use a sewing pin as a bolt and white glue it. Trim extra after dry.

Diffrent countries have diffrent designed post and telephone poles. If you look on the net you can get many photos of power poles and telephone poles.mine are canadian poles and are close to being correct.

Now in canada we have our maine power wires and telephone wires and cable high speed hanging attached a few feet from the bottom of our transformers.the insulators hold our ground wires.but in my case im going to use my poles to hook up real power at low voltage for home lights and street lights.the trasnformers are for the look or realisume.hope this helps and if any
questions leave a message on the site and i will answer.

Have fun.

Kim”

A huge thanks to Bill for sharing his pics and videos on his N scale model train scenery – can’t wait to see the next update too.

Over the years there has been hundreds of posts on scenery – here’s just a few of them

That’s all for today folks.

Please do keep ’em coming.

And don’t forget, the Beginner’s Guide is here if you want to get going on your own layout.

Best

Al

PS The very latest ebay cheat sheet is here. Still updated daily.


Small N scale layouts

When it comes to small N scale layouts, Bob’s always springs to mind – his layout goes up in three levels, instead of out.

If you want to get up to speed on his stunning N scale, his first post is here.

He’s been kind enough to talk us through how it came about:

“Al,

I mentioned in my original post, my challenge with this new project was transitioning from an HO scale layout that filled most of a 400 square foot room to an N scale layout that could be no larger than about five by ten feet.

I made some preliminary drawings and quickly realized that to accommodate the number of trains I wanted to run I would need a terraced layout.

One of my favorite parts of my previous HO scale layout was a mountain that incorporated a trestle bridge at its base (Figure 1) and a castle on its top Figure 2). I wanted both in my new layout.

small n scale layouts

small n scale layouts

I made several scale drawings and finally decided on a terraced layout with three levels (Figure 3).

small n scale layouts

Level one would have two tracks and levels two and three would have one track each. In order to better evaluate perspective, I constructed a one-tenth scale model of the layout using foam core, Styrofoam, cardboard, and balsa wood (Figure 4).

small n scale layouts

In the completed layout, both level two and level three would be removable.

The layout is built on a custom-made platform supported by two wooden pedestals (Figure 5).

small n scale layoutssmall n scale layouts

woodworking for model trains

Since levels two and three are removable, there should be easy access to construct a helix.

As you can see in the schematic (Figure 3), the inner loop on level one has a turnout leading to a three-track siding and the loop on level two has a turnout leading to a single track siding. There are a total of four right-hand turnouts on the layout.

All the track (code 83 flex track) and turnouts are Peco products. I still need to ballast the track (my least favorite part of the whole process. I use four Bachmann Power Packs which are located in a small drawer at one end of the platform (Figure 7).

model railroad N scale control panel

I used Mold-A-Scene plaster on a foam core base to build the mountain. I am really partial to trestle bridges and there are four on the layout (Figure 8).

model railroad bridges

All four were scratch-built. At the end of the post I will share with you how I made the bents for the trestles. I also kit-bashed a viaduct model and a model of the Bietschtal Valley Bridge (Figure 9) to fit the available space. I incorporated a mix of kit and built-up structures on the layout.

model train bridge

Level one is a small town (Figure 10), level two is an industrial complex (Figure 11), and level three is a rural area (Figure 12).

Most of the structures are lighted and there are street lamps in the town and the industrial complex. All the lights are Just Plug LED units, which I highly recommend. I scratch built a few of the trees (very tedious), but most are ready-made.

n scale overhead view

n scale overhead view

n scale farm

I typically operate a mix of trains including steam and early diesel-electric.

My favorites are a model of the Durango & Silverton Railroad and a model of the Burlington Pioneer Zephyr. Just for fun, I recently added a model of the JR 500 bullet train.

I occasionally run the Pioneer Zephyr on one tract and the bullet train on the other (Figure 13). It’s all about having fun.

model bullet train

The remaining photographs show how I constructed the bents for my trestle bridges (Figure 14).

trestle bridge diagram

The first task was to decide the size and shape of each trestle bridge so I could design the individual trestles and determine how many I would need for each span.

Next, I fabricated a simple jig made from balsa wood attached to a foam core base to align the posts (Figure 15).

making trestle bridge

I used bamboo skewers for the posts and balsa wood strips for the cap, sills, and sway braces. I cut the bamboo skewers to length, inserted them into the jig, and attached the sills (except for the mud sill at the bottom of the bent and the cap on the top) with wood glue, and secured them with pins (Figure 16).

I removed the bent from the jig, placed it on a guide attached to a foam core base, and glued on on the cap, mud sill, and sway braces (Figure 17).

Once the glue was dry, I turned the bent over and attached the cap, sills, and sway braces to that side (Figure 18).

I painted and weathered the completed bent (Figure 19), and moved on to the next one. I hope you found this post helpful.

model railroad trestle bridge support

I’m still working on a video.

Thanks,

Bob”

A huge thank you to Bob for such a detailed walk through of his small N scale layout.

Hope you enjoyed it as much as I did.

That’s all for today folks.

Please do keep ’em coming – it’s all getting a little thin on the ground this end.

And if today is the day you want to start on your own layout, the the Beginner’s Guide is here.

Best

Al

woodworking for model trains

N scale model train layout update

Dick’s been back in touch with his N scale model train layout update.

You can see his last post here.

“Hi Al:

I took up all track at Chicago, added 2’8″ length to the table so now it is 10’8″ by 2′ 6″ and relaid track.

Major changes to give a bit more feeling like this is the Union station stub end area.

The track is laid out, not fixed to the board nor rewired yet. Right now all but the last 3′ of each siding is Kato unitrack. I ran out of long straight sections right now.

Now there will be 3 inbound and 3 outbound tracks.

Also there will be diesel services, pullman storage, diner car service, baggage and mail loading, etc.

I may add two spurs in the empty corner area for industry and one more spur by the inbound throat area to hold the switcher for handling inbound train cars.

Or possibly use the empty corner for a turntable for turning locos and servicing needs. Leaning more towards industry spurs though as locos can run around the inside main track to be turned.

This gave me the chance to pull the thin cardboard back off that I had put under the track and did not like it.

Many feeders will be added to insure good DCC connectivity.

Later I will extend the Oakland Division at the other end of the layout another 5′ to give a much longer mainline run, right now Oakland is an end point only.

This is it for now, I hope to have more updates soon and I am still working on a layout diagram to send that can be seen well.

Thanks ever so much for your site Al, there is so much to enjoy from everyone.

Dick Sr

Hardin Mt”

N scale model train layout update

N scale model train layout update

N scale model train layout update

N scale model train layout update

N scale model train layout update

“Hello Alastair:

I’m not sure if you remember me, I wrote to you a few months ago. After trying my luck at scratch building, I decided to try building a diorama.

Naturally, the diorama was based on two of my favorite things, Makers Mark bourbon and the Philadelphia Eagles.

Everything I did to construct the diorama was a first attempt. I have watched quite a bit of You Tube videos to learn the how to’s. I also used a lot of tips from Luke Towen.

I used Sculp-ta-mold for the ground form and used Luke’s home made ground cover applicator(i.e. a spray can top and a stocking). I used your printable roofs for the buildings. The property fence was made from matchsticks and sewing thread.

The buildings were scratch built from photo’s that were taken last year while I was visiting the Distillery in Loretta Kentucky.

I had a GREAT time creating this and can’t wait to start my long awaited layout.

I have included a few photos that I would like to share with you, and hopefully others.

Thanks again

Ernie G
Philadelphia PA”

A big thanks to Ernie and to Dick for sharing his N scale model train layout update.

I do love seeing your updates and creations – I hope you do too.

That’s all for today folks.

Please do keep ’em coming, it’s all getting very thin on the ground again this end.

And don’t forget, the Beginner’s Guide is here if you want to take your first step towards your own layout.

Best

Al

PS Latest ebay cheat sheet is here.