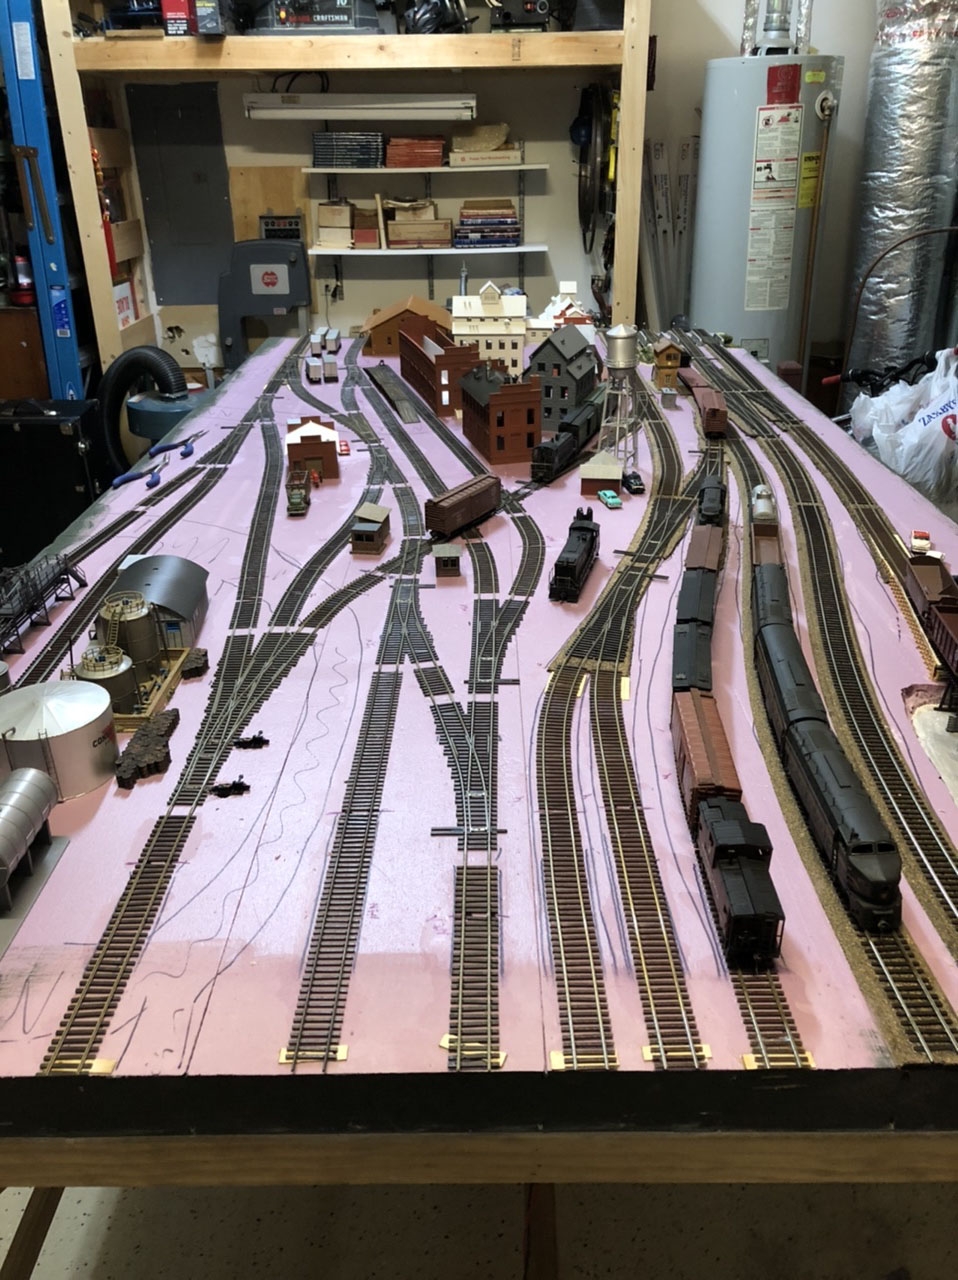
I have been able to spend time in the garage the past several weekends and have made good headway.
Track in glued in place and wiring is done and now I’m adding in ground throws on my turnouts.
This video shows what I’m doing on the new module. Making the modules portable/moveable makes it so easy to work on them.
Tracks are aligned between the sections so when together I enjoy a tremendous amount of switching opportunities.
Once all ground throws are in I’ll make plexiglass stops for each end of the layout but for now on the end opposite I’m working on I’m using long solid craft pins as bumpers in case I get to close to the end of the tracks.
Al thanks for continuing your great work hosting all of us modelers from around the world!
I have been able to spend time in the garage the past several weekends and have made good headway.
Track glued in place and wiring is done and now I’m adding in ground throws on my turnouts.
This video shows what I’m doing on the new module. Making the modules portable/moveable makes it so easy to work on them. Tracks are aligned between the sections so when together I enjoy a tremendous amount of switching opportunities.
Once all ground throws are in I’ll make plexiglass stops for each end of the layout but for now on the end opposite I’m working on I’m using long solid craft pins as bumpers in case I get to close to the end of the tracks.
Al thanks for continuing your great work hosting all of us modelers from around the world!
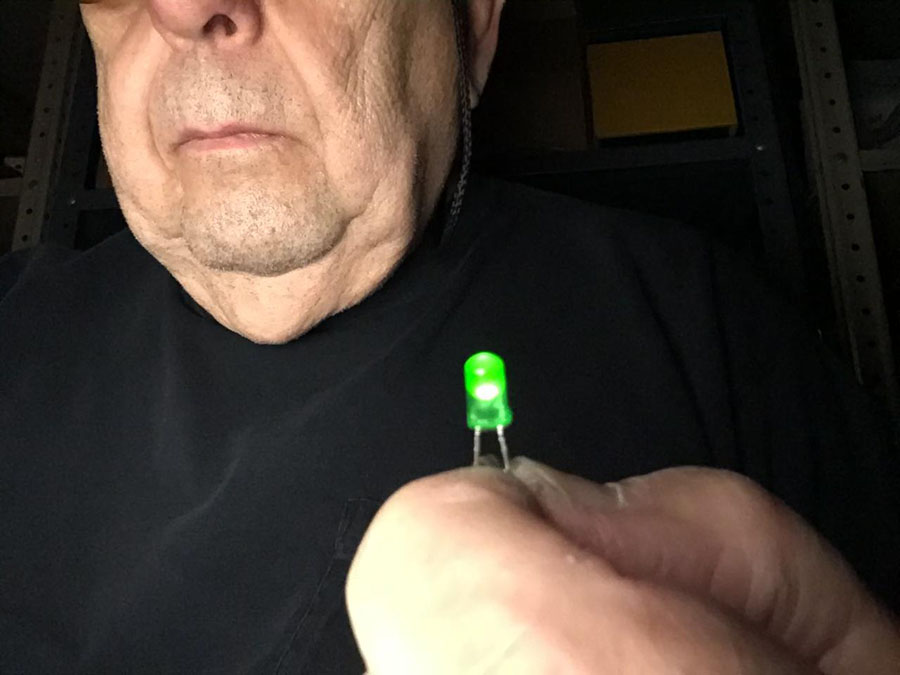
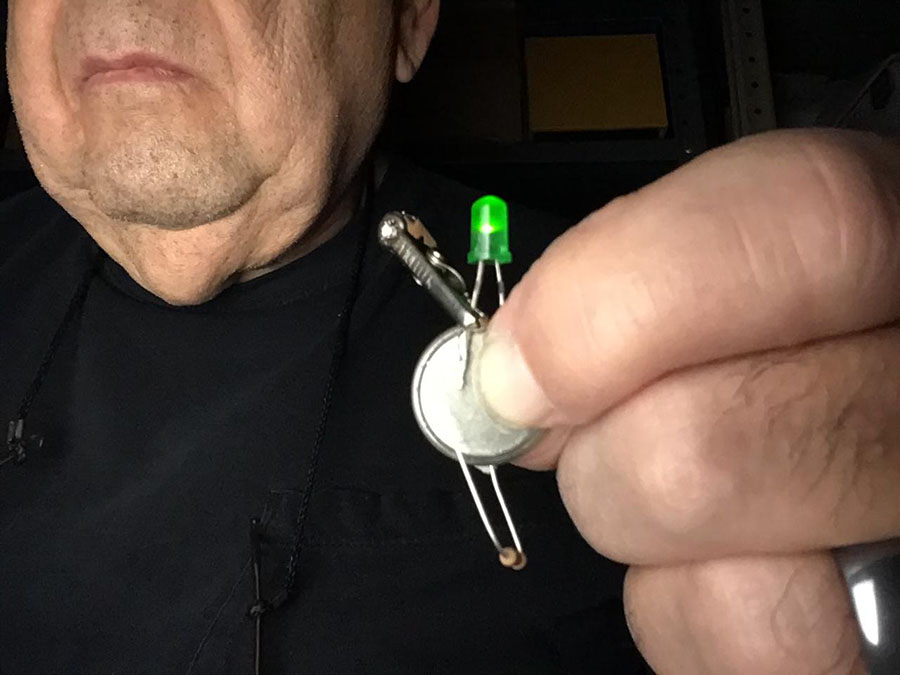
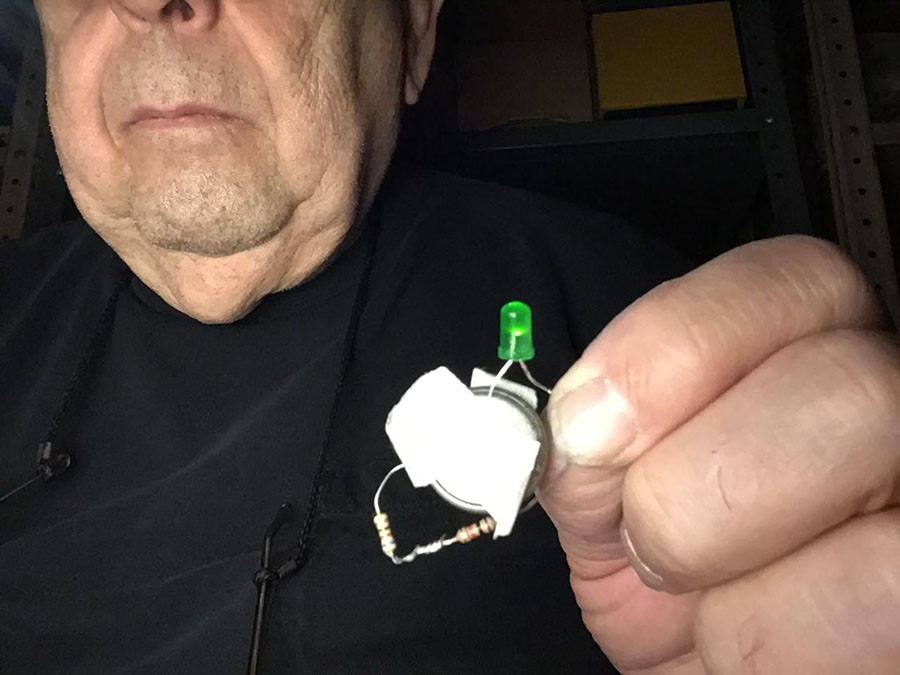
“Gentlemen…..Please accept my apology for posting that request for help with the LEDs and Resistors.
I originally ask for help because when I set up an LED bulb with two resistors in series (combined ohm of 1.5 ohms) in order to dim the green LED for my signals it appeared to get brighter or so I thought.
BUT when I redid the test to provide the attached pictures, it worked fine and the bulb was dimmer with a combined a 1K ohm resistor with a .5K ohm resistor in SERIES.
I could not reproduce what I reported as my original problem that the LED got brighter.
I do not know what I did or what I saw that made it look brighter for me to report the original problem; so please accept my apology.
As you can see, putting the resistors in SERIES works well to reduce the voltage and dim the LED.
Everything was done with the same Battery, LED and RESISTORS.
Picture 1 – LED1 – LED just attached to 3 volt battery
Picture 2 – LED2 – LED with 1K ohm resistor
Picture 3 – LED3 – LED with attached !k & .5K ohm in SERIES
“Hi Al, just a short video showing the new couplings that were recommended to me with a magnet uncoupler to be installed.
Also I have made a few changes to the layout, giving an extra siding and a bigger curve on the track helping to have smother running round these areas where problems were occurring.
Unfortunately in doing so I must have damaged some of my wiring which lead to the layout shorting out.. all part of the learning curve ? Then again , problems we could do without.