HO scale wiring block

Gary’s been in touch with his HO scale wiring block.

If you missed his earlier posts, here’s the first, and here’s the second.

“Hi Alastair…. Gary from Elmont, NY, USA, here with an interim update on my Sunnyside Yard project.

My last blog to you was that I had completed the track work for the passenger yard and was going to start planning for the engine yard.

My steps are still the same and that is to complete all the track work, switches and signals before working on any scenery.

Picture 1 that I sent was the layout plan that I designed using SCARM but that did not work out because I did not have enough room because the radius of the turn track I need to use for the long engines, GG1s, and passenger cars has to be at a minimum of 22 degrees.

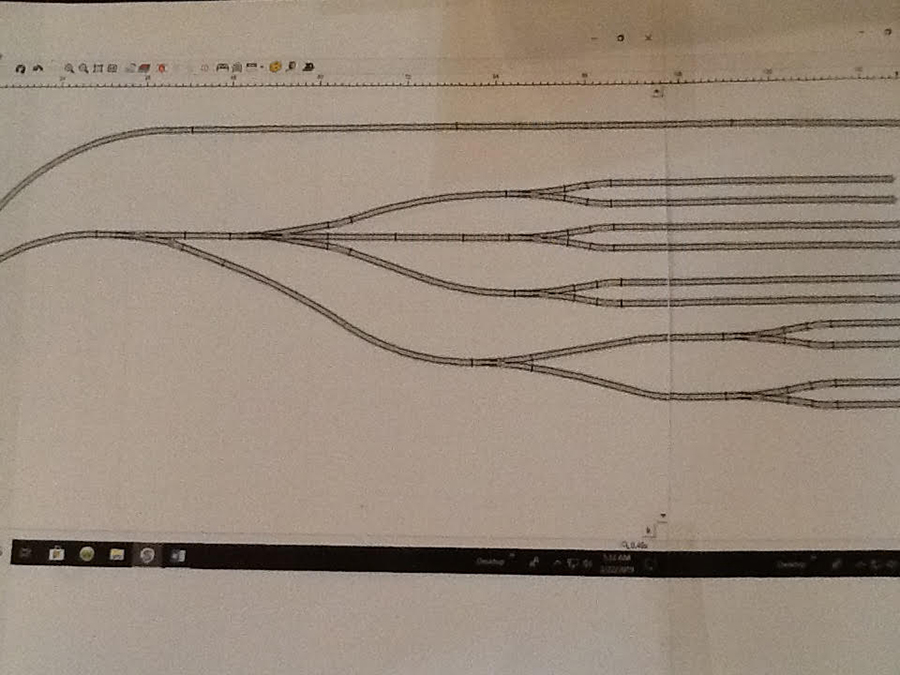
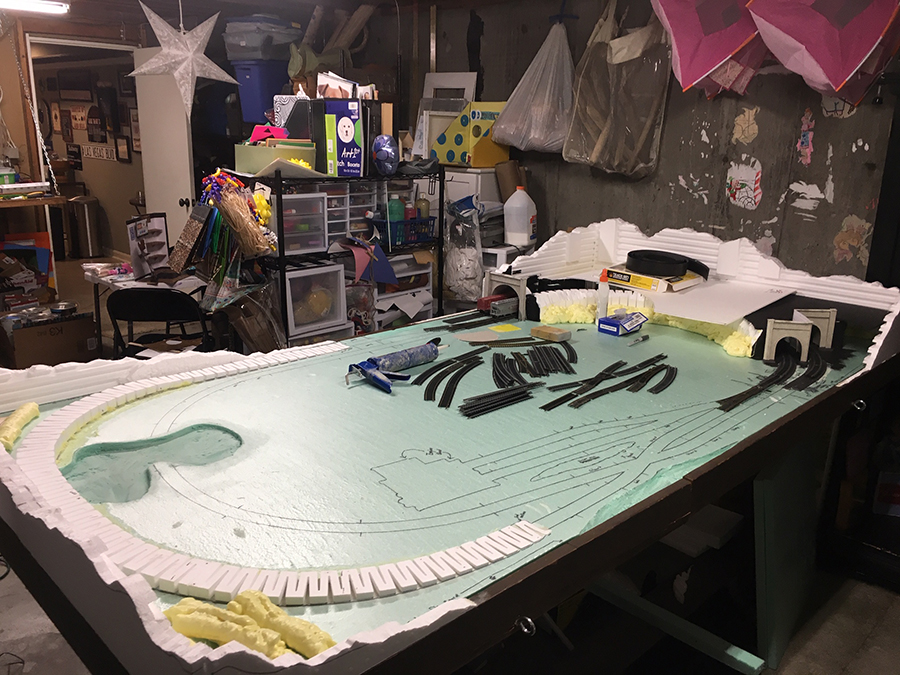
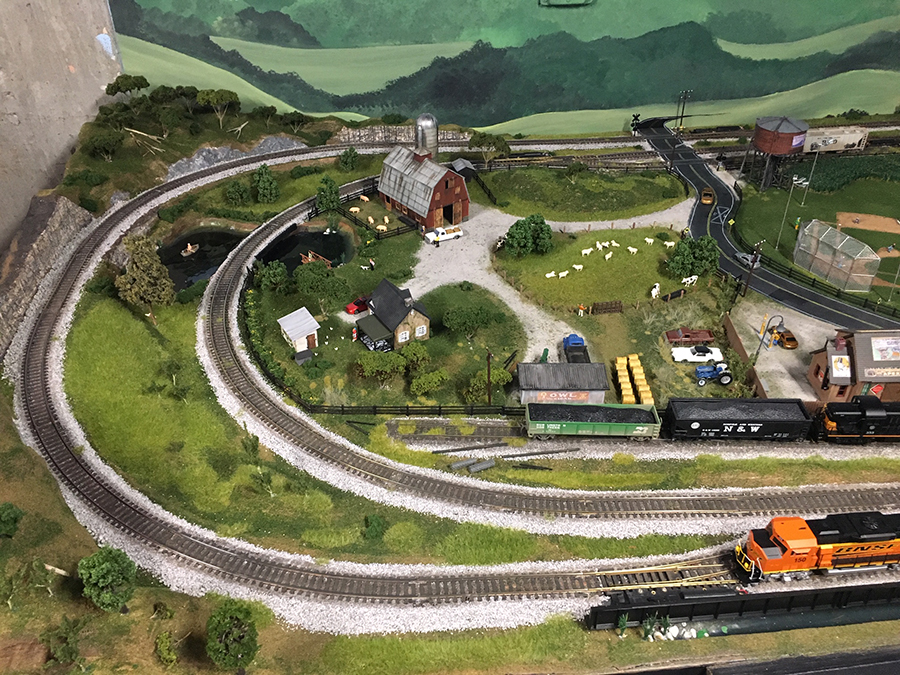
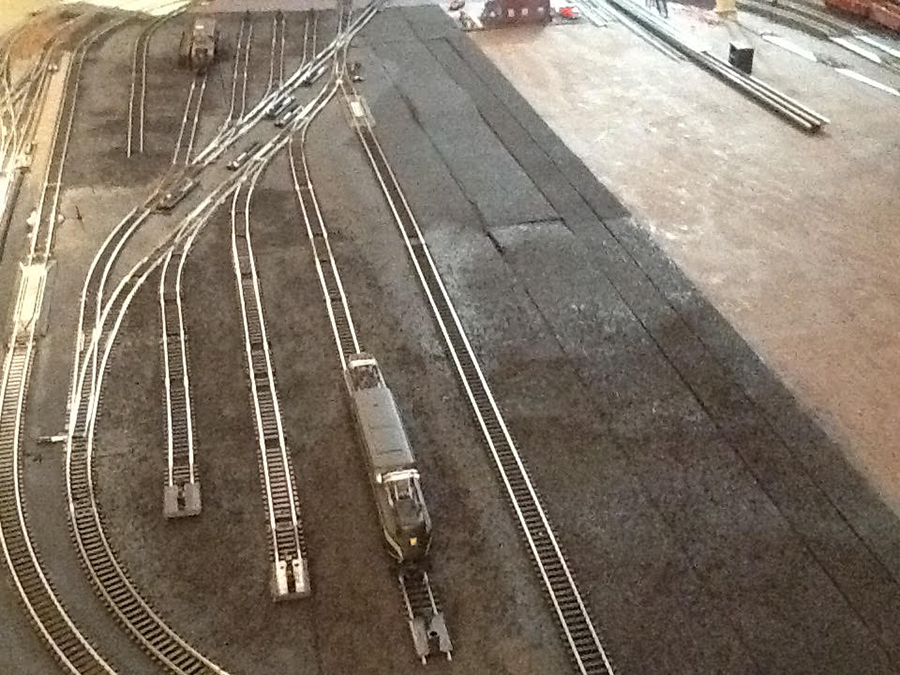
I am using 24 degree as much as possible. So I had to redesign the engine yard. Picture 2 is what I designed in order to fit within the 7 foot length that I had to work with.

HO track plan

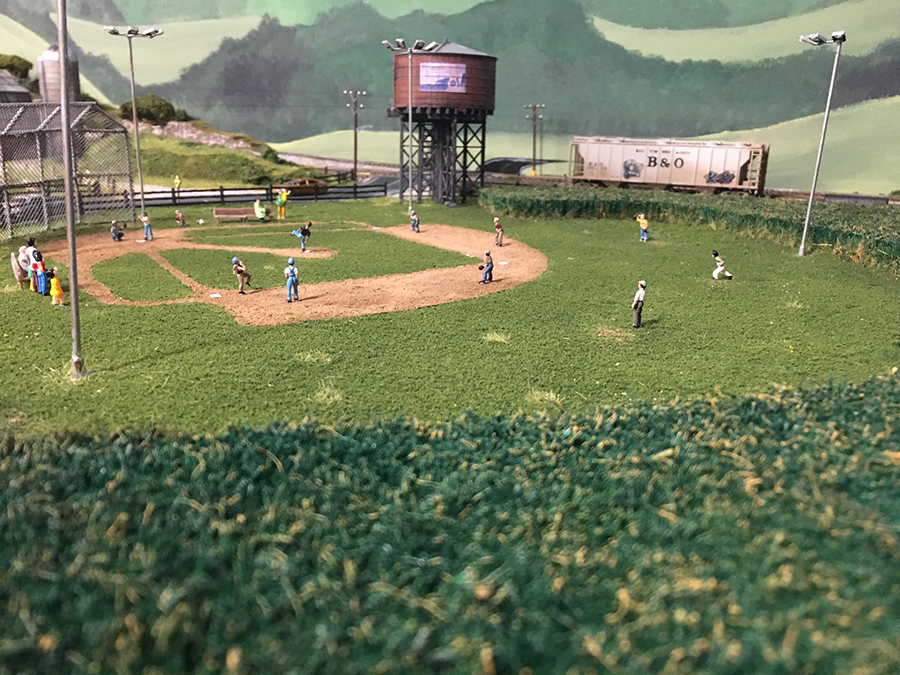
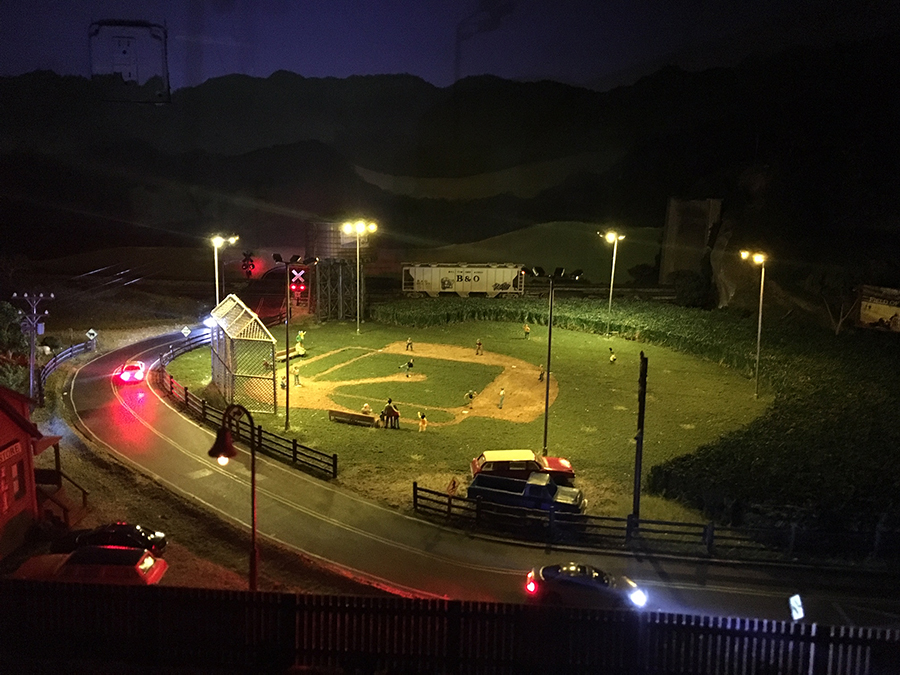
Nothing in these pictures is permanent and the few structures and trackside scenery are only temporary to give me some ideas on how it would look.

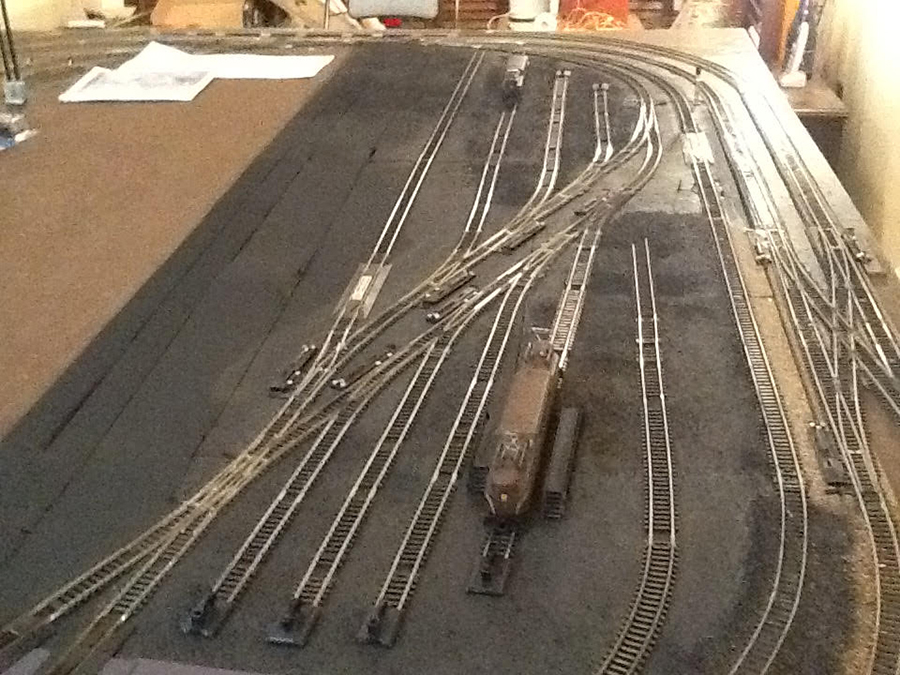
The tracks are laid down with temporary rail spikes. This actually worked out better than using SCARM because now I know that this design will fit.

I tested each above table switch machine to make sure they worked. I will be using Tortoise and Atlas under table switch machines for the rest of the turnouts.

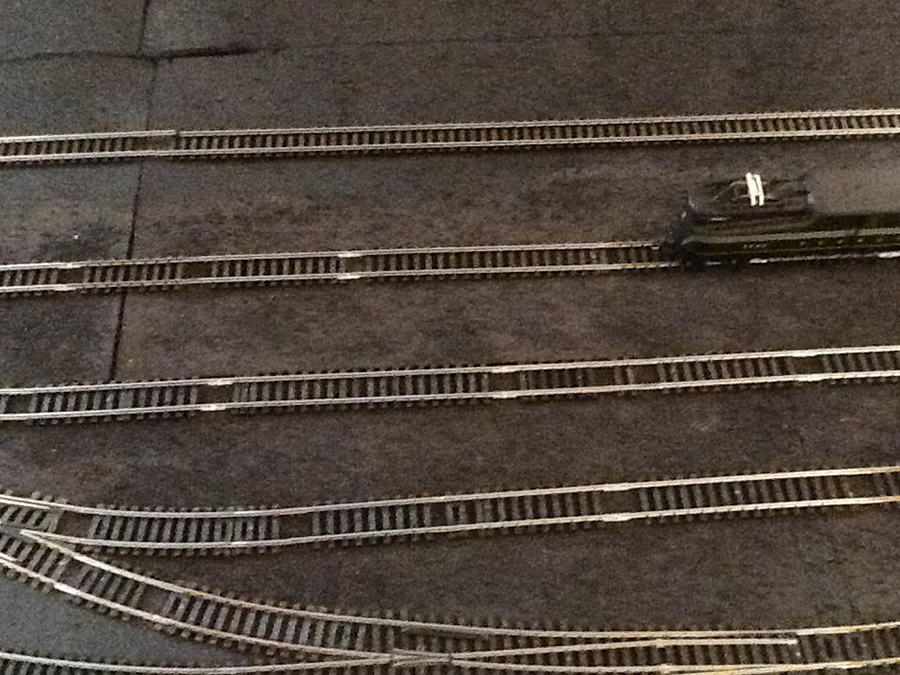
Pictures 3 & 4 I will print out and use to plan my wiring for all the blocks, switches and signals.

HO scale wiring terminal sidings

HO scale wiring terminal sidings

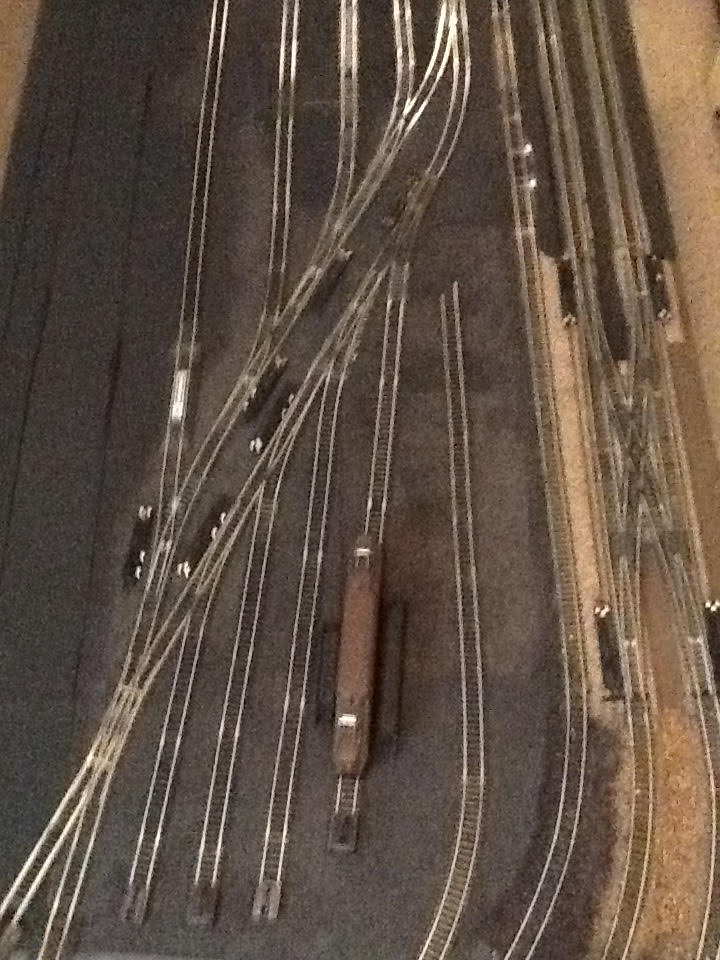
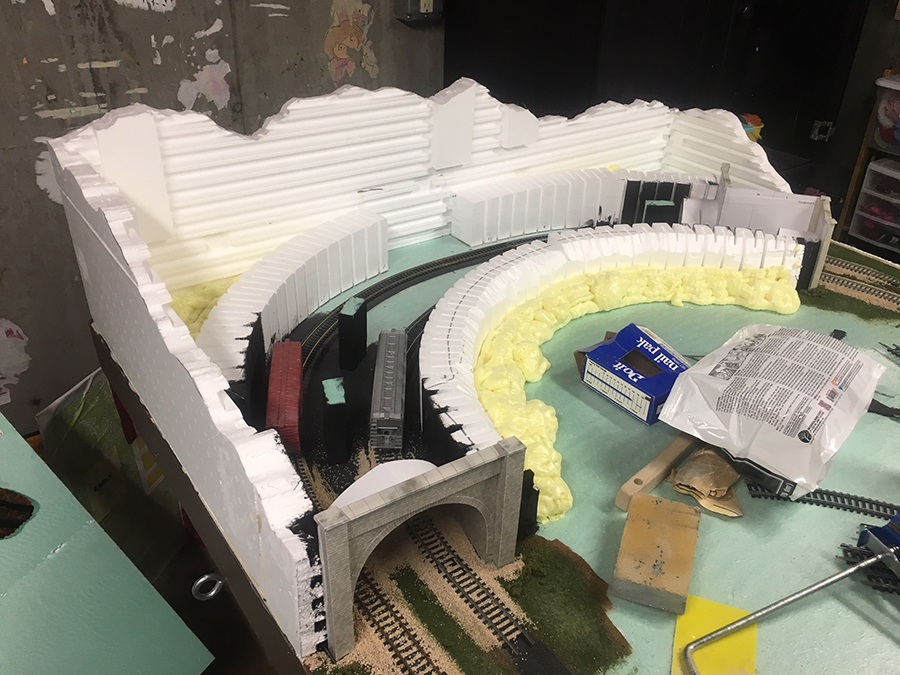
I am not using DCC so I needed to develop induvial 13 inch blocks for each engine. If you look at PICTURE 5 closely you can see where I used insulated rail joiners to create the blocks.

HO scale wiring block

All told I have 16 small 13 inch blocks; each can hold a long GG1 engine. I also will have two work trains. If you go back and look PICTURE 2, the track to the right of the GG1 in the forefront of the picture is no complete on purpose. This is a dummy track that I am going to use to have a track crew working on the rail, to connect it up.

In PICTURE 2 again, you will see the SLIP Switch in the left hand corner that I am using to give any engine the ability to access and be parked in any of the yard sidings.
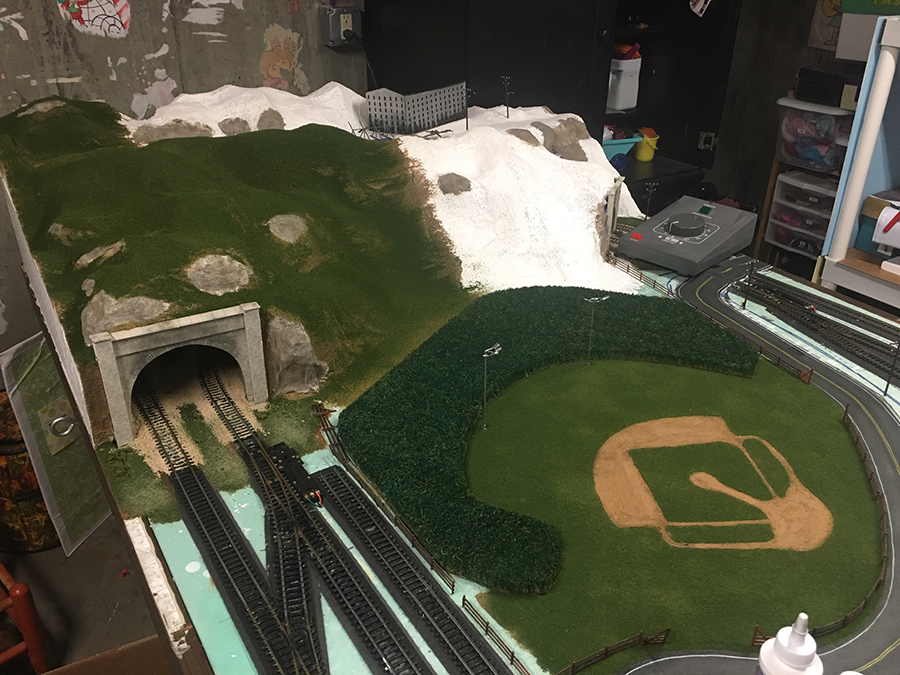
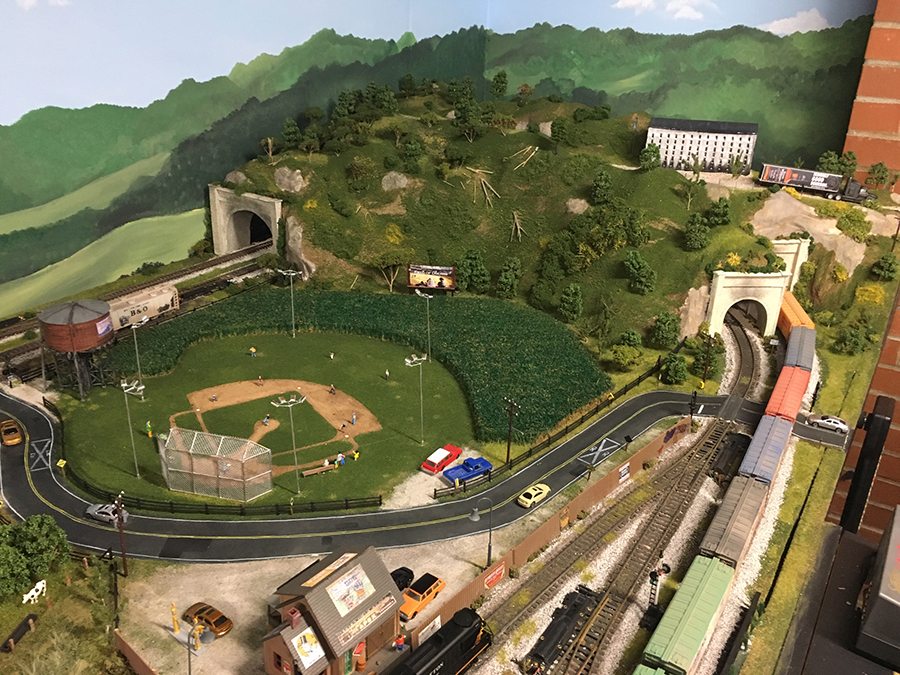
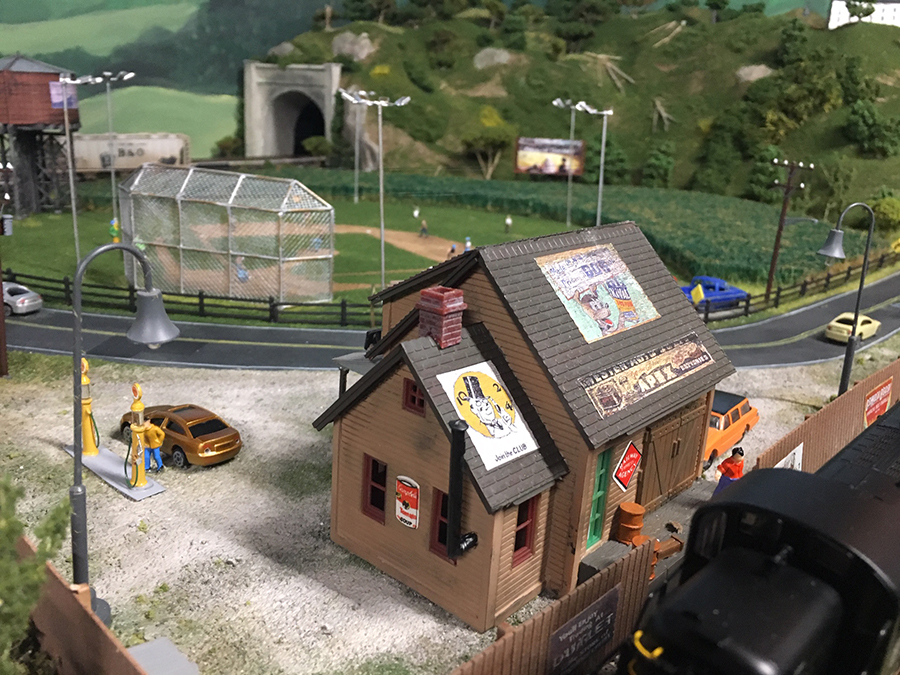
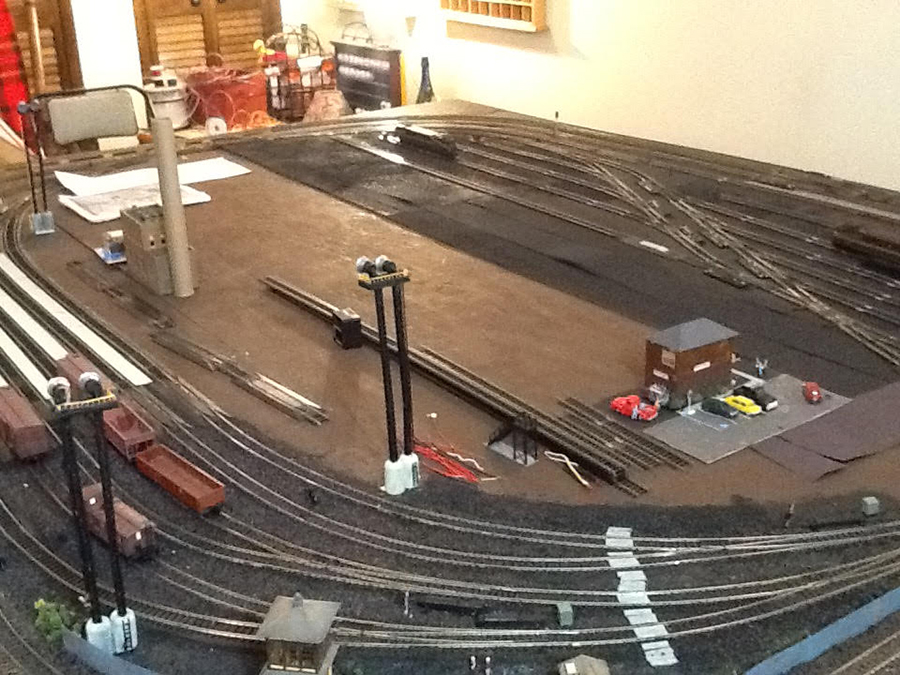
PICTURE 6 is what the layout looks like right now before I start working on the electrical wiring for the engine yard.

HO scale wiring terminal block track plan

I am leaning towards have this engine yard be its own block section with a separate power supply and have a control panel catty-corner in the layout to the passenger yard control panel.
Each block will be controlled with a DPDT toggle which will control the power to the block and the changing of the dwarf signal from RED to Green when the power is on and Green to Red when the power is off.

I know that I can use the Tortoise and Atlas switch machines be able to throw the switch and change the color of the signal indicating the direction of the turnout. I would like to also be able to control power to certain blocks when a switch is thrown. I do not know if I can throw the switch, change the signal and provide power to the block that the engine is leaving. I will be calling Circuitron to talk to their tech people to find out if that is possible and how to do the wiring.

Hooking up the power to control a block is not a problem……doing it for 16 small blocks might be a wiring nightmare?

In my last blog, I received many suggestions from many of the readers……. If anyone has suggestions on the wiring, please don’t hesitate to comment. One question….is it better to use a Power Distribution board or Terminal Blocks?

Once I complete the track work for this section, I can then start on the scenery and figures for the engine yard. I am planning a two stall engine house with maintenance crews; a track crew working on completing a section of track; a road maintenance crew; some maintenance sheds and maintenance crews. Then I will go back to the passenger yard.

Am I crazy doing this because I love it. But I think I am going to be here a long time.

Keep you posted and I love reading and looking at all your layouts.

Gary”

A huge thanks to Gary for sharing his HO scale wiring block. If you can help out with his questions, please do leave a comment below.

It’s so wonderful seeing all your layouts take shape from the very beginning – especially with a good narrative too. And I know it inspires a lot of readers too, so please do keep ’em coming.

That’s all for today folks.

Please do keep ’em coming.

And if today is the day you get started on your layout, the Beginner’s Guide is here.

Best

Al

PS Latest ebay cheat sheet is here.

PPS More HO scale train layouts here if that’s your thing.


HO scale model baseball field

Jacob has been in touch with his HO scale model baseball field – all on a 4×8 too!

“Hi Al! Long time subscriber but first time to share my work and tips from my layout.

To begin, a little about where I come from as my layout reflects aspects of my life and my hometown. I am a pharmacist and 43 years old and live in Bardstown, KY (also known as the bourbon capital of the world).

I have loved electric trains since my first set when I was 7 years old from the 80’s – a TYCO Chattanooga Choo Choo – which I still own today and it still operates! I am also a huge baseball fan, not only of MLB but also enjoy baseball movies, etc.

My wife and I met when we were 16 years old. She worked as a waitress on the My Old Kentucky Home Dinner Train that RJ Corman Railroad Corporation owns and operates here in Bardstown. She grew up on a dairy farm and her father still farms to this day.

Anyway, enough about me and my history but I had to share some of it because my layout is of no particular place or industry, but instead a culmination of my memories and experiences throughout my life – all condensed on a 4 x 8 HO scale layout!

It features a dairy farm with pond, a “Field of Dreams” baseball field (complete with kids from “The Sandlot” playing ball) made into the cornfield across the road from the dairy farm, a little general store similar to the one down the road from where I grew up, and a distillery rickhouse similar to one you would find here in Bardstown storing and aging barrels of bourbon at the Heaven Hill property.

The layout can be switched from DC to DCC with a toggle switch so I can run both my old TYCO locomotives (and a replica of the dinner train that my wife worked on as a waitress when we dated) as well as my Athearn RTR locomotives with sounds. I also installed a small Bluetooth speaker in the water tower near the baseball field and can play background sounds from a little league ballpark while running the trains.

Beginning stages:

HO scale foam

HO sacel foam tunnel

HO scale model baseball field

model railroad locomotive

Then final product:

HO scale model baseball field

HO track field curve farm

HO scale model baseball field


model railroad bourbon factory

HO scale store

model train shed

HO scale bridge

HO scale field farm barn

HO scale model baseball field

The one tip I wanted to share is that about how I made the cornfield. I surely didn’t want to plant each individual stalk of corn because I would have been cross-eyed and out of money to do it properly to look realistic!

I found a way to make a decent sized cornfield for less that $25 and it turned out pretty good in my opinion. First I started with buying an outdoor coconut husk welcome mat that one would put at the entrance into their house. It was already a golden brown color, plain and uniform, and able to be cut to whatever shape I wanted.

Once I cut it to shape, I spray painted over the top with a medium dark green and let dry completely for a few days. Once dry, I used a wire brush and scrubbed over the top that I painted and brought back remnants of the golden brown color through the green and it creates the look of tassels on the corn! Then just glue it down to the location of your choice on the layout! The thickness of this mat is perfect height for a maturing cornfield!

Happy model railroading!

Jacob from Kentucky”

A huge thanks to Jacob for sharing his HO scale model baseball field – I do love it when folk create their own themes from their own lives. Wonderful!

That’s all for today folks, please do keep ’em coming.

And don’t forget the Beginner’s Guide is here if you want to recreate your youth on your layout.

Best

Al

PS Latest ebay cheat sheet is here.

PPS More HO scale train layouts here if that’s your thing.


HO scale operations yard

Gary’s been back in touch with plans for his HO scale operations yard:

Here’s his first post and pics on the track work so you can get up to speed.

“Hi Alastair…… thank you for giving me this opportunity to thank you and all the guys that responded to my blog and pictures on my Sunnyside Yard project.

I do not know the right words to express how I feel after seeing the number of responses that were posted, the suggestions and positive views on what I have done so far. I do not think I am a sentimental guy but WOW, FLABBERGASTED, TOUCHED…….. I don’t know the right word…..THANK YOU ALL.

I asked Alastair how I could respond to your questions and he said to put this blog together and he would post it.

So here it goes…… I am going to list by subjects that you commented on:

WIRING…..

I agree with all of you that the wiring got out of hand. I did label each of the connections. I have two transformers; one for A/C and one for D/C each going to a Power Distribution Board. From there, I have 4 D/C buss’s and 3 A/C buss’s.

So far, the D/C buss’s I have are used only for track power and running the engines and one undertrack uncoupler by Railcrew.

The A/C buss’s feeds the power for the signals, switches and lights and future power needed for scenery. The wiring started out organized but when I started having the signals work in conjunction with the switches that’s when it got crowed. I also have wiring for the 4 blocks that are on the layout. Right now I have 20 switches (turnouts) and 15 signals. Each switch (turnout) has 3 wires that have to run from the switch machine to the switch controller.

I haven’t connected signals to all the switches yet. I bought a terminal switch but I did not know how to use it to cut down on the amount of wiring. You still have to run wire to the connectors and controllers.

The HO scale operations yard is going to add more so I am thinking of having the engine yard have its own power source. I have to figure out where to locate it. I am going to have many small blocks with signals that will store the engines.

One of you gave me some good advice on how to avoid a “RAT’s NEST”. I am going to look into these “Brady” markers as they are called. I haven’t run into a “ground Loop” problem because I have separate power supply for the lights and trains.

I am also going to take your suggestion and run separate A/C lines for the different accessories (street lights, housing lights, signals, etc.).

For the Electrical Engineer, I hope your ankle heels. As for the lump that was found being non-benign; my prayers are with you and I hope the biopsy is negative. Right now I am in remission from my Lymph Node cancer. Went through 8 months of chemotherapy; still have a few side effects remaining but I am doing OK. Enough of that, let’s get back to model railroading.

Another gentleman wrote about “solder tag strips for wiring and bundle them into “looms” for your future sanity”? What’s a LOOM? I will investigate that.

SIZE OF LAYOUT & CENTER OF LAYOUT

The layout table 9 feet long and 7 feet wide.

It originally was going to be 11 feet by 10 feet but I was concerned about getting to the center of the layout. So I decided to make it smaller and I have area around the whole layout to walk around. I purposely did not build the table into a corner or against a wall and I measured my arm span to make sure I could reach into the center of the layout. I have provided a picture of the main portion of Sunnyside Yards:

HO scale operations yard theme

It’s not the whole yard. Not shown, the bottom left hand corner leads into the Long Island Railroad Freight yard and to the right there are actually 31 passenger tracks not shown and then east of that was a smaller freight yard where the post office was, also not shown.

This picture is the basis for my layout but it won’t look exactly like this. If you look closely will see the passenger yard to the right of the center buildings, then there are the buildings (commissary building, and power supply buildings); behind the buildings you will see parking lot and cars and a street going up a ramp (I am not doing that) and right next to the smokestack on the right you will see the two stall engine house (I will have to make this from scratch because of the shape) and the left hand corner in front of the buildings is the engine yard.

This is the basis for my layout but it will not look exactly like this. In the center of my layout will be these buildings, so once they are in place, I should not have to worry about reaching over. My plan after all the track and signals are installed is for me to measure the center area and build this portion outside the layout. When done, fit it in and lay it down in that area.

TOGGLE SWITCHES

I have started out using SPST (single pole single throw) toggles for changing the signal lights. Then I started using the Snap Relay by Atlas for that and now I am going to use the Tortoise and or the Atlas Deluxe under table switch for throwing the turnout and changing the signal color.

I also use a DPDT (double pole double throw) toggles to turn power on & off to a block while also changing the signal color at the same time. I will continue to us DPDT because you can control both D/C and A/C current with the one switch.

I don’t know what a Pulse Controller is but I will look it up. What did you mean by “slow speed running”?

Gentlemen……. thank you…… like one of you said…”…all the frustration evaporated….” when I read your post and compliments and suggestions.

I will be starting on the engine yard tomorrow. I don’t think my layout will look as good as some of the model railroads you guys put up that Alastair shows, BUT IT WILL BE FUN.

Oh and I also ordered Alastair’s Beginner book.

Alastair…………..many thanks.

Gary of Elmont”

A huge thanks to Gary for sharing his HO scale operations yard update – another wonderful post. What I like most about it is it always comes back to the most important point – having fun.

That’s all for today folks.

Please do keep ’em coming. And if you want to get cracking on your layout like, Gary, the Beginner’s Guide is here.

Best

Al

PS Latest ebay cheat sheet is here.

PPS More HO scale train layouts here if that’s your thing.