London model railroad

Joe’s been in touch. He’s in Tampa, but his been in touch with his London model railroad:

“Hi Alistair,

I have been getting your excellent newsletter for a couple of years and really enjoyed it for the information and joy of seeing other model railroader’s ideas and layouts. So here goes my story.

I started in model railroading when I was around 13 years old. (That was 60 years ago)

My dad bought the traditional Lionel set that we set up in our basement. We had an engine with smoke from little pellets, a milk car that automatically spit out cans and a cattle car with moving cattle in and out of the car. How could it be any better than this?

After couple years, my dad’s good friend asked him if he would like to trade our Lionel trains for HO gauge trains and accessories. We did and my connection to real model railroading began. No offense to Lionel train collectors, but I never understood how the third rail was realistic.

This trade included a set of Marklin, engines and freight and passenger cars. (I sold those years ago).
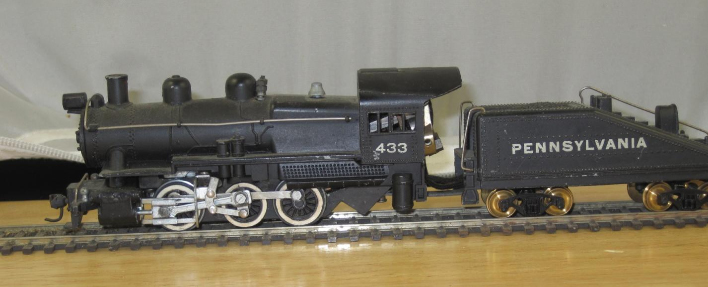
An A C Gilbert HO engine (still own) and cars, track, power pack and buildings.

HO Gilbert engine

I then put together my first layout around 14 years old in our basement. I had no idea what I was doing but I started to read Model Railroader magazine to get some ideas. After some time, I think girls got in the way and I put the model trains away in storage.

So over the years, living in apartments and moving a lot, still having an ongoing interest, I began to purchase HO model train engines, cars and accessories when they went on sale for anticipated use in the future. I knew someday I would begin the hobby again and I did have plans and a vision in mind.

In the late 80s, I moved to London with The Franklin Mint and my wife said “you need a hobby”.

So I decided to start again my long inactive hobby with all British 00 gauge since all my American HO trains were still in storage in United States.

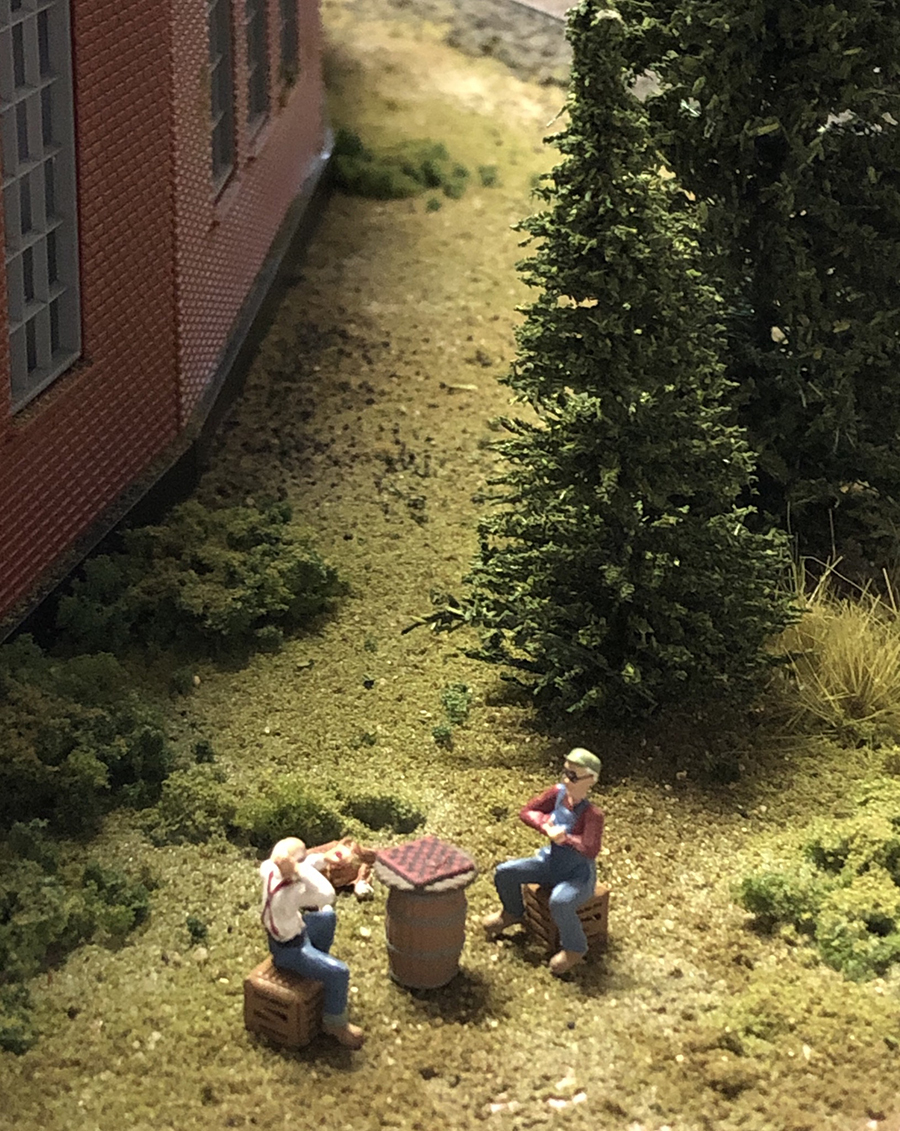
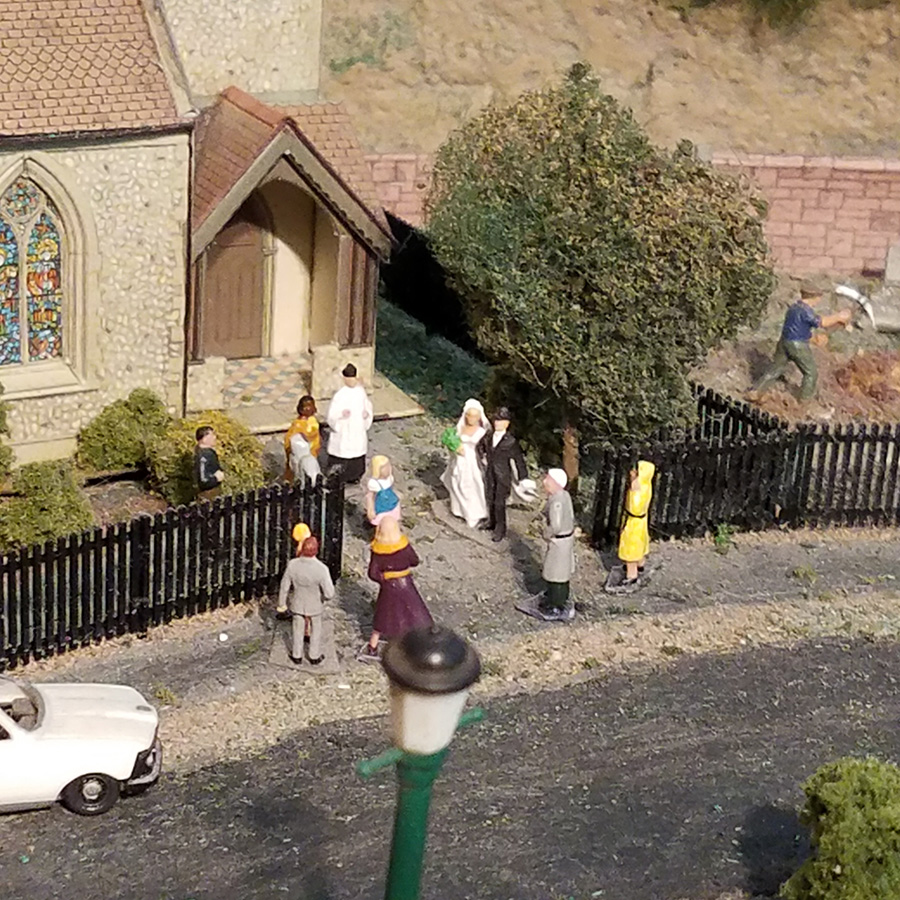
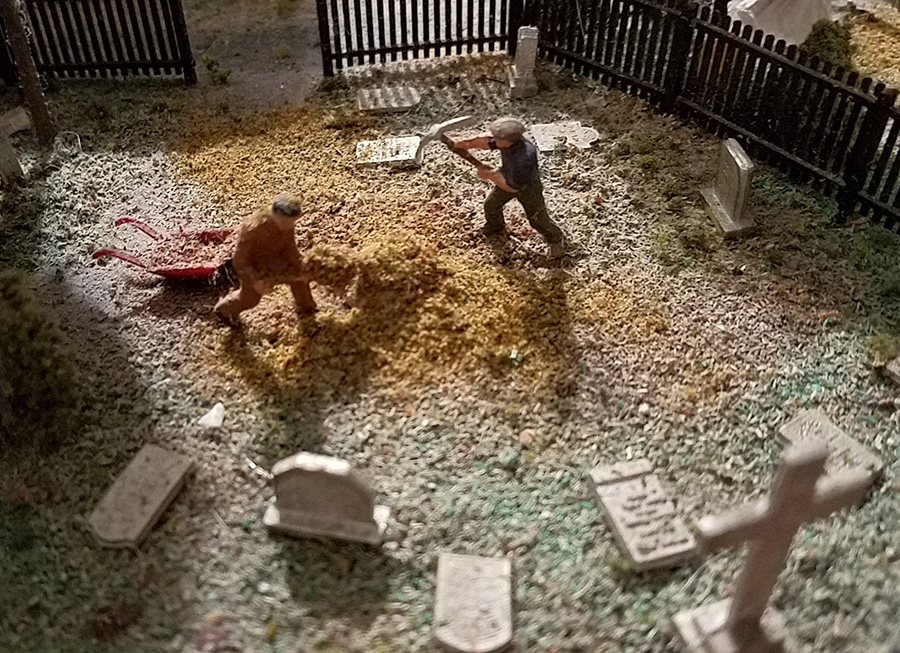
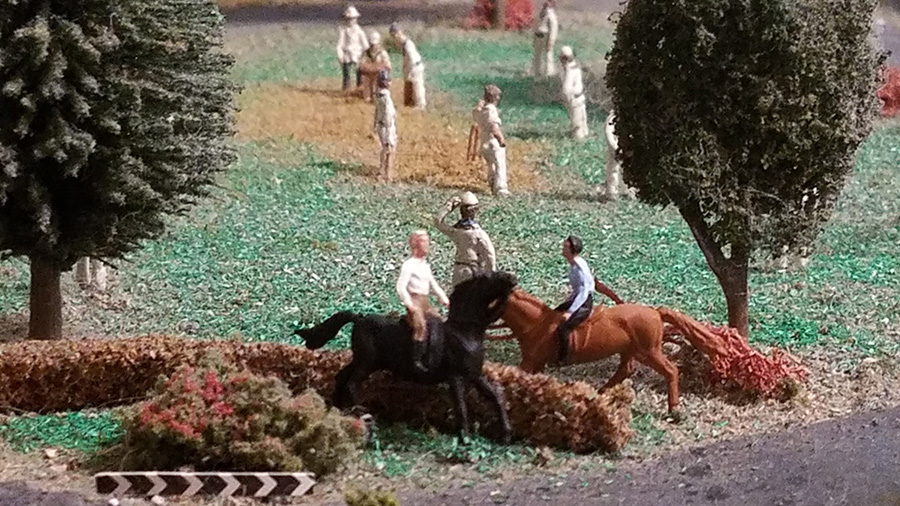
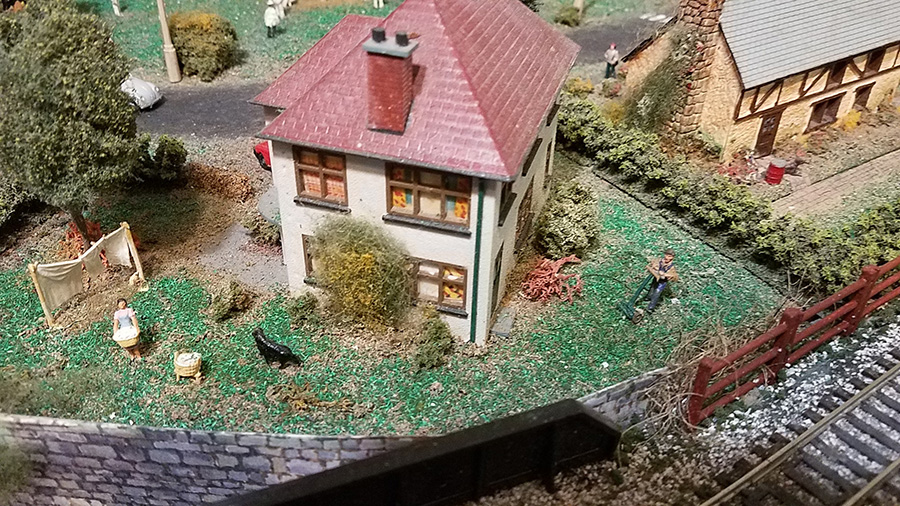
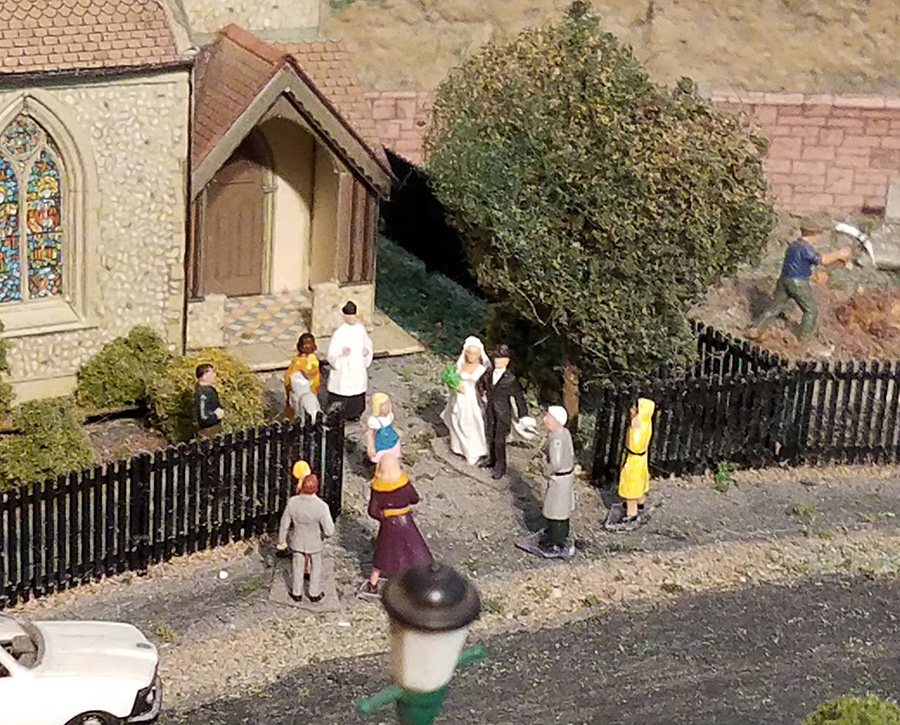
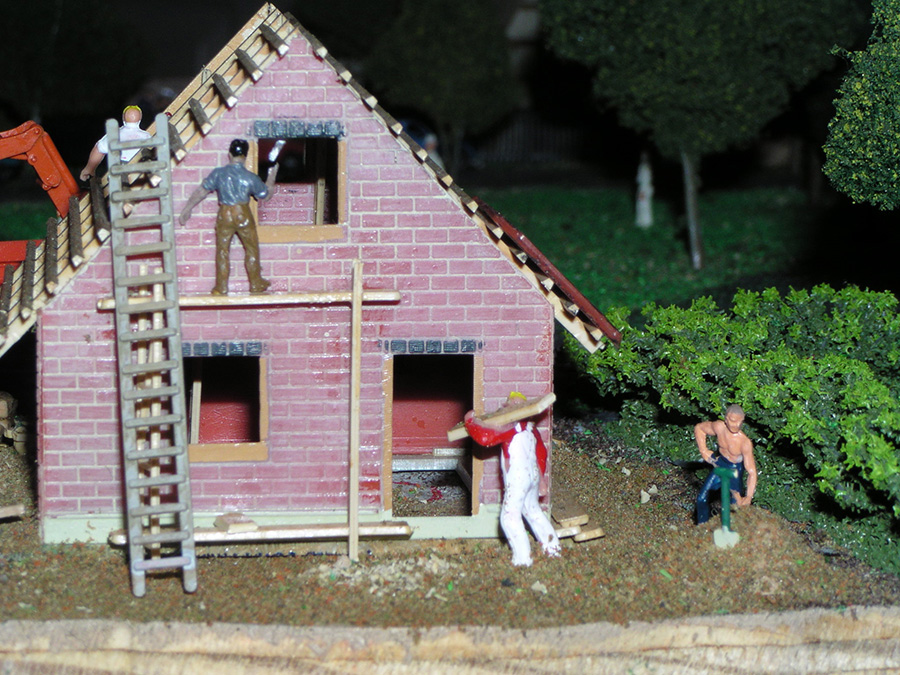
Again, I started another layout with all Peco track, Hornby, Wrenn, Lima wagons and engines. I constructed buildings, hand painted figures, including a whole cricket team. Ironically, all of the structures were fabricated 30 years ago while living in England and carried them to all locations.

model train layout

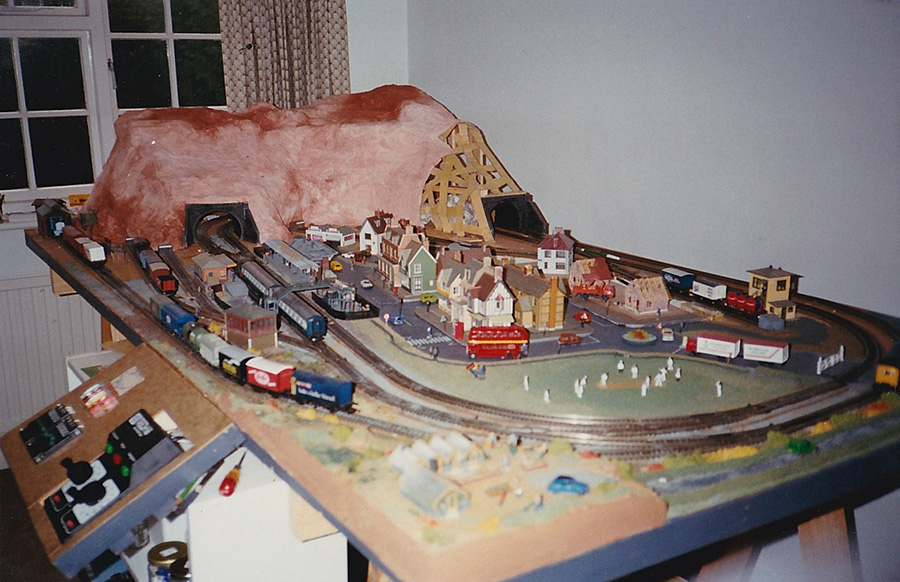
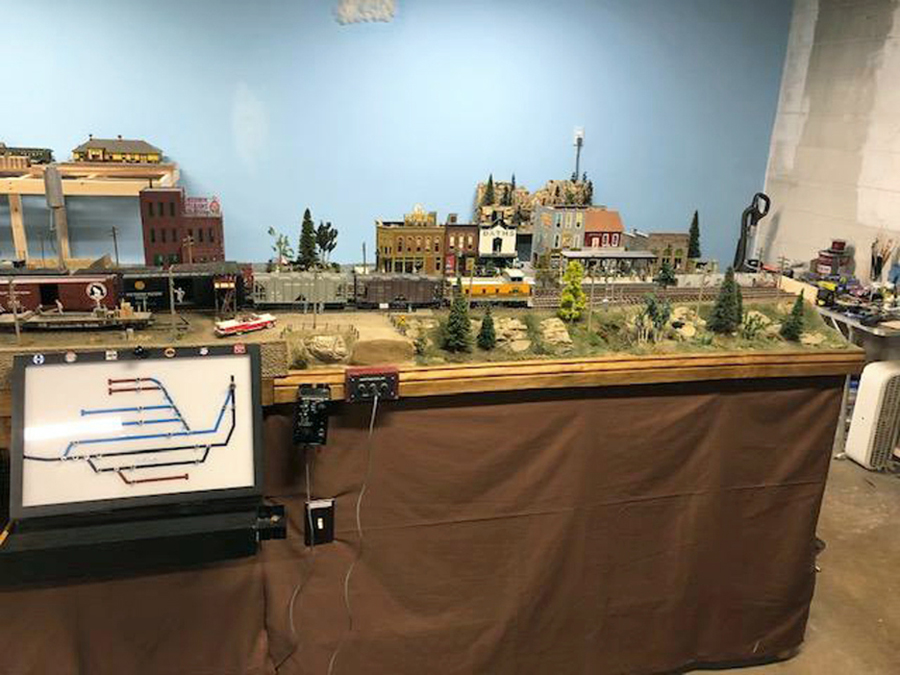
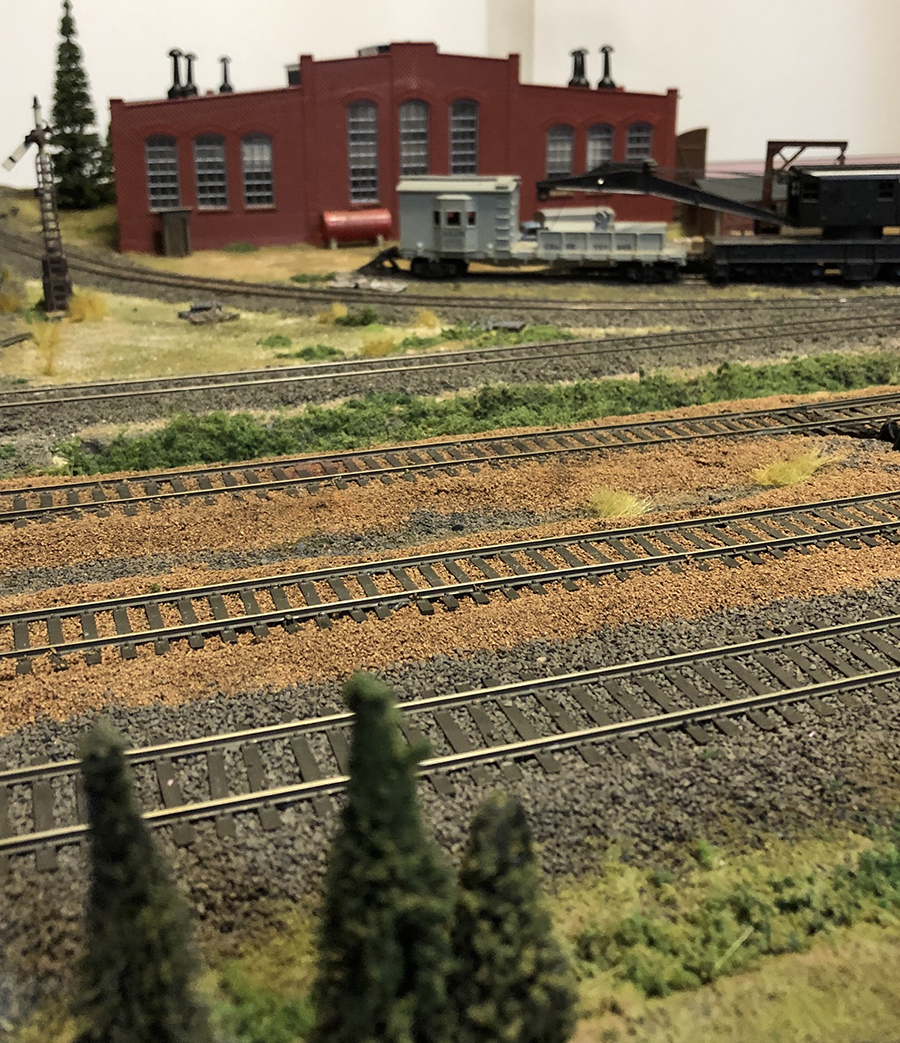
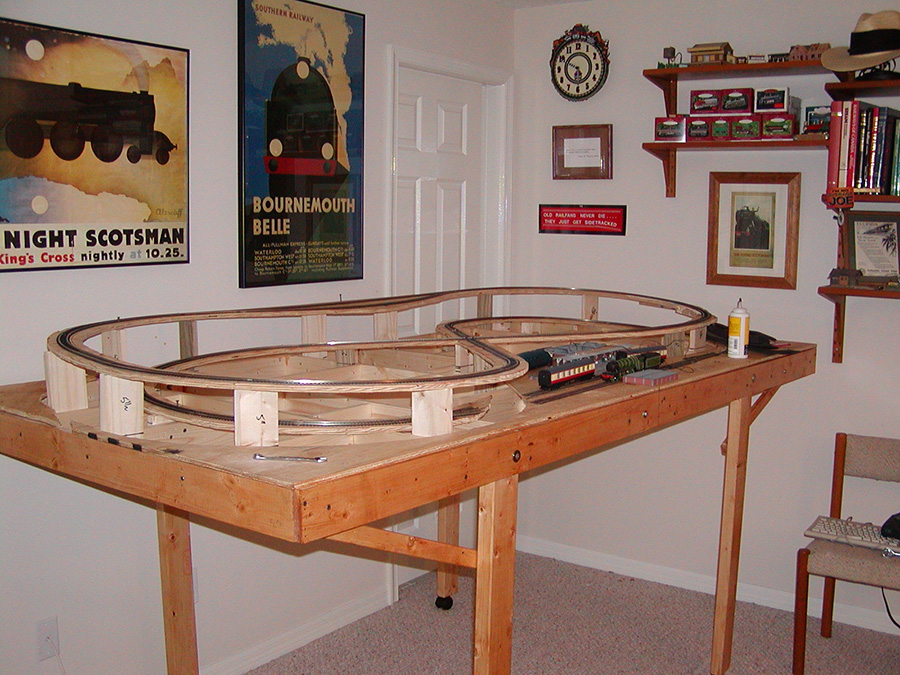
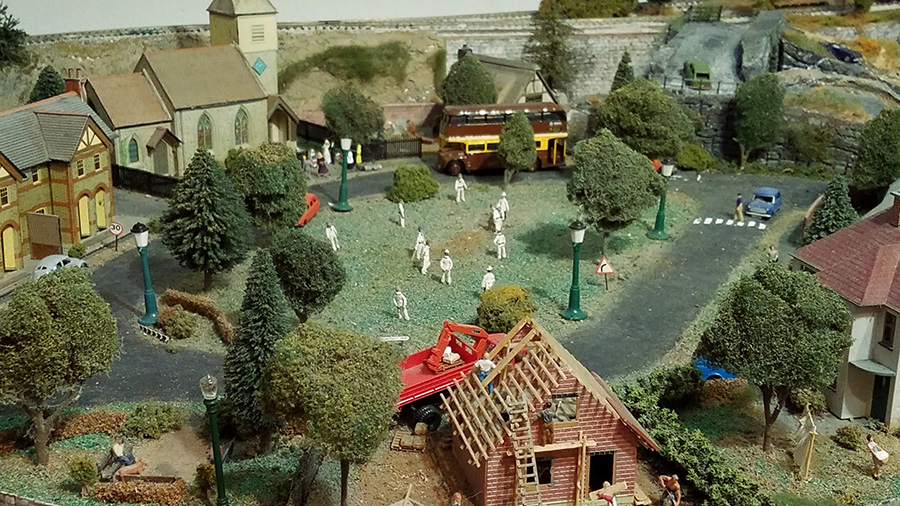
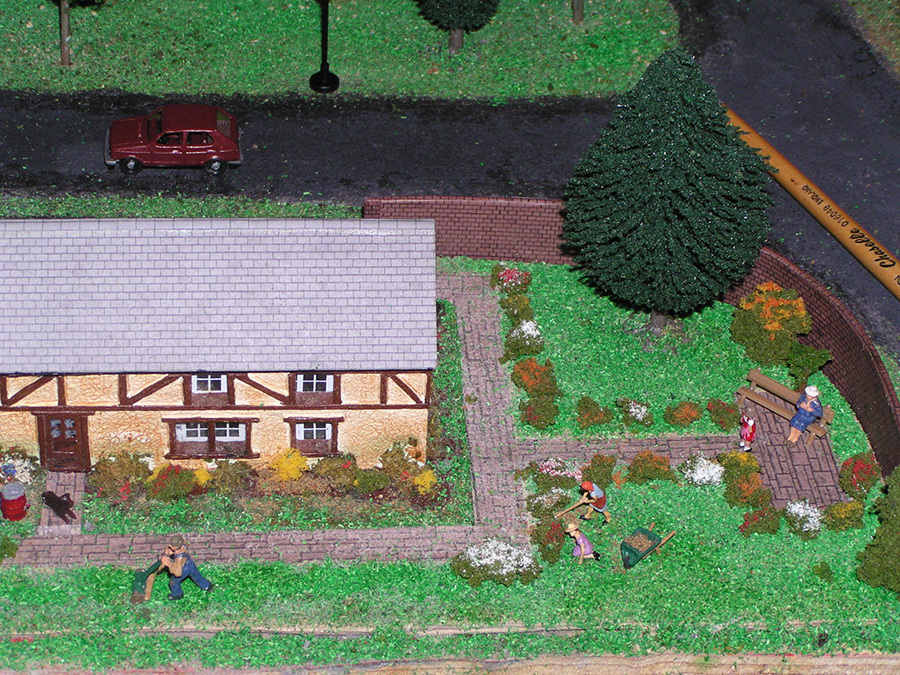
My London OO gauge layout after many years of dreaming of this day.

oo scale London bus

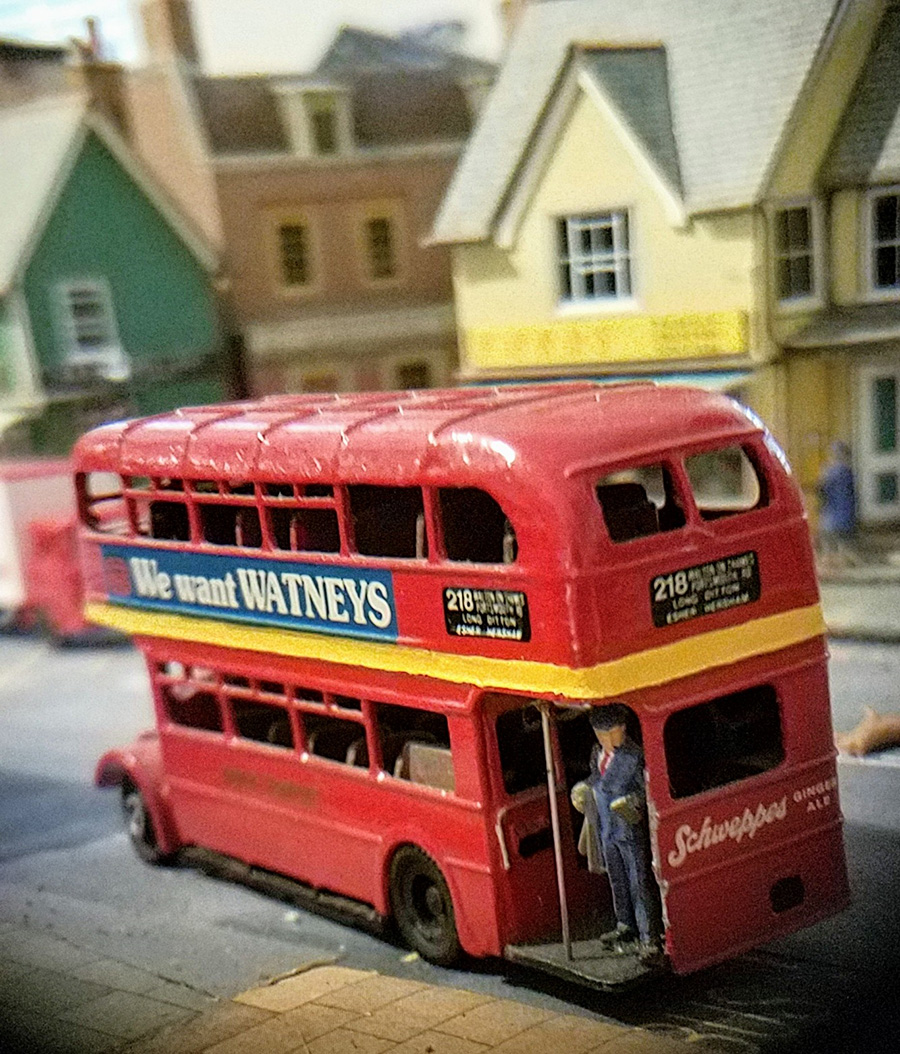
Plus, a traditional British double-decker bus which I assembled and painted with over 40 pieces of cast metal. An Anbrico kit 19AEC Mk III Weymann.

After couple years in England, we moved to Toronto, Canada as President of The Franklin Mint, and started another layout. After three years I moved to Minneapolis, Minnesota and started from scratch again.

model train layout

model train layout

I completed the layout with mountains, multi-levels and never really finished it because I then sold it to a friend, before I moved to Tampa, Florida, in 2000.

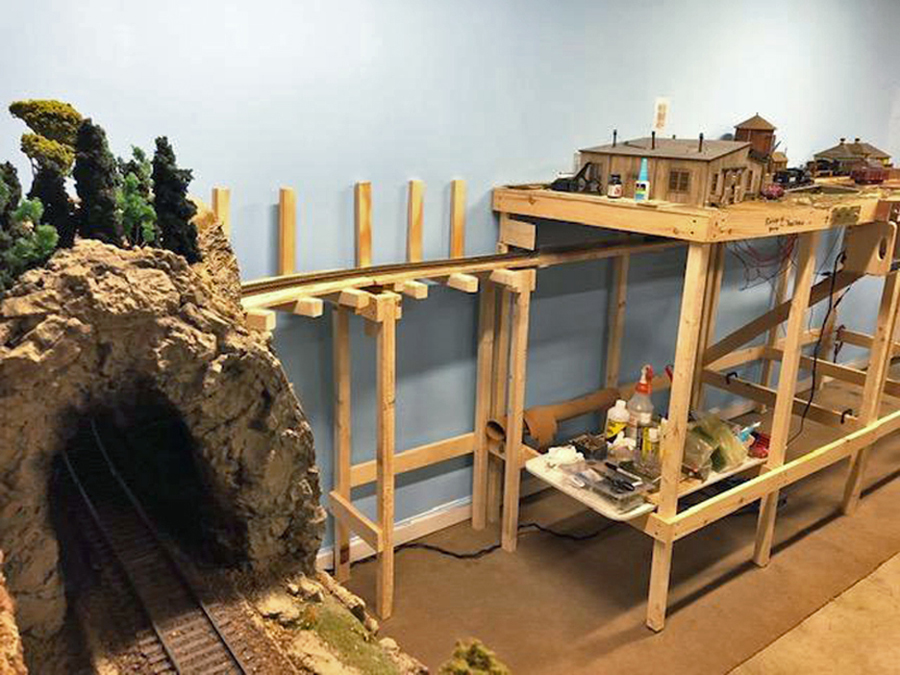
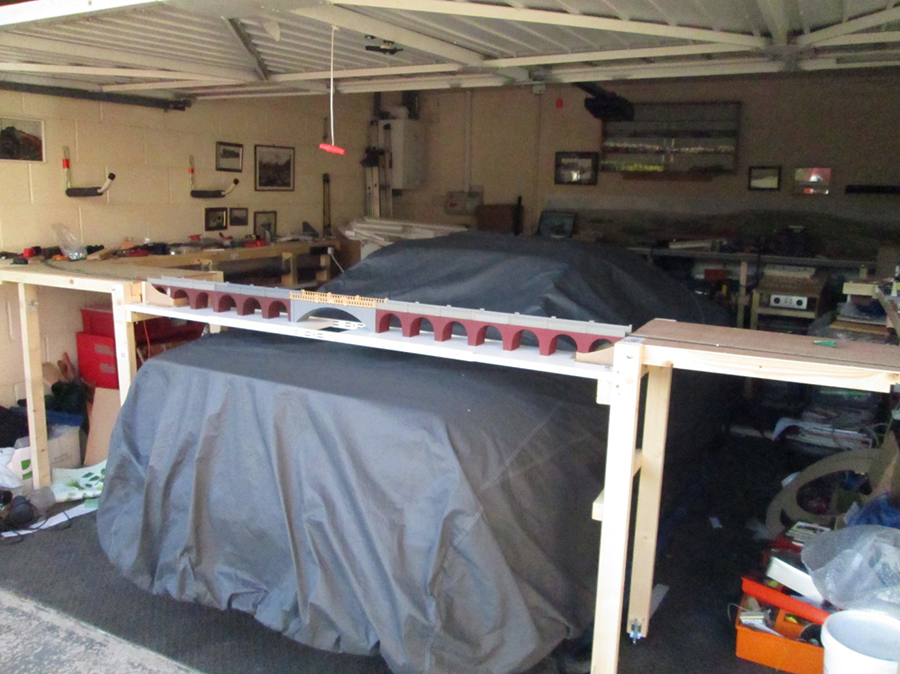
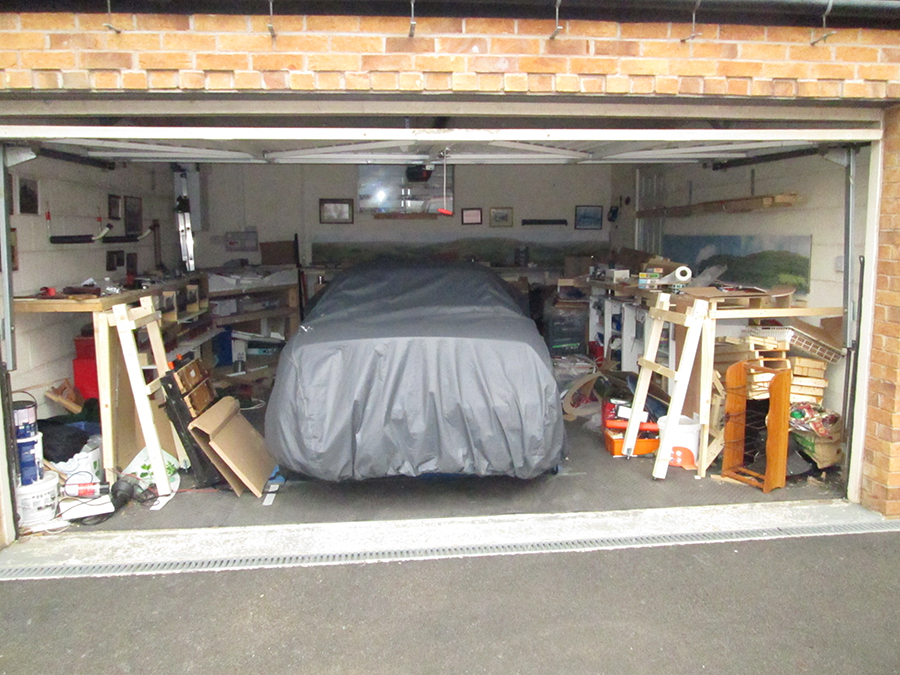
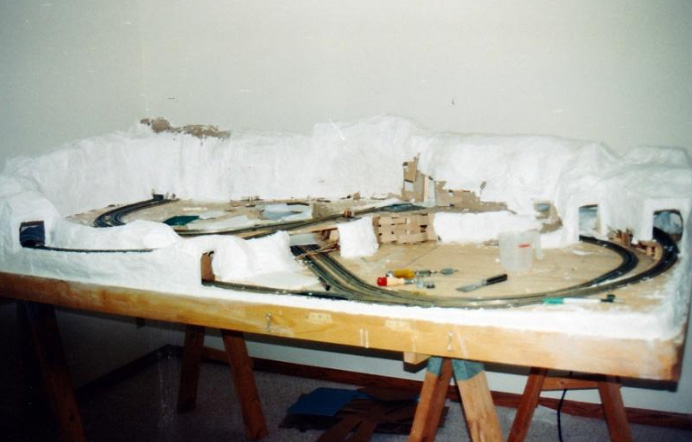
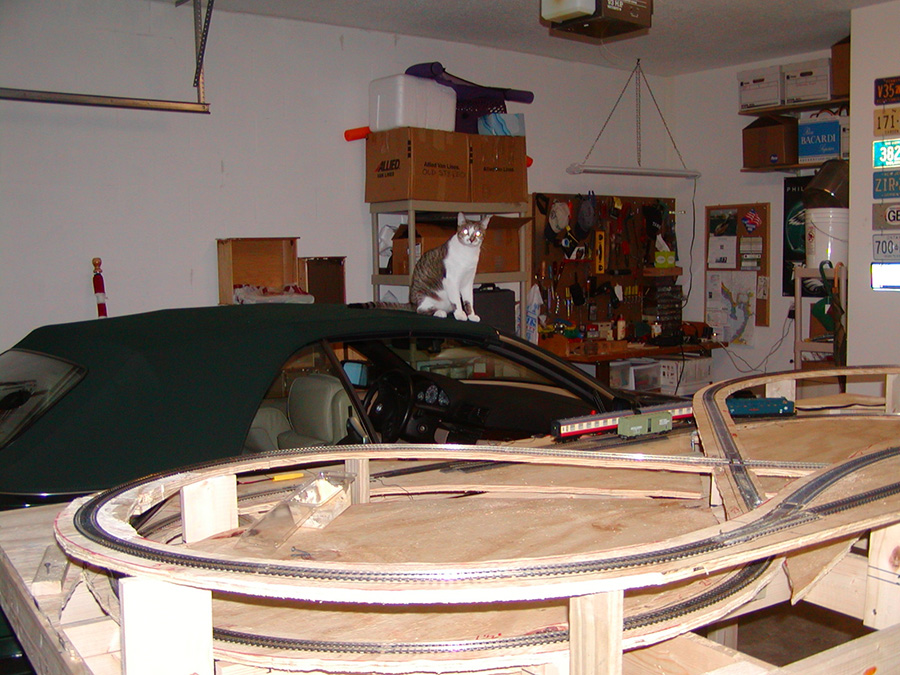
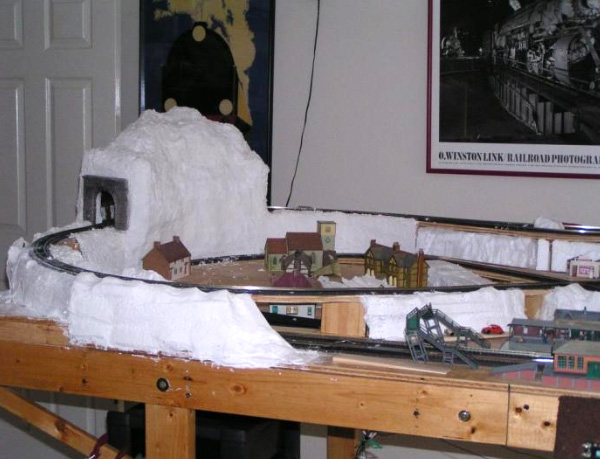
In 2005, I started again. As you could see I put together substructure in my garage in pieces moved to the second floor and put it together.

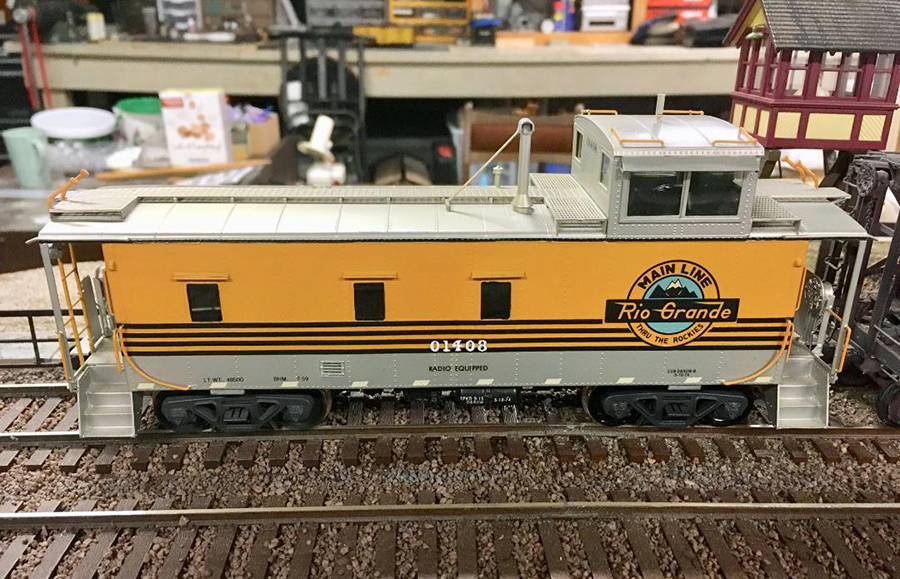
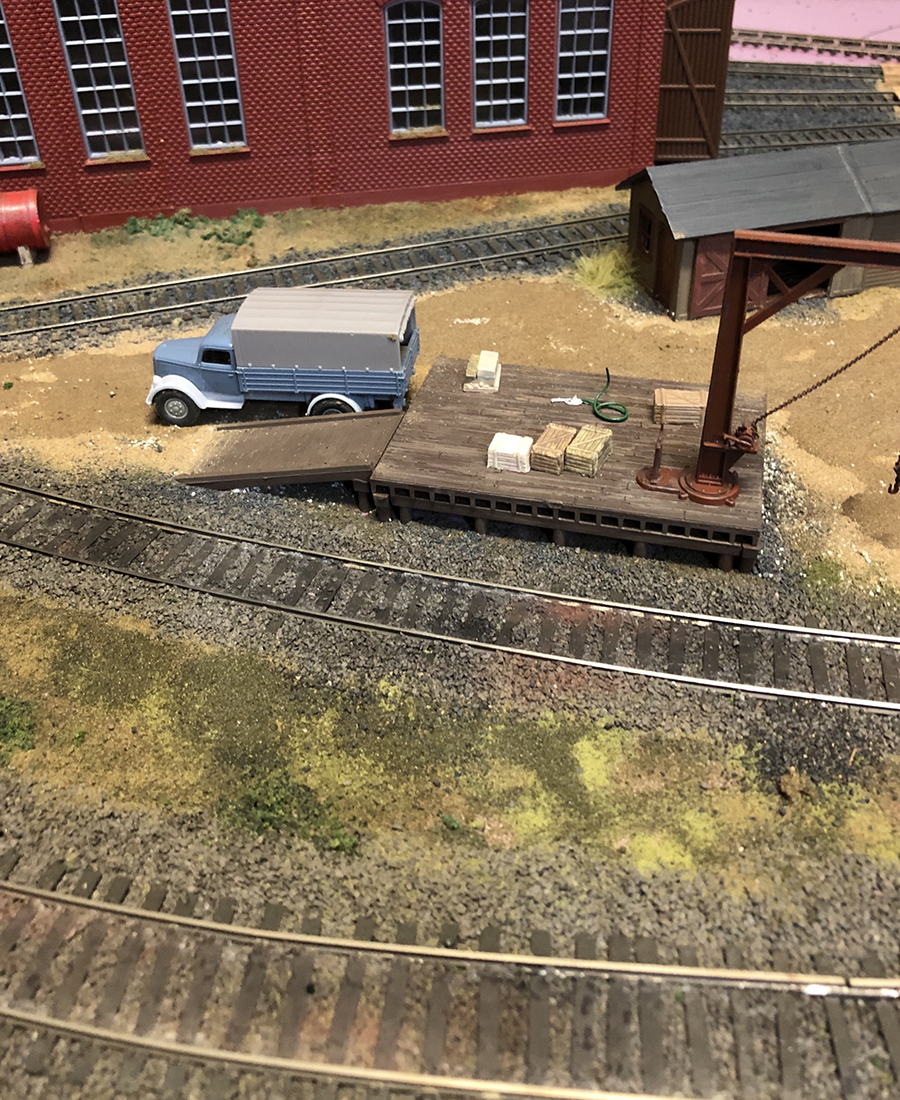
I took them out of the boxes from storage. All of the assembled structures, trees, engines, wagons and track and points were bought over 30 years ago in England.

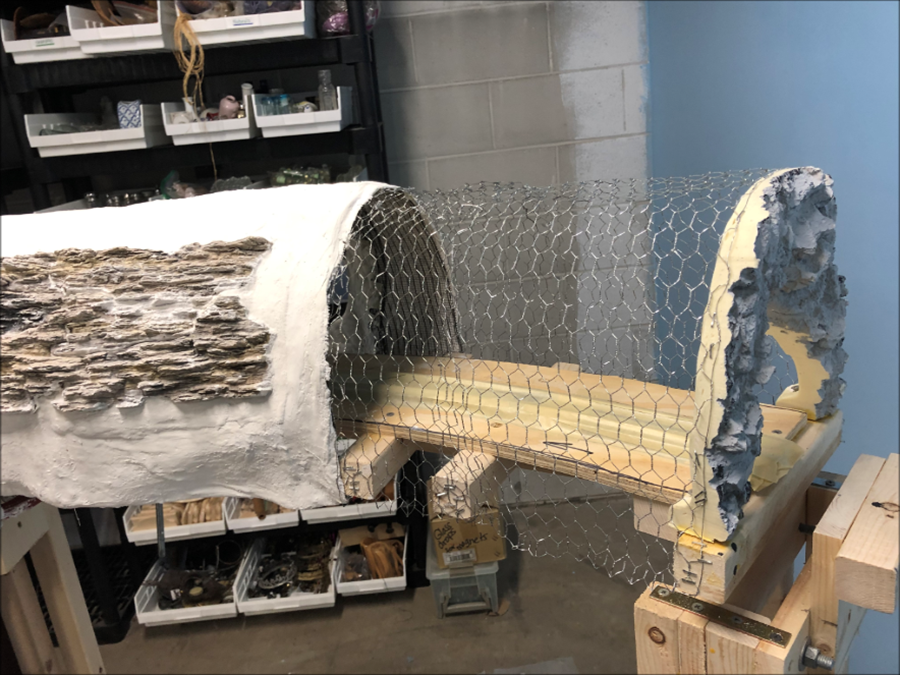
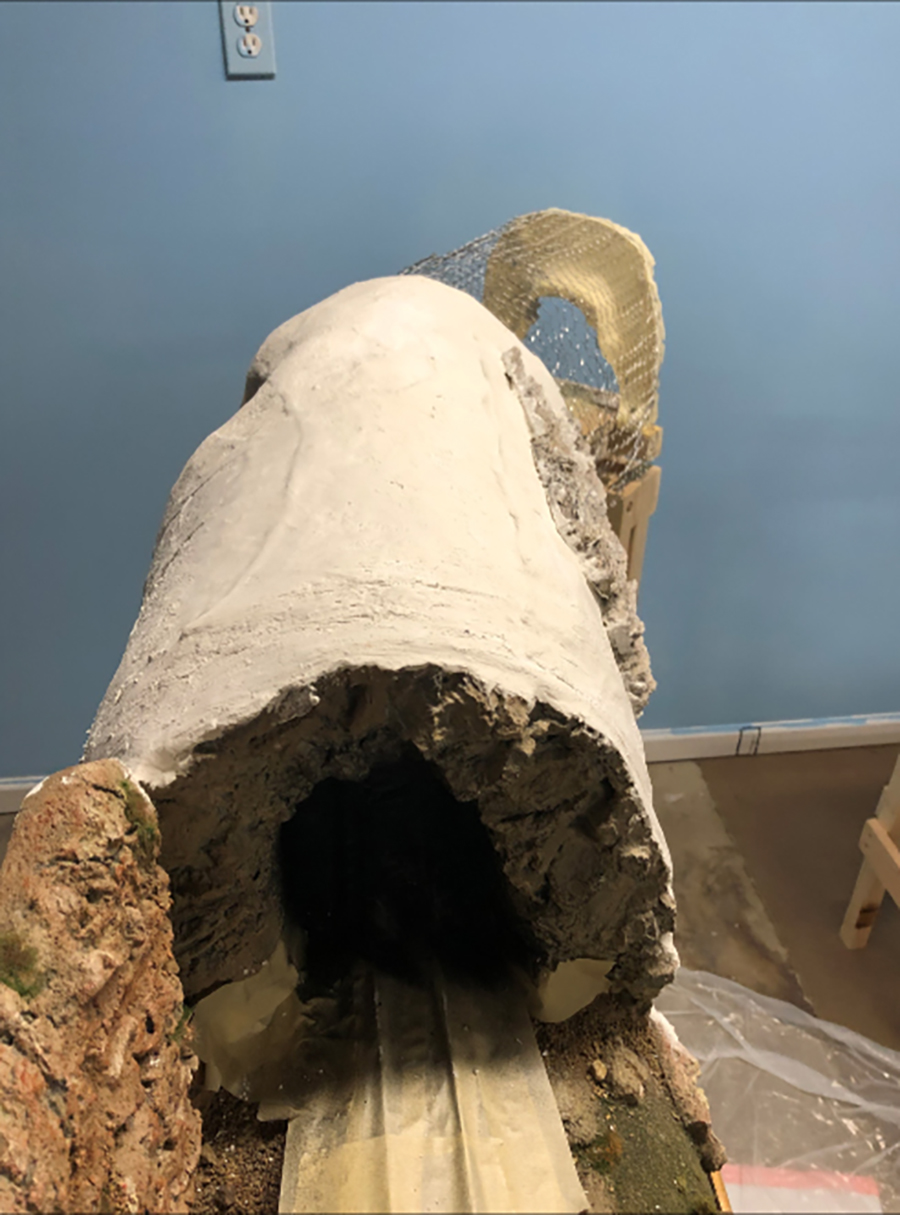
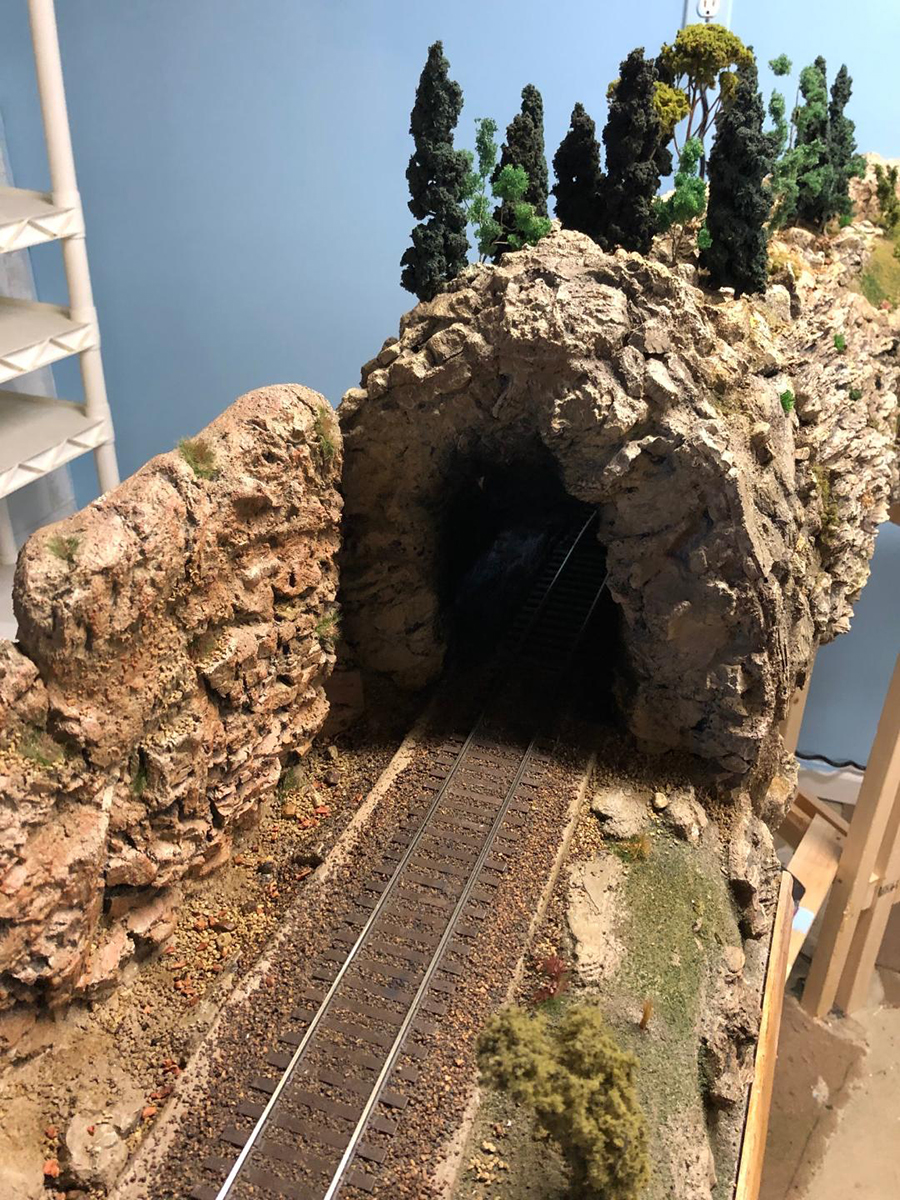
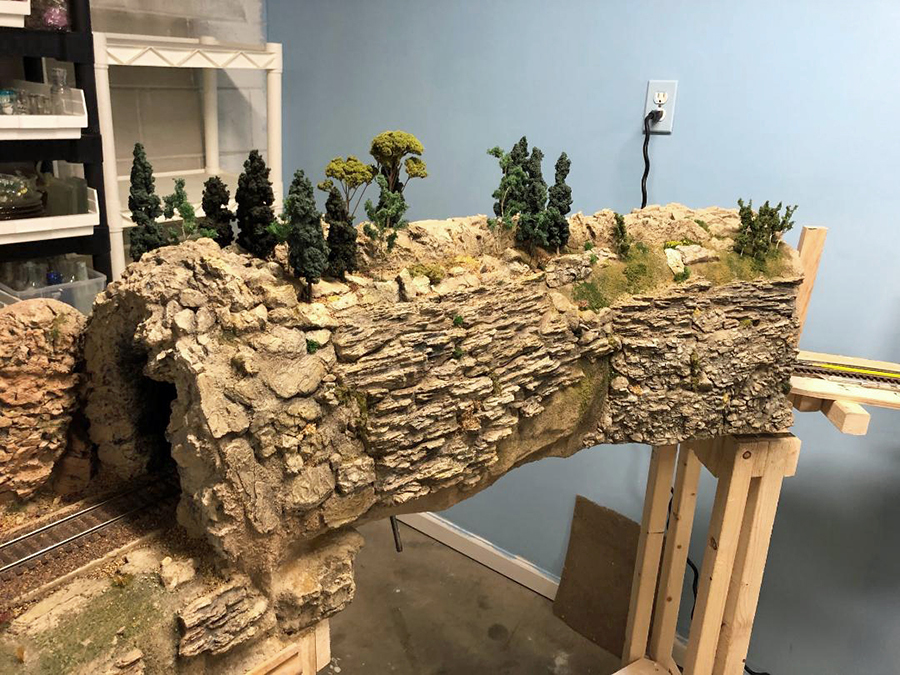
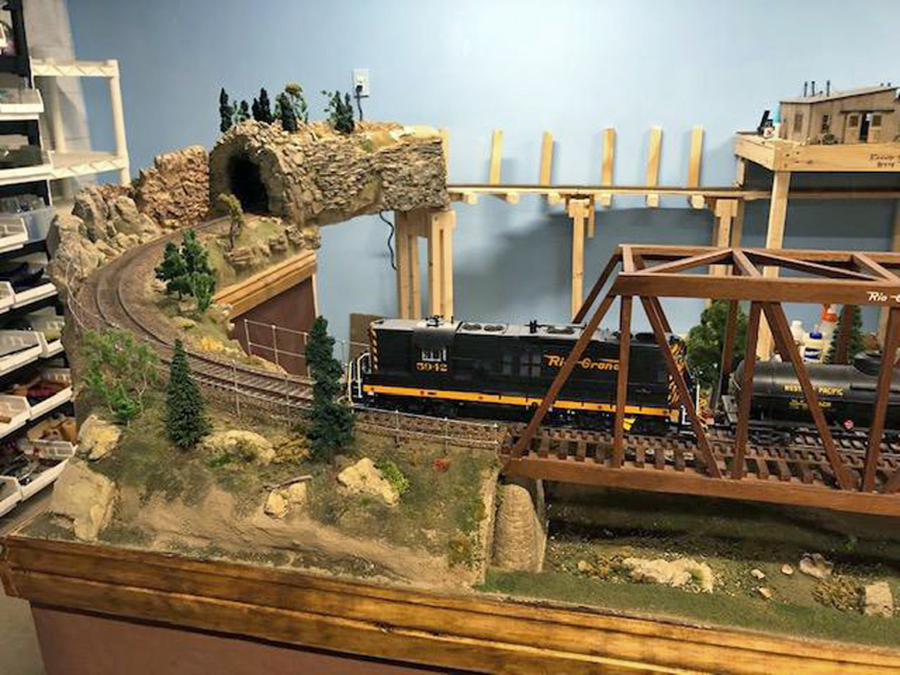
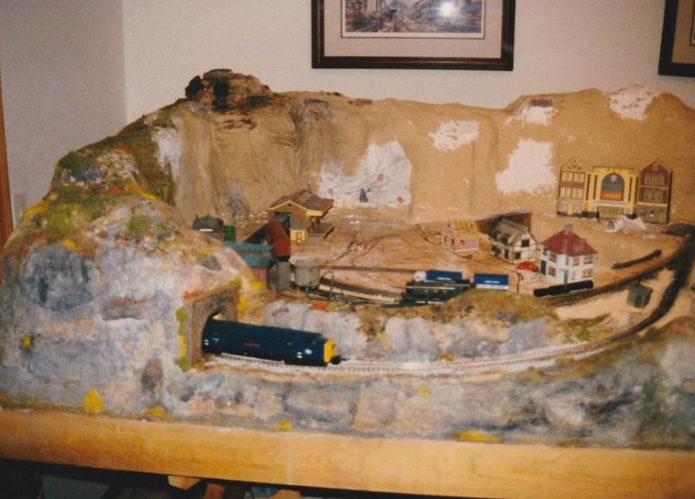
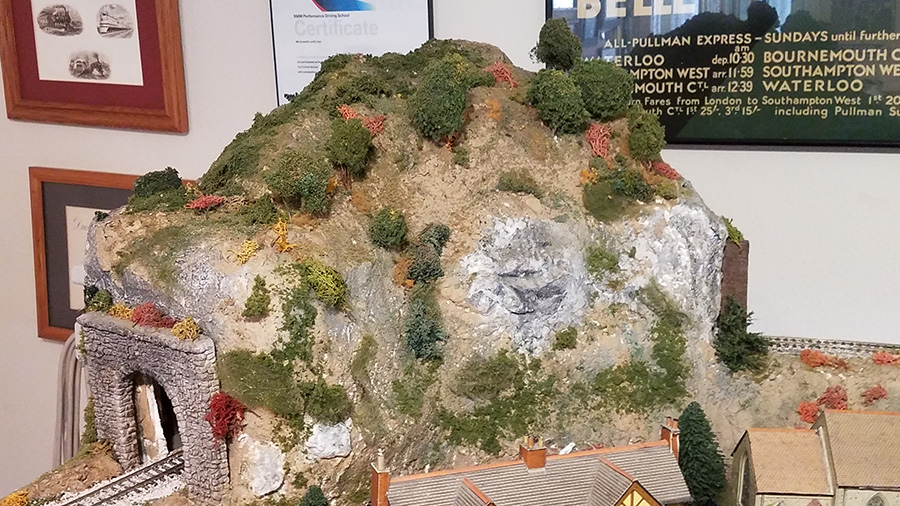
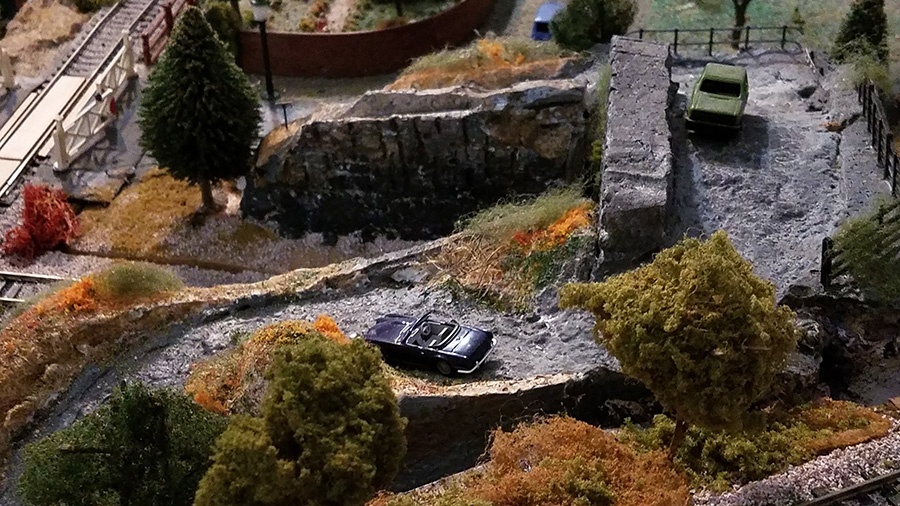
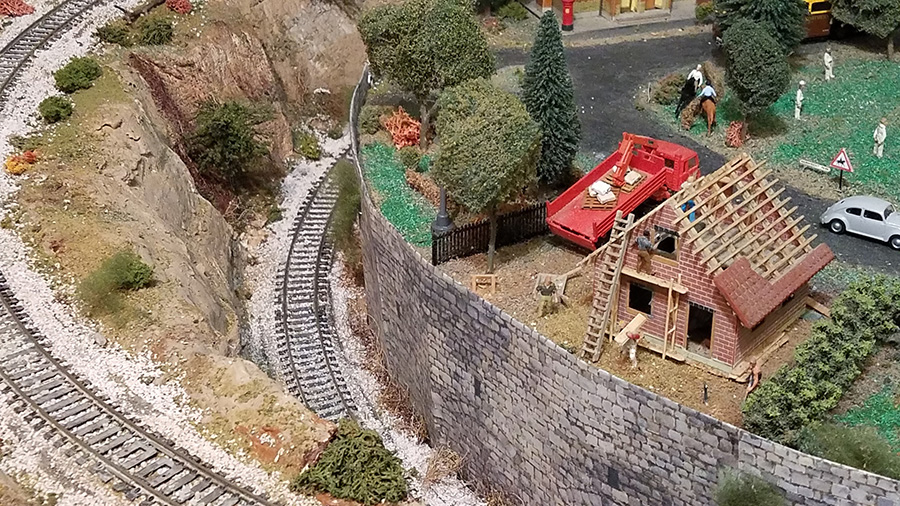
On the layout, I began to build mountains, with high detail and try to characterize the chalk mountains that I had experienced in England. Even now, I have many boxes of American trains which I am now selling on eBay.

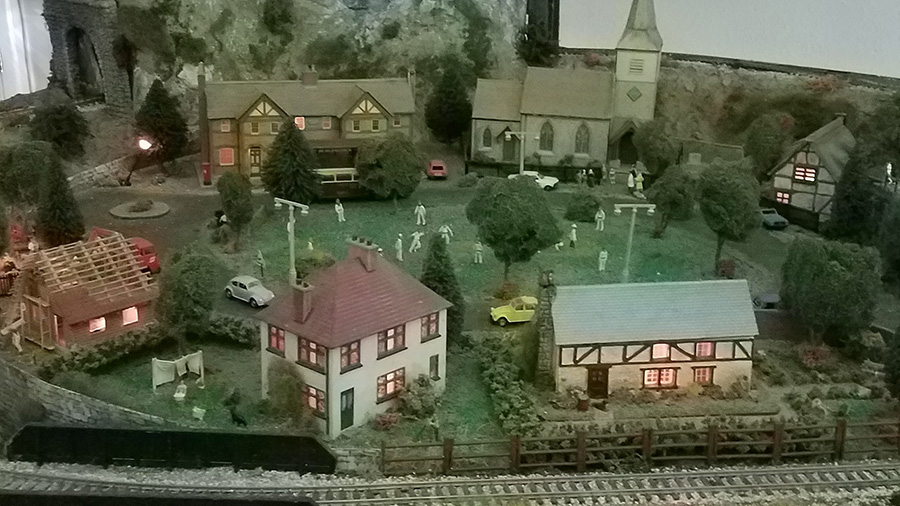
I continued with my 00 gauge with everything British and a small town, of course with a cricket pitch with all players are hand painted. My plan in the future is to have a High Street area.

model railroad benchwork

model railroad benchwork

model train mountain frame

model train mountain frame

model train mountain

model train trees

model train trees

model train trees


London model railroad:

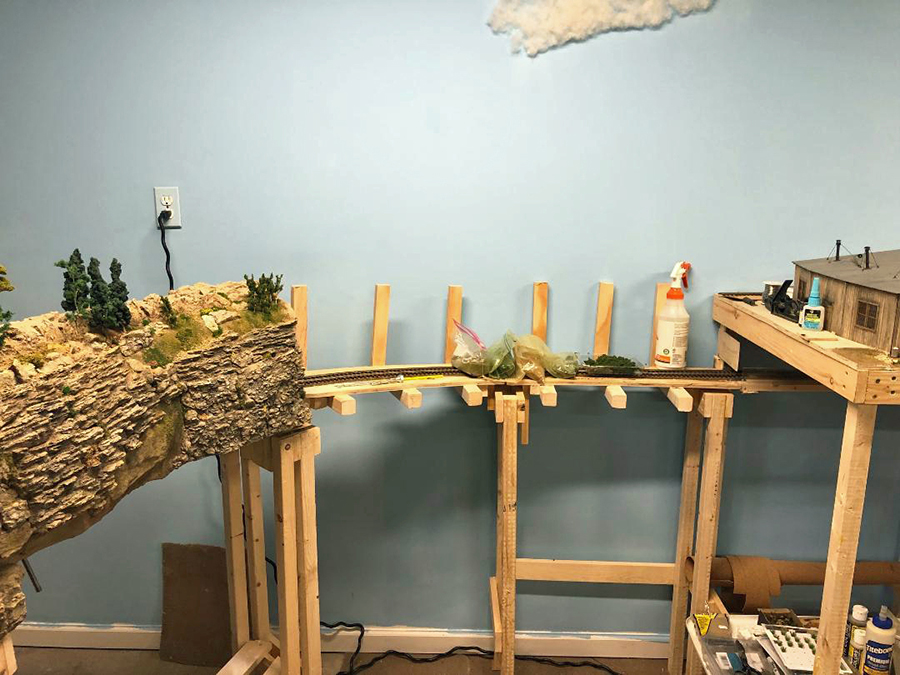
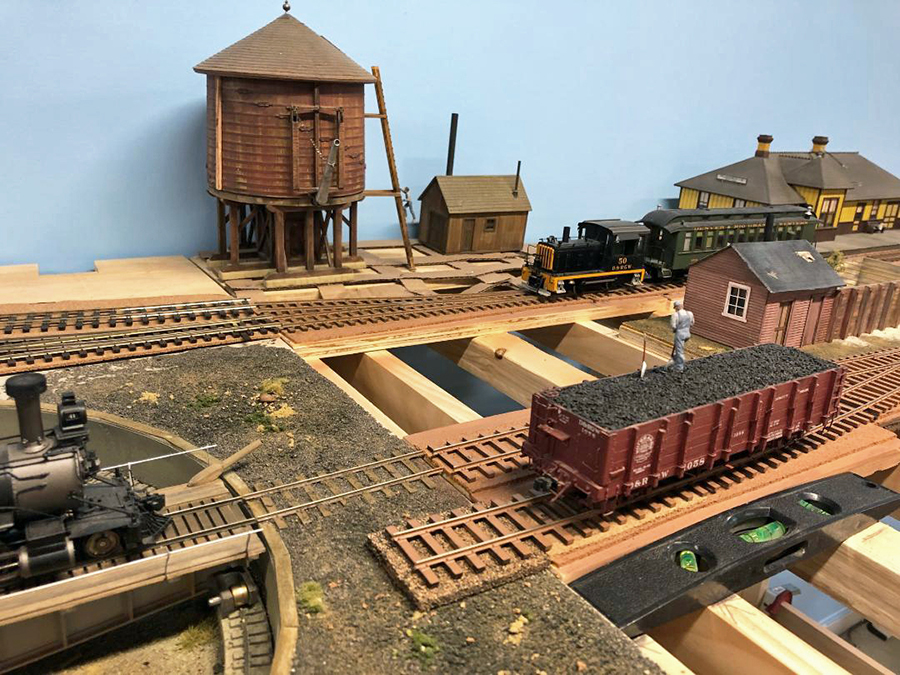
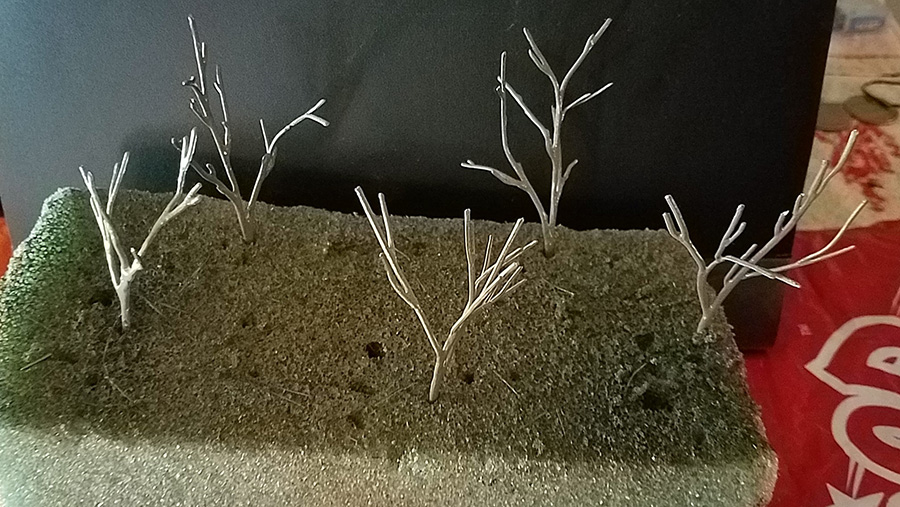
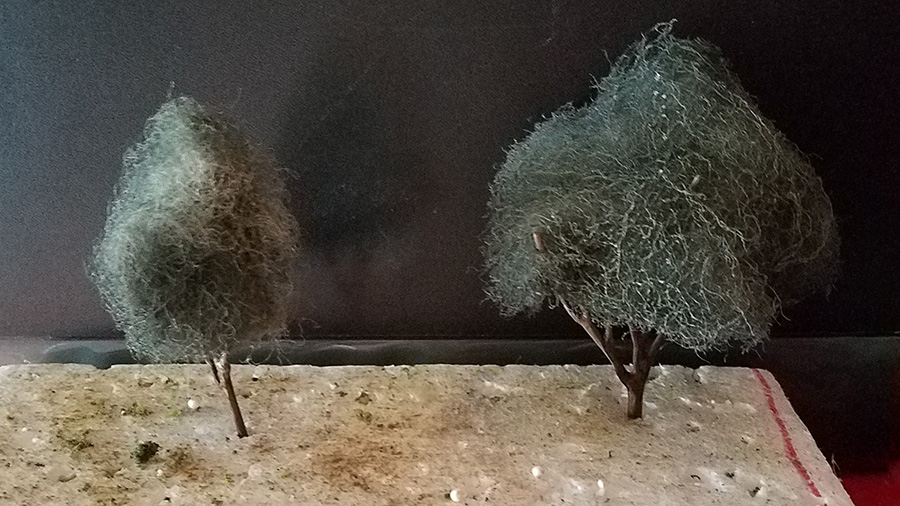
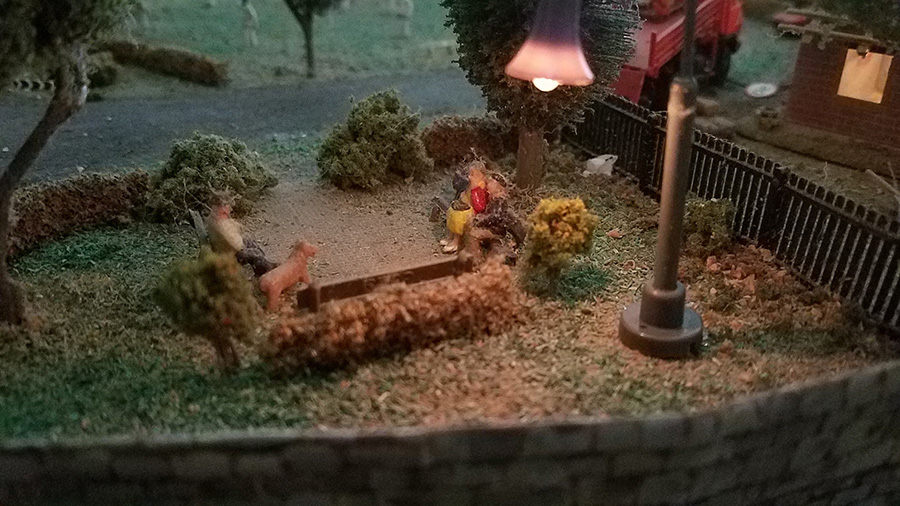
After many years, I finally got my act together to making trees, constructing a new layout, new houses, stations, etc. streets, and lighting.

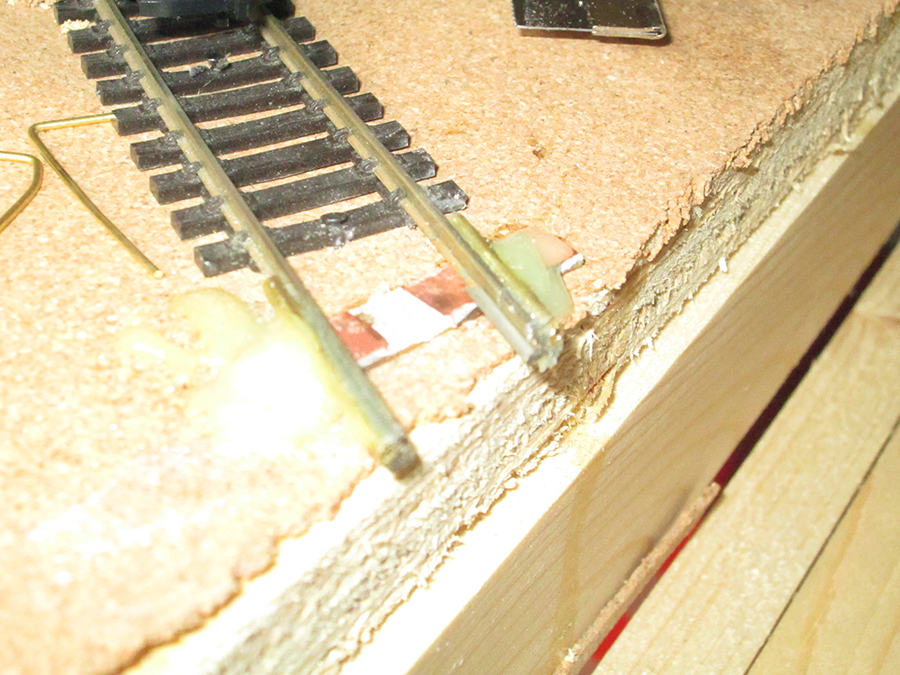
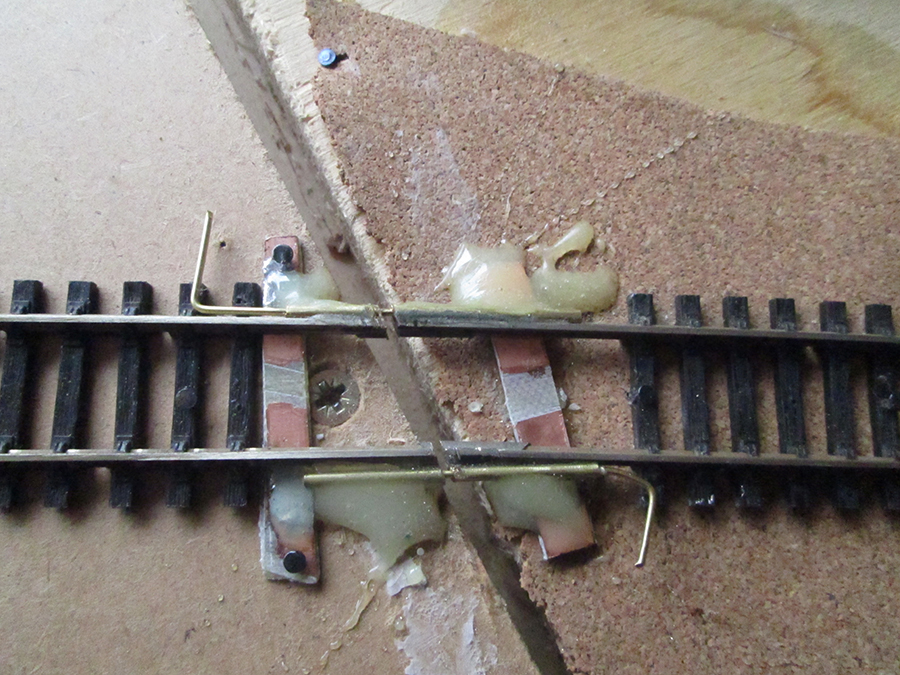
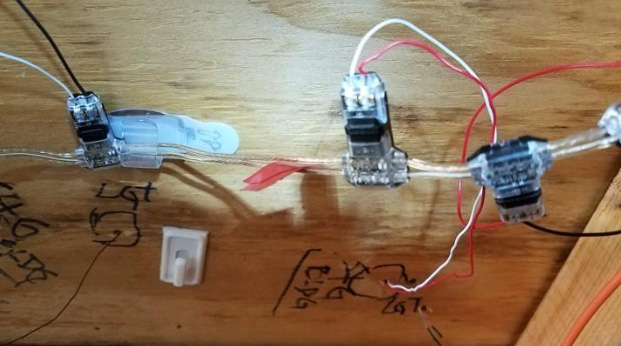
Speaking of lighting…I became so frustrated with the process of lighting structures and street lamps that did not work consistently, sometimes there was a connection then they would go out, very unreliable.

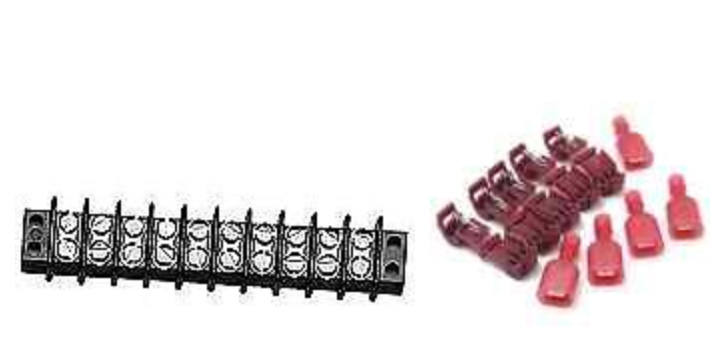
I started using terminal blocks for connectors, then Quick Splice Wire Terminals &Male Spade Wire Connectors and then finally Wire splice connectors Quick Solder less T Tap Connectors that work flawlessly. Success at last, after many tries and many years. (See below)

model railroad wiring

model railroad wiring

London model cricket match tunnel

model railroad scenery

model railroad scenery

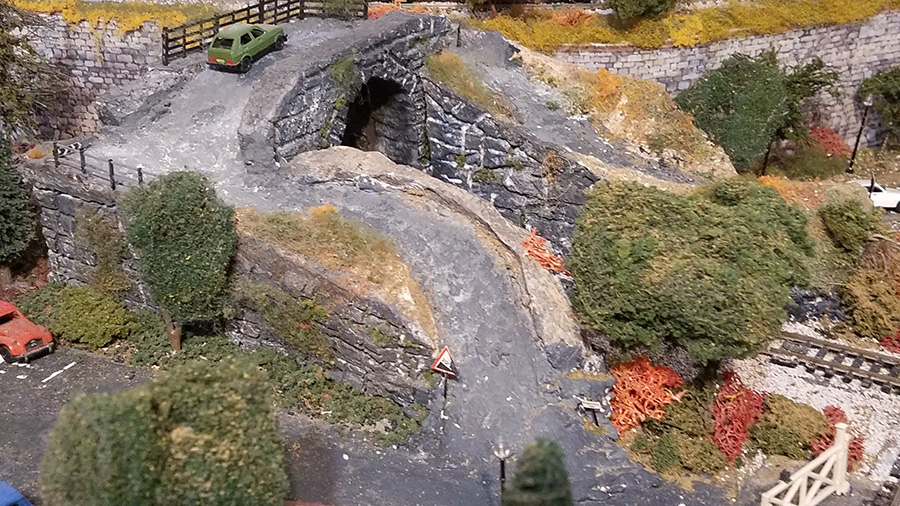
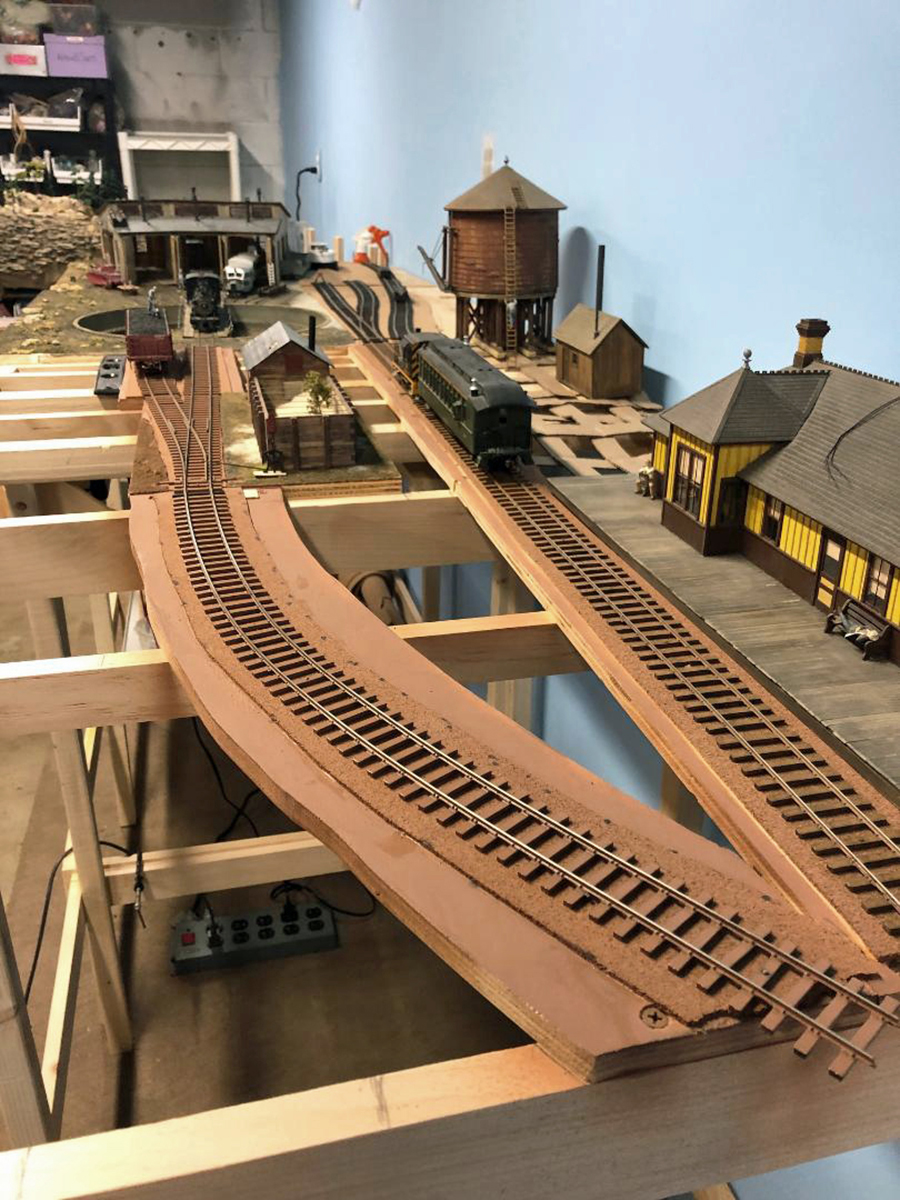
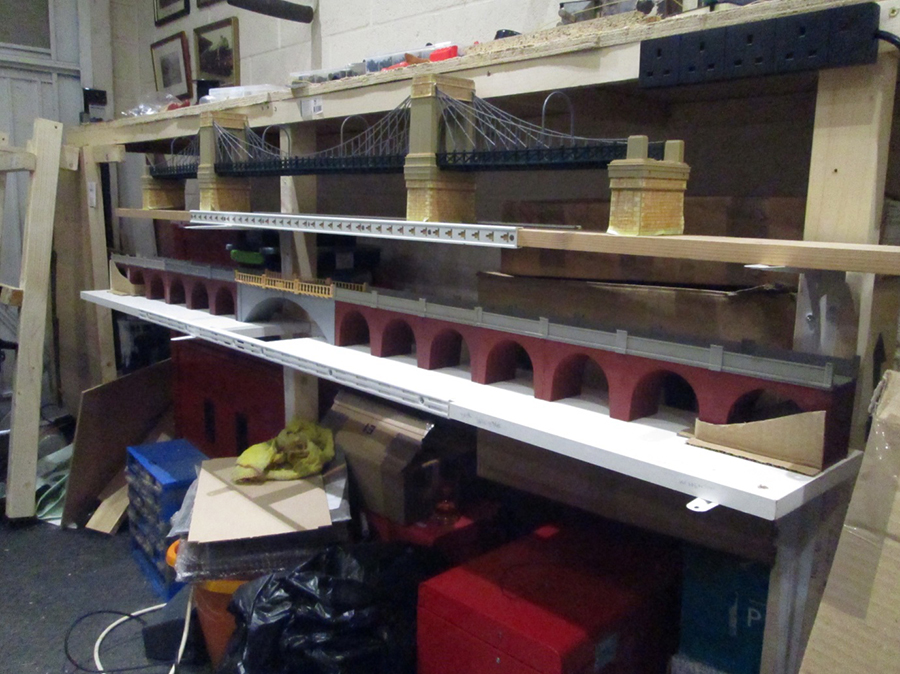
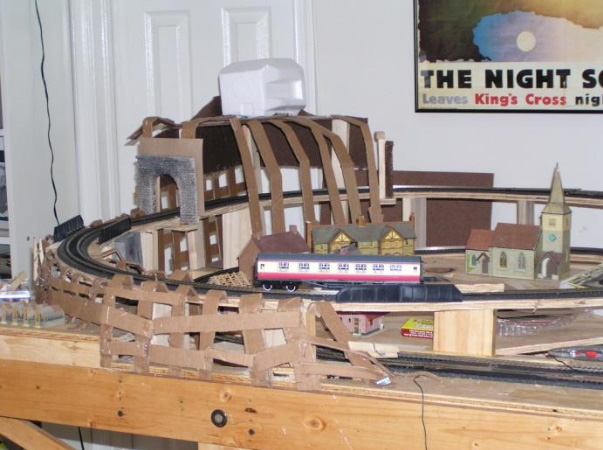
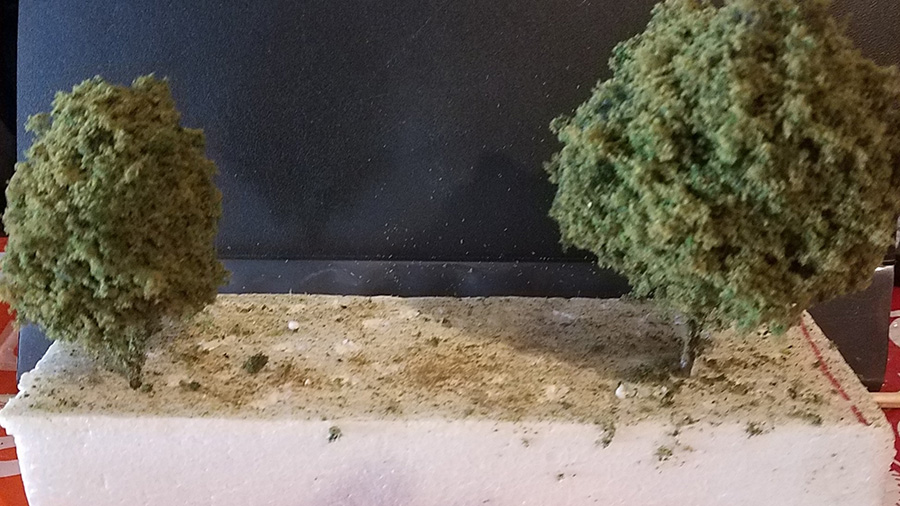
I created a bead board overpass consisting of 3 parts and put it together simulating stone with my hot wire cutter. This stone over pass was needed to have an access to my future High Street area.

london model railroad wedding

london model railroad grave

london model railroad house

model train garden

model train park

model train horses

model railway embankment curve

london model railroad cricket match

model train figures wedding

model train figures wedding

london model railroad cricket match

london model train cricket

model train house builders

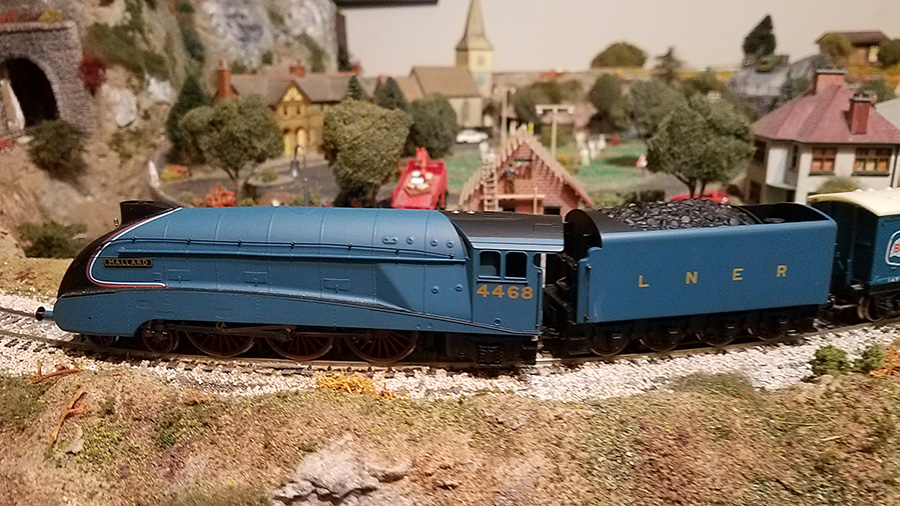
I am now in the process of rewiring the entire layout from 5 blocks with excessive wiring to DCC. I have sold my 5 DC engines and acquired a Hornby A4 Class 4468 “Mallard” with TTS sound.DCC engines and a Prodigy Express DCC controller.

mallard model train

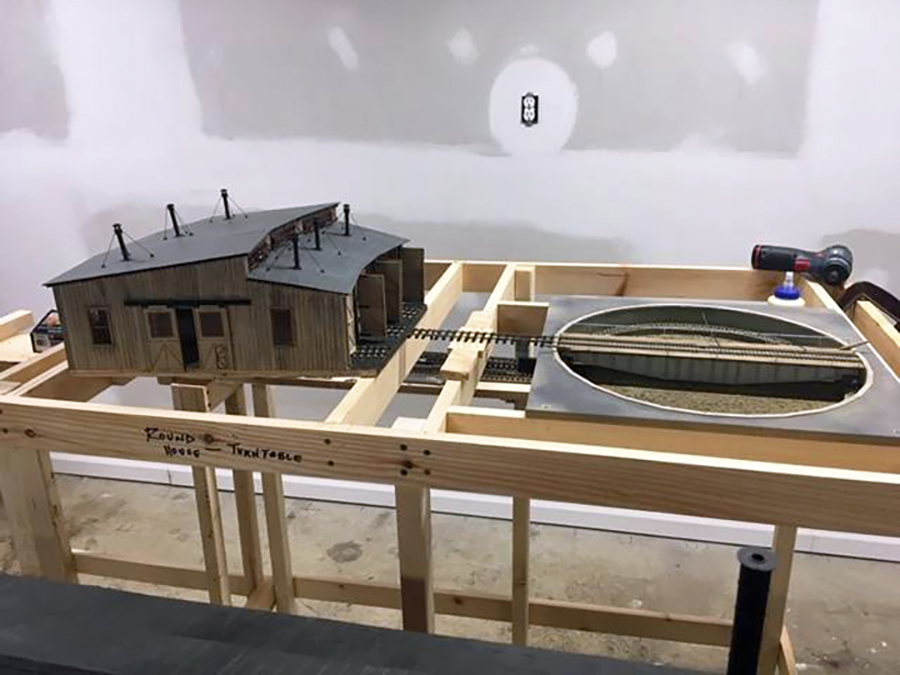
Building Phase 2 with a new mountain, yard and a High Street.

My Best,

Joe

Tampa, FL”

A huge thanks to Joe for sharing his London model railroad – really enjoyed his narrative.

It’s funny how this hobby never really leaves you. You may take a break for 40 years or so, but it always comes back. And I’m thankful for that because I do love reading your tips, stories and adventures.

That’s all for today folks.

Please do keep ’em coming.

And if today is the day you get started on your layout, the Beginner’s Guide is here.

Best

Al

PS More HO scale train layouts here if that’s your thing.


Need buildings for your layout? Have a look at the Silly Discount bundle.

Model railroad O gauge tunnel portals

Peter’s been in touch again this time with his model railroad O gauge tunnel portals.

(If you missed his last post, it’s here.)

“Greetings Al,

Peter here. Been a while but some progress has been made. As you know model railroading has many facets, i.e. scenery, track, running trains, photography, electrical etc.

I’m sending 18 or 19 pics with brief explanations and how I’m progressing, starting with brass engines I’ve modified, painted and decaled, to combining both standard 2 rail O scale with On3 narrow gauge together.

Pics 1 through 8 are modifications and paint jobs.

o gauge loco

Pic 1 is how I received this GP 40-2, nice factory paint, but not my road, so pic 2 is the stripped and finished model of Rio Grande, with soldered on added details to that particular road. snowplow, horn and antennae arrangement and other details.

o gauge loco

o scale loco brass

Pics 3 through 6 starts with a generic GP-9, Lot’s of work here.. As you see I had to convert the two 48 inch fans on top with four 36 inch prototypical fans.The dynamic brake fan in the middle was in the parts bag, so I just attached it.

Most parts came from Precision Scale Co. They have all the diesel and steam detail parts any one would want. But they still need to be soldered on correctly, There are rerail frogs added, and most painstaking were the spark arrestors I had to make from brass from scratch because these particular ones are not available commercially.

o gauge locomotive

o gauge locomotive

o gauge loco

o scale loco

Pics 7 and 8 are Brass train paint jobs I had done a while ago, but very happy the way they turned out; F7 A & B and the 4 stripe caboose..

O gauge locomotive


Next the tunnel work how to and how I’m combing the two gauges. I appreciate you posting both of these in succession.

Pics 9 through 14 (2) show the tunnel I completed as it curves around to go under the narrow gauge which is against the wall and curve out on the other end eventually. There’s an aisle between the two gauge layout so one can operate either or.

Model railroad O gauge tunnel portals

Model railroad O gauge tunnel portals

Model railroad O gauge tunnel portals

Model railroad O gauge tunnel portals

Model railroad O gauge tunnel portals

The portals are commercial products cut down and I used the excess on top of the tunnel. I either used rubber rock molds on part of this and smashed up the dried excess for boulders. The rest as in the side are woodland scenic ready rocks placed in combination to suit my eye.

I used a floral type chicken wire which is light and pliable to form the tunnel in sections because of the curvature of the tunnel itself. Then, plaster soaked gauze is next with ready made drywall plaster that comes in buckets from any Home Depot or Lowes.

I don’t mind mixing hydrocal for rubber rock molds, but for bigger areas I would suggest getting the ‘Mud’ or drywall plaster because it not only saves time and mess, it goes on smooth.

model train roundhouse

Model railroad O gauge tunnel portals

Model

Model railroad O gauge tunnel portals

control panel

Pic 14 shows how the standard gauge with curve under neath the narrow gauge. There will be a back ground against the wall eventually.

Pics 14 through 18 show the start of the narrow gauge, eventually this will lead to Rio Grande Southern wooden tresles etc. (later)

model train roundhouse

coal freight

o scale turnouts

o scale buildings

Pic 18 is a shot of the town in the standard gauge where Mrs. Thorkle caught her husband at the bathouse (ha ha).

TY Al and hope all is well with you.

Peter”

And now on to Dave:

“Hi Al, just had a day up on N.Y.M.Railway, enjoyed seeing the City of Wells… one of the Battle of Britain Class Loco`s… and our own Repton running up there, made for a good day out and a bit of nostalgic Steam.

Nice to see a bit of real steam still in operation.

Regards

Dave”


Loved seeing Peter’s model railroad O gauge tunnel portals – it’s amazing how much charm his layout has. Can’t wait to see the next one.

That’s all for today folks.

Please do keep ’em coming.

And if today is the day you get started on your layout, the Beginner’s Guide is here.

Best

Al

PS More HO scale train layouts here if that’s your thing.


Need buildings for your layout? Have a look at the Silly Discount bundle.

HO scale switch track

Bill’s been back in touch with his 4×8 HO scale switch track – his last post is here.

“Hi Al

I so continue to enjoy your newsletter and all the wonderful people that share our hobby.

I am making some progress on my switching layout. More ballast down and more scenery added. Still a longggggg way to go but I think that is what is fun is enjoying the labor of love we each put into our layouts. I’ve attached a few pictures showing progress and a video link walking through where I am at on the project and what is coming.

Thanks!

Bill in Virginia”

HO scale switch track

HO scale switch track figures

HO scale switch track loading platform


And now we leave Bill’s HO scale switch track, on to something that always makes me smile: grim determination and ingenuity:

“Hi Al

Thanks for the e-mails.

I am building a layout around the walls of my garage and as I want to be able to get a car in and out some kind of removable section across the door was needed.

I have solved this by making a drop-down flap each side and having a removable leg section at the end of each flap.

The legs have ledges facing inwards which support bridge sections (one made up from three 3-arch viaducts, a river bridge and a single arch and the other consisting of a Suspension Bridge – all Triang-Hornby).

The suspension bridge will be extended by the addition of a second river bridge as it is a little short. I’m not sure what the justification might be for such a combination of bridges but I had them available so will worry about that later!

The bridge sections are held in place by coach bolts and the rails joined by sliding fishplates to align them. I will add a jump lead with a plug and socket under the boards rather than rely on the fishplates to conduct the power.

As there is very little clearance between the base of the bridge section and the car boot, I a) take great care when fitting/removing them, b) usually have a large sheet of foam over the top of the boot and c) have kept the depth of the bridge board to a minimum by using metal shelving racks along the side rather than conventional wooden bracing.

Where the flaps hinge down the rails have small lengths of brass tube fixed to each rail end with a slightly longer section of brass rod which is a tight fit pushed through to keep the rails aligned.


I have glued using epoxy rather than soldered, mainly because it was easier with the track across the hinged joint being on an angle and a curve – not ideal but needs must! This isn’t the neatest bit of work I’ve done, but it works and is in the fiddle yard section of the layout.

If I need to do the same on a scenic section I will be a bit less slapdash! I laid the track right across the gap and once the glue had dried used a razor saw to cut through the rails and the brass tubing. Some slight distorting of the tube resulted but a quick clean up with a suitable sized drill in a pin vice sorted that out.

Jumper leads are soldered to the tracks either side of the hinged joint and pass below the baseboard.

The bridge sections are stored by simply laying them on brackets fixed to the legs under the fiddle yard section of the layout.

Hope that is useful to someone.

Regards

Steve

Lincs, UK”

model train garage

One of the bridge sections in place with the car in the garage. It is (just) possible to get at all of the baseboards even with the garage door shut.

model train garage

Flaps at each side folded down and bridge sections removed. The leg sections are just leaned against the lowered flaps. As you can see, tidiness is not something which comes naturally to me – plus the layout is very much a work in progress. Accurate parking is needed to allow both flaps to swing up – I have marked the garage floor with white tape to help with this and a small baulk of timber at the rear of the garage acts as a gentle reminder to stop.

model train gargae

The suspension bridge board on its storage brackets showing how metal shelf “ladders” have been used to brace the board. Like the rest of the layout, there is no scenery yet of either of the bridge boards. Suspension bridges carrying railways were rare in real life but I like the model!

model train garage

One of the flaps folded down with the leg section propped against it.

How brass tube and rod has been used to align tracks across the hinged section.


Both bridge boards stored.

A huge thanks to Bill for sharing his HO scale switch track, and to Steve for showing us nothing can get int the way of a layout with a little thinking.

I know I’ve said it before, but I do love seeing all the different things that pop up in my inbox. Please do keep ’em coming.

That’s all for today folks.

Please do keep ’em coming.

And if today is the day you get started on your layout, the Beginner’s Guide is here.

Best

Al

PS More HO scale train layouts here if that’s your thing.


Need buildings for your layout? Have a look at the Silly Discount bundle.