Small O scale layouts

Got this in from John, and loved it. He’s added to the small O scale layouts on the blog:
“Dear Mr. Lee…

While looking over the post today I noticed someone asking about O Scale prints…

I know I have sent you mine before… And my “Grasse Pointe” On30 layout that used only your structures…

You have published them but would you like a recap of my “best hits” to show what can be done?

Also, right after I finished “Grasse Pointe” I decided to start cleaning up some stuff — What better way than to build a layout with the intention of selling it… Notice I said “Intention”…

Well after about two or three weeks I am essentially done and have decided to keep it and part with something else… I am running out of space for my little layouts!

John the printout builder and videographer is not the only John that might be a little “touched” if not downright bonkers.

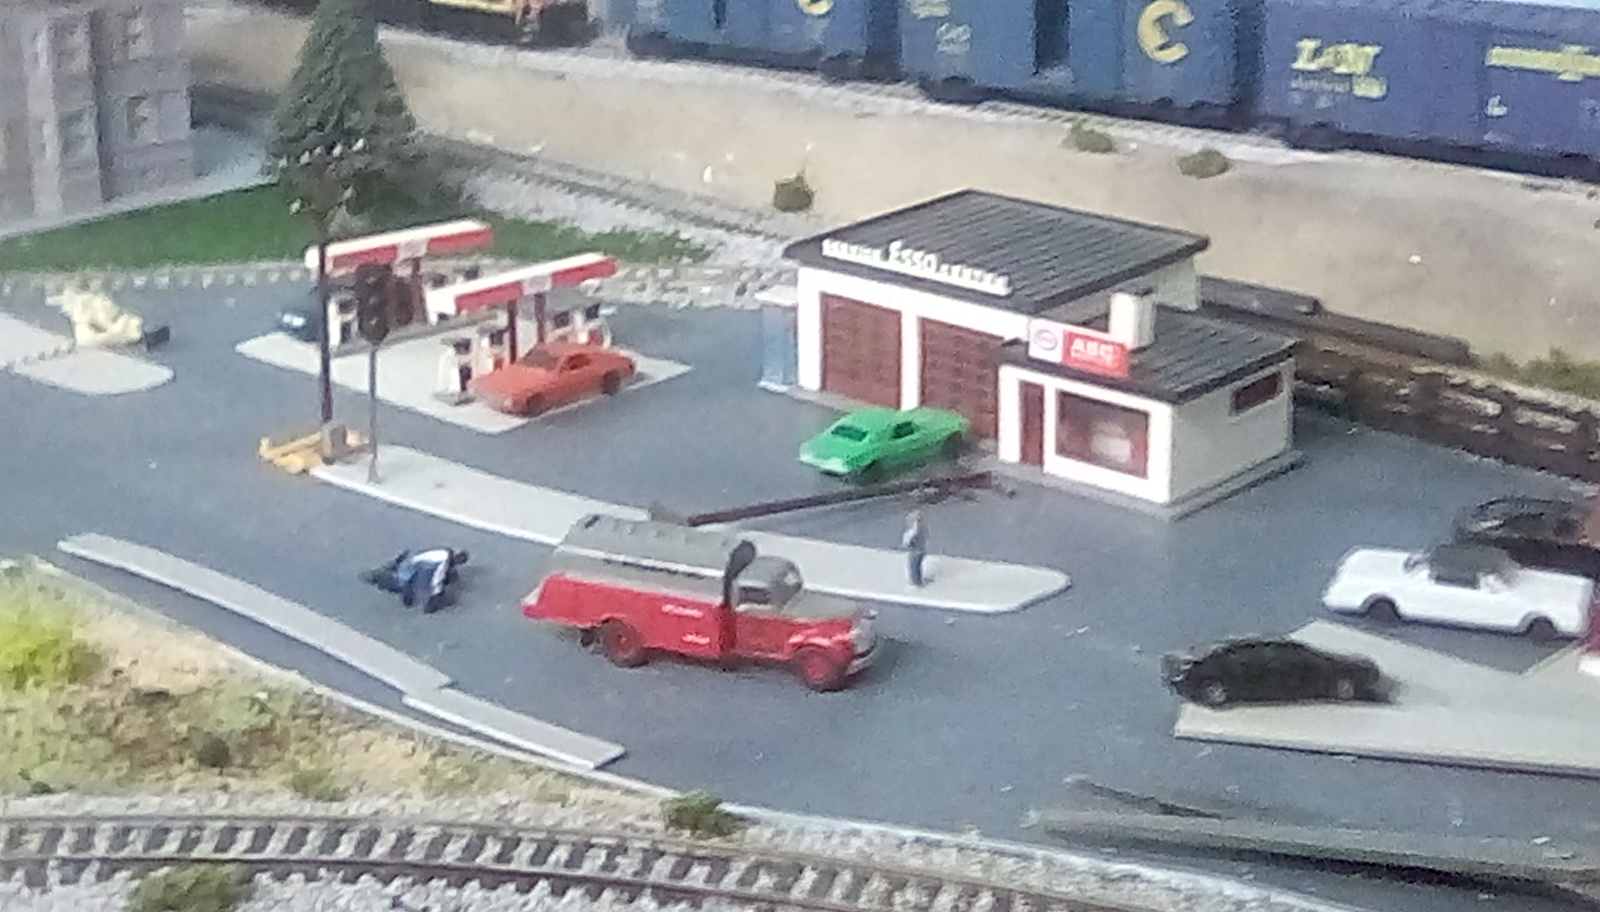
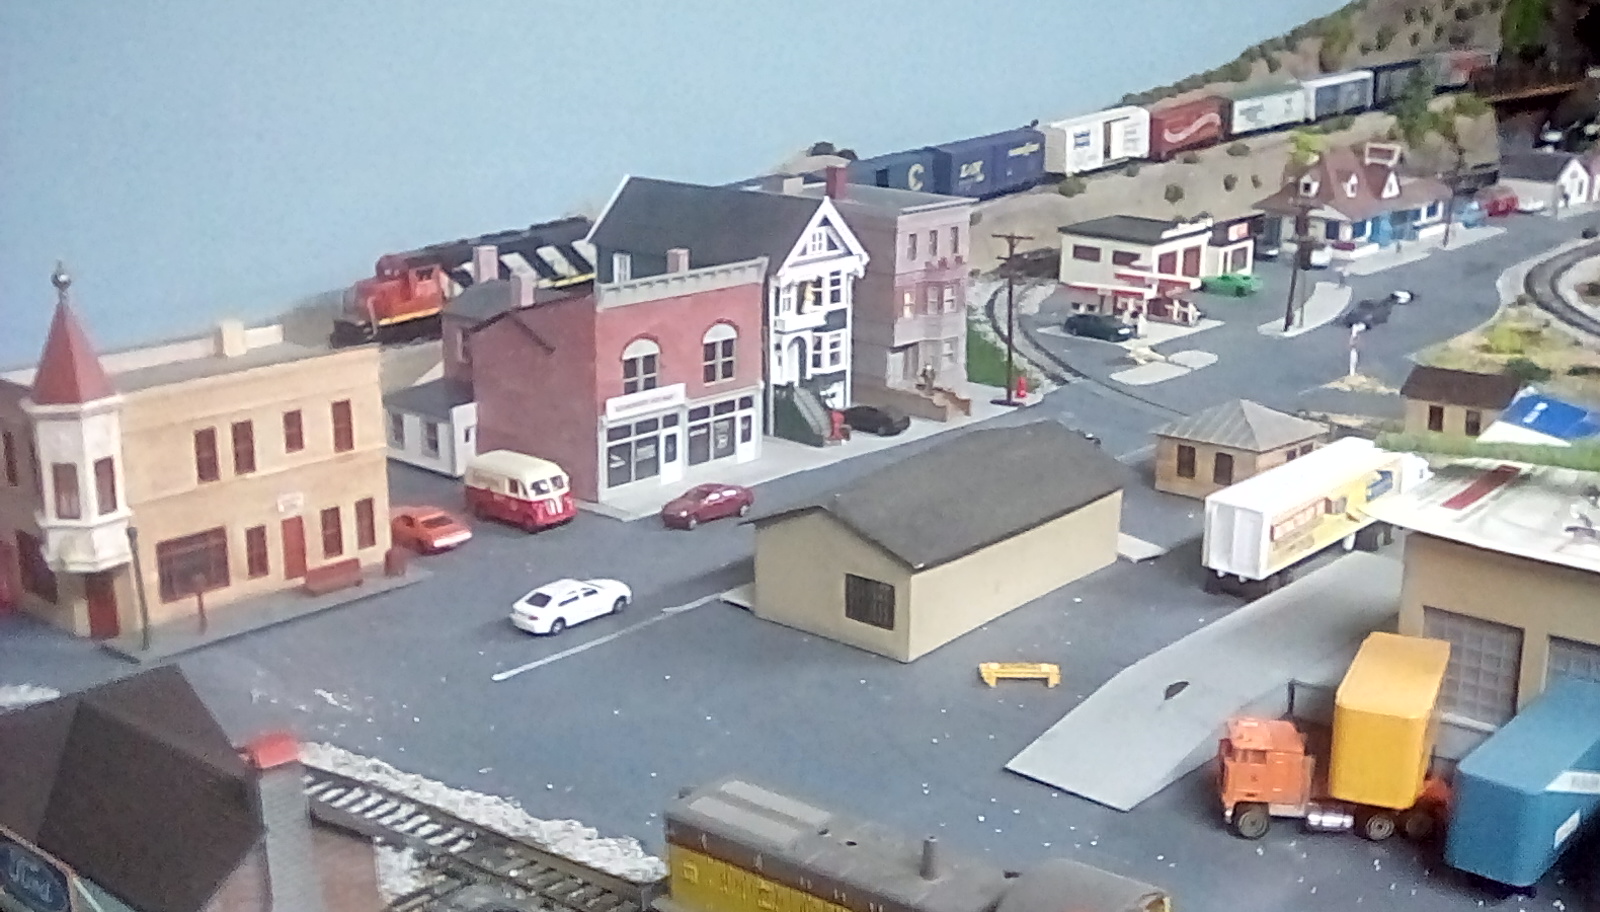
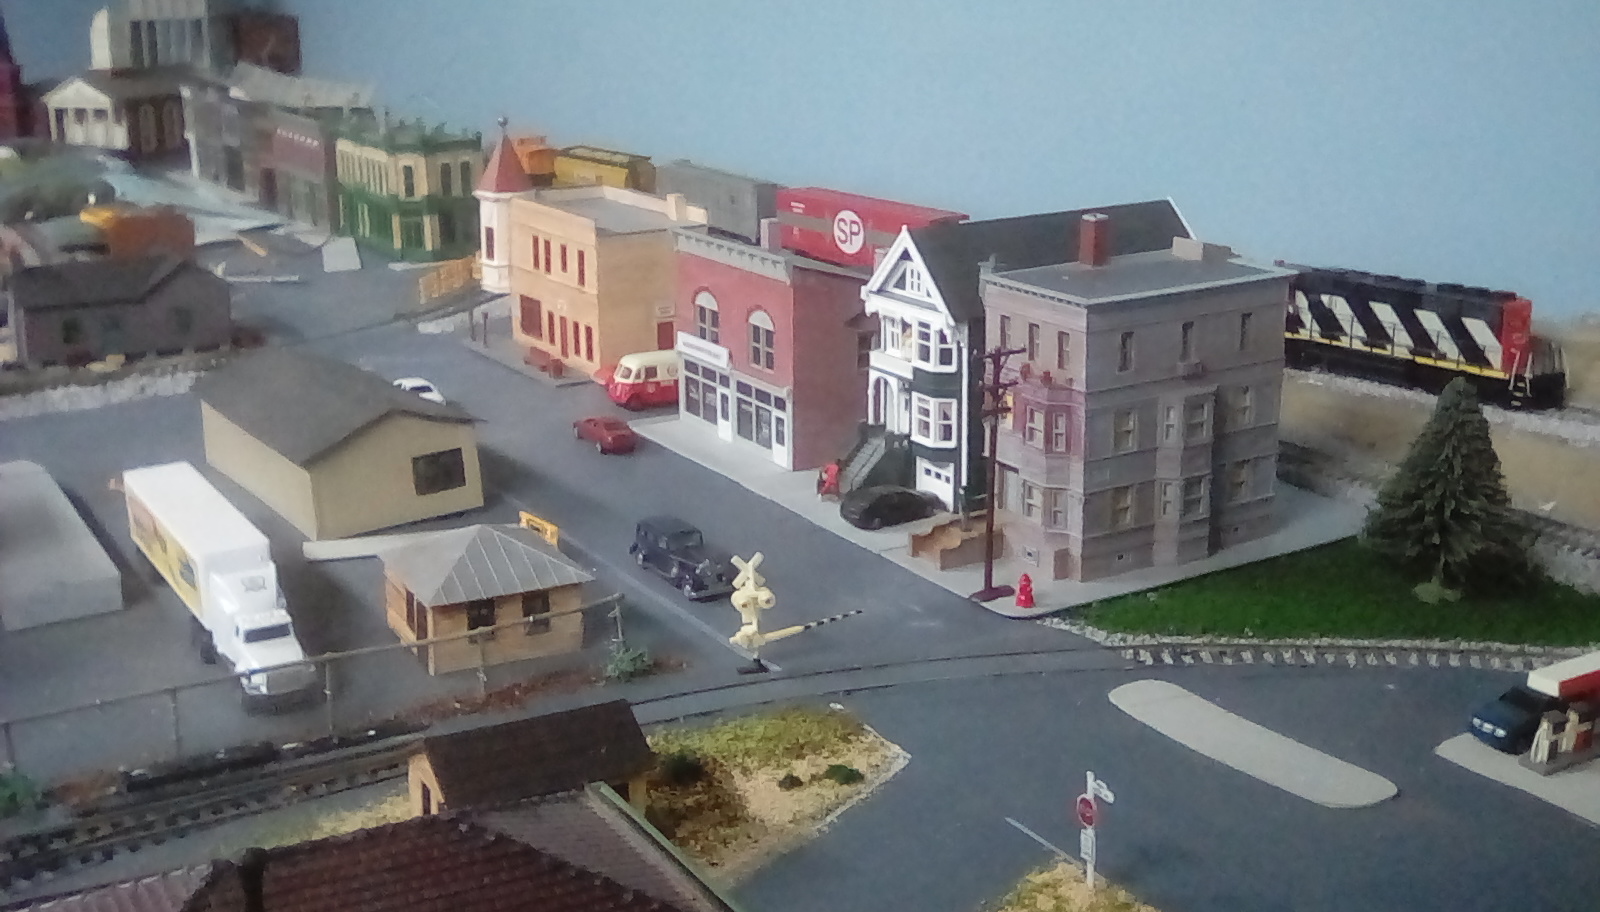
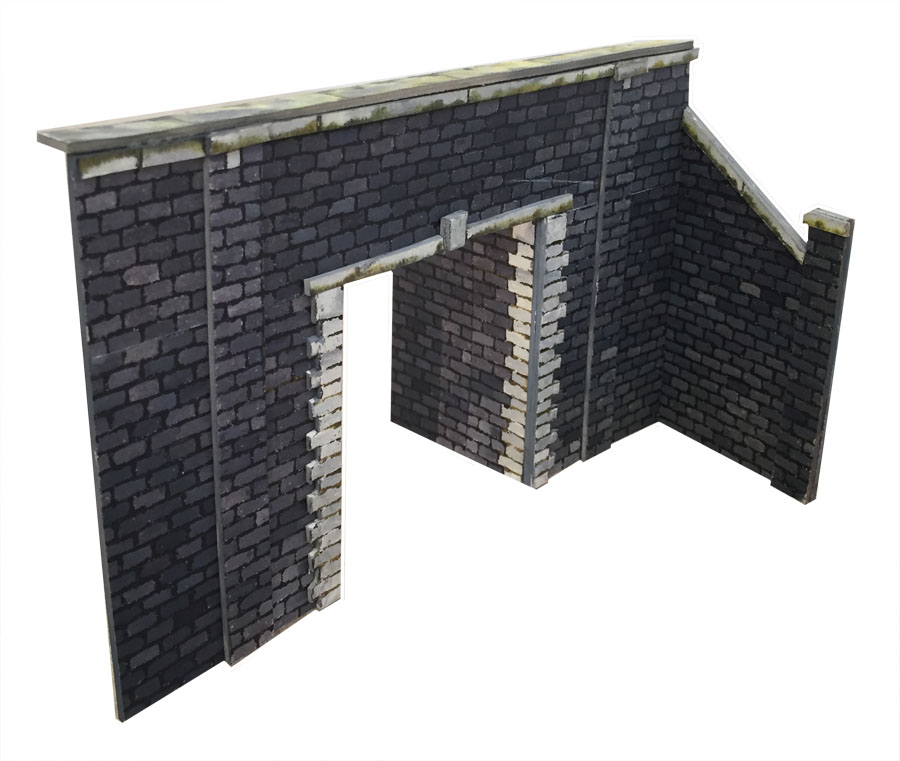
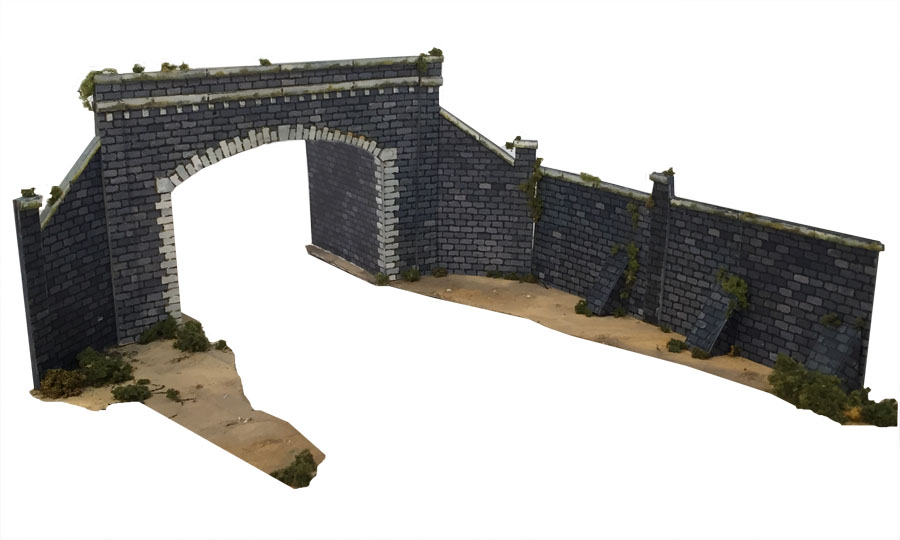
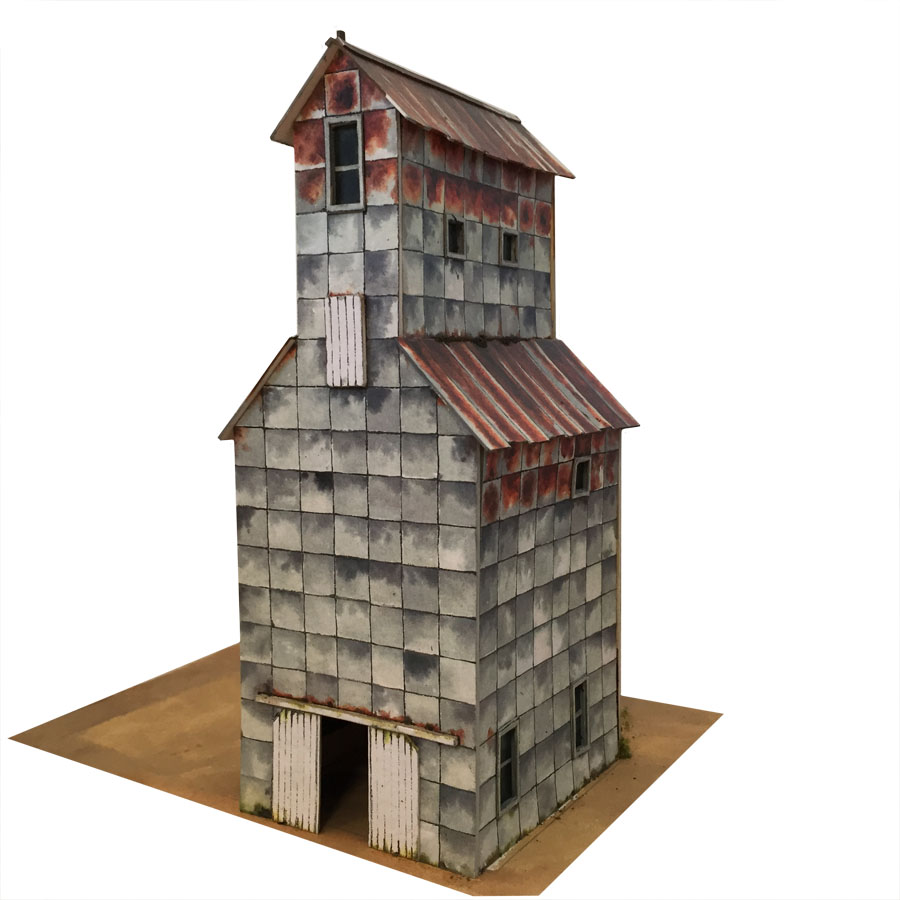
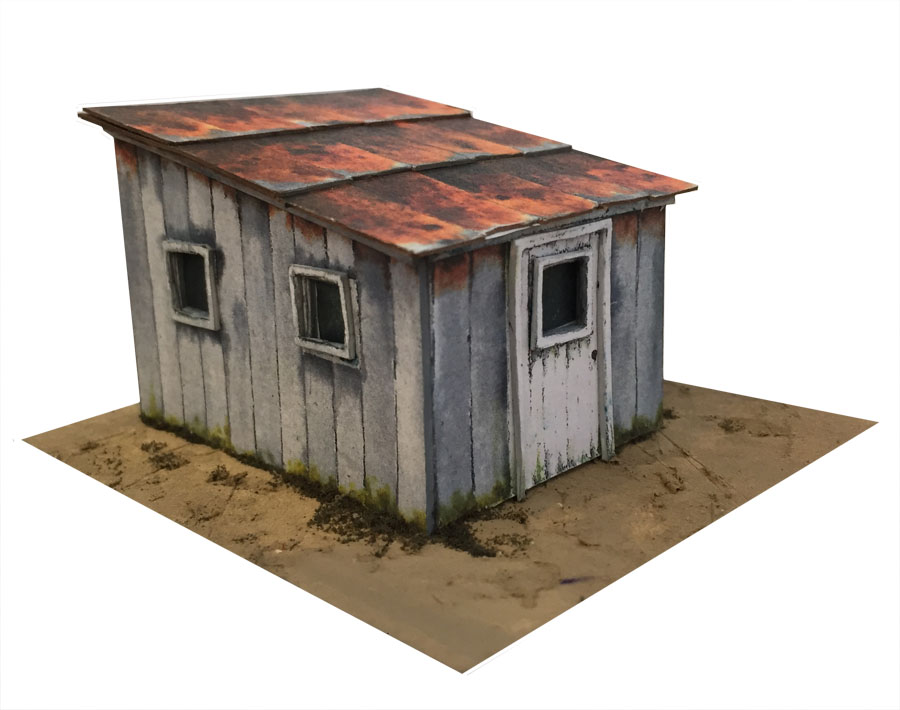
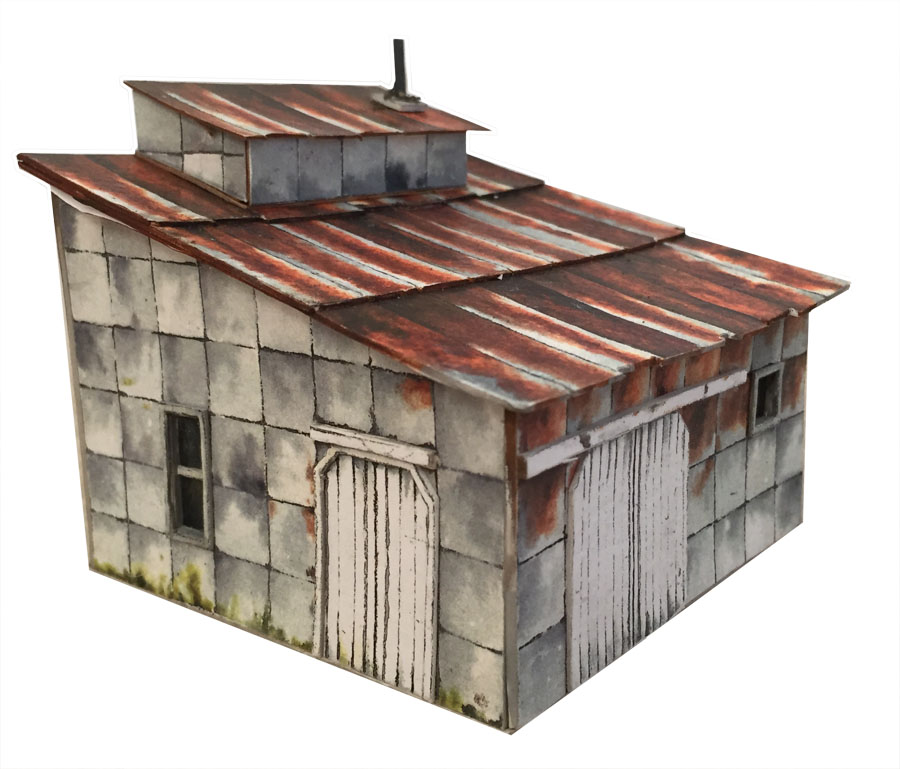
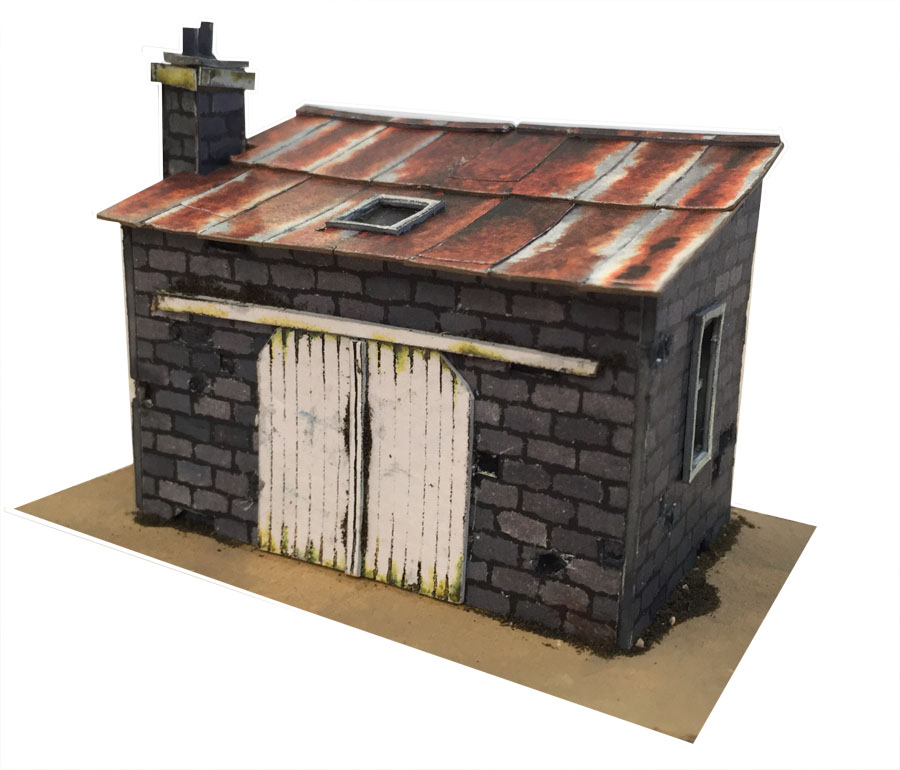
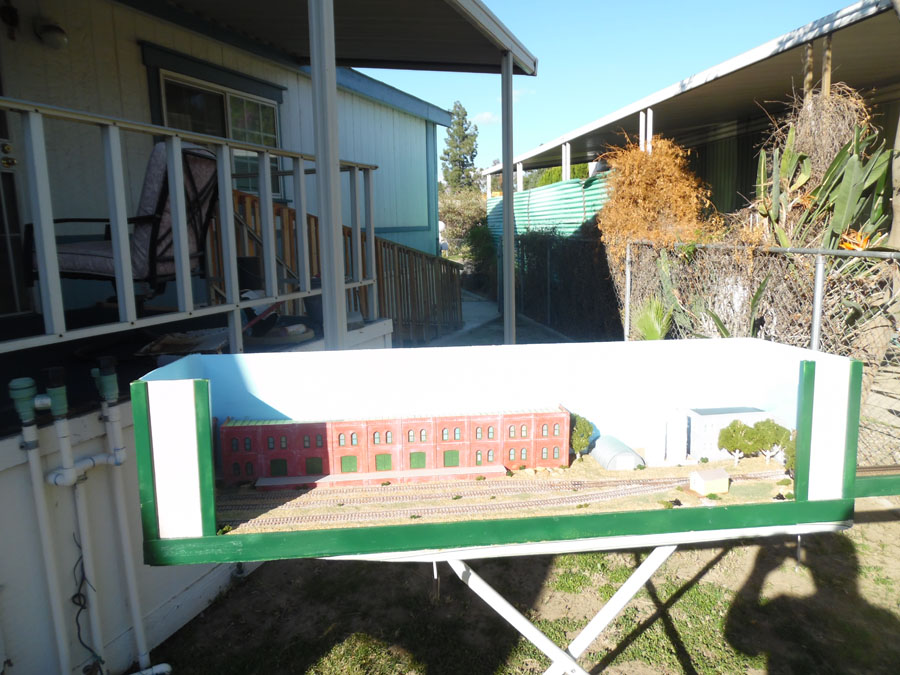
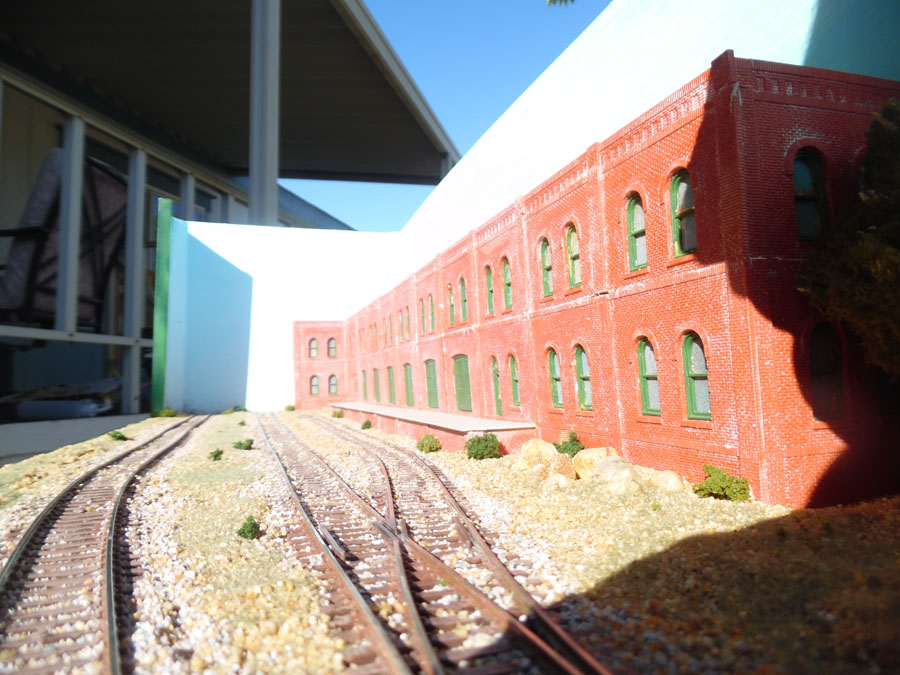
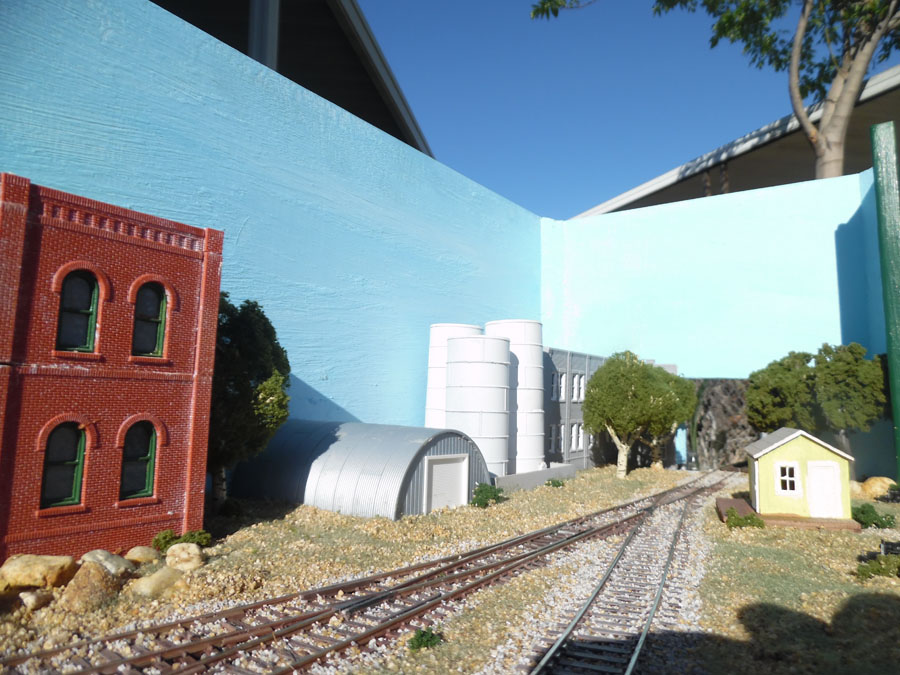
Here is Inglenook Growers… HO Scale (U.S.)… Everything on it was salvaged from some other project — Including the baseboard!

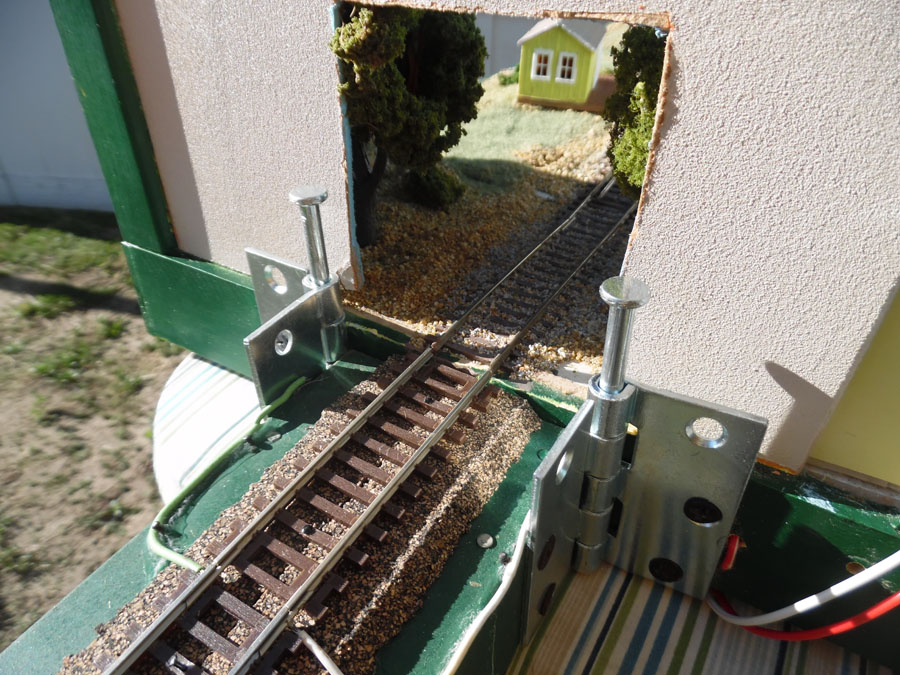
The layout is a 3-3-5 pattern Inglenook. The main body of the layout is in a space that is one foot wide and four feet long… A “fiddle stick” held to the layout with a pair of hinges that have removable pins serves as the “headshunt” or switching lead… The theme is a produce warehouse at the end of a spur line… “Inglenook Growers”…

Just remember here in America “We eat what we can and what we can’t, we can.”

I believe on your side of the pond it would be said “Americans eat what the can and what they can’t they tin.”

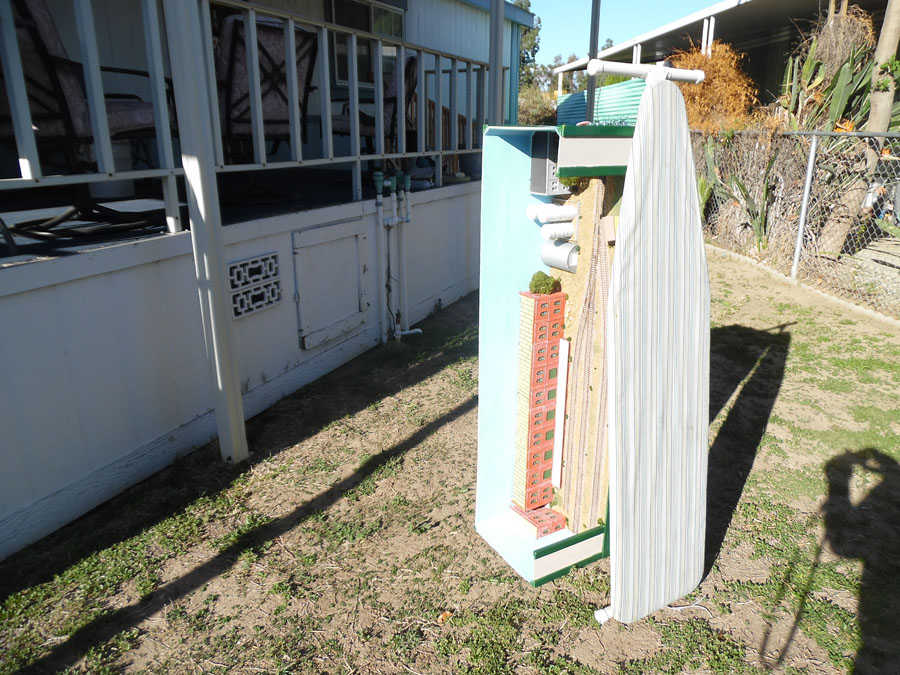
The last photo in the set has the layout on end with the ironing board I often use to support my layouts…

While this layout is destined for my living room to serve as “art”, It is operable and the reason I have the photo of it standing “on end” is to make the point that anyone has room for some kind of layout and a chance to be an active participant in this wonderful hobby.

All the best…

John
California, USA
aka. John from Cali”

Small o scale layouts

Small o scale layouts

Small o scale layouts

shelf model railroad

model railroad shelf layout O scale

A big thank to John for adding to the small O scale layouts.

That’s all for today folks.

Please do keep ’em coming.

And if today is the day you get started on your layout, the Beginner’s Guide is here.

Best

Al

PS Latest ebay cheat sheet is here.

PPS More HO scale train layouts here if that’s your thing.


How to apply bullfrog snot

Larry has been in touch – he’s keen to know how to apply bullfrog snot, and whether it works:

“Hi Al. Keep up the great work on your blog. I have a question for you and your followers.

I have an n guage steam engine buy bachmann. On part of the track it pulls like a champ and on another part the wheels start to spin. I have cleaned the track and same thing happens.

I read on the internet about bullfrog snot. it is a coating you put on the wheels. If you would can you get me an answer if this stuff works or is there another solution?

Thanks,

Larry from Baltimore Md.”

how to apply bullfrog snot

And here’s just on of your replies for Larry on how to apply bullfrog snot:

“Larry, Bullfrog Snot is GREAT stuff, BUT I wouldn’t put it on EVERY drive wheel. Because those drive wheels MUST pick up electric on your Bachmann steamer, that said, look for the driver or drivers that have a little rubber-like band on the “tread” surface.

The part of the wheel that touches the tops of the rail heads. REMOVE that band from the driver, by either cutting it off, OR removing the side-rod and then with the engine upside down, ran at yard speed (VERY SLOW) apply the Bullfrog Snot to the indentation where that band once was.

LEAVE the engine running for about 12 minutes, at that slow speed keeping an eye on the Bullfrog Snot to make sure its as much as needed (thickness of said removed band) and if not, in 24 hours, apply another coat of it to the same place…. AGAIN allowing the engine to run at very slow speed!

Running he engine applying the Bullfrog Snot, you want to keep the wheels turning so the Bullfrog Snot is the same all the way around the driver as if you stop it and the Bullfrog Snot is still wet, it will “lump” at the lowest part of that driver, creating it to not roll smoothly on the rails….

Apply the Bullfrog Snot, with a tooth pick. Allow the tooth pick to literally “drag” the wet Bullfrog Snot AROUND the entire driver…..

Once you have a good first coating, even all the way around, then let it continue to run very slow for that 12 minute time period as after that the Bullfrog Snot, is starting to “set”, once 12 minutes has passed, leave it set for 24 hours to insure its fully “cure” NOT just “dry”!

IF more needs to be added after that 24 hour period has passed, the second application will require the same as the first did on application.

Speaking of this, I have a few that I have to do as well, both steam and diesel!

Hemi”


Now on to Tony:

“Well this is my first layout.

I was a carpenter by trade so I just kind of winged it. No track plan or anything.

It’s by far not the best but I feel that I’ve lucked out a bit. I built some of the buildings from scratch. all of the trees except the orchard.and made the mountains from screen and plaster thanks for looking

Tony”

HO scale model railroad

HO scale model railroad

HO scale model railroad

HO scale model railroad


Now on to Tom:

“This is what my coal load looks like from start to finish

( 1 ) I start with a piece of quarter inch From that I trace out from the hopper cut to size

( 2 ) then I’ll make some support in the middle to hold up that foam put a dab of silicone to hold a three pieces together

(3) then take Elmer’s School or cheap school glue then brush on the glue light Coat, then pour the ant sight coal, after that dries then I either make 3 mounds or 1 mound the length of the hopper on my. O gauge cars. I also do slag loads the same way.

here are the pictures start to finish

Tom”

model railroad coal load

model railroad steel load

model railroad gondola load

model railroad gondola load


model railroad gondola

model railroad gondola

model railroad gondola

“Hi Alistair,

Just spent most of Saturday figuring out how to work a new camera , for the layout , trust me, got the wrong pass word in , but once I got it , I could use this with Wi Fi , the result is fairly good ,also a couple of more things I have done , new sounds , and more of the gangway joining with the coaches

Regards

Dave”


New ebay cheat sheet yet still going strong

A big thanks to Tony and Tom.

And who can help Larry with how to apply Bullfrog snot?

That’s all for today folks.

Please do keep ’em coming.

And if today is the day you stop dreaming and start doing, the Beginner’s Guide is here.

Best

Al

PS Latest ebay cheat sheet is here.

PPS More HO scale train layouts here if that’s your thing.


Card model train buildings

I like to put my feet up on Saturdays – but today I’ve finally sat down to iron out some wrinkles on the card model train buildings store.

(It’s all my own fault, there are two stores, which makes things a tad confusing.)

It appears the biggest wrinkle – by a long stretch – is folk are having trouble finding the items they want. Every now and then I get an email asking, “Where can I buy the little bridge?”

So, while I busy myself behind the scenes, I thought I’d not only link to the bridge and tunnel entrance, but also resurrect the silly launch offer – just $9 – but only for a day or two.

If you are new to the site, you just download the scenery, print it out and stick it together.

It really does show how this scenery is only limited by your imagination – John’s enthusiasm is infectious – and it’s fantastic to see all his little tricks that bring these print out scenery buildings to life.

And of course, I’m baised, but I think he really shows what can be done with them:


Here’s some pics too:

card model train buildings

card model train buildings

card model train buildings

card model train buildings

And can’t forget the grain elevator too – which also comes with the tunnels:

card model train buildings

And here’s what John has scratch built with the same prints:

printable buildings

printable buildings

printable buildings

Print the tunnels out and they are HO scale, for N scale, just reduce the print size by 54%.

The bridge and tunnel entrance will be in the store for $19.97.

But as a launch price, for a few days only, you can grab them both (and the grain elevator) for just $9.97.

That’s both tunnels, and the grain elevator – everything you see in John’s video, for less than $10.

Click here to buy both tunnels for just $9.97

I’m really looking forward to seeing your pics of these. After all, who doesn’t want a tunnel on their layout.

And of course, a huge thank to John. He really is a star (if you missed his embankment-how-to, it’s here).

That’s all this time folks. Please do keep ’em coming.

(The embankment print is HO scale at 100% – as they all are. Print out at 504% for N scale).

Hope you enjoy the card model train buildings, they are a lot of fun.

They are easy to make too, here’s a post showing you how:

Easy way to make printable buildings.

That’s all for today folks.

Please do keep ’em coming.

And if today is the day you get started on your layout, the Beginner’s Guide is here.

Best

Al

PS Latest ebay cheat sheet is here.

PPS More HO scale train layouts here if that’s your thing.