There are lots of N scale layouts 4×8 on the blog now, and I’m really please to be able to add Tom’s.
And my word – look at all the comments below.
“Dear Al,
herein I would like to exhibit my “Catawissa Branch” of the Reading Railroad, an eastern US anthracite (hard coal) hauler.
I apologize, in advance, for the length of this description.
Catawissa is my birth town in Pennsylvania. Born in 1942, I have memories of steam locomotives and later, early diesel locomotives hauling long coal trains up the steep grade near my home.
I can still envision and hear the wheel slip of the drivers, slack taken out of the couplers and the steel-on-steel screeching of the wheels on rails.
I have been purchasing N scale engines and rolling stock since the 60’s when Reading Railroad items started to show up.
It mattered not if the items were ‘correct’, if they were marked Reading, I bought them.
On three occasions, I started constructing layouts but subsequent job assignments ended my efforts.
Being retired and house-bound by continuing bad weather the winter of 2014-2015, I decided to make a plan and construct an N scale layout based upon my recollections of my youth and train-watching in Catawissa.
As a youngster I would climb a bluff near my home where I could view trains on the Delaware, Lackawanna and Western on the far side of the Susquehanna River, the Pennsylvania Railroad on the near shore and, of course, the Reading Lines nearest to my home.
The Reading had shops that burned down in our town before I was born.
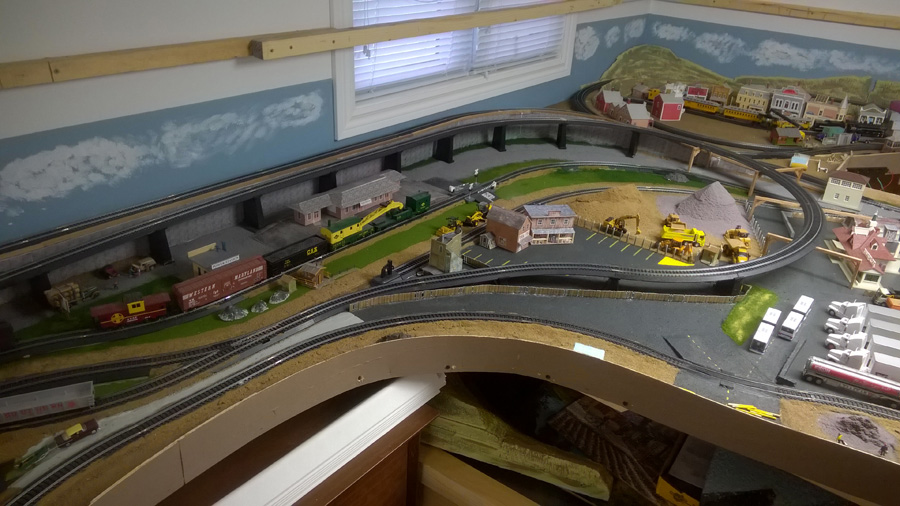
I knew I wanted all three railroads on my layout, the Susquehanna River and its tributary, the Catawissa Creek, as well as a small portion of a canal that ran along the river. Black and white photo to follow.
Because of the N scale layouts 4×8 space constraint, I used ‘creative compaction’ to get most of the features represented…not necessarily in their correct location or scale, but in a workable plan.
I used maps obtained from the Reading Company Technical and Historical Society Museum I belong to for a starting point.
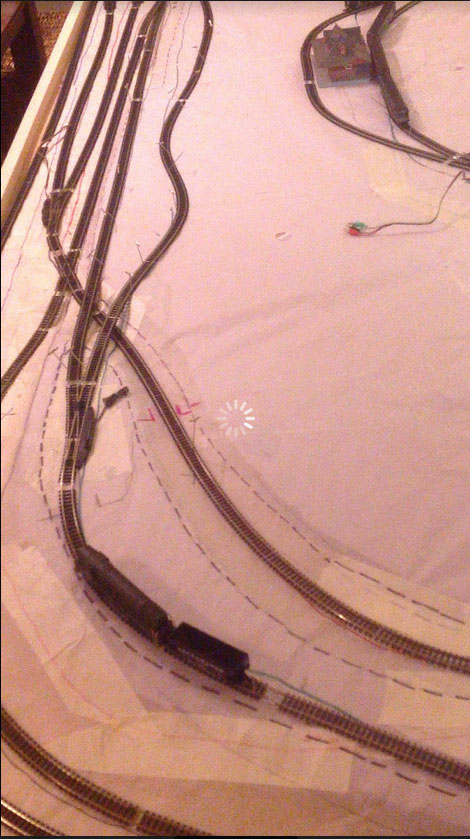
I made a 4′ x 8′ tracing paper sheet gridded into 12″ x 12″ squares.
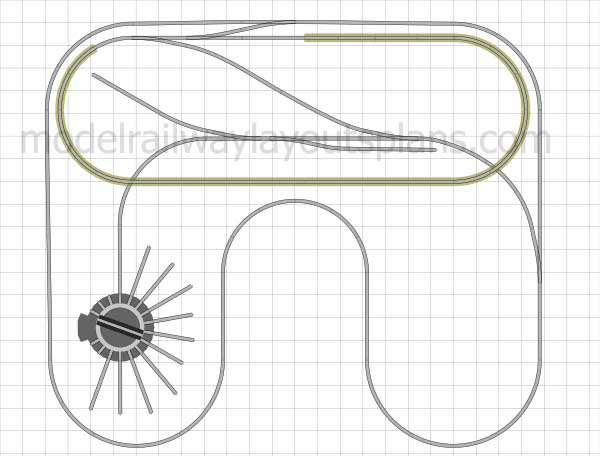
I tried various track plans to get the three railroads to become separate operating lines as well as interconnected to run a train continuously on all three routes.
The grades are steep and the curves are tight…just like the real condition.
Catawissa Branch and its terrain limited equipment the Reading could operate on the Branch.
I had constructed the platform with plywood and solid 1″ X 4″s on the perimeter band and 1″ X 3″s underneath as supports 16″ o.c. glued and screwed.
I plan to hoist the layout to the ceiling of our small family room and wanted to keep its weight light.
The elevation of the layout is limited to the approximate height of actual surrounding ridges. Most clearances are minimal. Most flex track is laid over cork roadbed adhered to foam panels adhered to plywood.
Scenic contours utilize plaster gauze over balled newspaper (which was later removed), layers of foam board, plaster cast rock using Woodland Scenics molds and lightweight Hydrocal applied directly to shaped foam.
I brought actual rocks back from a visit ‘home’ because the local rock is an unusual reddish- brown color which I wanted to duplicate.
The native stone was used to make a paint match that was applied to the white plaster terrain prior to vegetation being added. The rocks, boulders, etc. were produced from crushing the natural real stone into small pieces and inserting them along the waterways and at the base of cliffs, etc.
Where possible I have tried to keep the theme around 1945-1955.
The roads and town streets had to be made narrow but I wanted to include them.
In the 1970’s I purchased used N gauge items from a retired gentleman not knowing when or if I would get to ever use them.
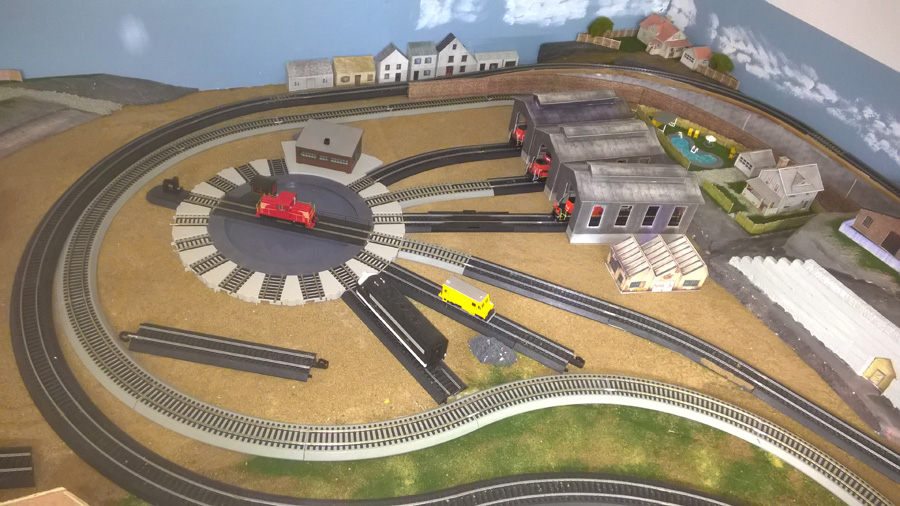
One item is an Arnold turntable with selector and a five stall roundhouse that was designed for it.
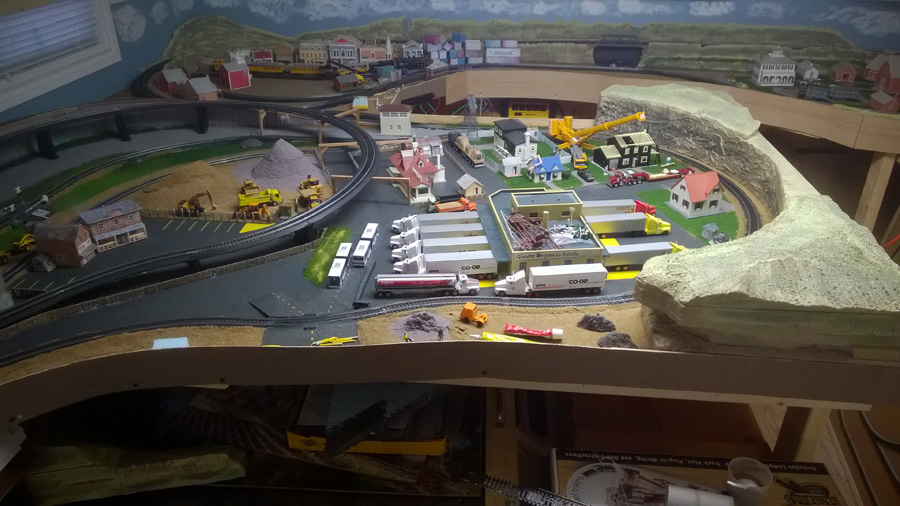
I wanted to use both in my plan however the roundhouse was too large. I reduced it to three stalls in order to squeeze in a small diesel-engine house and servicing area.
The railroad shop portion is fictitious as is the industrial sector.
I liked the scale of the Walthers cement plant which added to the skyline but I reduced it in height to accommodate the platform-to-ceiling when raised.
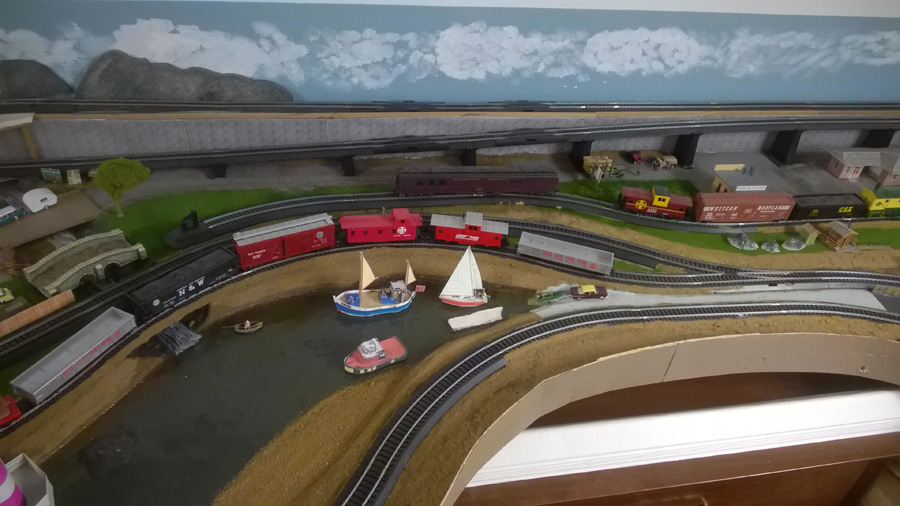
During my youth I remember several derailments, one of which sent cars into the river.
It was fascinating to watch the wreck trains clear the areas and I wanted to depict a derailment on my layout.
The wrecked hoppers and scattered coal are on an overlay that can be removed from the river along with the wreck train. Seaplanes at one time landed upriver on the Susquehanna so I added an aerial observer of the wreck scene.
The locomotives are DC. I chose not to rehab them to DCC and no mfgr produces DCC period engines for these lines. No operating sessions were planned, just my enjoyment of watching the trains run.
If you choose to share my layout with your readers, I hope they will enjoy it as much as I have enjoyed, appreciated, learned and look forward to their efforts and comments in your blog.
Thank you, Al.
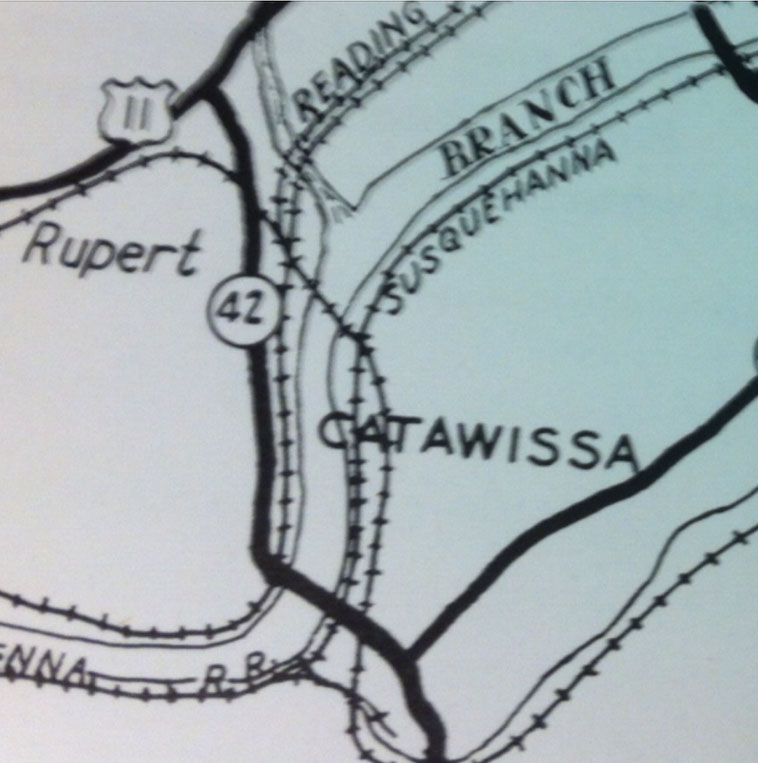
The map.
N scale layouts 4×8:
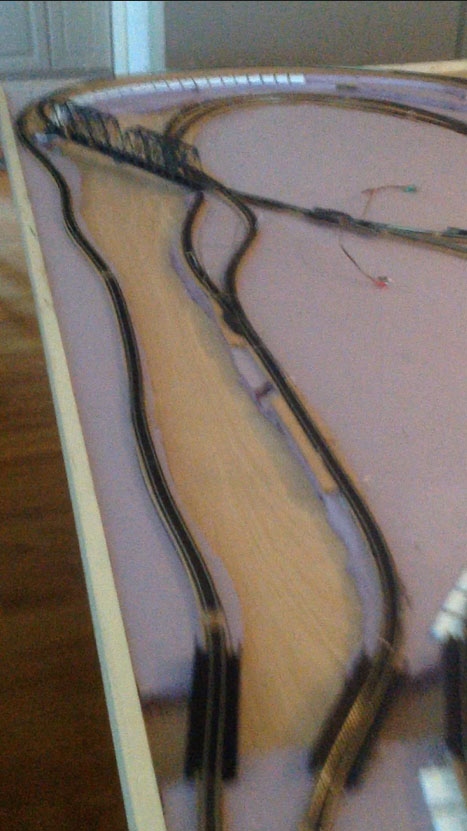
The first photo shows the paper pattern used to layout track, waterways, etc. The second photo shows beginning of foam board buildup.

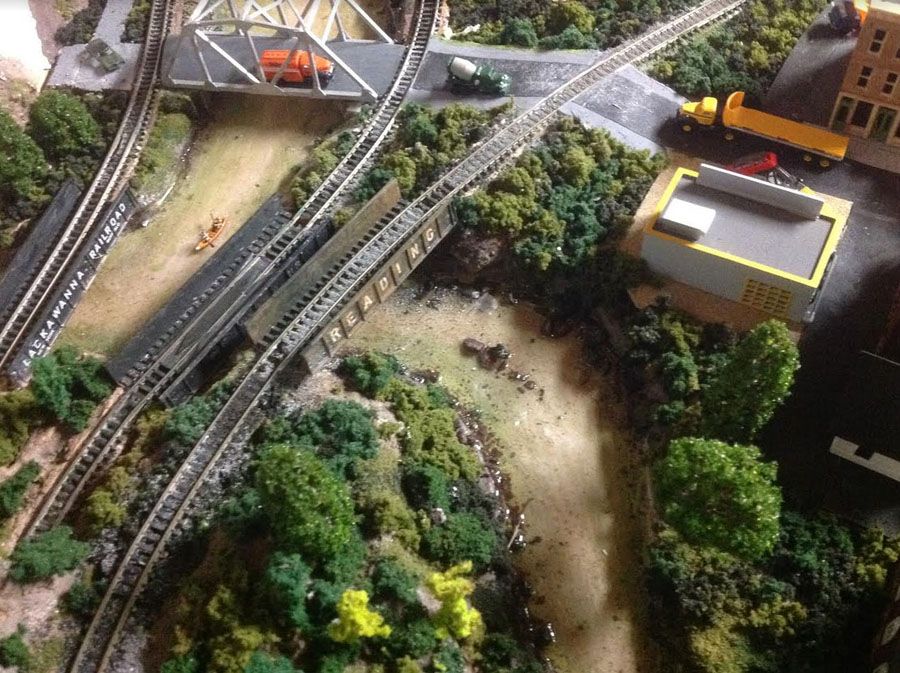
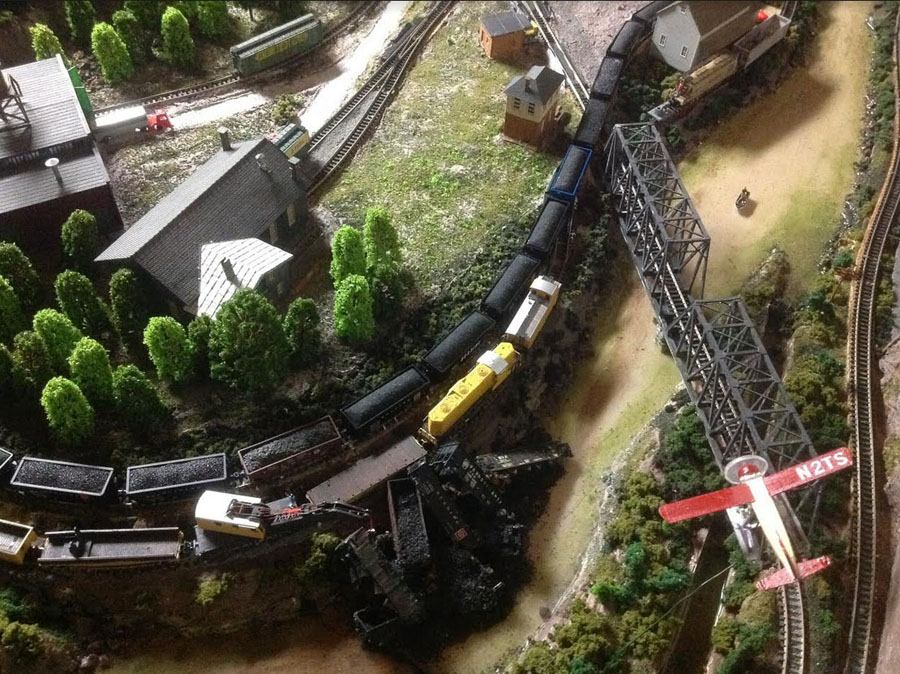
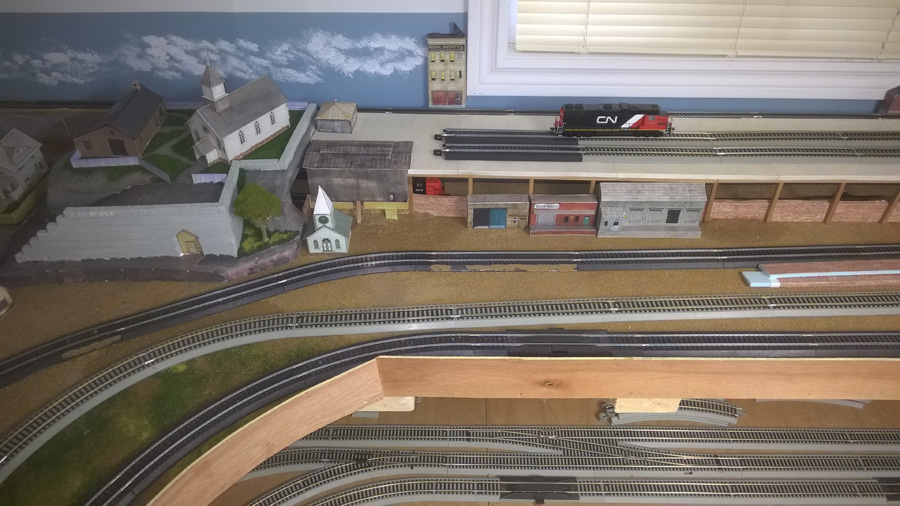
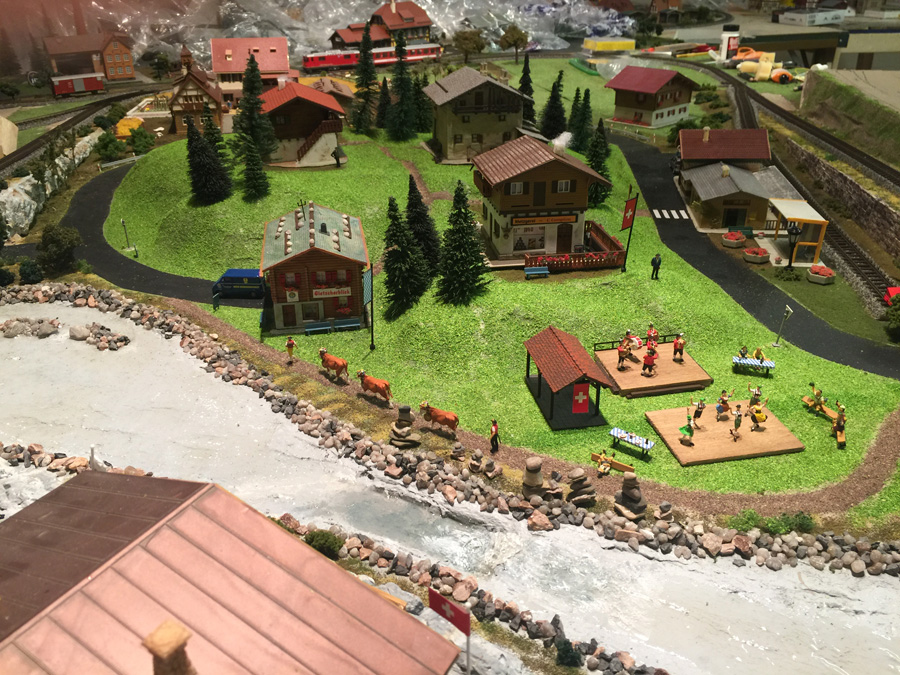
Photo of the abbreviated town of Catawissa showing our church, the Opera House and creek where we ice skated in winter and went swimming in summer.
The second photo shows the convergence of the Catawissa Creek and Susquehanna River.
Third photo shows the derailment of loaded hoppers into the Susquehanna and cleanup in progress.
Tom”
A huge thanks to Tom. Really enjoyed the narrative. Just goes to show it happens to us all – life always gets in the way of a layout… But with a bit of planning it all comes together eventually.
It’s great to have add Tom’s to the N scale layouts 4×8 collection.
Now, a small rant:
I enjoy running the newsletter / blog – but every now and then, the trolls come out in force. And sometimes it does leave me thinking, why do I bother?
Well, I tell you why. Yes, I get abuse, but I also get the stuff that makes it worthwhile:
“Mr. Lee,
You are a GEM to make me part of your mailing list.
Some of it pertains to me (in the US) and some doesn’t, but, at the age of 67 it’s motivating me to finish my attic, and create a layout, and put on display all I’ve collected.
Thank you for all the inspiration, even if it frustrates me for not having what others have.
Richard”
That’s all today folks.
Please do keep ’em coming, and don’t forget the Beginner’s Guide if you want to get going on your layout.
Remember, there’s never a good time to start so just jump in…
Best
Al
PS Latest ebay cheat sheet is here. N scale stuff going bonkers at the mo.
PPS More N scale layouts here if that’s your thing.