Bruce has been in touch with a great tip to get those model train radius curves right the first time:
“Al,
A tip for those newbies who are creating a track plan. The issue is track spacing in curves.
I have build some layouts in the past and am beginning my plans for a new one.
I learned early that it is most important to have proper clearances in those dastardly parallel curves. Especially in the hidden areas where one tends to make things “tight’ to conserve open layout.
Consider taking the longest engine, car or any other object that will be placed and operated on the layout rails. Include, depending on the size of the layout, all object lengths of future acquisitions of greater length.
First get paper, ruler and compass to draw arcs from a common circle center or along a common radius.
Any multiple arcs of different radiii created from the common or other circle center along this common circle radius will be used to determine the clearance of objects on adjacent arcs.
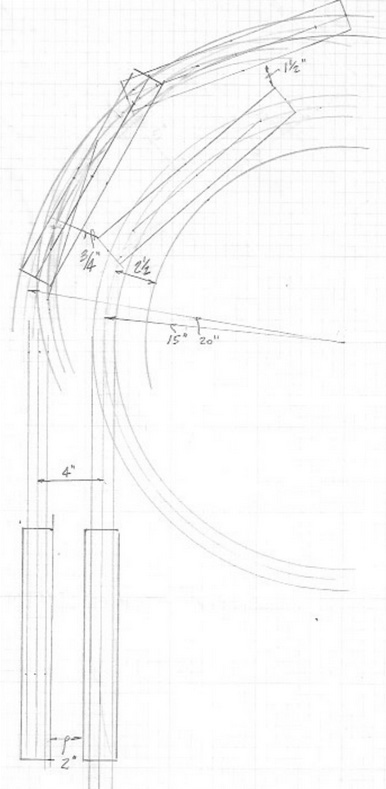
As example, see the attached image
Draw the arc with desired minimum radius of inside track of the two tracks
Using the common arc center, Draw the arc with desired radius of the next track
Draw extensions at one end of the arcs to represent parallel straight tracks
Measure longest item that will traverse the rails
Measure length between wheel truck centers
Draw car on paper and cut out; make two more
Place cars in locations similar to the example
Use the dimensioned cars to determine minimum clearances for the cars on the desired curves
The extended straight tracks can then be used to determine the minimum parallel track spacing for car clearances Use the locomotives as they are usually wider
The location of the intercept of straight to curved rails may then determine the required easement
This dimensioned example is for O gauge that I have used to lay track for a long time. The radii shown are tor minimum diameter arcs and longest cars considered.
Hope this will assist others from creating unexpected derailments but allow maximum use of hidden or exposed track layout.
Bruce from SC USA”
A huge thank you to Bruce for sending this tip on model train radius curves: a simple, but effective way to stop hours of misery with trial and error.
“Hi Alastair,
I am new to the hobby and your posts, I am putting together my first layout and think I might put in a turntable scratch built so I started looking for parts then I remembered I had just the other day thrown out an inkjet printer/scanner and luckily it was still outside, I brought it back in and stripped it down.
I found all the motors, gears and belt drives I could possibly need to power the turntable and several more besides, this printer turned out to be a treasure for the hobbyist and I thought I would share it, I have posted to you tube (not great video but it does show what I found).
happy for you to share and hope you and others find it of use.
Happy modelling.
Wayne”
Now on to Lindsay:
“Hi Al,
This has been long time coming hahaha. I first subscribed around the beginning of 2013 when Gary used to run similar service.
I finished making my table,then like a lot of us got sidetracked and the table became just another storage facility in garage. Here it is and finally extracted digit cleaned table off and began where I left off.
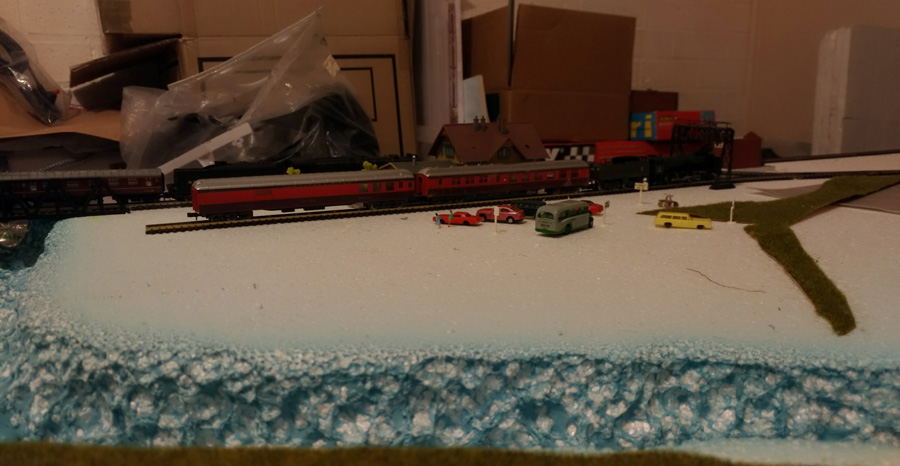
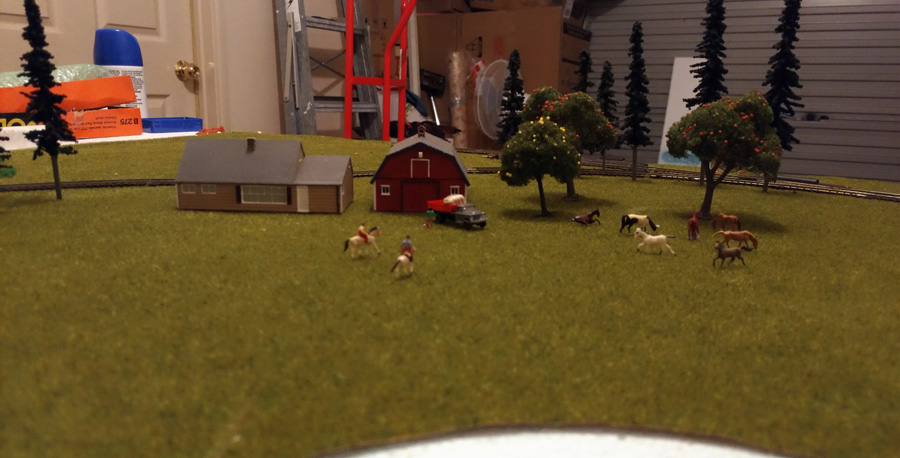
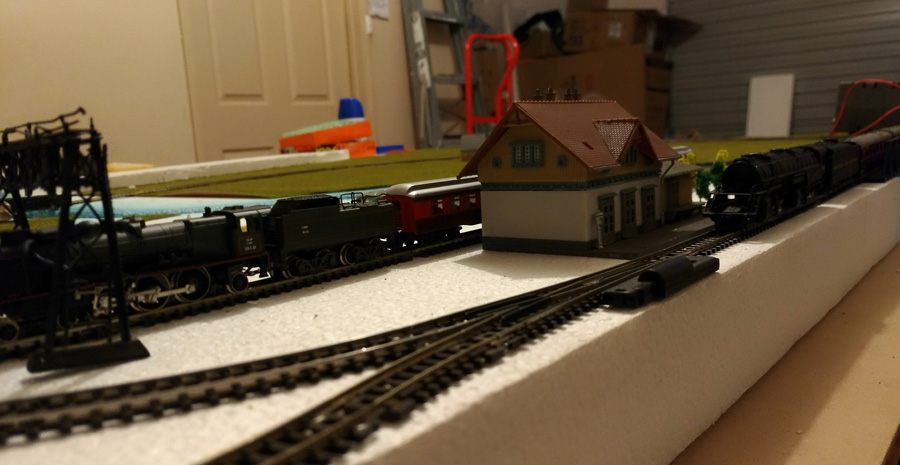
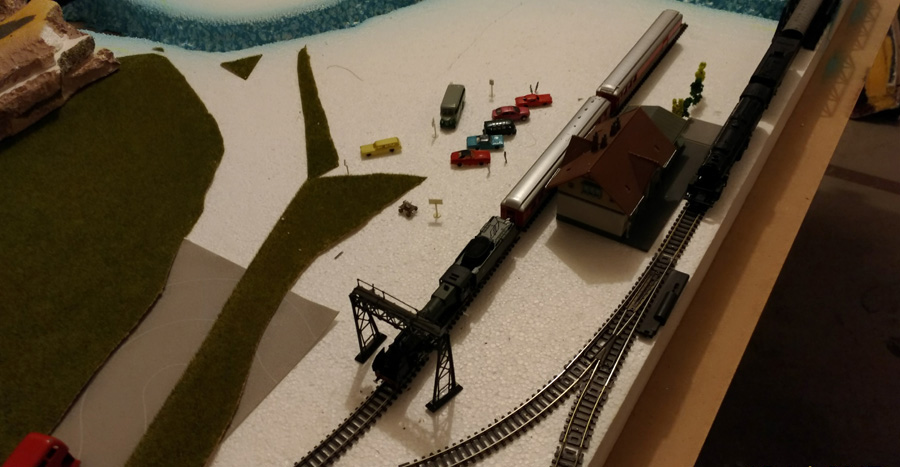
Scale is N Table is 2200x 1300 still a long way off finishing. the lower level track is operational,mountain track still needs some pieces cut and of course scenery has lots required. Put some basic grass down to let me see where to go and construction of buildings and roads has begun.
Hope you enjoy pics and will post more as we go if you like.
Lindsay
Australian Capital Territory
Australia”

A big thanks to Bruce for a great tip on Model train radius curves. And thanks to Wayne and Lindsay too.
That’s all for today folks.
Please do keep ’em coming.
And if today is the day you say no to boredom, the Beginner’s Guide is here.
Best
Al
PS Latest ebay cheat sheet is here.
PPS More HO scale train layouts here if that’s your thing.


Or of course one could use one of the free software track drawing programs.
Ah, yes. There are those programs that are useful for the entire layout. And there are those who will obtain them and spend the necessary time to become familiar with the program chosen.
I have a some of these programs. One I purchased in the late 1990’s was/is based on the AutoCad software. I have two other freebies that work well.
The drawing I submitted was drawn and kept for reference after I had taken track and my longest cars, quite some time ago, to determine min radii and easements. I pushed the cars along the track to assure my minimums were acceptable.
Remember, there are people who are not as astute with software as you are likely to be. Personally, I still initially make a rough drawing of a planned layout, whether for self or for the small layouts I make for the kids and grandkids.
Thank you for your comment. I should have added your additional information as an alternative in my original submittal to Al.
Happy RRing to all.
Hello Bruce,
Greeting from Calcutta, India
Excellent and very scientific explanation for clearance in curved track layout. I am confident that it will go a long way to help modellers. May I express a big Thankyou for your effort. I Persue my hobby in N scale. It is indeed very usefull tip for me as well. Thanks, once again.
GOPAL DAGA / CALCUTTA, INDIA
I have S-gauge. What gauge is the paper cutout buildings/
I would like to add one more caveat to the problem. If you run an articulated engine such as a 4-8-8-4 Big Boy or 4-6-6-4 Challenger, check its front overhang on the inner rail. Note that the pivot points on these engines are the drivers on the rear (fixed) portion.
My neighbor has a diesel centipede and its nose and tail hang out there quite a way. I hope this helps.
Keep on training,
Carl in Kansas
OK. you got a large thing that is flat, put the outside track where you it and tack it down, put the longest car you may ever use on it, set the inside track, again tacked down, and put a car of the same length on it, if the out side will clear the inside car no matter where it is on the curve it is. I think it will work, as it has worked for me. But then again I am old school, DC
NV Bob.
Hi
Not a bad idea, I model N scale and for dual or more curves, a friend told me to put a piece of track between each curve. So what I do is put down the inner curve then put a piece of flex track next to it, then lay the next curve. Have found this to work on my layout with 4 curves to a yard and double curves around the track. And if your wondering I run SD60 coal trains and 4-7 car passenger trains on a 2.5x1m layout.
Great tips Al
Steven
great tip .I am doing a new layout next year so this will be very useful for planning.
I read in a Lionel book some years ago that to avoid clearance issues on curves, use 4-1/2 ” minimum clear from center rail to center rail … for safety sake and new products I have used a six inch radius difference for concentric curves … or a twelve inch diameter difference (042 to 054)
With all the conflict in the world which will never end, about all most ordinary folk can do is to vote for the candidate or party they think best (and be glad in those places where they can vote freely when election time rolls around) it’s a pleasure to have an international forum like Al’s where people just want to be helpful. The ideas for the treatment of curves are very useful; if there’s one thing most of us have in common it’s not enough space. I’m currently reluctantly modifying a proposed 00 double-track folded (bent) double-dog-bone layout in order to reduce 36-inch radius curves to 27. But really I just wanted to thank Al for keeping this forum going. It must take a lot of effort.
Hi Bruce,
Am not a fan of computer programs about model railroading, I learn from a “hands- on” modeling process as it gives me a chance to use my thinking, engineering & mechanical skills in the learning process. That’s why I enjoyed your presentation! Thank you for your time & effort.. It’s rewarding to know there’s other modelers out there that aren’t shackled to a computer to have model railroading pleasure.
Regards, Tom (USA)
great engineering tips are always welcome!!
these are very helpful
thanks Bruce
oh and YEH…..
thanks to Alistair too mate…..!!!!
keep em runnin’ fellas n gals….
stjohn in long beach calif
When buying new (special) trains, you may have issues. The APT-E stocks its nose out a long way, even though the coaches have common bogies, and so no expectation of overhang (and a maximum expectation of cutting the corner)
Gidday all,
I used the tightest of my inside curves as my initial guide.
As the base board was going to be painted, I took my longest coach and used ‘blu-tac’ to hold a pencil onto the coach half way through its length and on the outside leading corner of the coach, this gives the clearances for that track and as a guide for the others using the same coach on the different radii going outwards. For the next curve, set the middle pencil on the outside curve and mark next track (pushing the coach around) and continue out. Everything will have standard spacing from the inner most rail to the outermost rails of the layout
‘Blu-tac’, ‘Plastercine’ and other semi-soft non-permanent adhesive products and masking tapes are available from most stationery stores.
Wayne McClelland
New Zealand
THE NMRA gauge is NOT useful on a curve. I have curved tracks into tunnels. I found that foot long passenger cars hit the inside edge if the portal is centered
over the track. I offset the portal to the inside of the curve. I have one single track at 24 inch radius and double tracks at 27 inches. Tighter curves may not work with long passenger cars.
I really appreciate your information and pictures. This will greatly help me with my issues. Thanks Bruce from SC USA”
Thank you Bruce for the curve guidance. There is a good Clint Eastwood movie entitled “Trouble with the curve” and that is especially true in modeling. Plus, if you have a bad curve, a six-axle engine will find it for you. I have a curve I have to redo!
Rats, I just recycled my old HP printer a month ago. While useful for lots of mechanical uses, those gears could also be used statically as loads, debris etc. Good Call !!
MN Dan
The solution is easy. Use Kato track. Every curve is properly spaced to the next curve. They have like 12 curve radaii.
Hi Wayne
That’s a great suggestion and video for ‘up cycling’ an old printer. I can’t wait for mine to pack up – lol.
All the best to everyone.
Brian, Wokingham
Wayne,
Great advice on how to up-cycle that old ink jet or laser printer. I have three identical Brother ink jet printers but they never seem to give out. Bought one at a thrift store for $20 + tax last year for spare parts, but it too is chugging along just fine. All they ever seem to need is new ink cartridges and they sometimes get persnickity if I don’t use official Brother brand cartridges.
As for laying out curves, I agree that Kato’s wide selection of HO curve radii makes creating concentric curves pretty easy. I hadn’t thought about the tunnel entrance problem with long passenger cars, but giving a little extra clearance on the outside of the curve makes sense.
Look great.!!!! I hope mine comes that good.
Thanks Bruce – Your system to avoid collisions on curves also applies to the placement of trackside accessories eg. telegraph poles.
Andrew in Oz
Wow Wayne, Thank you, great advice
Andrew in Oz