HO track layout 4×8 – Cal’s

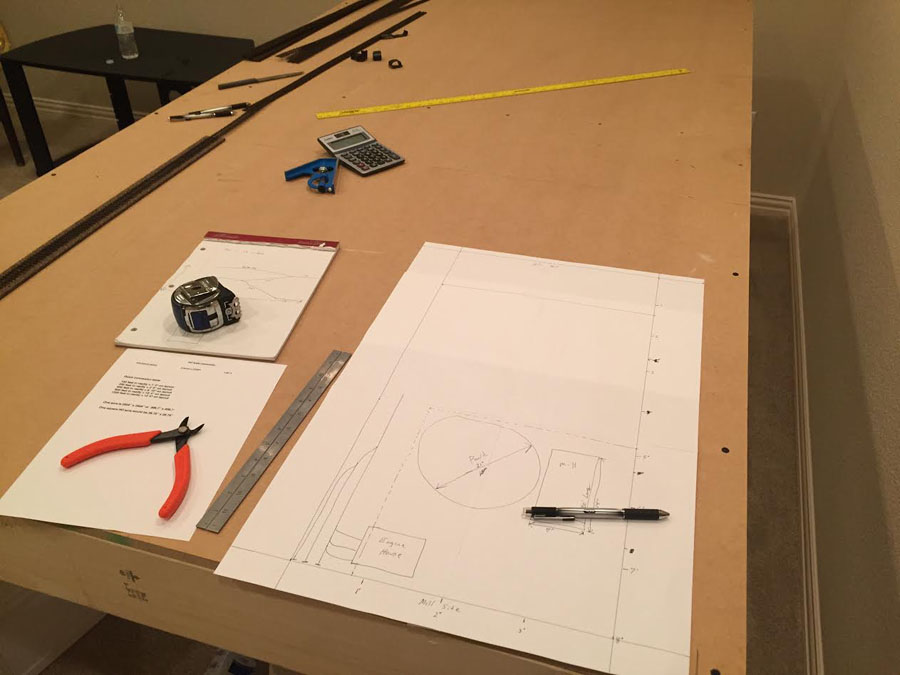
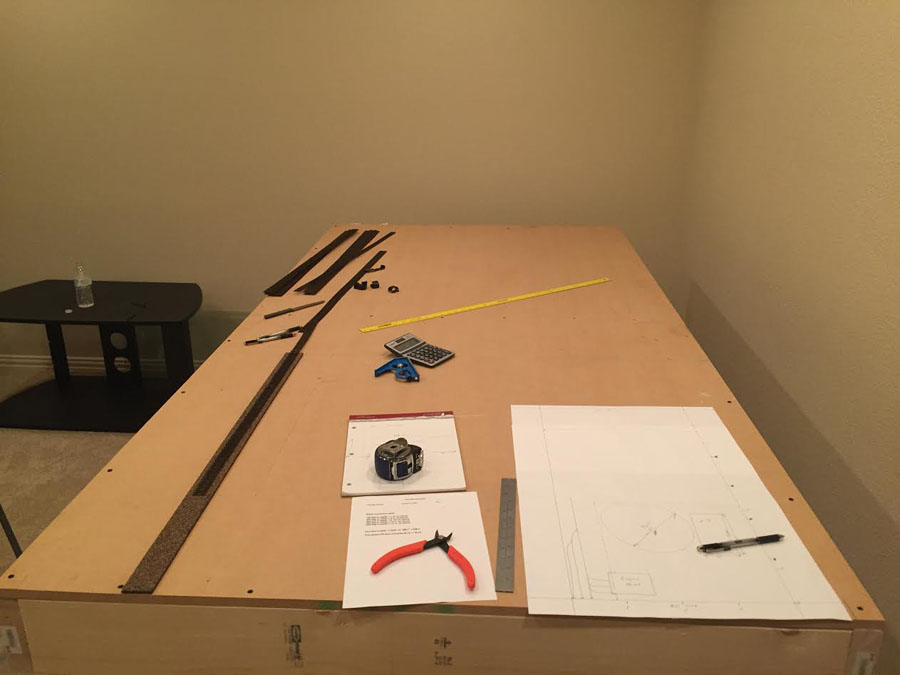
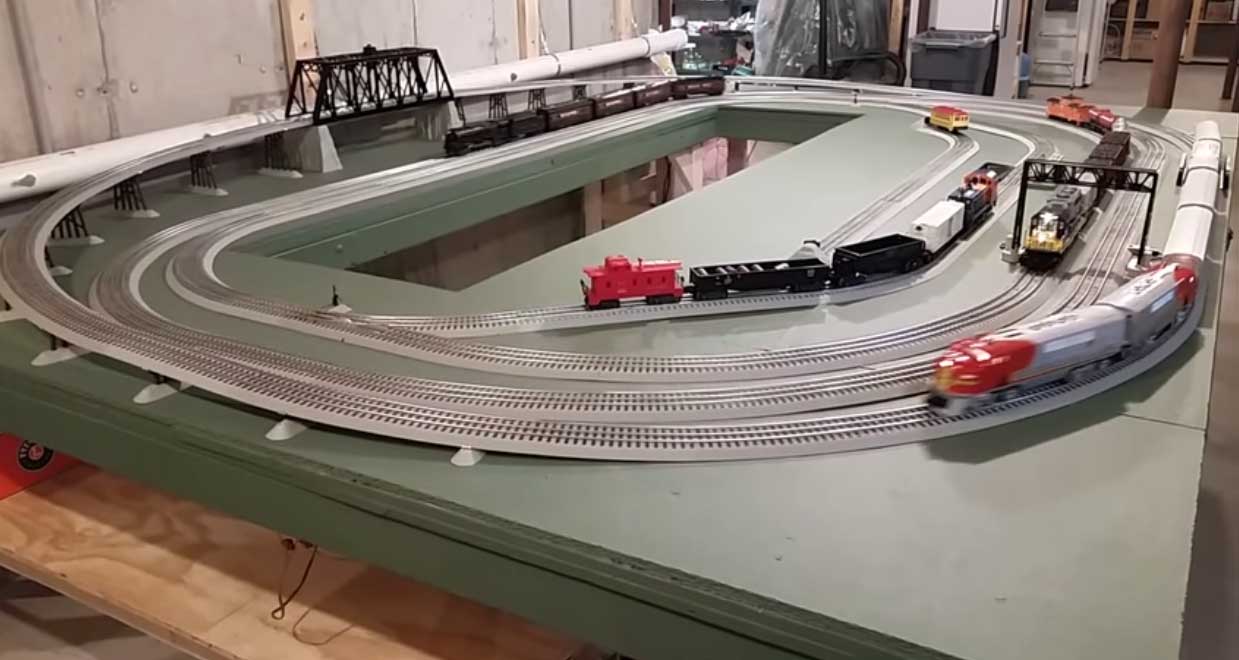
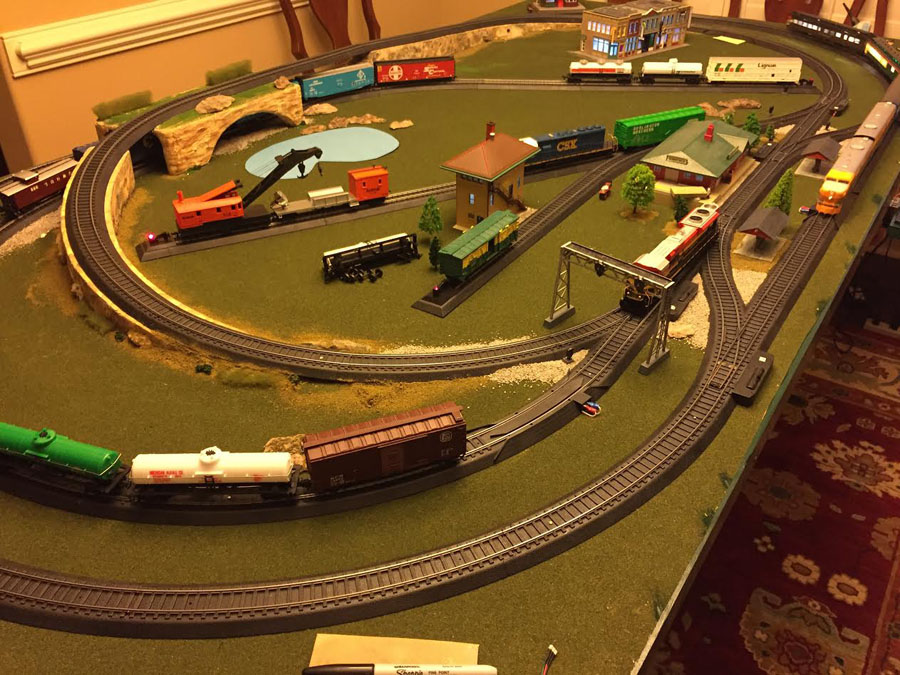
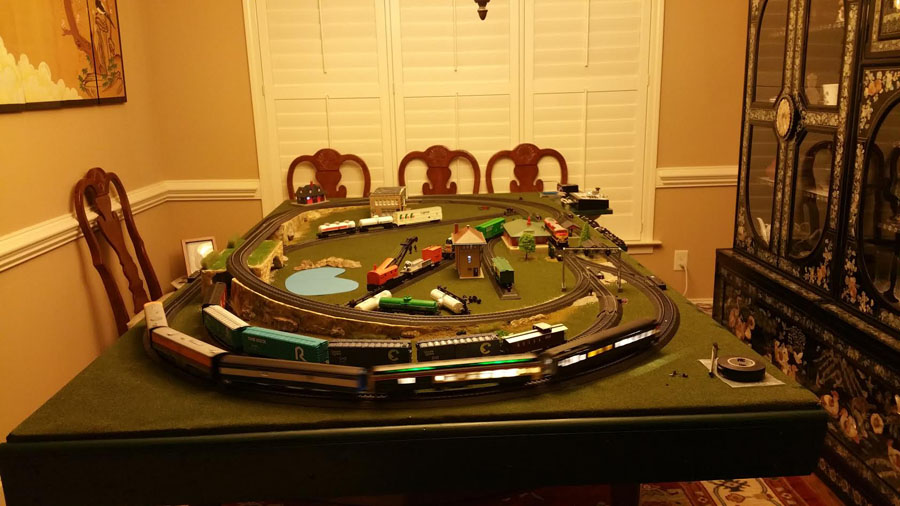
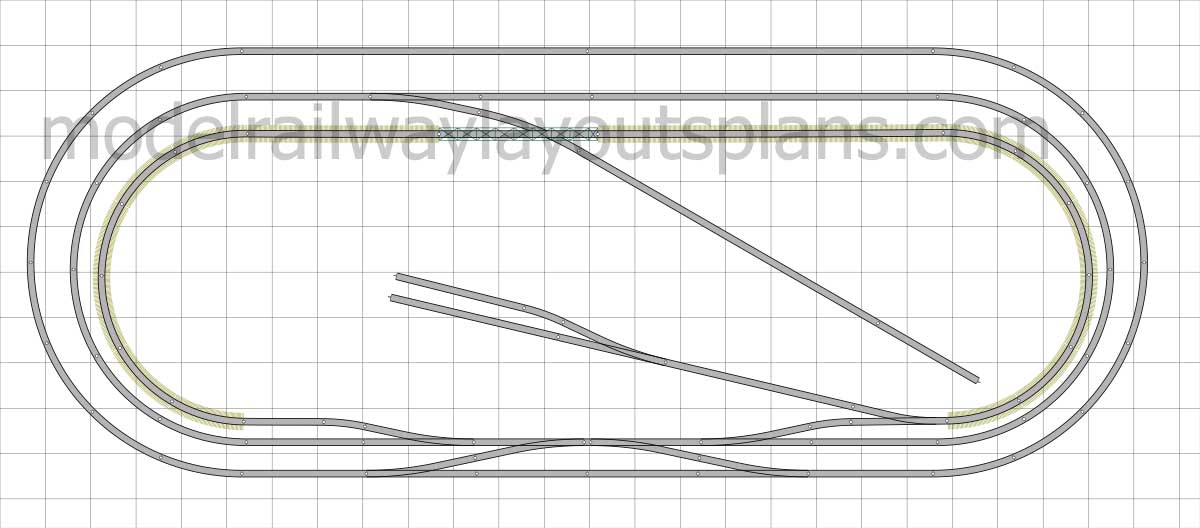
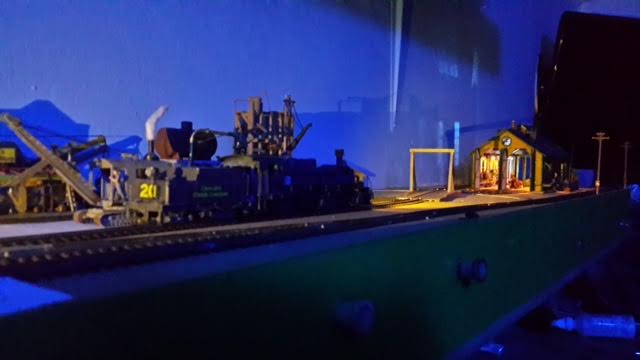
Cal’s been in touch with his HO track layout 4×8 – a very popular size.

“Alastair

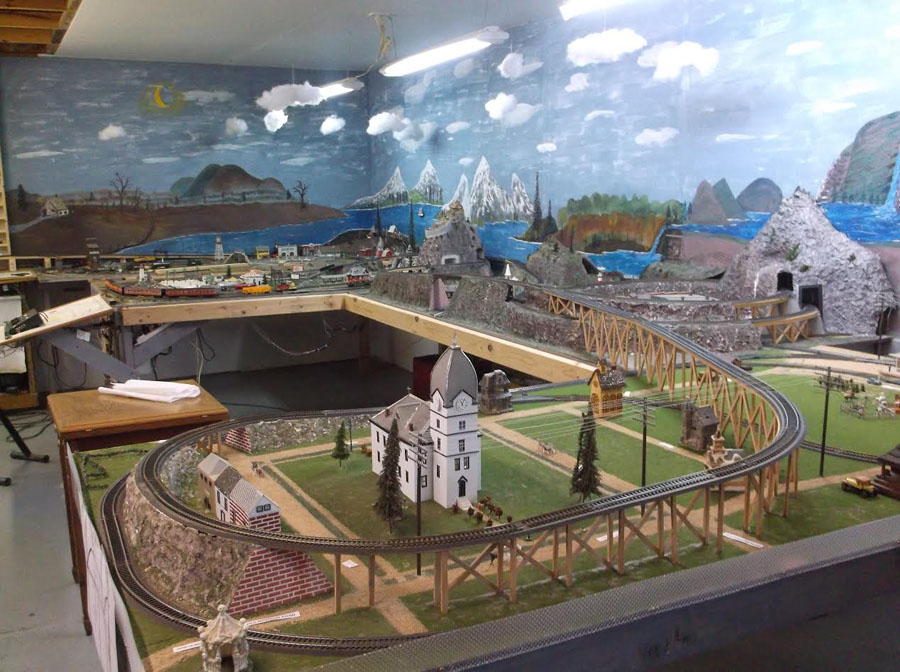
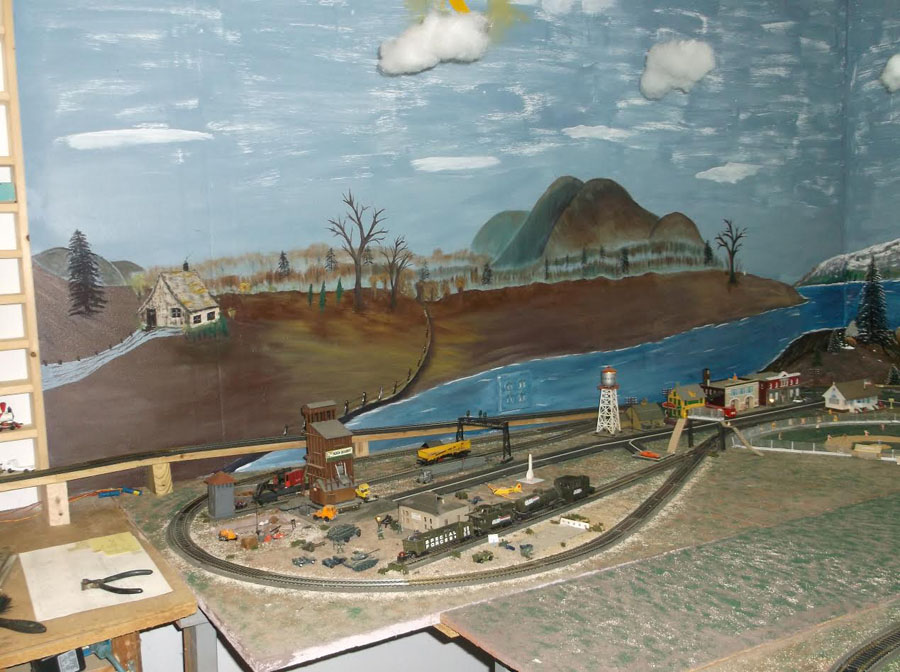
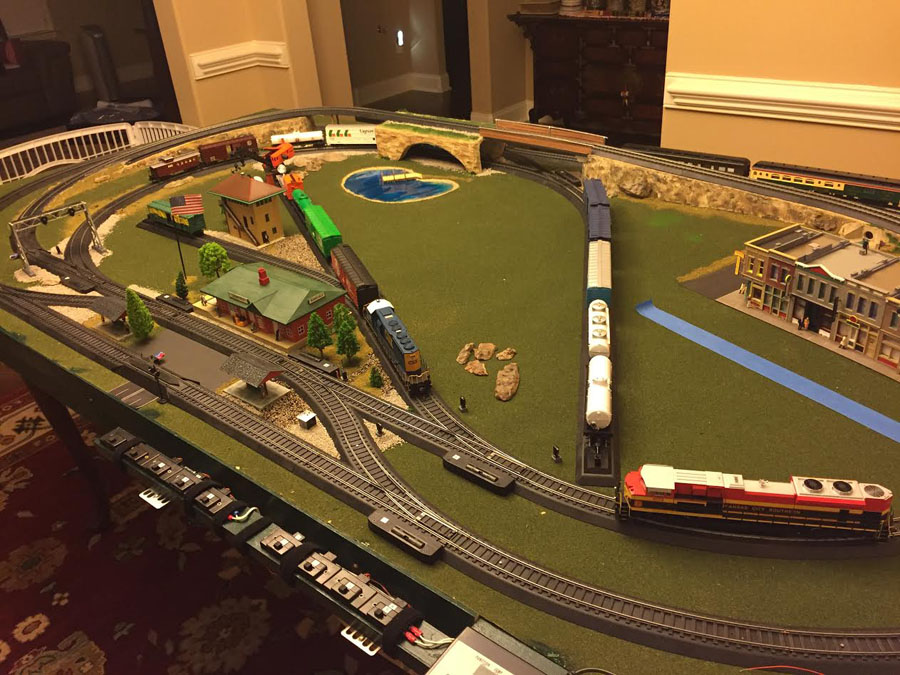
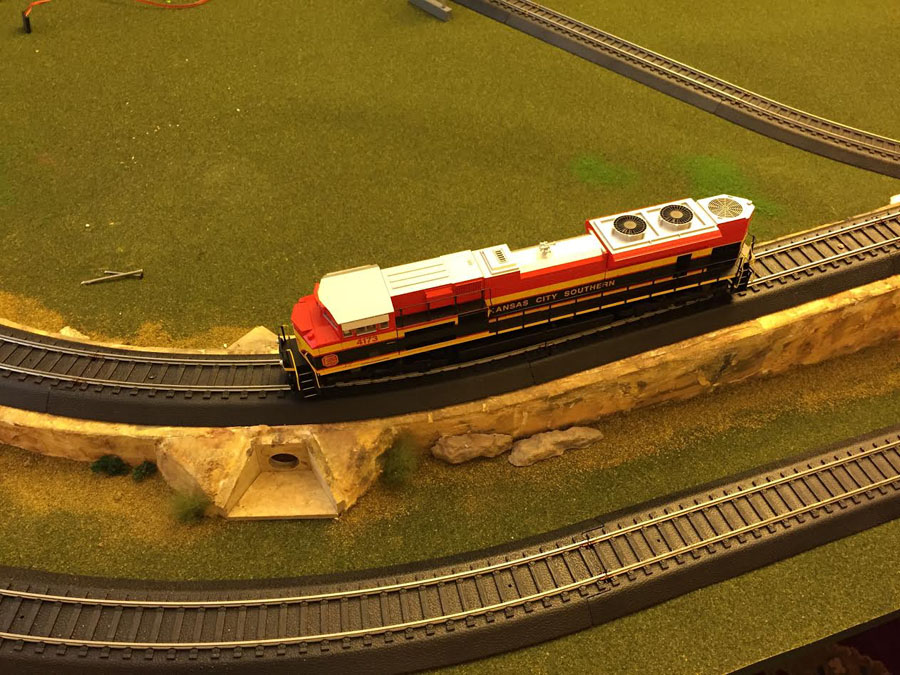
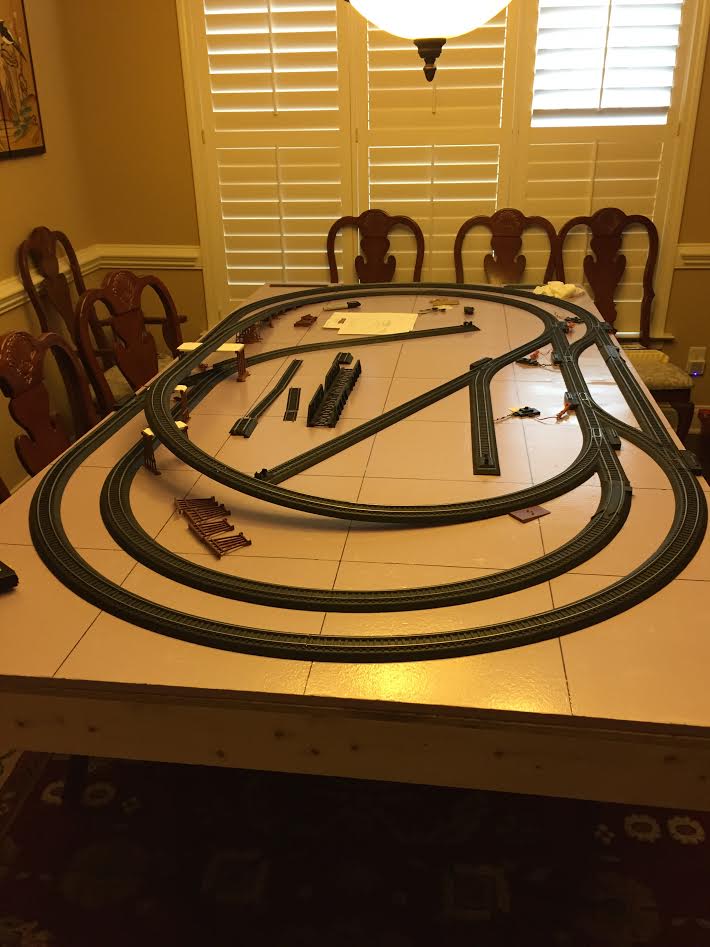
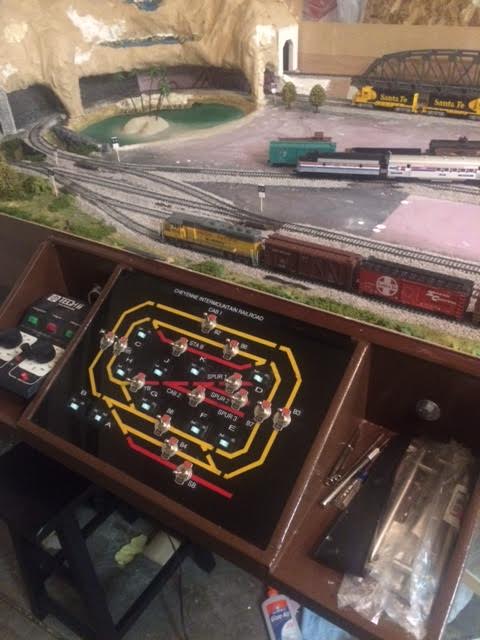
Here’s my layout so far.

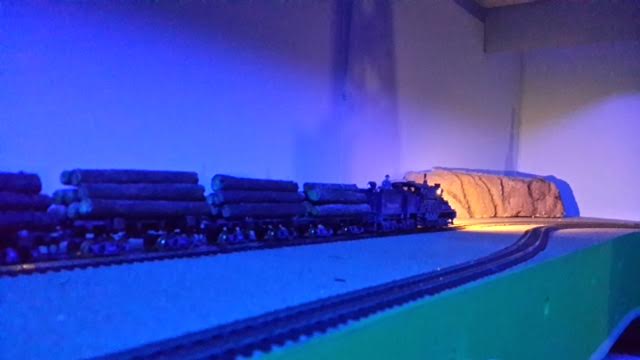
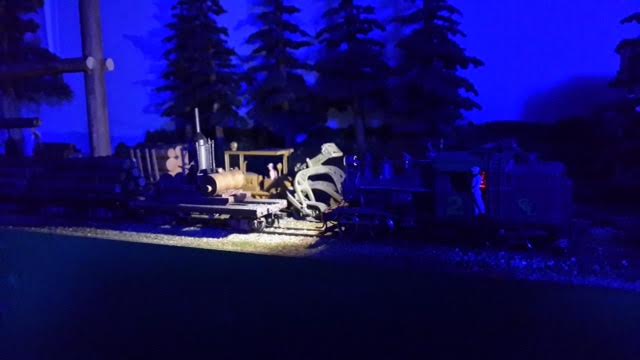
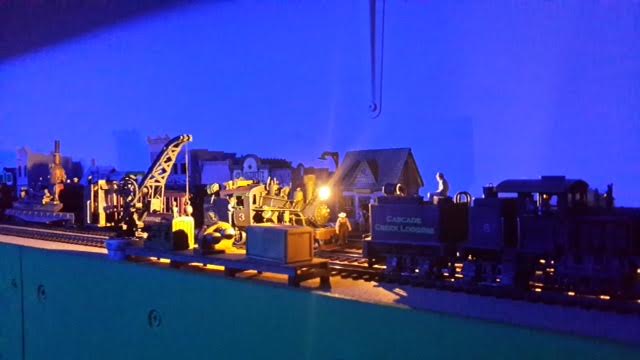
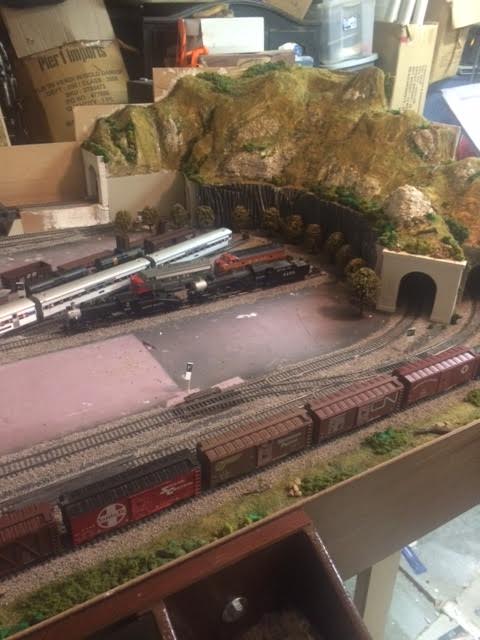
It’s a 4×8 HO scale and everything is scratch built down to the flocking except for the trees. Made my own flock, rocks, bridges, everything.

HO track layout 4x8 mountain tunnel

HO track layout 4x8 model railroad sidings

HO track layout 4x8 tunnel

HO track layout 4x8  mountain tunnel

HO track layout 4x8 control panel

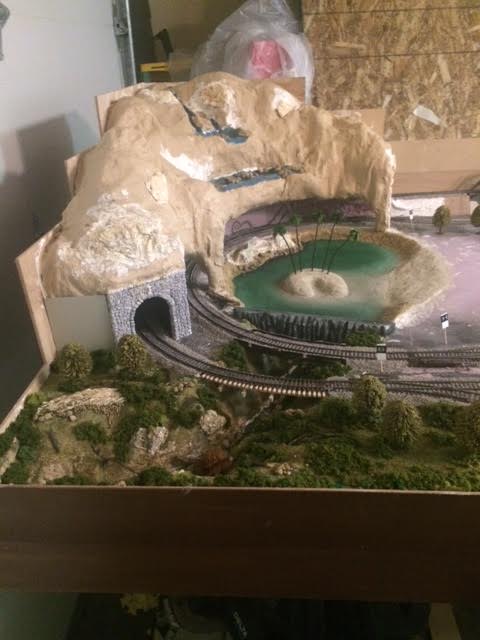
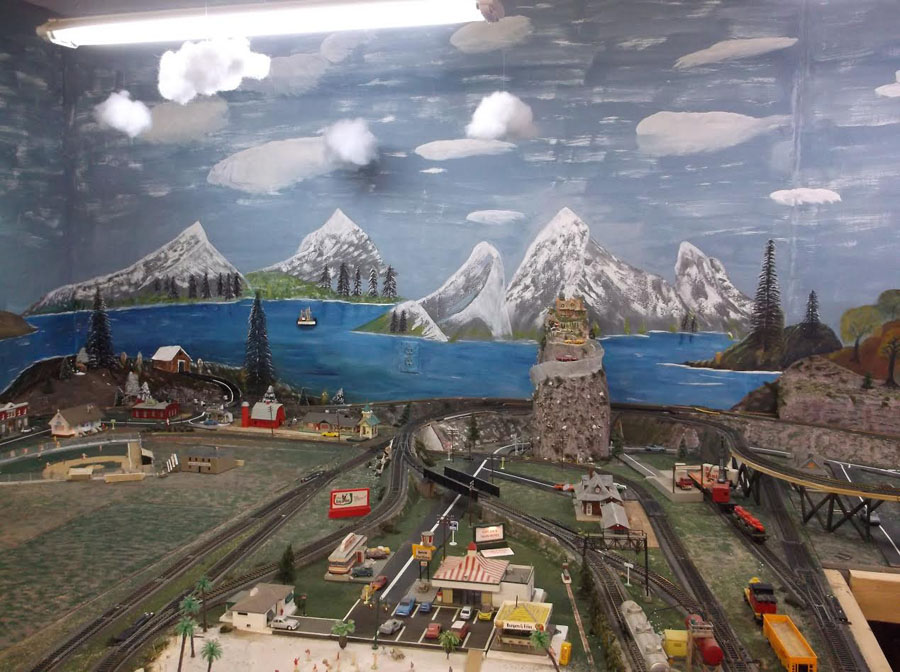
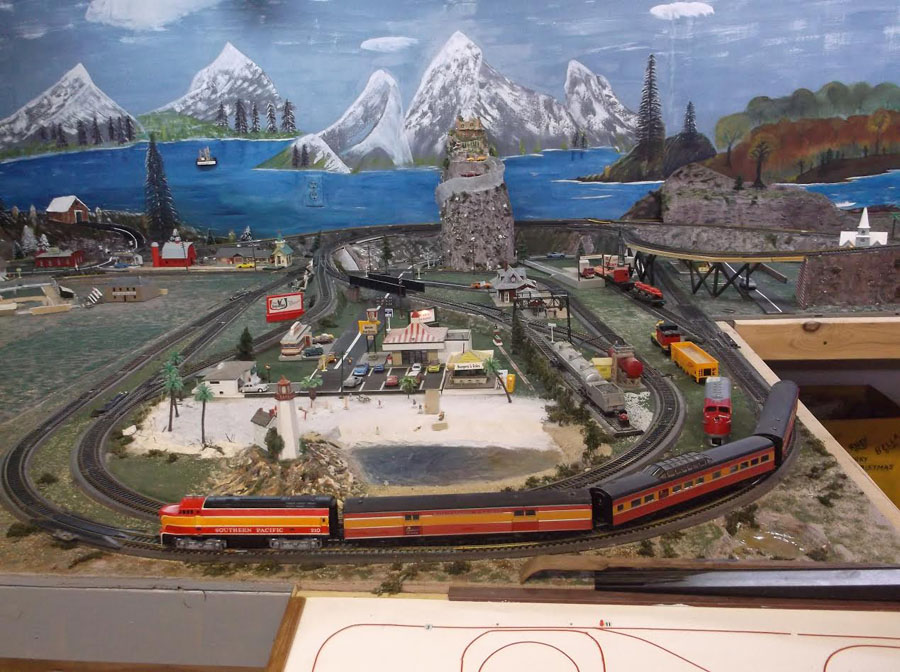
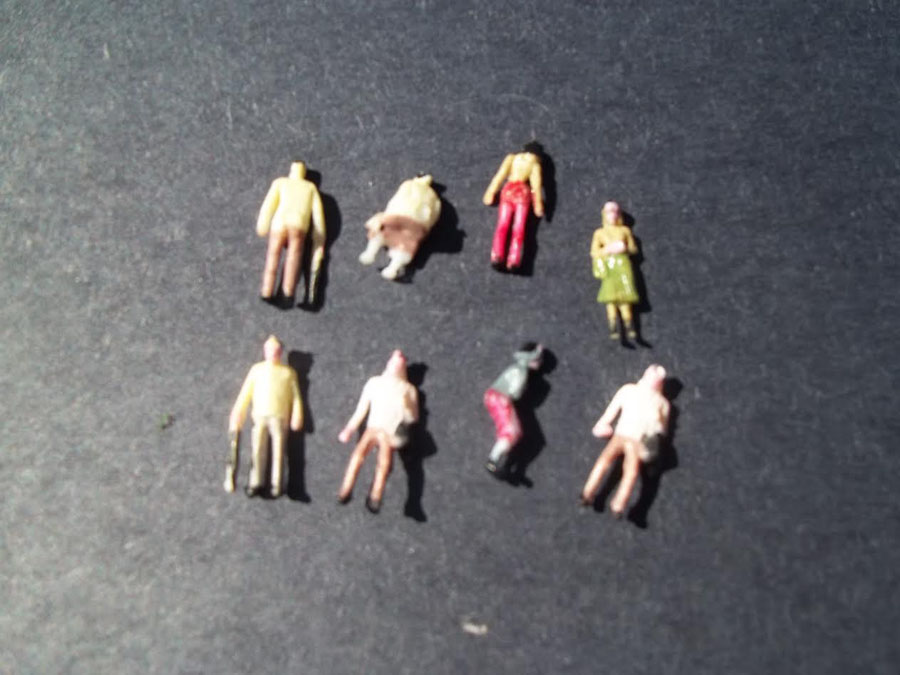
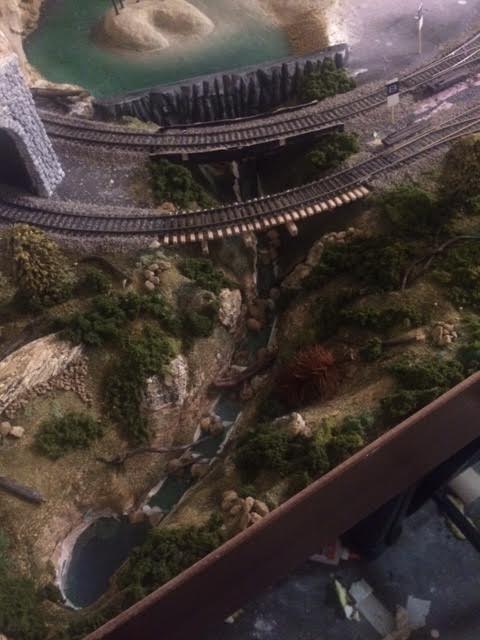
Here you see what will be a cascading waterfall cantilevering over the tracks in which the train will go behind. The waterfall cascades into the pond in which there will be a shipwrecked Gilligans Island SS Minnow on it with 7 figurines representing the castaways, a lurking monster in the waterfall and fishermen of course. The pond sits behind the dam which forms the stream and gorge.

HO track layout 4x8 ravine

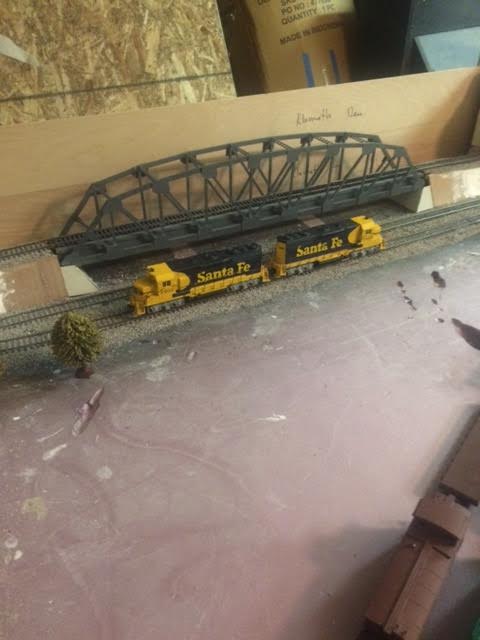
Here is the bridge I made from balsa wood.

HO track layout 4x8 trestle bridge

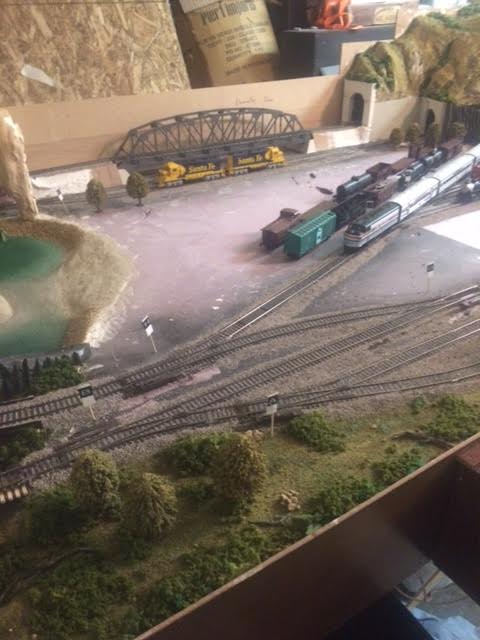
I have some thoughts tho. I didn’t allow for a big enough yard because I thought it would be too cluttered by the time I added buildings and such. I don’t know just yet. I’m making all of this up as I go along.

I’m still considering adding a branch line where you can see I have cars sitting there with no tracks.

Anyway, I will send a video when I can and I will continue to give updates.

Any helpful suggestions from your readers would be a ginormous help.

Thank you

Cal
Oregon, USA”

A big thanks to Cal for sharing the start of his HO track layout 4×8. Can’t wait to see the next update.


Now on to Danny:

“I thought that you might find these photo’s interesting.

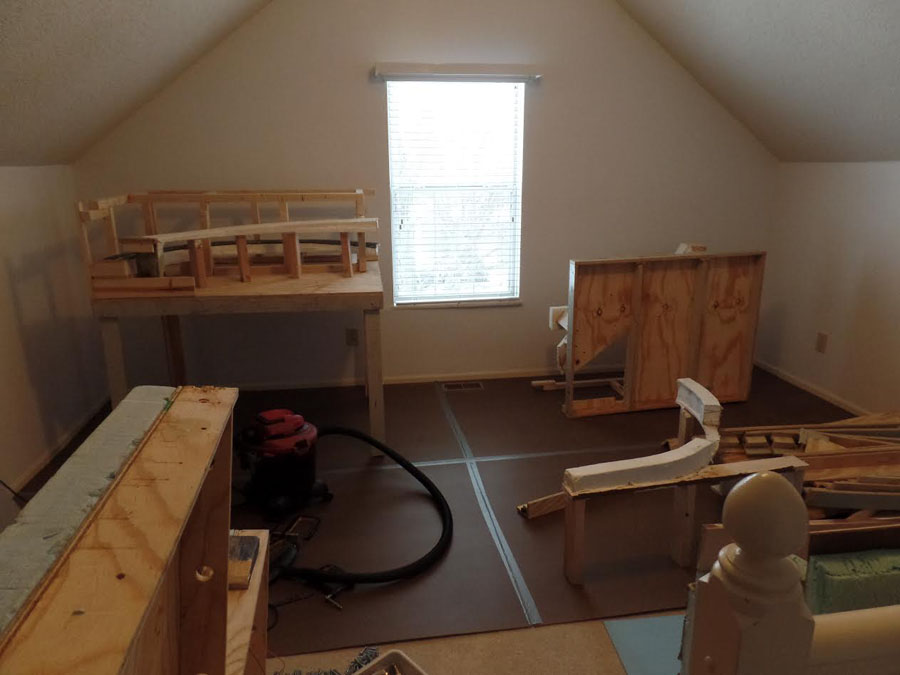
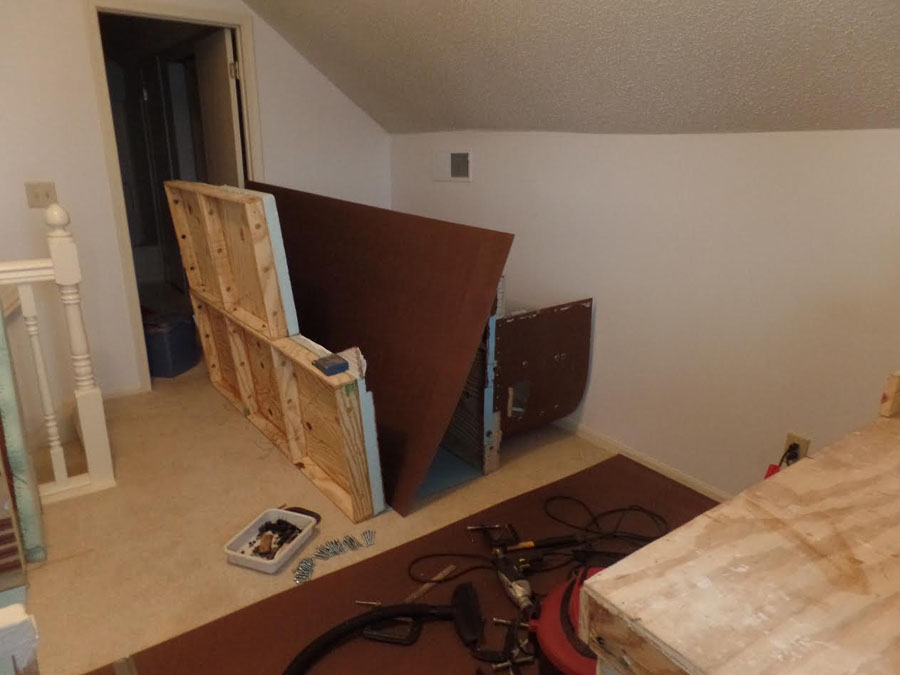
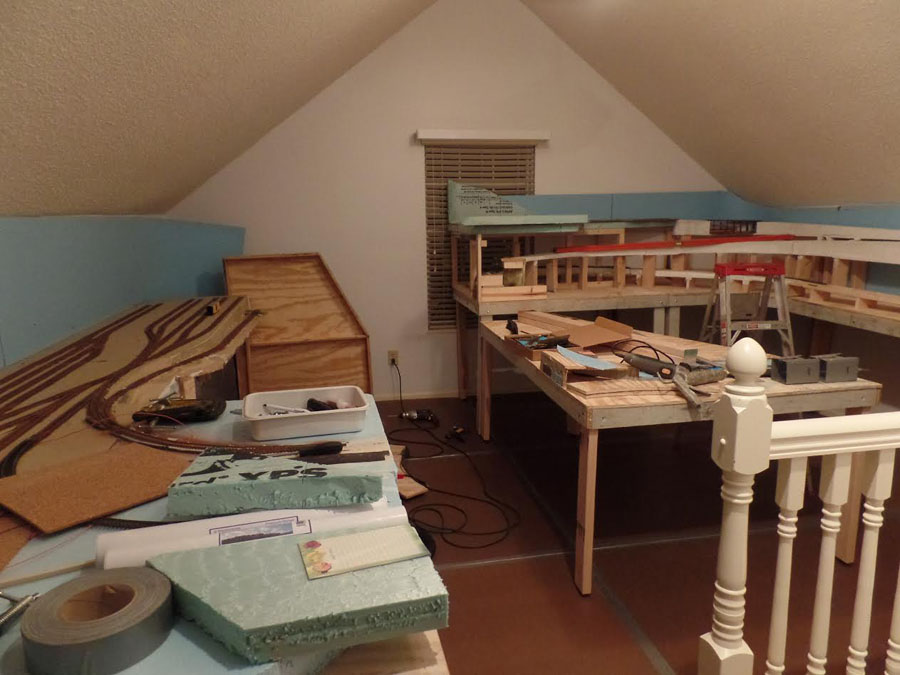
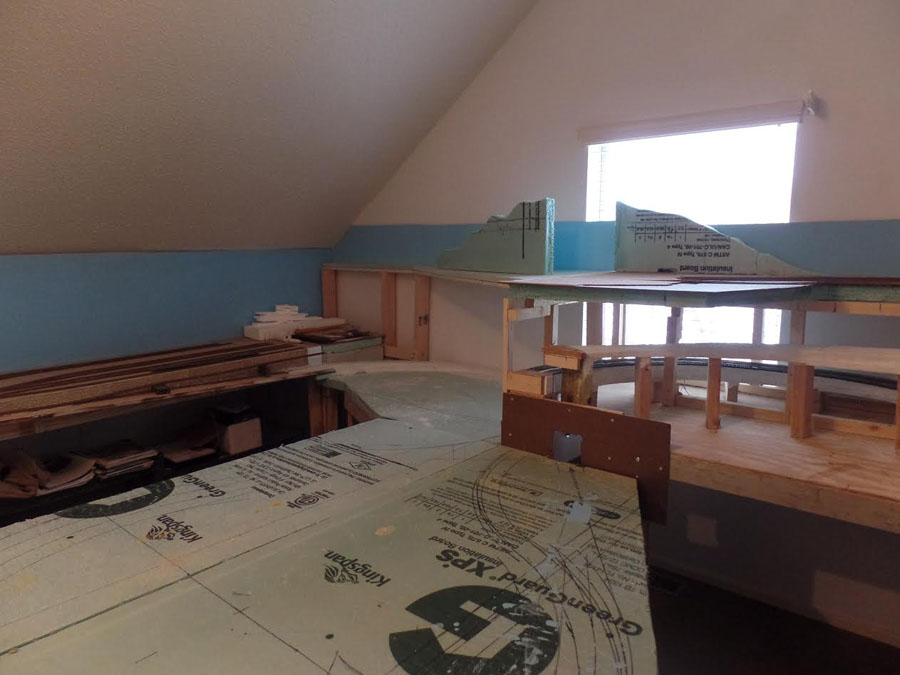
In the past I’ve commented on making your railroad with modules. I had a 22 by 12 foot railroad started in our basement when my wife decided we needed to move to a condo. We bought one with an extra 15 by 15 foot upstairs bedroom, closet, and bath.

the first three pictures show the parts as delivered. The forth shows them in place. It was putting a puzzle together. The new layout is much different then the old but all modules were saved.

The photos show a new 2 foot square module in the corner, a 2 by 6-6 in the front left and a 6 inch piece added at the base of the angular section. A new corner section is shown next. Lastly the layout is shown in its current state. Much is left to go, but modules saved much time and money.

Danny”

model railroad bench

model train layout benchwork

model train layout benchwork


I get asked a lot why I post ‘very unfinished layouts’ – and the simple answer is because it’s all about making that start, which brings me to Mike:

“Dear Al,

I never built a train layout before, even though for two years when I was 35 I managed the model train department of a large Model and sports shop in the north of England. 12 years ago I decided to build a layout in the loft of my bungalow after having it fitted out with a new floor, two velux windows, insulation and a wooden loft ladder.

I managed to build almost all of the base boards but no further . My wife was diagnosed with terminal Cancer and died within the month. I found that I could not live in the house any more and moved to an apartment. The woodwork had to be dismantled and consigned to a Skip when I sold the house. The track, locomotives, rolling stock,DCC control system had to be packed away in boxes and put in store.

7 years later I met a lady through an online dating agency and we became an item as they say. I sold my apartment and moved in with my new partner, taking with me all of the model railway gear and my precious tools. These all lived in the garage for 3 years until last September when we bought a house in Essex by the sea.

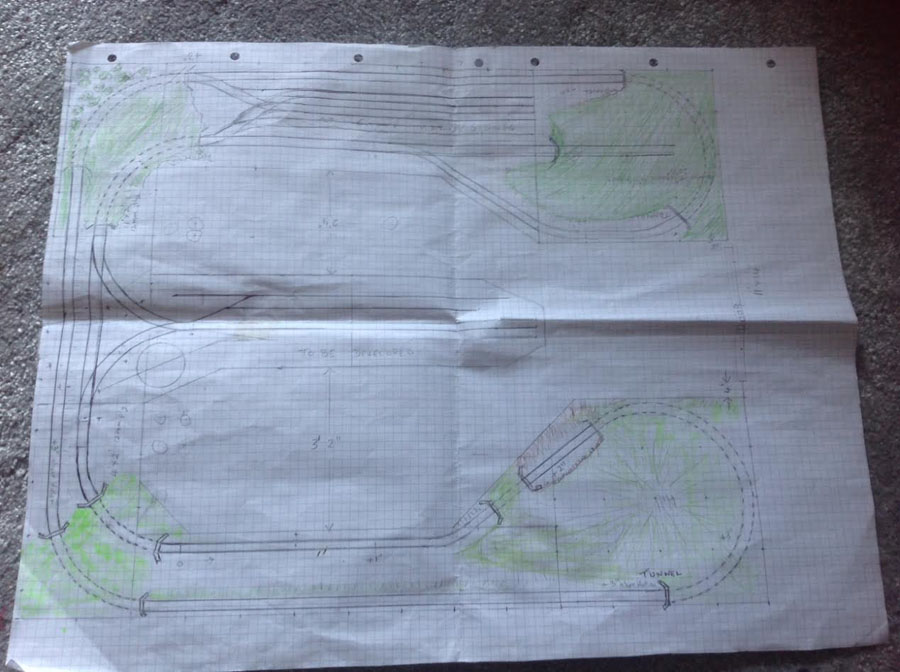
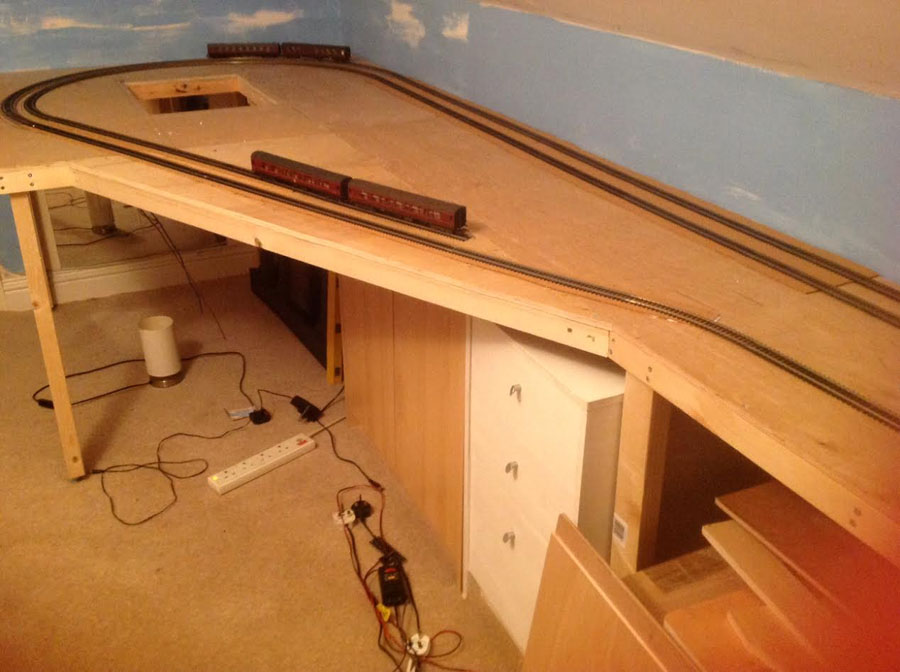
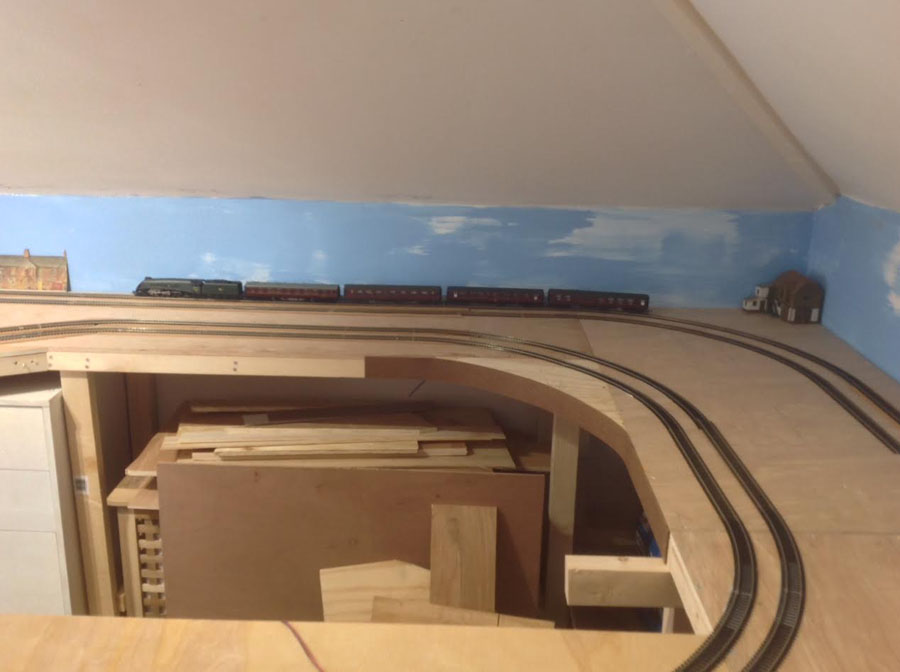
This bungalow had been kitted out with two upstairs loft rooms accessed by a wood loft ladder. Both rooms fully insulated and velux windows. At last I could start again and I am well on the way to build a large 12 feet by 15 feet layout . Track is now going down and I look forward to many hours of modelling. In the end age will stop me. I can shoot up and down the loft ladder well enough at the moment but in five years I will be 90.

I have this time built the layout in sections bolted together and the power bus will plug together so that dismantling the layout will be possible and each unit is small enough to get down the loft ladder when the time comes.

I have recorded the building process in pictures and I enclose a few.

One problem that cannot solve involves the triangle junction that connects the folded oval to the terminal station. I have purchased two Hornby reverse loop modules, but I,m not sure where to install them.

Can any one help?

Your sincerely.

Mike”

model train track plan

HO layout corner

model train bench

There’s something about someone talking through their layout that brings it all to life. Can anyone help Mike?

That’s all this time folks, a huge thanks to Cal for sharing his HO track layout 4×8.

And don’t forget the Beginner’s Guide is here, if you want to follow Cal’s lead, and get going on your layout.

Please do keep ’em coming, it’s getting a bit thin on the ground this end.

Best

Al

PS Latest ebay cheat sheet is here. A lot of HO stuff at the mo.

PPS More HO scale train layouts here if that’s your thing.


Tips for model railroading

I have a collection of tips for model railroading today, all from you lovely lot:

“I found a good use for the wrapping that tools and screws and such come in. It is almost perfect for glazing in the print out buildings.

Hope you can use this.

Guy”


“Alastair,

My grandson and I have started our railroad project. The photos aren’t much but everyone says the first thing to do is get started.

We are doing an HOn3 logging theme as I was raised in the Pacific Northwest. I had built an O27 and S gage layout as a young boy. We have built a 4×8 base and we are currently planning the layout.

Working with my grandson is allowing me to teach him how to plan things and then lay them out. Soon we will be building and running trains.

Best Regards,

Lynne”

track plan tips for model railroading

model train table

“Hi, From Joe in Fayetteville Georgia.

Years ago I wanted to do paintings so I purchased the “Joy of Painting ” book of Bob Ross and that go me into wall painting for my train layout. I am sending pic’s of mine.

I had a 25 x 25 workshop with HO scale and with dual manual operation. I have since moved into a smaller home and let all of mine go with the sale of the old home. As you can see with the layout you cannot tell where the layout to wall starts.

I even have clouds made with pillow stuffing hanging from the ceiling with fish line.

KEEP THEM ROLLING

Joe”

model railroad backdrop

tips for model railroading backdrop

model train bridge

model railroad backdrop


Tips for model railroading:

“A reader recently asked for help in deciding which to use – code 55 or code 80 N scale track.

Since you are asking, I must assume you are aiming for a realistic looking railroad. Let me preface my answer by stating that I model in HO, and I am using code 83 vs. code 70 and code 100.

I think code 100 is too big, out of proportion. I think code 83 looks OK, especially on the main line. However, I think code 70 would look more realistic, especially since I am modeling the 1930’s.

Code 70 should be used in yards and sidings. With code 83 I have had no derailing problems due to size. Code might present problems with larger flanges on older rolling stock.

My suggestion would be to create two dioramas, one using code 55 track, and one using code 80 track.

Other than track, they should be identical, about 3 cars in length and about a foot wide. Use roadbed, ballast, and grass exactly like you plan to use later. Place two similar cars, one on each diorama. Look at them both from multiple angles, and see which looks better in your eyes. Repeat with two engines. Now you can make your own decision.

It also depends on the era you are modeling. If you are modeling an older era (pre-diesel, for example) then light rail may look better. Also, using code 80 on your mainline and code 55 for sidings, then the contrast would contribute to an overall more realistic layout.

Once you are finished with the diorama, add a back to them, add basic scenery, and use them to display your models.

Keep on training,

Carl in Kansas”


“Good day Al!

After getting back into model railroading after patiently waiting for 34 years, I was shocked to see how much the model railroad hobby had gotten expensive.

Thankfully I had purchased over 300 feet of atlas track and 36 switches back in 1983 and it was boxed up until February of this year when I started by long awaited layout. So, I was determined to make use of this track versus wasting it and purchasing something new.

As I have been re-educating myself on all the new stuff out there, I have also been wanting to make this affordable and see what options are out there to some of the more “expensive” items.

Now, first, I totally support quality products (as I have been in electronic retail & repair for more than 30 years with a brick and mortar store), but I feel there are times and situations that a cheaper alternative may be more fitting. I have been looking at a few inexpensive products I found for N scale and thought for a few bucks, lets see if they live up to what they appear to be and if not, I have learned my lesson. I have sent you photos of 2 products that I found and ordered and have been pleased and there is more to come.

I ordered a package of 100 painted people that was labeled as 1:150 scale (Europe N scale size). I just received them and I am very pleased with these. I measured many of them and they range for a person in the real world being 5’6 to 6’6, so actually they are not bad at all. Most were in the 5’6 range. Some people are sitting as well as standing. I thought this is a great bargain for $13.99.

I also have been making my own trees which has been fun, but again wanted to see what options where out there.

I found 24 trees for $5.99. Well, I must be honest, they were a little cheap looking out of the bag but I did give them some dressing up with spray adhesive and various colors of shredded foam and in my opinion, they now look pretty good for a mid to background area and especially mixed in with other trees. They are plastic and the trunk and limbs are brown but I plan to probably paint the main trunk a little to tone down the dark brown color.

They measure out to 2-3/4″ tall (1″ of that being the trunk) so in the real world this would be a 36′ tree…well within scale. This was a bargain for basically 25 cents a tree!

I have more items on order and will give you my opinion on those when they arrive. I wanted to share this for those who may want to try to save some money and have some cheaper alternatives where the more expensive items may be to far away to be appreciated.

Thanks,

Kevin”

model railroad tree

tips for model railroading figures


Tips for model railroading:

And I got this in from Joe. It’s a problem that crops up time and time again on the site:

“Alistair,

I have been reading your messages and have found them very helpful. I am a Jamaican and am building an HO scale railway with some unique Jamaican scenes. As I advance I intend to send you some photos.

For now I have an immediate concern. I have acquired a set of very old Fleischmann engines and coaches, made I believe in Germany probably 30 or 40 years ago. I am adding to the collection by acquiring some contemporary engines and coaches and would like to interchange the wagons & coaches, but the couplings are incompatible.

I have attached 3 photos showing the difference in couplings. Can anyone help with a solution to this?

Thanks,

Joe”

model train couplings

model train coupling tips

model train coupling tips

“Hi Al–really enjoy your daily e-mails. Here’s something that I’ve been thinking about for a long time (but haven’t taken any action), and was wondering if any of your viewers had done it:

A 3 gauge layout–the gauge closest to the viewer would be O, a little farther back would be HO and in the distance it would be N. The idea is that the further you are from anything, the smaller it looks.

In my ideal layout a train would begin at the O gauge station, run around and disappear into a tunnel or something,go into a reverse loop and stop.

Meanwhile out from the other side of the tunnel would come the same train in HO gauge which would then do the disappearing act at some point and resume as N scale.

Each of the gauges would have a hidden reverse loop and automatic stop/start relays so after the N gauge makes its rounds, it would reverse itself and return in the opposite direction and of course when it goes into the hidden part of the layout, would turn into an HO version running in the same direction.etc.

Theoretically it sounds kind of neat and I don’t think it would be difficult to construct. As I said I’m just wondering if anyone has already done that and any problems they encountered.

Regards & keep up the good work

Terry”

Can anyone help Joe? And I know some of you out there have done exactly what Terry is suggesting. If you have, please do send pics.

Loved Lynne’s missive – I couldn’t agree more, it’s all about starting.

And poor old Joe, moving and having to let his layout go. Sadly, I get too many mails saying that!

Some more tips for model railroading and layout pics next time.

That’s all for today folks.

Please do keep ’em coming.

And if you feel like you’re missing out on the fun, the Beginner’s Guide is here.

Best

Al

PS More HO scale train layouts here if that’s your thing.


Need buildings for your layout? Have a look at the Silly Discount bundle.

Lionel prewar layout

Bob’s been in touch with his Lionel prewar layout:

“Greetings, Al.

This is my first opportunity to reach out to you and your readers, although I have been reading and learning from your posts for almost a year.

I am resurrecting, and building on, family Lionel O Gauge trains, some of which date back to WWII.

This is my first permanent “adult” layout, encouraged by my recent retirement and the birth of my first grandchild.

I spent the first part of the winter months building the platforms 8’x12′ x 36″ high with a void area in the middle for access. I threw out all my old tubular track, which was badly pitted, and went with the Lionel FasTrack.​

Then the fun began. I had the Pennsylvania Railroad 2020 steam turbine locomotive refurbished. It was my uncle’s, dating back to WWII. I contacted the PRR Historical Society to get some background on the real-life engine. They were terrific, and sent me magazines, etc.

As it turns out, that engine wasn’t very successful (compared to the first diesels coming into service), so they only made one and it hauled passengers, not freight. So, of course, I needed to buy some Broadway Limited cars for a bit of historical accuracy.

My grandparents bought the Santa Fe Silver Chief set for me when I was about 10 yrs. old (1955 or so). I always had trouble keeping those 15 in. cars on track, so I put them on the outer loop with 84 in. curves and a modest grade and trestle bridge.

Historical fact: In the ’50s, the Broadway Limited would take you NY to Chicago, and the Silver Chief would take you Chicago to LA — a full U.S. cross-country representation here.

To build out a Pennsy theme, I decided to get a current CSX loco to pull some coal and oil. The Seaboard switcher on the inside freight spur has a few random operating cars, just for fun.

My wife is much more “craftsy” than I, so she is helping with the buildings, scenery and landscaping. I am keeping a few web sites in business building out town and country settings. I will stay in touch as I make progress.

Thanks to you and your contributors for sharing very valuable expertise and experience.

Bob”

lionel prewar layout

lionel prewar layout


There are quite a few prewar layouts on the blog now, but when it comes Lionel trains, I’m always reminded of Ed’s post:

Vintage lionel train layouts.

And of course there is Hugh’s too:

Pre war lionel o gauge train engines

Now on to Rowan:

“Al,

I have been working on a couple of layouts this past year a HO scale down stairs and an O scale up stairs. Both are a work in progress and I have taken many ideas from your blog.

I restarted my enthusiasm in railroading after my father passed – he worked and retired from the Kansas City Southern Railroad for over 40 years. Many thanks to you. PS my wife did give permission to use the dining room, she loves trains, too.

Rowan”

model train layout

model train

model train track layout


model railroad track plan

“Hi Al, A few photos of night operations on the Cascade Creek Railroad in HOn3.

Logging operations continue into the night on the Cascade Creek railroad.

1 – A train bringing logs to the yard for sorting and then onto the sawmill.

2 – Heavy work at camp 4 to get the logs loaded.

3 – Guys are busy in the yard at the town of Cascade Creek sorting incoming cars.

4 – Number 20 on its way to be turned on the turntable, refueled and ready for the next mornings run to Camp 4. The yardmaster is welding a repair job in the engine house, ready for the next mornings early start.

All lighting is from the locomotives headlights. Main lighting in the room is only a blue light for night time operations.

This is what the hobby is all about – having FUN.

Hope you enjoy.

All the best

Brian”

(You can see more of Brian’s stuff here).

A big thanks to Bob for sharing his Lionel prewar layout, and to Brian, and Rowan too.

I liked these layouts because they show what this hobby is all about – making a start.

That’s all this time folks. Please do keep ’em coming.

And for all those who want to take the plunge and get going, the Beginner’s Guide is here.

Best

Al