Fred’s tips and John’s engine shed

“Saw the post about pulling power

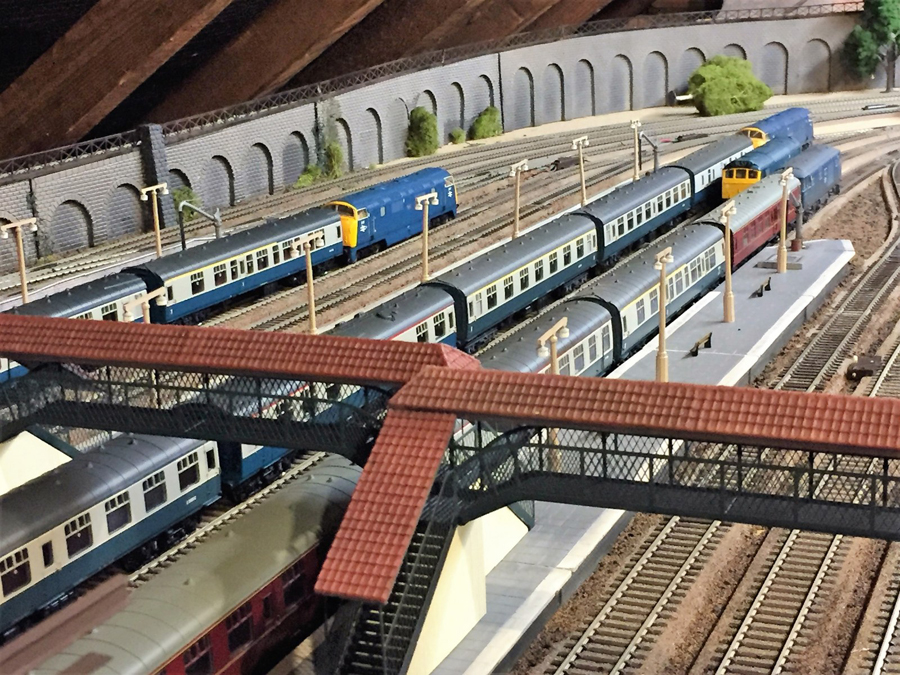
Alluding to I think of length of passenger train.

I know this is out of character for this blog but I must share in defense of Dangerous Dave.

In summer 1967 I took my first train ride from Missoula Montana to St Louis Missouri (sort of).

While coming into the Twin Cities (Minneapolis / St Paul) I was hearing rumblings of an engineers strike. (Guess it would be the first one in the nation ever) I had no idea what that meant, being 20 years old. Heard lots of rumors. Wondering.

Got into the TC Train yard. Lots of trains sitting. Going no where. As was ours. Sitting. Several Hours.

After about 4-6 hours we started moving. Guess they were short of manpower (due to strike) so they connected us to another 2 other Passenger trains. Finally we left for Chicago.

I think the train was now about 25-30 cars long. Sometimes traveling along the Mississippi through Wisconsin
we could see our train from our train several times through the curves. We stopped at each station along the way about 3 times.

Slow Going. But finally made it — to — Chicago!

The Chicago station was — strange — deserted — hardly Anyone there. Empty. Was told the train was not going anywhere. This was it! You are on your Own. 1600 miles from home. Still not at my destination. I got the final taxi out of Union. My first taxi ride. Went to the airport. Got a plane ticket to St Louis. My first airplane ride.
Funny thing is – I do not recall my return trip 3 weeks later! It must have been boring!

So long passenger trains may not be the norm – but has occurred at least once!

Elbert”

A big thanks to Fred and Elbert (I think Dave was just playing around with his pulling power video).

And now on to something that I hope you’ll all find very helpful.

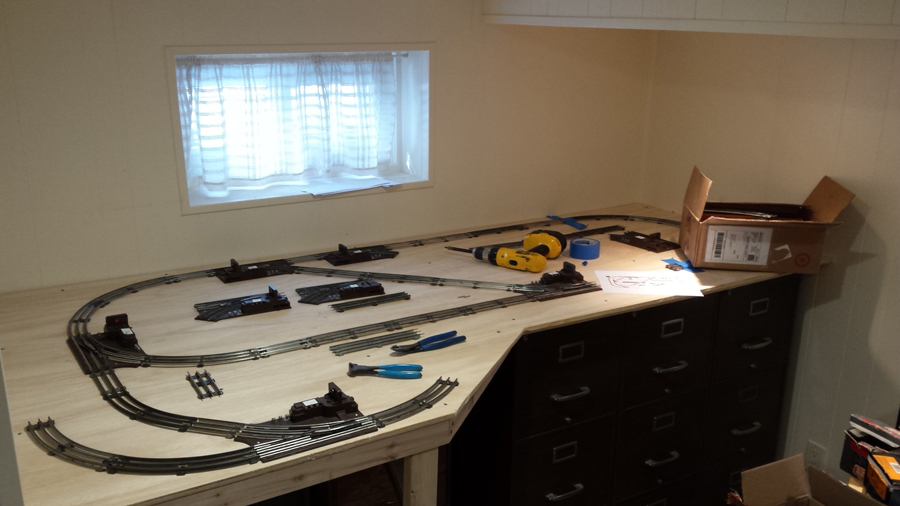
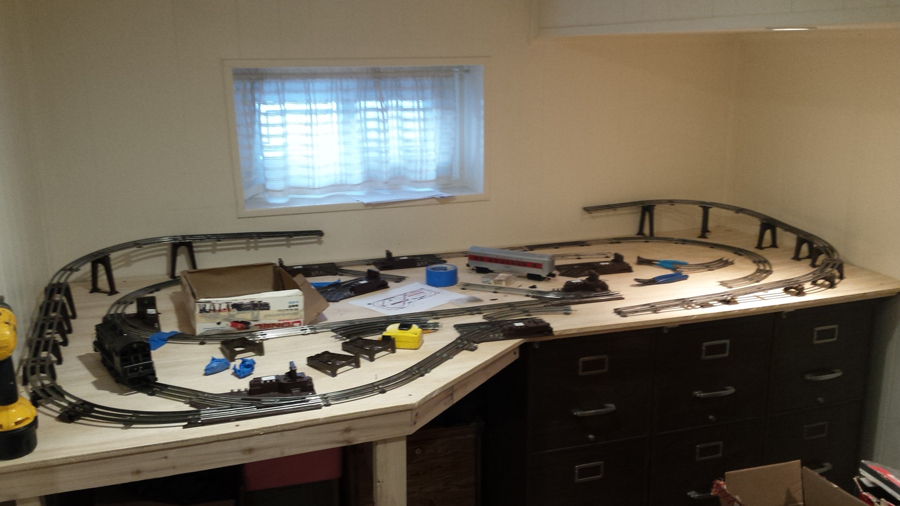
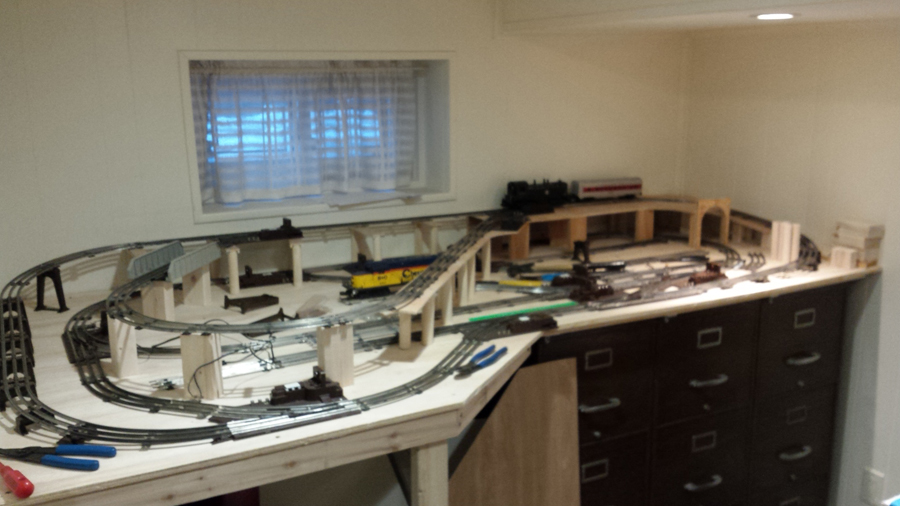
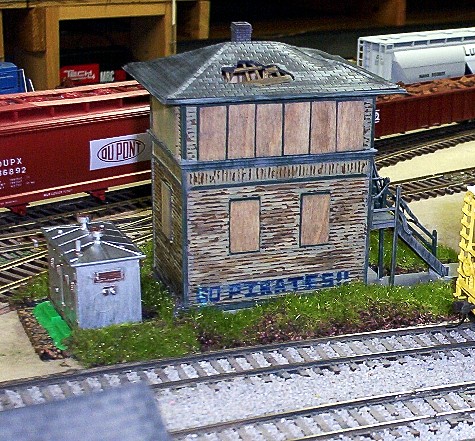
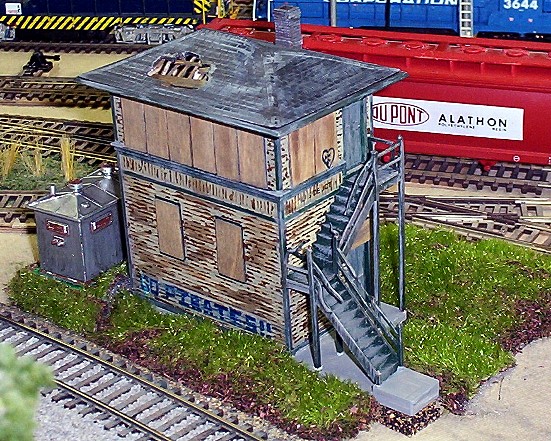
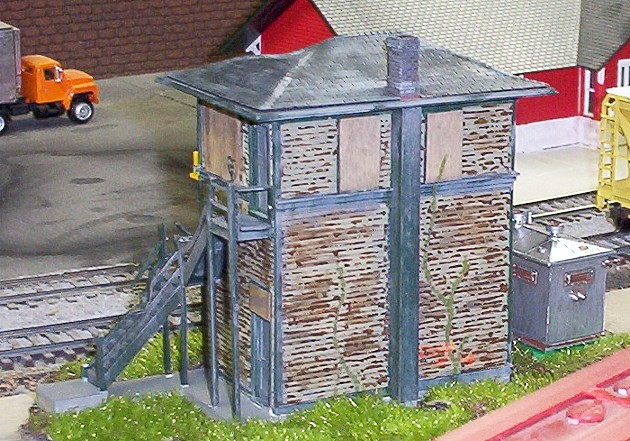
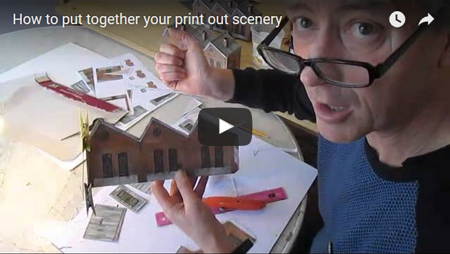
Some time ago, my boy wonder made some engine sheds. A lot of folk asked how they looked so ‘3d’ when they are just print outs.

Fortunately, my good friend John has come to the rescue. He’s made a very detailed ‘how to’ video on the engine sheds. He’s a genius when it comes to doing stuff like this.

john_screen_shot

It’s very satisfying to see all the print out scenery appear in your layouts. Please do let me know your comments and thoughts on them below.

And if you want to try your hand at the engine shed, the engine shed bundle deal for just $9 is here.

That’s all this time folks. Please do keep ’em coming. And if you want to roll your sleeves up and get started, the Beginer’s Guide is here.

Best

Al

Rob starts again

“Al,

I have been following your site for a while now and I enjoy all of the posts and tips.

As with many of your readers, I have gotten the “BUG” again after many many years thinking about it.

I had a large HO layout in my parents house as a boy but after college, marriage, etc, I never had the time to start another layout.

Well, my in-laws came across a box of Lionel Tin plates (Pre-war). For those who are not familiar with Lionel grading, they made all of their trains out of metal until WW II. After that they started using plastics.

I was always fond of Lionel trains but HO was the popular scale in the 70’s so that’s what we built. Well, I jumped in with both feet, started with a small 2-4-2 steam engine and some track.

I recently negotiated for some space in the basement for a 4 X 8 table and began construction.

I have always been more interested in running trains than scenery so I have jammed in as much as I could fit. The track it all O27. I have just about finished laying the track and will be wiring next.

I have done some test runs and so far so good. I will work on the scenery last, but I will do it this time.

I have a mix of steam and diesel, passenger and freight so I can keep changing as I like.

No particular line or theme to the plan as of now.

I got my 11 year old son the Lionel Polar Express set for Christmas and he is anxious to see it run.

The detail that Lionel put into the set is amazing, one of the best Berkshires I’ve seen.

I have attached a few progress photos and a short video.

Thanks,

Bob S,

Long Island, NY, USA”

2016-01-31 13.24.32

2016-01-31 16.05.16

2016-02-07 16.59.12

model train track plan


“For me the important part is to get as much out of my hobby as I can without spending too much money.

To that end I go to flea markets, garage sales and train shows to find good deals on collections of old Tyco rolling stock. For not much money I can detail, repaint, add knuckle couplers and steel wheels, and other minor items and get a nice looking and nice rolling fleet of cars for not much money, but a bit of time and work.

Rick”

“I signed up for your emails about a week ago. One of them mentioned what you do with oddball things you find that you can use in your train layout. Was laying in the hospital bed a couple years ago and was looking at this breathing machine that was supposed to blow into to see if I had enough strength in my lungs. I said you know that looks like a silo. So here it is!

Roger”

silo


“I have just made a requested video showing the pulling power of a couple of diesels pulling a long rake of coaches, bit of fun, but not realistic on a model railway.

Regards

Dave”


Latest ebay cheat sheet is here.

Thanks to everyone – enjoyed Rob’s narrative, it’s all about getting started! And Roger proves a point – it really is amazing what you can make use of if you keep your eyes open.

Lots more like this in the Beginner’s Guide.

Keep ’em coming folks.

Best

Al


Dave adds rust to his rails

“Hi Alastair,

My son and I have a layout under construction and we found a product that resembles wild grass or dirt, depending which side you use.

It is available in many craft stores and is called “pot toppers”. They come in 2 sizes, 10.16 & 17.78 cm..

You fit the topper into the top of small clay flower pots and push the stems of your artificial flowers through the topper to create a potted plant.

We created the abandoned signal tower using one 17.78 cm pot topper.

Tommy USA”

junction tower 2009-01 (a)

junction tower 2009-01 (b)

junction tower 2009-01 (c)


“Hi Al

Thanks for putting these pictures up for people to see and comment, here are few taken of the terminus station with some trains this time!

This was the first test run a couple of days ago, with some final track tweaking a couple of minor electrical issues and thorough cleaning it all works OK. The pictures show a typical view of somewhere in south west England in the early seventies as an example.

The work continues, detailing the engines which some are “straight out of the box” the buffer beams require full detailing, people, signals the list goes on as we all know! While again I stress virtually all what you see is off the shelf I estimate about 30 hours total to create this station.

If your readers wish to know the sequence and checks along the way I would be happy to list them as even with this simple approach there are pit falls and I have fell into many of them! Hope you like the station coming to life at last! Engine sheds next! As I am sure your readers might notice I am a diesel hydraulic fan! but I have steam and other diesels awaiting a run!

Regards

Steve”

IMG_6062 (5)_1600x1200

IMG_6077 (5)_1600x1200

IMG_6078 (5)_1600x1200


IMG_6082 (5)_1600x1200

IMG_6086 (5)_1600x1200

IMG_6097 (5)_1600x1200

IMG_6105 (5)_1600x1200


“Hi Al
Just uploaded a video again, this shows the upper level now near complete with the track rust added and viewed with the truck cam, also a good tip starting at 5.40 on how to make a card building look like a stone dressed or pebble dashed cottage / out building.

Dave”


Latest ebay cheat is here.

A big thanks to Dave, Tom, and Steve. Particularly liked Dave’s truck cam. And yes, Steve, we’d love to read your check list! I know what you mean about the pitfalls – there are lots listed in the Beginner’s Guide.

That’s all this time folks, please do keep ’em coming.

Best

Al