Model train town layout

Steve’s been in touch with his model train town layout:

“Al

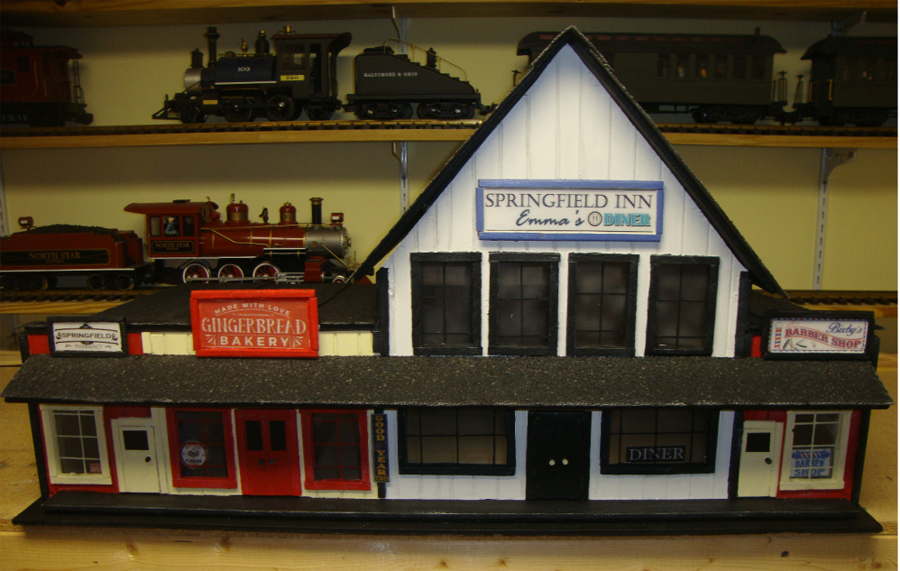
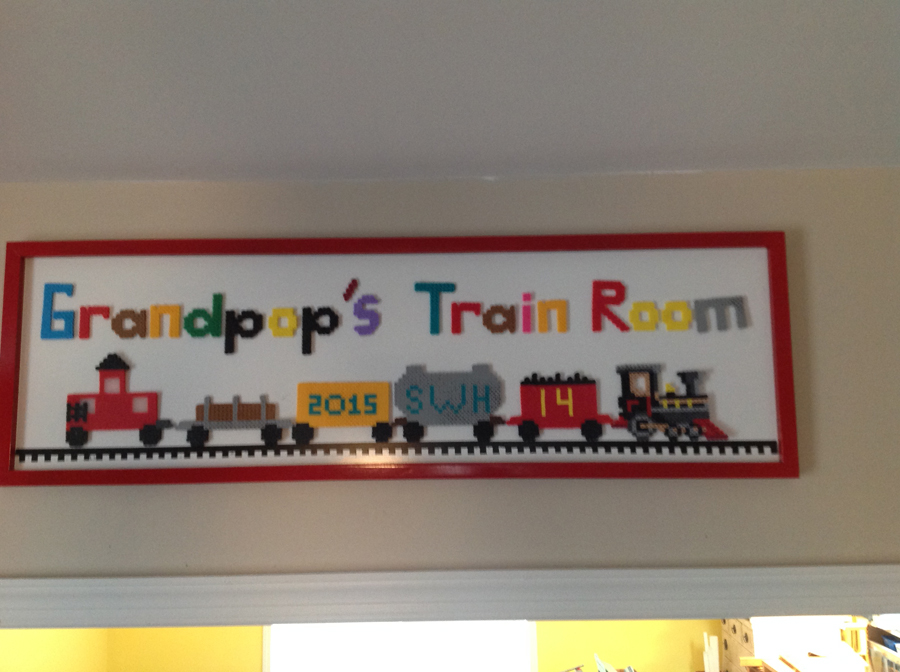
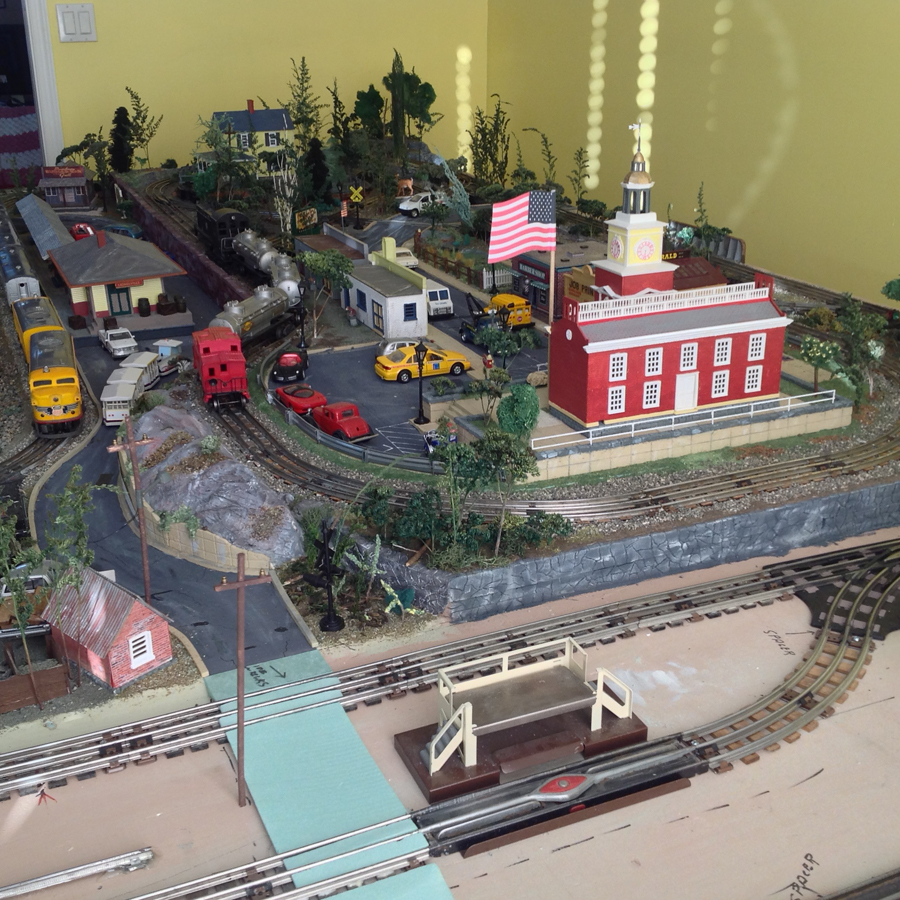
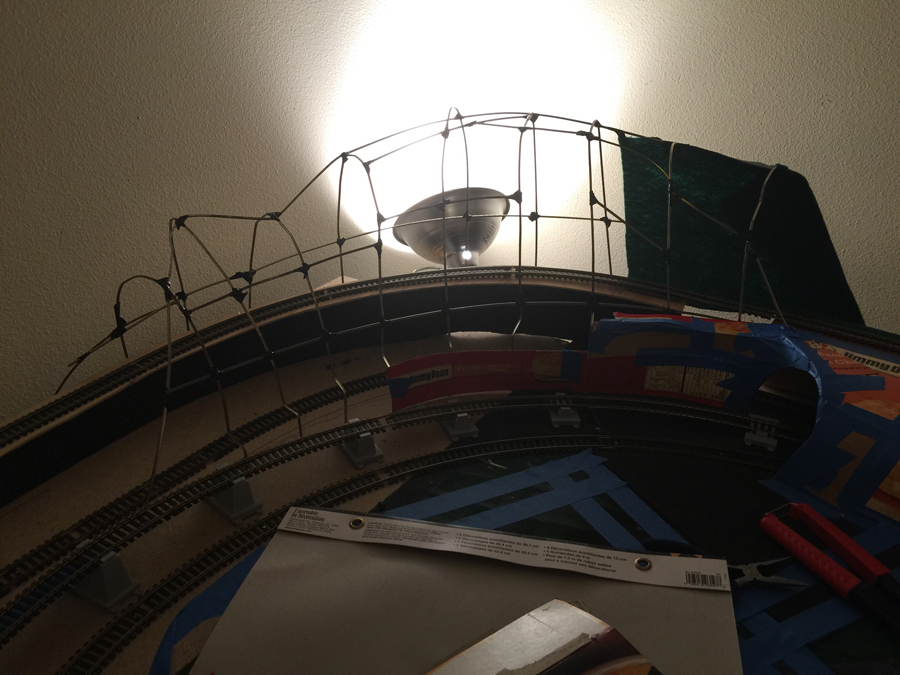
I was sitting in our home office taking a break from the railroad work and I looked up at the train room entrance and noticed the sign above the door. My 6 year grandson made the train and the letters with beads you iron together. He did it all on his own. I made the frame and the tracks for him. This is the best part of my layout.

1

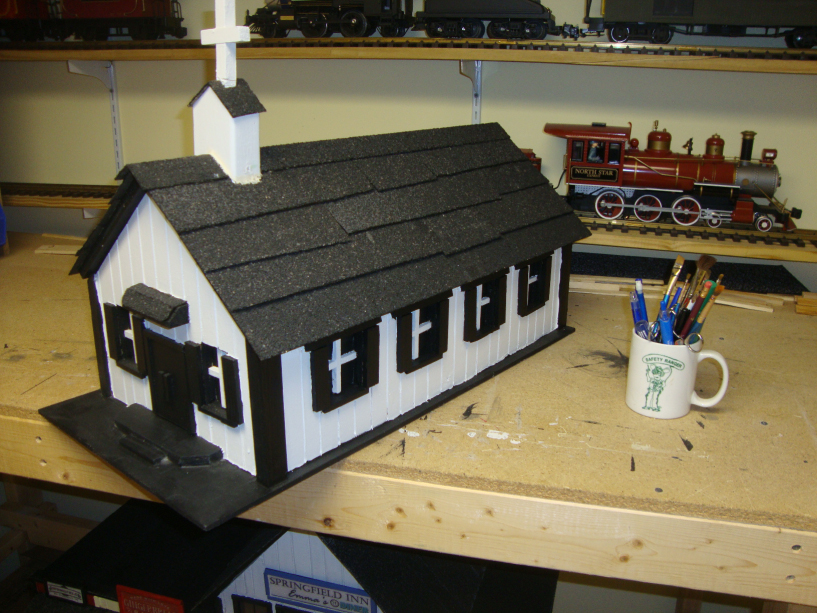
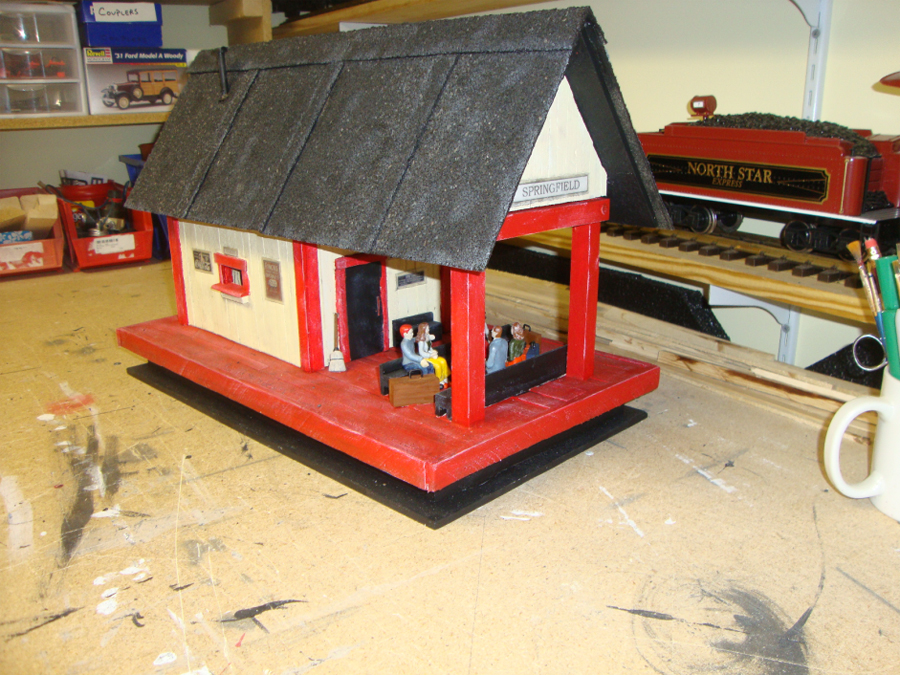
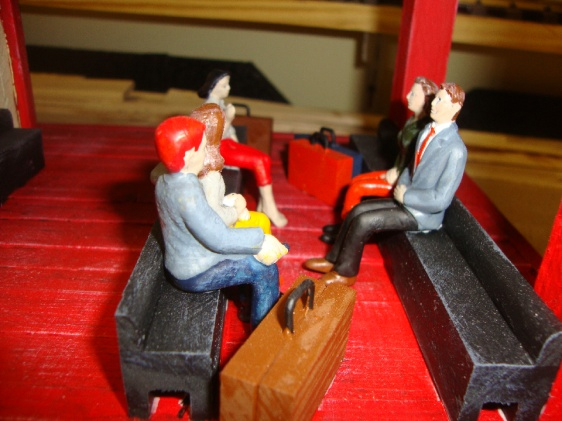
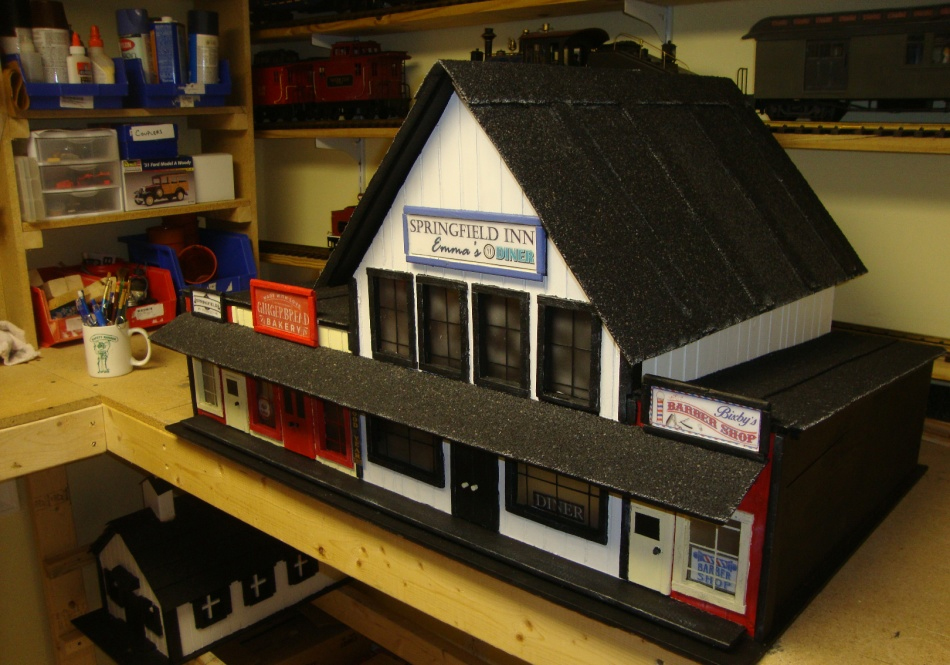
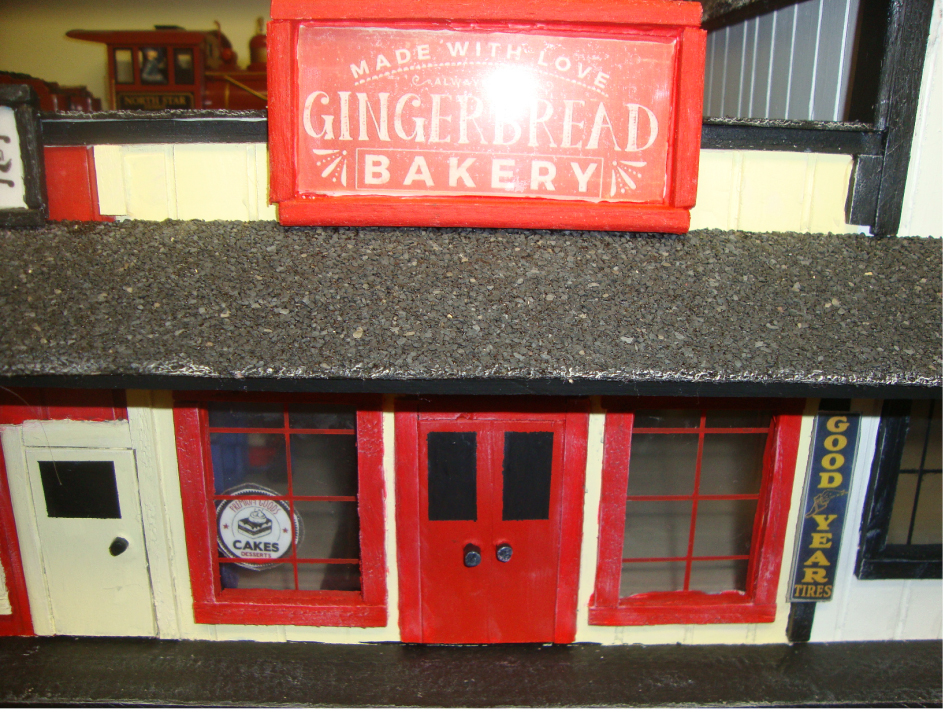
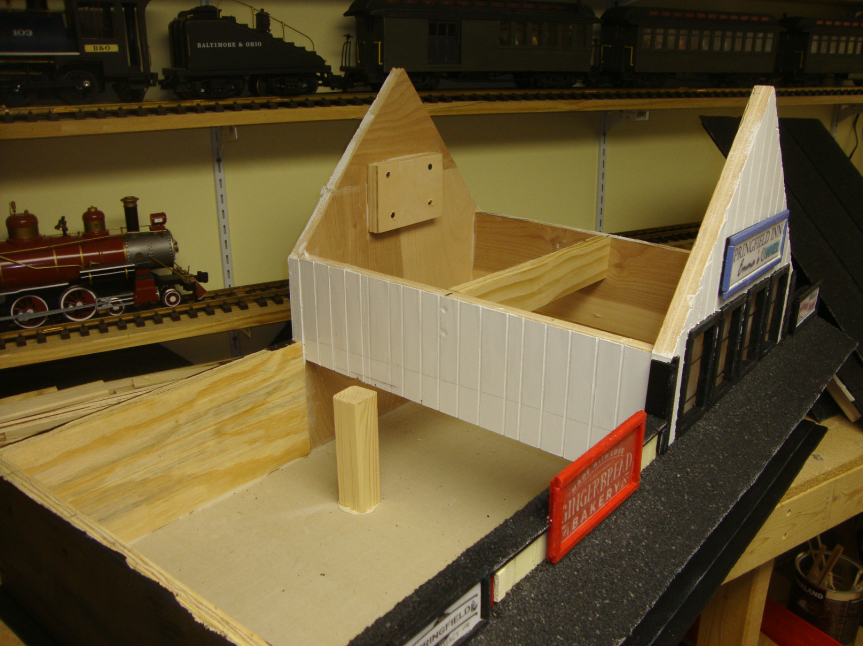
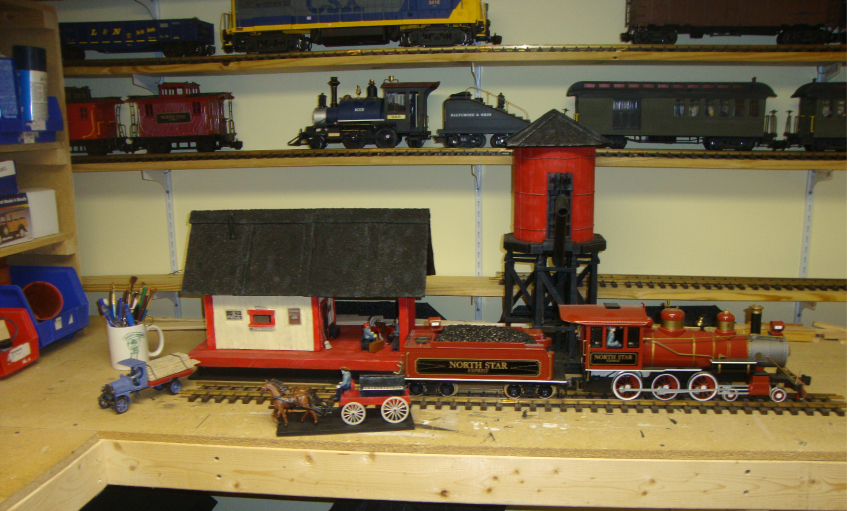
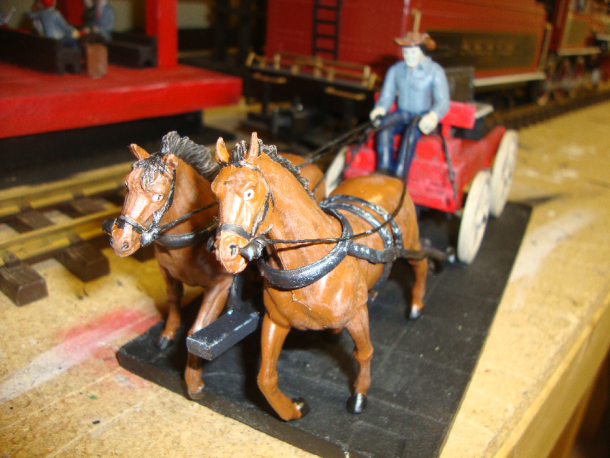
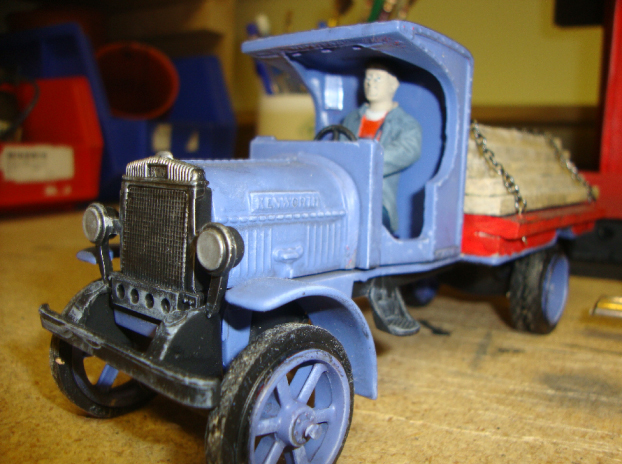
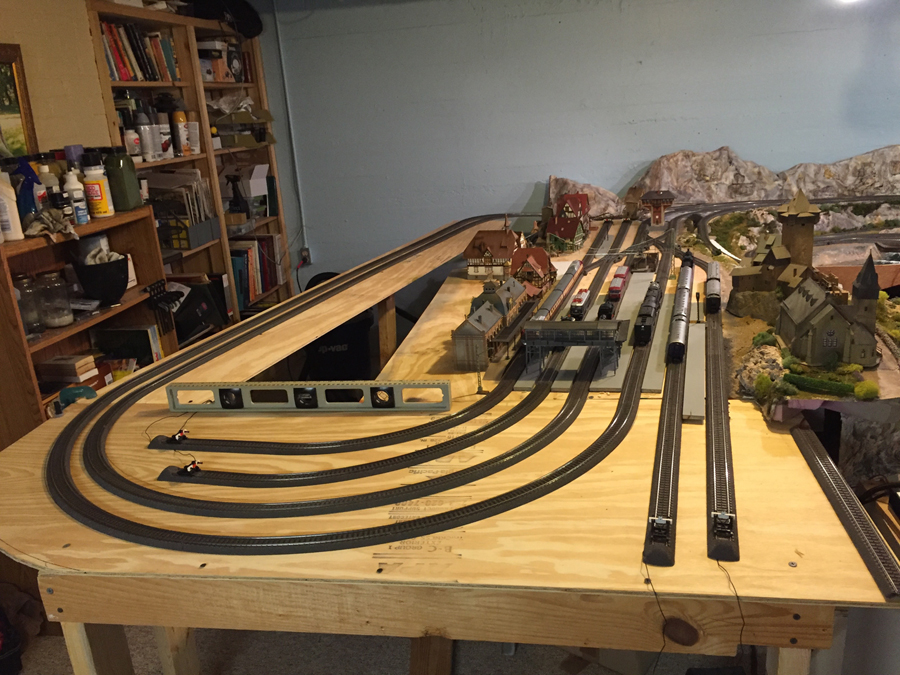
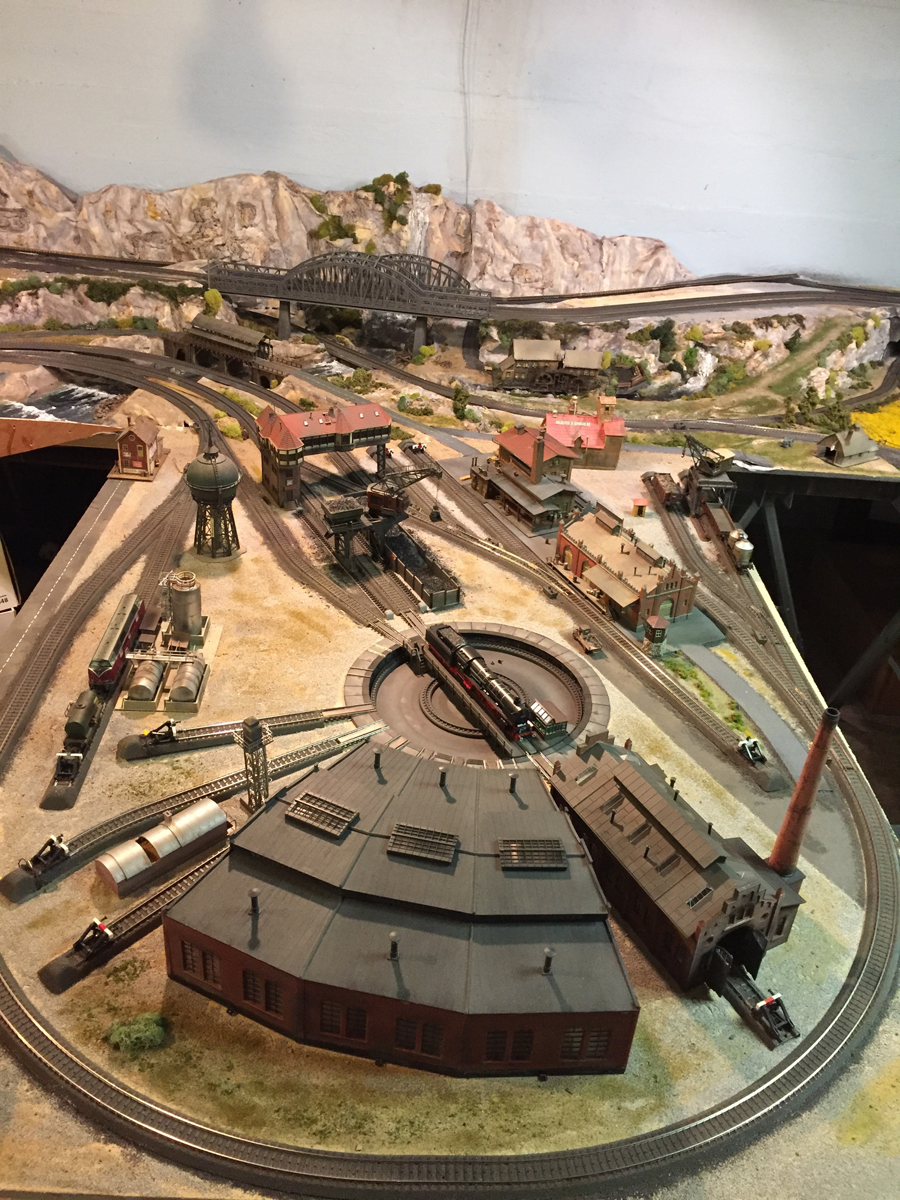
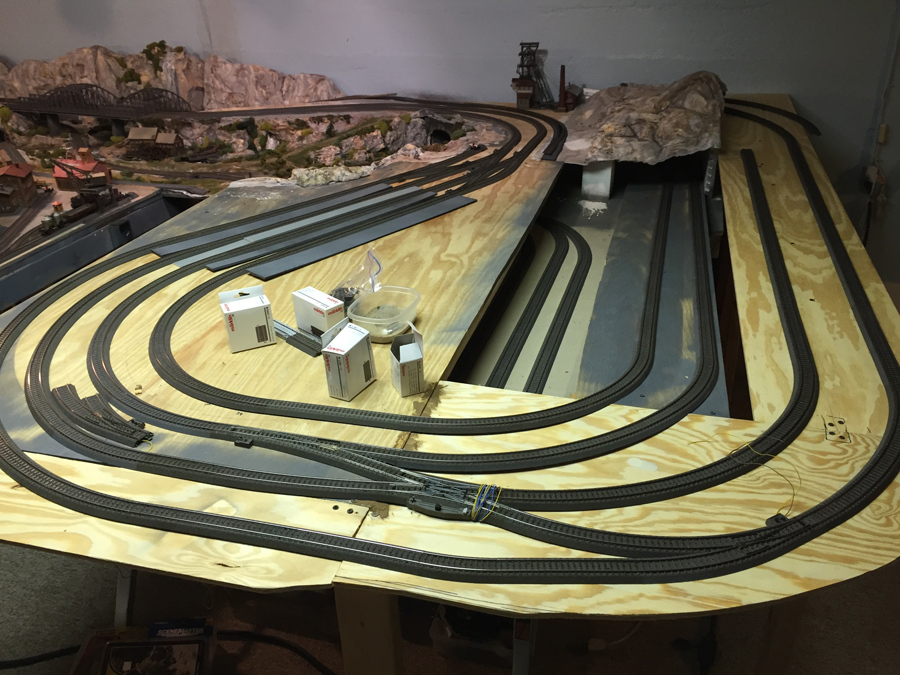
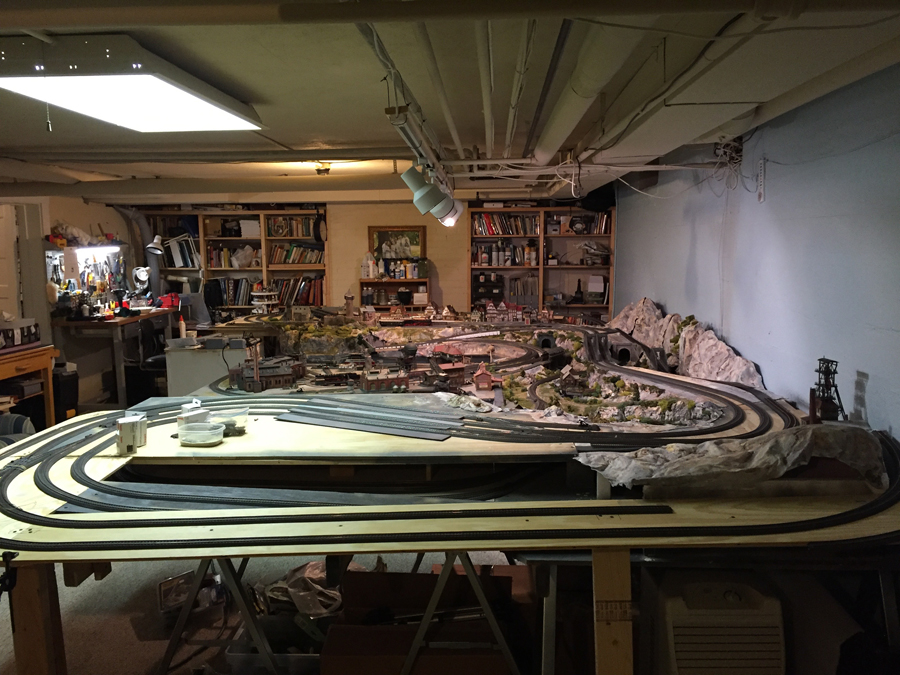
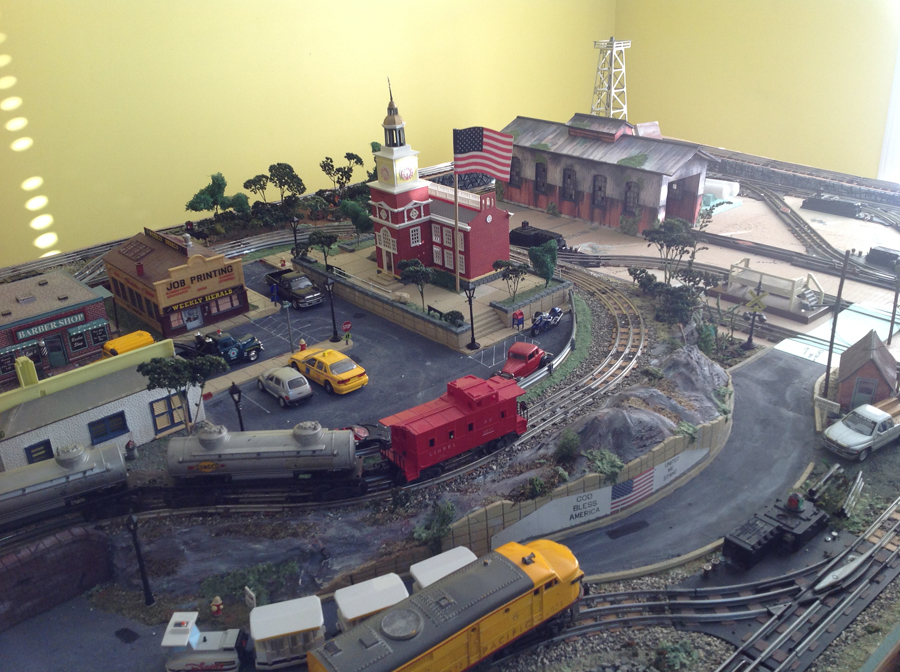
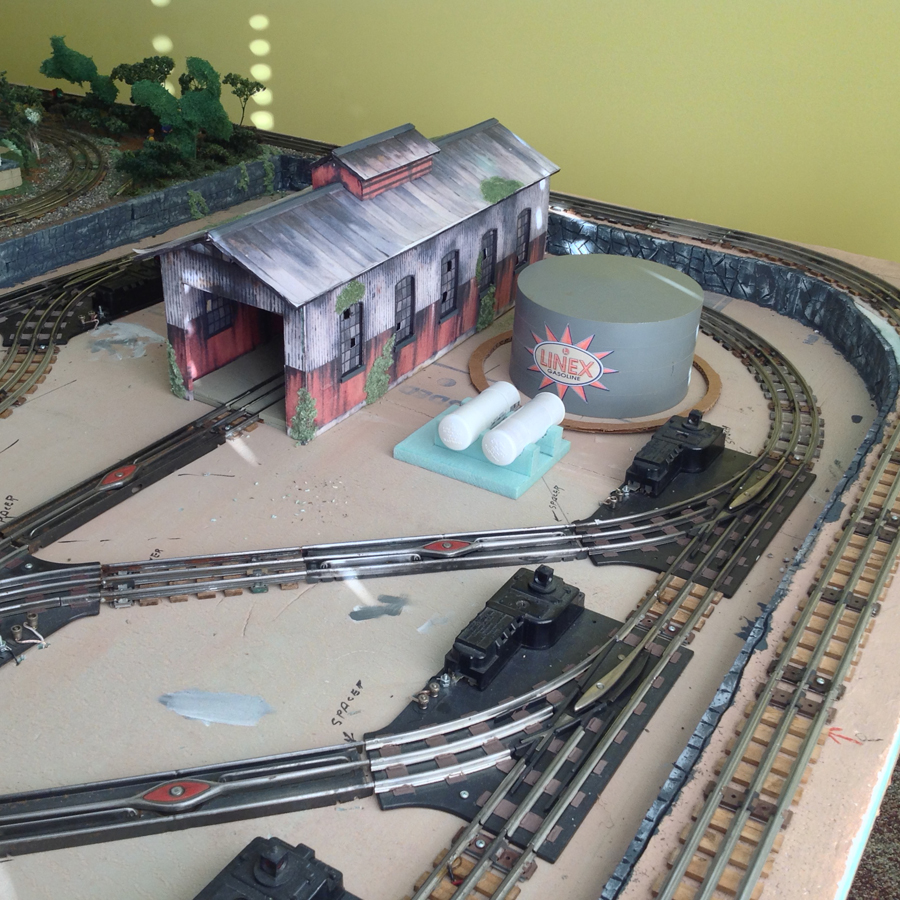
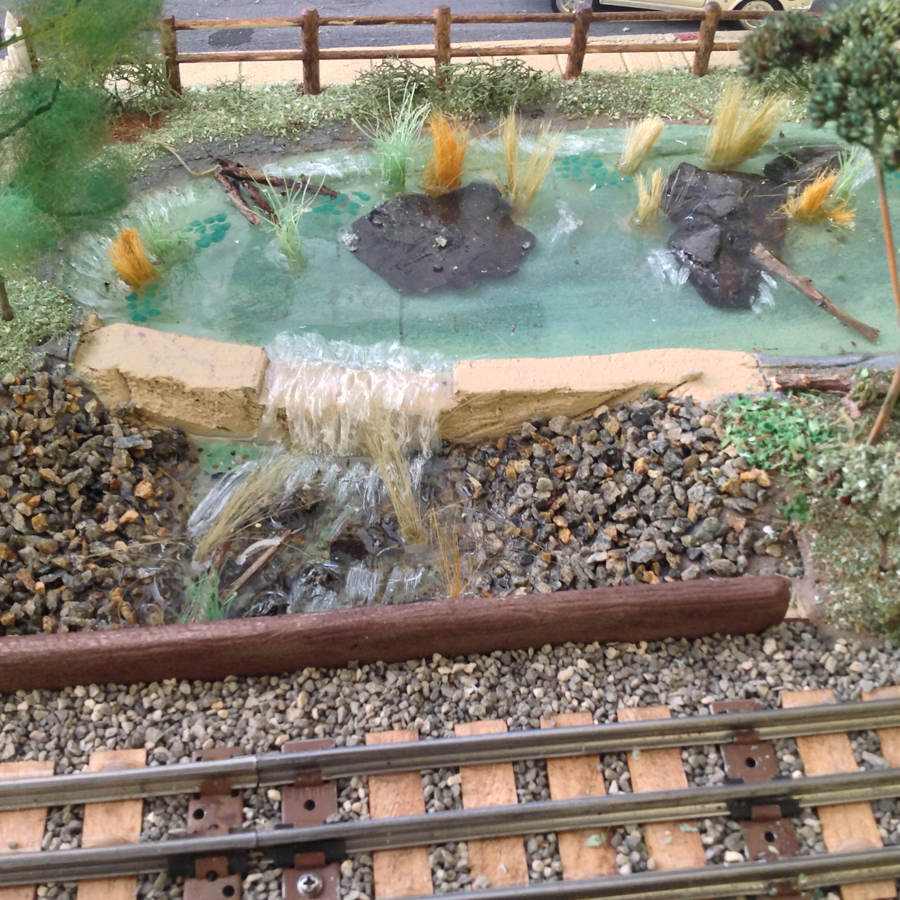
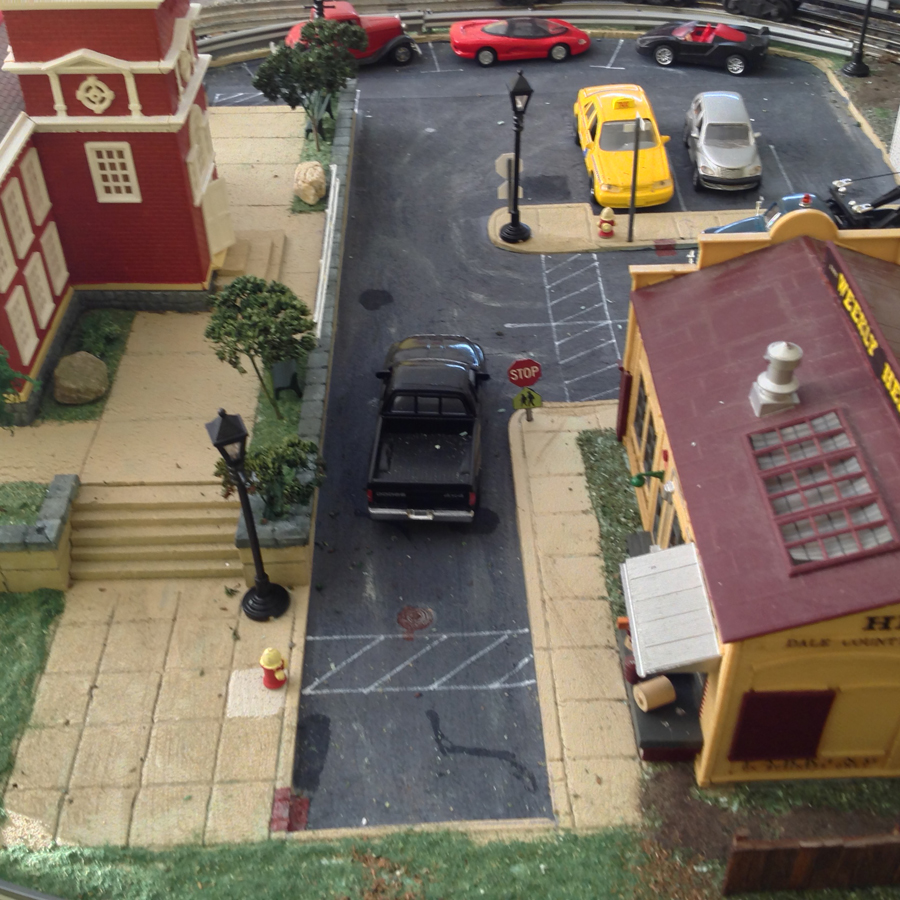
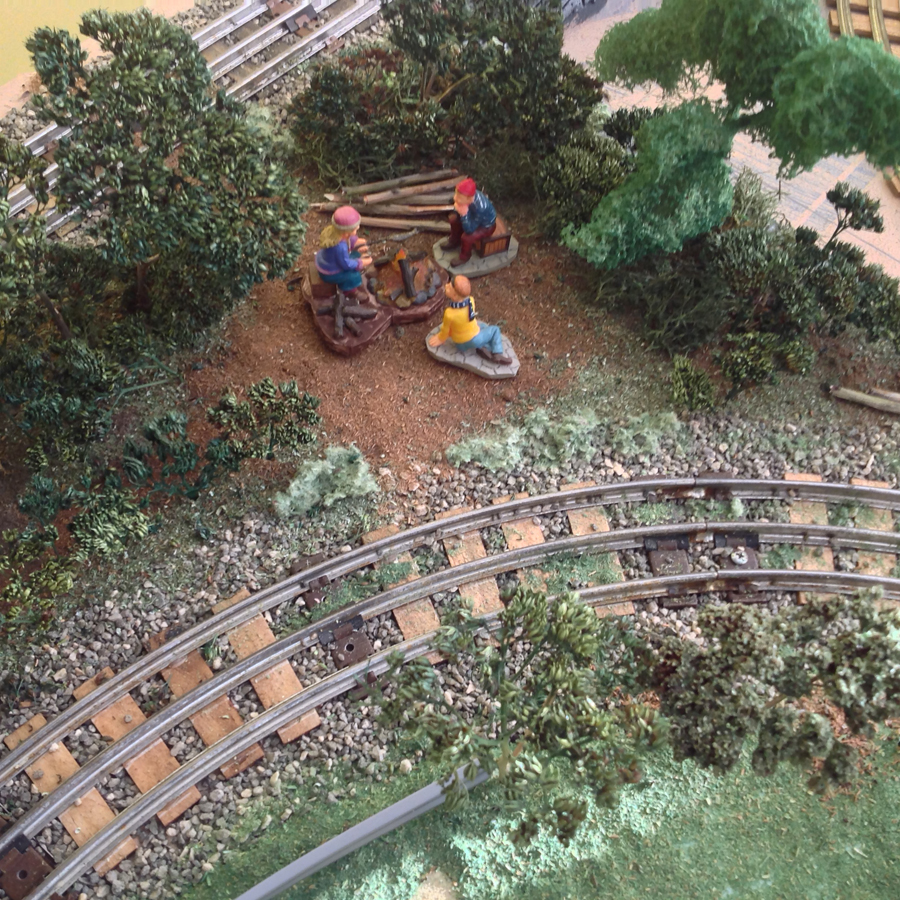
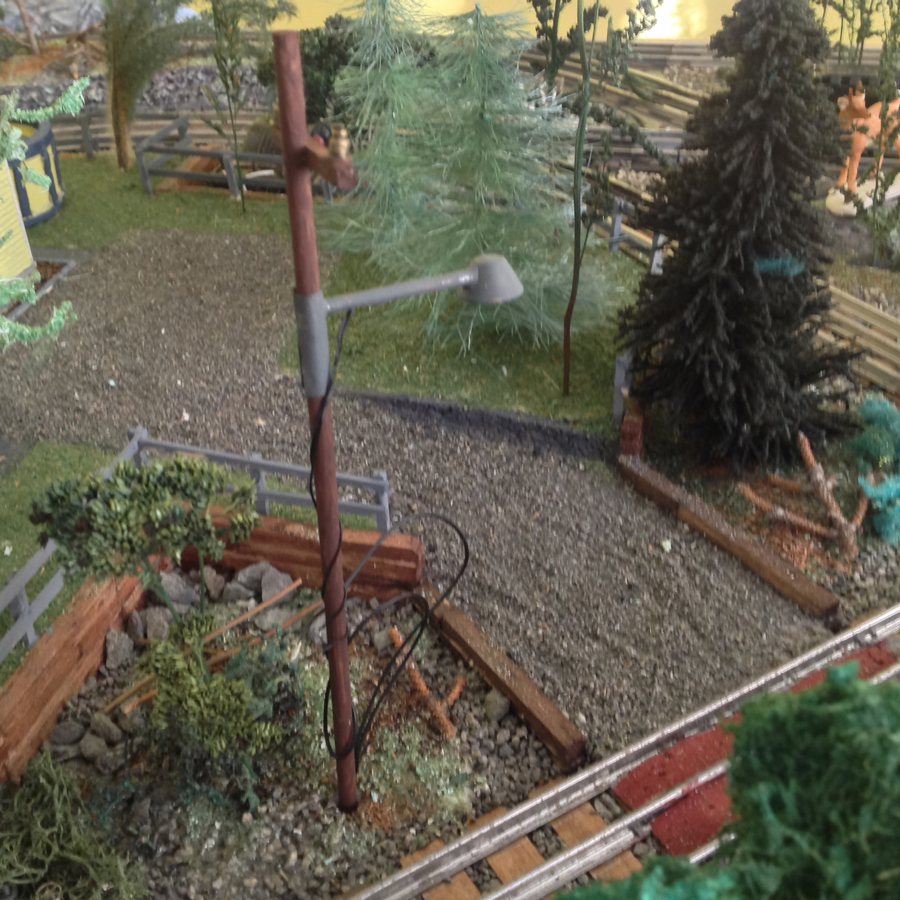
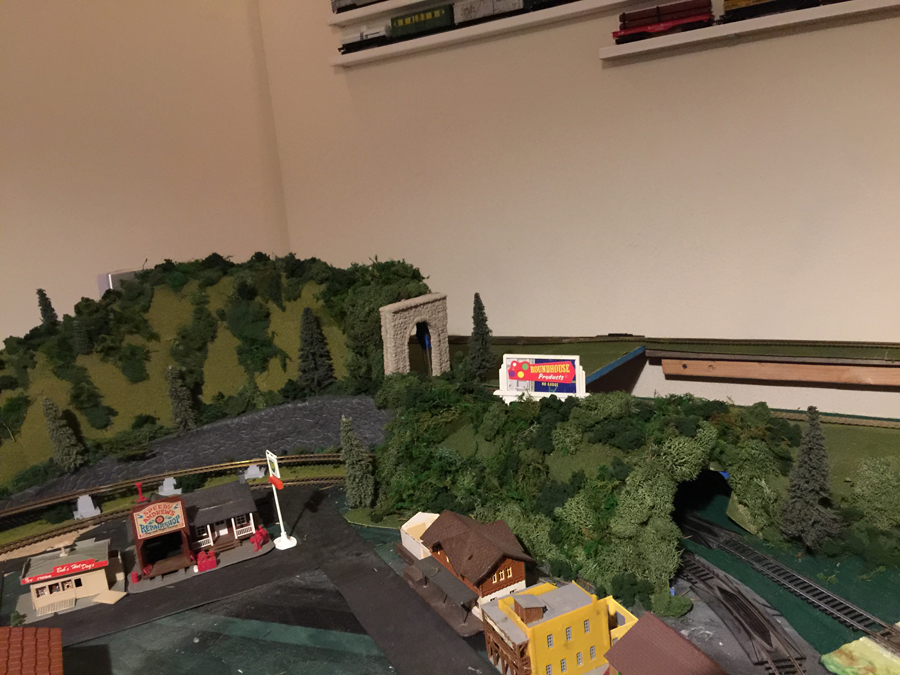
I have been busy almost completing the town area of my layout. I still have to add people and I am working on lights for the buildings and streets. I am roughing in some ideas for the industrial area and may try to send you a short video.

Steve from Toms River.”

Grandpas train room

model train town layout

model train town layout

model train town layout HO scale engine

model train town layout HO scale engine house


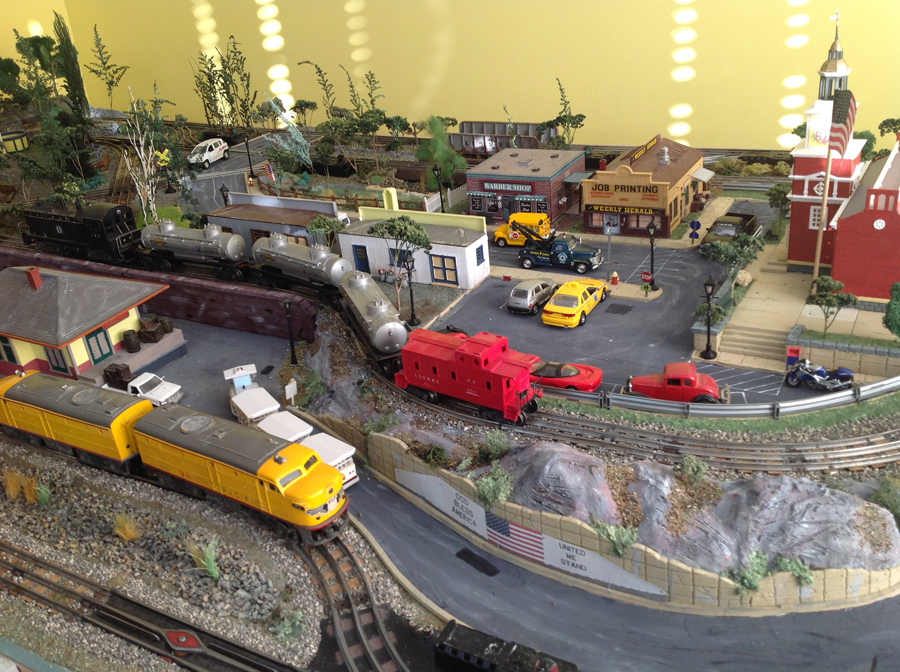
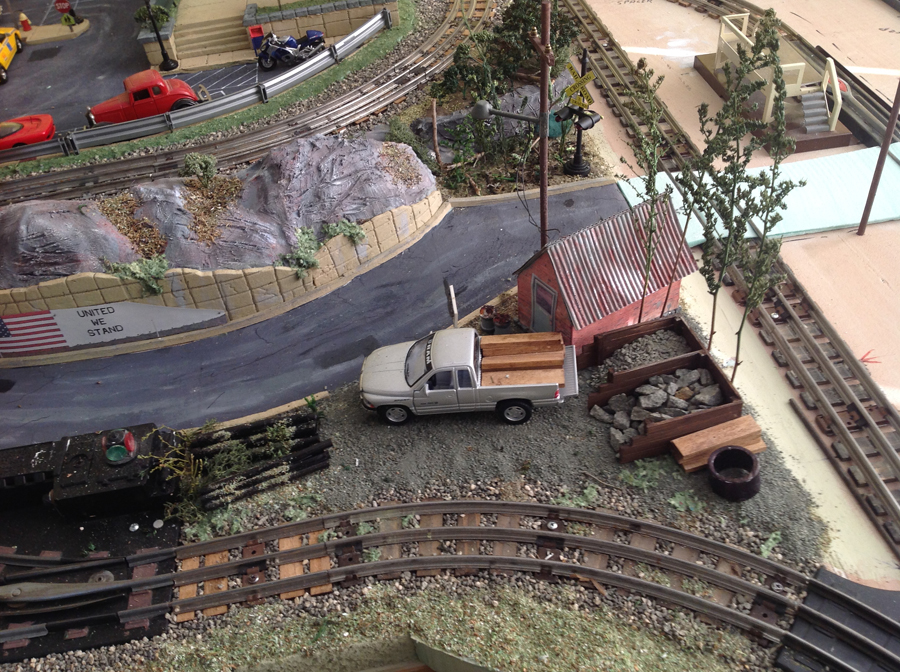
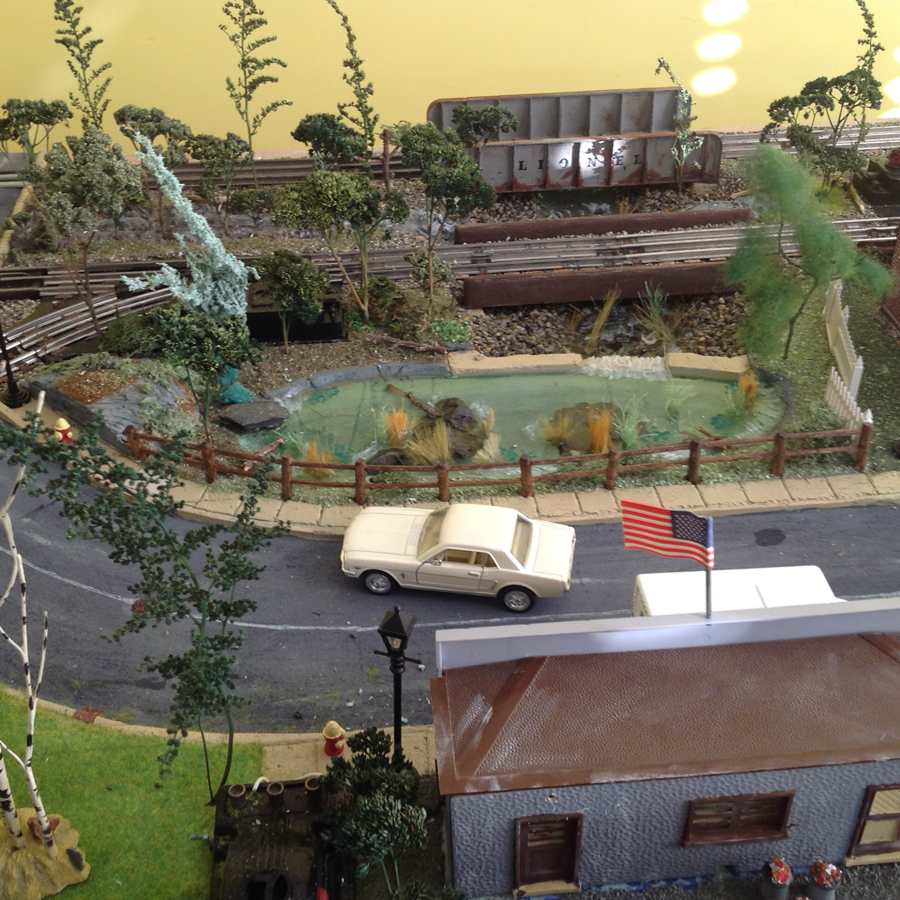
Model train town layout:

HO scale car

HO scale pond

model train town layout

model train town layout HO scale town hall

HO scale


“Al,

When it comes to train layout scenery i`m cheap, save the money for things i can`t make.

Fine saw dust+clothes dye+ enough water to mix it well, gives me green for grass,light or dark what ever i want, brown for dirt, black for coal yard and around coaling stations shops and such.

Small dried weed tops with ca glue, sprinkle on colored sawdust for foliage, i dye many weeds and types of dead grass for scenery.

I use old cork like ceiling tiles for building cuts through hills and mountains, break them in long pieces, rake the showing edge with a wire brush, paint, stack and glue together, looks just like the real thing, also use for stone walls.

For track ballast i use chicken grit, in case you were not born on a farm, chicken grit is tiny pieces of gravel made to aid chickens in digesting food, just the right size for any scale almost, and it`s CHEAP.

By the way, my layouts have always been O gauge, but i have helped a few of my friends that have ho scale, and all of the above works well for them also.

Wishing you the best,

Hearl”


“I guess I would say don’t just accumulate kits and models–actually BUILD SOMETHING from your collection of unbuilt kits.

I often use the name “Old Armchair” to describe myself.

Ralph”


“Here Goes

1. take a screen from a old screen door ore a piece of screen cut it
in to long sections to make a chainlink fence.

2. take an aluminum tube about a pencil width cut with
pliers about 1/2 inch apart pliers will crimp the ends of the tube pieces to make small bags of dog food or eny product you like.

3. cut a long piece of brown or earth tone color corduroy fabric glue it to an area on the layout to make a plowed field.

4. fiber optic line i saw a guy do these in a book he took a optic line from a lamp the kind that changes color and mad a locomotive head light he took a lighter to the end of it to melt it in to headlamp shape then the other end goes near the bulb of the locomotive.

5. a small rock the size of your finger nail makes a great boulder.

Michael”


“When building large hills or small mountains or N scale I used the rails from old track sections and even old flex track it gives a very sturdy base then use old window screen and hot glued to the rails then u put your terrain and grass mat came out nice and just stuff hanging around so don’t toss those things are very useful.

Have fun. I use for tunnels also.

Blitz”

IMG_2495

IMG_2504

IMG_2561

That’s all this time folks. A big thanks to Steve for sharing his model train town layout.

Please do keep ’em coming – and big thank you to everyone who has contributed.

I’m looking forward to seeing Steve’s video, it’s a fine looking layout. Beginner’s guide is here if you want to be more than an armchair subscriber!

Best

Al

PS Latest ebay cheat sheet is here.


G scale railroad layout plan – Cary’s

“My name is Cary from Crestwood Kentucky. I’m 52 years old and started collecting a G Scale railroad layout when my son was small.

I always wanted to do a G scale railroad layout but it seemed impossible without adding an addition to my house. I finally decided to do an outdoor layout.

I’ve been preparing the ground for the last few summers, in the winter months I’ve been building structures, vehicles and painting people which has been great fun!

For buildings, I’m using concrete backer board for the base and roof. I’m using real shingles, exterior house paint and lots and lots of construction adhesive and caulk.

Hope you enjoy these photos, I look forward to sharing more with you as this project develops.

My first project was this church. The walls are birch plywood that I cut vertical grooves in with my table saw to give the look of planking.

I lapped the shingles, but have since found a better method. As you can see I didn’t attempt real windows on this first project.

g scale railroad layout church

The water tower started with a large coffee can and planking I ripped on my table saw. This was my first attempt at building trestle and I was pleased with the result. That’s the fun with a G scale railroad layout!

g scale railroad layout watertower

The train station is plywood with planks glued on the outside. I tried windows using some thin plexi-glass. Still not the effect I was hoping for but a step closer. The shingles turned out much better by just gluing them down flat and covering the seams with a thin piece of shingle.

I use construction adhesive on the shingles but also use hot glue when corners flip up, the hot glue dries fast and holds the edges in position until the adhesive dries.

railroad_waiting_room

The figures are 1/24 scale from Ebay/China. they were inexpensive and have a reasonable amount of detail. The luggage is blocks of wood with wire formed for handles.

g scale model railroad passengers

My most recent and most ambitious project is this two story hotel with shops on either side. The walls are birch plywood and I used a router on the back side to mill out around the windows so the interior of the window would not be too thick.

The window panes are painted onto the Plexiglas.

The signs are also caulked and glued under plexi-glass and lightly airbrushed with dull coat to remove the gloss.

You can have a lot of fun with a G scale railroad layout.


g scale model railroad store front

g scale model railroad layout store

railroad_store

I always make the roofs removable so I can make repairs and look for critters once the buildings are outdoors.

g scale model railroad layout house

g scale model railroad engine

I found a 1/24 scale covered wagon on ebay, not a great kit, but the horses are very detailed.

The truck was a 1/24 scale Ertl die cast coin bank I picked up for $8. I removed the tanker on the back, painted it, added a flat bed and a figure. Good detail, made of metal to hold up outdoors, and inexpensive…..I’ll be looking for more of these!

The thing with a G scale railroad layout is the size gives you lots of scope.

railroad_horses

railroad_truck

Thanks to Alastair for his emails, it’s always interesting to see what others are doing.

Hope you’ve enjoyed my G scale railroad layout.

Cary”


“Here’s a quick introduction and some first videos of my current N-scale layout which is under construction.

Like many modelers my age (I’m 74), I started out when I was young with a Lionel train set that my parents gave my brother and me. It was a typical oval with an internal route using two switches. Within a couple of years, I had mounted the track on a 4×8 sheet of plywood painted green, set in a paper mache tunnel, and added a few buildings.

It was my first and only “compete” layout. I spent hours running the train and setting off cars at the siding. (I would give anything to have photos, but back then we didn’t photograph much.) A couple of years later I tore up the track and started to rebuild the layout; we moved and it was never completed.

Over the next 40 years I started at least five HO- and N-scale layouts. None were completed and only one was built to the point that trains were running.

Twenty years ago, I began a large G-scale outdoor railroad that, although trains were running most of the time, I never considered complete. Also the changing weather in northern New Mexico where I live (temperatures go from 100 deg F in the summer to -10 deg F in the winter) caused the track to continually move about, necessitating frequent rebuilds. Worse, elk and deer would come through my back yard to drink at the pond, ripping up the track. Finally, it was becoming increasingly difficult for me to get down on my knees to work on it. So it is on hold for awhile.

About a year ago I discovered your site and was intrigued with the multitude of beautiful model railroads. I became determined to finally complete a layout. I purchased the Woodland Scenics “Scenic Ridge” N-scale kit which included everything needed to build a 3×6 layout using their system. (I highly recommend their products for building light weight plaster cloth and foam layouts.) My rational was, if I got everything at once, I might complete it. I also bought their “Town and Factory” building kit with everything needed to build 13 buildings.

After about eight months, the first stage of the 3×6 layout is virtually complete and trains are running. The scenery is mostly done and about half the buildings are put together and painted. I followed the original track plan (which can be seen on the Woodland Scenic website), but added three additional sidings: one to the factory and two in the yard shown on the bottom of the videos. This will allow some switching action.

But, of course, nothing stays the same. Now I am starting a second stage which will more than double the actual track, plus add a hidden three track staging area. I’ll also continue to work on the first stage, improving the scenery and adding people and vehicles.

More to follow from across the pond,

Dean”


Latest ebay cheat sheet is here.

Two wonderful narratives today – a big thanks to Dean and Cary – quite a G scale railroad layout. What a project!

And as Cary said, it’s wonderful to see what you are all up to. If you compare today’s post with last time, you really do get a feel of all the different styles and scales.

That’s all for today folks.

Please do keep ’em coming.

And if you’re still watching from your armchair, and want to get involved, the Beginner’s Guide is here.

Best

Al

PS Latest ebay cheat sheet is here.

PPS More HO scale train layouts here if that’s your thing.


More from Ken

Remember Ken’s fantastic layout? Well, if you don’t, it’s here.

Ken’s been kind enough to answer your questions and dig out an old video of his layout:

“Thanks for all of the compliments folks! Very humbling.

As far as some of the questions: Scale is HO, and in regards to planning… We didn’t have one. I started this in a very “off the cuff” approach and never looked back.

My son and I did a lot of what we called “playing checkers” , meaning we would try something and discuss and move things around a thousand times until we liked it.

This may not be a typical approach as we reinvented the wheel and had to backtrack many times. But we feel all the nights of the intense deliberation paid off.

The track plan itself came from my memory and my 42 years experience as a locomotive engineer.

I knew I wanted a double main, I wanted to do a little switching, but mostly just wanted to run a few trains for hours on end weaving and winding, over and under.

For the small size of this layout I am very pleased at how well the trains run on my pike.

Basic layout wise, I wanted a little industry, a little open country and some populated rural stuff…Basically a little bit of everything.

Again, for this size layout I think it all came together pretty well through a lot of blood sweat and beers.

As far as the scenery goes my son is an artist to the core and ridiculously hellbent on photo realism. He sees things that most don’t and sometimes loses me at hello.

From a technical standpoint: My trains are all DCC , and I can run 14 different units. I have run 4 at a time but usually run 2 main liners. One with 28 cars and one with 24, plus 2 lighted cabooses. And speaking of lights I have over 400 working lights on my layout, a nod to my 11 years on the 3rd shift.

I have 18 tortoise switches controlled by toggles where I sit and 8 live industry tracks. Now and again myself and some old retired hoggers will have a bit of an operating session, but mostly let the hours melt away as the trains keep a runnin’…

Thanks again everyone, and as I think of more detail I’ll post… Perhaps getting into the wiring, scenery techniques, etc. I’d be happy to answer any questions.

Cheers!

Ken”


Stunning stuff from Ken.

And now another blast from the past. Remember Glyn?

Well his last post is here. Have a look at his progress:

“Hello Al

It’s Glyn again – although buried in work lately, I’ve been thoroughly enjoying the excellent posts from our friends across the globe.

I hadn’t progressed much with my own layout due to work commitments and travel but am settling back into a more sane schedule finally.

I have been itching to get back into layout construction as I have so much to do. Watching Dave’s lengthy trains cruising long multilevel tracks made me re-think my own layout.

As you may recall I had a terminal station to the left, a service/maintenance and fiddle yard centrally and a small town station with several through tracks to the right.

The frustrating part was the terminal station – too short for some of the lengthy consists I need to run and the issue of turning steam locos easily .

I also could only run 1 train constantly in a long dog bone type route, interspersing shorter trains in between.

The obvious solution was to turn the terminal end station into a through station but that meant adding track and a major addition. Being a sucker for punishment and quite driven, I decided to take the bull by the horns and re-work the layout!

I converted a 16’x11′ layout into a 20’x13′ by adding a double main line round the back edge of the layout. This meant lengthening the terminal end station on the left by nearly 3′ into a through station looping around behind the old town up a slightly inclined ramp toward the rear of the layout.

The double track will then climb gently across the mountainous rear portion across Faller’s Bietschtal bridge (yet to arrive but ordered) then back around the right hand side of the layout down a gentle 2% grade back to the through station district line.

I modified the trackage on the right to create multiple running options for both long inter-city type trains as well as short district trains and heavy freight so it should prove far more entertaining for multiple operators to run locos.

I’ll be able to have 2 large consists running in opposite directions continuously as well as interspersing shorter rural passenger and smaller freight trains simultaneously – much more fun all round.

So this weekend, I wandered off to Lowe’s and a very kind fellow in the lumber dept ripped up a pile of wood for me and I returned home, burying myself in the basement for about 8 hours until I had the ramps built and new track set up roughly. I’m attaching pics of the progress.

I can’t do a great deal more construction on the rear portion until the bridge arrives for me to build but at least its taking shape. Thanks to Dave for inspiring me to commit to the re-vamp!

Best wishes

Glyn”

IMG_1687

IMG_1689

IMG_1690


IMG_1691

IMG_1692

model train track plan

A huge thank you to Paul, Mark (Paul’s son) and Glyn. Really enjoyed today’s missive. Hope you did too – have a look at the comments below!

That’s all for today folks.

Please do keep ’em coming.

And if today is the day you get started on your layout, the Beginner’s Guide is here.

Best

Al

PS Latest ebay cheat sheet is here.

PPS More HO scale train layouts here if that’s your thing.