“I have never in all the posts I’ve seen and received, seen anything on how to submit material to you.
Perhaps it would be nice to occasionally mention the process?
I have been modeling for a long time. Recently moved, tore down a 550 sqft layout and am now working on the first half of 1230 sqft.
Would share ideas I’ve discovered if I had a clue how. Do people just forward these pictures and videos to the above email address? How big is your space? Some must be too big to fit on your email account????
Roger”
I think Roger has a fair point, so just so you all know, if you’d like to submit your pics just email them in to me with a few words about your layout – it’s that simple.
That’s all this time folks. Please do keep ’em coming.
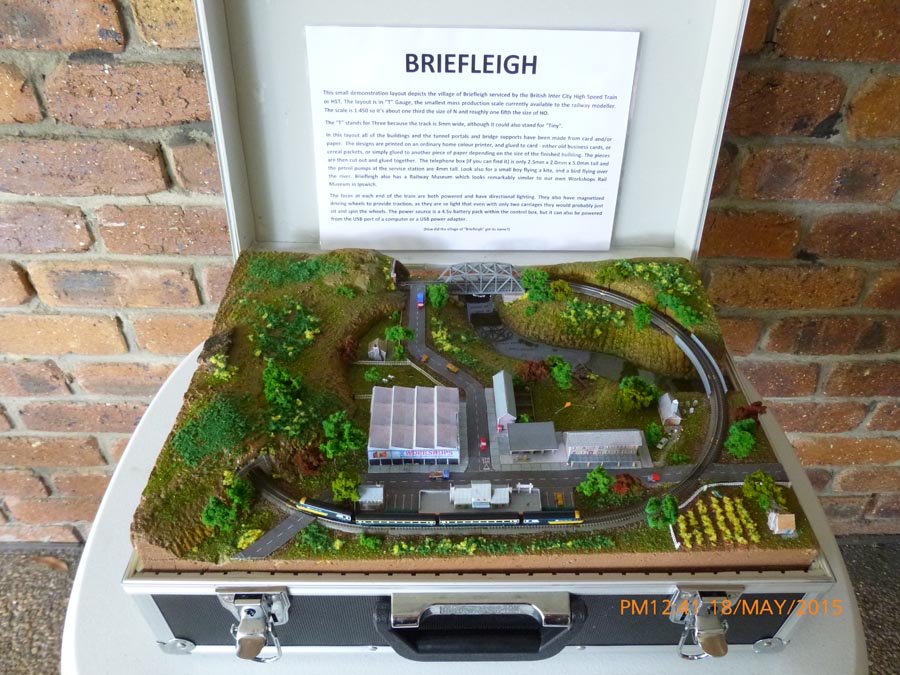
“G’day Al. Some time ago I sent in a few photos and a bit of a story on my T Gauge layout called “Briefleigh”, so called because it’s a model train in briefcase.
I built it purely as a novelty display item for model railway shows.
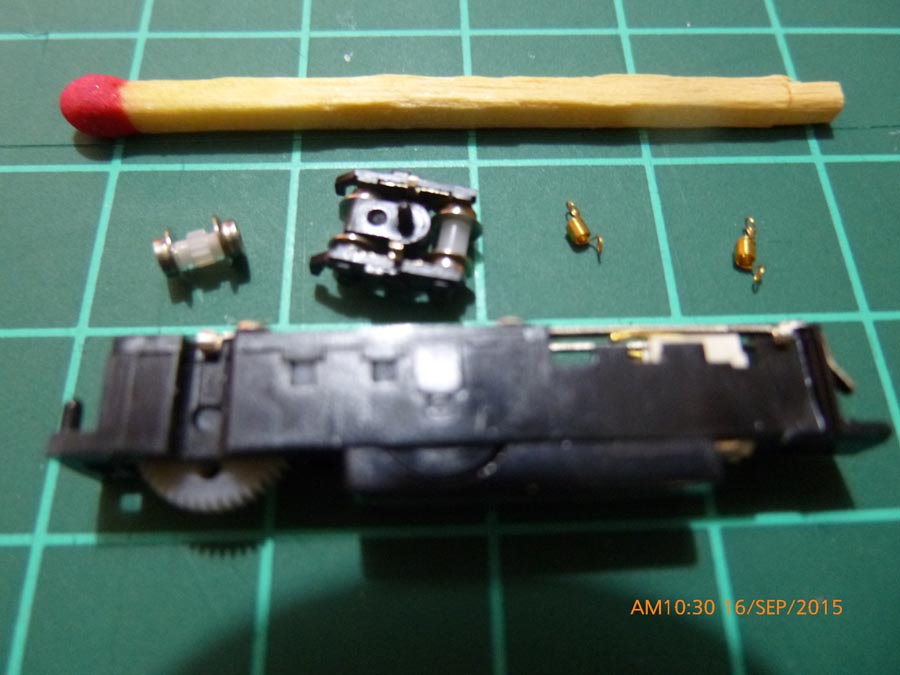
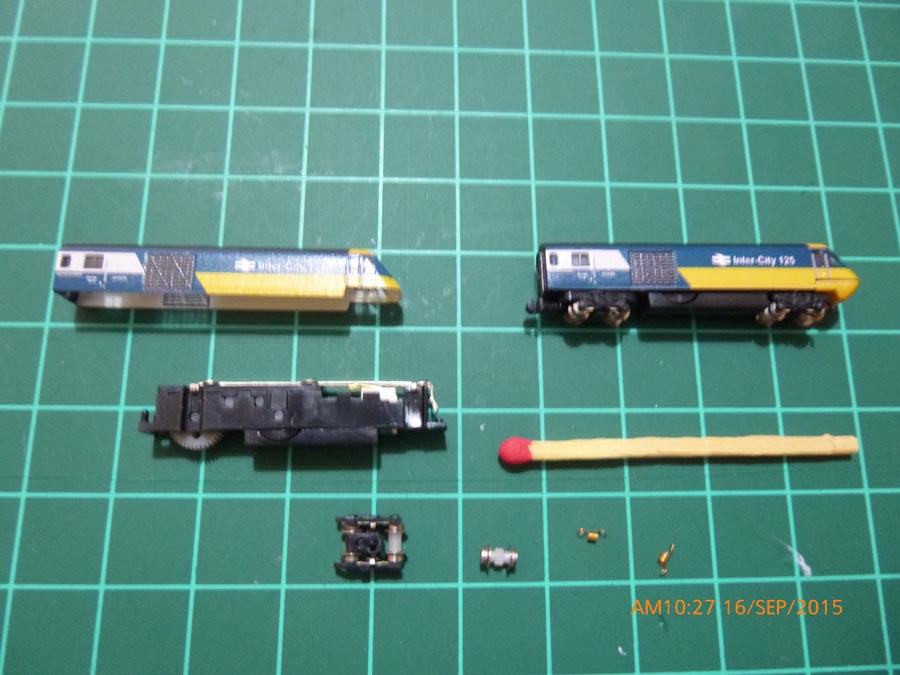
After several shows where it has run basically all day for two or three days straight, one of the HST locos developed a fault which required replacing the driven bogie with a new one.
I’ve previously replaced wheel-sets, but not the whole bogie.
The bogie is attached to the power chassis by two small (very small) springs which also act as the power conduit from the wheel pick-ups to the motor.
The springs have a loop at each end and these attach to hooks, one on each side of the bogie and then another on the top of the chassis.
You can just see one of the hooks at the top of the groove near the main gear.
I ruined one of the springs by stretching it slightly when I took it off, then it went “pinnggg”, never to be seen again.
I have the new bogies and spare springs, now all I have to do is reassemble my loco.
If you’re are short on patience I would not recommend getting involved in T Gauge. (“T” stands for “three” because the track is 3mm wide. The scale is 1:450)
Sorry if bits of the photos are a bit blurred. It was hard to get a complete focus so close, but you can see the size of the bits by comparison with a standard match.
That tiny chassis contains the motor and the gearbox.
Cheers,
Ken G.”
And now on to Carl. I love it when tips like this come in:
“I read about ‘paints to use on bare Styrofoam packing materials’. Apple Barrel, or other acrylic craft paint, works fine.
To airbrush them can be a challenge – I have airbrushed them, but thinning with 90+% alcohol is a process that took a lot of trial and error.
To get to the consistency of milk it takes a multi-day procedure.
I finally have my routine worked out, first I mix the color I want in a jar that can be tightly sealed, I use baby food jars mostly.
I then add about double the amount of alcohol as paint to the jar and stir for a few minutes, the paint is not going to thin readily.
I add a half dozen or so BBs, tightly screw on the lid and shake vigorously for a few minutes, then I sit it on a shelf that I know I will pass several times daily, every time I pass the jar I agitate it for a minute or so.
In 2-3 days it is thoroughly mixd and smooth enough to spray.
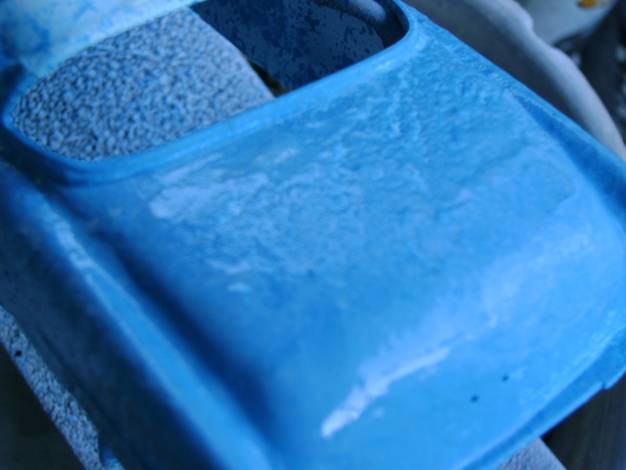
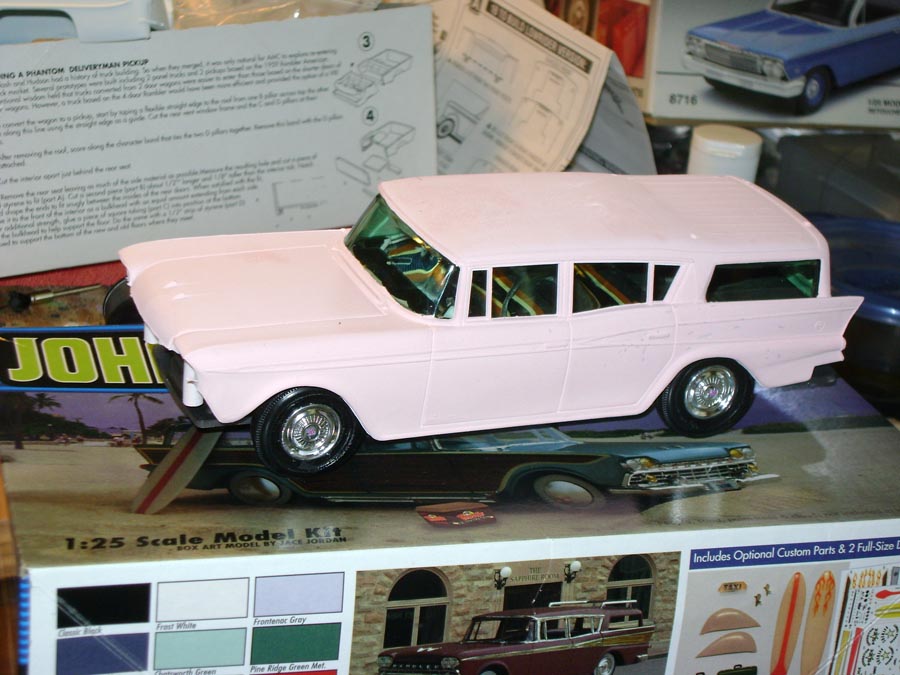
Here is a ’53 chevy I sprayed with paint not thoroughly mixed (the blue pic).
The keys are time and agitation. This rambler wagon is done in craft paint.
Laslty, some people have been asking how to leave comments.
It’s really easy, just fill in the form below.
You only need to leave your email address – which is not published – and a comment.
Then it’s held until the spam police approve it, then it’s published.
John’s added ot the Hornby train sets on the blog:
“Some 7 years after purchasing a Hornby OO gauge digital train set, ancilliary track and a range of buildings, modelling materials etc, I eventually got around to planning how I could constuct the type of layout I wanted to create.
Having studied a number of existing layouts I started by using my dining table to see what could be achieved by working to a limited size.
Using 1st, 2nd and 3rd radius curved track I eventually constructed the layout shown on my dining room table.
The concept of having an upper and lower track layout provides the ability to run trains from the upper tracks to the lower tracks.
The eventual layout was modified to allow trains to travel to and from the upper and lower tracks in a forward direction and additional sidings were also added.
I then set about finding someone who had the expertese to build my layout in consultation with me, working as far as possible to the design and style I sought to achieve.
The person I eventually found was Steve Pilling who is based at Long Eaton in Derbyshire.
Steve has worked mainly with N and Z gauge layout construction in the past but he willingly took on my challenge to fit in a lot of track in the confinment of a 6’ 6” x 3’ 6” board.
The other requirement I gave Steve was the need to make the layout fully transportable!
This in fact is Steve’s speciality as he constructs the smaller scale sets within a case which can easily be shipped around the world to his various customers!
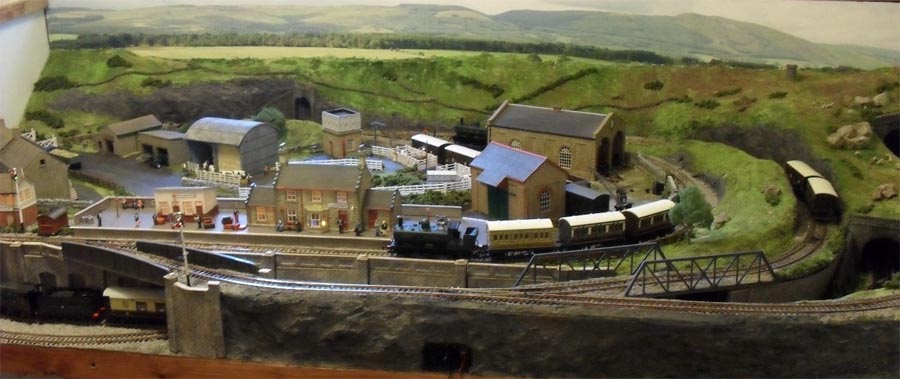
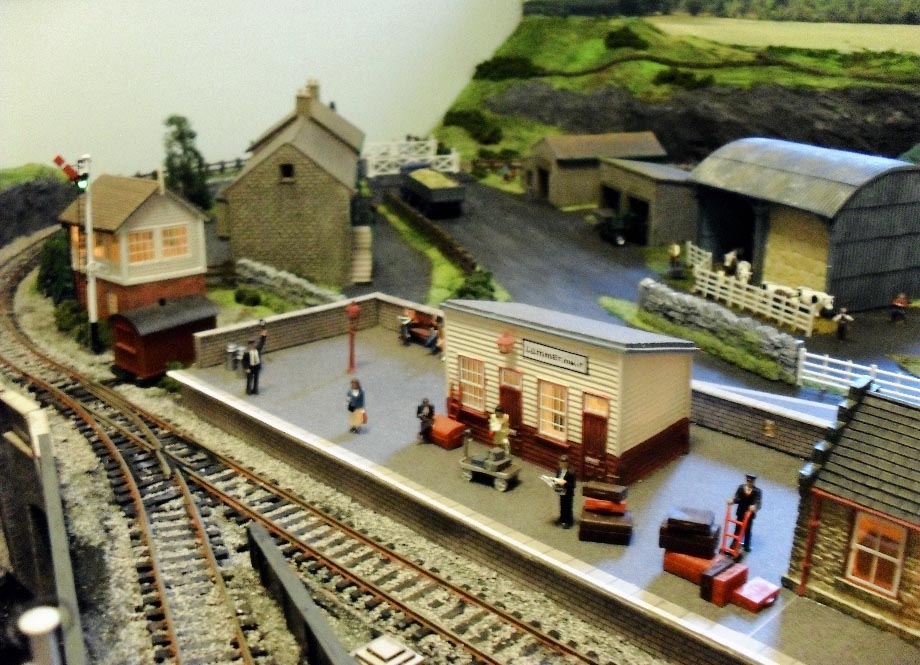
My Lammermuir layout is based loosely on the concept that the original idea of constructing the London to Edinburgh main east coast line passed through Haddington, as was originally proposed.
This would have taken the mainline close to the Lammermuir Hills to the south of Edinburgh. In reality, the east coast line did not pass through Haddington but took a route via Drem to the north.
The distant views are of the Lammermuir Hills and the theme of the layout combines a rural station and livestock loading docks to transport cattle and sheep.
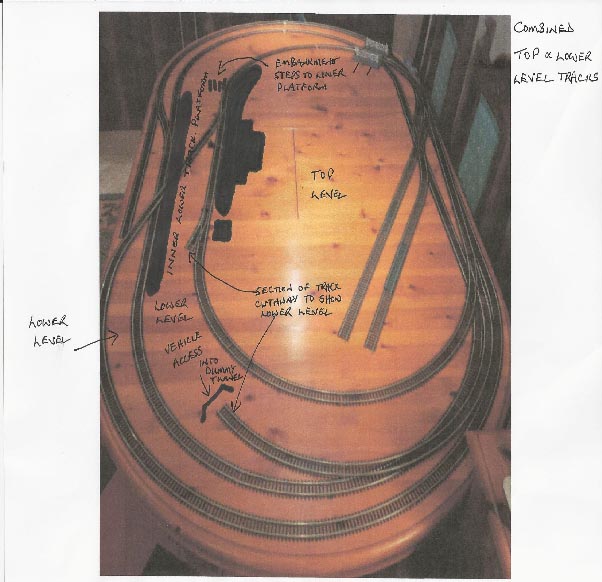
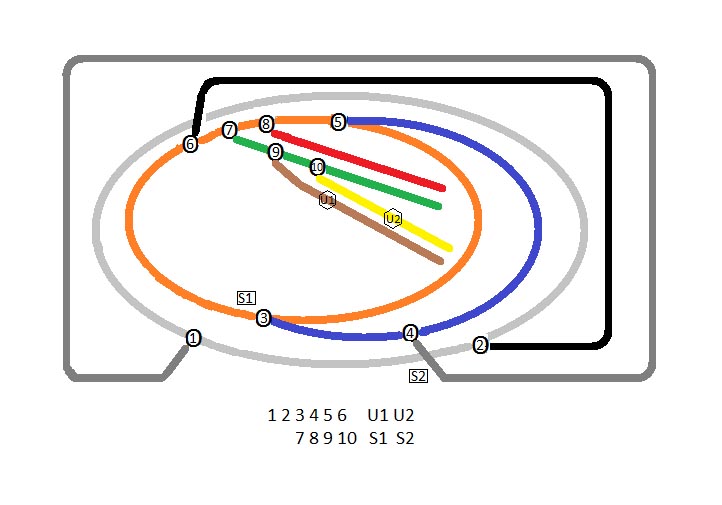
Track Circuit Plan
(The grey and black tracks are tunnel and lower track)
There are 10 electrically operated points, 2 electric uncoupler units and 2 electric signals
John”
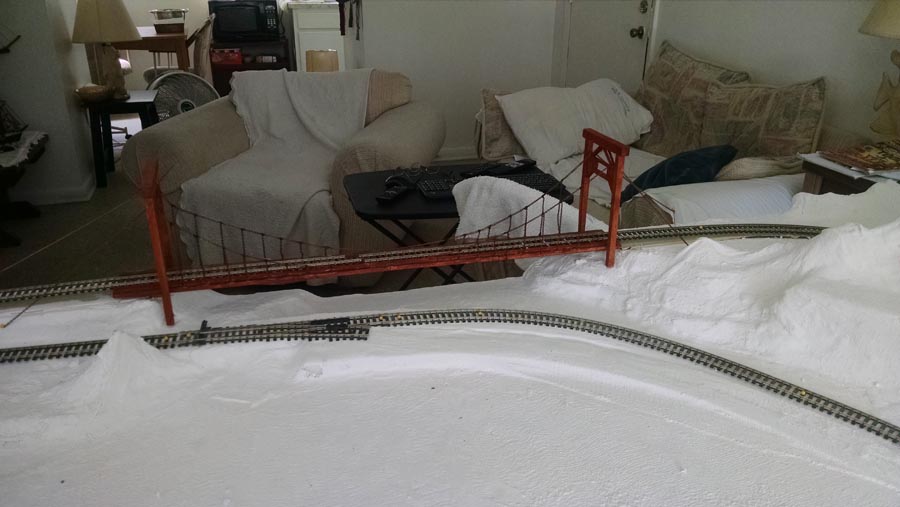
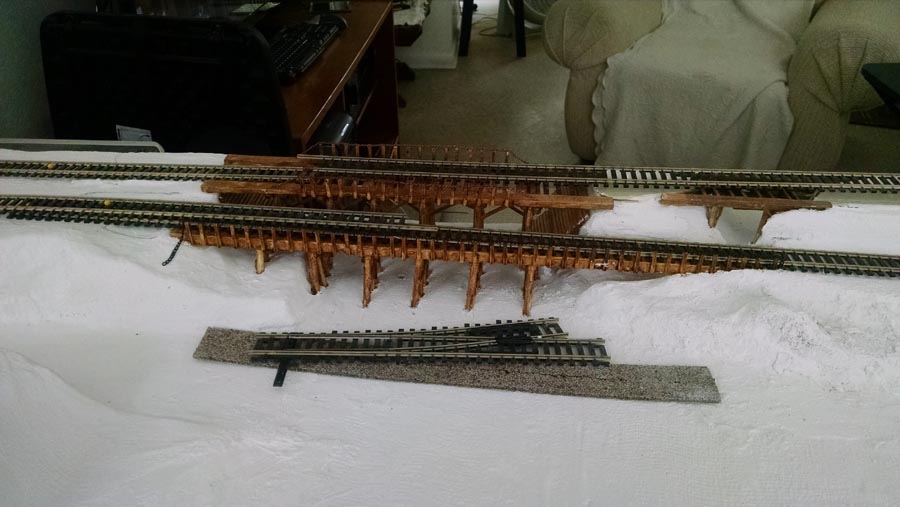
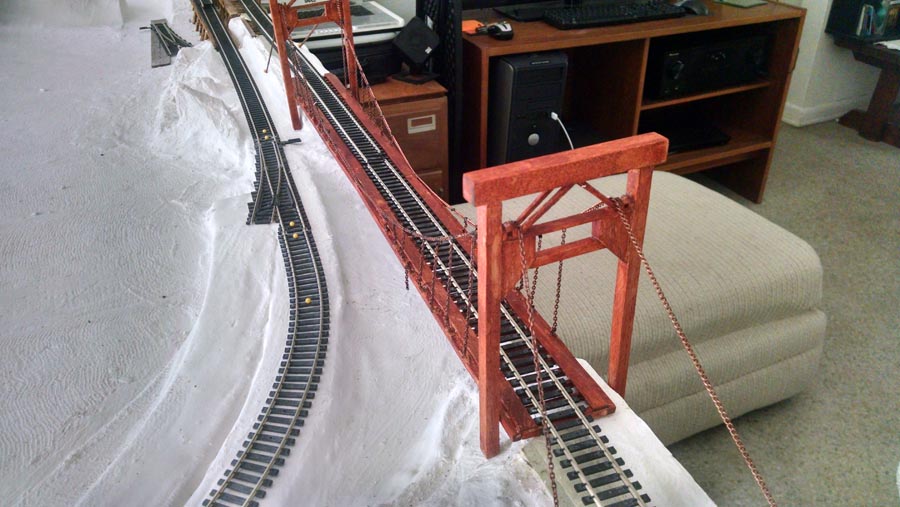
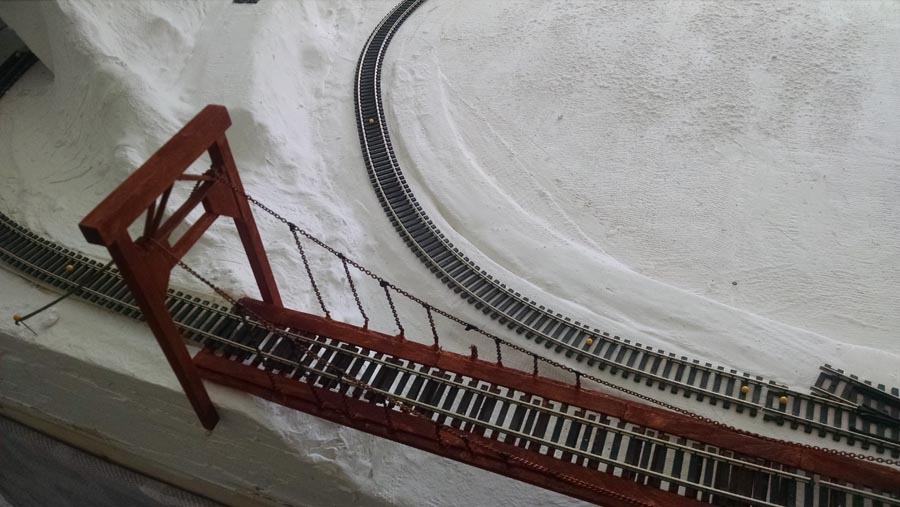
“Hello Al, This the first time posting something, so I hope that it goes well.
I am building an HO table in my apartment, after being away from the hobby for 30 years.
I am a disabled vet and don’t have much money so I look for any way to make things cheaper.
I have gone to wal-mart here and got small square and round wood stock and coffee stir sticks as well as wood matches (cut the heads off)I have made several bridges from them. I think I have about 10 dollars in all.
Please remember they are my first attempt in 30 years.
Alva”
I think Alva’s bridges are very impressive – and I can’t wait to see the next installment from John too.
That’s all this time. A big thanks to Ken for adding to the Hornby trains sets on the blog.