Cameron and Rob have been back in touch with more on their model train buildings:
“Dear Al,
Yet another instalment.
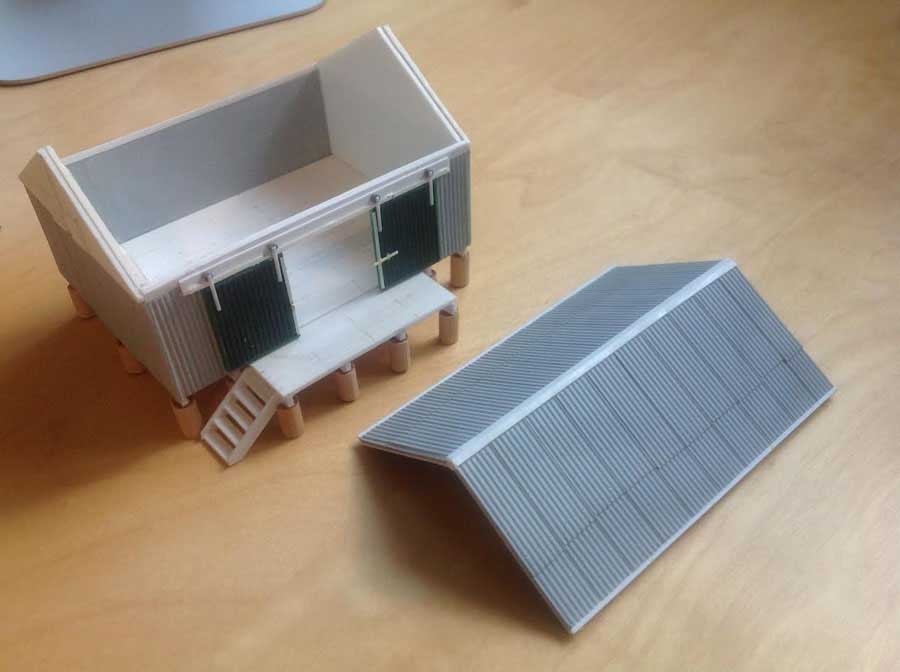
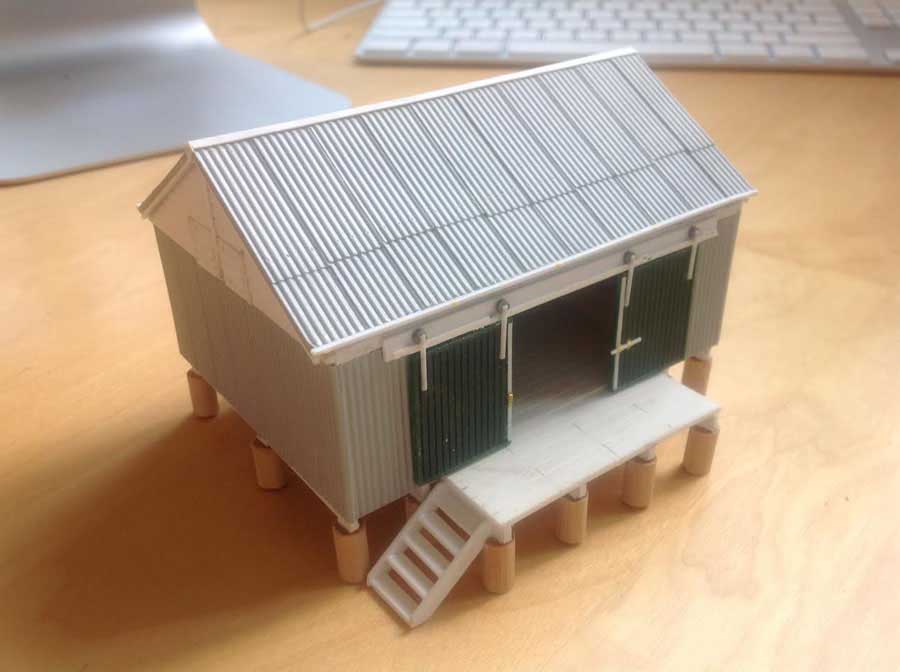
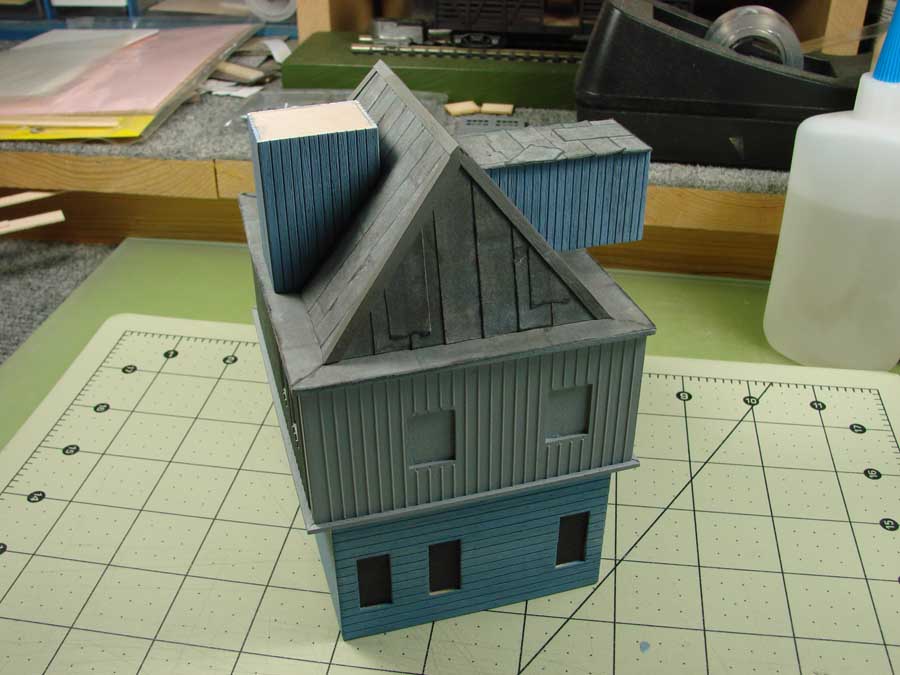
The third building constructed for the layout was a provender store located at the end of the siding. This most likely would have been used by private feed suppliers for the surrounding dairy farms. There was little in the way of photographs of this building available other than in the background of a few grainy black and white photos.
I looked for photos of similar structures to fill in the gaps and filled the shed with feed sacks which more than likely would have been stored in the prototype.
Like my other buildings this is also made with plastic card except for the stumps which are timber dowels. I always keep an eye out for plastic card sheets at the second hand stalls or buy/sell events organised by my local clubs.
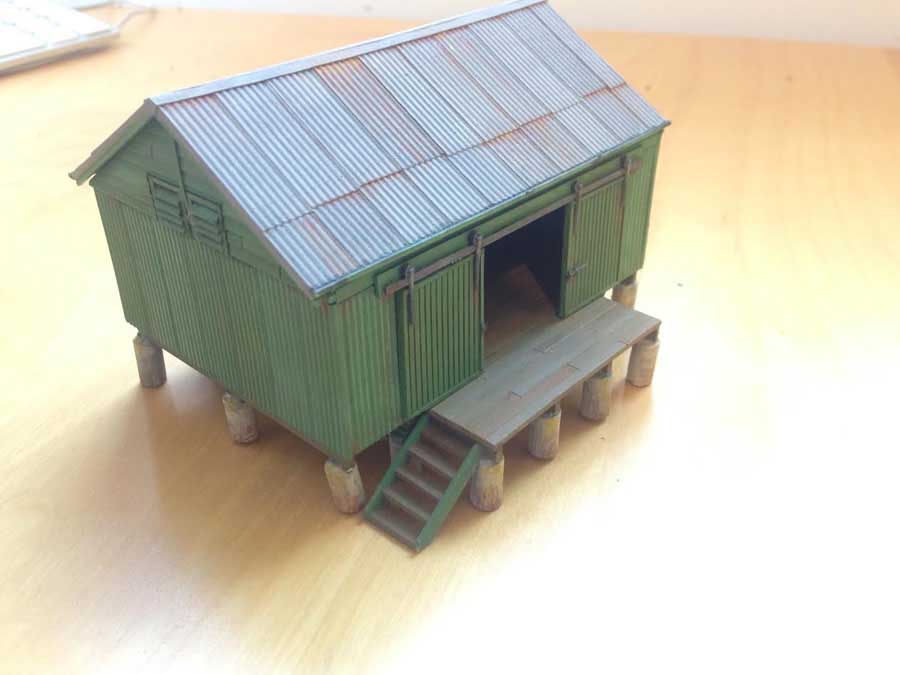
I got some comments on the weathering on the previous posts so I thought this might be a good chance to share my method for this. In the past I have tried all sorts of weathering techniques including weathering powders, acrylic paint, real coal, talcum powder etc.
These all work well but there is a lot of trial and error before you find the right combination. For these buildings I have just used a few basic enamel colours (gun metal, orange, dark grey and yellow) combined with some dirty turpentine to get the desired effect. I like this method because there is less to remember and it is easy to move between one effect and the next. As with any weathering it is important to work of photos of real weathered objects.
Cameron”
You can see more of Cameron, here.
Next, Rob with his model train buildings too:
“Hello Mr.Lee:
My name is Robert …a 75 year old Ho scale modeler.
The intent of this email is to share an alternative method of building model railroad structures.
I started modeling HO scale almost 50 years ago. Back then Campbell Scale Models was one of the key manufacturers of Ho scale kits.
These kits…as well as…other manufacturers required a lot of time to build.
Start to finish could be as much as a month depending on the complexity of the kit…ie: Fine Scale Miniatures.
Fortunately…a number of major improvements have made the Ho scale scene.
Pre-cut parts…plastic detail parts…and currently laser kits.
Even the latest technology requires a lot of time to fabricate a kit.
Specifically…reinforcing the cutouts with bracing…set aside to dry…and then assembling the various braced components into a basic structure…making certain that all is square and true.
At my age I am on the short end of the stick and time is valuable.
I cannot afford to spend more than a day or two building a structure.
Hence…I am sharing my process for speeding up the building process.
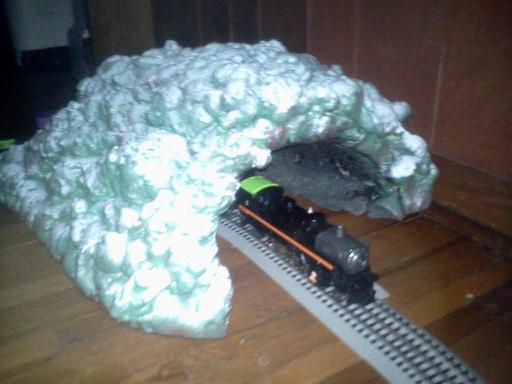
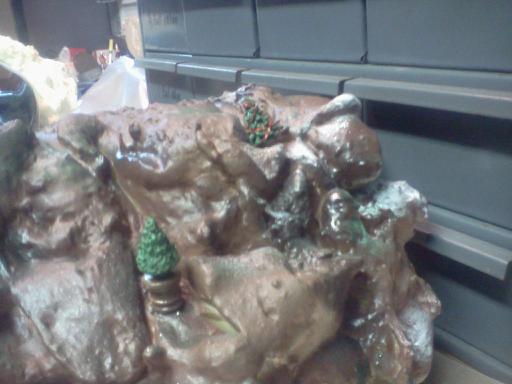
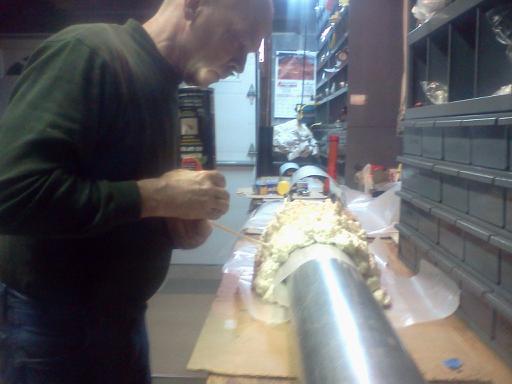
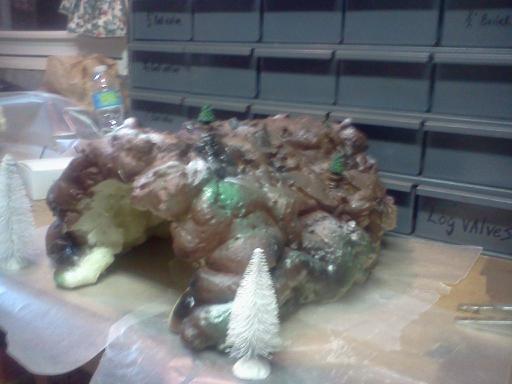
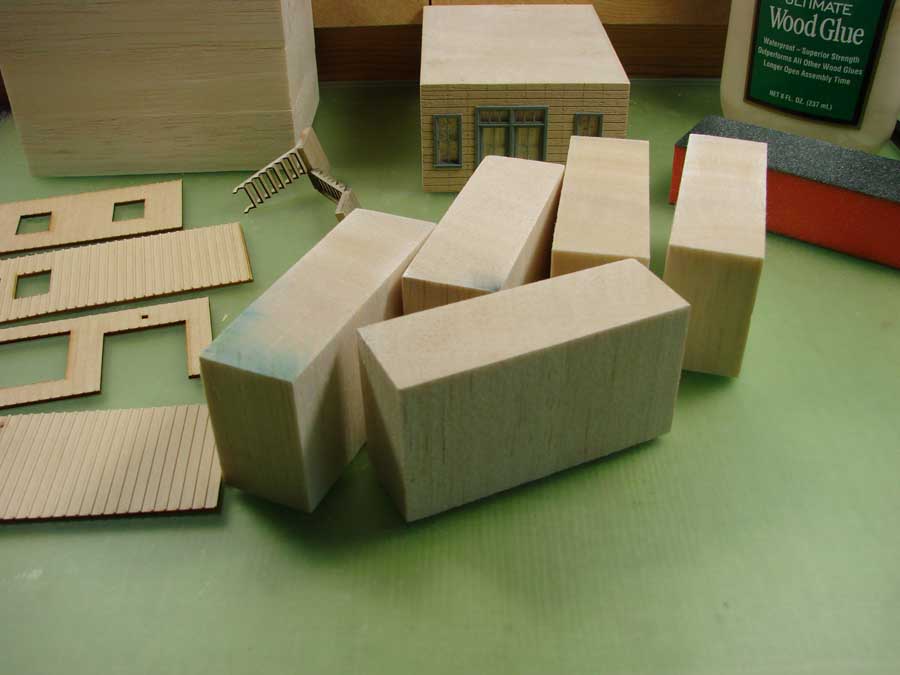
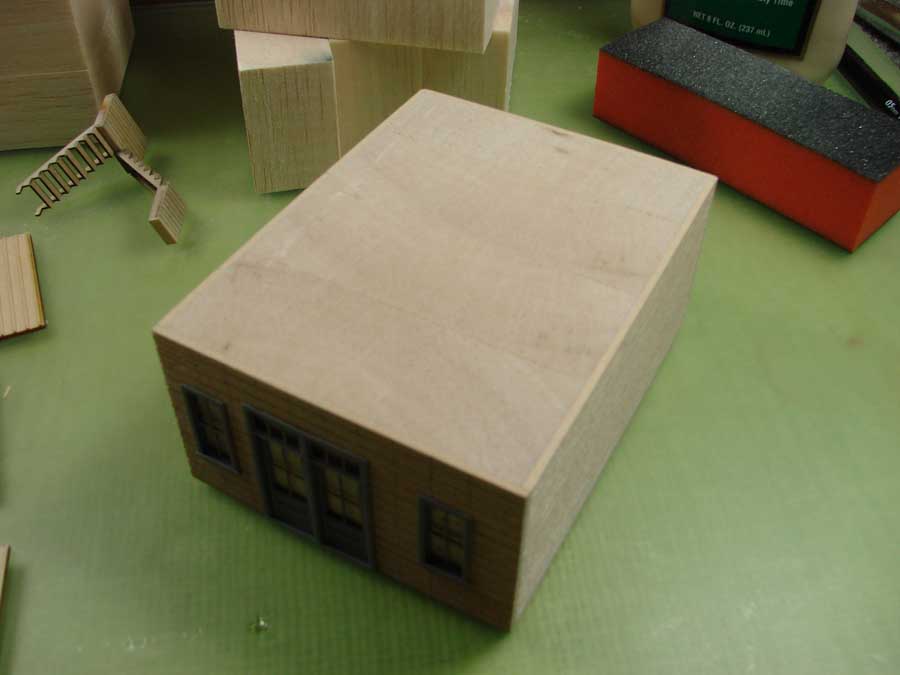
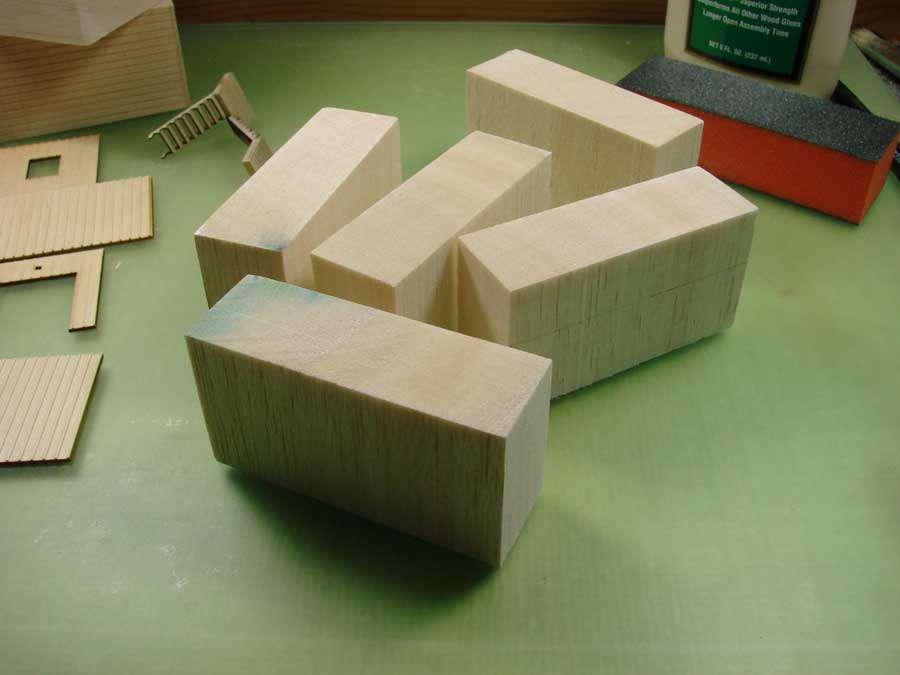
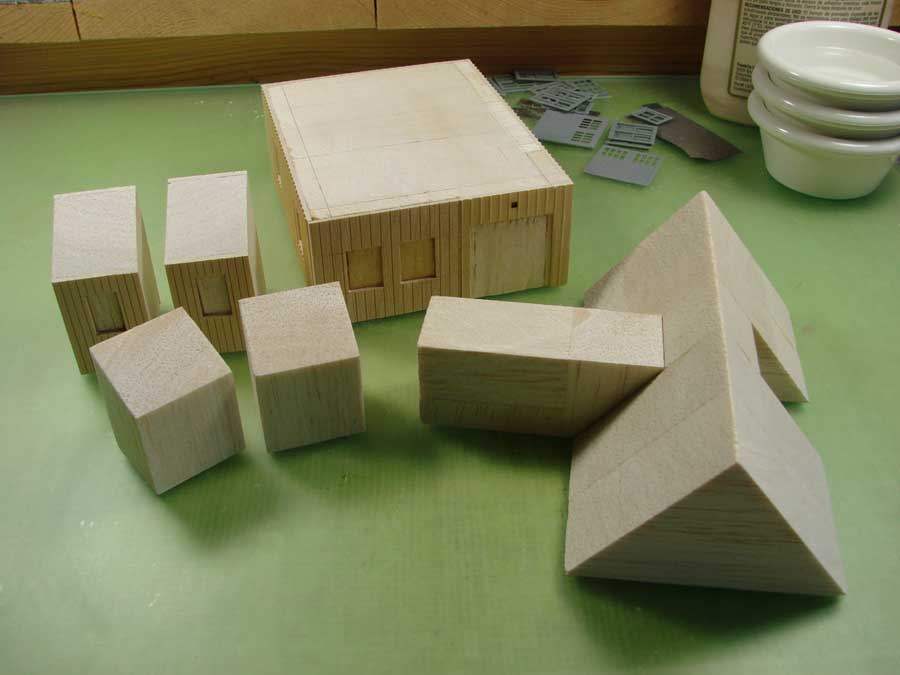
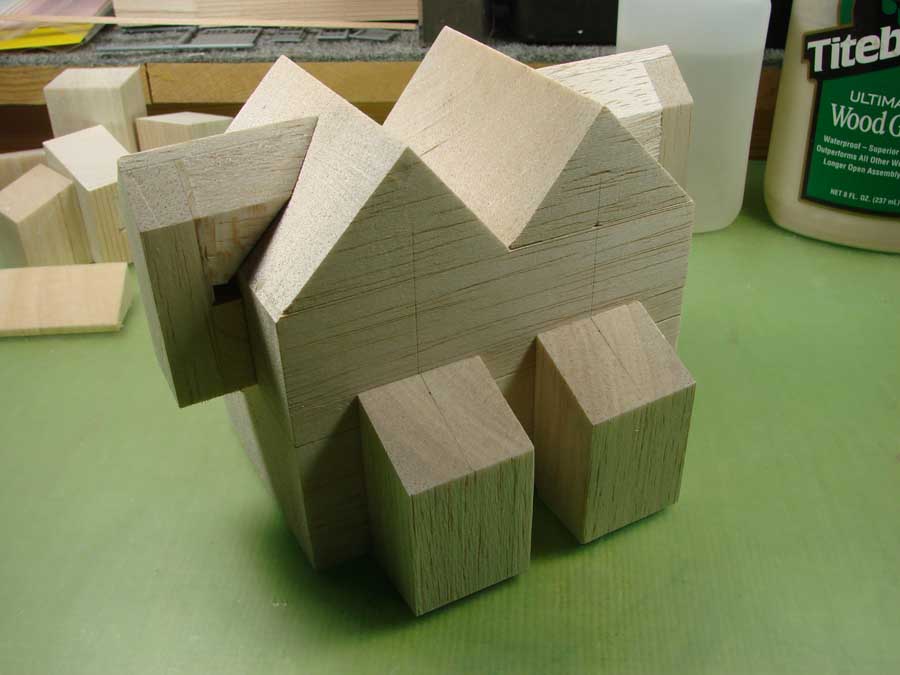
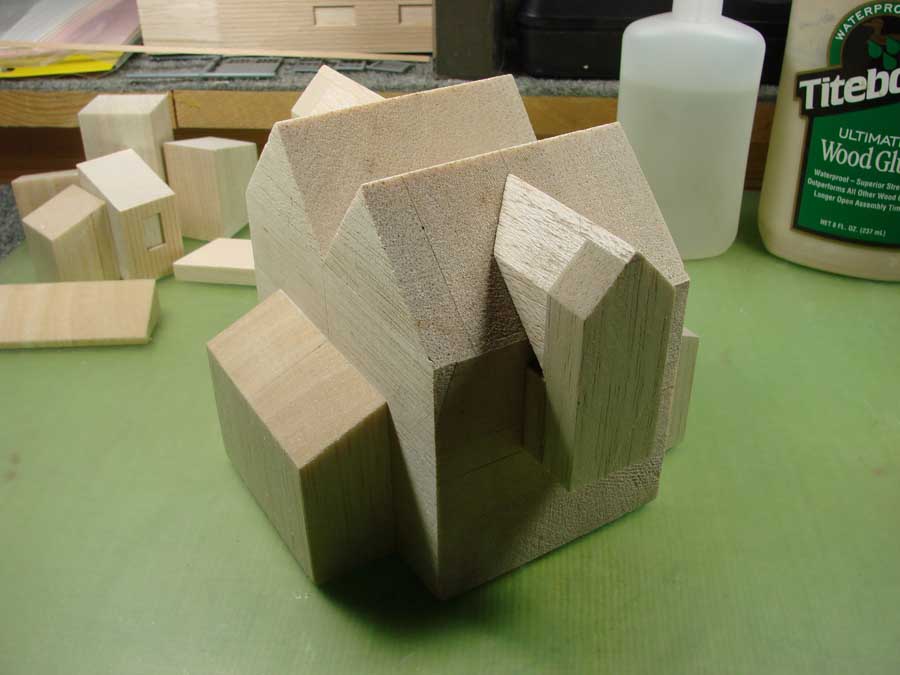
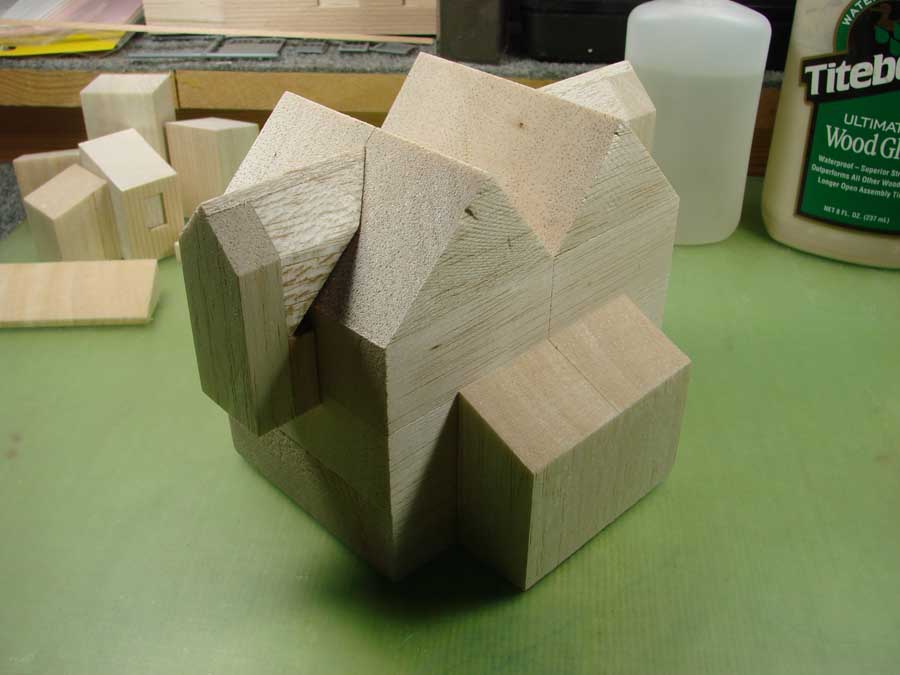
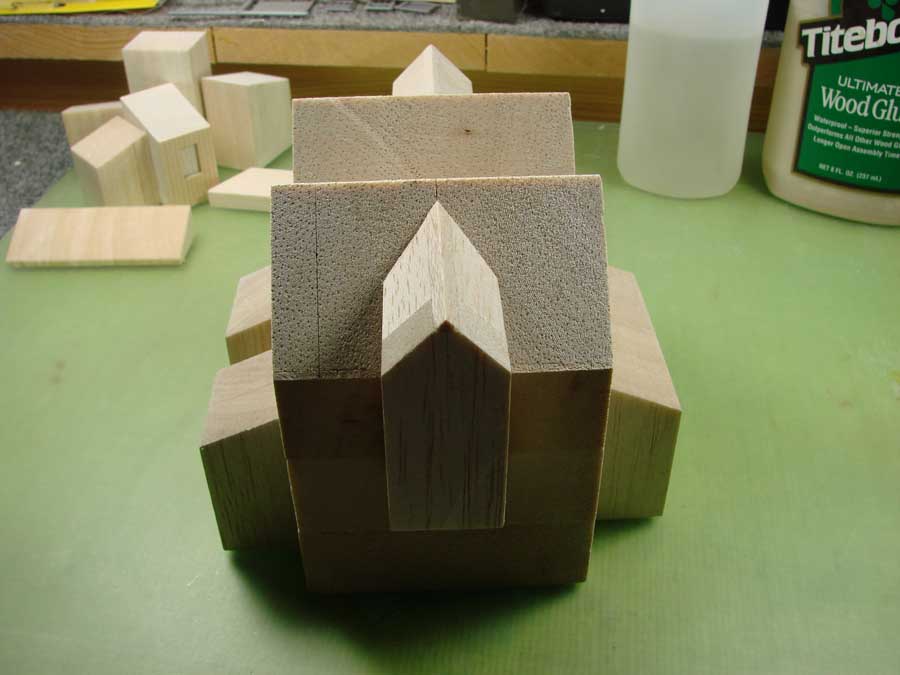
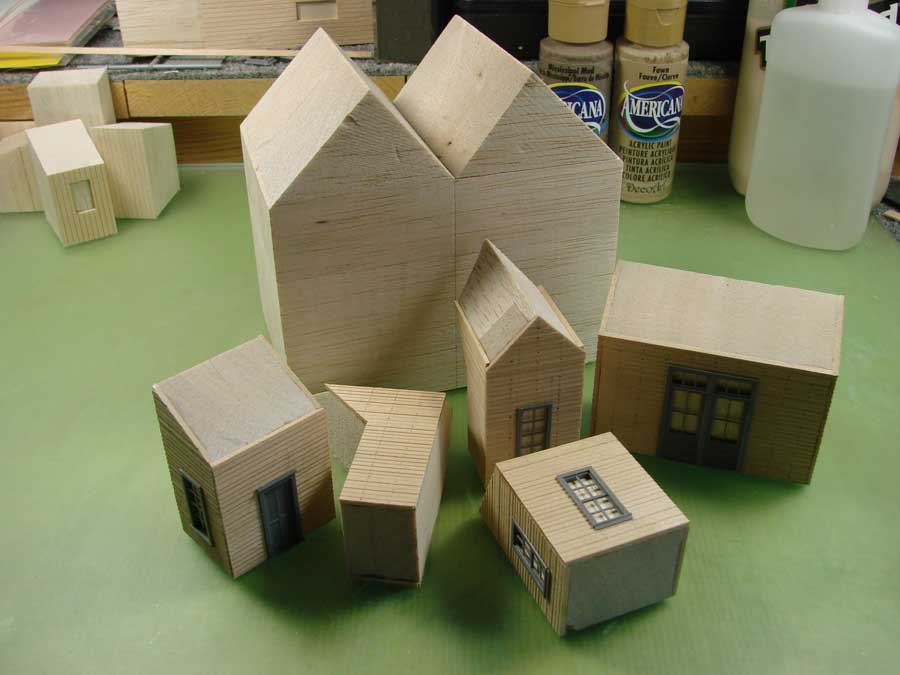
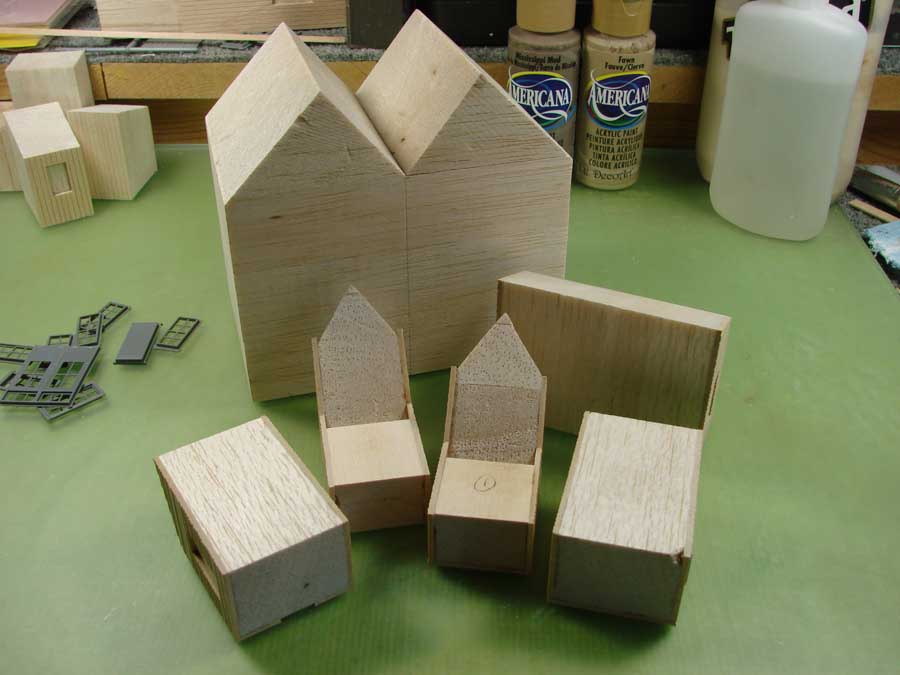
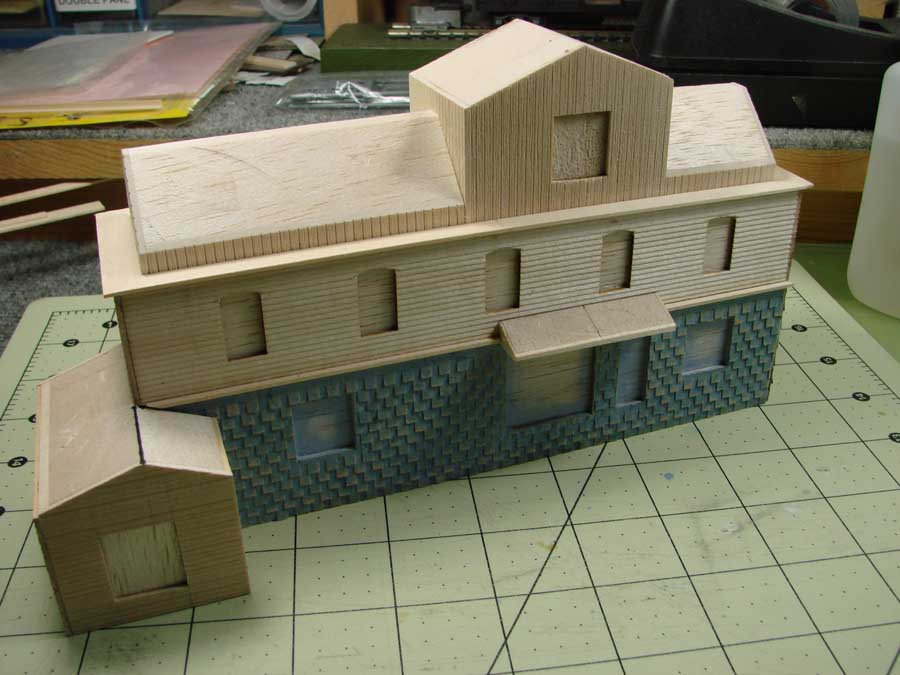
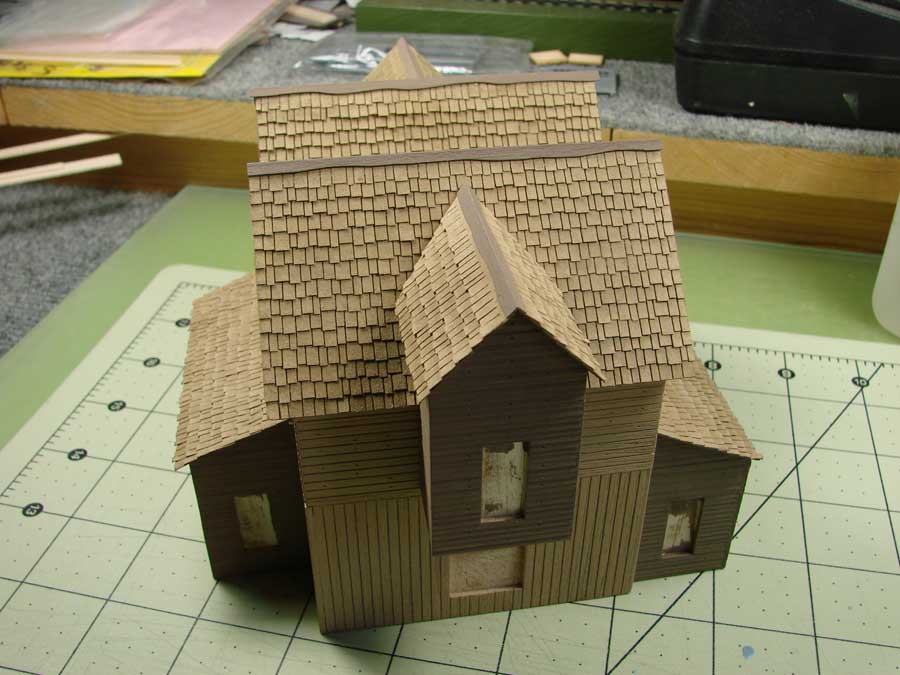
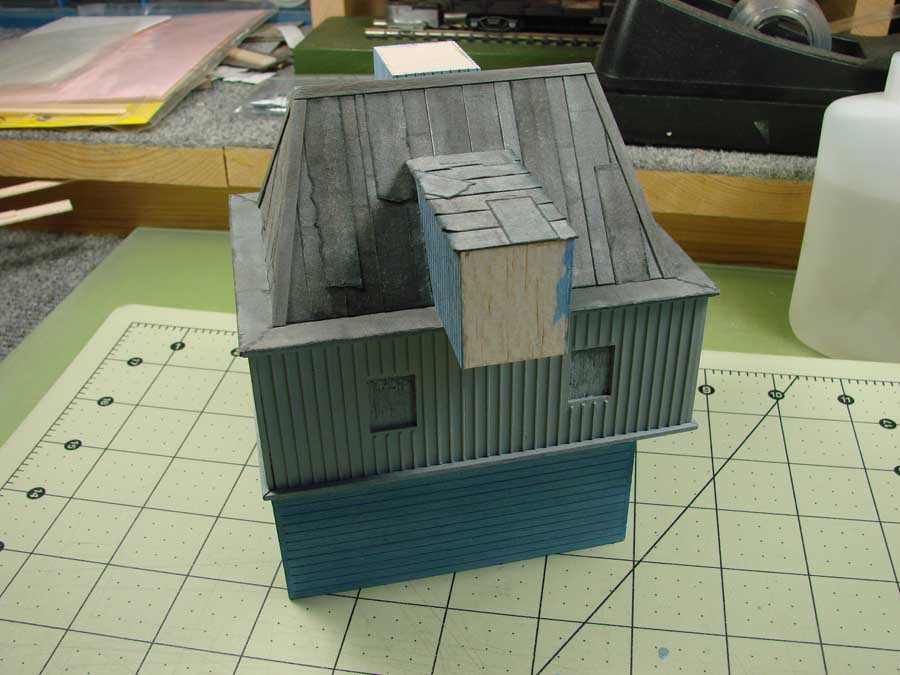
I now build solid balsa cores that I veneer with the type of finishing materials required to complete the model.
Attached are some photos of my process and I no longer have to anguish over bracing…drying time…combining components hoping that all is square and true.
The structures that are almost complete took me less than a day to build from start to finish.
Best regards,
Robert, USA”

Model train buildings:
Now on to Dave:
“I’m new to your great site. I’m 66 years old, retired, and lucky enough to have my first Lionel 027 set from 1951. I’ve added to it past few years. Theme is Des Plaines, IL where I lived as a child.
Time frame is 1949 to 1961. The train set, layout, buildings, scenery, etc. sort of defined itself because Plasticville buildings from then look just like Des P looked then. Train station, bank, first McDonalds rstd., O’Hare airport which was in Des P until Chicago annexed it, and lots more. Des P was known as “City of Roses” back then and was primary local industry, so of course I have greenhouses. Lots of little touches. I find inspiration in your postings.
Thanks,
Dave”
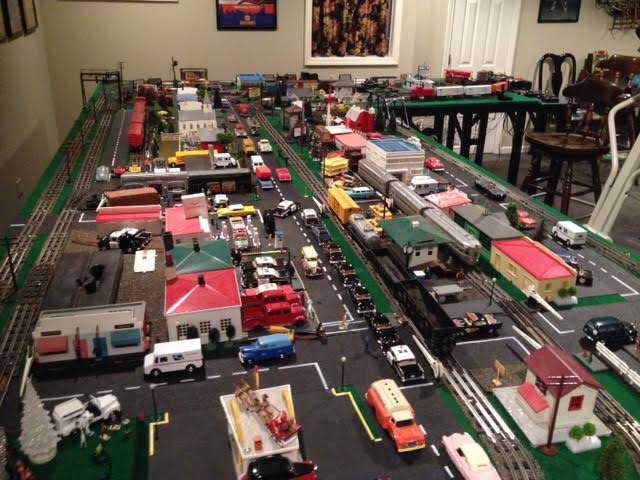
Now on to Bern who sent in this fab layout:
“This project started in July and at last I think I have sorted out the track as I want it, now the big task is to fill in the scenery.
Because of the spacing between the tracks, organised that way to get the longest running time, I am limited to what I can fit in so decided against buildings, choosing to give a more country look.
Trees have been bought on price at an average of £2 for 3, given the quantity I needed to give a “woodland look”.
Most of the grass area is made up with sawdust dyed with green food dye, it does lose its colour, so I am now going over it again adding commercially bought scatter of different colours which seems to be working.
The outside running track is fitted with crossovers giving four circuits of the board to return to the starting point, at an average speed this takes 2.25 minutes.
With planning and quite a bit of luck I have run three trains at one time but a watchful eye is needed to avoid a crash at the crossovers.
With this in mind I fitted three sets of points allowing to change between tracks.
There are five sidings for passenger trains and seven sidings for freight all installed on two 8 x 4 foot boards fitted together in an “L” shape.
One of the next things, do I ballast the tracks ? As you can see there is a lot of it, around 90 metres, and I am a little concerned that I will end up with something totally immovable.
Living in rural France, near Mont St Michel, I have been unable to find anyone interested in model trains, the shops that do have any trains are very expensive and extremely small amounts of stock and tell me no one had been interested for the past 12 years.
Is there anyone out there near me ?
Regards
Bern”
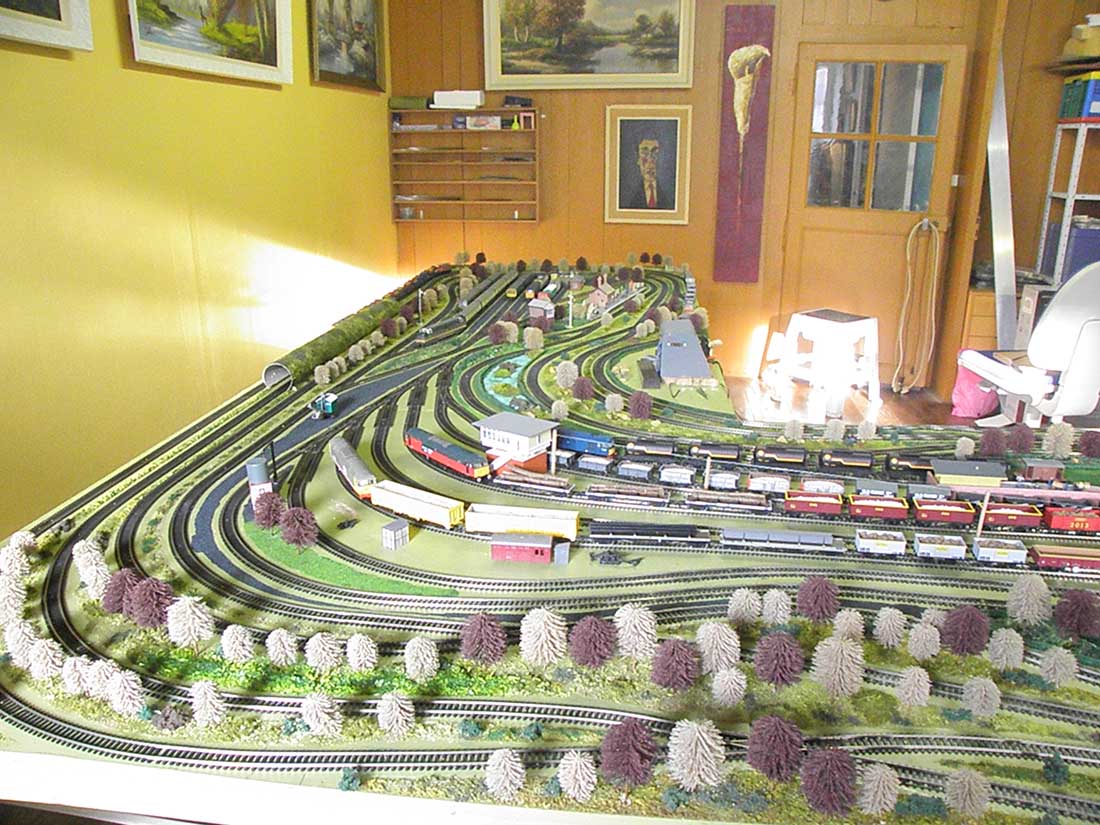
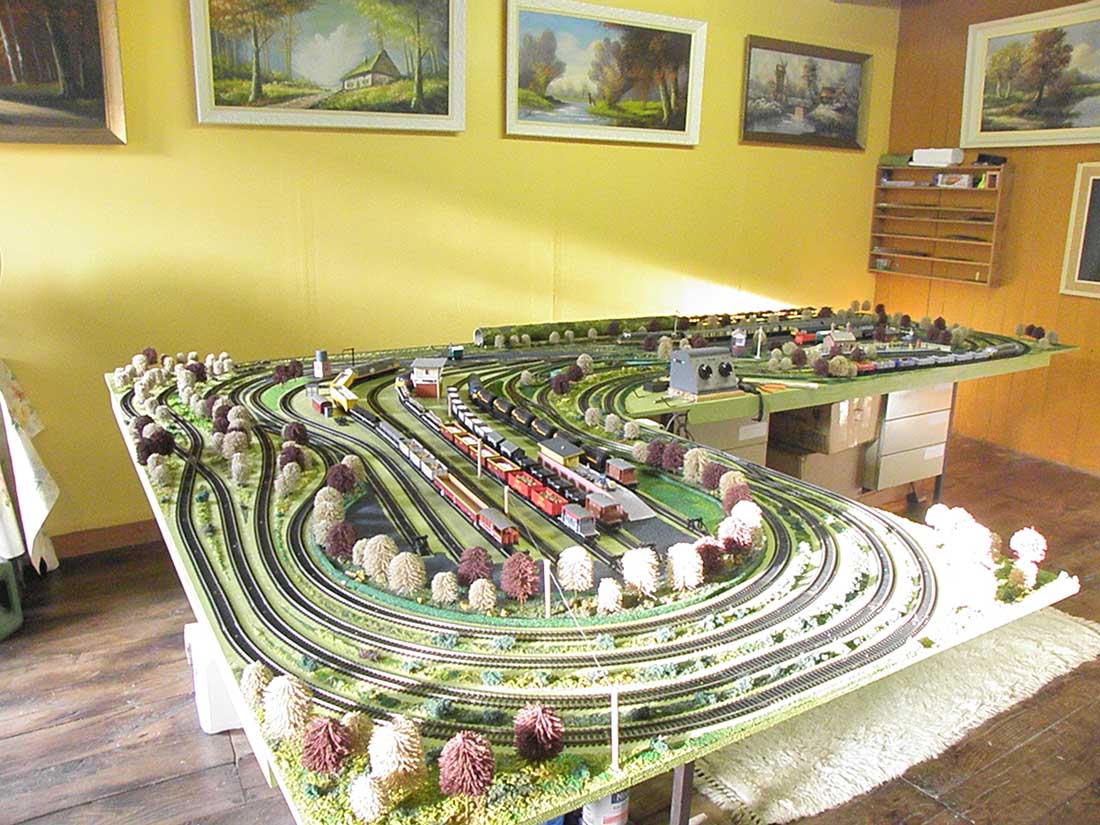

Just loved the busyness of Bern’s layout. I think it’s superb.
A big thanks to Bern, Rob, and Cameron for sharing their model train buildings.
That’s all for today folks.
Please do keep ’em coming.
And if today is the day you get started on your layout, the Beginner’s Guide is here.
Best
Al
PS More HO scale train layouts here if that’s your thing.
Need buildings for your layout? Have a look at the Silly Discount bundle.