Bernard needs help

“Light bars for lighting cabooses or passenger cars can be made from 5mm LEDs and clear drinking straws. One in each end wired appropriately. The light carrying medium is 5 minute epoxy from one of those Loctite instant mix tubes. (One minute epoxy is too fast and sets in the mixing tube.) Squirt it into the straw, cap with the LED then cap the other end with the other LED. This is all much less expensive than lighting kits. With the new Evan Designs LEDs, no decoder is needed. Any voltage source works.

Michael”


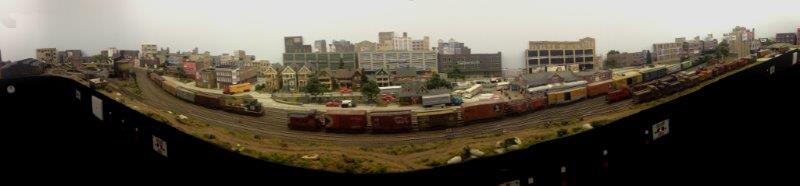
“The best tip I got when starting an HO layout,was to spend the extra cost for nickel silver track.

Richard”


“Dear Alastair

Sixty years on I got my train set out again, invested in new track etc. and off I went only to find I am not that clever.

I was trying to set up a continuous loop using four tracks but hit problems when I tried to put in a cross over to reverse direction.

See attached photo: I want to cross from “A” to “B” and inserted insulating fishplates at “C” but when the engine gets to the fishplates it stops ! !

Could I solve the problem by inserting “D”, adding insulating fishplates at each end and wiring in a parallel electric supply to that section ?

The points at either end are Hornby R8073 & R8072.

I have looked on the Internet but am getting more confused. Can you advise please.

Please excuse track spacing, I am only running single track and tried to gain as much space as possible.

Thanks in anticipation

Bernard”

train track


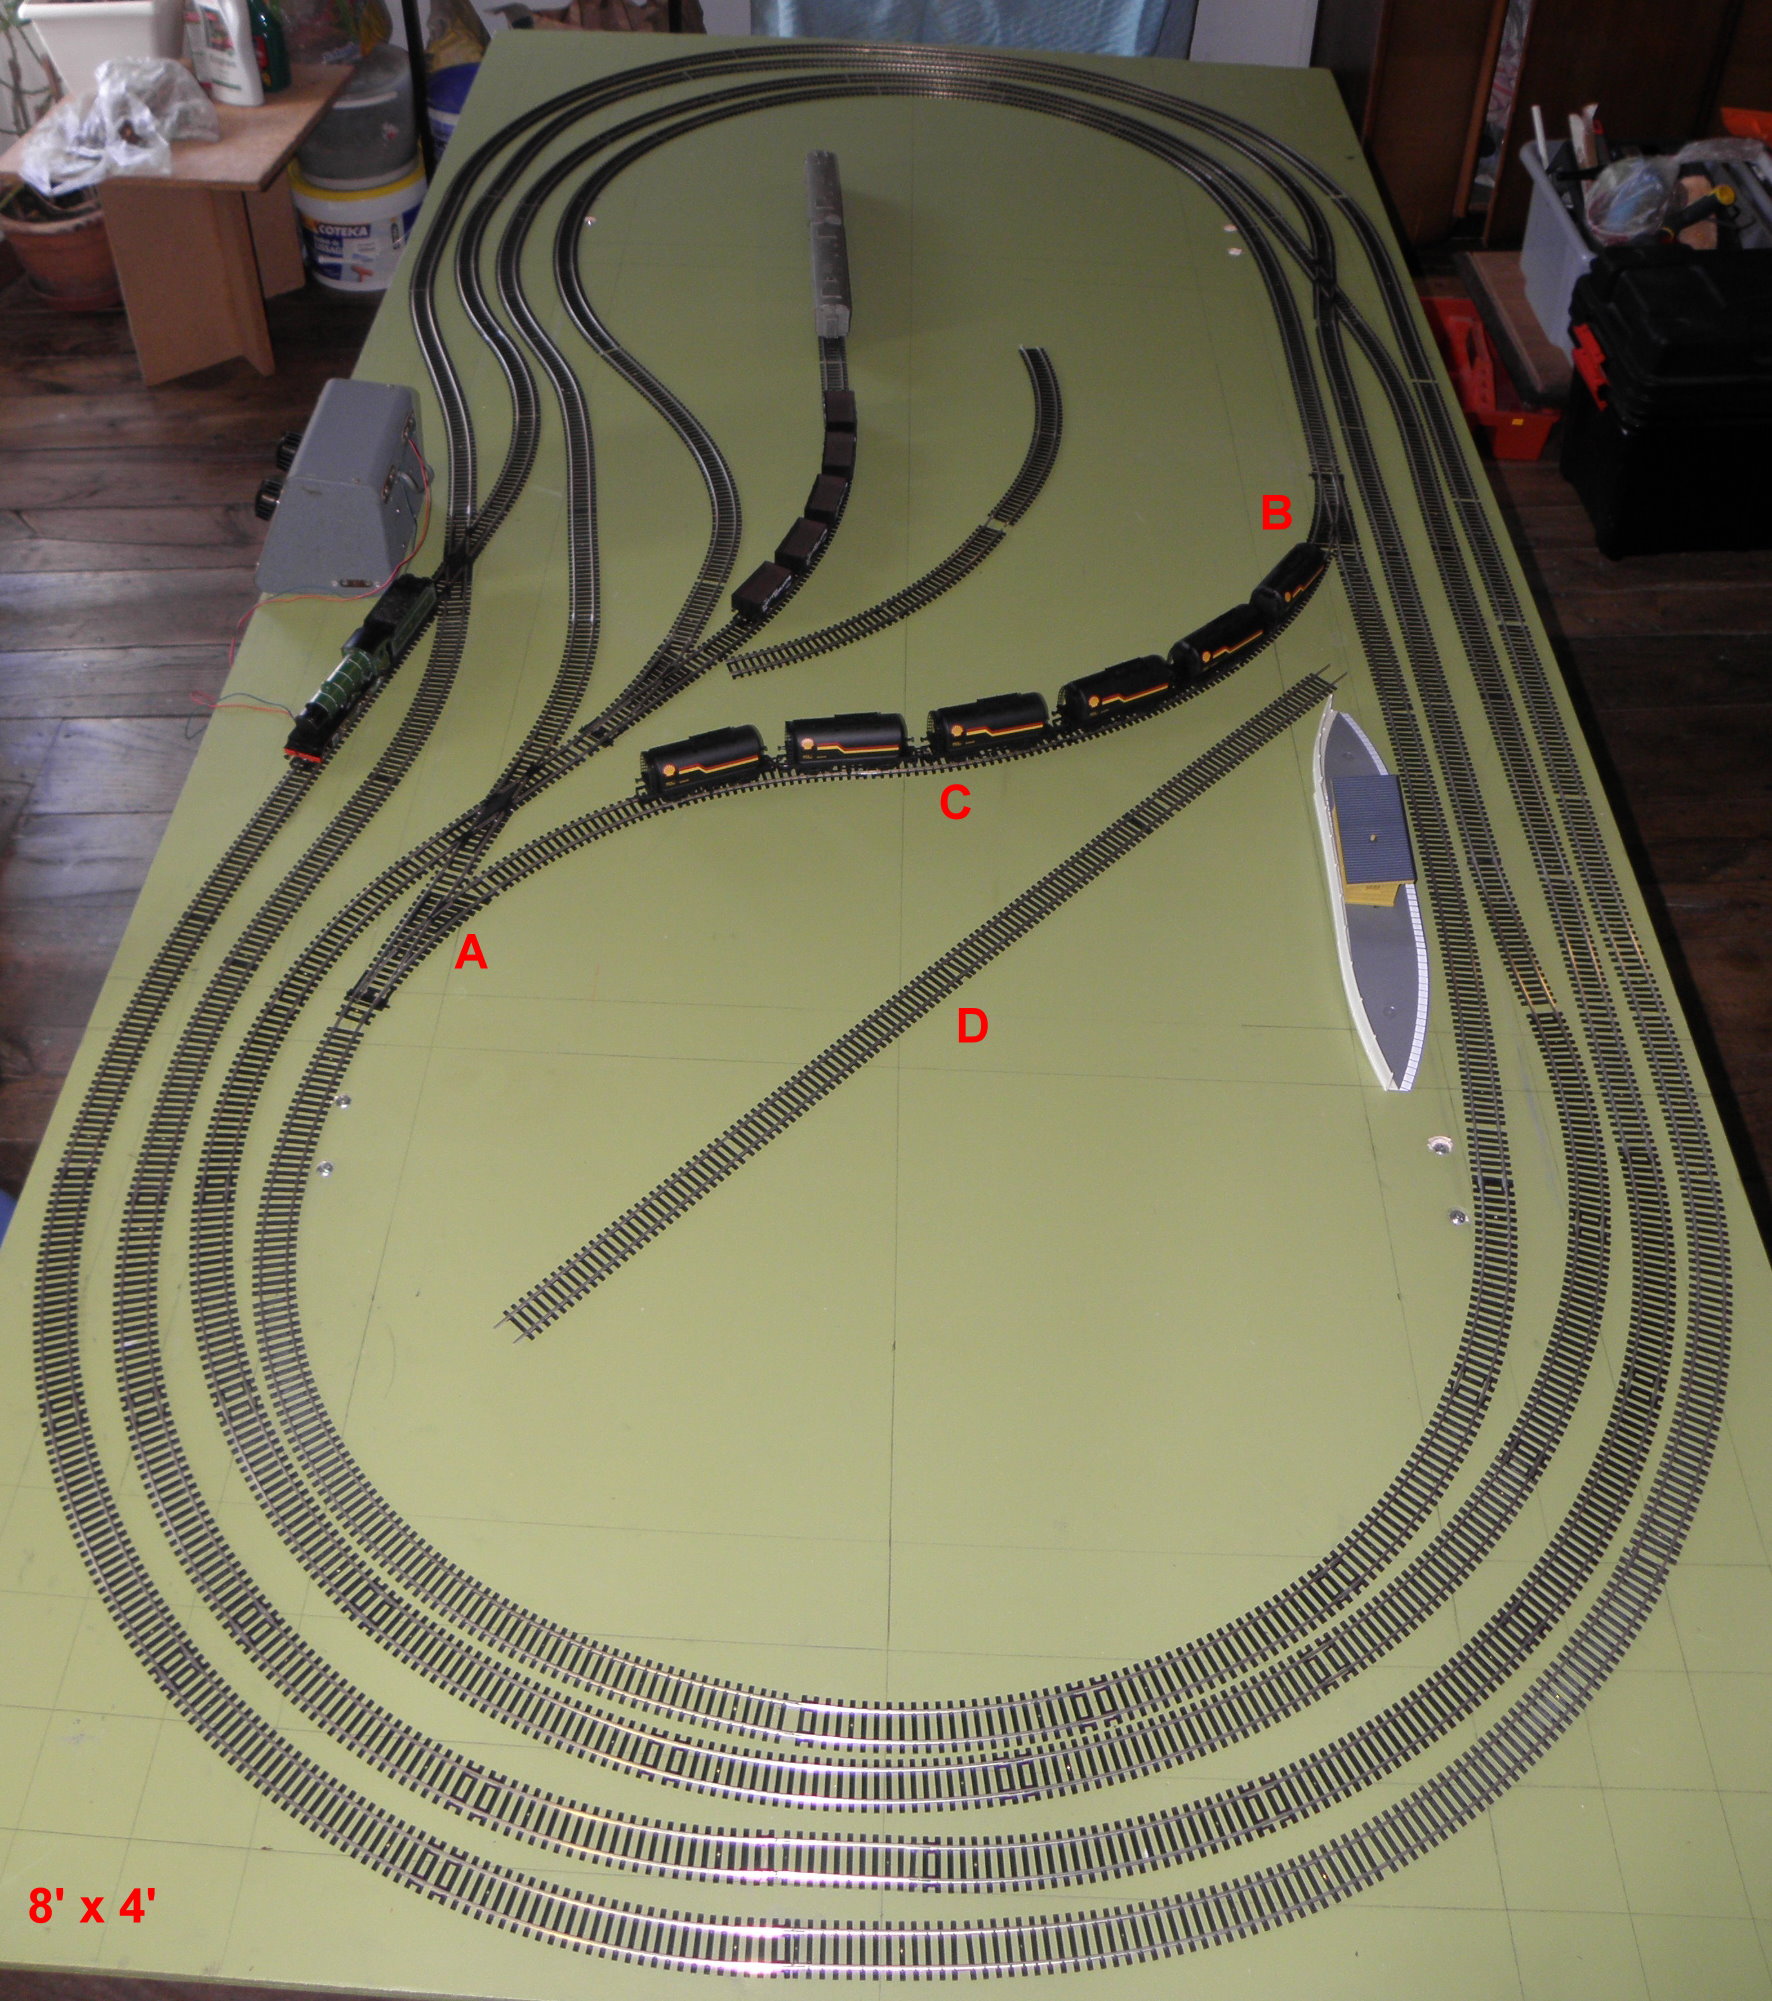
So who can help Bernard?

Latest ebay cheat sheet is here.

Best

Al

Alick’s HO scale layout

Alick has been in touch with his HO scale layout:

“Hi

Some pics of the layout HO – I am working on…

Alick”

HO scale

ho scale

HO scale model railroad

HO scale model railroad

GFR.145

jj1

PA174799


PA174800

PA174801

PA174802

PA174803

PA174804

PA174805

PA174806

PA174807

PA174808

PA174809


“I am a retired engineer and have been frustrated with the high price of contact cleaner.

Well I found that automotive MAP sensor cleaner will clean contacts, motor armature’s, track, switches, etc…

It costs about 1/4 of regular contact cleaner and works just as well and will not damage many plastics.

It also is a good de-greaser.

Like any cleaner, you should avoid skin contact and inhaling the fumes.

It is wonderful for cleaning potentiometers that are noisy or spotty.

I hope this is a helpful hint.

Kevin”


“Hi Al. just put this together with a bit of Youtube copy write free music , got a sort of swing with it , but having delivery problems with the coaches to go with the A4 and a few problems (gout) so could not get in to the loft to finish the changes , but this sort of made me smile when I edited it, so maybe your members may smile along with it …?

Regards

Dave”


A big thanks to Alick. Have a look at the comments below!

That’s all for this time folks.

Please do keep ’em coming.

Don’t forget the Beginner’s Guide is here is you want to stop dreaming and start doing.

Best

Al

PPS More HO scale train layouts here if that’s your thing.

printable buildings


Al makes his own couplers

“Not being able to find coupler boxes (N scale), I started using plastic shapes. I take a square tube that seems to fit the coupler (such as Bachmann EZ II), and cut it down the middle with a hobby saw. Then it is just a matter of fitting on the floor of the car, drill to clear whatever size screw I am using, (already have drilled & tapped the floor), tighten securely, and all done. Except for painting, of course.

Have done this on more than a dozen car now, and seems to work just fine. Trying to work through all to convert to body-mounted couplers.

First, cut square tubbing down the middle. Select the size that best fit your couplers, allowing for movement.

1

Then drill for screw… will be “clear” size for your mounting screw.

2

Insert screw and coupler (here, a EZ II coupler), and mount into the tapped hole in the floor of the car. Add shims if required for proper height.

3

4

Hope this helps someone.

Al Lyons”


“I have a 40 year-old 6ft x4 ft N gauge layout, which I’m about to resurrect. Plenty of good track, rolling stock and scenery. Sort of European 1930s era…but it’s all about to be freshened up, some replaced, and added to.

My tip is for the hills/ mountains. Try to get a surfboard blank – they are about 6 inches thick (15cm) , rigid , dense, fine cell foam. It can be carved with a bread knife, sander or similar, painted, and holds trees and posts without needing reinforcement. You can even mount track directly on it with short nails to hold the sleepers down. Has plenty of strength to be self-supporting. Could even be used for buildings if you have the carving skills.

I also use coarse sawdust for ballast. It can be glued using straight white glue – apply the glue sparingly and sprinkle it on. It sometimes comes pre-coloured, and not all ballast is black, so you can buy your preferred pre-coloured sawdust, or paint it with water based paint afterwards. Other advantages are that it is not abrasive to delicate train components, and non-conductive – so no electrical shorts, especially around points.

Water – a layer of white glue dries clear –works if the river bottom is painted a preferred colour first. Clear 2-part epoxy also gives good results, as does clear polyurethane. Colour the underlying river-bed before you do the water for better realism. The colour has to dry first, and not be reactive to the clear coating.

Regards,

Terry”


Big thanks to Al and Terry for sharing. Please do keep them coming!

That’s all for today peeps.

Don’t forget the Beginner’s Guide is here is today is the big day when you make a start.

Best

Al

PS Latest ebay cheat sheet is here.


Al