Lewis has been in touch with some model train scenery pics:
“Well it’s been a while since I talked with you but this is Lew.
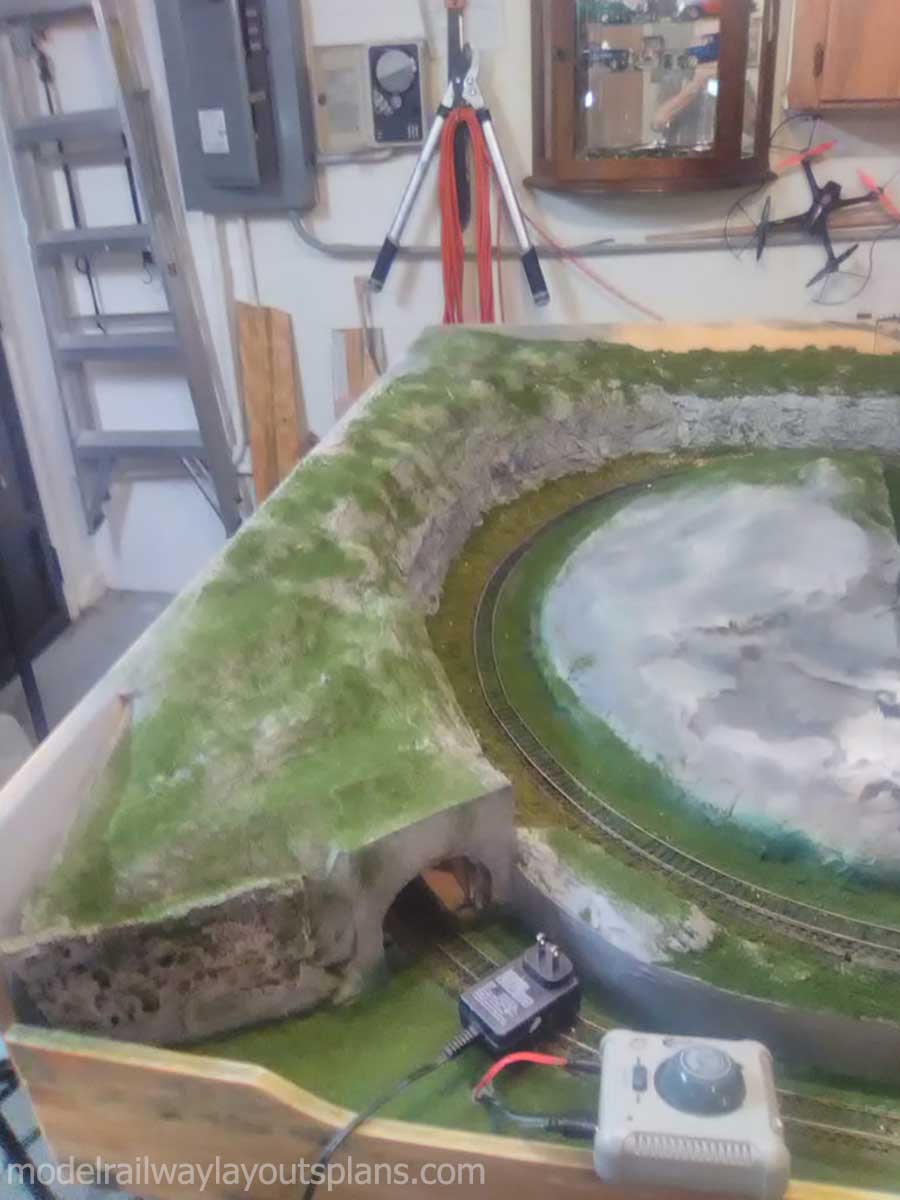
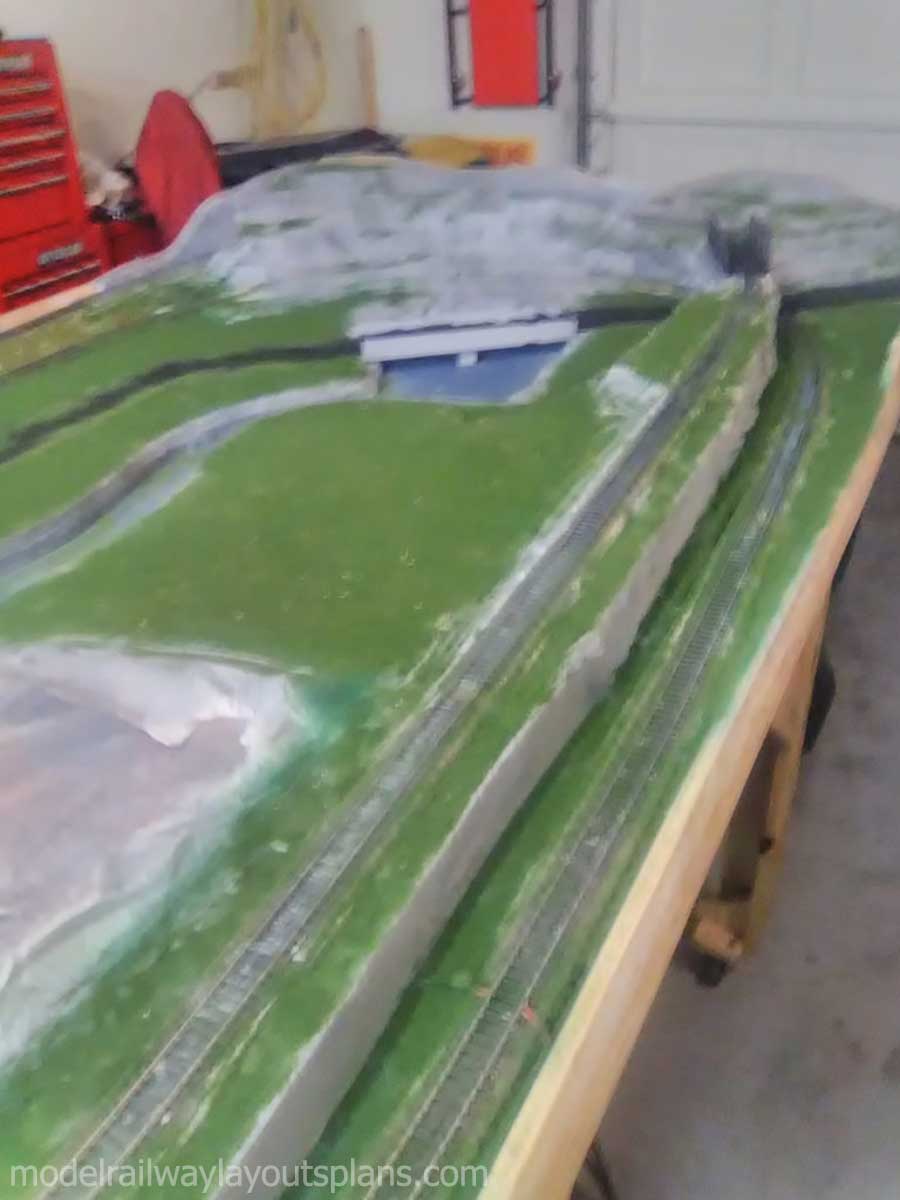
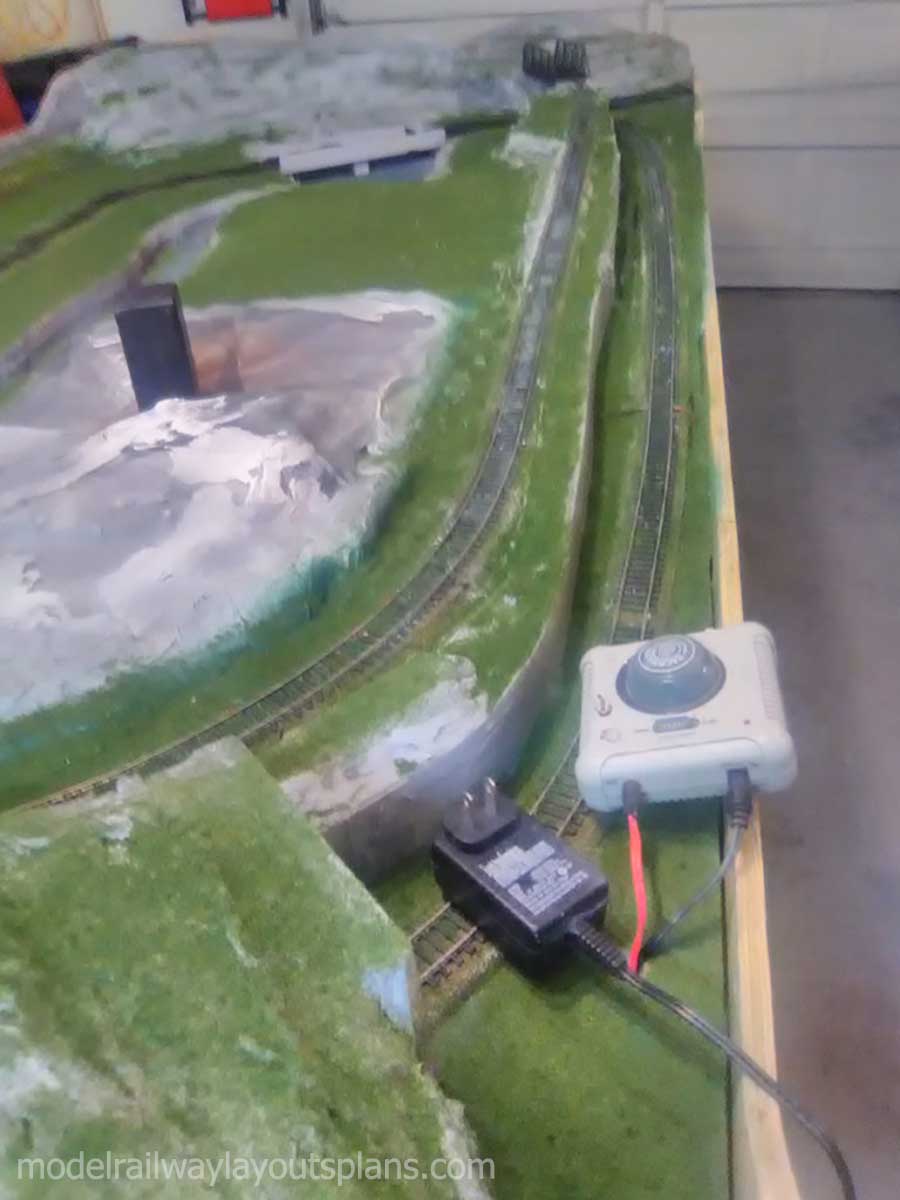
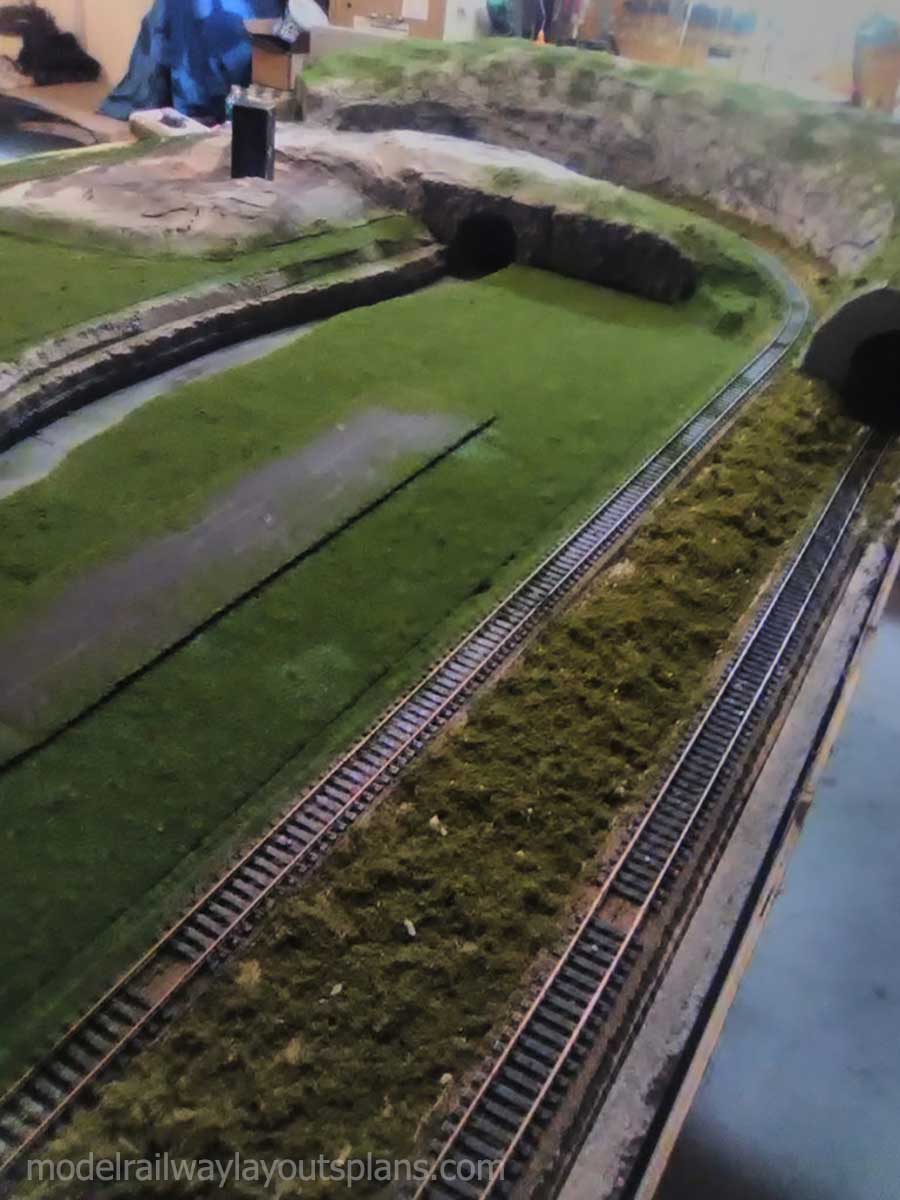
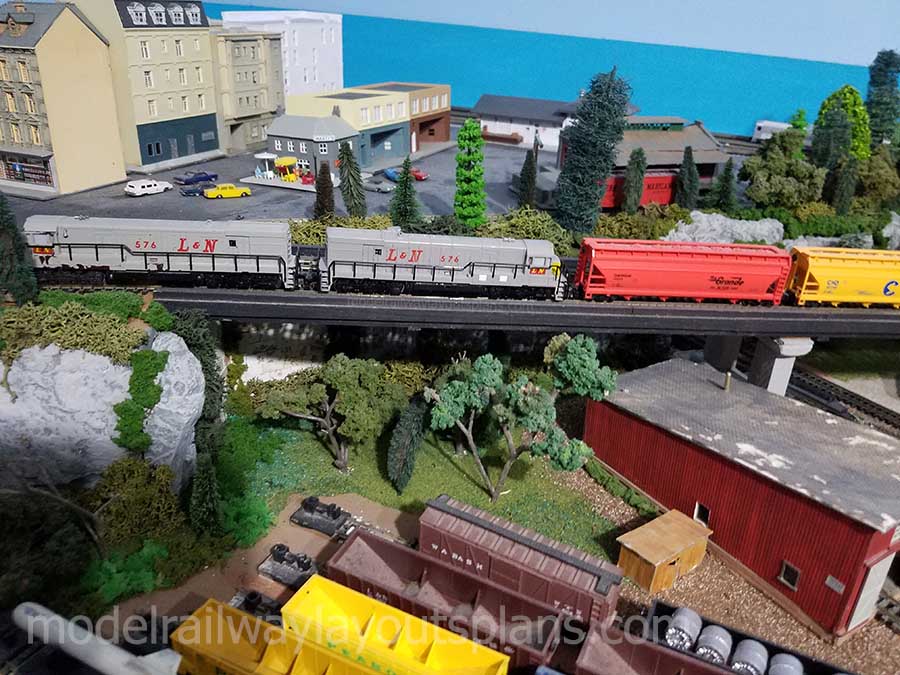
This is how far I am, money’s tight so I try to use whatever I can to form mountains and roadways and so beefing up the table some more.
I changed the lake configuration so that it was inboard instead of outboard and it has made storage a lot easier as well as more stability when moving the table.
I hope it’s a somewhat interesting to some of the guys and I’m sorry that I don’t know how to describe things as well as these guys do that send all of these things into you all the time, but I thank you for all of them and hopefully they’ll see something here that trips your trigger who knows.
Lewis”
“I introduce myself and just say thanks for all of the great posts you do daily.
Here a a few shots from my N scale model layout. I hope you enjoy these. My layout is 36″ x 120″ and I am about 60% complete still a lot of small detail work that has to be done.
Dave”
Now on to Pete, who shares what this hobby is all about:
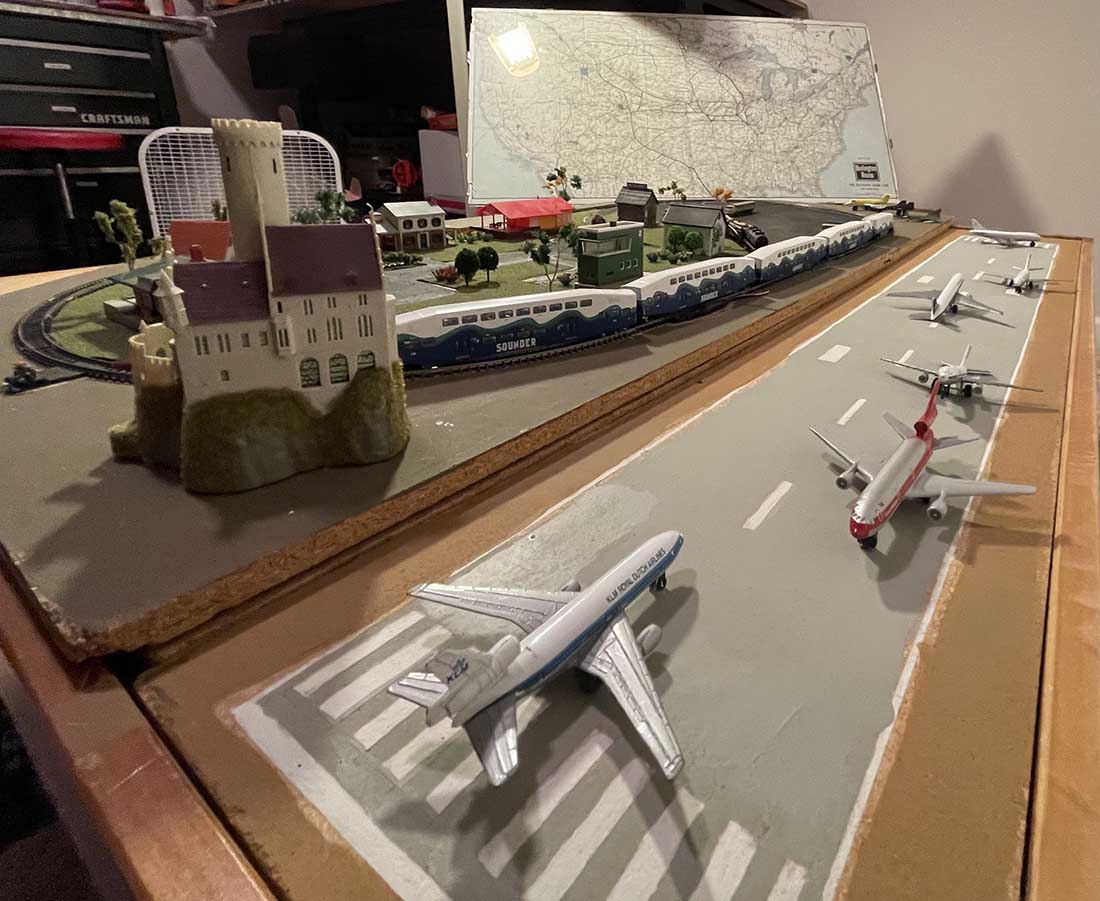
“Alastair – I thought that you might be interested in a N-scale project my pre-teen grandson, Liam, has undertaken recently.
I know it might pale as compared to most layouts presented here recently and in the past. However, I believe it shows quite a deal of planning and innovation on Liam’s part.
He started with an old table from his favorite Brio trainset and superimposed this N-scale layout. Since he is very passionate about airplanes and airports, he said: “Papa, let’s add an airport next to the town!
Liam performed most of the airport runway painting and building placement in the town, including placement of the “castle” overlooking the activities.
He also added the cars/lorries and parking areas to handle the airport cargo.
Haven’t observed much from your “younger” fans, so this as might exemplify the next generation of “train spotters”.
Thanks for the review & Cheers Mate!
Pete
Washington State, USA”
A big thanks to Lewis, Peter and Dave for sharing their model train scenery pics.
Now on to Hall of Famer Dave:
“Hi Al…
I was up on the N.Y.M.Railway a few weeks back with the return of the famous British icon Loco A4 Sir Nigel Gresley.
Managed to get a few shots in along with a few other Locos
Brian’s been back in touch with the latest on his HO scale waterfront layout.
If you want to get back up to speed, his last post is here:
“Hi Alastair,
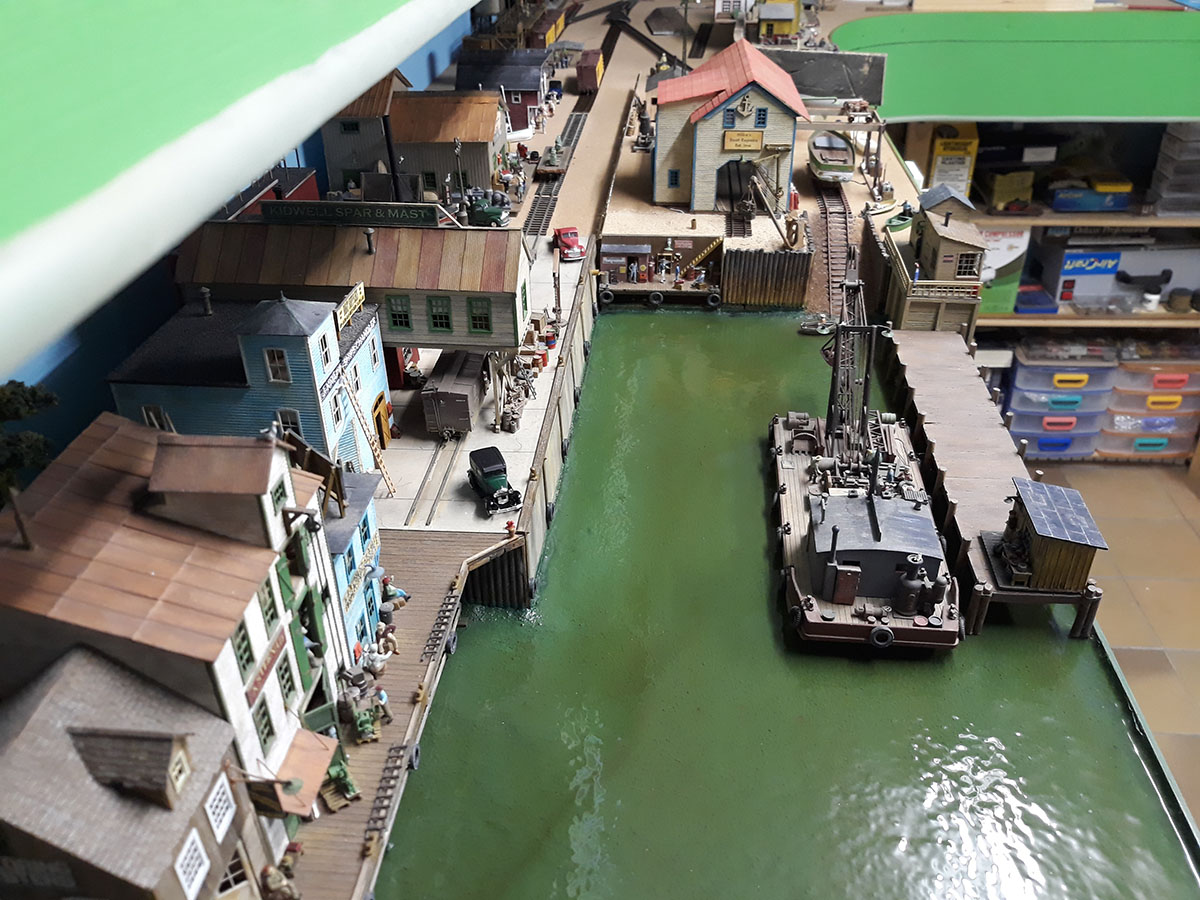
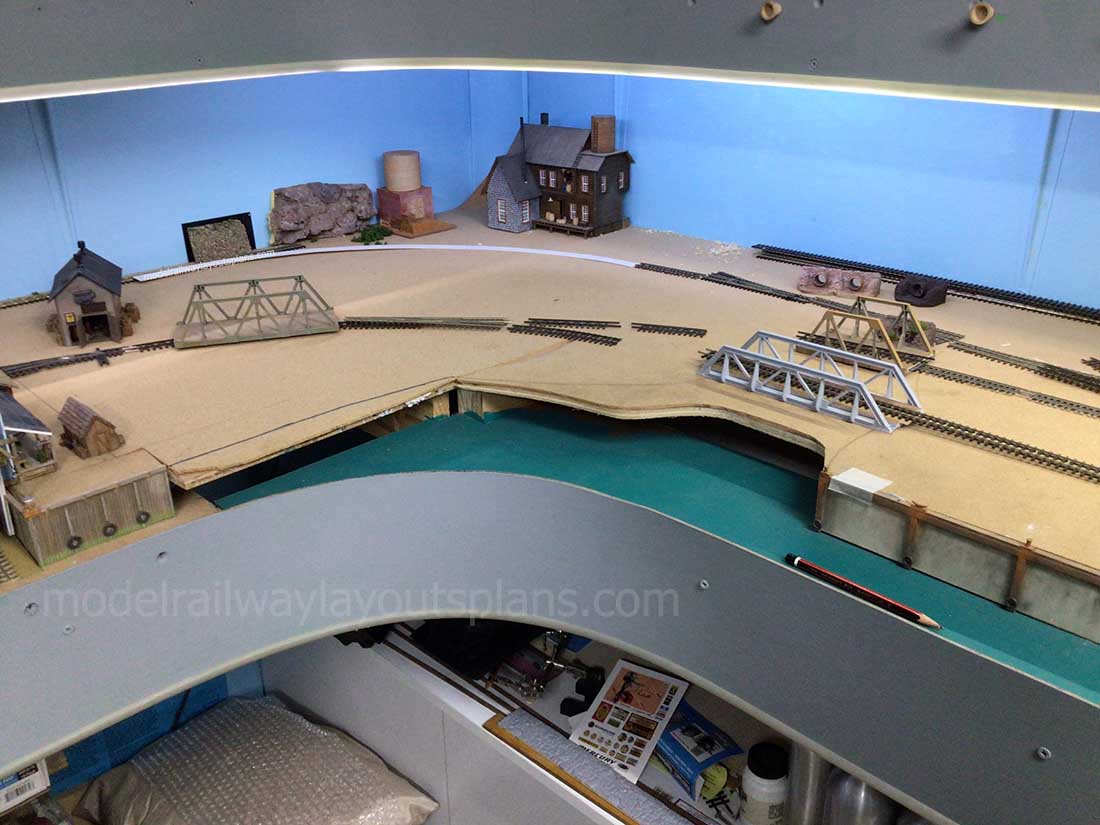
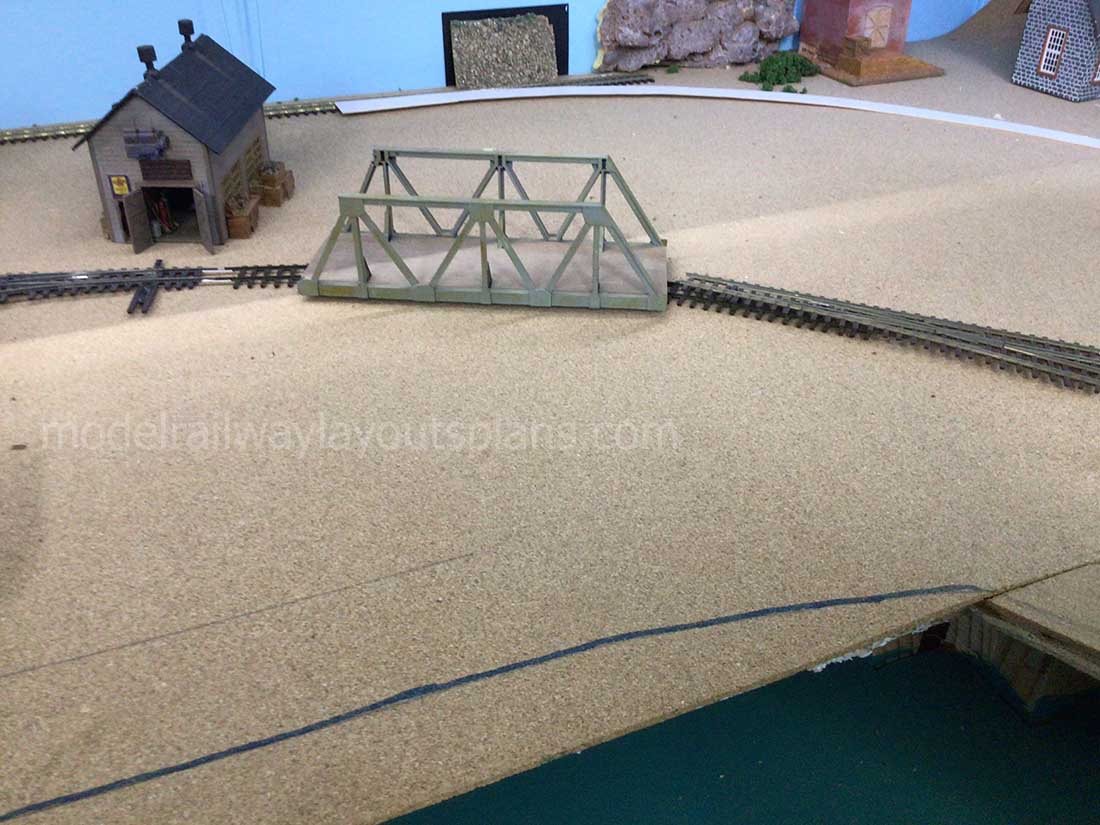
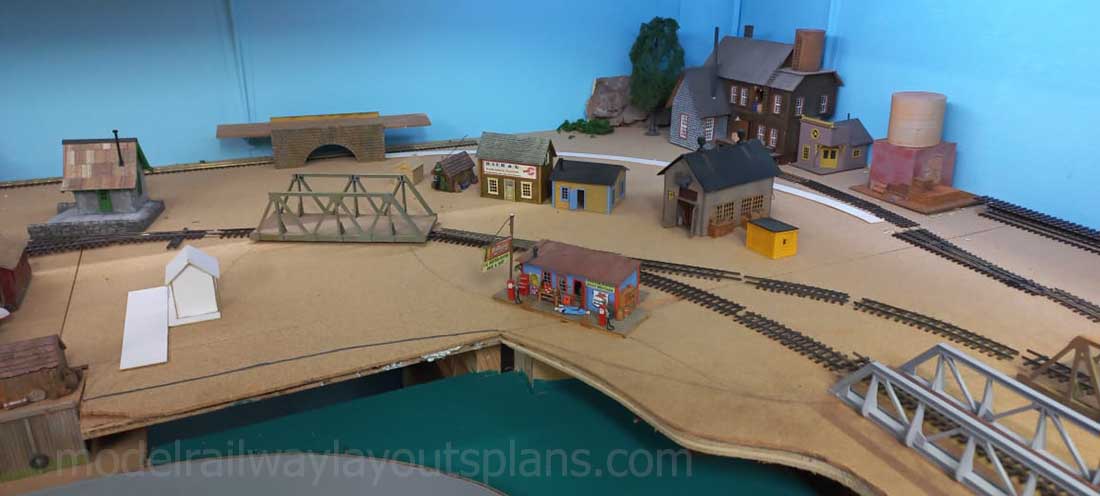
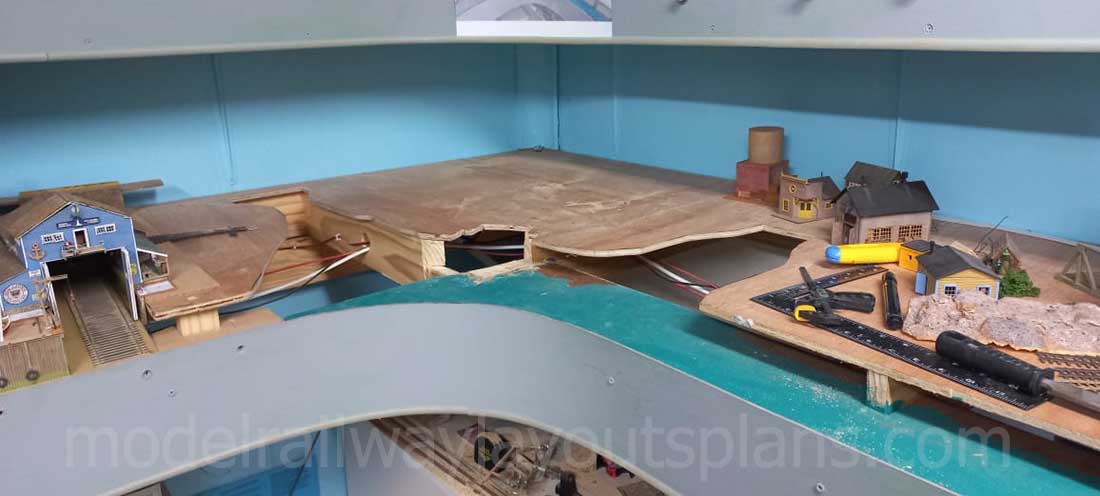
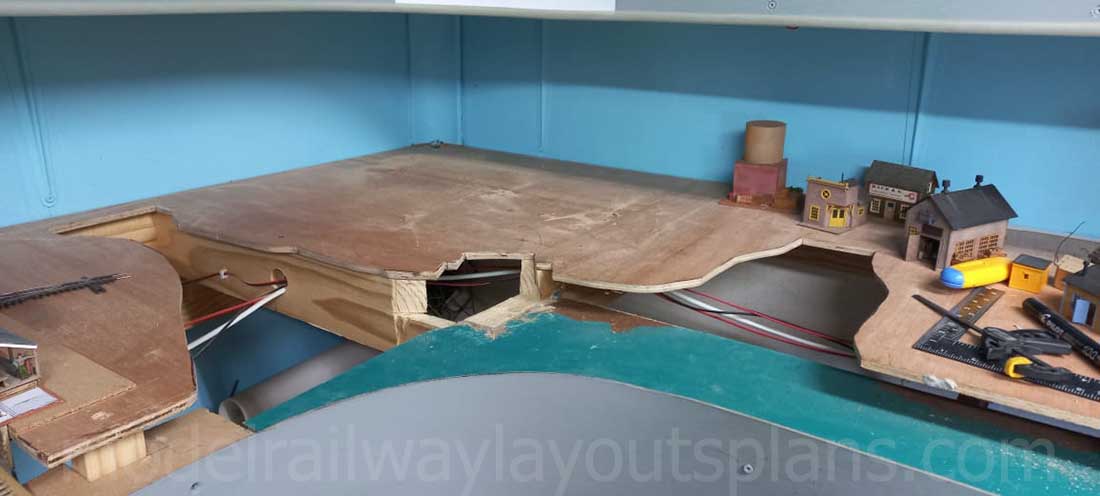
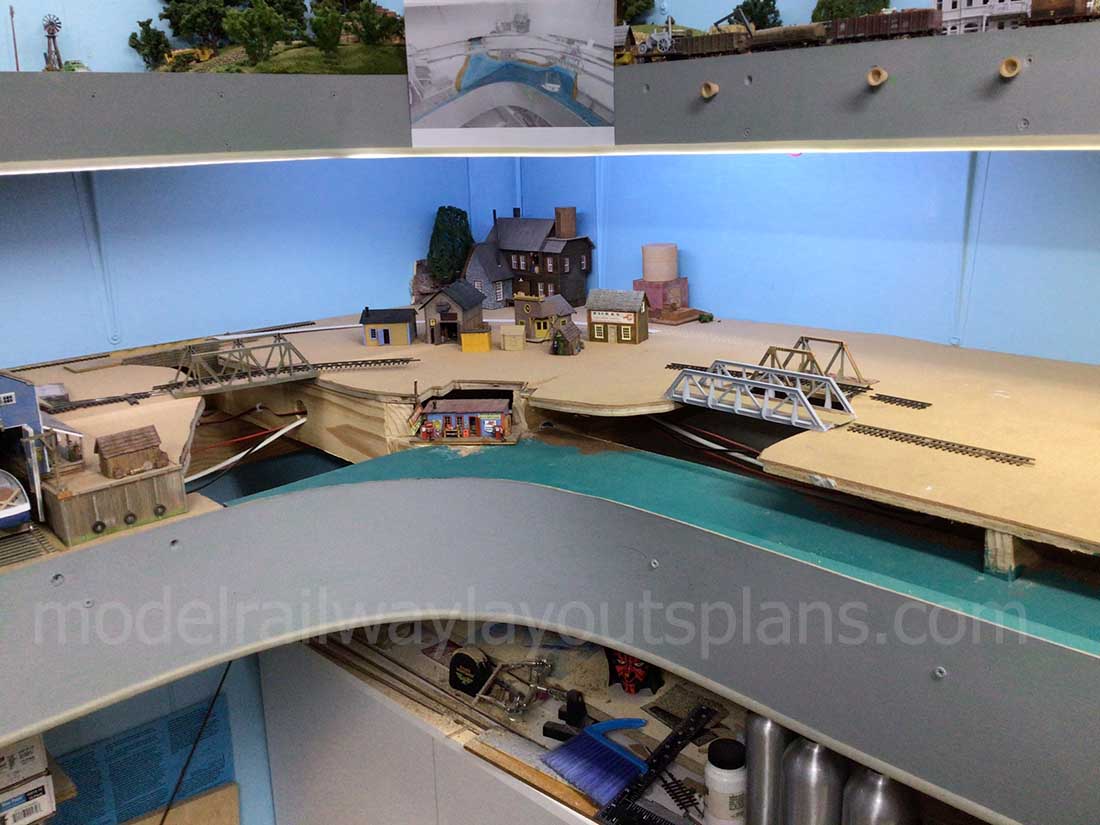
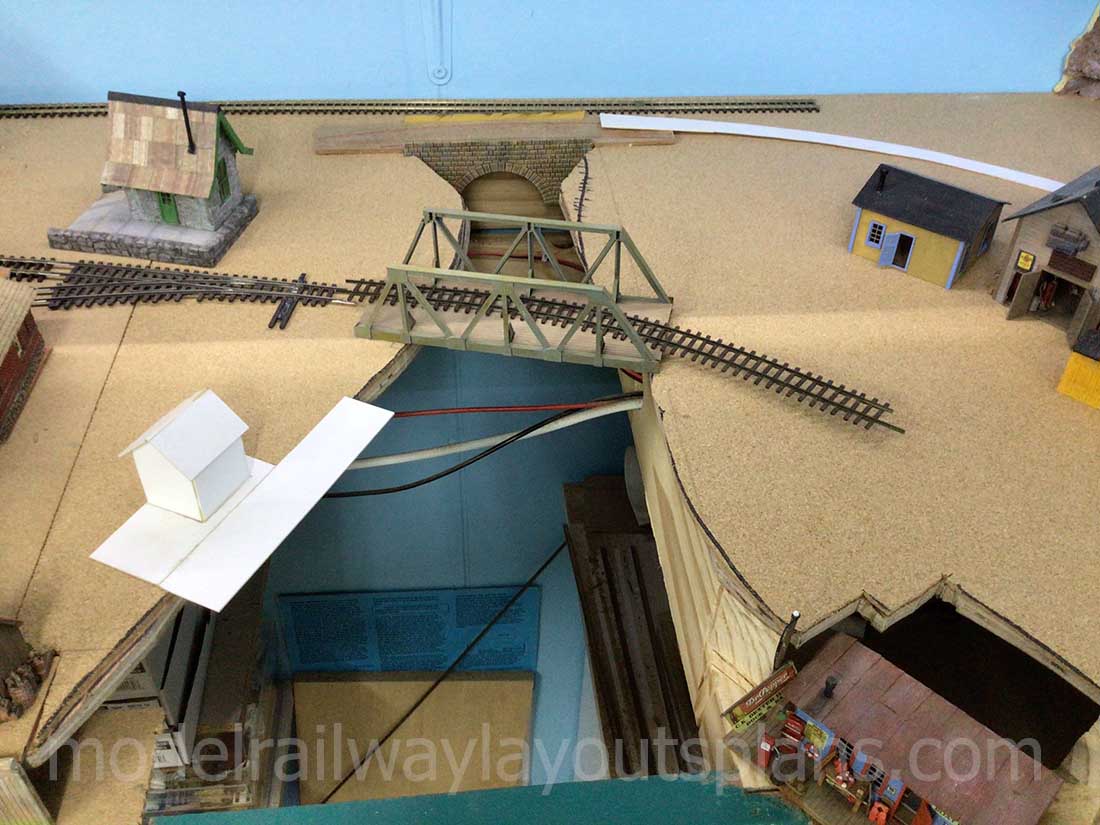
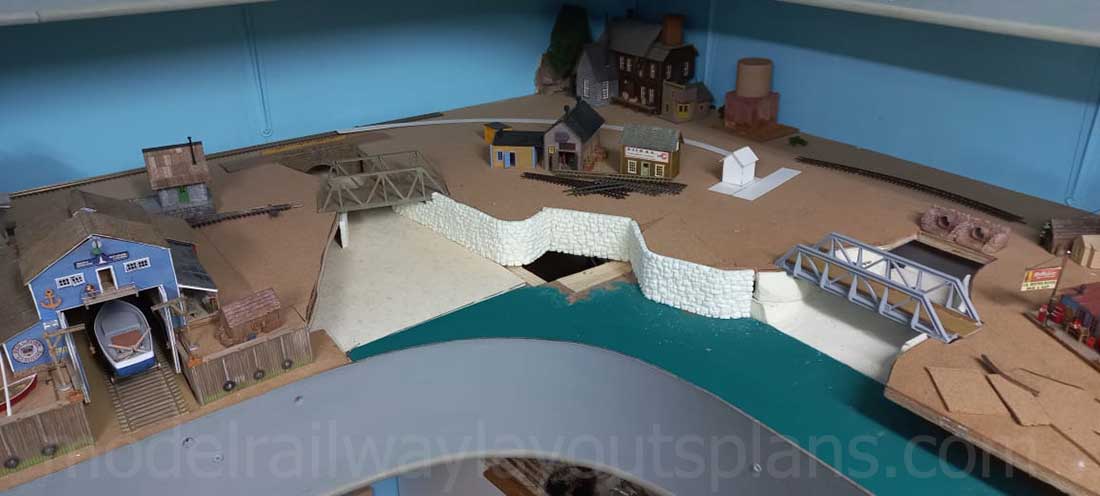
Herewith the continuing saga of the Cascade Creek HOn3 railroad on the lower level of my double deck shelf layout.
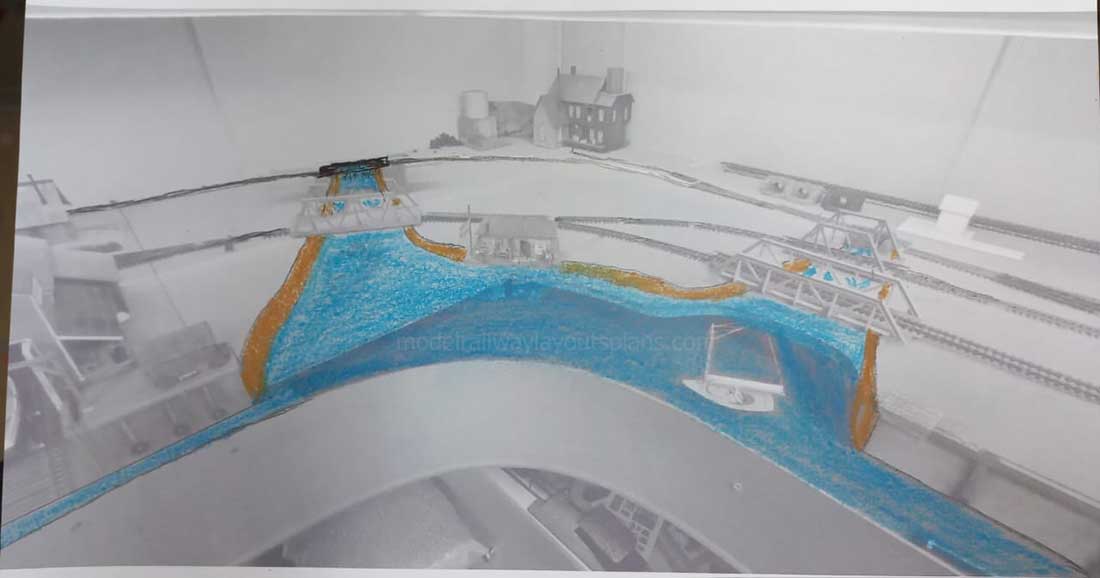
I decided that it is time to get moving on the second corner on the lower level of my layout which has had me scratching my head for months on what to do there.
I printed a black & white photo of the corner and started sketching what I would like to do there.
Below is what I roughly came up with.
This was the starting point where I would like to have a small river stretching to about two thirds of the way towards the back wall.
In the back corner is a kit bashed Campbell scale Brett’s brewery.
Here is an expanded picture of the area that I am working on. I am going to have another river on the left also going in all the way to just before the back wall.
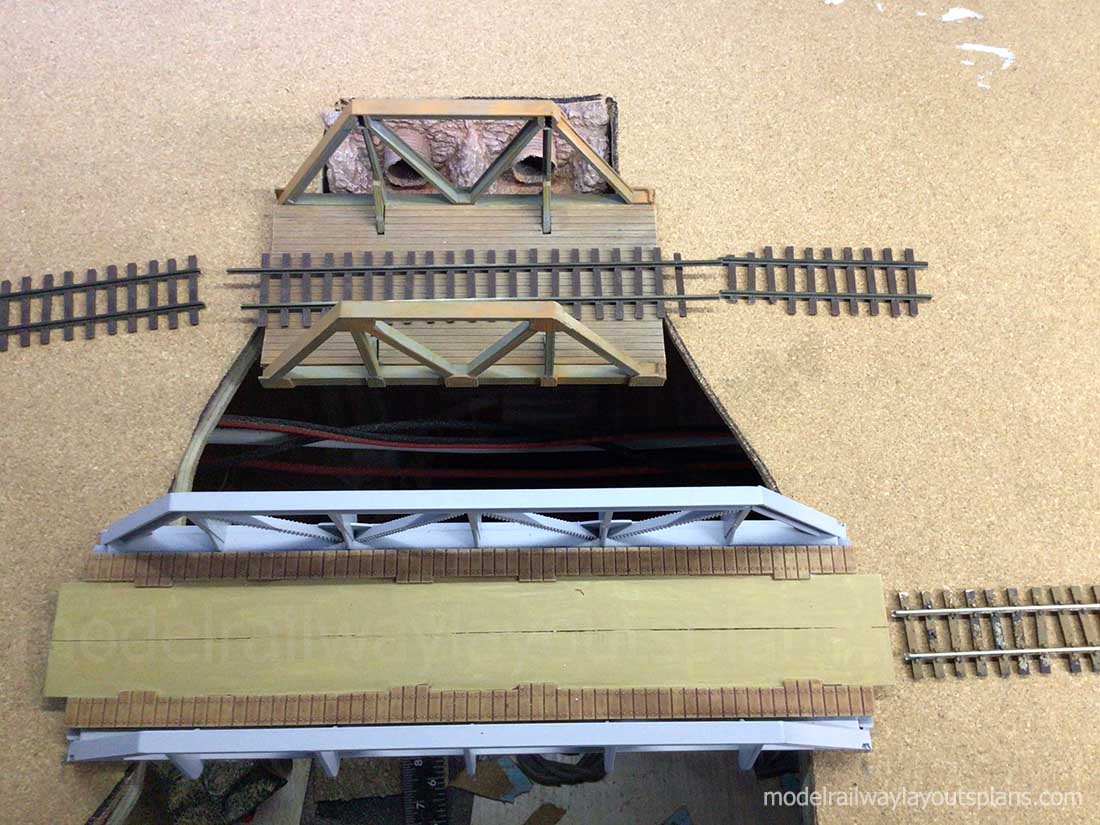
All the bridges are kit bashed from HO Atlas and Volmer kits.
I started marking out where the river has to go and the next part is to cut the baseboard out on the pencil outlines.
Below is where the left side river will be with the rail crossing over it.
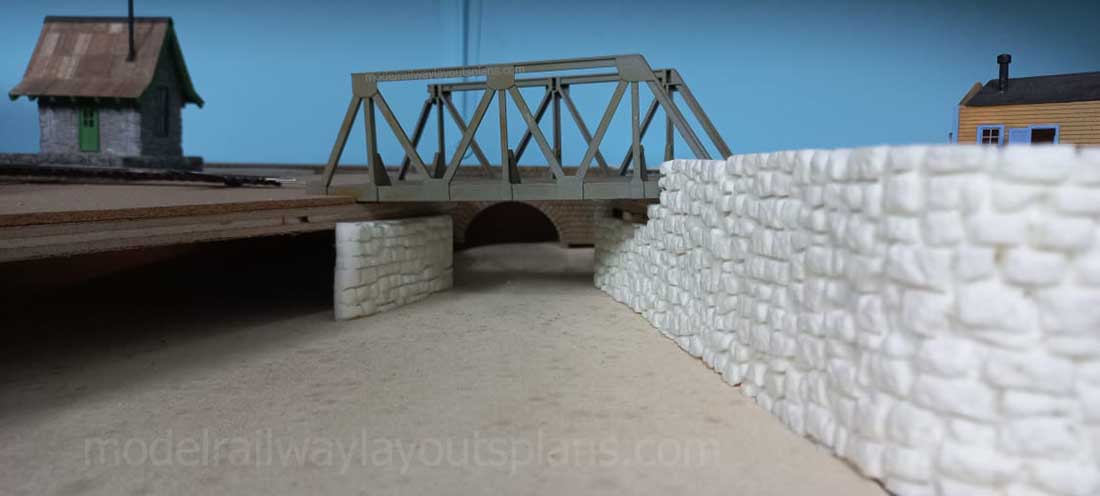
Just behind the rail bridge will be a road bridge to enable traffic to go from the left side to the right eventually leading to businesses, the yard, engine terminal facilities and a turn table.
Here is where I need to figure out what and where the buildings need to placed on the right hand side of this intended river.
The cutting process has begun. I was able to get some splinter free jigsaw blades and managed to cut the board without any vibrations to the surrounding buildings already fixed in place.
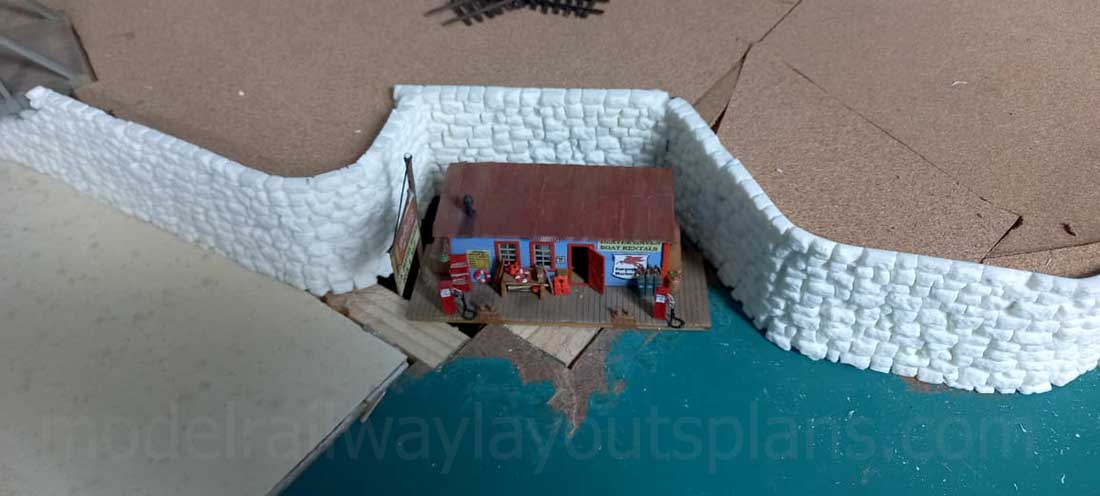
Another view of the area. (The buss wires are visible under the layout) They will run under the river beds. The odd shape cut out in the middle is where the boat hire business will be.
Below, checking the fit and placement of the bridges and the small boat hire building in the middle of the photo.
Note the sketch above the work area attached to the upper level to keep me focused on what needs to be done next.
The stone arch road bridge near the back is in place and the track coming from the harbour area (left, out of the photo) running behind the road bridge to the intended yard and engine facilities.
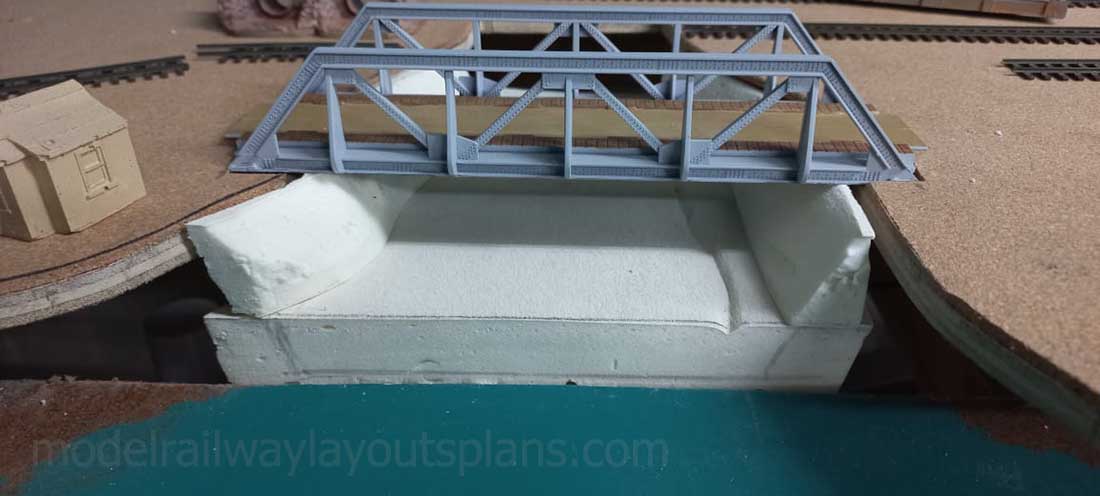
The white card stock building may be a small dock and office on the river. (Yet to be scratch built.
The culverts need to be fixed in place. Water will eventually come out of the pipes into the river.
SO board is used to shape the river and plaster cloth will be used to form the banks and the bed of the river.
I used ISO board to pre-form the banks and will be covered with plaster cloth.
I had previously cast quite a few random stone walls in resin (in a silicone mold) which I am using to line the waters edge shown below. They were super glued (cyanoacrylate) together to form a longer section which I would then use my heat gun to form the curves and shape as required. Tamiya modelling putty will be used to hide any joints between the sections.
River bed in place and once the plaster cloth is in place, the river bed will be raised, the stone wall support (left) for the bridge will be at the correct level.
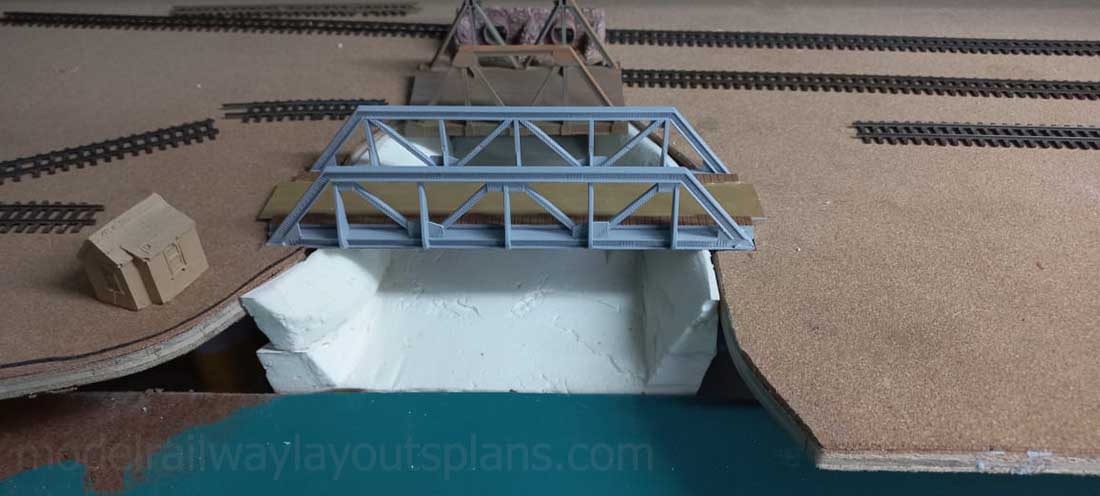
Checking the fit of the small boat hire building before bending the stone walls to fit snugly allowing for a staircase from the deck up to ground level.
This is as far as I am at this stage. Very time consuming stone work to make sure that all the curves are correct.
I will send more photos and a write up as I progress on this layout.
Brian – the HOn3 guy in Knysna, RSA”
A huge big thanks to Hall of Famer, Brian, for sharing his HO scale waterfront layout update.
Brian’s post reminded me of Sheldon’s (which is N scale):